Kitchen Stories and Recipes

Herb Salts, Plant of the Week, Garden and Kitchen Update

herb salt bowls from above.jpeg

YUM. We are very excited to share this week’s Plant of the Week deal. Any remaining berry plants we have, are available for the Buy One, Get One Free promotion. This includes the following:

  • Strawberries - Alpine strawberries in 4-packs that can be used for edible landscaping, and as a perennial ground cover in sun to part-shade; and ‘Mara des Bois’, French ever-bearing strawberries that are in hanging baskets, but can be planted in the ground for years of enjoyment.

  • Raspberries- a few varieties, including summer bearing and fall bearing

  • Elderberries- hardy, easy to grow native plants that are good for making plant medicine as well as attracting wildlife, creating a hedgerow, and for their fragrant flowers that can be eaten or turned into tea or cordials.

  • Blackberries - a hardy, thornless variety that produces huge blackberries

  • Gooseberries - an old-fasihoned fruit that is great for jams and preserves

August is a great time to plant berries of all kinds, and leaves them plenty of warm days to establish healthy root systems so that will support them for years to come. Our “Plant of the Week” promotion lasts until Sunday, or while supplies last, whichever comes first. Quantities are limited.

In the Garden

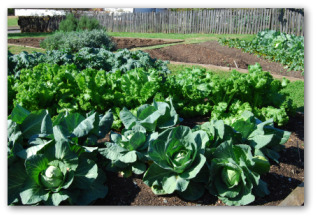
The next few weeks are the funnest part of the gardening calendar in my mind. The weeds are under control, we are in harvest mode, and there are lots of empty spots to fill in with plants for the autumn bounty. Going in this week: more escarole, radicchio, lettuce, scallions, spinach, cabbage, broccoli and sprouting broccoli.

I have harvested garlic, shallots and sweet onions. If you haven’t done it yet, you probably should this week. The storage onions - yellow, red, and cipollini - look almost ready in our garden. I will check them later in the week, and if I see that lots of the tops are laying down, I will pull them all out of the soil. I usually wait for about half of them to be fallen over as a sign that they are mature enough to cure well and develop those papery skins that allow them to stay firm in storage all winter long. If you are not sure if your onions are ready, send a photo and we can help you decide.

In the flower garden, Lily has been deadheading her zinnias and recommends making a bouquet to give to someone. It feels good. She has a new baby niece who turned one week old today, and was the lucky recipient of said bouquet. So adorable.

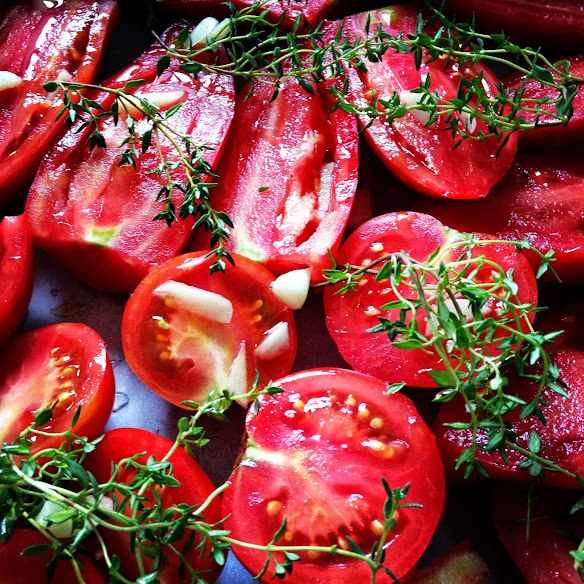
Sara says to check for hornworms in the tomato patch. The earlier you catch and destroy them, the less chance of a full on invasion. Good luck.

In the Kitchen

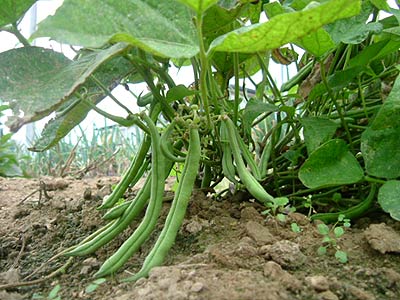
I have started freezing and canning in earnest, with a big batch of Roma beans taking center stage this weekend. If you have not grown these or eaten them, I encourage you to put them on your list for next year’s garden, or stop by a farmers’ market or farm stand to stock up while summer is still with us. Trillium Hill Farm in Hinesburg has them currently.

Eggplants and peppers are finally abundant in the garden (the rain slowed them down) and I just made a simple dinner with roughly chopped peeled eggplant, shallots, peppers of all kinds, halved cherry tomatoes, torn herbs, minced garlic, a glug of olive oil, and chunks of feta. I laid everything out on a sheet pan and roasted it for about 45 minutes at 375F. What an easy summer dinner, served warm on the deck, or at room temperature for a picnic by the lake. Preferably with an icy cold rosé and a baguette from O’bread or this easy recipe for pita from King Arthur. I spent a good part of the pandemic winter making pita, and I am not mad about that new skill.

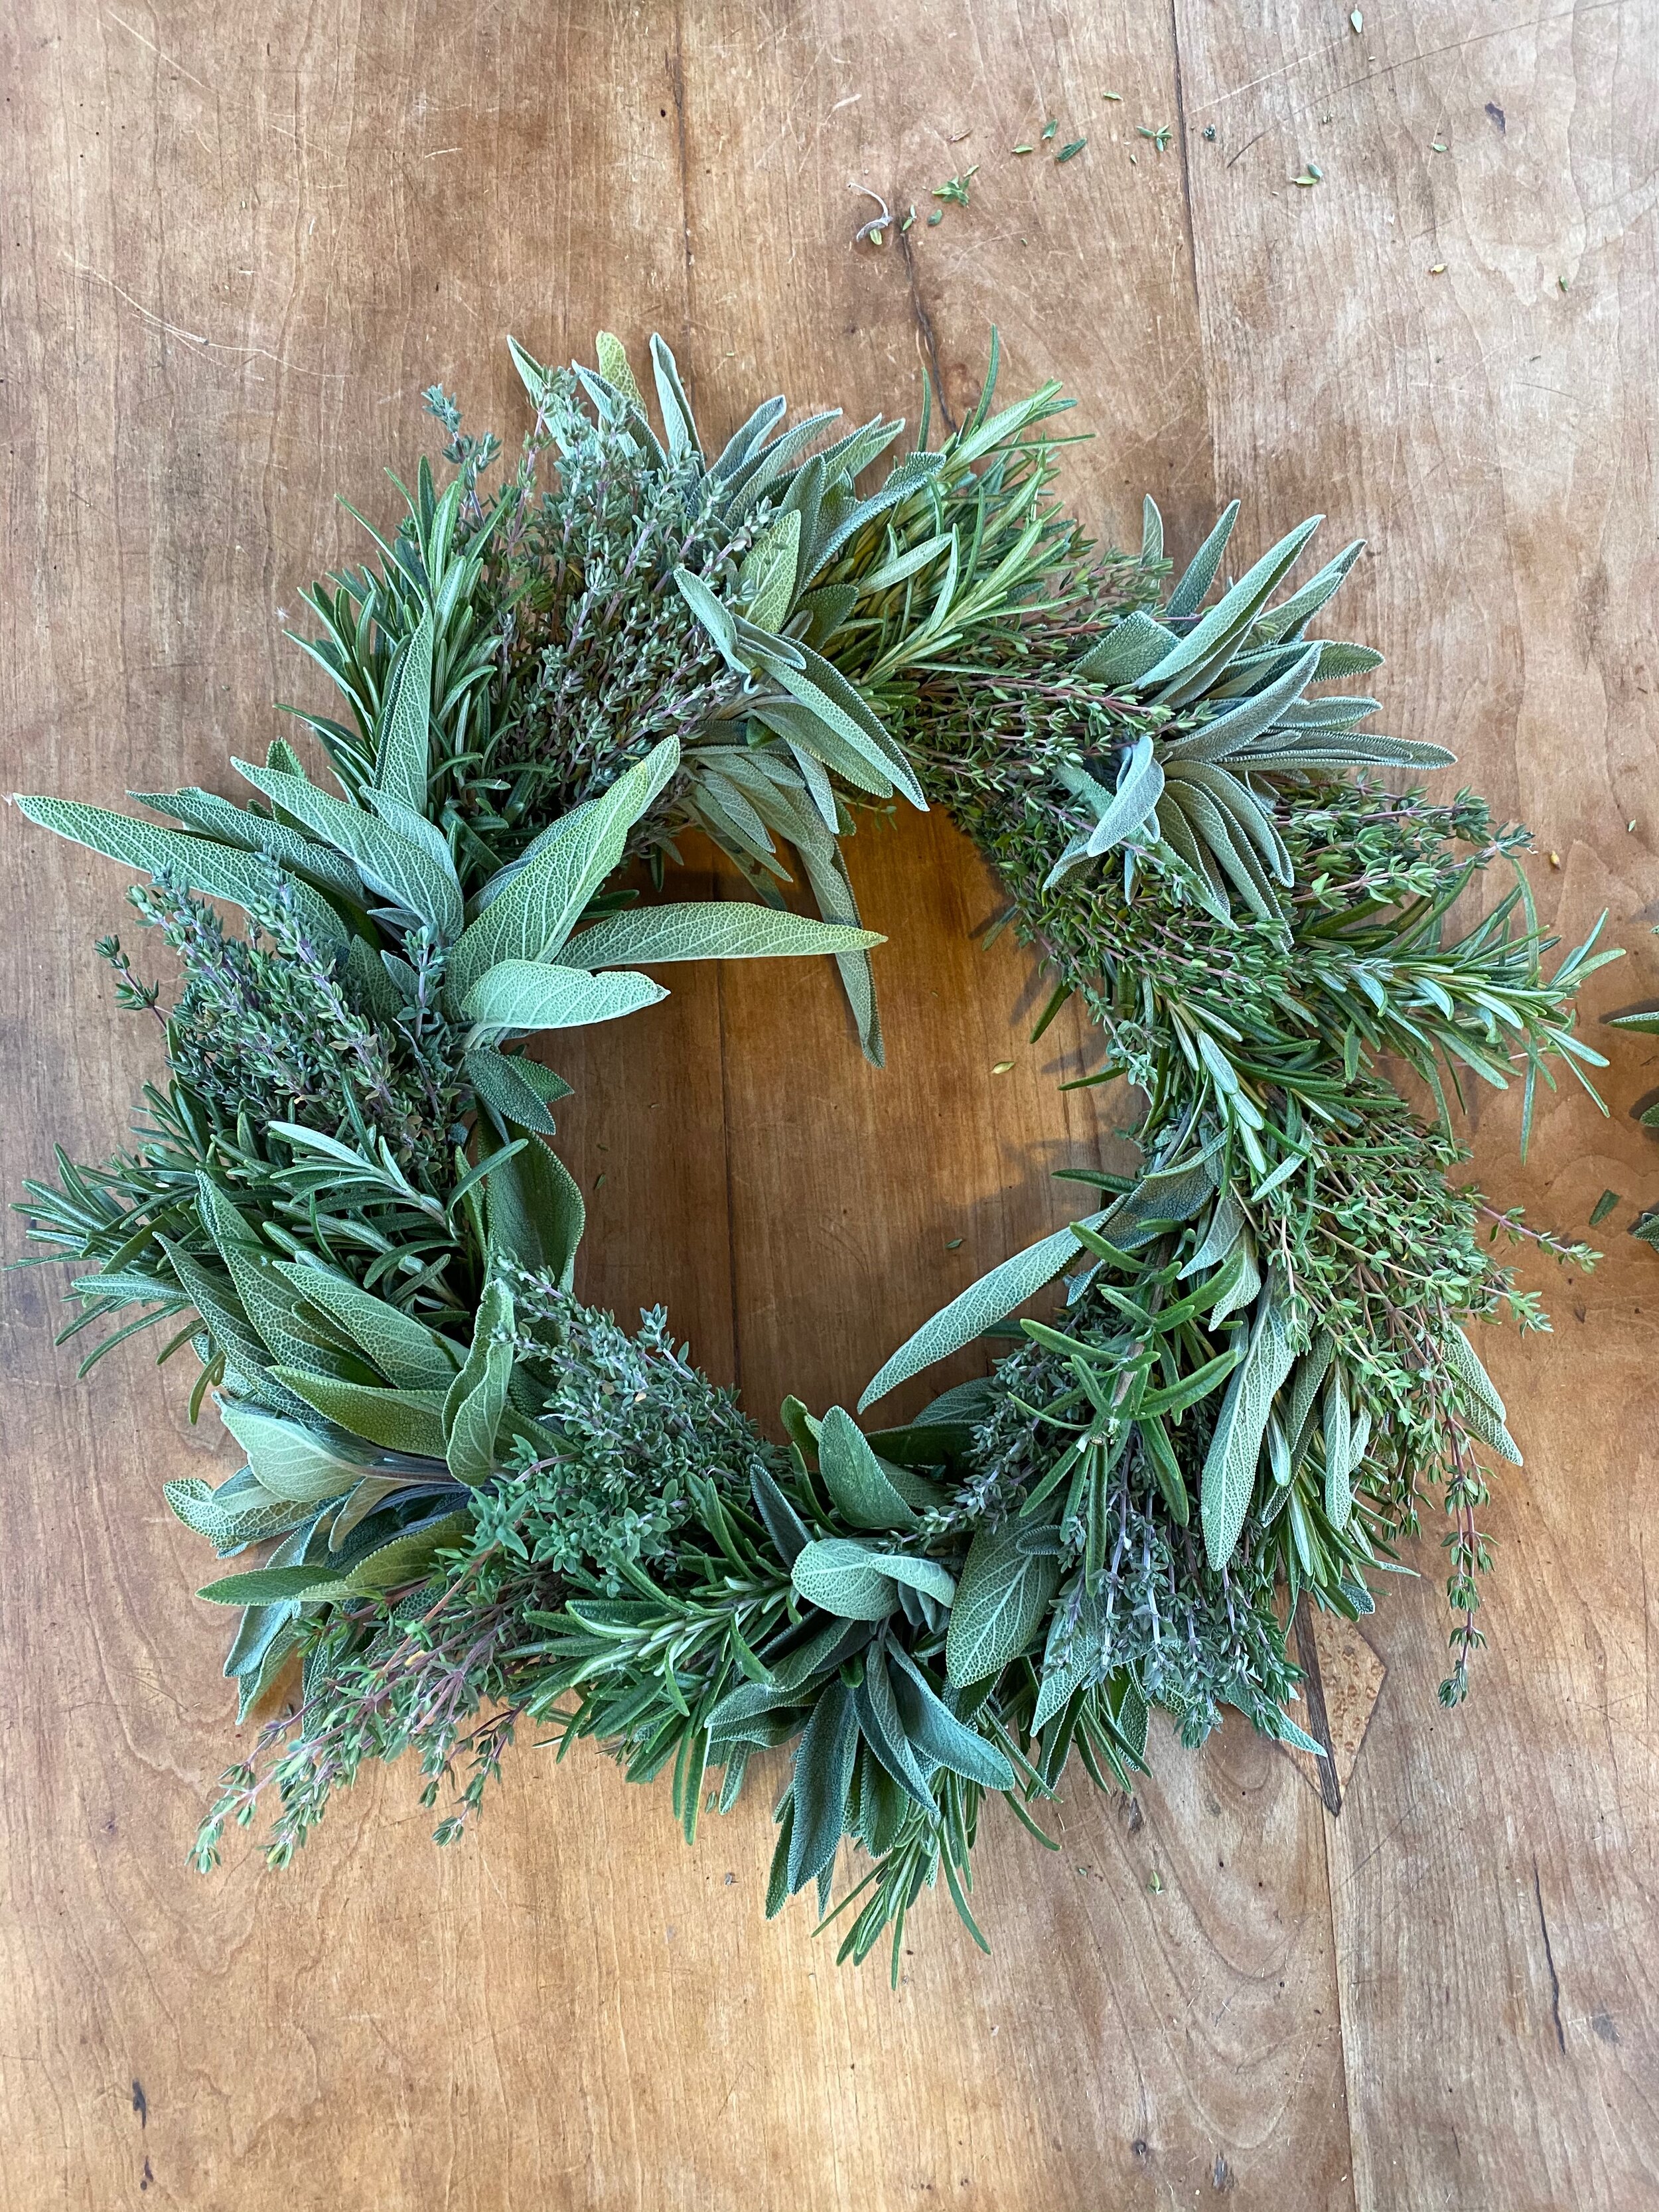
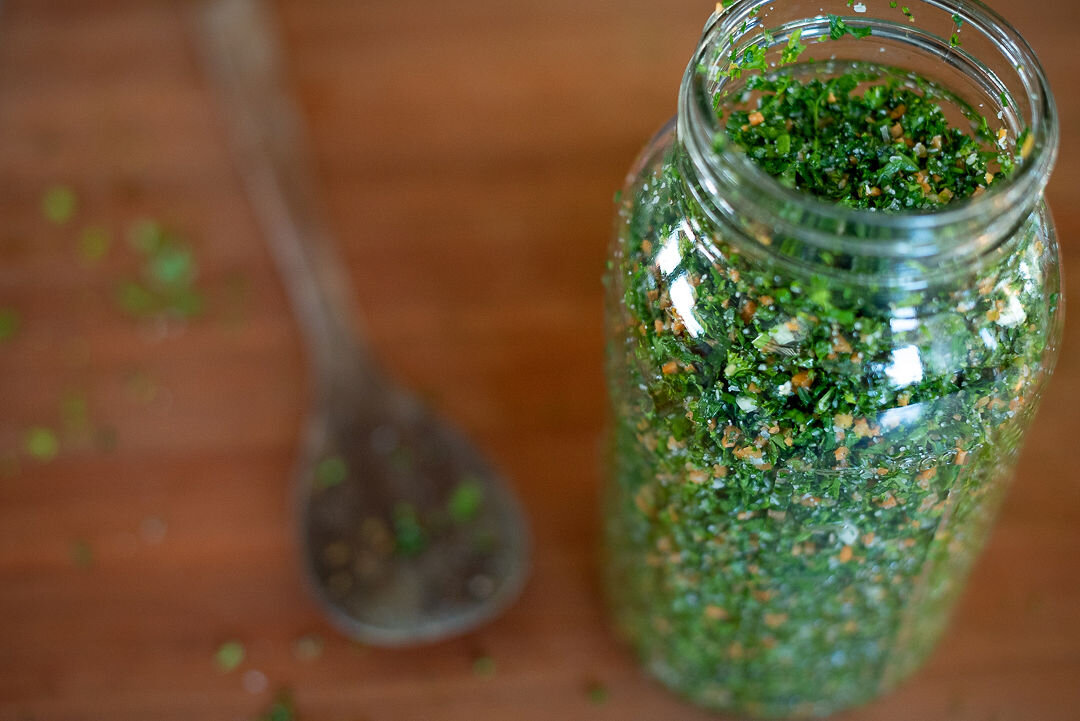
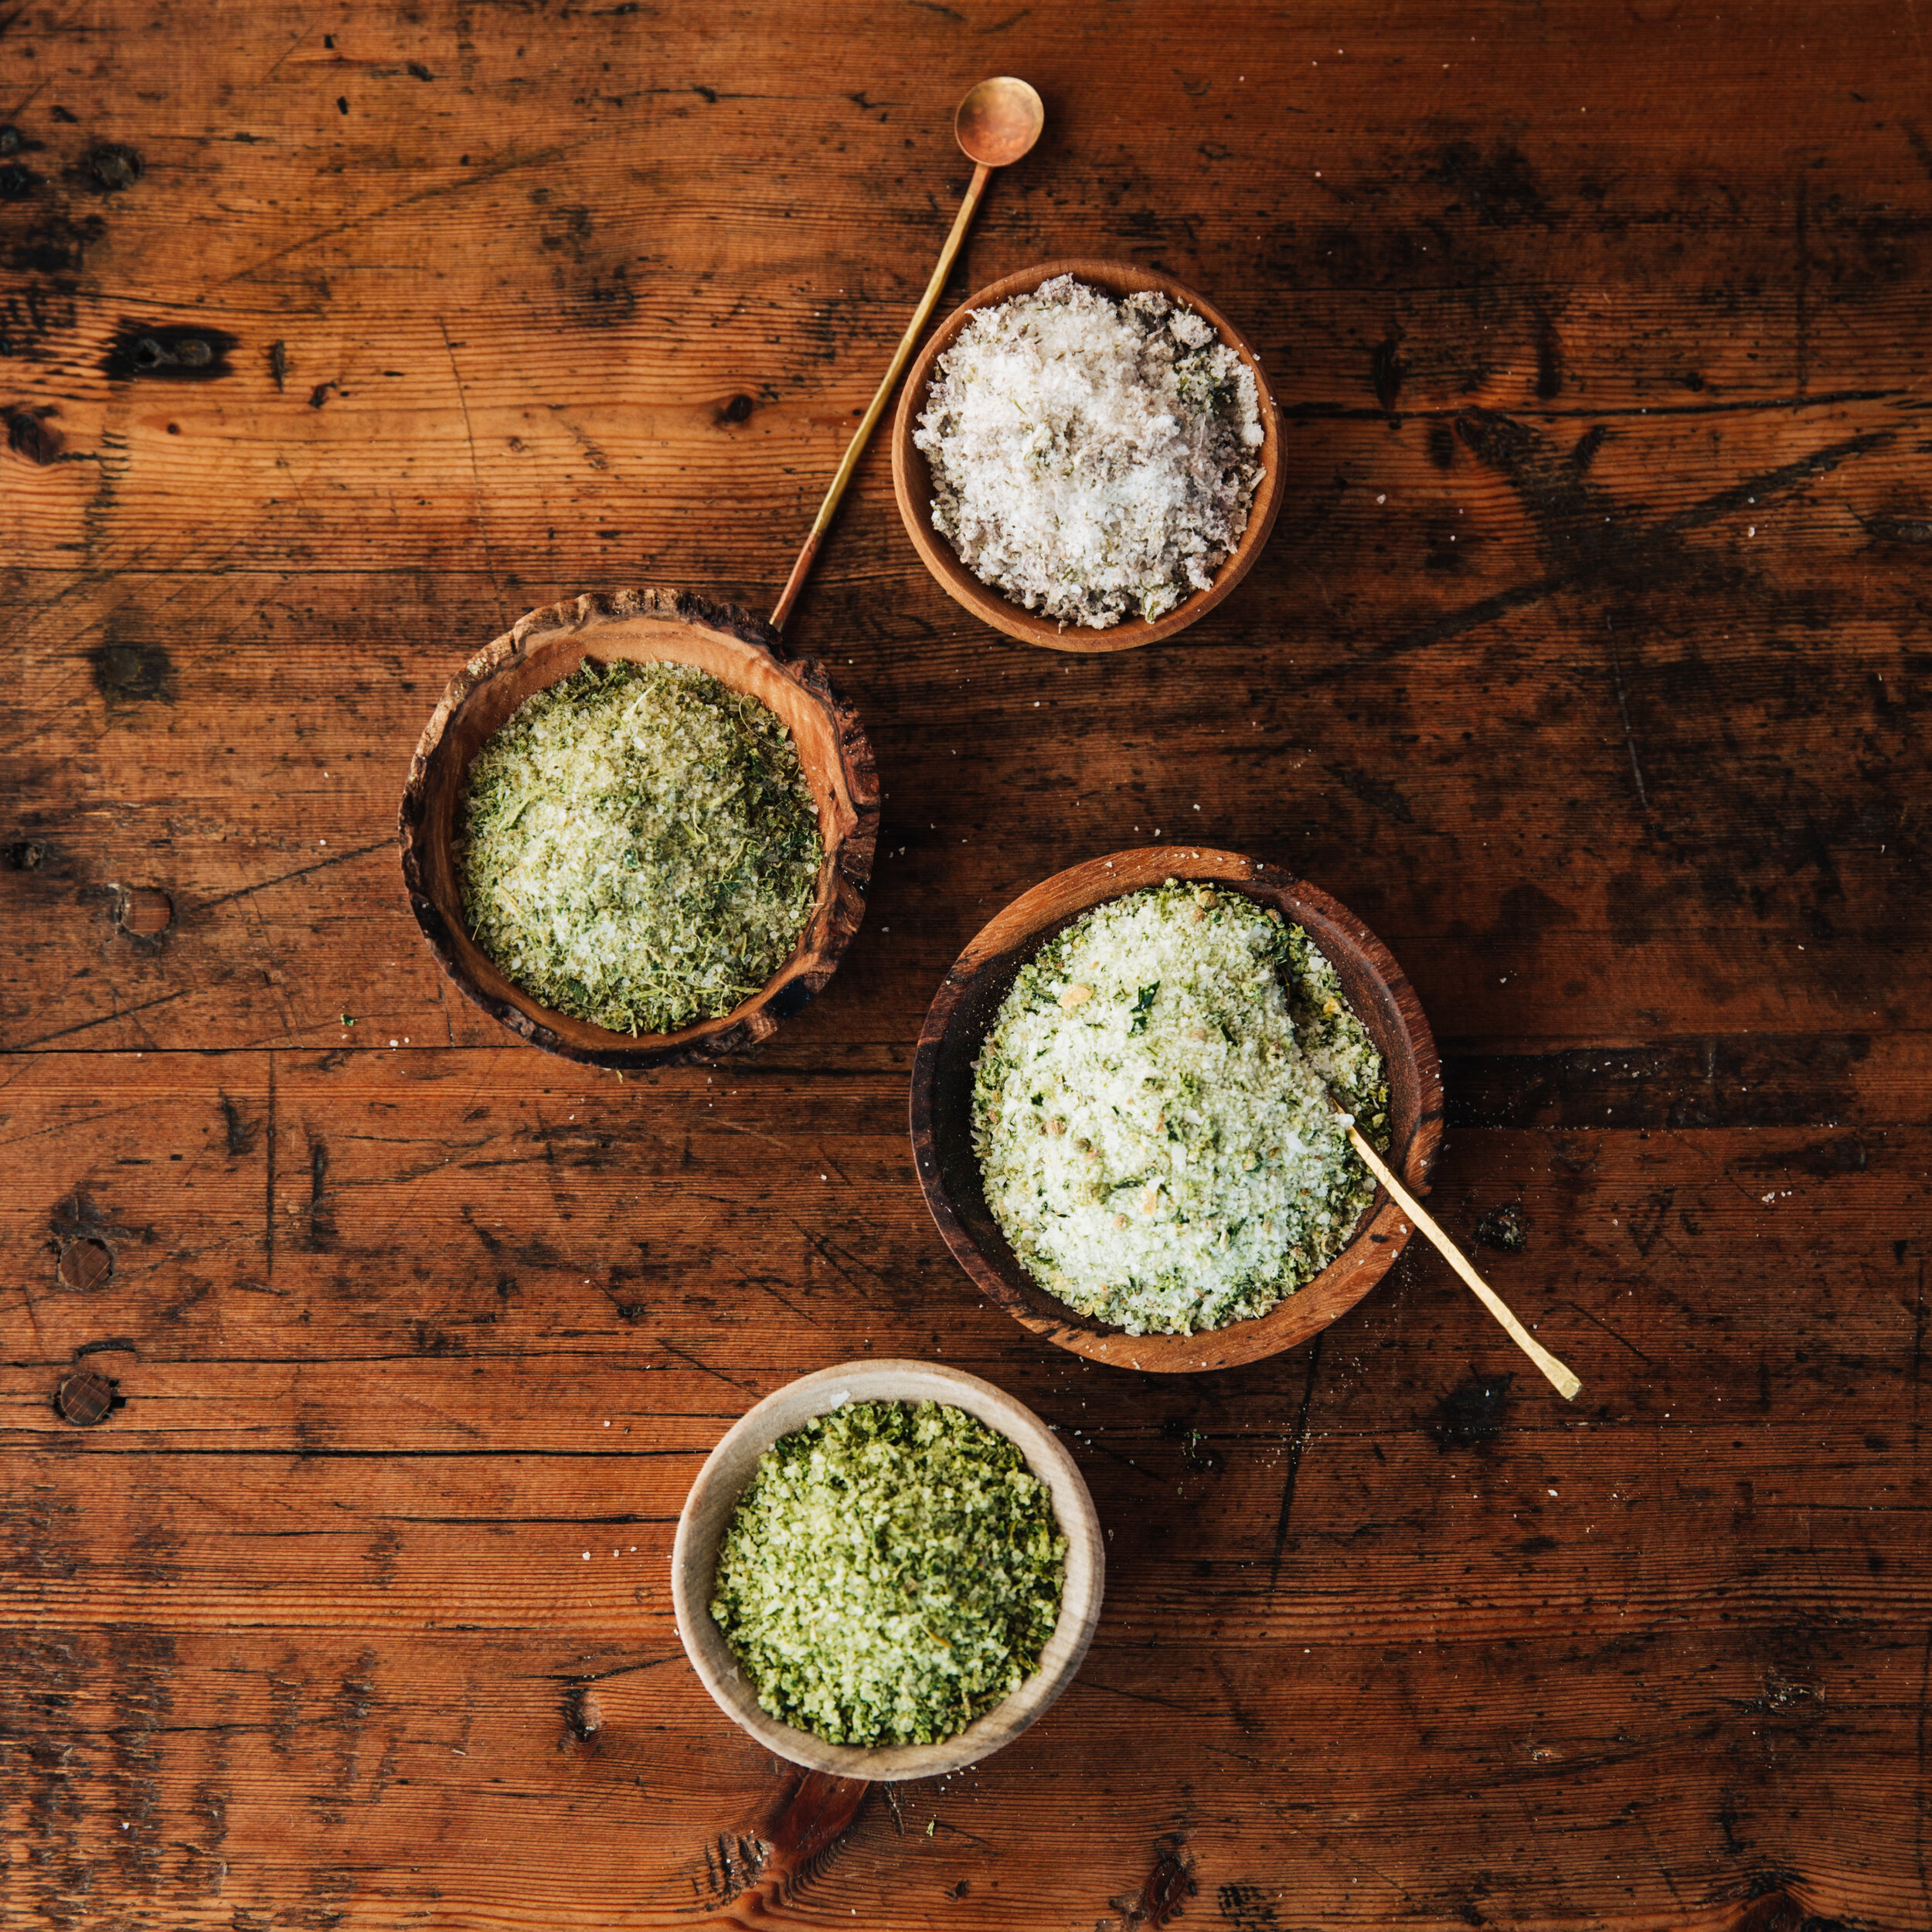
Our herb salts and vinegars are now available! We have been busy harvesting and chopping herbs, and curing them in salt for maximum flavor and fragrance. I recommend them all right now, especially to elevate simple garden meals of cucumbers, tomatoes, greens, and grains into something special every night of the week. They are also great for the grilling and entertaining you might be doing outdoors while the getting is good. You can find them at our Hinesburg greenhouses, at City Market, Hunger Mountain Coop, Farmers to You, Intervale Food Hub, Sweet Roots Farm, Trillium Hill Farm, and Philo Ridge Farm. And here online. We are set up to ship herb salts and vinegars. Maybe you would like to make someone’s day by sending some as a gift?

Enjoy the week, enjoy each other.
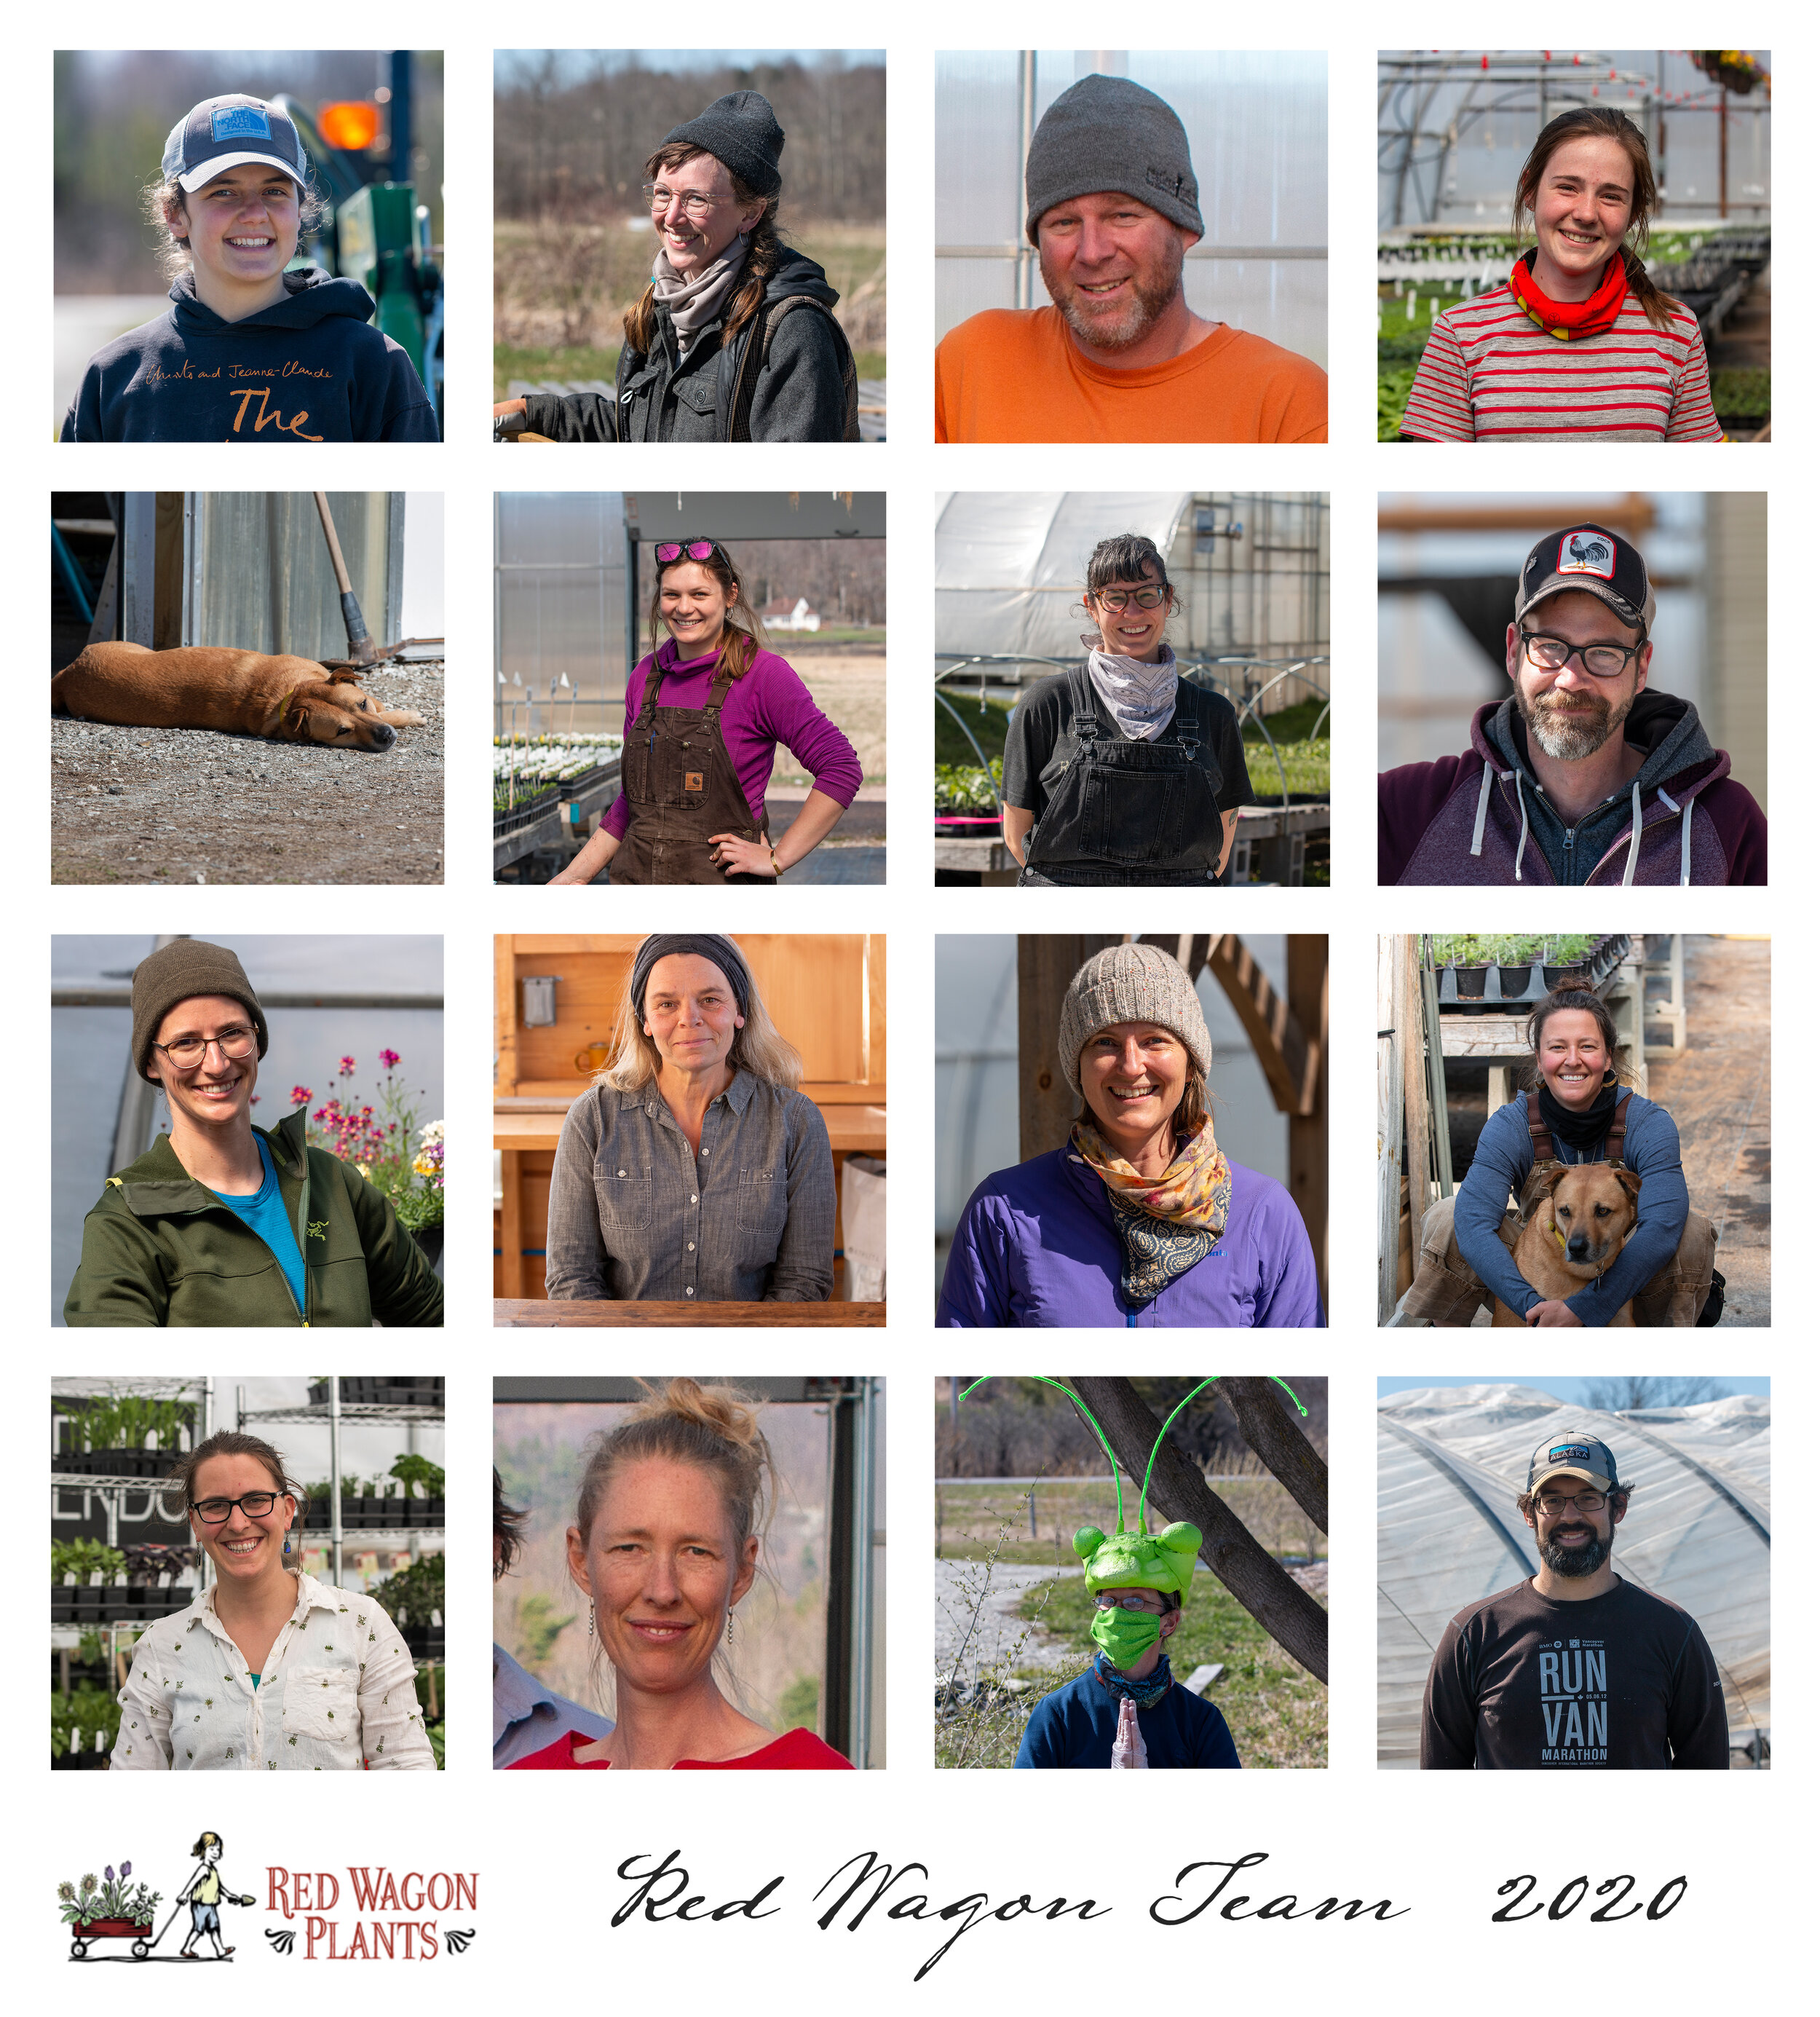
Julie

Herbes Salées - a Traditional Quebequois Preservation Method

Recipe for Herbes Salées (adapted from Spruce Eats)

Here is a traditional Quebequois way to preserve large amounts of herbs to use all winter.

Suggested uses: A teaspoon in hot water makes a soothing and instant herbal broth. Stir into soups and stews, mix into salad dressings and tomato sauce, mix with cream cheese, yogurt or cottage cheese for dips, spreads and snacks….the uses are endless and a jar of these preserved herbs will be a welcome reminder of summer’s freshness during the depths of winter.

  • 1 cup chives (fresh, chopped)

  • 1 cup savory (fresh, chopped)

  • 1 cup parsley (fresh, chopped)

  • 1 cup chervil (fresh, chopped)

  • 1 cup carrots (grated)

  • 1 cup celery leaves or lovage or cutting celery (chopped)

  • 1 cup green onions (chopped)

  • 1/4 to 1/2 cup coarse salt

    In a large bowl, combine chopped chives, savory, parsley, chervil, carrots, celery leaves, and green onions.. Layer 1 inch of herb mixture in the bottom of a crock or glass bowl and sprinkle with some of the salt. Repeat layers until all of the herb mixture and salt is used.

    Cover and refrigerate for 2 weeks. Drain off accumulated liquid and pack herb mixture into sterilized jars. Refrigerate until ready to use. Can keep for up to a year in the refrigerator.

Herbes Salées photo by Kate Bentley

Herbes Salées photo by Kate Bentley

Herb Wreath How To

Here is a little project that is easy to do and uses up herbs from your garden (or purchase one of our kits). Lily and Julie made some herb wreaths this week to give you a sense of how to do it. We instantly felt better after doing a creative project like this, and my wreath is in the kitchen smelling and looking great. Check out this video for a tutorial on how to do it. And if you would like to purchase one of our kits, you can find them here for purchase (we will contact you to arrange pick up at our Hinesburg location).

IMG_2193.jpeg

Peppers

pepper pickles.JPG

We grew an abundance of peppers this year. With 35 varieties on our plant list, it is hard to not grow too many. Every variety deserves a chance and some are absolute favorites and I end up planting 6 or more plants of each, but really I am making a giant note to stop this madness next year. Every day, for the past month, I am starring at huge bags of peppers in the fridge and figuring out what to do with them. Not a bad problem to have, especially these days. Here are a few things I have been doing.

Pickled Cherry Bomb and other Hot Peppers

I make a brine that is based on this basic recipe from the cook book 6 Seasons by Joshua McFadden and Martha Holmberg. This amount is about enough for 3 pints.

½ cup rice vinegar

1 tablespoon white wine vinegar

1 ½ cups water

3 tablespoons sugar (original recipe calls for 5 TBS)

1 tablespoon plus 1 teaspoon kosher salt

Bring ingredients to a boil,

Pack washed, stemmed and seeded (optional) peppers into clean glass jars. Add a clove of garlic and a sprig of thyme to each jar.

Pour hot brine over the peppers, filling each jar to the top. Let cool to room temperature and then store in the refrigerator. Please note this brine solution is not acidic enough to preserve the peppers with a hot water bath method of canning. These are refrigerator pickles that will keep for months. I pack big ½ gallon jars of them into the back of the fridge and use them all winter, chopped into tacos, as a topping for sandwiches, stuffed, etc.

You can pickle sweet peppers too, using this method.

Hungarian Hot Wax peppers are perfect for pickling.

Hungarian Hot Wax peppers are perfect for pickling.

I also made this pepper relish recently and really liked it. You can incorporate some hot peppers into the mix if you want it spicy. This is for canning with a hot water bath method. If you have never done this, please make sure to look up a reliable tutorial, like this one.

Pepper Relish

adapted from Well Preserved by Mary Anne Dragan

6 cups of finely chopped sweet peppers, combination of colors. A few hot peppers can be included in the 6 cups for a spicy relish.

2 cups of finely chopped onion

2 cups of cider vinegar

1 cup of sugar (I used ¾)

2 tablespoons of mixed pickling spice (I did not have a pre-made blend, so made my own with coriander seed, bay leaf, a few cloves, a few black peppercorns, 2 dried chilies, and a tsp of mustard seed) in a cheesecloth bundle or a tea ball.

2 teaspoons of dried hot pepper flakes or substitute with fresh hot peppers

2 teaspoons of salt

Combine peppers and onions into a bowl, and pour boiling water over them. Let sit 5 minutes, then drain well.

Combine the remaining ingredients into a large pot, and bring to a boil. Add the vegetables, and stir to combine. Reduce the heat to medium, stirring occasionally for about 30 minutes.

Remove from the heat, take out the spice bag. Spoon the relish into hot sterilized jars, leaving ½ inch of head space. Release the air bubbles, wipe the rims of jars clean, seal according to manufacturer’s directions. Process the jars in a boiling water bath for 10 minutes. Please refer to this process here if you are not familiar with canning.

Other ways to preserve peppers

I freeze them. Just chop up raw peppers, and slide them into a freezer bag. That is it. They can be used in all kinds of stews, soups and braises over the winter.

I make a big pot of sautéed peppers and caramelized onions and freeze that in small bags. In winter, it can be turned into a tasty spread or dip by placing the thawed mixture in a blender with some walnuts, or cheese, or olives or dehydrated tomatoes.

I roast peppers, tomatoes, eggplants, onions and summer squash or zucchini with olive oil, salt, garlic and herbs at 400F for about 45 minutes. I freeze that mixture in freezer bags and then use it as a base for pasta sauces, soups, and a topping for pizza.


Fermented Fresh Salsa

by Guest blogger, herbalist, and RWP Staffer, Sophie Cassel

This is a salsa you make to eat fresh and eat in the fridge, not canned for storage.

This is a salsa you make to eat fresh and eat in the fridge, not canned for storage.

Ask anyone in my house or social circle what the big culinary wonder was last summer, and they’ll all tell you: “Fermented salsa!”. Far removed from the cooked salsa in jars, fermented salsa is like a tangy, juicy version of the popular pico de gallo type of dip. This was a technique I learned about years ago on a homestead in Maine, but started preparing last summer when faced with a constant glut of tomatoes and absolutely no desire to turn the oven on for canning.

By mid-August, I was making a half- to whole-gallon of fermented salsa per week, and we were eating it just as fast. It makes a great snack and is a tasty conversation starter when brought to backyard cookouts. Suddenly, adding fermented foods to your diet is as easy as breaking out the tortilla chips! It also makes the best topping for tacos and grilled meats. 

Below is the basic recipe. I change the proportions a little each time, based on what I have ripening in my garden or on the kitchen counter at that moment, and how much I could fit into the half-gallon jar. 

Ingredients:

  • 2-3 lbs ripe tomatoes 

  • 1 small onion

  • 1-3 cloves of garlic

  • 2-3 bell peppers

  • Hot peppers of your choice (I like my salsa more mild, so I use 1 jalapeno or 2 hungarian hot wax peppers, but the sky's the limit!)

  • Cilantro (stems included), or a mix of cilantro, pepiche, and papalo leaves

  • Salt to taste

Method:

  • Finely chop all ingredients into similar sizes and layer into a half-gallon mason jar. Add salt and taste; it should be just shy of “too salty”. Stir well (a long-handled cocktail stirrer works well), and cover loosely with the jar lid. Place jar on a plate to catch any overflow during fermentation, and leave on your kitchen counter. 

  • Shake jar (with lid tight) 2-3 times per day, loosening the lid to allow for gas to escape through the course of the day. You will start to see bubbles rising to the surface, but shaking ensures that all ingredients stay below the liquid.

  • After a day or two, taste to evaluate how the tanginess is developing. Depending on weather, it could take anywhere from 2-5 days to achieve desired levels of fermented flavor. You get to decide when you think it’s ready!

  • Eat immediately, or funnel into smaller jars and store in the fridge. It will store indefinitely, slowly building its fermented flavor, but good luck getting it to last long enough!

  • Note: If your tomatoes are really juicy, you may want to strain some of the excess liquid when transferring to storage jars. This fermented tomato juice is a refreshing drink, and makes a great addition to gazpacho or cocktails! 

Calendula

calendula sophie.JPG

Calendula (Calendula officinalis), historically also known as Pot Marigold, is one of those cheery plants that has successfully transcended the gap between herbal medicine and ornamental gardening. Its sunny blossoms start blooming early in the summer if transplanted, and will proliferate all season long and even after frost, as long as the flowers are picked before going to seed. Like others in the Asteraceae family, pollinators flock to this plant, which provides a valuable long-term nectar source. While there are many types of ornamental calendula available on the market, highly medicinal varieties include Resina, Alpha, and Erfurter Orangefarbige. You’ll know you’ve got a potent calendula if when you pick the blossom (snapping it from the stem and removing the flower head and green bracts) your fingers get sticky with resin.

If you’re growing calendula and deadheading the plants regularly, you’ll find yourself with a wealth of flower heads to use. Luckily, there are endless ways to make use of this beautiful and powerful plant! 

Calendula occupies a unique and important place in any herbal medicine chest. Powerful yet gentle, it’s listed as an active ingredient in balms for everything from cracked hands to rashy baby bums. Calendula enjoys a long history of use as a venerated wound healer and anti-inflammatory herb, soothing and repairing injuries and ulcerations of all kinds. As it also has documented immune-stimulating affects (through its work on the lymphatic system), calendula is also useful when dealing with skin issues that stem from some kind of infection. At the start of gardening season, I can often be found soaking my roughed-up hands in strong calendula tea to heal cracked cuticles and scraped knuckles. 

But we can’t talk about skin without mentioning the skin that lines our insides- the digestive tract! In the same way that calendula heals external wounds, it is equally as powerful when taken internally to alleviate the effects of inflammation in the gut. Allergic reactions both inside and out can benefit from application of this herb, and it is gentle enough to use every day in a variety of ways. I love including calendula in mouthwash formulas to heal irritation and inflammation in the gums.

There’s no reason to relegate calendula to the first-aid kit, though. It is also a wonderful tool in the kitchen, adding color and beauty to baked goods and salads as the “poor man’s saffron”. To use, simply pluck the petals off the flower head, and sprinkle into your batter or lettuce mix. The center of the heads, with their sticky resin, tend to leave an uncomfortable feeling on the back of the throat when consumed raw, so it’s best to save those for tea infusions, or thrown into soups and bone broths where you’ll get the benefit of the herb and the visual delight as well. 

Now that you’ve harvested your blossoms and dreamed up all the ways you’ll use your calendula, make sure to dry some for winter use. Flowers should be picked in the height of the day, when they have fully opened and any dew has dried. Dry flowers in baskets or on newspaper, spread in a single layer so that they are not touching (you can also use a dehydrator on the lowest setting). Calendula flowers hold lots of moisture, so it’s important to let them dry fully before storing, lest they get moldy on you. The center of the head should snap apart easily when dry. As the season wanes, leave some flowers to go to seed on the plant. You can harvest these fossil-like structures once they’ve turned brown and come off easily in your hand. 

Calendula is an excellent and safe introduction into the world of herbal medicine, and with its myriad uses, it’s one of the most reliable plants you can keep on hand throughout the year. 

Basic Calendula Oil, Two Ways:

  • Calendula flowers, wilted for a few days or completely dried

  • High quality oil, such as olive, sunflower, grapeseed, almond, or jojoba

Roughly chop calendula flowers and pack into jar, then fully cover with oil (add an extra glug or two to make sure flowers stay submerged). Label with contents and date, then leave to steep in a dry, shady place for 2-4 weeks. Different herbalists have different habits, and some prefer to let their oils steep in the sunshine, while I keep mine out of direct sunlight. 

If you’re in a rush, you can quickly make an infused oil by heating the oil and flowers slowly in a double boiler, making sure that you stay well below the smoke point for that oil. Heat gently for an hour or two. In either case, when you’re finished infusing the oil, strain out and compost the flowers, label your oil, and store in a dark place for up to a year. You can use this oil to make salves, lotions, and creams, or apply directly to skin. 

Gut-Healing Tea (make with fresh or dry herbs):

  • Calendula flower

  • Chamomile flower

  • Plantain leaf (Plantago spp.)

  • Fennel seed

  • Peppermint leaf

Blend equal parts of all herbs. Infuse about a handful (approx. ¼-½ cup) of herbs in 1 quart of boiled water, and allow to steep for an hour or overnight. Enjoy hot or iced, and drink daily as part of a regimen to help with digestive upset (can also be enjoyed as part of a healthy-skin regimen, too!)

Resources:

Calendula Monograph: https://www.herbrally.com/monographs/calendula

Henriette’s Herbal: https://www.henriettes-herb.com/blog/yell-calendula.html

Thank you, How to Find our Plants and Herbs, plus a Recipe

Thank you from all of us for an incredible, memorable, and unique season!

Thank you from all of us for an incredible, memorable, and unique season!

As our regular retail hours for 2020 end today at 5pm, our team would like to thank you for a wonderfully unique season. We are closing a little earlier than usual, but will keep up a once a week pick up with online sales and will continue twice a week deliveries to our wholesale partner stores. Read below to find out more!

During the month of August, we will be doing curbside pick up once a week, on Fridays between noon and 5. If you would like to order plants, please do so here, and we will have it ready the following Friday as long as orders are placed before midnight on Wednesday.

Our online store will carry an assortment of veggies and herbs for the fall kitchen garden, perennials, and houseplants. For the first time, we will also be offering directly to you the herbs and herbal products coming from our herb farm: freshly harvested herbs in bulk quantities for your drying and processing needs, herb salts, herbal vinegars, and pesto. Please check the website every Saturday for the latest updates, and place your orders by the following Wednesday at midnight for Friday pick ups between noon and 5.

If you need something sooner than the following Friday, just let us know and we can make another arrangement.

Confused? Have questions? Drop us a line at info@redwagonplants.com.

Thanks for a fantastic season in weird times. We are just so grateful for all of the orders and purchases you made this year. You kept our crew going, and you planted gardens like never before. We loved hearing from you and seeing you in person once we opened for shopping.

You can continue to find our plants at our wholesale partner stores:

  • Shelburne Supermarket

  • Gardeners Supply, Intervale and Williston locations

  • Healthy Living

  • CIty Market, South End and Downtown locations

  • Bibens Ace Hardware, North Ave location

Recipe for Herbes Salées (adapted from Spruce Eats)

Here is a traditional Quebecois way to preserve large amounts of herbs to use all winter.

Suggested uses: A teaspoon in hot water makes a soothing and instant herbal broth. Stir into soups and stews, mix into salad dressings and tomato sauce, mix with cream cheese or cottage cheese….the uses are endless and a jar of these preserved herbs will be a welcome reminder of summer and freshness during the depths of winter.

  • 1 cup chives (fresh, chopped)

  • 1 cup savory (fresh, chopped)

  • 1 cup parsley (fresh, chopped)

  • 1 cup chervil (fresh, chopped)

  • 1 cup carrots (grated)

  • 1 cup celery leaves or lovage or cutting celery (chopped)

  • 1 cup green onions (chopped)

  • 1/4 to 1/2 cup coarse salt

    In a large bowl, combine chopped chives, savory, parsley, chervil, carrots, celery leaves, and green onions.. Layer 1 inch of herb mixture in the bottom of a crock or glass bowl and sprinkle with some of the salt. Repeat layers until all of the herb mixture and salt is used.

    Cover and refrigerate for 2 weeks. Drain off accumulated liquid and pack herb mixture into sterilized jars. Refrigerate until ready to use. Can keep for up to a year in the refrigerator.

Herbes Salées photo by Kate Bentley

Herbes Salées photo by Kate Bentley

Pesto Time

photo by Kate Bentley

photo by Kate Bentley

PESTO for eating fresh or freezing


In food processor, blend until coarsely chopped:

2 cups fresh basil leaves, packed (can sub half the basil leaves with baby spinach)
1/2 cup freshly grated Romano or Parmesan-Reggiano cheese (about 2 ounces)
1/3 cup pine nuts (can sub chopped walnuts)
3 garlic cloves, minced (about 3 teaspoons)
Slowly drizzle in:
1/2 cup extra virgin olive oil
Do not over blend, the heat from the food processor will bring out the bitterness in the oil and the basil.
Taste, and season with
1/4 teaspoon salt, or more to taste
1/8 teaspoon freshly ground black pepper, or more to taste

Green Tomato Salsa Verde

photo: Kate Bentley

photo: Kate Bentley

Here is a perfect way to use up lots of tomatoes from the garden even if they have not ripened yet. Everyone who tastes this salsa loves it, and it is very easy to make. If you would like to freeze it, it does so very nicely in bags or jars or plastic containers; however, I usually can mine in 1/2 pint jars so that it is ready to go. If you do not have experience with hot water bath canning, please read about it on the ball website. The instructions below assume that you know how to sterilize jars and that you know what “process in a hot water bath” means. You also can just share with friends, and eat this fresh, right now. Or preserve some for later, and keep some to eat now, depending on how many green tomatoes you have to use up. This recipe is from a blog called Local Kitchen, where I have found many recipes that I love for winter preserving. I usually double this recipe for a bigger batch.

Salsa Verde

INGREDIENTS

  • 4 cups green tomatoes, finely chopped

  • 1/2 cup red onion, diced to 1/4-inch (about 1 tennis ball-sized)

  • 1/2 cup green bell peppers, diced to 1/4-inch

  • 1/2 cup minced hot peppers (a mixture is great), with or without seeds (about 3 – 4 large) (wear gloves)

  • 1/4 + 1/8 cup white wine or cider vinegar

  • 4 tbsp lime juice

  • 3 large cloves garlic, minced

  • 2 tbsp fresh cilantro, chopped

  • 1 and 1/2 tsp ground cumin

  • 1/2 tsp sea salt

  • 1/4 tsp chile pepper flakes

  • 1 tsp raw sugar (optional)

METHODS

  1. If canning, prepare canner, jars and lids.

  2. Chop vegetables. Add all ingredients except cilantro to a medium stockpot; bring to a boil over high heat. Reduce heat and boil gently for 10 – 15 minutes, or until vegetables have softened and the salsa has thickened slightly. Add cilantro, mix well and return to a boil.

  3. Ladle hot salsa into hot, sterilized jars; remove air bubbles and push all vegetables down below the level of the liquid, adding more salsa to yield a 1/2-inch headspace if necessary. Wipe rims, affix lids and process for 15 minutes in a boiling water bath.

Yields about 5 half-pints.

Secret Sauce to Remember the Herb Garden in Winter

Photo by Kate Bentley

Photo by Kate Bentley

This blog post is guest written by Sophie Cassel, Red Wagon Team member and herbalist educator. Thanks, Sophie!

As much as I love ripe tomatoes and blooming flowers, high summer to me is all about the fresh herbs. While this time of year you’ll find me outside snipping chives and parsley to add to my meals, it’s also a great time to prepare for a day when we don’t have a bouquet of fresh herbs outside our doorstep. Dried herbs have their purpose in the kitchen, but fresh-frozen herbs can add a whole new depth of flavor and color to any midwinter meal. The easiest way to do this is by employing some ice cube trays and a little creativity to make what I like to call my “secret sauce cubes”. 

If you’ve ever made fresh pesto, you’ll recognize the general technique, but the beauty of this technique is that you can really let your imagination, as well as your garden, guide your recipe.

Basic Recipe:

  • Gather your herbs from the garden or farmer’s market. This is a great time use up the leaves from those woody basil plants or the kale that’s looking a little bug-eaten but still has good flavor. Try to pick a selection of flavorful plants and good bases like spinach, parsley, or kale. You’ll need somewhere between 2-3 largeish bunches of herbs per ice cube tray.

  • Roughly chop herbs and remove woody or tough stems. Rinse everything and shake the excess water off, but don’t dry the herbs out.

  • Toss it all in the blender! Now’s the time to add things like garlic, ginger, chili flakes or citrus zest. You can also add a little salt to taste, but I keep mine salt free so I don’t have to worry about the extra salt when I’m throwing the cubes in my cooking.

  • Pulse in the blender until everything is evenly pureed, scraping down the sides as necessary. Add just a little water to emulsify, a tablespoon at a time.

  • Spoon your herb puree into ice cube trays and freeze for a few hours or overnight.

  • Transfer the frozen cubes to a plastic bag that is labeled with all ingredients, and store in the freezer for a snowy day! 

  • To use the cubes, thaw on the counter while you’re preparing your food. You can add them in while you’re sweating onions at the beginning of a dish, or toss in towards the end to lend a bright green hue and tons of flavor. Remember that if the cubes are still cold, they will lower the cooking temperature of your dish, so slowly bring it back up to heat through. 

If you’re the type to can fresh tomatoes for winter sauces, adding a couple cubes of fresh-frozen oregano and parsley when it comes time to make pasta will result in a transcendent trip back to summer. Many a meager rice-and-vegetable stir fry was elevated this past winter using chef Amanda Cohen’s “Secret Weapon Stir Fry Sauce” (from the New York Times) which was my inspiration for breaking out of the basic basil pesto mold. Amanda Cohen’s delicious Asian-inspired blend is just one of many combinations based on what you have on hand throughout the season. Cohen recommends blanching her ingredients before blending, but I’ve found that you can also keep things raw if you’d rather not boil water in the heat of summer. Below I’ve included some combination ideas, but feel free to experiment! Your future self will thank you.  

Amanda Cohen’s Secret Weapon Stir-Fry Sauce:

  • Cilantro

  • Parsley

  • Thai basil or other basil

  • Spinach

  • Garlic, peeled

  • Fresh ginger


Pesto inspired

  • Basil

  • Parsley (about 1/4th the amount of basil)

  • Garlic cloves

    • I prefer to keep my pesto basic at this stage, and leave room for adding cheese or nuts during cooking. 

Chimichurri inspired:

  • Parsley

  • Arugula

  • Oregano

  • Garlic or shallots, chopped

  • Chili flakes

    • Add lime juice, oil and a little rice vinegar when cooking

“Scarborough Faire”:

  • Parsley

  • Sage

  • Rosemary

  • Thyme

  • Oregano

  • Marjoram

    • Make sure to strip leaves off any tough or woody stems

Zucchini Days

costata romanesco zucchini on chair red wagon plants
  • It is that time of year, when the zucchini plants needs to get checked every couple of days or you end up with some giant baseball bats in no time. I have unfortunately not followed my own advice, and ignored my plant for 2 weeks straight, only to be confronted with vegetable mayhem. But, in need of some inspiration, I have turned to social media to find out what you all are doing with your big zucchini and here is a round up of the brilliant ideas:

  • shredding all the zucchini in 2 cup measurements and freezing it. I make zucchini tots and bread in the winter! Also made a zucchini pie with corn and mushrooms, one for the freezer, one now.

  • Bread, cookies, zucchini noodles

  • I just made zucchini chocolate chip bread

  • Zucchini pizza crust: There’s recipes online but also in the old-school Moosewood cookbook: grate and salt zuke, wring it out, mix with eggs, a small amount of flour, parmesan and mozzarella, bake, dress with toppings and bake again. I’m still tweaking things to make the crust more crusty and less soggy, but it’s really tasty.

  • Bread or baked stuffed zucchini .

  • Roasted in tomatoes, garlic scapes and butter. Finish with fresh goat cheese

  • Among my favorites: grated into fresh spaghetti sauce, roasted w/ olive oil as a side veg, zucchini relish using my Mom’s recipe!

  • Walk around Shaw’s and Hannaford’s parking lots and put some in every vehicle with its windows down. 😂 That’s what my grandfather used to do.

  • Zucchini lemon bread with apple juice from how to cook everything- Mark Bittman ( fruit and veg bread)-

  • Smitten kitchen zucchini fritters!

  • obviously you could install an engine into that big guy. take it for a spin.

Thanks for all the suggestions! Here are the two I am making this week:

Chocolate zucchini bread from King Arthur and the zucchini fritters from Smitten Kitchen.

EASY Sage Recipes

sage.jpg

This cool rainy weather has me reaching for sage a little more. It adds warmth and depth to so many dishes. 
Here is a super quick and easy soup you can make any night of the week: 
Simmer whole leaves of sage in broth in a pot, on low on the back of the stove. In another pot, sauté onions, garlic, carrots until tender and starting to caramelize. Remove (and discard) the sage from the broth and add the infused broth to the vegetables. Add any of these options: shredded cooked chicken, cooked beans, small pasta or rice (cooked), diced tempeh or tofu. Just before serving, add a handful or two of fresh spinach, chopped parsley, and a few grates of lemon zest. Very easy weeknight soup. 

I also love to use sage with roasted meats, chicken and vegetables. I stuff whole handfuls of sage inside the cavity of a chicken before roasting it. Add a lemon, a few cloves of garlic, salt and pepper, and it will add tons of flavor to your chicken. I also like to finely chop 5 or so leaves of sage along with 2 cloves of garlic, a teaspoon or two of lemon zest, and and a 1/2 teaspoon of coarse salt. I just smash and chop it all into a paste right on the cutting board, but you could also put it in a food processor or use a mortar and pestle. Then I toss washed and chopped root vegetables with this mixture, drizzle everything with olive oil, toss again, and roast in a preheated 400F oven for about 40 -45 minutes, until soft and caramelized. Or I will take the lemon / sage mixture and rub it all over a pork roast or beef roast before it heads into a hot oven.

These are all simple things to make in big batches so that you can use leftovers for lunches or hurried week night dinners. 


If you aren't able to harvest sage out of your own garden, you can find ours at  Market, Healthy Living Market and Cafe, Shelburne Supermarket, Lantman's MarketNatural Provisions Market & Deli, and Hunger Mountain Co-op. Warm up and enjoy! We will sell bulk herbs (1/2 a pound or more)directly to customers if you arrange it ahead of time. We have thyme, rosemary, sage, savory, marjoram, oregano, and mint. This is a great way to dry and put away herbs for the winter. I keep paper bags of herbs loosely closed all winter long.

Sweet Potatoes Slip Sale 2016

sweet_potatoes_3.jpg

Sweet Potato Slip Sale

June 11th and 12th, 2016

8:00 to 6:00 pm

 Red Wagon Plants greenhouses

2408 Shelburne Falls Rd  * Hinesburg, VT

Proceeds from the sale benefit the educational programs of Vermont Community Garden Network.

For more information, call 482-4060

Sweet potatoes can be grown in Vermont. Under ideal conditions they thrive and can yield up to 5 pounds per slip. During this benefit sale, we will be selling sweet potato slips in 4" pots, with three slips per pot. These get transplanted 18" apart, in loose, well drained soil. You can also grow them in containers. They like warm, southern exposure, and can be trellised to save space.

Here are some resources for more information on Sweet Potatoes:

The Vermont Community Garden Network has information on their programs and the sweet potato sale here.

This  article on the Mother Earth News website highlights growing methods for northern gardeners and best ways to store the tubers.

 Here is a photo essay on how some ingenious customers are growing their sweet potatoes in Starksboro.

Recipe for Roasted Sweet Potato Fries with Herbs

2 large sweet potatoes, peeled and cut into 1/3 inch batons

3 TBS olive oil

salt and pepper

1/3 cup finely chopped parsley, chives, and or cilantro

2 cloves of garlic, finely chopped

1 small pinch of cayenne

1 tsp lemon juice

  • Preheat the oven to 450 F. Place 2 large cookie sheets in the oven so they are pre-heated as well
  • Toss the cut sweet potatoes with the olive oil and salt and pepper in a large bowl
  • Arrange them on the hot pans in a single layer.
  • Roast for 20 minutes, and flip them over with a spatula, and return to the oven for another 20 minutes, or until tender and browned.
  • Meanwhile, toss the herbs, garlic, cayenne and lemon juice together in the same bowl
  • When the hot fries come out of the oven, sprinkle the herb mixture on the fries and serve immediately

Growing Instructions for Sweet Potatoes

Sweet potato slips are cuttings that come from a parent vine. The slips grow best in a loose, sandy or silty soil that drains well. If sweet potatoes are grown in a rich dark soil they may discolor but are still good to eat. • Transplant the slips into garden beds during June, preferably in the late afternoon or on an overcast day. When transplanting, lay the slips on their sides with 2/3 of the slip buried a half inch under the soil. Water enough to keep the soil moist, but not saturated. • Plant the slips 10 to 18 inches apart in rows that are three to four feet apart. The rows or raised bed should be elevated 4 to 8 inches above the ground level to allow the sweet potatoes room to form. • Keep the cuttings watered while they are getting established. The leaves that were originally on the planted slips will dry up and fall off leaving just the vine stem. New leaves will emerge from the cuttings as the slips become established. • The sweet potato vines will cover the ground reaching 5 to 10 feet in length. Hoe around the vines to cultivate weeds and mulch with hay if desired. • Deer love sweet potato leaves, so be sure your planting area is fenced if deer are aproblem. A flying gold colored beetle may chew round holes in the leaves. The vines are tough and will keep growing despite insect damage. • Sweet potatoes are dug and harvested in late September through mid October, a day or two before the first predicted frost. Most of the sweet potatoes will be just below the parent plant. Each plant can produce up to six sweet potatoes. • After harvesting, dry the sweet potatoes on the ground for two or three hours. Allow them another 10 to 14 days to cure at room temperature or above, before storing the sweet potatoes at a temperature between 50 and 60 degrees F. • Unlike Irish potatoes, sweet potatoes should not be kept cold in a garage, refrigerator or outbuilding. If properly cured and stored, they will keep until April. Enjoy!

Giving Thanks with Braised Thyme and Turnips

A few years ago, I worked for the Intervale Center as a farming consultant for the New Farms for New Americans program run by the Association of Africans Living in Vermont. My job was to help new Americans, primarily refugees from Bhutan, Somalia, and Burundi, in finding markets for their beautiful produce and to help them understand and navigate the vagaries of our cold climate, on-line seed purchases, calendar planning, etc. Most of the time, probably all of the time, I was the one doing the learning. It is an experience I look back on fondly and feel thankful that I was able to get to know these smart gardeners and farmers. Every time I walk into Stone Soup in Burlington and see braised Hakueri turnips at the hot bar, I think of Michel and François who established a long term relationship with the restaurant by growing these perfect and tender roots. They still grow and sell them for Avery and Tim at Stone Soup, and it all started with a face to face meeting, in 3 languages, a seed catalog, and a warm feeling or two.

A fitting Thanksgiving side dish, don't you think?

Braised Hakurei Turnips with Thyme

Serves 6 as a side dish

1.5 pounds Hakurei turnips, the small white ones. About 2 bunches

6 healthy sprigs of thyme (about 1/2 a clamshell package or 1/3 of a bunch)

1/2 cup water

1/4 tsp salt

2 tablespoons butter

1 tablespoon honey

Salt and pepper to taste

Cut off the greens, but save them for another use. They are delicious!

Wash and scrub the turnips and cut into halves or quarters, depending on size. If very small (1 to 1.5 inch in diameter, leave whole). Each piece should be about 2 bites worth.

Add turnips to a medium saucepan with water and salt and thyme.

Bring to a boil, and immediately lower the heat to medium-low. A strong simmer, low boil. Leave the pot covered for 6 to 10 minutes. When the turnips are tender but not mushy, uncover the pot, add the butter and honey, and gently shake the pan to mix. Cook another 5 or so minutes until the water is mostly evaporated and the turnips are cooked through but not falling apart. Remove the thyme sprigs.

Taste for salt and pepper and season accordingly.

Want to grow your own? 

If you haven't grown your own white turnips, consider it for next year. They are easy to grow, last long into the fall, and are sweet and delicious. While rutabaga and traditional purple-topped turnips have their own charms, these white "salad" turnips are delicate, sweet, and can be eaten raw or cooked.

For a fall crop, sow seeds of Hakurei turnips directly into a shallow furrow in the garden in mid-August. They prefer loose, deep soil that drains well. A little compost is always a good idea, but not too much as it can stain them or create crooked  growth. When the plants are a couple of inches tall, thin to 1 plant every 2 to 3 inches. Keep well watered. That's it.  They are a perfect crop to follow an earlier planting of peas or beans or lettuces or greens.

Sage Brown Butter and Ricotta Gnocchi

Here is a quick dinner that sounds difficult to make. But it is really easy. Sage is still looking great in our garden with the long, warm fall we have had and it pairs beautifully with butter in about 5 minutes of gentle cooking. The ricotta gnocchi is a little more involved but not much, and if you have ever tried to make potato gnocchi and felt discouraged, redemption is at hand. These are super simple to make.  We first ate these when our friends Marjorie and Marian of Orb Weaver Farm made them for us, and we have been hooked ever since.

Ricotta Gnocchi with Sage Brown Butter

Ingredients:

  • 2 cups whole-milk ricotta (1 pound) Have you had the yummy one from Mountain Home Farm?
  • 2 large eggs, lightly beaten
  • 1 1/2 cups grated Parmigiano-Reggiano (3 ounces), divided
  • 1/4 teaspoon grated nutmeg
  • 1 1/4 cups all-purpose flour
  • 1/2 stick unsalted butter
  • 10 to 15 whole sage leaves, depending on size. About 1/4 cup.
  1. Stir together ricotta, eggs, 1 cup cheese, nutmeg, and 1/4 teaspoon each of salt and pepper. Add flour, stirring to form a soft, wet dough.
  2. Shape dough on a well-floured surface with lightly floured hands into 2 ropes that are about 1 inch thick. Cut crosswise into 1-inch pieces with a lightly floured knife. Place in 1 layer on a lightly floured parchment-lined baking sheet while you work.
  3. Cook gnocchi in 2 batches in a pasta pot of boiling salted water (3 tablespoons salt for 6 quarts water), adding a few at a time to pot and stirring occasionally, until cooked through (cut one in half to check), 3 to 4 minutes per batch. Lift out with a slotted spoon and drain in colander.
  4. Meanwhile, cook butter with sage in a 12-inch heavy skillet over medium-low heat until golden brown, about 5 minutes.
  5. Gently toss gnocchi with brown butter in skillet and sprinkle with remaining 1/2 cup cheese. Season with salt.

For a great photo explanation of this, click on any of these pictures for a link to the "Inspired Taste" website. They do a great job of explaining the simple process. 

Shorter days, winding down, and it is alright.

Our greenhouses start up in February, when we begin the bustle that does not end until the final sales of early September. During that 6 moth period, we are in constant motion, putting in 14 hour days at the beginning of our season for a solid three months and gradually tapering down to a normal 8 to 10 hour day for the remainder of the year. Work moves into the office where I am planning out next year's varieties; we are also busy with greenhouse clean up and putting everything to bed for the winter.  When the maples signal that autumn is here, I am ready for a little slowing down. A little time to enjoy the fruits of the garden, to eat those fall greens that quietly draw attention amidst shades of yellow, red, and orange. I finally have time to cook, to preserve some of the bounty with the help of the canning pot, dehydrator, root cellar and freezer.

I tend to be a creature of habit and make more or less the same things each year, because I know my family loves them and because I  am not willing to give up precious time and space with experiments that might not work, that might join the sad jars and mystery freezer bags that lay untouched. I do try one or two new things each year, but only after they have been enthusiastically recommended by trusted sources.

Here are some of the tried and true that show up every year in our winter pantry:

Sauerkraut. I use this recipe from Sandor Katz, fermentation guru, author, and person of note who just recently spent some time teaching his craft in Vermont.

Plain and easy,  roasted and frozen tomatoes. I wrote about this one last year, and you can read that here. This is the easiest way to make tomatoes that will taste great in a sauce mid-winter. I have more time to cook in the winter, so I don't bother making sauce to freeze or can during the height of summer. But if i have these in the freezer, I can turn them into sauce, soups, add them to braises, etc.

Fancier, slower, seasoned roasted tomatoes. These are a different beast. The tomatoes are slowly roasted, like 8 hours of slow, in a 240F oven with olive oil, garlic, herbs. I sometimes do different batches and label them as such so that they can be used in various dishes during the winter. For example, I make some that are sprinkled with just oregano, or just cumin. But most of them are made with olive oil, thyme, and garlic. And a little sea salt.

Here are some of the tried and true that show up every year in our winter pantry:

Salad Burnet Dressing Recipe from a Customer

Ruth Henry, one of our many loyal customers, came in a little while ago asking for salad burnet. This is not one of our most popular herbs, and frankly, one that I never grow because I never know what to do with it. She assured me that it is amazing in a special salad dressing she makes. Naturally, this peaked my curiosity and she promised to send along the recipe. Here it is! And now I finally have a reason to plant this pretty little herb that tastes like cucumbers.

Thank you, Ruth, for sharing your "secret" recipe with us! Mum's the word!

" As promised this is my family's recipe for salad dressing using Salad Burnet......It's a big hit with lots of flavor! Enjoy"

Herb Salad Dressing 1 cup salad oil 1 cup honey 1/2 cup basil vinegar 1 clove crushed garlic 1 tsp salt 1 cup of finely chopped green herbs such as burnet, basil, chives, parsley 1  tsp celery seed 1 Tbsp paprika

Shake everything in a jar. Keeps in the refrigerator for a week or so.

Planning Now for Great Eating all Year Long

Lori and Doug's Garden

Garden Planning for the Seasonal Kitchen

Growing vegetables in your backyard, community garden or in some containers by the kitchen door is a great way to feed yourself -- whether it be just a few ripe tomatoes in August or a full-fledged homesteader's garden, you are on the right path to feeding yourself and your family. Gardening is a great way to improve how you eat while spending some contemplative time outside. With all of these benefits in mind, it is easy to jump into gardening enthusiastically, and you will reap even more rewards with a little bit of planning.

In Vermont, our gardening season seems short but can be stretched almost year round with a few simple tips. I always recommend that people take a look at how their vegetable gardens have been in the past and find just one or two things they would like to improve so that they can grow more of it for a longer season. For example a common question I hear is "how can I keep cilantro from bolting?" Well, in short, you can't! But with a few changes in your gardening practices, you can grow it all spring, summer, and fall without ever seeing it go to seed. The trick is to understand the life cycle of each vegetable or herb and how to best plant it to maximize it's harvest. With certain crops, like zucchini, it is best to understand how prolific they are and to plant them conservatively so that the entire garden (and thereby your diet and your neighbors' diet) is not taken over with just one thing. It is also helpful to plant things seasonally so that the harvest is not so overwhelming in August with little to eat before or after. Or sometimes we just want fresh salads all summer, but don't replant and are left salad-less after July 1st.

Succession Planting for Successful Gardening

Certain crops should be planted multiple times throughout the season to ensure a continuous harvest. This is called succession planting. How often you plant is a matter of taste and space and time. The following list describes the maximum you could do with each crop, but adjust according to your needs and priorities -- this is just a guide. If you want to make sure you have a certain vegetable all summer long, then you can follow the guidelines. If you want it a little less, then create your own modified planting schedule.

Planting Guide

Lettuce can be grown from seed or from transplants. Seed grown lettuce is often grown in a row that can be cut and will re- grow a few times - think of mesclun. Transplanted lettuce can be grown to produce full heads like what you find in the store. Both methods require regular planting every week or two for a continuous harvest.

  • It can be planted from seed in mid-April to mid-August for cut greens
  • Or it transplanted for full heads from late April / early May through early August.

Some people will transplant a few plants and plant some seeds at the same time in a different area; this method provides two generations of lettuce and two types of salad greens. Once the cut lettuce becomes bitter in the heat of summer, it is best to pull it up, recondition the soil with compost, and plant something else. If the goal is to always have fresh lettuce, it is very simple to do if you remember to replant it. You can even purchase a number of plants and hold some in their pots in a shady spot and only plant out a few each week. You can seed it yourself in trays or pots and follow this same method. Having several varieties, cold-tolerant ones for spring and fall plantings, and heat-tolerant ones for mid-summer, will produce the best flavor.

Cilantro is very similar to lettuce in its growing habits. It will grow up to a point and then goes to seed, called bolting. It will bolt more quickly in summer heat and, conversely, will stand ready to harvest for many weeks in the cool weather of fall--even early winter. It is good to time plantings so that cilantro is ready to harvest before June 21 (the solstice), and then plant more afterward. It can be transplanted or grown from seed. Like lettuce, it is simple to do both at the same time, thereby giving the gardener two generations. Cilantro seed is coriander, so it does have a use if you enjoy that flavor. There is nothing you can do to prevent cilantro from bolting entirely, but you can slow the process down by placing your mid-summer plantings in a partly-shady spot.

Dill can be treated just like cilantro, and, like coriander seed, dill seed heads have a use in the kitchen, so it is fine to let some of the dill patch go to seed. The seed heads can be used in pickles. you can also let them self-sow or save the fully dried seeds in a paper bag for replanting.

Basil can be planted multiple times for best results. Plants can be pinched to slow down the flowering, but best flavor will come from newly replanted basil plants. This is a heat loving plant. Should only be planted once soil temps are in the upper 50's - usually last week in May or first week in June. Basil's flavor is at its peak right before it starts to make flowers.

Cucumbers, cantaloupes, and zucchini and summer squash are best in quality when well tended.Just a single plant or two of any of those is usually enough for the home gardener, but by planting it two to three different times, the quality will always be good.

  • The best planting dates are: June 1st (or last week in May if you are in a warm spot), July 1st and July 15th.

This method will ensure a continuous harvest of prime looking vegetables. Just remember to pull out and discard the pest- and disease- prone older plants. If your compost gets very hot and is well managed, it is okay to compost these plants. Pest problems will diminish when the older, less healthy plants are removed.

Arugula, Cress, and other cutting greens for saladsare best if sown or transplanted on a weekly or biweekly basis. Again, a small amount can be seeded next to the transplanted crops in order to give you 2 generations at once. This way you can have smaller quantities coming in at various times.

Broccoli gives the gardener a couple of options.

  • It is best if transplanted and can be planted 3 dates in the spring and 3 dates in late summer for a continuous harvest.
  • I would choose late April, early May and mid May for the spring plantings and
  • then Early August, mid August and early September for the fall plantings. Full heads can be harvested and the plants can stay in the ground to produce side shoots.

Green Beans are best when fresh and young. The seed is relatively cheap, so it is better to rip out old plants and have new ones coming along regularly. Having smaller, multiple plantings also means that no on is stuck picking beans for hours on end. Sow new seeds when the previous or first generation is about 6 inches high.

Boc Choi, Cabbage, Scallions, and Cauliflower can also be planted multiple times. Cabbage holds well in the heat and

  • can be planted every couple of weeks late April through early August.
  • Boc Choi and Cauliflower are not as heat tolerant and should be planted around the same dates as broccoli (see above).
  • It is best to use row cover like Reemay on these young transplants so that flea beetles do not destroy the plants.

Spinach is another one that does not do well in the heat, but can be planted multiple times in spring and late summer. It can also overwinter with a little straw mulch for very early spring eating.

  • Frequency of planting can happen every week mid April to early June and then early August to mid September. T
  • he last plantings in September are the ones which will be over-wintered and eaten the following spring.

Apply straw mulch on overwintering spinach in December once the ground is frozen.

Beets, Carrots, Turnipscan be planted every two or three weeks from mid-April until about the third week in July. Summer carrots are not the same as fall carrots and certain varieties do better in summer than in fall. The flavor of fall carrots is much sweeter, so I usually plant a larger patch in the fall. Fall carrots can also be stored all winter without going bad due to their lower moisture content. I don't love summer carrots, so I often skip those. Remember, it is all about what you like to eat.

Celery and Celeriac are slower growing and

  • can be planted 1 to 3 times during the season, from mid May until early July.

These need lots of water and benefit from straw mulch to hold the moisture evenly around the roots. Bulb Fennel and radishes are similar to lettuce -- they can be planted each week if really loved, but they bolt in the heat and do best in the cooler temperatures of spring and fall.

  • They are best if planted late April to early June and then again late August to mid September.

They are cold tolerant and hold well in late fall. Radishes are grown from seeds and fennel is best transplanted. Fennel also benefits from a straw mulch - even moisture around the roots is what helps it make larger roots. Corn -- it is possible to do multiple plantings over different weeks, but an easier method is to plant all at once, but with various varieties that have different days to maturity. There can be a 40 day span between early and late varieties.

Peas can be planted every week, but this requires a lot of harvesting, irrigating, trellising, and variety research. It is possible though. More practically,

  • the home gardener can sow 2 or 3 varieties in late April with various days to maturity.
  • Fall plantings are sometimes successful but are weather-dependent. These should be done in mid August.

The following are generally planted just once a year, but the harvest can be staggered with a few tricks

Tomatoes, Peppers, Eggplant -- try a few varieties of each in order to not have everything at once. Determinate tomatoes will provide you with a big harvest all at once which is a good thing for people who make big batches of sauce for canning or freezing. Determinate tomatoes are the ones that grow until a certain height and then mature all at once. Indeterminate tomatoes are the ones that grow indefinitely until the frost and the fruit ripens gradually August until frost or disease kills the plant.

Peppers and eggplant are best if transplanted in early June once the soil warms up. One planting is usually plenty, but again an assortment of varieties will keep the harvest varied, staggered and interesting.

Onions and Potatoes are generally planted all at once, and again a few different varieties will provide you with a longer period of fresh eating. Both onions and potatoes can be stored for long periods of time in cool and dark conditions. Both can also be eaten fresh as young, green onions or new potatoes. Both can be harvested, cured, and stored for eating year round, though some onion varieties store much longer than others.

Winter Squash is another crop that is planted just once and can be stored. It is best cured for a week or two in a warm spot before eating.

Sage Cookies


I first made these cookies when a group of us from Red Wagon Plants took an herb cooking class with Jessica Bongard of Sweet Lime Cooking Studio last summer. We had such a fun time making herbal treats together, and I thought I would share this recipe. I just made it for our Open House and it was such a tasty way to use sage in a not-too sweet treat.

Sage Cookies 

1 3/4 cups all purpose flour 1/3 cup sugar 1/4 cup yellow cornmeal 1/2 cup butter (one stick), room temp 2 Tbsp chopped fresh sage 6 Tbsp milk 1 egg white, beaten with 1 Tbsp water (egg wash) fresh little sage leaves coarse sugar to sprinkle

  • Preheat oven to 375
  • Whisk together flour, sugar, and cornmeal in medium bowl
  • Cut in butter using a fork, until fine crumb forms
  • Stir in chopped sage
  • Add milk stir with fork
  • Make dough into 2 balls
  • Roll out to 1/8 inch thick
  • Use 2 inch cookie cutter, onto cookie sheet
  • Brush with egg wash, add sage leaf or two, brush with egg wash again to seal
  • Sprinkle with sugar
  • Bake 12 minutes, until edges brown, turning pan halfway through

Enjoy!