Kitchen Stories and Recipes

Butter Lettuce, I love you

Green butter lettuce has to be my all time favorite lettuce....perfect texture, a color that can only be described as translucent and pearly, and a delicate flavor that truly is butter-like. I eat it in all sorts of situations and for all sorts of meals. Breakfast is toast with a thin spread of butter, snipped chives, some shavings of cheddar and a pile of butter lettuce leaves. Lunch is butter lettuce with a white wine vinaigrette, a piece of bread, and maybe a little tuna with herbs. Dinner will always include a butter lettuce salad with lots of snipped chervil. Or perhaps some grilled flank steak with butter lettuce, cilantro, thai basil, shallots, and a little hot pepper drizzled with a light sesame dressing.

Late May and June are the butter lettuce weeks. I plant a four pack of the lettuce every week from mid- April through August and I am rewarded with huge, green and white pillow-like heads of tenderness.  Here is a blog recipe from David Leit, who also appreciates this delicacy.

He is recommending a blue cheese dressing, which will be great later in the summer, but for now I cannot get enough of the delicate flavor and taste, so I will stick to my lighter dressings.

What to do with Sweet Potato Slips

We're so excited for this weekend's sale of sweet potato plants, and want to make sure everyone has what they need to enjoy these wonderful plants.

Here's a link to the information we'll be handing out to everyone who comes out to the greenhouses for the sale.

You can grow them in containers too.  They look beautiful in containers and whiskey barrels, apple crates, five gallon buckets with holes drilled out for drainage are all great, low cost options.

We recommend Fort Vee as a growing medium for containers, as we do for all container plants.  Sweet potatoes need a loose and well-drained soil, whether in a container or in the ground.

By now you're wondering how many plants you should get, and how many things you can cook with your sweet potatoes.  Here are some recipes to tempt you:

We hope to see you this weekend!

Sweet Potato & Milk Recipe Contest

We are holding our Second Annual Sweet Potato Slip Sale to benefit Friends of Burlington Gardens this Saturday and Sunday (6/5/10 & 6/6/10)  from 10 am to 6 pm both days.   We will provide 4.5" pots of rooted sweet potato slips (4 to a pot) for $5.00 each. This will provide you with tremendous yields of this delicious "super-food." Also on Saturday, June 5th, our neighbors at Family Cow Farmstand will be holding an open house from 11 am to 3 pm. You can meet their adorable cows, taste their creamy, rich, raw milk and even help build the new stone calf corral with Charley MacMartin from Queen City Soil and Stone.  It's a great way to meet all the great businesses based here at 2408 Shelburne Falls Rd in Hinesburg.

crop food tour burlington 017

To celebrate this joint effort, we are holding a fun and friendly contest. Everyone is invited to submit a recipe that uses both sweet potatoes and milk by 5:00 on Friday 6/4 - online via email at julie(AT)redwagonplants(DOT)com or on Facebook. We will post all of the recipes on our website, and on Saturday morning we will announce the winner of the contest.   The winner will receive a $25 gift certificate to Red Wagon Plants and a free gallon of milk from Family Cow Farmstand.

Here is the first recipe we have received so far.

Creamy Sweet Potato Soup Recipe

from Carin Laughlin Hoffman (5/31/10) INGREDIENTS 2 Tbsp (1/4 stick) butter 1 cup chopped onion 2 small celery stalks, chopped, greens reserved 1 medium leek, sliced (white and pale green parts only) 1 large garlic clove, chopped 1 1/2 pounds red-skinned sweet potatoes (yams), peeled, cut into 1-inch pieces (about 5 cups) 4 cups chicken stock or canned low-salt chicken broth (use vegetable broth for vegetarian option) 1 cinnamon stick 1/4 teaspoon ground nutmeg 1 1/2 cups half and half 2 Tbsp maple syrup The leafy tops of the celery stalks, chopped METHOD 
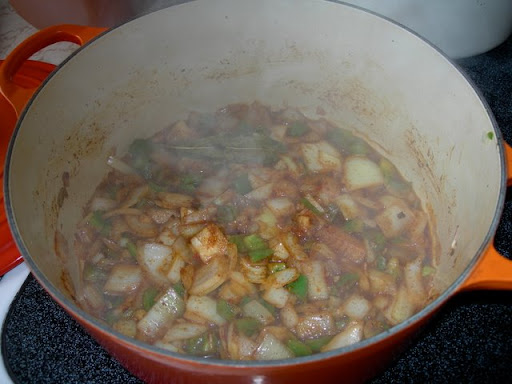
1 Melt the butter in a large, heavy-bottomed pot over medium-high heat. Add the chopped onion and sauté for about 5 minutes. Add chopped celery stalks and leek, sauté about 5 minutes. Add garlic and sauté 2 minutes. 2 Add sweet potatoes, chicken stock, cinnamon stick, and nutmeg; bring to boil. Reduce heat and simmer uncovered until potatoes are tender, about 20 minutes. 3 Remove cinnamon stick and discard. Working in batches, puree soup in blender until smooth. Return to pot. 4 Add half and half and maple syrup and stir over medium-low heat to heat through. Season soup to taste with salt and pepper. (Can be prepared 1 day ahead. Cool soup slightly. Cover and refrigerate soup and celery leaves separately. Bring soup to simmer before continuing.) Ladle into bowls. Sprinkle with celery leaves. Serves 6 to 8.

Here is an another recipe from Melissa Meese  (6/1/10)

Sweet Potato Buttermilk Biscuits 1 C. of mashed sweet potatoes 1 Tbs. baking powder... See More 2 Tbs. packed brown sugar 1 tsp. of salt 1/2 C. butter, room temp 1/2 tsp. baking soda 2 cups all-purpose flour 3/4 C. buttermilk

Heat oven to 425 degrees F. Combine flour, baking powder & salt in a large bowl. In a mixing bowl, combine sweet potato, brown sugar and butter. Beat at low-med. speed until fluffy. Dissolve baking soda in buttermilk. Stir buttermilk & sweet potato mixture alternately into dry ingredients. Roll dough 1" thick. Cut with floured 2" round cutter.

Place on ungreased baking sheet. Bake at 425 degrees for 15-20 minutes.

Sweet Potato and Corn Chowder

From Nora Doyle-Burr (of Last Resort Farm - a great farm stand and pick-your own berry farm)

(serves 6-8) 8 ears corn, husked and silked 6 cups vegetable or chicken broth 2 tablespoons butter 1 leek, white and tender green parts, thinly sliced 1 garlic clove, minced 1 large sweet potato, peeled and diced Salt 1 1/2 cups milk 1 tablespoon sugar, or to taste Freshly ground black pepper

1) Strip the kernels from the corn and set aside. Combine the broth and corncobs in a large pot and bring to a boil. Reduce the heat and simmer for 30 minutes. Strain, discarding the cobs and reserving the broth. It should now be infused with corn flavor.

2) Melt the butter over medium heat in a large saucepan. Add the leek and saute until softened, about 3 minutes.  Add the garlic and saute for another 2 minutes.  Add the stock, corn kernels, sweet potatoes, and salt to taste.  Bring to a boil, lower the heat, and simmer for 25 to 30 minutes, until the potatoes are tender.

3) Add the milk and sugar.  Season with the pepper.  Taste and season with more salt, sugar, and pepper, if desired. Simmer for 5 minutes. Serve hot.

Adapted from "Serving Up the Harvest:  Celebrating the Goodness of Fresh Vegetables" by Andrea Chesman

From Clare Joy of Shelburne, VT

Sweet Potato Bake Ingredients: 3 sweet potatoes, sliced thinly 1 lb Emmentaler (Swiss) Cheese, grated 1 pint cream Some herbs of your choice, optional (I like a little lemon thyme) Salt & pepper

Directions: Layer the sweet potatoes sprinkling over the cheese and seasonings as you go.  Top with a layer of cheese.  Pour the cream slowly in one corner so it spreads across the bottom of the dish but not over the top of the other ingredients. Bake covered for 1 hour at 350 degrees then remove the cover and bake a further 15-30 mins.  until all the liquid is absorbed. Enjoy!

from Carolyn Siccama

Velvety Squash (and Sweet Potato) Soup

1 (3 pound) butternut squash (*I have used many different types of squash in this recipe, Delacata is particularly good) 1 (2 pound) acorn squash* 1 sweet potato 2 cups chopped onion 2 tsp canola oil 5 cups veggie broth 2/3 cup apple cider (when I don't have cider I use applesauce and it works just as well) 2 tablespoons molasses 1 tsp curry powder 3/4 tsp salt 1/8 tsp ground red pepper 2/3 cup milk

Peel and cut squash and sweet potato into small cubes and cook in boiling water until soft.

In another pan, saute onion until soft. Add cooked squash & sweet potato. Stir in broth and next 5 ingredients (through pepper). Reduce heat. simmer 5 minutes.

Place half of squash mixture into a blender and blend until smooth.  Repeat until all soup is blended (I do like to leave a few chunks of squash and potato un-blended).  Return everything to the pan. Stir in milk.  Cook over medium heat until thoroughly heated.  Enjoy!

Vermont Sweet Potato Milkshakes & Creamsicles

From Deirdre Holmes

1 sweet potato (med-sized) 2 cups milk 1 tablespoon maple syrup (or maple liqueur) 3-4 ice cubes crystalized ginger (optional) lime or lemon juice (optional)

1. Bake washed whole sweet potato in a 400º oven for approximately 45 minutes or until soft. 2. Remove peel and put insides into blender or food processor. 3. Add Lindsay's finest whole milk including cream layer, maple syrup and ice cubes, and pulse until smooth. You can adjust the consistency by adding more milk or ice cubes. 4. If you're agreeable to adding a few non-local ingredients, several pieces of crystalized ginger, juice of 1/4 of a lime or lemon, and/or your favorite pumpkin pie spices make delicious additions. 5. For Creamsicles, pour this mixture into a popsicle mold and freeze.

Mother' Day at Red Wagon Plants

Did you know that Mother's Day was founded as a protest to war and violence?  This is the powerful original proclamation made by Julia Ward Howe in 1870.  Sometimes when I look around at the weird commercial venture that the holiday has become, it just makes me shake my head. But we're a business and the day is still a great one to honor those marvelous mothers of ours.  And it's true that we've got some great things around for the mothers in your life if you're looking for a gift.

We've still got these amazing ever-bearing strawberries in hanging baskets.  A few are just dripping with ripe  berries even.

strawberry basket
strawberry basket

And the flowering baskets really are just breathtaking.

For something a little different, why not a cookbook to go along with the plants you buy?  We're so happy to be selling Cooking Close to Home by Fletcher Allen Health Care's Diane Imrie and Richard Jarmusz.  It's a beautiful book that features a year's worth of recipes that rely on ingredients we can get in Vermont and throughout the northeast.  A copy of this, and a couple of herb plants would be a terrific gift.  (We'll tell you more about the very exciting project we're working on with FAHC in an upcoming post.)

We've got a ton of beautiful things for you to give, or for your own enjoyment of your garden and food.   Hope we'll see you this weekend, and we invite you and your families to join in honoring the original intent of this day by going to the Peace & Justice Center's Mothers for Peace Celebration in Burlington.

Leek Fest

I have just used up the last of my leeks. That means we ate about 225 leeks this fall. That is a lot of leeks. We grow two different kinds for two slightly different purposes.

My favorite for flavor and beauty is Bleu Solaize, a French heirloom variety that is just majestic in the garden. It stands about 2 feet tall and has thick, blue-green leaves that make for a dramatic, palm-like display in the kitchen garden or tucked into a mixed ornamental bed. The leaves even turn a pretty violet color once cold weather hits. I think they would make a lovely back drop for some bright red ladybird poppies or mixed in with some verbena bonariensis and short sonata cosmos.  What really makes Bleu Solaize special though, is its ability to survive very cold temperatures.  If I still had some in the garden, I would start mulching them with straw right about now (early December) and would be able to harvest them all winter and even into early spring. I guess next year I will have to plant even more leeks.

The other variety we grow is King Richard (known as "King Dick" around the greenhouse work bench).  I love this variety because it is ready to eat long before the Bleu Solaize (you can start to eat them at the baby stage - see recipe below), it does not require hilling, and it easy to clean.  It has been bred to be "self-blanching" which means that the white, edible part is extra long in proportion to the green part and does not have to be buried in soil to stay white, so overall the leek stays cleaner and there is much less waste or compost to deal with. All of this ease in growing and cooking is at the cost of flavor.  These leeks are sweet and mild, but just don't pack the same rich, leeky flavor of the Bleu Solaize. I still like them a ton, though, and this is why we grow TWO kinds of leeks!

Growing and Care of Leeks:

Our plants come in 4 packs and there are about 100 plants per pack. This may seem like a lot, but since they hold in the garden for such a long time, it is really a moderate amount that can be eaten over a 3 to 6 month period. I start out by making a trench with the edge of my hoe, about 3 inches deep. You should allow for 6 inches of space per leek in rows that are about 8 to 12 inches apart. So for one 4 pack of leeks, I usually prepare three row that are 18 feet long. You can pack them in a little tighter if you don't have the space. You can also plant them in once long row, which makes them easier to hill.  You can also plant crops with a short life span (radishes, arugula, lettuce, spinach) right near them since leeks take a long time to size up and use all their alloted space.  When planting the leeks in their trench, it is important to bury them about as far down as you can and leave only a few inches of the delicate green top showing. They are really slow to grow, so you can save space by planting them in a nurse bed, where you just pack them in pretty tightly and wait a month or so to transplant them to their rows in the garden. Just keep them well watered either way. Leeks and onions need lots of water to get established and off to a good start.  And keep them well weeded too; the slow growth rate of leeks makes them very susceptible to weed pressure. Once the leeks are about a half inch in diameter, you can hill them by gently piling loose soil around their base a few inches up the plant. This is alos a great time to add compost and some straw mulch.  Once mulched and composted, the leeks become pretty much care-free other than some watering every now and then. The mulch and the compost help retain moisture, so it they are a critical component of having nice, large leeks.

Some of my favorite leek recipes

First of all, here is a nice video of how to wash leeks. It's pretty quick once you are used to it.

Leeks in Vinaigrette

3 to 4 leeks per person (if they are small) or 1 or 2 leeks per person if they are large.
about a tablespoon of this vinaigrette
Garnishes: a table spoon of capers per plate, half a chopped hard boil egg, finelly chopped tarragon, parsley or chives
Arrange leeks on indivudual serving plates, drizzle with dressing and top with garnishes.

Braised Leeks

Place washed and trimmed leeks in an oven-proof casserole dish in a single, snug layer.
Pour in enough stock (chicken, beef, veggie - your choice) to fill in half way up the leeks.
Tuck in a few sprigs of thyme, rosemary, or savory in between the leeks.
Salt and pepper  liberally, dot with a few small nuggets of butter.
Cover with tin foil and bake in a preheated 350 degree oven until soft, about 45 to 60  minutes depending on the size of your leeks.
Uncover the leeks, sprinkle with a little freshly grated parmesan and place under a preheated broiler until browned and bubbly.  You can skip the cheese and broiler phase if you want to be more wholesome about it.

Potato Leek Soup

In a large soup pot, place the following ingredients:

3 washed and trimmed leeks, roughly chopped
2 small/medium potatoes, roughly chopped
1 gallon or so of broth of your choice (chicken, beef, or veggie)
a few sprigs of rosemary or thyme
a few cloves of garlic, finely chopped
Let everything simmer on medium/low heat  until very tender, about one hour or so. Remove herb sprigs and puree in a blender or with a hand held immersion blender (much easier method).
Salt and pepper to taste.
Stir in a little heavy cream if you are feeling decadent.
Garnish with fresh pasley or chives, finely chopped.

Black Bean and Butternut Squash Chili

This is one of my favorite things to do with butternut squash, and every time I make it, I am reminded of my friend, Robin Holland.  She made it for a mom's group I was a part of when my daughter was a baby and a toddler.  A dozen or so of us would get together once a week, share an amazing meal and, together, relish in the joys and burdens of motherhood.  I still make this often, and every time, the flavors combine together to transport me back to those days.  There is something inherently grounding and warming about this dish.

Black Bean and Butternut Squash Chili

(enough for a crowd and easily reduced)

2 cups of dried black beans, soaked overnight, rinsed and drained (turns into about 6 cups of soaked beans

1 large butternut squash, peeled, seeded, and roughly chopped into 1" chunks

2 TBS olive oil

2 large onions, chopped

1 or 2 green or red peppers, chopped

5 cloves of garlic, finely chopped

4 bay leaves

6 TBS chili powder

1 tsp dried chili flakes

2 cups of apple cider

8 cups of water

Salt to taste (at the end)

2 to 4 TBS maple syrup

Chopped cilantro, jalapeno and lime wedges for garnish (optional)

In a large, heavy pot, heat the olive oil.  Add the onion, bell pepper, garlic, chili powder, pepper flakes, bay leaves, and stir until soft and starting to brown.  Add 1 cup of the apple cider, and scrape up the brown bits and allow it to cook down by about half the volume.  This helps to concentrate the flavors of the aromatics (onions, bay leaf, etc).

It should look something like this.

Next add the squash, and the soaked beans, the remainder of the liquid, and allow to cook over medium to low heat for about 1 1/2 hours, or until everything is soft. Finish the stew by adding the maple syrup, and about 1 TBS salt (I find the beans and the squash really need lots of salt).  Stir and wait a few minutes before tasting.  Adjust with more syrup or salt if needed.

This is great served with the garnishes, some corn tortillas or corn bread, and a piece of cheddar cheese.  The warmth and sweetness create a harmonious and satisfying balance.

Lost Potatoes and the Simple Garden Dinner

Tonight's dinner was another super easy one and I averted yet another trip to the grocery store. First, I found some feral potatoes. I was turning over a plot of soil in the garden where the potatoes once stood and there they were, gnarly and red, asking why they had been forgotten. After a good scrub down, they got tossed into a pot of cold water and gently boiled until tender. Did you know potatoes should always start their cooking in cold water? That way, their temperature rises gradually and evenly. They don't end up with the dreaded mushy exterior and crunchy interior.

While the potatoes were cooking, I did a quick cabbage braise which turned out to be luscious and silky. Here is the recipe.

Braised Green Cabbage with Leeks and Apples (for 2)

1 TBS Butter and 1 TBS olive oil

1 leek, white part only, washed and sliced into 1/4 inch rounds

1/2 macintosh apple, peeled and seeded and slice into thin crescent slices

1/2 a small green cabbage, cored and sliced thinly (about 3 cups)

1/4 cup of cider vinegar

Sea salt

another TBS butter (optional)

Heat up olive oil and butter together over medium high heat. Add leek and stir occasionally for a few minutes until leek starts to soften. Add the apple and cabbage, and stir. Cook a few minutes, add the vinegar and salt to taste. Put a lid on the pot, and cook about 15 minutes. If there is too much liquid, you can take the lid off and raise the heat to boil off the extra liquid. Finish by adding more butter if you like.

This is great spooned over simple boiled or mashed potatoes. The sweetness of the apple and leek is a nice balance to the acidity of the vinegar.

This is also delicious, for the meat eaters among us, with some salt pork, bacon, or cured sausage. Just add it in at the beginning with the leek, and then let it simmer away. Reduce some of the butter or olive oil if you do the pork ad-ins.

Bon Ap.

Dropsies Dinner and Caffeine

From frugal and fabulous to dizzying drech....that is the risk of the home cooked meal.  Sometimes food blogs just sound a little too easy and full of grace.  The photos are perfectly shot, as if a food stylist lives in house, and the recipes and anecdotes that accompany those perfect shots are always well mannered, well dressed, and say all of the appropriate food things. Precious. Well, last night's dinner wasn't like that in our house.  I set out to make use of some butternut squash leftovers and one of the 8 heads of cabbage currently in residence in my fridge drawer.  A simple cheddar/squash souffle and some vinegary coleslaw with boiled dressing sounded good.  But first let me confess....I drank coffee earlier in the day. 2 large, strong cups of the stuff.  After many weeks of being coffee free, I could easily say it was a BIG mistake.  I have to tell myself that I am allergic to the stuff, period.  Must stay away.

I approached every ingredient as if it were a wild animal needing a fast chase, a violent catch, and followed by a quick wrestle and throw down into waiting  bowl or pot.  Eggs were smashed accidentally, lumpy squash was beaten to smoothness, without success, using the help of 2 different electric tools - the immersion blender zapper and the under sized hand held mixer - to no avail and butter was scorched before the roux could even get out the door.  Many pots, pans, spatulas, whisks and spoons later, I found myself "gently" folding in the egg whites with the grace of an elephant on speed.  The batter took up two different souflfe dishes (but one of them was just a brownie pan), and I slid both into the oven.  Of course, my impatience made me check on it too often, but still they rose and looked beautiful.  At least the one I didn't drop on the open oven door looked beautiful.  The spill victim turned into a lovely mess of charred egg and squash smeared all over the window of my oven door, filling the house with a toasty burned egg aroma.

The slaw was a little better, but I did manage to get small shreds of cabbage in every nook and cranny of the kitchen and I also tatsed the boiled dressing a little too soon after the said boiling point and still can't feel my tongue.  When all was done, we sat, opened a bottle of red (the cork broke in half and I plunged it with great relish down into the bottle, and we had a funny, even tasty meal.  Many jokes were made about the crazy housewife who possessed me and the effing souffle she felt compelled to make.  All because of some squash leftovers.

Frugal and Fabulous

My pantry is small, but pretty well stocked with staples.  Between that and the garden, it's easy to spend a week without going to the grocery store.  I get milk from Family Cow Farmstand, eggs from a neighbor, and a few items at the Burlington Farmers' Market during the summer.  The main thing I go there for is the cheese from Does' Leap Farm: they make the  best chevre I have ever had.  The feta is fabulous too, and I used it in this dish.  Having a garden, visiting the farmers' market, and having a well stocked pantry (I buy stuff like pasta, beans, and olive oil in bulk, when it is on sale) means you can throw together simple meals for not much money.  We stretched Sunday's dinner to make 8 meals over two days.  That comes out to ahout .33 a meal.  Pretty good, huh? I made this escarole feast after I noticed a huge, beautiful head of the stuff in the garden (wish I had a picture).  It's one of my favorite vegetables, and has to be grown to be appreciated.  The flavor gets kind of bitter if it sits in the fridge too long, but if you cook it up right after harvesting, it is magnificent...silky, unctuous yumminess.  Frugality means not being afraid of leftovers.  Often, I will cook one large meal and then stretch it by morphing it into other things.  Shape shifting dinners.  Here's what I made on Sunday night,  and a few ideas for the leftovers. You can substitute any other greens if you must, but really, you should  give escarole a try next year in your garden...it's pest free, super cold tolerant, and gorgeous.  But for now, there might even be a head or two with your name on it at the farmer's market.

Escarole and White Beans on Pasta

1 TBS olive oil

1 medium onion, chopped or 2 leeks (for a sweeter flavor), white parts only, washed and chopped

1 jalapeno, chopped (use the seeds if you like it hot. Mine came from the garden, not to brag or anything)

3 cloves of garlic sliced, minced, or crushed (all three ways produce different results, figure out what you like).

1 large head escarole, washed, but not chopped.  (mine came from my garden...wish I had a photo, it was gorgeous) or any other green you like -- chard, kale, mustard greens, arugula

1 can white beans (butter beans are my favorite)

1 box pasta, whatever you like

Optional garnishes -- fresh squeezed lemon juice, capers, feta or parmesan, another drizzle of olive oil.

Salt and Pepper to taste

  • Get your (salted) pasta water going in a large pot.
  • While that is coming to a boil, heat the olive oil in a large skillet or dutch oven type of pot.
  • Saute the onion or leeks, garlic, and jalapeno over medium high heat, stirring.
  • After about 5 minutes, when everything is softening and realeasing its aroma, dump in all of the escarole (still wet from being washed so that it creates some steam).  Put a lid on the whole pan and ignore it for a few minutes.  Open the can of beans, rinse them if you need to, dump them on top of the escarole and put the lid back on for a few more minutes.
  • By now, you should also be cooking your pasta to the toothsome al dente point - i.e. not mushy.
  • Stir up all the escarole and beans so that they are evenly distributed, and season with the salt and pepper to taste.
  • Drain the pasta, reserving a little of the cooking liquid if you want to stir it into the finished dish later if it seems dry.
  • You can combine noodles with the vegetables in the big skillet or pot, or alternately, you can serve big shallow bowls of pasta with the veggies on top, passing the optional garnishes around at the table.

This is a great dish to serve reheated as is, or you can turn it into a stew by reheating it with some broth.  I also love it with an egg cracked on top, and steam poached: just put the lid on the pot you are using and make sure there is enough liquid or fat in the bottom of the pan so that nothing sticks.   Super simple, and super yummy.  The escarole becomes silky, with a little bit of pleasant bitternes and the garlic and jalapeno balance it all out.  Bon Ap!

Chicken Broth Medicine and Reconstructed Soup

Last night, I made 2 gallons of chicken broth using 2 chickens from Shuttleworth Farm, an armful of mixed herbs (sage, lovage, thyme, rosemary, winter savory, and parsley), the tops of many leeks, a handful of carrots, some onions, bay leaf, peppercorn, and salt.  I let everything cook very slowly on medium to low heat in a big stock pot for about 3 hours.  The key is to never let anything boil...that is what makes the chiken rubbery and the broth cloudy (I am sure there are some food science explanations, I am merely going from experience.) I strained the broth, let it cool and filled up empty yogurt containers for the freezer (leaving a few inches of head space since liquids expand when they freeze).   The broth is a rich golden, green color and will be pulled out whenever I want to make a quick soup using whatever ingredients are around during the winter.  I reserved one of the cooked chickens for last night's dinner, more on that below; and with the other bird, I took all of the meat off the bone and it will go into chicken salads and such for the rest of the week.  I think using two whole birds makes such a rich broth, but it does leave a lot of meat to use up.

For dinner, I saved about a half gallon of broth, placed it in a 7 qt pot and added whole peeled carrots, potatoes, and leeks (white part only, carefully trimmed and washed).  I let the broth and veggies come to a gentle boil, and waited about 40 minutes. I served this in shallow bowls with a parsley salad, and good sea salt. In France, there is usually dijon mustard as a condiment with this, but I am all out right now.  This is one of my favorite fall and winter meals, along with some of the poached chicken,  a sort of reconstructed chicken soup.  In French it is called Poule au Pot.  (Hen in Pot).  It is the poultry cousin to Pot au Feux, (Pot on Fire)  which is made with beef -- brisket, short ribs, chuck.  And uses the same method described above.  Using fresh vegetables cooked in strained broth is preferable eating the vegetables that have simmered in the stock pot for a few hours thus becoming a wee bit mushy.

Herb Salad is the perfect accompaniment to so many things.  Parsley is probably my favorite.

Parsley Salad

2 cups chopped parsley

3 scallion, washed and chopped finely

Juice from 1/2 a lemon

1 TBS good olive oil

Sea salt to taste

Mix everything together.  Let sit about 20 minutes before serving so that the flavors combine.

Extra! Extra! 85 pounds of food from one plant.

Help!  Today has brought in a rainy September morning and a houseful of the ubiquitous butternut squash.   I just can't believe that one plant could produce 17 (!!!) giant squashes (85 pounds).   Some will go to the food shelf and some will go to friends (watch out). The truth is, I thought that I had planted delicata squash, which is my favorite, not butternut.  Whoops.  Soups, gratins, and stuffed squash will be on our table this fall and, thankfully, the squashes keep well into winter, but I am sure my people will be tired of eating butternut long before it runs out. Here is a recipe I love, and it will use up about 1/17th of my harvest....

Butternut, Cheddar and Sage Gratin

This needs only a green salad.  It's a hearty dish.

  • one peeled and cubed (1/2" or so) butternut squash
  • 1 TBS butter
  • 1 medium onion, roughly chopped
  • 1 clove of garlic minced or pressed
  • 1/4 cup of finely sliced, fresh sage leaves
  • a drizzle of olive oil
  • salt and pepper to taste
  • 1/4 c heavy cream
  • 6 oz grated cheddar cheese (I like sharp)

Preheat oven to 350.

Melt butter in a cast iron or other heavy skillet.  Over medium heat, add onion to melted butter and stir until it begins to soften (about 4 minutes). Add sage leaves and garlic.  Drizzle in some olive oil (about 1 or 2 TBS) and stir until fragrant and onions start to caramelize. (About 12 minutes)

Add squash to a butter or oiled 9 x 13" baking dish.  Toss in the onion and sage mixture, the cream, and salt and pepper to taste. Use your hands or utensils to get a good blend of all the ingredients.  Cover with foil and bake in preheated oven for about 40 minutes.  Take out the dish, remove the foil, turn up the oven to 450, cover squash with the cheddar cheese and return to oven until brown and bubbly, about another 20 to 30 minutes.  You can even turn on the broiler for a minute or two at the end to really make the top brown.

This freezes well.  It's great for potlucks and any other time you want to feed a crowd.

Simple Food Preservation for the Home Gardener

The most important element of putting up food is safety. While problems like botulism are rare, they can be serious. Please make sure to follow recipes exactly, as the amount of acid, cooking time, and temperature can determine whether foods will be safe to eat.

The type of food preservation you'll do depends on your storage space, what you like to have on hand to eat in the winter, and how much work you want to do. Freezing food is the easiest method, but it depends on whether you've got extra space in your freezer.

For excellent over-all advice and recipes for canning, freezing, and otherwise preserving food, visit any college's Extension Service website, or:

  • Canning Across America
  • preservefood.com
  • simplycanning.com
  • A brief rundown of what I do most years:

  • Fruit Spreads and Jams: I use a low sugar pectin such as Pomona's, which you can buy locally at City Market. It allows you to make a really simple fruit spread with honey, fruit juice concentrate or just a fraction of the sugar that would be in a regular jam.

    Canning is a great technique for preserving high acid foods like tomatoes, fruit, and pickles. For a thorough explanation of canning, go to vegetablegardener.com. This will give you a very clear introduction to water bath canning (non-pressure canning of acidic foods). The ones that I do each year are tomatoes, peaches, and applesauce.

    Simple Tomato Sauce: wash and cut up tomatoes into halves or quarters. Then pulse in food processor until they are chopped up well and the skins are pulverized. I usually do a few batches at a time until I have about a gallon of soupy tomato sauce which I then cook down for several hours over low heat until the desired thickness is reached. Salt to taste. This can then be canned or frozen. I doctor it up with herbs, garlic, etc when I use it in the winter time that gives me more flexibility.

    Tomatoes can also be frozen whole and raw by placing them in a zip-lock bag as they ripen. When you later need to use them, you just have to run them under warm water to slip the skins off.

    Roasted Ratatouille: I chop up onions, zucchini, eggplant, and tomatoes and toss them with herbs, olive oil, and sea salt. I then spread it on cookie sheets in a single layer and roast in a 400 degree oven until soft and starting to caramelize (turning once or twice helps). It takes about 50 minutes per batch. I then freeze this in containers or freezer bags. It is fantastic on pizza, pasta, in lasagnas or other casseroles, or on its own.

    Sweet Peppers: just chop up raw peppers and place in a freezer baggie. Very simple and a great addition to just about anything you are sauteeing.

    Herbs: any herb can be turned into a puree with a little olive oil and salt in the food processor. This is a good candidate for freezing in ice cube trays and then placing the frozen blocks into labeled baggies. When making dishes in the winter, simply toss an herb cube into the pot for extra flavor ; soups, sauces, stir fries, salad dressings are all good options for this method. Pesto can be frozen this way too, allowing you to thaw out just what you need.

    Other vegetables that freeze well are green beans and spinach: just steam, dry well, and place in bags. You can also chop spinach or other greens after blanching briefly, and press into ice cube trays to freeze into cubes to have on hand for soups, pasta and the like in the winter.

    Pickling beets, carrots and cucumbers is another simple and satisfying way to store these veggies, either in the refrigerator (for consumption within 3 months), or by canning them for a longer shelf-life. See recipes at:

  • Recipezaar AllRecipes Garden Web/Harvest Forum