The Rototiller and the Gym

straw in the garden

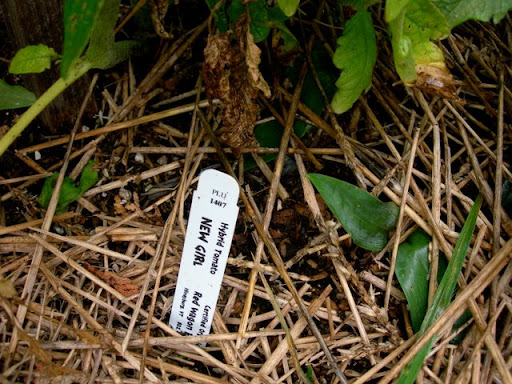
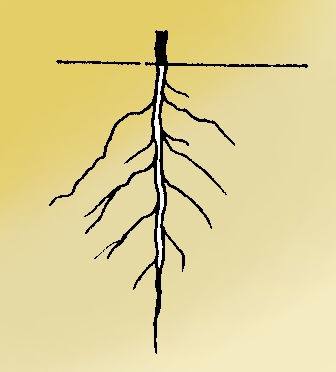
Every year, around October, I join a local gym and start to do arduous things indoors.  I don't love to exercise indoors, but it's a way to keep myself from going a little batty and  it means I can't use our foul weather as an excuse.  This year though, I am waiting a little longer to submit myself to the four walls and the machines and instead I am tilling my garden by hand.  With a fork.  You may be asking, what, pray tell has come over her? Well, two things....rototilling is bad for your soil and, yes,  I like the workout.  Those rototiller tines break up the titlth and structure of your soil, churning everything up too finely and forcing all of the organic matter to decompose too quickly, thereby not leaving the nutrients in the ground for next year's plants.  It also only works the top layer of the soil and leaves an untouched hard pan just a few inches below the surface--not ideal for root crops or any plant with a tap root. You can read about no-till agriculture here and here.  It is the newish trend in organic farming systems that copy how things were done a long time ago, before big farm machinery,  and has been proven to reduce carbon emissions by using fewer fossil fuels, and by storing carbon in plants rather than by losing it to the atmosphere when plant matter breaks down too quickly.  All this sounds like a great reason to park the rototiller permanently, but the truth is, I do it for other reasons as well.  I don't own a rottotiller; I don't like having to ask someone to do it, and I like the messy workout.  Here's how I did it this year. Back in the spring, I invested in about 20 bales of straw.  My garden is broken up into an odd assortment of rectangles connected with meandering paths.  It is a place that encourages inefficient wandering and discourages straight ahead speed. I love my garden for these qualities that make it an antithesis to the hassle and bustle of most days. And it's another reason a machine just doesn't work for me: I don't want one big rectangle with a bunch of straight rows.  Rather, I like my garden to have a series of mini gardens with their own mini rows and blocks. It makes for a beautiful patchwork quilt of vegetables.  So when I started to plant everything back in April and May, I covered up the paths and all the bare soil around the plants with lots of straw.  This did a great job of keeping down weeds and limiting the amount of water the plants needed.  I added more straw and pulled a weed here and there, but for the most part, found that the initial investment more than paid for itself in time spent swimming.

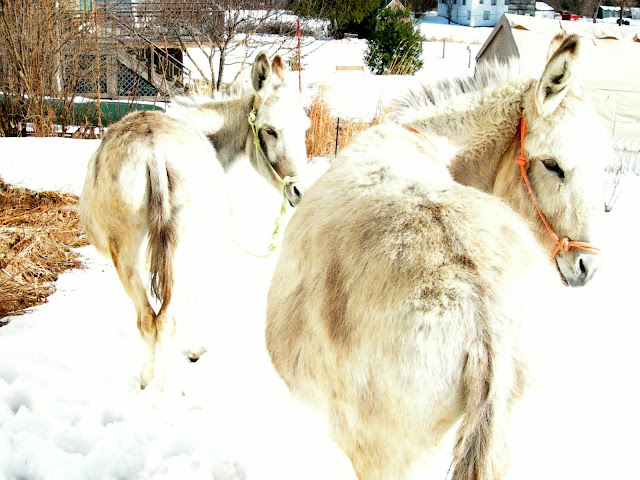
Now that the plants are done, I am going through and cutting down dead stalks, composting them in a corner along with some of Rosie and Pokey's donkey manure.  For crops that can be planted in fairly coarse soil, I will just leave the straw in place and come next spring, I will push the straw away, add a big scoop of compost, incorporate compost and soil, dig a little hoel,  and plant right into that.  I will add more straw too since so much of it will break down over the winter.

For prepping areas where I am going to be seeding first thing in the spring, I'll need a finer bed preparation which will be done in two phases.  Fall phase, now, is to push away the straw, churn up the soil with a four pronged pitchfork, smash it up a little, rake it smooth, and place the straw back on top.  This keeps the soil in place and does not allow erosion to do its thing.  Come April, I will push the straw back yet again, hoe and rake the bed to make the top layer of soil fine and not too chunky, and plant some seeds in little furrows.  The straw just waits in piles along the edge of the rectangle and gets spread out again once the seeded plants are about 6" to 8" high.  This requires a little weeding around the plants in between straw replacement times, but it's not too much.

This sounds like a lot of work, but it saves time come spring to prep as much of the garden as possible now.  I really like the benefit of seeing the soil texture improve year to year and each little rectangle of my garden seems to have its own characteristics.  It all feels very wholistic, a little messy, and not at all perfect.  I don't feel bad when some weeds get through the system because I will just pull them out or chop them down and layer them into the accumulated straw.  It's about your mulch being part of your fertility plan and it is about gadening without guilt.  The gym can wait another month while I play in the dirt a little longer.

Dropsies Dinner and Caffeine

From frugal and fabulous to dizzying drech....that is the risk of the home cooked meal.  Sometimes food blogs just sound a little too easy and full of grace.  The photos are perfectly shot, as if a food stylist lives in house, and the recipes and anecdotes that accompany those perfect shots are always well mannered, well dressed, and say all of the appropriate food things. Precious. Well, last night's dinner wasn't like that in our house.  I set out to make use of some butternut squash leftovers and one of the 8 heads of cabbage currently in residence in my fridge drawer.  A simple cheddar/squash souffle and some vinegary coleslaw with boiled dressing sounded good.  But first let me confess....I drank coffee earlier in the day. 2 large, strong cups of the stuff.  After many weeks of being coffee free, I could easily say it was a BIG mistake.  I have to tell myself that I am allergic to the stuff, period.  Must stay away.

I approached every ingredient as if it were a wild animal needing a fast chase, a violent catch, and followed by a quick wrestle and throw down into waiting  bowl or pot.  Eggs were smashed accidentally, lumpy squash was beaten to smoothness, without success, using the help of 2 different electric tools - the immersion blender zapper and the under sized hand held mixer - to no avail and butter was scorched before the roux could even get out the door.  Many pots, pans, spatulas, whisks and spoons later, I found myself "gently" folding in the egg whites with the grace of an elephant on speed.  The batter took up two different souflfe dishes (but one of them was just a brownie pan), and I slid both into the oven.  Of course, my impatience made me check on it too often, but still they rose and looked beautiful.  At least the one I didn't drop on the open oven door looked beautiful.  The spill victim turned into a lovely mess of charred egg and squash smeared all over the window of my oven door, filling the house with a toasty burned egg aroma.

The slaw was a little better, but I did manage to get small shreds of cabbage in every nook and cranny of the kitchen and I also tatsed the boiled dressing a little too soon after the said boiling point and still can't feel my tongue.  When all was done, we sat, opened a bottle of red (the cork broke in half and I plunged it with great relish down into the bottle, and we had a funny, even tasty meal.  Many jokes were made about the crazy housewife who possessed me and the effing souffle she felt compelled to make.  All because of some squash leftovers.

Frugal and Fabulous

My pantry is small, but pretty well stocked with staples.  Between that and the garden, it's easy to spend a week without going to the grocery store.  I get milk from Family Cow Farmstand, eggs from a neighbor, and a few items at the Burlington Farmers' Market during the summer.  The main thing I go there for is the cheese from Does' Leap Farm: they make the  best chevre I have ever had.  The feta is fabulous too, and I used it in this dish.  Having a garden, visiting the farmers' market, and having a well stocked pantry (I buy stuff like pasta, beans, and olive oil in bulk, when it is on sale) means you can throw together simple meals for not much money.  We stretched Sunday's dinner to make 8 meals over two days.  That comes out to ahout .33 a meal.  Pretty good, huh? I made this escarole feast after I noticed a huge, beautiful head of the stuff in the garden (wish I had a picture).  It's one of my favorite vegetables, and has to be grown to be appreciated.  The flavor gets kind of bitter if it sits in the fridge too long, but if you cook it up right after harvesting, it is magnificent...silky, unctuous yumminess.  Frugality means not being afraid of leftovers.  Often, I will cook one large meal and then stretch it by morphing it into other things.  Shape shifting dinners.  Here's what I made on Sunday night,  and a few ideas for the leftovers. You can substitute any other greens if you must, but really, you should  give escarole a try next year in your garden...it's pest free, super cold tolerant, and gorgeous.  But for now, there might even be a head or two with your name on it at the farmer's market.

Escarole and White Beans on Pasta

1 TBS olive oil

1 medium onion, chopped or 2 leeks (for a sweeter flavor), white parts only, washed and chopped

1 jalapeno, chopped (use the seeds if you like it hot. Mine came from the garden, not to brag or anything)

3 cloves of garlic sliced, minced, or crushed (all three ways produce different results, figure out what you like).

1 large head escarole, washed, but not chopped.  (mine came from my garden...wish I had a photo, it was gorgeous) or any other green you like -- chard, kale, mustard greens, arugula

1 can white beans (butter beans are my favorite)

1 box pasta, whatever you like

Optional garnishes -- fresh squeezed lemon juice, capers, feta or parmesan, another drizzle of olive oil.

Salt and Pepper to taste

  • Get your (salted) pasta water going in a large pot.
  • While that is coming to a boil, heat the olive oil in a large skillet or dutch oven type of pot.
  • Saute the onion or leeks, garlic, and jalapeno over medium high heat, stirring.
  • After about 5 minutes, when everything is softening and realeasing its aroma, dump in all of the escarole (still wet from being washed so that it creates some steam).  Put a lid on the whole pan and ignore it for a few minutes.  Open the can of beans, rinse them if you need to, dump them on top of the escarole and put the lid back on for a few more minutes.
  • By now, you should also be cooking your pasta to the toothsome al dente point - i.e. not mushy.
  • Stir up all the escarole and beans so that they are evenly distributed, and season with the salt and pepper to taste.
  • Drain the pasta, reserving a little of the cooking liquid if you want to stir it into the finished dish later if it seems dry.
  • You can combine noodles with the vegetables in the big skillet or pot, or alternately, you can serve big shallow bowls of pasta with the veggies on top, passing the optional garnishes around at the table.

This is a great dish to serve reheated as is, or you can turn it into a stew by reheating it with some broth.  I also love it with an egg cracked on top, and steam poached: just put the lid on the pot you are using and make sure there is enough liquid or fat in the bottom of the pan so that nothing sticks.   Super simple, and super yummy.  The escarole becomes silky, with a little bit of pleasant bitternes and the garlic and jalapeno balance it all out.  Bon Ap!

Chicken Broth Medicine and Reconstructed Soup

Last night, I made 2 gallons of chicken broth using 2 chickens from Shuttleworth Farm, an armful of mixed herbs (sage, lovage, thyme, rosemary, winter savory, and parsley), the tops of many leeks, a handful of carrots, some onions, bay leaf, peppercorn, and salt.  I let everything cook very slowly on medium to low heat in a big stock pot for about 3 hours.  The key is to never let anything boil...that is what makes the chiken rubbery and the broth cloudy (I am sure there are some food science explanations, I am merely going from experience.) I strained the broth, let it cool and filled up empty yogurt containers for the freezer (leaving a few inches of head space since liquids expand when they freeze).   The broth is a rich golden, green color and will be pulled out whenever I want to make a quick soup using whatever ingredients are around during the winter.  I reserved one of the cooked chickens for last night's dinner, more on that below; and with the other bird, I took all of the meat off the bone and it will go into chicken salads and such for the rest of the week.  I think using two whole birds makes such a rich broth, but it does leave a lot of meat to use up.

For dinner, I saved about a half gallon of broth, placed it in a 7 qt pot and added whole peeled carrots, potatoes, and leeks (white part only, carefully trimmed and washed).  I let the broth and veggies come to a gentle boil, and waited about 40 minutes. I served this in shallow bowls with a parsley salad, and good sea salt. In France, there is usually dijon mustard as a condiment with this, but I am all out right now.  This is one of my favorite fall and winter meals, along with some of the poached chicken,  a sort of reconstructed chicken soup.  In French it is called Poule au Pot.  (Hen in Pot).  It is the poultry cousin to Pot au Feux, (Pot on Fire)  which is made with beef -- brisket, short ribs, chuck.  And uses the same method described above.  Using fresh vegetables cooked in strained broth is preferable eating the vegetables that have simmered in the stock pot for a few hours thus becoming a wee bit mushy.

Herb Salad is the perfect accompaniment to so many things.  Parsley is probably my favorite.

Parsley Salad

2 cups chopped parsley

3 scallion, washed and chopped finely

Juice from 1/2 a lemon

1 TBS good olive oil

Sea salt to taste

Mix everything together.  Let sit about 20 minutes before serving so that the flavors combine.

Privacy from the Traffic to the Secret City

I like to plant perennials and woody ornamentals in the fall for two reasons: one, I finally have the time to do it, and two, they benefit from the cooler temperatures and the rainy days.  Today, I am planting a privacy screen between our house and the noisy road we live on.  While it's still a country road, the traffic is such that we cannot simply tune it out. There are cars every few minutes, and they are going way too fast.   We've determined there is a secret city over the ridge and all these cars are in a terrible hurry to get there.

My privacy planting is mirroring one that I already planted on the other side of the walk way.... Nine bark - those are the tall burgundy shrubs (Physocarpus), sedums (Autumn Joy and Madrona), some ornanmental grasses, some fall pink asters, and some heuchera or coral bells (Purple Petticoats).  Underneath, I will stash a bunch of pale Pink Emperor tulips and a few white daffodils.  I love keeping color combinations harmonious season to season and this creates a nice range of pinks, deep reds and maroons.  The grasses fill in to give it a naturalistic look and it only takes about two years for everything to grow up enough to become an 8 foot screen. I will stick in a few kale and chard plants come spring for the mandatory (in my mind) edible component.  In an effort to practice Gardening Without Guilt, I grow very practical plantings that will always accomplish a few of my gardening goals -- easy maintenace (it's okay if there a few weeds in there since it all looks like it belongs), habitat for wildlife (the birds and pollinators love these groupings of plants), beauty (to my eye at least) and harmony with some lovely edible plants (in this case it will be chard, kale and a few herbs).  The closer to the house we plant edibles, the more we will eat them and tend to them.  And by using plants for a privacy screen, we are not seeing the cost of and avoiding the aesthetic impact of a tall fence.

Pokey and Rosy

My plan is to add a few wheelbarrow loads of our compost, made from donkey manure (thanks to Pokey and Rosy, above), kitchen scraps, and garden debris.  Then I will work it all into the soil which was tilled up several weeks ago (and,no, I have not kept up with the weeding in the meantime).  The planting holes should be a couple of times bigger than the root ball of the plant, that way the soil can be loosened and worked up to create a welcoming home for newly spreading roots.  I don't add any fertilizer when planting in the fall because it encourages tender new growth that will not fare well in our frigid winters.

I like these types of plantings for the simple pleasure they provide as they grow up and the effect they have of anchoring the house into its place, making it more of a home and sheltering it from all those cars speeding off to their secret city.  I'll post a picture when I am finished.

Extra! Extra! 85 pounds of food from one plant.

Help!  Today has brought in a rainy September morning and a houseful of the ubiquitous butternut squash.   I just can't believe that one plant could produce 17 (!!!) giant squashes (85 pounds).   Some will go to the food shelf and some will go to friends (watch out). The truth is, I thought that I had planted delicata squash, which is my favorite, not butternut.  Whoops.  Soups, gratins, and stuffed squash will be on our table this fall and, thankfully, the squashes keep well into winter, but I am sure my people will be tired of eating butternut long before it runs out. Here is a recipe I love, and it will use up about 1/17th of my harvest....

Butternut, Cheddar and Sage Gratin

This needs only a green salad.  It's a hearty dish.

  • one peeled and cubed (1/2" or so) butternut squash
  • 1 TBS butter
  • 1 medium onion, roughly chopped
  • 1 clove of garlic minced or pressed
  • 1/4 cup of finely sliced, fresh sage leaves
  • a drizzle of olive oil
  • salt and pepper to taste
  • 1/4 c heavy cream
  • 6 oz grated cheddar cheese (I like sharp)

Preheat oven to 350.

Melt butter in a cast iron or other heavy skillet.  Over medium heat, add onion to melted butter and stir until it begins to soften (about 4 minutes). Add sage leaves and garlic.  Drizzle in some olive oil (about 1 or 2 TBS) and stir until fragrant and onions start to caramelize. (About 12 minutes)

Add squash to a butter or oiled 9 x 13" baking dish.  Toss in the onion and sage mixture, the cream, and salt and pepper to taste. Use your hands or utensils to get a good blend of all the ingredients.  Cover with foil and bake in preheated oven for about 40 minutes.  Take out the dish, remove the foil, turn up the oven to 450, cover squash with the cheddar cheese and return to oven until brown and bubbly, about another 20 to 30 minutes.  You can even turn on the broiler for a minute or two at the end to really make the top brown.

This freezes well.  It's great for potlucks and any other time you want to feed a crowd.

Planting the Perfect Pumpkin

We all want that giant, magical pumpkin come harvest time.  Here are a few tips to get you there.  Pumpkins are related to cucumbers, melons, summer squash, zucchini, and winter squashes and all of the vegetables in this family will benefit from this treatment. Warm soil. In Vermont wait until early June to put out the plants--a good rule of thumb is to wait until we have had a few nights above 50 F degrees. Transplants do better than seeds since you will have a head start on the season and don't risk having seeds rot in cold soil or be eaten by the local rodent.  It's best to keep two plants together when transplanting since the larger volume of foliage will help shade out weeds later in the season.

A raised bed or mound. This will help warm the soil and improve drainage.  It also gives the plants' shallow roots a place full or looser soil to spread without strain.

Lots of fertility. Compost is a  must for successful pumpkins, squashes, cucumbers and melons.  At home, we use rotted donkey manure (thanks to Pokey and Rosy) mixed with well composted yard debris (leaves, grass clippings) and food scraps.  More can be learned about compost at the Vermont Compost Company website.  A little granular fertilizer can be used as well if you do not have access to good compost and/or very poor soils.  A soil test is always a good idea, and can be done easily at your local extension office.

Adequate water. One inch a week.  That means that if it does not rain, you should gently pour about 3 gallons of water at the base of your plants.  A slow drip irrigation system or soaker hose is a great option as well.

Full sun. There is no compromise on this one.  The plants must have at least 8 to 10 hours of full sunlight.

Lots of room.  Plants (actually, groups of 2 plants) should be at least 3 feet apart. They need that much space for proper ventilation and so that the flowers and foliage are exposed to pollinators and sunlight.

Pollination. Plant a few bee friendly plants such as calendula, borage, mint and salvias around your garden to attract bees and other beneficial insects.  Cucurbit plants have male and female flowers on each plant and have to be pollinated by insects.  Welcoming bees to your garden will help yields since more female flowers will become pollinated--the only way for them to produce fruit.

Harvest at the right time. Winter squashes and pumpkins should be harvested when the skins are hard and cannot be pierced by your thumbnail.  Summer squashes and cucumbers and zucchini should be harvested at whatever stage you like to eat them, from baby to baseball bats.  Watermelons are harvested when the tendrils on either side of the attaching stem are dead and the yellow spot on the bottom of the fruit (where it rests on the ground) is a deep yellow, and when thunking the fruit with your knuckle produces a hollow sound.  Cantaloupes are ready when they slip off the vine with a gentle tug (called the "half slip stage").  Melons take a little trial and error to learn to harvest at the right time, but a good rule of thumb is "if in doubt, wait."

The Autumn Garden: Time to Gather and Restore

With these colder days also come a chance to produce a few more late season greens in the vegetable garden. These include lettuce, kale, parsley cilantro, arugula, mustard greens and spinach. Here is a simple system that can be followed by anyone wishing to extend the fall and winter harvest.

Julie's Introduction

If you ask me, September is the best month in the garden.

The warm season crops are still doing well (in theory) and the colder season crops are starting to come back, thankful for the cooler nights.

The harvest basket seems to just fill itself up the minute I step into the straw mulched paths, pausing for a moment to ask if I should eat the raspberries before or after I do a little grunt work.

But while all of this pastoral musing seems idyllic enough, there are some other thoughts in the nether layers that I need to reckon with.

First of all, why is my garden so big?

Why is it that every April, the month of good intentions, I decide that this is the year I will finally find time to keep everything weeded and tended?

As we slide from April to September, my good intentions are slowly eclipsed by my desire to spend summertime in places other than the garden. I love to bike, hike, swim, row, travel, read in the hammock, and yes, I love to cook, hence the garden. But gardening feels like work when it is 95 F and the weeds are scratching my neck.

I used to feel guilty about all of this, but now I have learned to cope with the ebb and flow of my gardening enthusiasm-- what I am working on now is gardening without guilt.

While it is true that I am very passionate about gardening, I realize that there is a seasonal drive to every aspect of this hobby. Every gardener must come to terms with his or her own type of engagement in the garden. There is no right or wrong way to garden. There is beauty and purpose in every type of garden and what matters most is that a garden meets the needs of the gardener, not the other way around. Gardens without guilt are places of liberation and revelation....a place to accept both our shortcomings and our successes.

The food coming out of my garden this year is bountiful as always, and I have managed to learn a few things which have made the garden easier to manage in spite of its size. Over the next few months as we go through another autumn and winter cycle, I will reflect on what gardening means to me, what I do with the food from my garden, and how I go about deciding what to grow at Red Wagon Plants.

As I share these thoughts with you, I encourage you to share your notions about The Garden. What works well for you? What are the disasters? How does your garden fit into your life? This garden journal is a collective effort between the people of Red Wagon Plants and the family of customers created by all of those young plants going out into the world of our gardens. We hope you will share the thoughts you glean this season and keep the conversation going until we see you again in the spring.

Cheryl's Introductory Post

And the tomatoes, with their smell of high summer, and the wavy lines of heat off our driveway and loud trill of cicadas in the background. I don't remember what we did with them, but I know that's where my love of growing things began. It was tomato plants that first called up a particular sense of wonder in our natural world. How could this tiny seed transform into these green sharp leaves, these yellow star flowers, this juicy bursting fruit?

Don't Fear Frost! Extending Your Growing Season

Here in Vermont, we can count on just a few frost-free months. But with a little bit of planning, strategic planting, and getting the right tools, you can harvest through a bit of frost and snow. But by planning out crop planting so that crops are mature before the short days and cold weather hits, you can then protect them and harvest them well into winter.

Row covers such as reemay are usually used with hoops made of #9 gauge wire so that the fabric does not rest right on the plants. These covers breath and come in various weights. They allow light and water in, but raise the temperature of the soil and air inside the cover.

Cold frames are simple boxes that are filled with good quality soil and are covered with windows (called "lights") or clear plexiglass or sometimes plastic. They are used for season extension, plant protection, as mini-greenhouses, and as a place to overwinter tender perennials. The covers are closed at night and opened on sunny days. Lettuce, spinach, hardy greens, and herbs can be grown most of the winter in a hot bed with a south facing light. "Hot beds" are deep cold frames that hold a thick layer of manure below the soil. As the manure decomposes, it lets out a tremendous amount of heat which keeps the frame very warm at night even in the winter. Cold frames can be made out of wood, straw, stone, concrete with old storm windows on hinges. The windows must be small enough that they can be opened and closed easily by raising them up and propping them with a stick.

Straw mulch is a great way to extend the season for vegetables such as kale, spinach, carrots, beets and other root crops. Once the crops are matured, a very thick layer of straw around the base of the plants will keep the ground from freezing so that the roots may still be harvested. The straw also keeps the top of the crops from freezing in extreme temperatures. Spinach can be overwintered under straw so that an early spring crop can be eaten. Kale lasts well into winter and is also helped by a deep straw layer so that the cold wind does not completely dessicate the leaves.

Every home garden has microclimates. It is a good idea to take advantage of these when planning the fall garden. A south-facing foundation wall is a great place to prep a small area for greens and herbs that will be well sheltered from cold, northern winds. It's a good place to situate a cold frame as well and to plant it with radishes, greens, and other crops that will benefit from the micro climate.

Containers are another great way to extend the season. Herbs, greens and lettuces can be planted in pots, apple crates, milk crates, or window boxes and moved inside when the weather gets too cold. While they might not last all winter long, they will certainly give you some fresh eating for a few months longer...all you need is a sunny spot or some simple grow lights. Thyme, parsley, rosemary, and sage all do well in containers in the home and will last all winter. Kale and lettuce will last up to 5 or 6 weeks longer than they would outdoors.

Photograph by One Green Generation . Creative Commons license.

Simple Food Preservation for the Home Gardener

The most important element of putting up food is safety. While problems like botulism are rare, they can be serious. Please make sure to follow recipes exactly, as the amount of acid, cooking time, and temperature can determine whether foods will be safe to eat.

The type of food preservation you'll do depends on your storage space, what you like to have on hand to eat in the winter, and how much work you want to do. Freezing food is the easiest method, but it depends on whether you've got extra space in your freezer.

For excellent over-all advice and recipes for canning, freezing, and otherwise preserving food, visit any college's Extension Service website, or:

  • Canning Across America
  • preservefood.com
  • simplycanning.com
  • A brief rundown of what I do most years:

  • Fruit Spreads and Jams: I use a low sugar pectin such as Pomona's, which you can buy locally at City Market. It allows you to make a really simple fruit spread with honey, fruit juice concentrate or just a fraction of the sugar that would be in a regular jam.

    Canning is a great technique for preserving high acid foods like tomatoes, fruit, and pickles. For a thorough explanation of canning, go to vegetablegardener.com. This will give you a very clear introduction to water bath canning (non-pressure canning of acidic foods). The ones that I do each year are tomatoes, peaches, and applesauce.

    Simple Tomato Sauce: wash and cut up tomatoes into halves or quarters. Then pulse in food processor until they are chopped up well and the skins are pulverized. I usually do a few batches at a time until I have about a gallon of soupy tomato sauce which I then cook down for several hours over low heat until the desired thickness is reached. Salt to taste. This can then be canned or frozen. I doctor it up with herbs, garlic, etc when I use it in the winter time that gives me more flexibility.

    Tomatoes can also be frozen whole and raw by placing them in a zip-lock bag as they ripen. When you later need to use them, you just have to run them under warm water to slip the skins off.

    Roasted Ratatouille: I chop up onions, zucchini, eggplant, and tomatoes and toss them with herbs, olive oil, and sea salt. I then spread it on cookie sheets in a single layer and roast in a 400 degree oven until soft and starting to caramelize (turning once or twice helps). It takes about 50 minutes per batch. I then freeze this in containers or freezer bags. It is fantastic on pizza, pasta, in lasagnas or other casseroles, or on its own.

    Sweet Peppers: just chop up raw peppers and place in a freezer baggie. Very simple and a great addition to just about anything you are sauteeing.

    Herbs: any herb can be turned into a puree with a little olive oil and salt in the food processor. This is a good candidate for freezing in ice cube trays and then placing the frozen blocks into labeled baggies. When making dishes in the winter, simply toss an herb cube into the pot for extra flavor ; soups, sauces, stir fries, salad dressings are all good options for this method. Pesto can be frozen this way too, allowing you to thaw out just what you need.

    Other vegetables that freeze well are green beans and spinach: just steam, dry well, and place in bags. You can also chop spinach or other greens after blanching briefly, and press into ice cube trays to freeze into cubes to have on hand for soups, pasta and the like in the winter.

    Pickling beets, carrots and cucumbers is another simple and satisfying way to store these veggies, either in the refrigerator (for consumption within 3 months), or by canning them for a longer shelf-life. See recipes at:

  • Recipezaar AllRecipes Garden Web/Harvest Forum

  • The Garden Awakens Our Senses

    There are times that the scents tantalize you, as in the thyme wafting up from a spring raking, or perhaps you go to where your cat is taking in the first of the catnip leaves and you too join in! Other days it may be the sounds of all the birds that capture your ears. A single buzz of a bee laden with pollen is one of my favorite moments in the quietude of the garden. Then the touch, the feel, of soil on your hands.

    Spring Time Gardening: Getting an Early Start

    The most cold tolerant food crops we can grow here are things like kale, spinach, collards, arugula, mustard greens, mache (corn salad), and many herbs such as cilantro, dill, sorrel, and chives. Certain lettuces are very cold hardy, but they cannot take the frost quite as well as the plants mentioned above--good cold hardy varieties include the French heirlooms, “Reines des Glaces” and “Merveiles des Quatres Saisons.” These most tender and delicate looking lettuces can take quite a beating when it comes to cold weather.

    Vermont Woman Article

    Julie Rubaud, owner of Red Wagon Plants, a greenhouse in Shelburne that specializes in seedlings, also feels that gardeners in Vermont are an increasing population. "My business grows easily 20 percent a year," says Rubaud. "Community gardening is exploding. People want to have a little plot even if they live in town." She attributes the growing interest to Vermont's cold climate. "Getting outside and growing beautiful plants helps feed the soul," she says. "Gardening is an antidote to our hectic digital lives. I don't know of anything else that can create a sense of wellbeing for all ages and sensibilities."