Kitchen Stories and Recipes

Peppers

pepper pickles.JPG

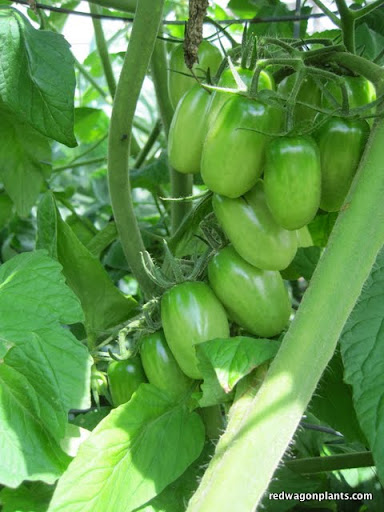
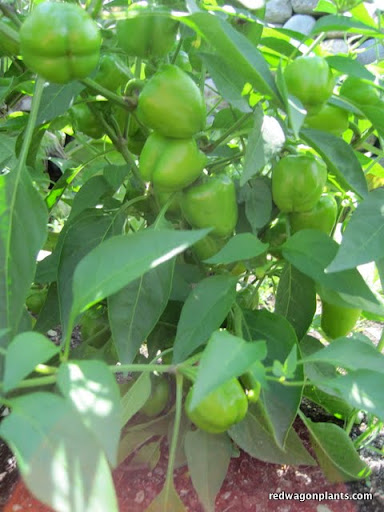
We grew an abundance of peppers this year. With 35 varieties on our plant list, it is hard to not grow too many. Every variety deserves a chance and some are absolute favorites and I end up planting 6 or more plants of each, but really I am making a giant note to stop this madness next year. Every day, for the past month, I am starring at huge bags of peppers in the fridge and figuring out what to do with them. Not a bad problem to have, especially these days. Here are a few things I have been doing.

Pickled Cherry Bomb and other Hot Peppers

I make a brine that is based on this basic recipe from the cook book 6 Seasons by Joshua McFadden and Martha Holmberg. This amount is about enough for 3 pints.

½ cup rice vinegar

1 tablespoon white wine vinegar

1 ½ cups water

3 tablespoons sugar (original recipe calls for 5 TBS)

1 tablespoon plus 1 teaspoon kosher salt

Bring ingredients to a boil,

Pack washed, stemmed and seeded (optional) peppers into clean glass jars. Add a clove of garlic and a sprig of thyme to each jar.

Pour hot brine over the peppers, filling each jar to the top. Let cool to room temperature and then store in the refrigerator. Please note this brine solution is not acidic enough to preserve the peppers with a hot water bath method of canning. These are refrigerator pickles that will keep for months. I pack big ½ gallon jars of them into the back of the fridge and use them all winter, chopped into tacos, as a topping for sandwiches, stuffed, etc.

You can pickle sweet peppers too, using this method.

Hungarian Hot Wax peppers are perfect for pickling.

Hungarian Hot Wax peppers are perfect for pickling.

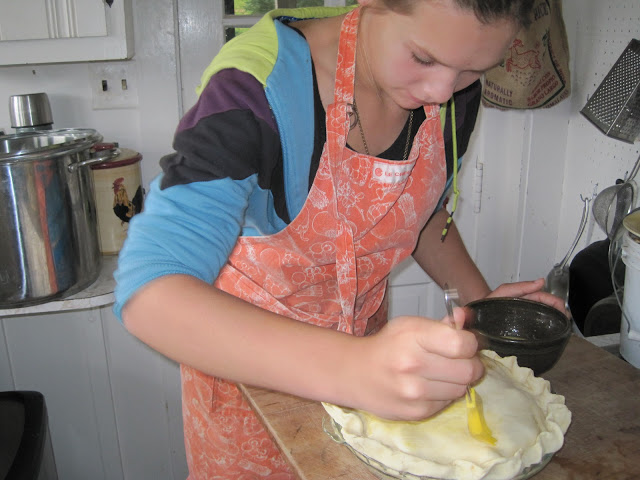
I also made this pepper relish recently and really liked it. You can incorporate some hot peppers into the mix if you want it spicy. This is for canning with a hot water bath method. If you have never done this, please make sure to look up a reliable tutorial, like this one.

Pepper Relish

adapted from Well Preserved by Mary Anne Dragan

6 cups of finely chopped sweet peppers, combination of colors. A few hot peppers can be included in the 6 cups for a spicy relish.

2 cups of finely chopped onion

2 cups of cider vinegar

1 cup of sugar (I used ¾)

2 tablespoons of mixed pickling spice (I did not have a pre-made blend, so made my own with coriander seed, bay leaf, a few cloves, a few black peppercorns, 2 dried chilies, and a tsp of mustard seed) in a cheesecloth bundle or a tea ball.

2 teaspoons of dried hot pepper flakes or substitute with fresh hot peppers

2 teaspoons of salt

Combine peppers and onions into a bowl, and pour boiling water over them. Let sit 5 minutes, then drain well.

Combine the remaining ingredients into a large pot, and bring to a boil. Add the vegetables, and stir to combine. Reduce the heat to medium, stirring occasionally for about 30 minutes.

Remove from the heat, take out the spice bag. Spoon the relish into hot sterilized jars, leaving ½ inch of head space. Release the air bubbles, wipe the rims of jars clean, seal according to manufacturer’s directions. Process the jars in a boiling water bath for 10 minutes. Please refer to this process here if you are not familiar with canning.

Other ways to preserve peppers

I freeze them. Just chop up raw peppers, and slide them into a freezer bag. That is it. They can be used in all kinds of stews, soups and braises over the winter.

I make a big pot of sautéed peppers and caramelized onions and freeze that in small bags. In winter, it can be turned into a tasty spread or dip by placing the thawed mixture in a blender with some walnuts, or cheese, or olives or dehydrated tomatoes.

I roast peppers, tomatoes, eggplants, onions and summer squash or zucchini with olive oil, salt, garlic and herbs at 400F for about 45 minutes. I freeze that mixture in freezer bags and then use it as a base for pasta sauces, soups, and a topping for pizza.


Sweet Potatoes Slip Sale 2016

sweet_potatoes_3.jpg

Sweet Potato Slip Sale

June 11th and 12th, 2016

8:00 to 6:00 pm

 Red Wagon Plants greenhouses

2408 Shelburne Falls Rd  * Hinesburg, VT

Proceeds from the sale benefit the educational programs of Vermont Community Garden Network.

For more information, call 482-4060

Sweet potatoes can be grown in Vermont. Under ideal conditions they thrive and can yield up to 5 pounds per slip. During this benefit sale, we will be selling sweet potato slips in 4" pots, with three slips per pot. These get transplanted 18" apart, in loose, well drained soil. You can also grow them in containers. They like warm, southern exposure, and can be trellised to save space.

Here are some resources for more information on Sweet Potatoes:

The Vermont Community Garden Network has information on their programs and the sweet potato sale here.

This  article on the Mother Earth News website highlights growing methods for northern gardeners and best ways to store the tubers.

 Here is a photo essay on how some ingenious customers are growing their sweet potatoes in Starksboro.

Recipe for Roasted Sweet Potato Fries with Herbs

2 large sweet potatoes, peeled and cut into 1/3 inch batons

3 TBS olive oil

salt and pepper

1/3 cup finely chopped parsley, chives, and or cilantro

2 cloves of garlic, finely chopped

1 small pinch of cayenne

1 tsp lemon juice

  • Preheat the oven to 450 F. Place 2 large cookie sheets in the oven so they are pre-heated as well
  • Toss the cut sweet potatoes with the olive oil and salt and pepper in a large bowl
  • Arrange them on the hot pans in a single layer.
  • Roast for 20 minutes, and flip them over with a spatula, and return to the oven for another 20 minutes, or until tender and browned.
  • Meanwhile, toss the herbs, garlic, cayenne and lemon juice together in the same bowl
  • When the hot fries come out of the oven, sprinkle the herb mixture on the fries and serve immediately

Growing Instructions for Sweet Potatoes

Sweet potato slips are cuttings that come from a parent vine. The slips grow best in a loose, sandy or silty soil that drains well. If sweet potatoes are grown in a rich dark soil they may discolor but are still good to eat. • Transplant the slips into garden beds during June, preferably in the late afternoon or on an overcast day. When transplanting, lay the slips on their sides with 2/3 of the slip buried a half inch under the soil. Water enough to keep the soil moist, but not saturated. • Plant the slips 10 to 18 inches apart in rows that are three to four feet apart. The rows or raised bed should be elevated 4 to 8 inches above the ground level to allow the sweet potatoes room to form. • Keep the cuttings watered while they are getting established. The leaves that were originally on the planted slips will dry up and fall off leaving just the vine stem. New leaves will emerge from the cuttings as the slips become established. • The sweet potato vines will cover the ground reaching 5 to 10 feet in length. Hoe around the vines to cultivate weeds and mulch with hay if desired. • Deer love sweet potato leaves, so be sure your planting area is fenced if deer are aproblem. A flying gold colored beetle may chew round holes in the leaves. The vines are tough and will keep growing despite insect damage. • Sweet potatoes are dug and harvested in late September through mid October, a day or two before the first predicted frost. Most of the sweet potatoes will be just below the parent plant. Each plant can produce up to six sweet potatoes. • After harvesting, dry the sweet potatoes on the ground for two or three hours. Allow them another 10 to 14 days to cure at room temperature or above, before storing the sweet potatoes at a temperature between 50 and 60 degrees F. • Unlike Irish potatoes, sweet potatoes should not be kept cold in a garage, refrigerator or outbuilding. If properly cured and stored, they will keep until April. Enjoy!

Giving Thanks with Braised Thyme and Turnips

A few years ago, I worked for the Intervale Center as a farming consultant for the New Farms for New Americans program run by the Association of Africans Living in Vermont. My job was to help new Americans, primarily refugees from Bhutan, Somalia, and Burundi, in finding markets for their beautiful produce and to help them understand and navigate the vagaries of our cold climate, on-line seed purchases, calendar planning, etc. Most of the time, probably all of the time, I was the one doing the learning. It is an experience I look back on fondly and feel thankful that I was able to get to know these smart gardeners and farmers. Every time I walk into Stone Soup in Burlington and see braised Hakueri turnips at the hot bar, I think of Michel and François who established a long term relationship with the restaurant by growing these perfect and tender roots. They still grow and sell them for Avery and Tim at Stone Soup, and it all started with a face to face meeting, in 3 languages, a seed catalog, and a warm feeling or two.

A fitting Thanksgiving side dish, don't you think?

Braised Hakurei Turnips with Thyme

Serves 6 as a side dish

1.5 pounds Hakurei turnips, the small white ones. About 2 bunches

6 healthy sprigs of thyme (about 1/2 a clamshell package or 1/3 of a bunch)

1/2 cup water

1/4 tsp salt

2 tablespoons butter

1 tablespoon honey

Salt and pepper to taste

Cut off the greens, but save them for another use. They are delicious!

Wash and scrub the turnips and cut into halves or quarters, depending on size. If very small (1 to 1.5 inch in diameter, leave whole). Each piece should be about 2 bites worth.

Add turnips to a medium saucepan with water and salt and thyme.

Bring to a boil, and immediately lower the heat to medium-low. A strong simmer, low boil. Leave the pot covered for 6 to 10 minutes. When the turnips are tender but not mushy, uncover the pot, add the butter and honey, and gently shake the pan to mix. Cook another 5 or so minutes until the water is mostly evaporated and the turnips are cooked through but not falling apart. Remove the thyme sprigs.

Taste for salt and pepper and season accordingly.

Want to grow your own? 

If you haven't grown your own white turnips, consider it for next year. They are easy to grow, last long into the fall, and are sweet and delicious. While rutabaga and traditional purple-topped turnips have their own charms, these white "salad" turnips are delicate, sweet, and can be eaten raw or cooked.

For a fall crop, sow seeds of Hakurei turnips directly into a shallow furrow in the garden in mid-August. They prefer loose, deep soil that drains well. A little compost is always a good idea, but not too much as it can stain them or create crooked  growth. When the plants are a couple of inches tall, thin to 1 plant every 2 to 3 inches. Keep well watered. That's it.  They are a perfect crop to follow an earlier planting of peas or beans or lettuces or greens.

Sage Brown Butter and Ricotta Gnocchi

Here is a quick dinner that sounds difficult to make. But it is really easy. Sage is still looking great in our garden with the long, warm fall we have had and it pairs beautifully with butter in about 5 minutes of gentle cooking. The ricotta gnocchi is a little more involved but not much, and if you have ever tried to make potato gnocchi and felt discouraged, redemption is at hand. These are super simple to make.  We first ate these when our friends Marjorie and Marian of Orb Weaver Farm made them for us, and we have been hooked ever since.

Ricotta Gnocchi with Sage Brown Butter

Ingredients:

  • 2 cups whole-milk ricotta (1 pound) Have you had the yummy one from Mountain Home Farm?
  • 2 large eggs, lightly beaten
  • 1 1/2 cups grated Parmigiano-Reggiano (3 ounces), divided
  • 1/4 teaspoon grated nutmeg
  • 1 1/4 cups all-purpose flour
  • 1/2 stick unsalted butter
  • 10 to 15 whole sage leaves, depending on size. About 1/4 cup.
  1. Stir together ricotta, eggs, 1 cup cheese, nutmeg, and 1/4 teaspoon each of salt and pepper. Add flour, stirring to form a soft, wet dough.
  2. Shape dough on a well-floured surface with lightly floured hands into 2 ropes that are about 1 inch thick. Cut crosswise into 1-inch pieces with a lightly floured knife. Place in 1 layer on a lightly floured parchment-lined baking sheet while you work.
  3. Cook gnocchi in 2 batches in a pasta pot of boiling salted water (3 tablespoons salt for 6 quarts water), adding a few at a time to pot and stirring occasionally, until cooked through (cut one in half to check), 3 to 4 minutes per batch. Lift out with a slotted spoon and drain in colander.
  4. Meanwhile, cook butter with sage in a 12-inch heavy skillet over medium-low heat until golden brown, about 5 minutes.
  5. Gently toss gnocchi with brown butter in skillet and sprinkle with remaining 1/2 cup cheese. Season with salt.

For a great photo explanation of this, click on any of these pictures for a link to the "Inspired Taste" website. They do a great job of explaining the simple process. 

Herb Thoughts

Herb garden planning is not a lot of work, but here are some thoughts I have put together on the topic. Herbs are easy to grow for the most part, but they are a big category of plants (we grow 100 varieties of herbs) and it helps to break them down and organize them into categories. This will help any gardener plant the right plant in the right place and give it the preferred amount of water, sunlight, food, and water.

Why grow herbs? For flavor, fragrance, and beauty - it is the easiest way to improve the flavor of what you cook. It is also one of the easiest ways to have a container garden on your porch or deck.  Herb gardening is intimate - you get close to the plants, smell them, taste them, see them respond to regular clippings. They are a perfect way to better understand plant physiology and the best short cut to great food made with little effort.

Propagation: Plants vs. Seeds

All herbs can be planted from plants, and some can be planted directly into the ground as seeds. The herbs that you can seed directly in the ground and expect great results are: cilantro, dill,  and chamomile. Everything else will do much better if you start the seeds in containers in a sheltered environment. You can start your own herb transplants easily if you have grow lights and a heat mat. Many herbs take a long time to germinate and many herbs are propagated only from cuttings. Making your own rooted cuttings is possible too, but that takes a little more of a sophisticated set up with misters, rooting hormone of some sort, and humidity domes. For those herbs, it is generally easier to purchase the plants.

Herbs from Seed:

  • Parsley
  • Chives
  • Cilantro
  • Dill
  • Chamomile
  • Savory (winter and summer)
  • Marjoram
  • Basil (all kinds)
  • Common Mint
  • Sage
  • Catnip
  • Chervil
  • Oregano (basic varieties)
  • Thyme (basic varieties)
  • Shiso
  • Sorrel
  • Lovage
  • Lemon Balm
  • Fennel
  • Salad Burnet

Herbs from Cuttings:

  • Rosemary
  • Lavender
  • Mints that are true to type (spearmint, peppermint, pineapple mint, etc)
  • Tarragon
  • Specialty Thymes (lemon, variegated, silver, etc)
  • Specialty Oregano (golden, ‘Hot and Spicy’, variegated, etc)
  • Specialty Sage (purple, tricolor, golden, etc)

Containers vs. in the Ground

Some plants love to be planted in the ground and others would prefer to be in pots.  Generally speaking, the herbs that like it dry and warm will prefer to be in a clay pot that breathes like Italian terra cotta. Plants that like it wet and cool might prefer to be in the ground, but they can also be grown in pots if the right conditions are given (more watering, a glazed or plastic pot, heavier potting soil, a little shade).

Herbs that like to grow easily in the ground in Vermont:

Cilantro, Dill, Parsley, Rosemary, Savory, and Chervil

Herbs that prefer to be in containers in Vermont: EVERYTHING ELSE!

This does not mean that you cannot grow herbs in the ground, it just means that in containers, it can be a little easier.

Some herbs do really well as tiny shoots for micro-greens: chervil, dill, cilantro, basil, fennel are our favorites.  And they are easy to grow indoors year round – just pat down some moist potting soil in a shallow container (only need 2” or so of soil) with holes in the bottom, press in the seeds, cover very lightly with a thin layer of soil, and keep moist. When the first set of true leaves begin to emerge, they are ready to eat. You can also grow pea shoots and sunflower sprouts this way. A south facing, sunny window is sufficient.

You can bring in potted herbs in the fall and keep them in a sunny window for use during the winter. The herbs that do best with this treatment: sage, parsley, rosemary, thyme, and savory. Basil can be brought in as well, but it won’t be terribly happy unless you have grow lights for it.  If you had some of these herbs planted in the ground, you can dig them up and slowly acclimate them to being in a pot and being indoors.

Herbs can be dried or frozen or infused in vinegar or simple syrup for year round use. Pesto or herb pastes made with oil or water can be frozen in small containers.  Drying is very simple or very elaborate – you choose! A dehydrator can be used, and the leaves can be stripped off of the stems once dried and stored in jars in a dark place. Or you can go the simple route and just harvest whole branches of the woody herbs such as thyme, oregano, rosemary, sage, and winter savory. Place the branches in woven baskets and keep in a dark, well-ventilated space. They will dry just fine on their own, and you can keep them covered with paper bags or kitchen linens and use as needed.

Related Upcoming Events

Cooking with Herbs with Molly Stevens and Julie Rubaud – a class and dinner.

South End Kitchen, Burlington, Vermont

March 19th.,  6pm

Red Wagon Plants pre-season Open House

April 4th 10 am to 3 pm. Tour the greenhouses and see behind the scenes.

Herbal Cocktail Party with Caledonia Spirits

April 17th, Red Wagon Plants 6 pm to 9 pm

Help us kick off our season with a bang!

Salad Burnet Dressing Recipe from a Customer

Ruth Henry, one of our many loyal customers, came in a little while ago asking for salad burnet. This is not one of our most popular herbs, and frankly, one that I never grow because I never know what to do with it. She assured me that it is amazing in a special salad dressing she makes. Naturally, this peaked my curiosity and she promised to send along the recipe. Here it is! And now I finally have a reason to plant this pretty little herb that tastes like cucumbers.

Thank you, Ruth, for sharing your "secret" recipe with us! Mum's the word!

" As promised this is my family's recipe for salad dressing using Salad Burnet......It's a big hit with lots of flavor! Enjoy"

Herb Salad Dressing 1 cup salad oil 1 cup honey 1/2 cup basil vinegar 1 clove crushed garlic 1 tsp salt 1 cup of finely chopped green herbs such as burnet, basil, chives, parsley 1  tsp celery seed 1 Tbsp paprika

Shake everything in a jar. Keeps in the refrigerator for a week or so.

Sage Cookies


I first made these cookies when a group of us from Red Wagon Plants took an herb cooking class with Jessica Bongard of Sweet Lime Cooking Studio last summer. We had such a fun time making herbal treats together, and I thought I would share this recipe. I just made it for our Open House and it was such a tasty way to use sage in a not-too sweet treat.

Sage Cookies 

1 3/4 cups all purpose flour 1/3 cup sugar 1/4 cup yellow cornmeal 1/2 cup butter (one stick), room temp 2 Tbsp chopped fresh sage 6 Tbsp milk 1 egg white, beaten with 1 Tbsp water (egg wash) fresh little sage leaves coarse sugar to sprinkle

  • Preheat oven to 375
  • Whisk together flour, sugar, and cornmeal in medium bowl
  • Cut in butter using a fork, until fine crumb forms
  • Stir in chopped sage
  • Add milk stir with fork
  • Make dough into 2 balls
  • Roll out to 1/8 inch thick
  • Use 2 inch cookie cutter, onto cookie sheet
  • Brush with egg wash, add sage leaf or two, brush with egg wash again to seal
  • Sprinkle with sugar
  • Bake 12 minutes, until edges brown, turning pan halfway through

Enjoy!


Rosemary

Rosemary is a great herb for winter use. It can be grown as a houseplant, it can be used fresh, dried, or frozen, and it adds a warming, deep flavor to roasted vegetables, all kinds of braised meats, roasted chicken, pork, lamb or beef, and can be used in soups and dips. Here are a few ideas that will help you make friends with this uplifting and aromatic herb all winter.
As a houseplant, rosemary is best brought indoors as late as possible. It can take some really cold temperatures, down into the teens, and still look rugged and healthy. When you do bring it indoors, give it a large pot, and keep it away from direct heat sources (woodstove, radiators) and place it in a window with indirect light (east or north facing). In winter time, in your house,  rosemary would like to have cooler temperatures and moist air. You can give it moisture by spraying the foliage with a spray bottle of water every couple of days. And only water the soil when it is very dry.  You are trying to recreate a foggy, cool San Fransisco winter.
When you harvest fresh rosemary or buy it in the store, the sprigs can be kept in the fridge, in a plastic bag that is not sealed tightly for up to 3 weeks. It can also be left out on the counter in a basket, where it will dry nicely and can be used all winter. Once fully dried, pull the leaves off of the stem and place in a jar, in a dark, cool place.
Here are some ideas for using the rosemary:
Toss a sprig under any meat you might roast - a holiday turkey, ham, chicken, lamb, roast beef, or pork loin. While roasting, the rosemary will add wonderful flavor to the pan juices and the gravy made from those pan juices.
Finely chop the leaves and add them to the onions that are sauteed for making stuffing or other casseroles.
Infuse some whole milk or heavy cream over low heat for about 15 minutes with a sprig of rosemary, and use this in making creamed soups....squash, tomato bisque, broccoli, any kind of vegetable potage, potato-leek, etc, These soups will all benefit from the earthy, woodsy fragrance and flavor of the rosemary-infused cream or milk. 
For a rosemary dipping or basting oil, finely chopped 1 or 2 TBS rosemary, mix with 1 or 2 cloves finely chopped garlic, salt and pepper and add in 1/2 cup of good olive oil. Serve in a small bowl and drizzle with a 1/2 TSP of balsamic vinegar and use as a dip for bread or raw veggies.
The same mixture can be used to baste a roasting chicken, or drizzled on roasted root vegetables (before roasting, you can toss the veggies with the herb oil), or used as a sautee oil for greens such as kale and chard.
Rosemary can also be used as a fragrant addition to hot baths, massage oils, and home made cleaning products. It is one of the most versatile herbs we can grow, and even though it prefers a California climate, with a little persuasion and help, it can adapt beautifully to our Vermont weather.
We've been harvesting lots of rosemary this fall, and you can find it locally at Healthy Living and City Market and in the Boston area through Farmers to You.
Happy gardening and cooking,
Julie

Coming Home

Earlier this week, I went away for a total of 48 hours. This is astounding for a couple of reasons. Not only because it is May, and who do I think I am going away for a whole two days while trying to manage a greenhouse business. No, it's astounding because of the way that I came home.  I landed. I arrived. No stress, no jumping into a chaos of activity, no guilt at being gone, no extra work piled up. I came home to a busy crew doing everything well and calmly. I came home to happy customers loading up on plants while wearing big smiles. I came home to a feeling that all is right in my little world.  Two days off in May is hard to pull off in this line of work, but what helped me so much was that everyone who works here knew what to do, they made smart decisions and I am sure they handled problems with grace.  So, thank you, crew.

I also came home to a garden. I love my garden. The moments in the garden are rare and precious for me in May, but the first thing I did when I got out of the car, was go up to the large garden above the barn and finished planting a bed of strawberries. I harvested an armful of asparagus, collected the 4 eggs the hens had laid, picked a handful of chervil and flat full of mache, and I got to work making  dinner. I looked at my haul, as the sun was setting and felt embraced by the bounty.

We ate late. We ate well.

Egg Salad in Spring

Makes enough for dinner for 3 and leftovers for everyone's lunches. 

  • Hard boil 8 to 10 eggs.  (My method is to put cold eggs and cold water in a sauce pan. Bring to a boil, covered with a lid. Let it boil one minute. Turn off the heat, but leave the pan on the burner. Set the timer for 8 minutes. Drain and run under cold water for 5 minutes.)
  • Finely chop a handful of herbs - I used chervil and chives.
  • Finely chop a rib or two of celery - I would have used lovage had it been big enough.
  • Finely chop half a shallot or 3 scallions
  • Peel the eggs and place in a shallow bowl. Cut them up with a couple of knives or a pastry cutter.
  • Add all the other ingredients.
  • Add enough home made mayo to moisten the whole thing.
  • Stir gently.
  • Season with salt and pepper to taste.

Homemade Mayonnaise

Add to the blender:

  • 1 egg yolk
  • 2 tablespoons lemon juice
  • a dash of cayenne
  • 1/4 tsp of salt
  • 1 tsp of Dijon mustard or 1/2 tsp dry English mustard
  • Blend for a few seconds and then very slowly drizzle in 1/2 cup of olive oil, grape seed oil, or a blend of the two.  Drizzle it in a very thin stream while the blender is whirring around though the top of the blender cover. Or you can use a food processor and drizzle it in through the feeder tube. Or you can do it by hand in a bowl, with a whisk. If you do that, try to anchor the bowl by wrapping a damp towel around the base. Or get someone to help you with another set of hands to hold the bowl, or beat the eggs, or do the drizzling. Beat or blend or process until it starts to thicken up.
  • Taste for salt and add a little pepper. If it is too thin, you can add more oil, still adding it in very slowly while blending.
  • You can add fresh herbs to the mayo, a little crushed raw garlic, a little chopped poached or roasted garlic (mellower flavor), anchovies, spices, roasted peppers etc. (for cleanest flavors add just one of these other ingredients, not a combination.)

We ate this lovely egg salad with toasted Pain de Mie (or Pullman Bread) from Scratch Baking Company in South Portland, ME and the asparagus was steamed and cooled, served on the side, splashed with some lemon juice.

Mache Salad

Mache is also know as corn lettuce. It is a cold hardy green that germinates only in cool temperatures. We grow it in flats in the greenhouse in the winter and gorge on it from late March to late May. It is a sturdy green with a nutty flavor, and it is eaten as a whole plant, washed well under running water, and dressed lightly with hazelnut or walnut oil and a good sea salt - fleur de sel, Maldon, or sel gris. The small plants have a really interesting texture and a rich flavor that is perfect this time of year when one craves green and fresh.

To the garden, the hens, and the amazing crew at Red Wagon Plants, thanks. You make life pretty, tasty, and lovely.

-Julie


Apple Pie Beats Chores

When today rolled around, I had lots of good intentions to do a bunch of garden chores, exercise, get some office work out of the way, and lots of other tasks that good intentions depend upon. But instead, the chores, tasks and lists took a back seat to making an apple pie with my daughter.

She made her first crust, which I learned from my father, which he learned from Molly Stevens, and you can learn how to make it by reading this. Yes, that is right, 3 sticks of butter for a double crust pie. Gulp. Hope to get in that exercise.

The apples came from Boyers' Orchard in Monkton, and they were just tossed with a little lemon juice, sugar, and cinnamon. Nothing fancy. The beauty of apple pie lies in simplicity. Getting me to agree to cinnamon and a double crust is about as wild as I will go - I would rather have an apple tart, single crust, with unadorned thinly sliced apples arranged in a pretty pattern. But I suppose that is the French in me.


A little egg wash goes on the crust, and vent holes are made to let out the steam so the crust does not turn to a watery mess. The beautiful creation goes into a 475F oven for 10 minutes, then lower the heat to 425F. Check on it after 20 minutes or so, but it usually takes an additional 40 minutes or so to cook.  I often turn the heat down one more time for the last 20 minutes.


Garden Breakfast for a Cold and Rainy Day

The weather's turning and so is my attitude towards the kitchen. In summer, I would rather be outside, just like you, and it can be hard to make time for all that garden produce to make it into anything but some quick salads and grilled dishes (at the beach, no less).  Here is a great dish that works for breakfast, brunch, lunch, dinner and pretty much anything in between. I made a big batch last Sunday and it kept us happy pretty much all day.

A green bean and ham hash - take some of those older green beans from the garden (the ones that did not get killed by the frost because they were hiding under the cover of leaves) and chop them up into 1/3 inch pieces. I like Romano beans for this, the wide and flat kind that is loaded with extra flavor and can be cooked a long time if you like a slowly simmered green bean, which I do, in case you are asking.  Chop up an onion, some garlic, and a potato. Chop everything pretty small, this is hash, not stir-fry. Heat a tablespoon or so of olive oil, add the onion, garlic and potato and cook until starting to soften, about 8 minutes over medium heat to high heat. I also added pimenton, a smoked paprika, at this point. If you don't have any, a little sweet paprika and cumin might be nice. Keep stirring the onions, garlic and potatoes every minute or so, but letting it all stick a little and brown is okay - that is how you build flavor. Once the potato is softened somewhat, add the chopped or sliced green beans, some chopped ham (I bought an incredible petite ham from Bread and Butter Farm last week) and a good splash of cooking sherry, white wine, broth or water (my order of preference for the liquid). Scrape the pan so the browned bits get incorporated into the liquid, lower the heat, and put a lid on the pan. At this point, the vegetables are both sauteeing and steaming. Wait about 10 minutes hear, stirring once or so and adding another splash of liquid if it is getting very dry. Add salt and pepper to taste, after 10 minutes, and a splash of cream, half and half, or milk - the dairy helps bind all the flavors and keeps the vegetables from getting dry.  Stir and sautee another 5 mintues or so, adding another splash of dairy as needed, and that is it.  This is great served with an egg on top, over easy or over hard, or scrambled on the side. But really, it is great on its own with nothing else and will keep you going for the whole day. So you can go out and pick apples, take a hike, put the garden to bed, and all the other stuff that still keeps you outside a little longer. Winter is not here yet!

High Priority - Roasted Ratatouille for the Freezer

I have to admit that I don't love frozen vegetables for the most part. So if you have a favorite way to freeze a vegetable from your garden, please share it with me. Here is one I like and eat willingly out of the freezer come the dark days of winter. I want to share this simple thing with you in hopes you might have a similar beloved thing to pass on to me. For some reason, this year has not been a year when I put up a lot of food for winter. A few jars of tomatoes and this amazing thing I will now show you are the only things I have done. No beans, no salsa, no jams, no chutneys. Well there is still time, so maybe I will play catch up and do a plum chutney with the amazing plums passed on to us by our friend, Yvan.

This recipe starts in the spring. I basically plan part of my garden just so I can have all the right veggies to make this. You need

  • onions
  • garlic
  • peppers
  • eggplant
  • tomatoes
  • zucchini or summer squash

The garlic gets planted the previous fall, the onions go in in late April, and everything else goes in June 1. I like to freeze about 10 to 20 quart bags of this ratatouille, so I usually plant about 6 pepper plants (3 Ace and 3 Italia) ,  6 San Marzano tomatoes, 6 eggplants (usually a combination of Listada di Gandia, Orient Express, and Hansel), and 1 zucchini plant ( I do two plantings, one June 1 and one July 1 that way the plants are always healthy). Most households do not need more than 1 zucchini plant. Really.

Harvest all the veggies, wash them well. And start chopping. This year, I was a bit lazy and bought a few disposable pans to do the roasting. It made for easy clean up, but the veggies did not caramelize as much as they would have on metal or pyrex. Lesson learned.

So basically you just chop up all the vegetables into 1" chunks or so. The proportions are different every year, but it is usually about 1 part onions, 1 part peppers, 3 parts eggplant, 2 parts tomatoes, and 2 parts zucchini. I chop everything separately and then add it to the pans. I then drizzle olive oil over every thing. Add lots of salt, good sea salt is best, and then handfuls of chopped herbs to each pan. I like a blend of thyme, oregano, and rosemary. But other combinations work well.

Preheat the oven to 375F and slide in the pans. Turn and toss every 20 minutes, until everything is cooked and starting to caramelize. The overall cooking time really depends on the amount you are doing, the type of pan you are using, the thickness of the vegetable layer in each pan, etc. Basically, cook it until the whole house smells really good and the veggies are very soft and starting to brown. If I were making this for a meal to be eaten that night, I would do a single layer, in pyrex, and let it get golden brown. This is much harder to do in big batches in a home oven, and since freezing compromises texture and flavor anyhow, I think of these roasted veggies as additions to other recipes all winter long, not the main showcase in a meal.

Once everything is cooked, let it cool down completely, and then carefully scoop it into plastic quart-sized freezer bags. I usually use a measuring cup and one of those funnels for jars, since it makes life a little easier. Once frozen, the veggies can be used in pasta sauces, on pizza, in lasagnas, in soups and stews, as fillings in calzones, or as a topping for polenta, etc. You get the picture. It's such a nice way to have a little taste of summer in the winter and uses up so much of that amazing garden produce. Even in a summer like this one, when I have had to take some time away from gardening and preserving, I made sure to do some of these roasted veggies for the freezer.

Best-dressed pasta goes for the layers

Turn on the oven - 400F. Go to the garden and look for cherry tomatoes.

Take lots of said cherry tomatoes and cut them in half and dump them into a glass or pyrex baking dish, a big one, so that they are in a single layer.

Add some finely chopped cipollini onion. Or red onion, or sweet onion, or any kind of onion really.

Add a few or more tablespoons of olive oil. A good one. Don't skimp here, you want everything well coated, slippy-slide like.

Grab some herbs like savory, rosemary, oregano, sage, (and/or) thyme and chop them up finely or coarsely, depending on the look you want and your tolerance for stems in food.

Add plenty of good sea salt.

Toss together and slide pan into a pre-heated 400F oven. Forget about it for a good 45 minutes. Check and stir / flip once, about half way through. It will start to get caramelized and yummy. You can do this ahead of time and just let it sit in the turned-off oven for a while. Gets better with time, promise.

Meanwhile, do the second flavor layer......

Heat up a generous amount of olive oil in a heavy saute pan (1/2 cup or so).  I used cast iron and it was lovely.

Chop up some sweet onion, red pepper, hot pepper.  (If you need quantities, try 1 medium onion, 1 large red pepper or 2 small, 1 jalapeno or cherry bomb or 2 thai hot peppers, or more to taste. No rules here.)

Add onion and peppers to hot olive oil, and let it fry for a while. Stir every now and then. These will sizzle gently for about 10  minutes. They will soften, get fragrant, etc.

Chop up about 6 cloves of garlic.

Chop up about 4 tablespoons of herbs - a combo of oregano, sage, rosemary, thyme is nice. But really, any woody, fragrant herb will do here.

Find some paprika. My favorite is Pimenton (the smokey kind) but if you don't have that, you can use sweet or hot (if you can take the heat.) If you don't have any paprika at all, just skip it; the dish will be good without it.

Add garlic, paprika, herbs, and about 1/2 tsp salt to olive oil and peppers in the pan.  Stir, and turn down the heat. This will simmer together another five minutes or so over low heat. More time is fine. But 5 minutes is the minimum. Again, expect fragrance here.

You can get the pasta water going at this point.  You know...big pot, lots of water, salt.

Once pasta water is boiling, add the pasta. However much you need and while it cooks finish off the sauce.

Here is how:

Squeeze a lemon. Turn sauce # 2 off ( the one on the stove, not the one in the oven) and take it away from the heat. Add the lemon juice. It may sizzle a bit, so stand back. Stir together. Add some chopped parsley or basil (one or the other, not both, please).

Take roasted cherry tomatoes out of oven. Add the sauteed peppers and herbs to the tomatoes, scraping up every savory bit. gently and lovingly merge the two sauces. Serve in a bowl with a nice small ladle.

This is a rich, olive oil intense sauce. Use sparingly over the pasta with lots of freshly ground black pepper. The flavors add up to more than the sum of the parts. Really.

Some possible additions, if you must:

  • anchovies ( with the peppers and onions on the stove)
  • olives (pitted and chopped, added at the end with the lemon juice)
  • capers (can be added at the beginning or at the end. Gives you two different flavors either way, experiment with which you like best).
  • scallions (toward the end of the cooking time in either of the two sauces)
  • freshly grated parmesan (to pass around at the table)

But really, the beauty of this sauce duo is the simplicity. Don't overdo the flavors right off the bat. Try it as is. Just swoony and simple.


Corn and Poblano Chowder

One of our customers, Michelle Reiter,  sent us this recipe which sounds and looks so incredibly great. She was making a hot soup during that broiling weather we had last week, so you know it has to be great! Thanks, Michelle! And this reminds me to make a note to grow some poblano's next year! The plants sold out before I could get one in the garden, and yet again, I am poblano-less. They are one of the varieties that seem to get more and more popular each year as people plant them and come back for more the following season.

Poblano Corn Chowder

Cut kernels from: 10 ears sweet corn (5 cups)

Puree in a blender: 3 cups corn kernels 1 cup whole or 2% milk Saute in 2 Tablespoons vegetable oil over medium heat in soup pan: 2 poblano chiles, seeded and diced 1 ½ cups white onion, diced 1 teaspoon garlic, minced Cook 4-5 minutes

Add: 2 cups chicken broth 2 cups corn kernels 1 teaspoon sugar 1 teaspoon kosher salt ½ teaspoon cayenne Simmer 5 minutes

Stir in: Pureed corn 1 ½ cups tomato, diced ¼ cup feta cheese, crumbled Simmer to heat through and melt cheese, about 3 minutes Garnish servings of soup with choice of avocado, lime, and/or cilantro

What are some of your favorite varieties this year? What are you making with them? Let us know and we can post your recipes, suggestions, ideas. This is the time of year when we start picking out the seeds for next season, so speak up, please!

The Garden in July, a Few Tips on Creating Micro-climates, and a Beach Picnic.

This summer, the weather has been garden perfect for many crops. All the heat lovers are thriving and the crops that like it cool and moist are doing well where they have been watered and are getting a little shade. I have a nice stone wall thanks to Charley of Queen City Soil and Stone, and the shady side of the wall is a perfect place for crops like celery, mid summer lettuce, artichokes, and boc choi. They benefit from the afternoon shade the wall creates. Additionally,  the moisture that builds up at the base of the wall from the terraced soil above it creates a perfect micro-climate within the garden. You can easily achieve this in any garden with strategic rock placement - not a full-fledged wall necessarily, but a few stones stacked up to retain moisture on a slope or to allow for  north-side shade in a fully exposed garden. Look around your garden for other mico-climates like tall plants that can be used to create shade for summer plantings of lettuce. Right now, I have lettuce planted in odd spots throughout the garden - under a  sunflower, at the base of the stone wall, and under some tomato plants.

The eggplant has been tremendous this year and last night, we had a great meal of marinated eggplant while sitting at the lake, scooping up piles of the salad with pieces of pita and a little feta. Here is the recipe. I used a combination of the Gretel and Machiaw eggplants (pictured above).

Marinated Eggplant adapted from smitten kitchen.com

  • 1 lb long, Asian eggplant, sliced 1/3 inch thick
  • 3 tbs olive oil, divided
  • salt and pepper to taste
  • 2 TBS red wine vinegar
  • 2 TBS capers, rinsed
  • 1/4 cup mint, finely chopped
  • 1/4 cup of feta, crumbled

Pre-heat oven to 400 degrees. Coat a cookie sheet with a layer of oil and layer the eggplant slices in a single layer.

Bake them until soft (about 20 minutes), turning once and drizzling with a little more olive oil about half way through.

Blend the vinegar, remaining olive oil, salt and pepper, capers, and mint together. Place eggplant into a bowl, drizzle with the dressing, and stir to combine. Let rest for at least a half hour or place in fridge (up to one day). When ready to eat, sprinkle with feta. Eat with flatbread, while sitting near a cool body of water.

Butter Lettuce, I love you

Green butter lettuce has to be my all time favorite lettuce....perfect texture, a color that can only be described as translucent and pearly, and a delicate flavor that truly is butter-like. I eat it in all sorts of situations and for all sorts of meals. Breakfast is toast with a thin spread of butter, snipped chives, some shavings of cheddar and a pile of butter lettuce leaves. Lunch is butter lettuce with a white wine vinaigrette, a piece of bread, and maybe a little tuna with herbs. Dinner will always include a butter lettuce salad with lots of snipped chervil. Or perhaps some grilled flank steak with butter lettuce, cilantro, thai basil, shallots, and a little hot pepper drizzled with a light sesame dressing.

Late May and June are the butter lettuce weeks. I plant a four pack of the lettuce every week from mid- April through August and I am rewarded with huge, green and white pillow-like heads of tenderness.  Here is a blog recipe from David Leit, who also appreciates this delicacy.

He is recommending a blue cheese dressing, which will be great later in the summer, but for now I cannot get enough of the delicate flavor and taste, so I will stick to my lighter dressings.

Leek Fest

I have just used up the last of my leeks. That means we ate about 225 leeks this fall. That is a lot of leeks. We grow two different kinds for two slightly different purposes.

My favorite for flavor and beauty is Bleu Solaize, a French heirloom variety that is just majestic in the garden. It stands about 2 feet tall and has thick, blue-green leaves that make for a dramatic, palm-like display in the kitchen garden or tucked into a mixed ornamental bed. The leaves even turn a pretty violet color once cold weather hits. I think they would make a lovely back drop for some bright red ladybird poppies or mixed in with some verbena bonariensis and short sonata cosmos.  What really makes Bleu Solaize special though, is its ability to survive very cold temperatures.  If I still had some in the garden, I would start mulching them with straw right about now (early December) and would be able to harvest them all winter and even into early spring. I guess next year I will have to plant even more leeks.

The other variety we grow is King Richard (known as "King Dick" around the greenhouse work bench).  I love this variety because it is ready to eat long before the Bleu Solaize (you can start to eat them at the baby stage - see recipe below), it does not require hilling, and it easy to clean.  It has been bred to be "self-blanching" which means that the white, edible part is extra long in proportion to the green part and does not have to be buried in soil to stay white, so overall the leek stays cleaner and there is much less waste or compost to deal with. All of this ease in growing and cooking is at the cost of flavor.  These leeks are sweet and mild, but just don't pack the same rich, leeky flavor of the Bleu Solaize. I still like them a ton, though, and this is why we grow TWO kinds of leeks!

Growing and Care of Leeks:

Our plants come in 4 packs and there are about 100 plants per pack. This may seem like a lot, but since they hold in the garden for such a long time, it is really a moderate amount that can be eaten over a 3 to 6 month period. I start out by making a trench with the edge of my hoe, about 3 inches deep. You should allow for 6 inches of space per leek in rows that are about 8 to 12 inches apart. So for one 4 pack of leeks, I usually prepare three row that are 18 feet long. You can pack them in a little tighter if you don't have the space. You can also plant them in once long row, which makes them easier to hill.  You can also plant crops with a short life span (radishes, arugula, lettuce, spinach) right near them since leeks take a long time to size up and use all their alloted space.  When planting the leeks in their trench, it is important to bury them about as far down as you can and leave only a few inches of the delicate green top showing. They are really slow to grow, so you can save space by planting them in a nurse bed, where you just pack them in pretty tightly and wait a month or so to transplant them to their rows in the garden. Just keep them well watered either way. Leeks and onions need lots of water to get established and off to a good start.  And keep them well weeded too; the slow growth rate of leeks makes them very susceptible to weed pressure. Once the leeks are about a half inch in diameter, you can hill them by gently piling loose soil around their base a few inches up the plant. This is alos a great time to add compost and some straw mulch.  Once mulched and composted, the leeks become pretty much care-free other than some watering every now and then. The mulch and the compost help retain moisture, so it they are a critical component of having nice, large leeks.

Some of my favorite leek recipes

First of all, here is a nice video of how to wash leeks. It's pretty quick once you are used to it.

Leeks in Vinaigrette

3 to 4 leeks per person (if they are small) or 1 or 2 leeks per person if they are large.
about a tablespoon of this vinaigrette
Garnishes: a table spoon of capers per plate, half a chopped hard boil egg, finelly chopped tarragon, parsley or chives
Arrange leeks on indivudual serving plates, drizzle with dressing and top with garnishes.

Braised Leeks

Place washed and trimmed leeks in an oven-proof casserole dish in a single, snug layer.
Pour in enough stock (chicken, beef, veggie - your choice) to fill in half way up the leeks.
Tuck in a few sprigs of thyme, rosemary, or savory in between the leeks.
Salt and pepper  liberally, dot with a few small nuggets of butter.
Cover with tin foil and bake in a preheated 350 degree oven until soft, about 45 to 60  minutes depending on the size of your leeks.
Uncover the leeks, sprinkle with a little freshly grated parmesan and place under a preheated broiler until browned and bubbly.  You can skip the cheese and broiler phase if you want to be more wholesome about it.

Potato Leek Soup

In a large soup pot, place the following ingredients:

3 washed and trimmed leeks, roughly chopped
2 small/medium potatoes, roughly chopped
1 gallon or so of broth of your choice (chicken, beef, or veggie)
a few sprigs of rosemary or thyme
a few cloves of garlic, finely chopped
Let everything simmer on medium/low heat  until very tender, about one hour or so. Remove herb sprigs and puree in a blender or with a hand held immersion blender (much easier method).
Salt and pepper to taste.
Stir in a little heavy cream if you are feeling decadent.
Garnish with fresh pasley or chives, finely chopped.

Lost Potatoes and the Simple Garden Dinner

Tonight's dinner was another super easy one and I averted yet another trip to the grocery store. First, I found some feral potatoes. I was turning over a plot of soil in the garden where the potatoes once stood and there they were, gnarly and red, asking why they had been forgotten. After a good scrub down, they got tossed into a pot of cold water and gently boiled until tender. Did you know potatoes should always start their cooking in cold water? That way, their temperature rises gradually and evenly. They don't end up with the dreaded mushy exterior and crunchy interior.

While the potatoes were cooking, I did a quick cabbage braise which turned out to be luscious and silky. Here is the recipe.

Braised Green Cabbage with Leeks and Apples (for 2)

1 TBS Butter and 1 TBS olive oil

1 leek, white part only, washed and sliced into 1/4 inch rounds

1/2 macintosh apple, peeled and seeded and slice into thin crescent slices

1/2 a small green cabbage, cored and sliced thinly (about 3 cups)

1/4 cup of cider vinegar

Sea salt

another TBS butter (optional)

Heat up olive oil and butter together over medium high heat. Add leek and stir occasionally for a few minutes until leek starts to soften. Add the apple and cabbage, and stir. Cook a few minutes, add the vinegar and salt to taste. Put a lid on the pot, and cook about 15 minutes. If there is too much liquid, you can take the lid off and raise the heat to boil off the extra liquid. Finish by adding more butter if you like.

This is great spooned over simple boiled or mashed potatoes. The sweetness of the apple and leek is a nice balance to the acidity of the vinegar.

This is also delicious, for the meat eaters among us, with some salt pork, bacon, or cured sausage. Just add it in at the beginning with the leek, and then let it simmer away. Reduce some of the butter or olive oil if you do the pork ad-ins.

Bon Ap.

Frugal and Fabulous

My pantry is small, but pretty well stocked with staples.  Between that and the garden, it's easy to spend a week without going to the grocery store.  I get milk from Family Cow Farmstand, eggs from a neighbor, and a few items at the Burlington Farmers' Market during the summer.  The main thing I go there for is the cheese from Does' Leap Farm: they make the  best chevre I have ever had.  The feta is fabulous too, and I used it in this dish.  Having a garden, visiting the farmers' market, and having a well stocked pantry (I buy stuff like pasta, beans, and olive oil in bulk, when it is on sale) means you can throw together simple meals for not much money.  We stretched Sunday's dinner to make 8 meals over two days.  That comes out to ahout .33 a meal.  Pretty good, huh? I made this escarole feast after I noticed a huge, beautiful head of the stuff in the garden (wish I had a picture).  It's one of my favorite vegetables, and has to be grown to be appreciated.  The flavor gets kind of bitter if it sits in the fridge too long, but if you cook it up right after harvesting, it is magnificent...silky, unctuous yumminess.  Frugality means not being afraid of leftovers.  Often, I will cook one large meal and then stretch it by morphing it into other things.  Shape shifting dinners.  Here's what I made on Sunday night,  and a few ideas for the leftovers. You can substitute any other greens if you must, but really, you should  give escarole a try next year in your garden...it's pest free, super cold tolerant, and gorgeous.  But for now, there might even be a head or two with your name on it at the farmer's market.

Escarole and White Beans on Pasta

1 TBS olive oil

1 medium onion, chopped or 2 leeks (for a sweeter flavor), white parts only, washed and chopped

1 jalapeno, chopped (use the seeds if you like it hot. Mine came from the garden, not to brag or anything)

3 cloves of garlic sliced, minced, or crushed (all three ways produce different results, figure out what you like).

1 large head escarole, washed, but not chopped.  (mine came from my garden...wish I had a photo, it was gorgeous) or any other green you like -- chard, kale, mustard greens, arugula

1 can white beans (butter beans are my favorite)

1 box pasta, whatever you like

Optional garnishes -- fresh squeezed lemon juice, capers, feta or parmesan, another drizzle of olive oil.

Salt and Pepper to taste

  • Get your (salted) pasta water going in a large pot.
  • While that is coming to a boil, heat the olive oil in a large skillet or dutch oven type of pot.
  • Saute the onion or leeks, garlic, and jalapeno over medium high heat, stirring.
  • After about 5 minutes, when everything is softening and realeasing its aroma, dump in all of the escarole (still wet from being washed so that it creates some steam).  Put a lid on the whole pan and ignore it for a few minutes.  Open the can of beans, rinse them if you need to, dump them on top of the escarole and put the lid back on for a few more minutes.
  • By now, you should also be cooking your pasta to the toothsome al dente point - i.e. not mushy.
  • Stir up all the escarole and beans so that they are evenly distributed, and season with the salt and pepper to taste.
  • Drain the pasta, reserving a little of the cooking liquid if you want to stir it into the finished dish later if it seems dry.
  • You can combine noodles with the vegetables in the big skillet or pot, or alternately, you can serve big shallow bowls of pasta with the veggies on top, passing the optional garnishes around at the table.

This is a great dish to serve reheated as is, or you can turn it into a stew by reheating it with some broth.  I also love it with an egg cracked on top, and steam poached: just put the lid on the pot you are using and make sure there is enough liquid or fat in the bottom of the pan so that nothing sticks.   Super simple, and super yummy.  The escarole becomes silky, with a little bit of pleasant bitternes and the garlic and jalapeno balance it all out.  Bon Ap!