Herbs

The Lemon-Scented Garden

Lemon bergamot

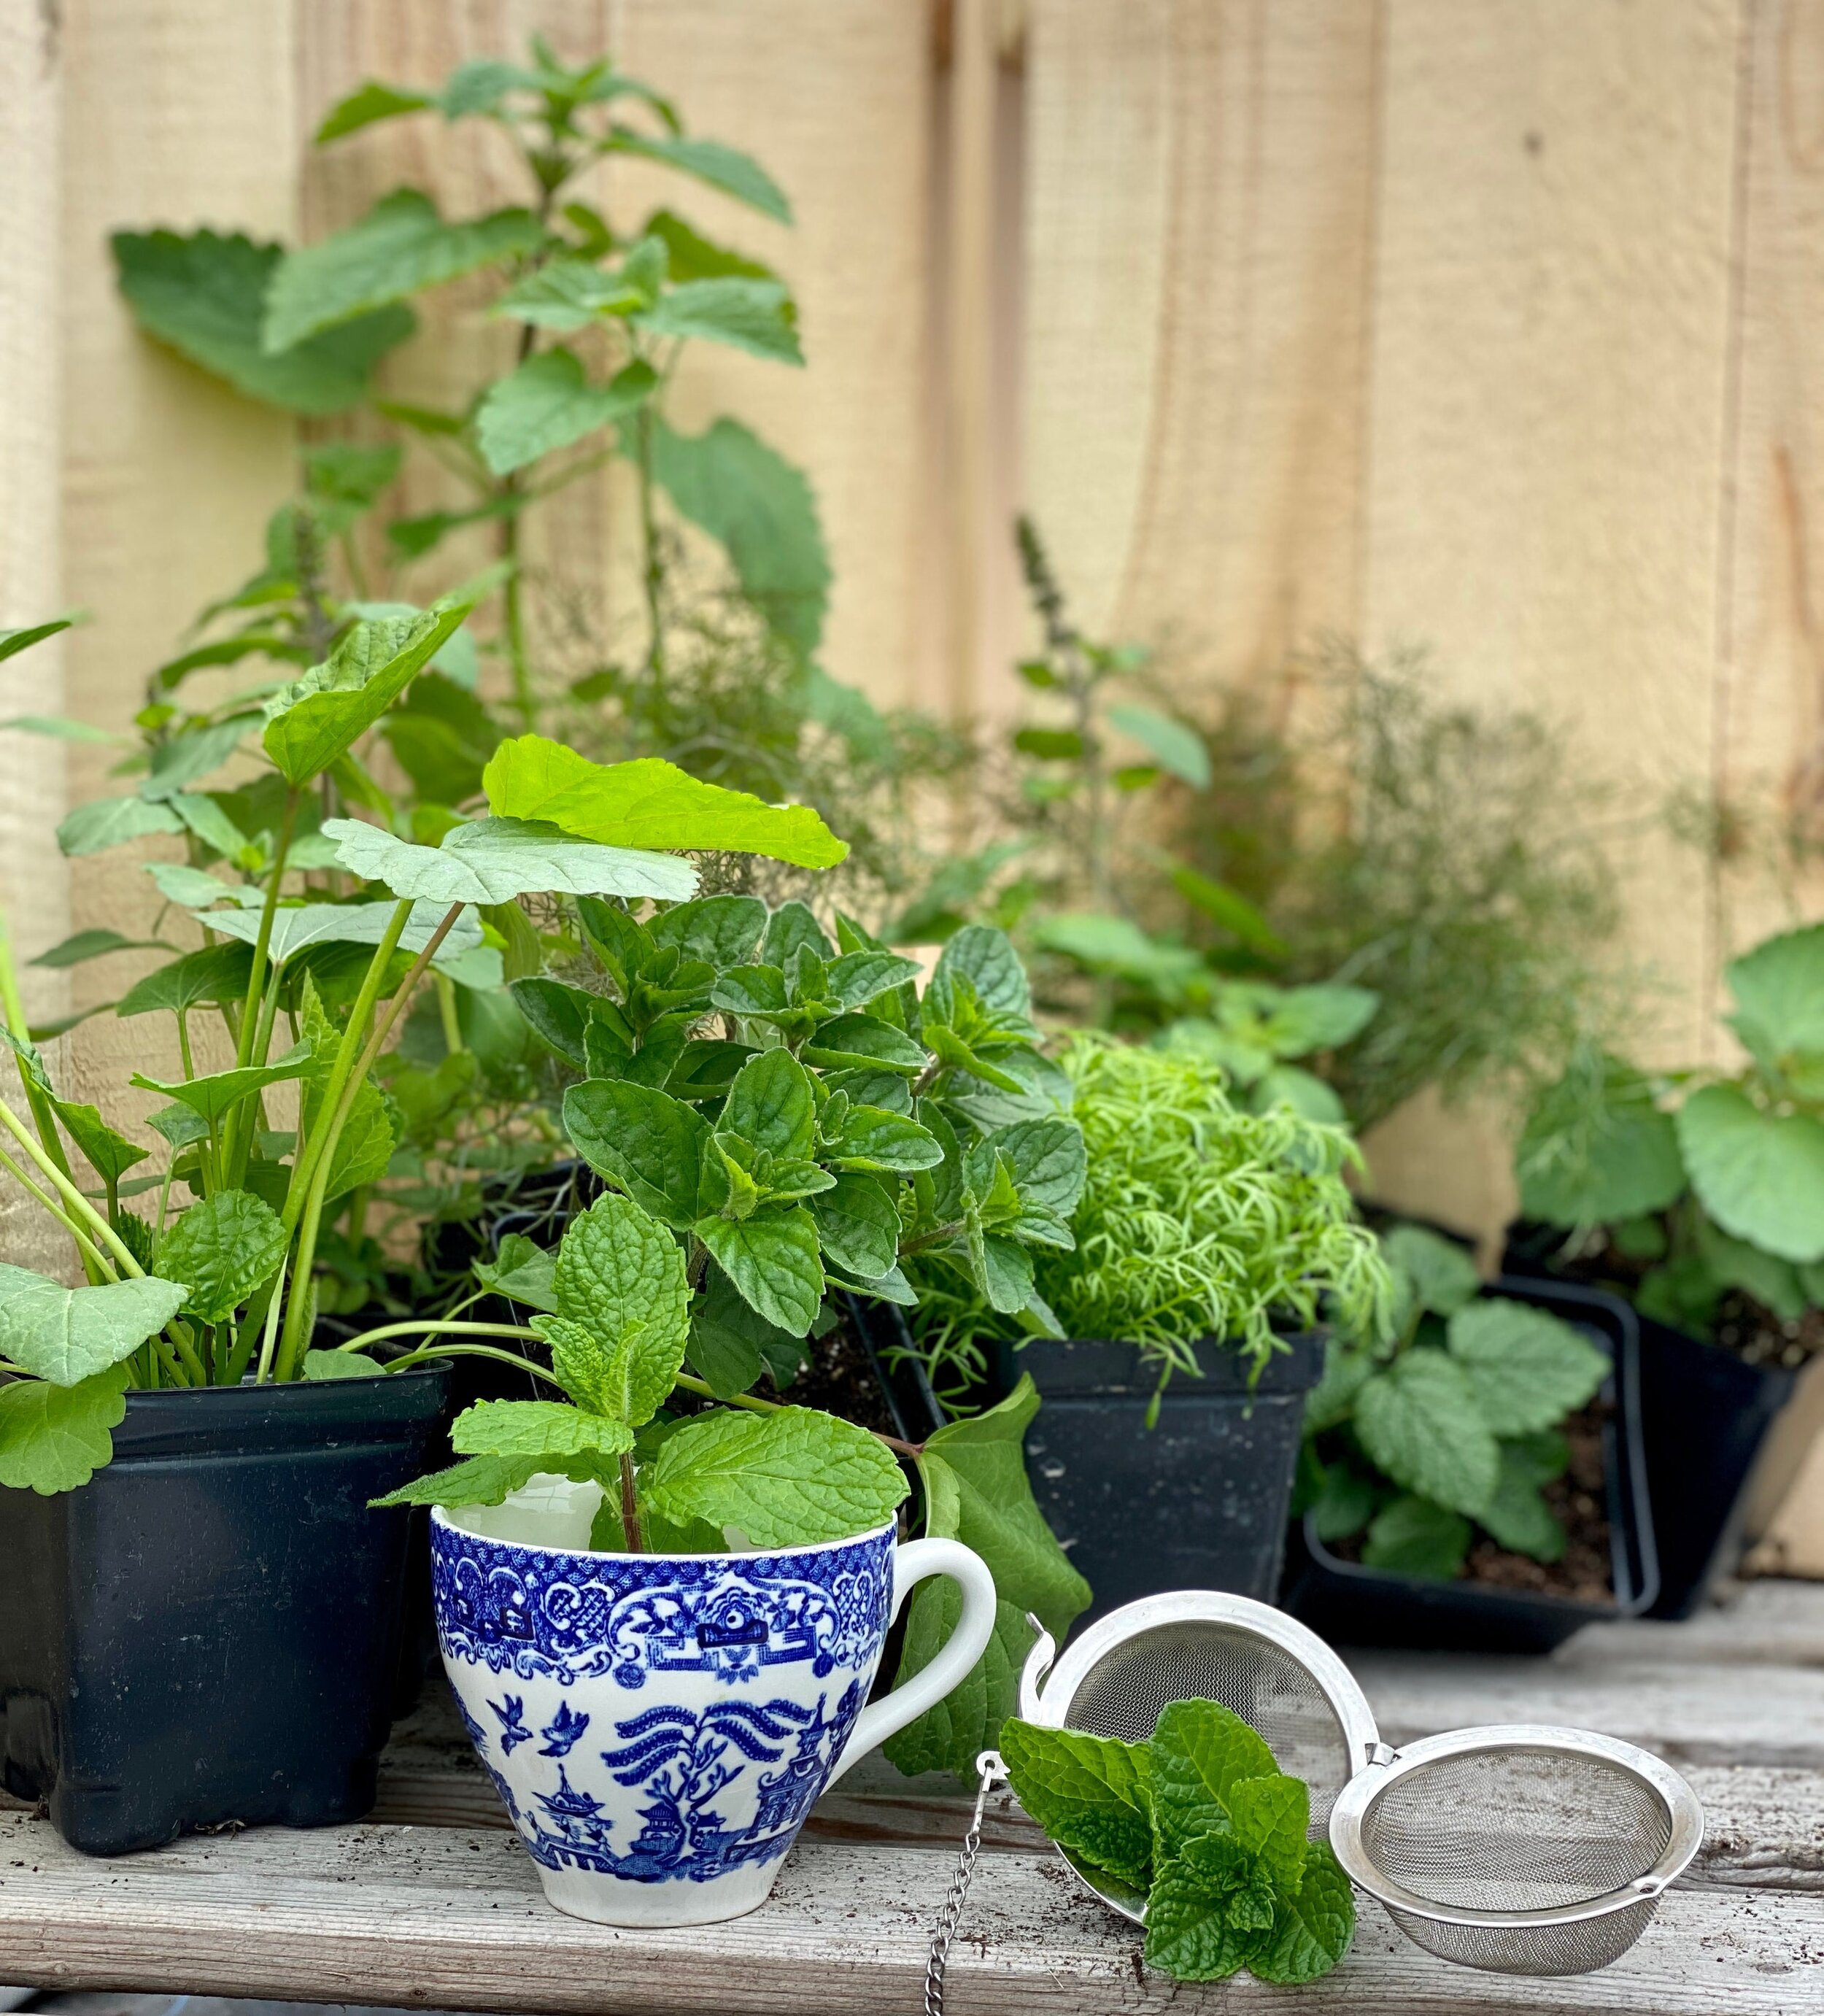
If you wander through the herb section of our greenhouse, you’ll notice quite a few plants with “lemon” in their name. While their aromas and flavors differ slightly, these herbs all offer a bright, citrusy scent that will perfume the herb garden as well as your kitchen. 

Many of these lemony herbs are actually in the mint family (Lamiaceae), a group of plants already well known for their diverse and potent aromas, thanks to high concentrations of volatile oils that are encased in bubble-like trichomes on the leaves and flowers. When the leaves are rubbed or dropped into hot water the trichomes open up, offering the heady aromas and flavors we have come to love.

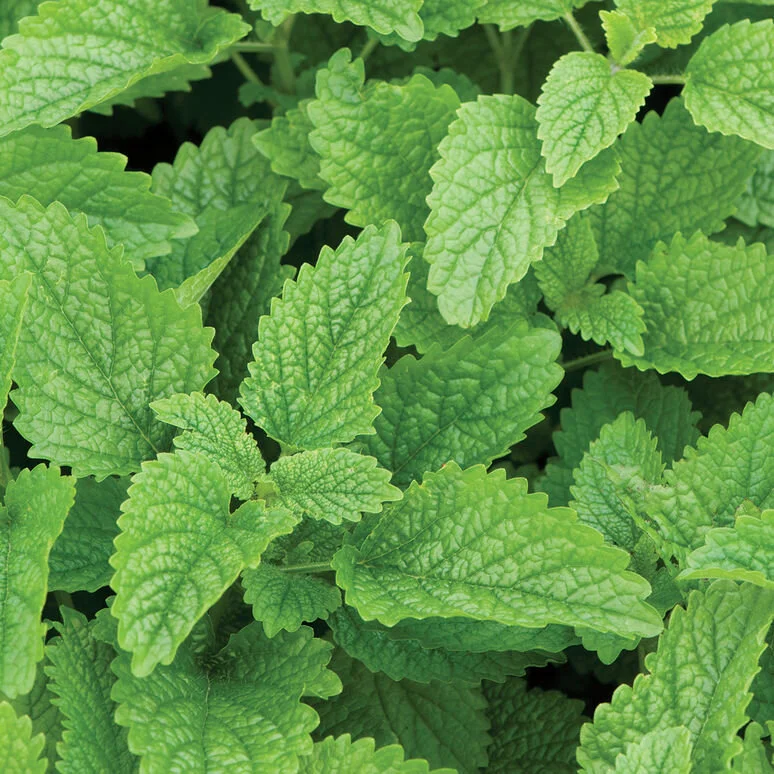
Lemon balm (Melissa officinalis) is a beloved herbal remedy that is as tasty as it is healing (we love it so much we already wrote a whole blog post about it). The plant itself is a mounding perennial that grows about two feet high and up to three feet wide. Harvesting the leaves for fresh or dry tea will also help this plant keep its shape.

In the kitchen garden, lemon basil and lemon thyme are indispensable. At Red Wagon, we love layering piles of fresh lemon basil underneath a chicken before grilling or roasting it. And lemon thyme is fabulous both fresh and dried. Crumble the dried leaves into soups, rubs, and marinades to impart a citrusy zest all season long- no real lemons required. Lemon basil is an annual, but lemon thyme may perennialize if it’s happy, similarly to lavender in the northern garden.

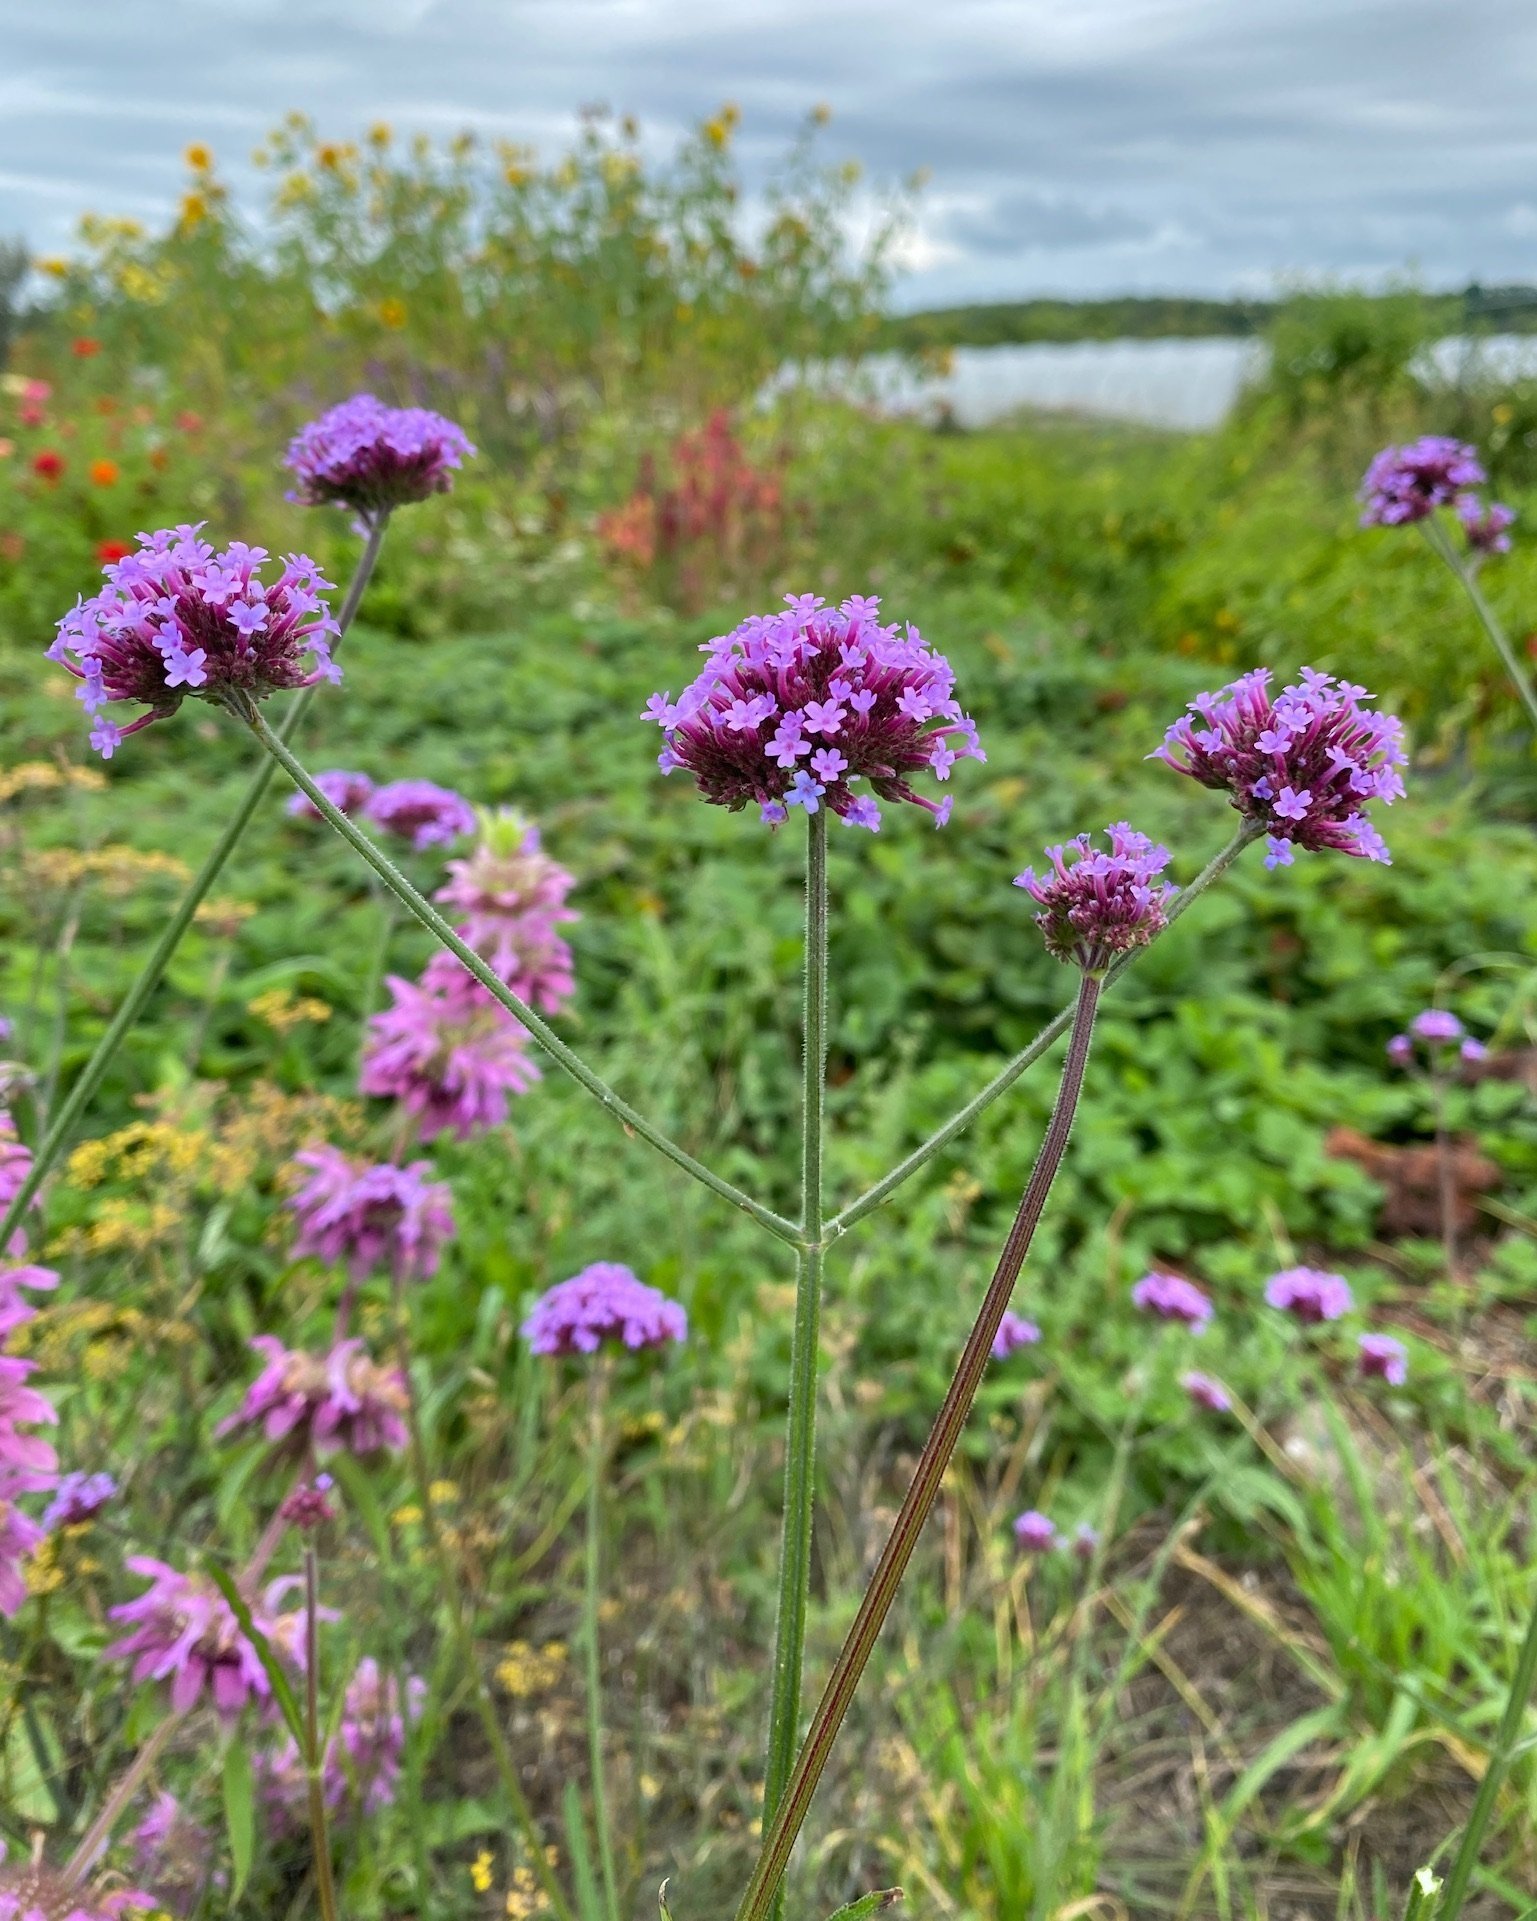
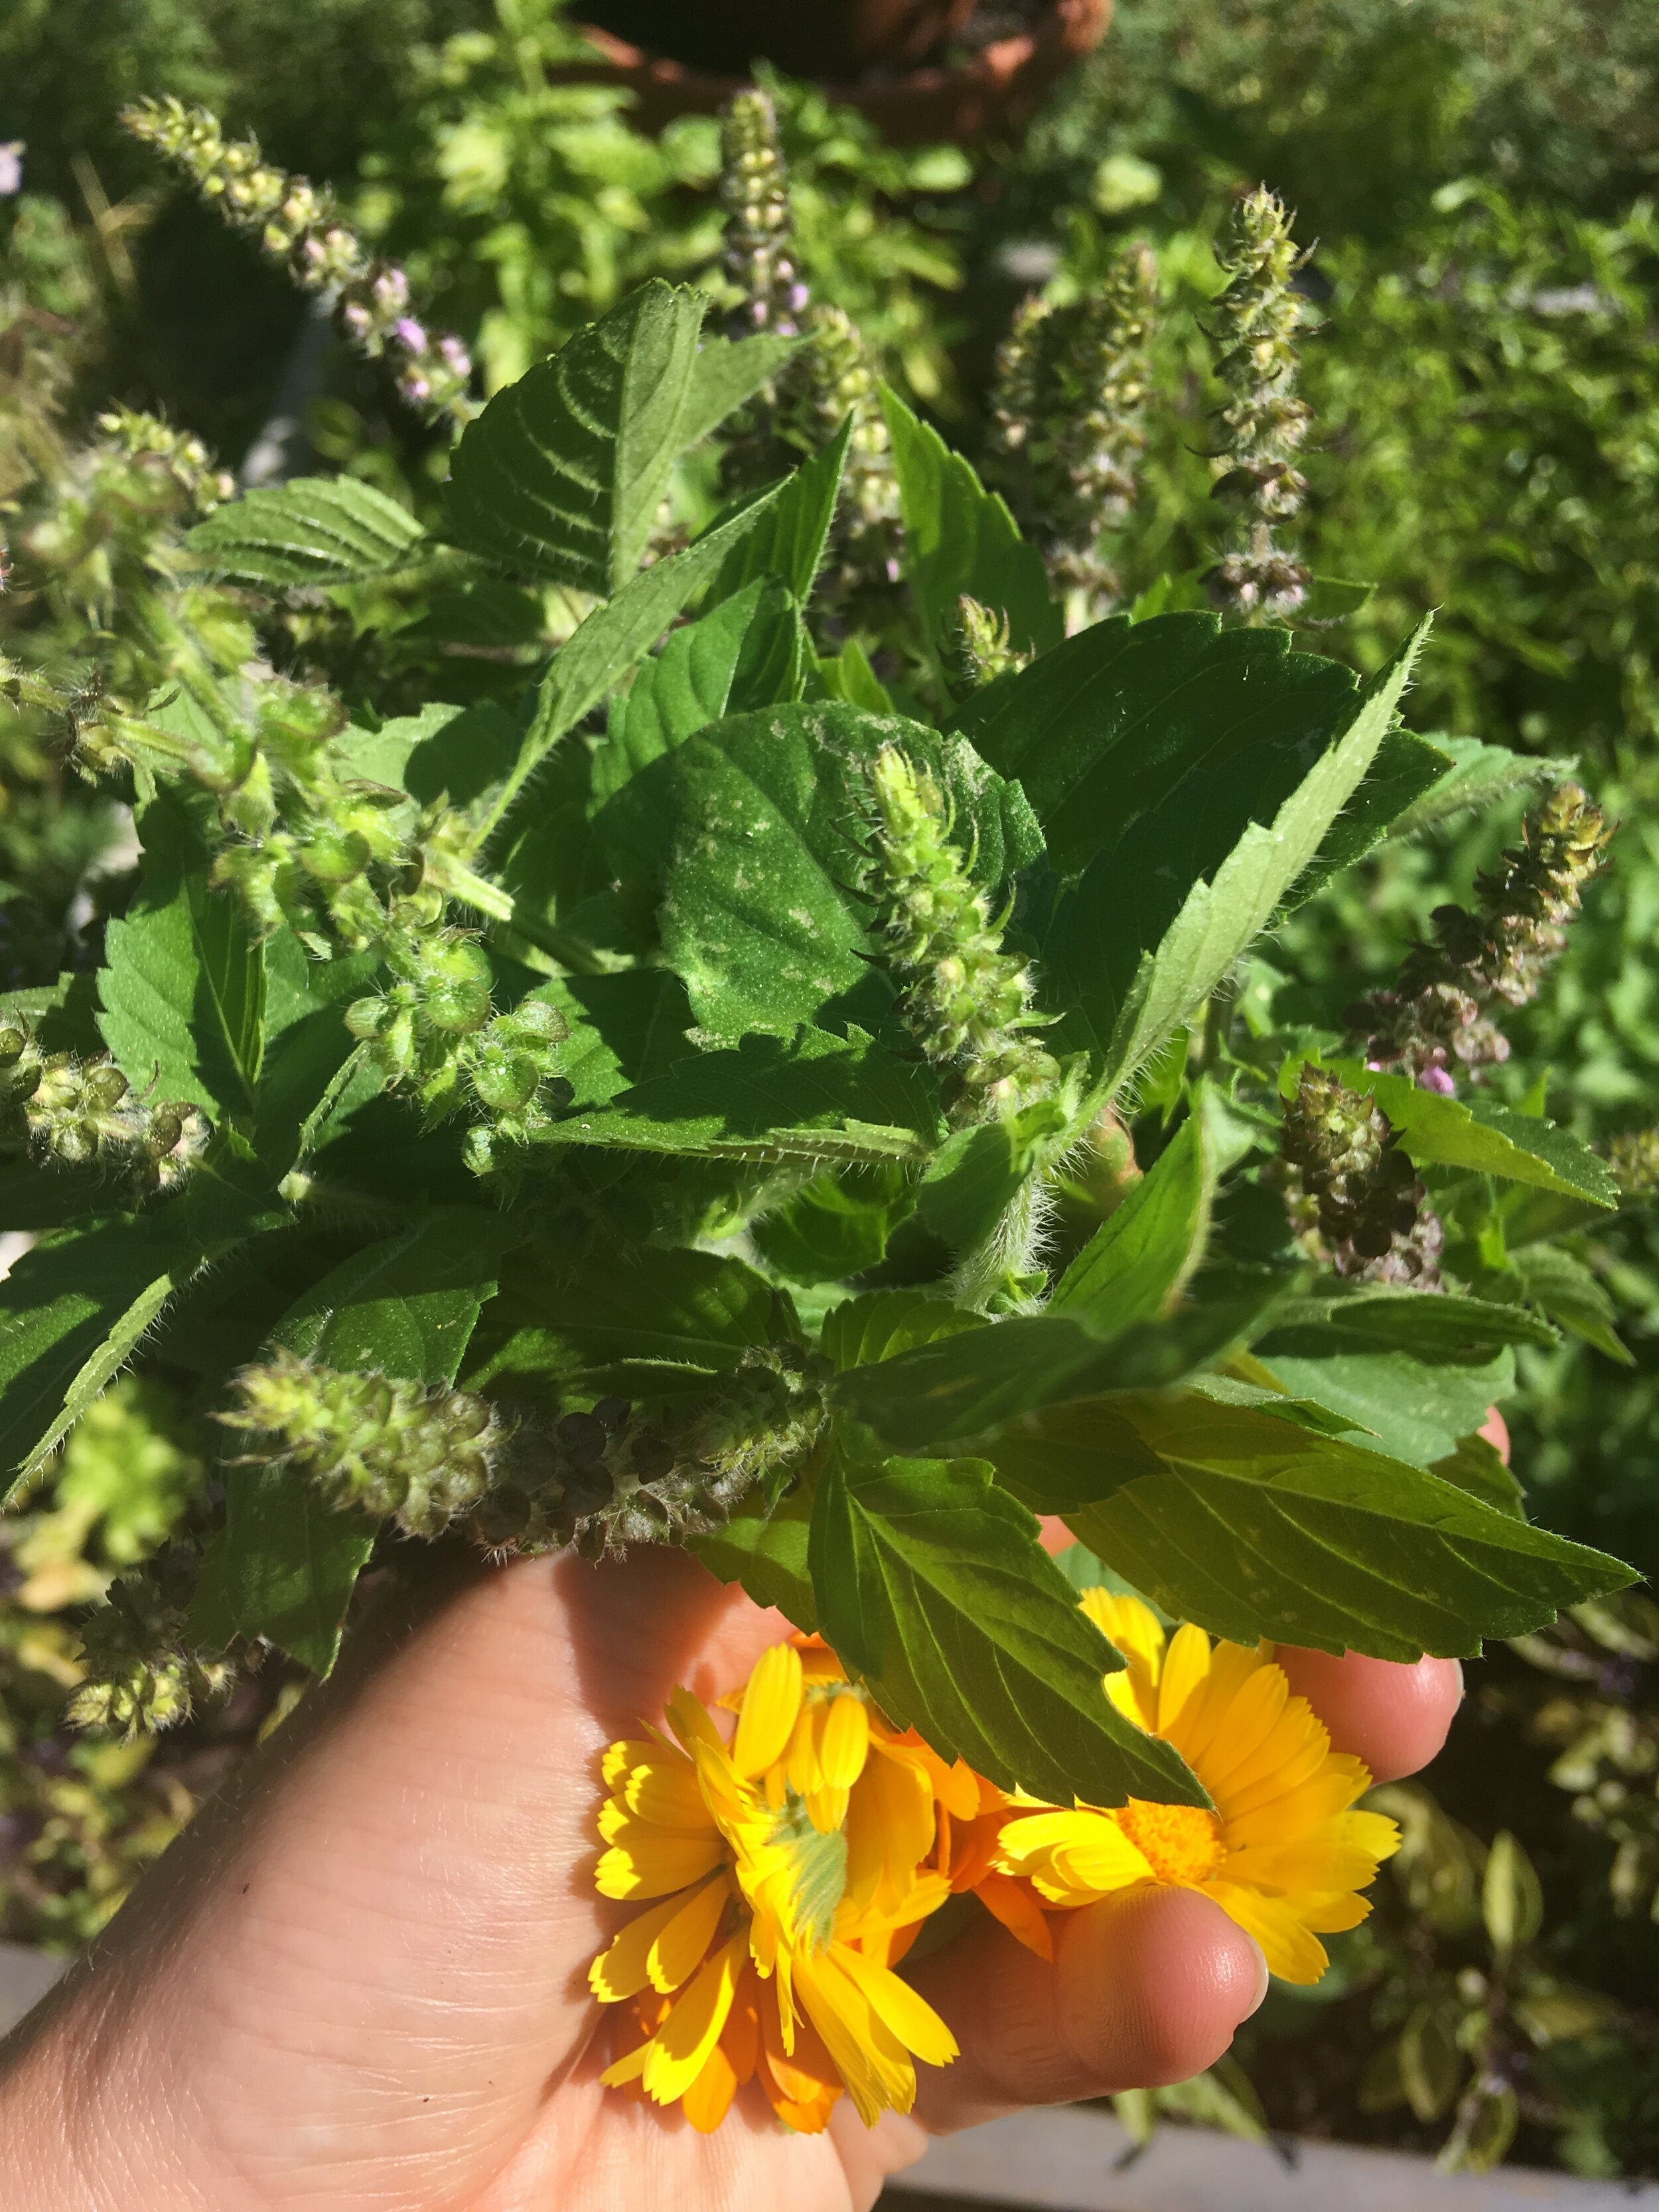
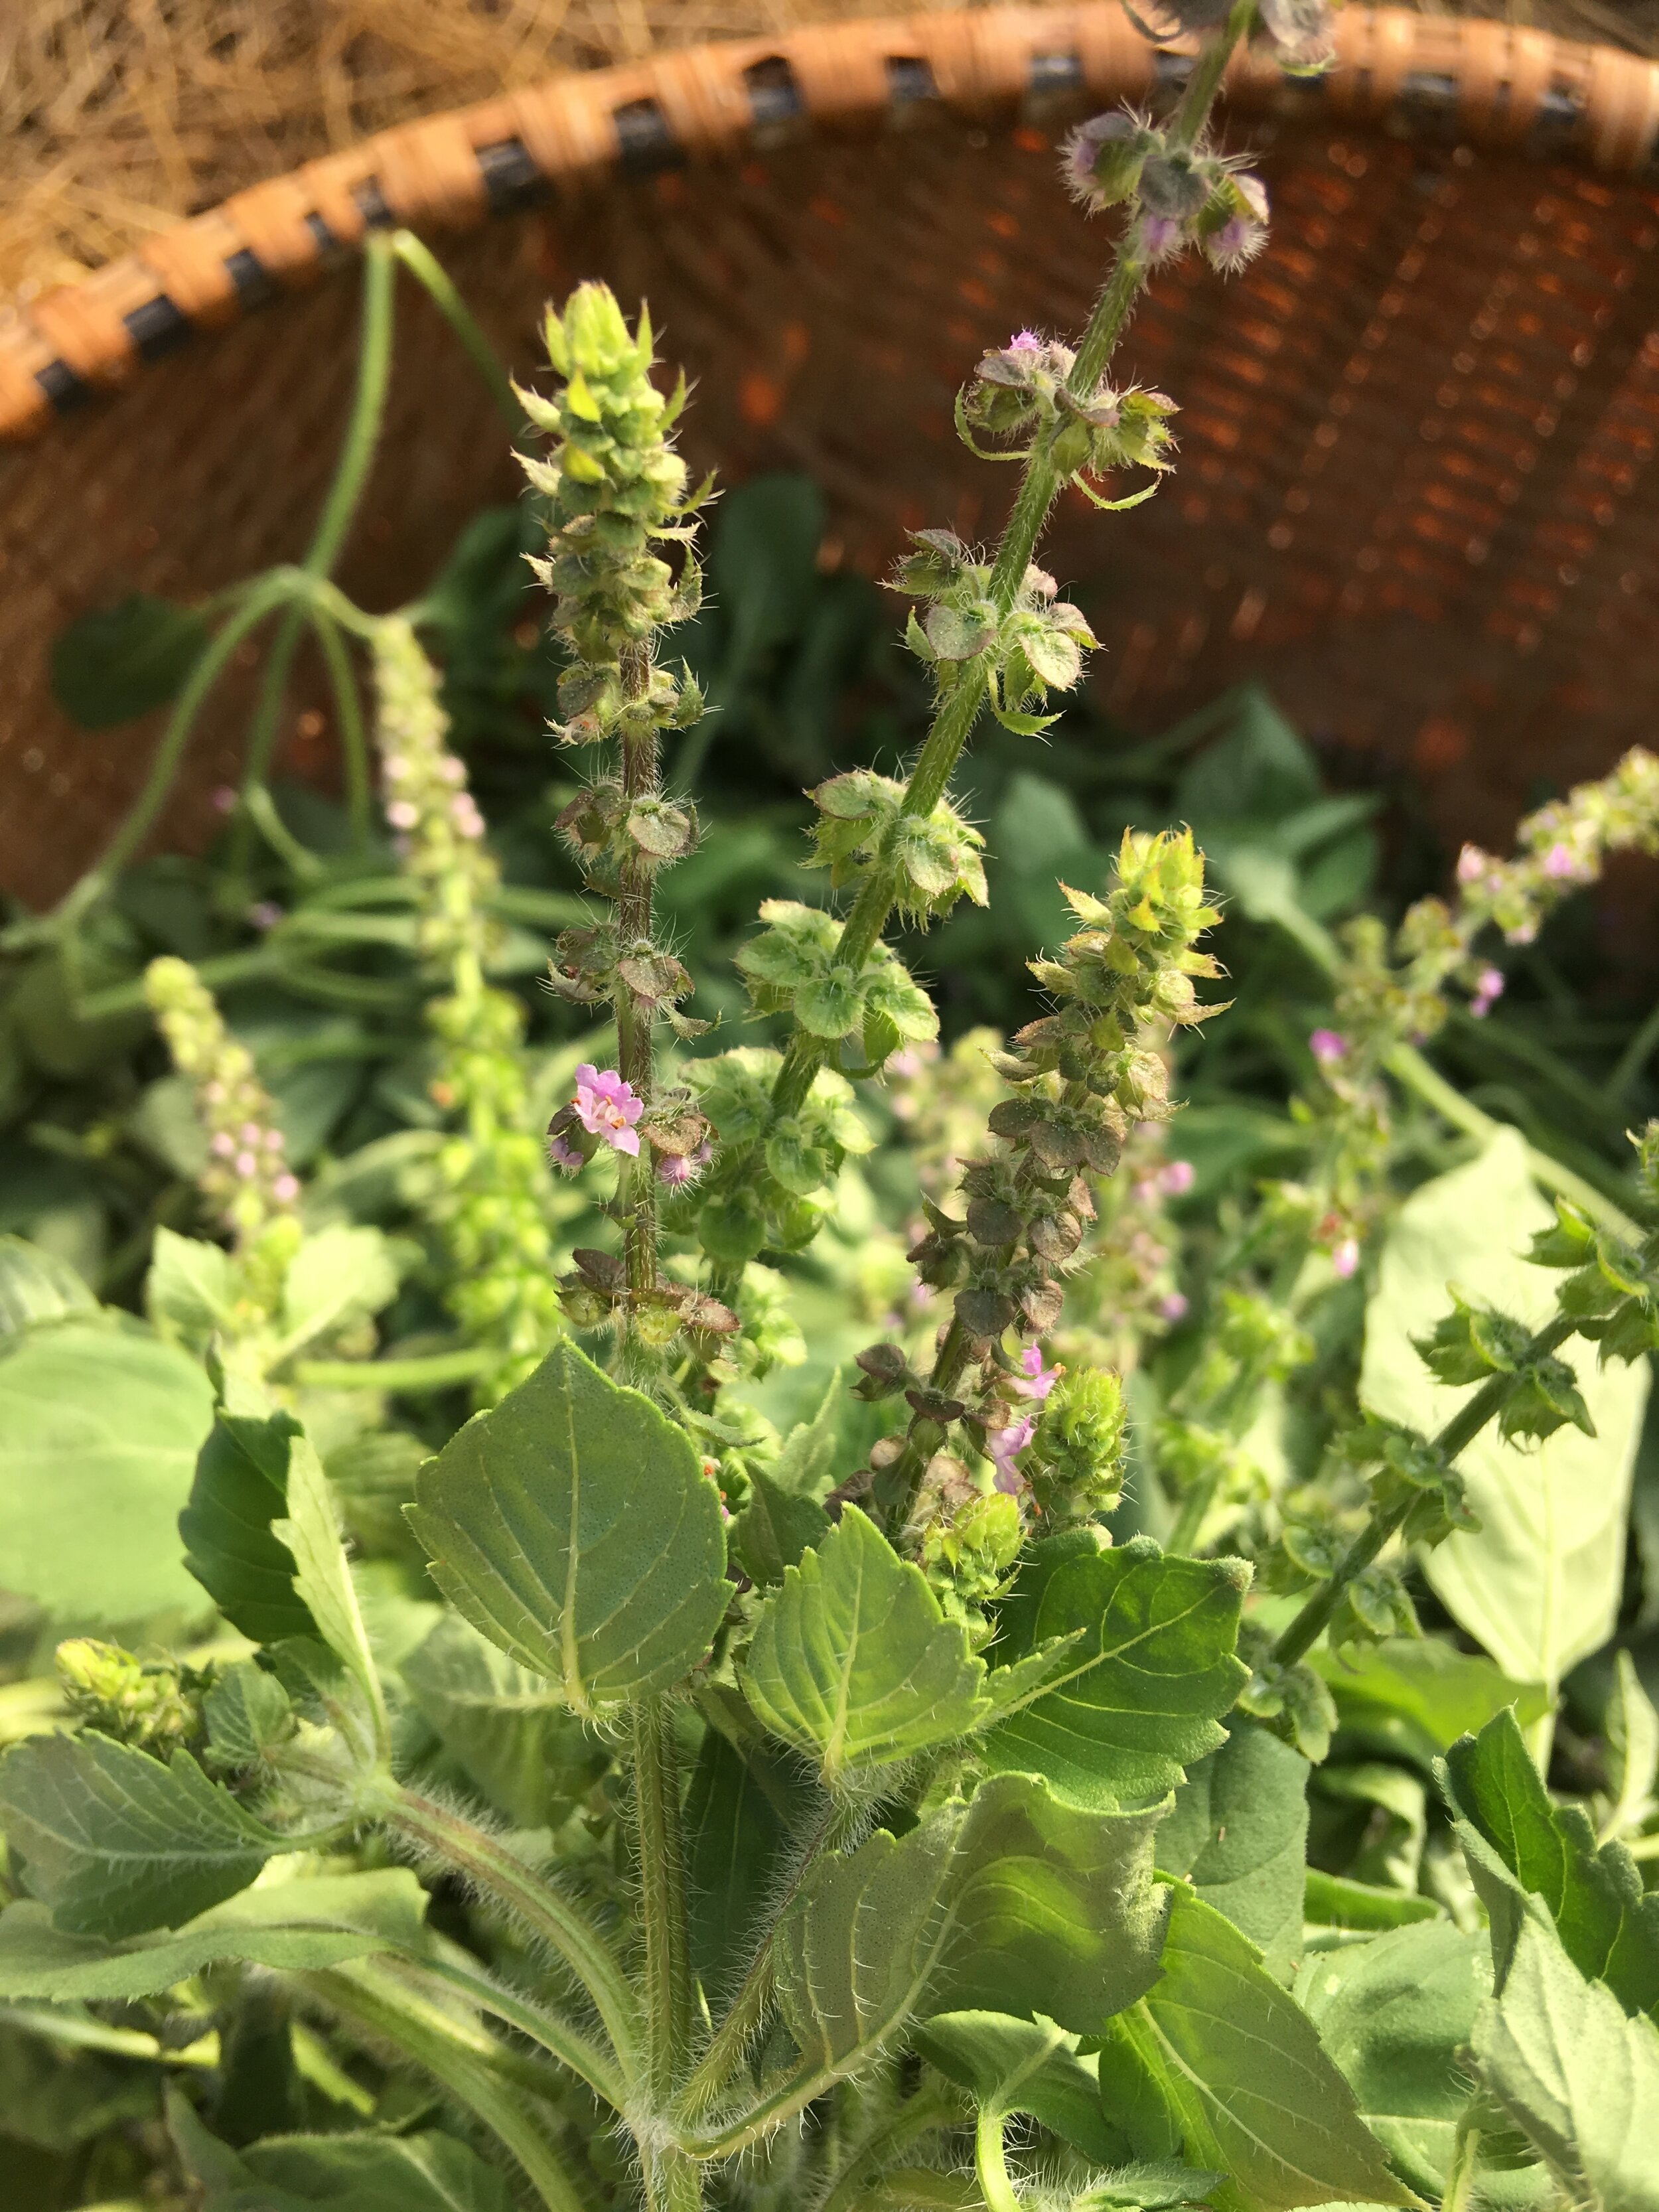
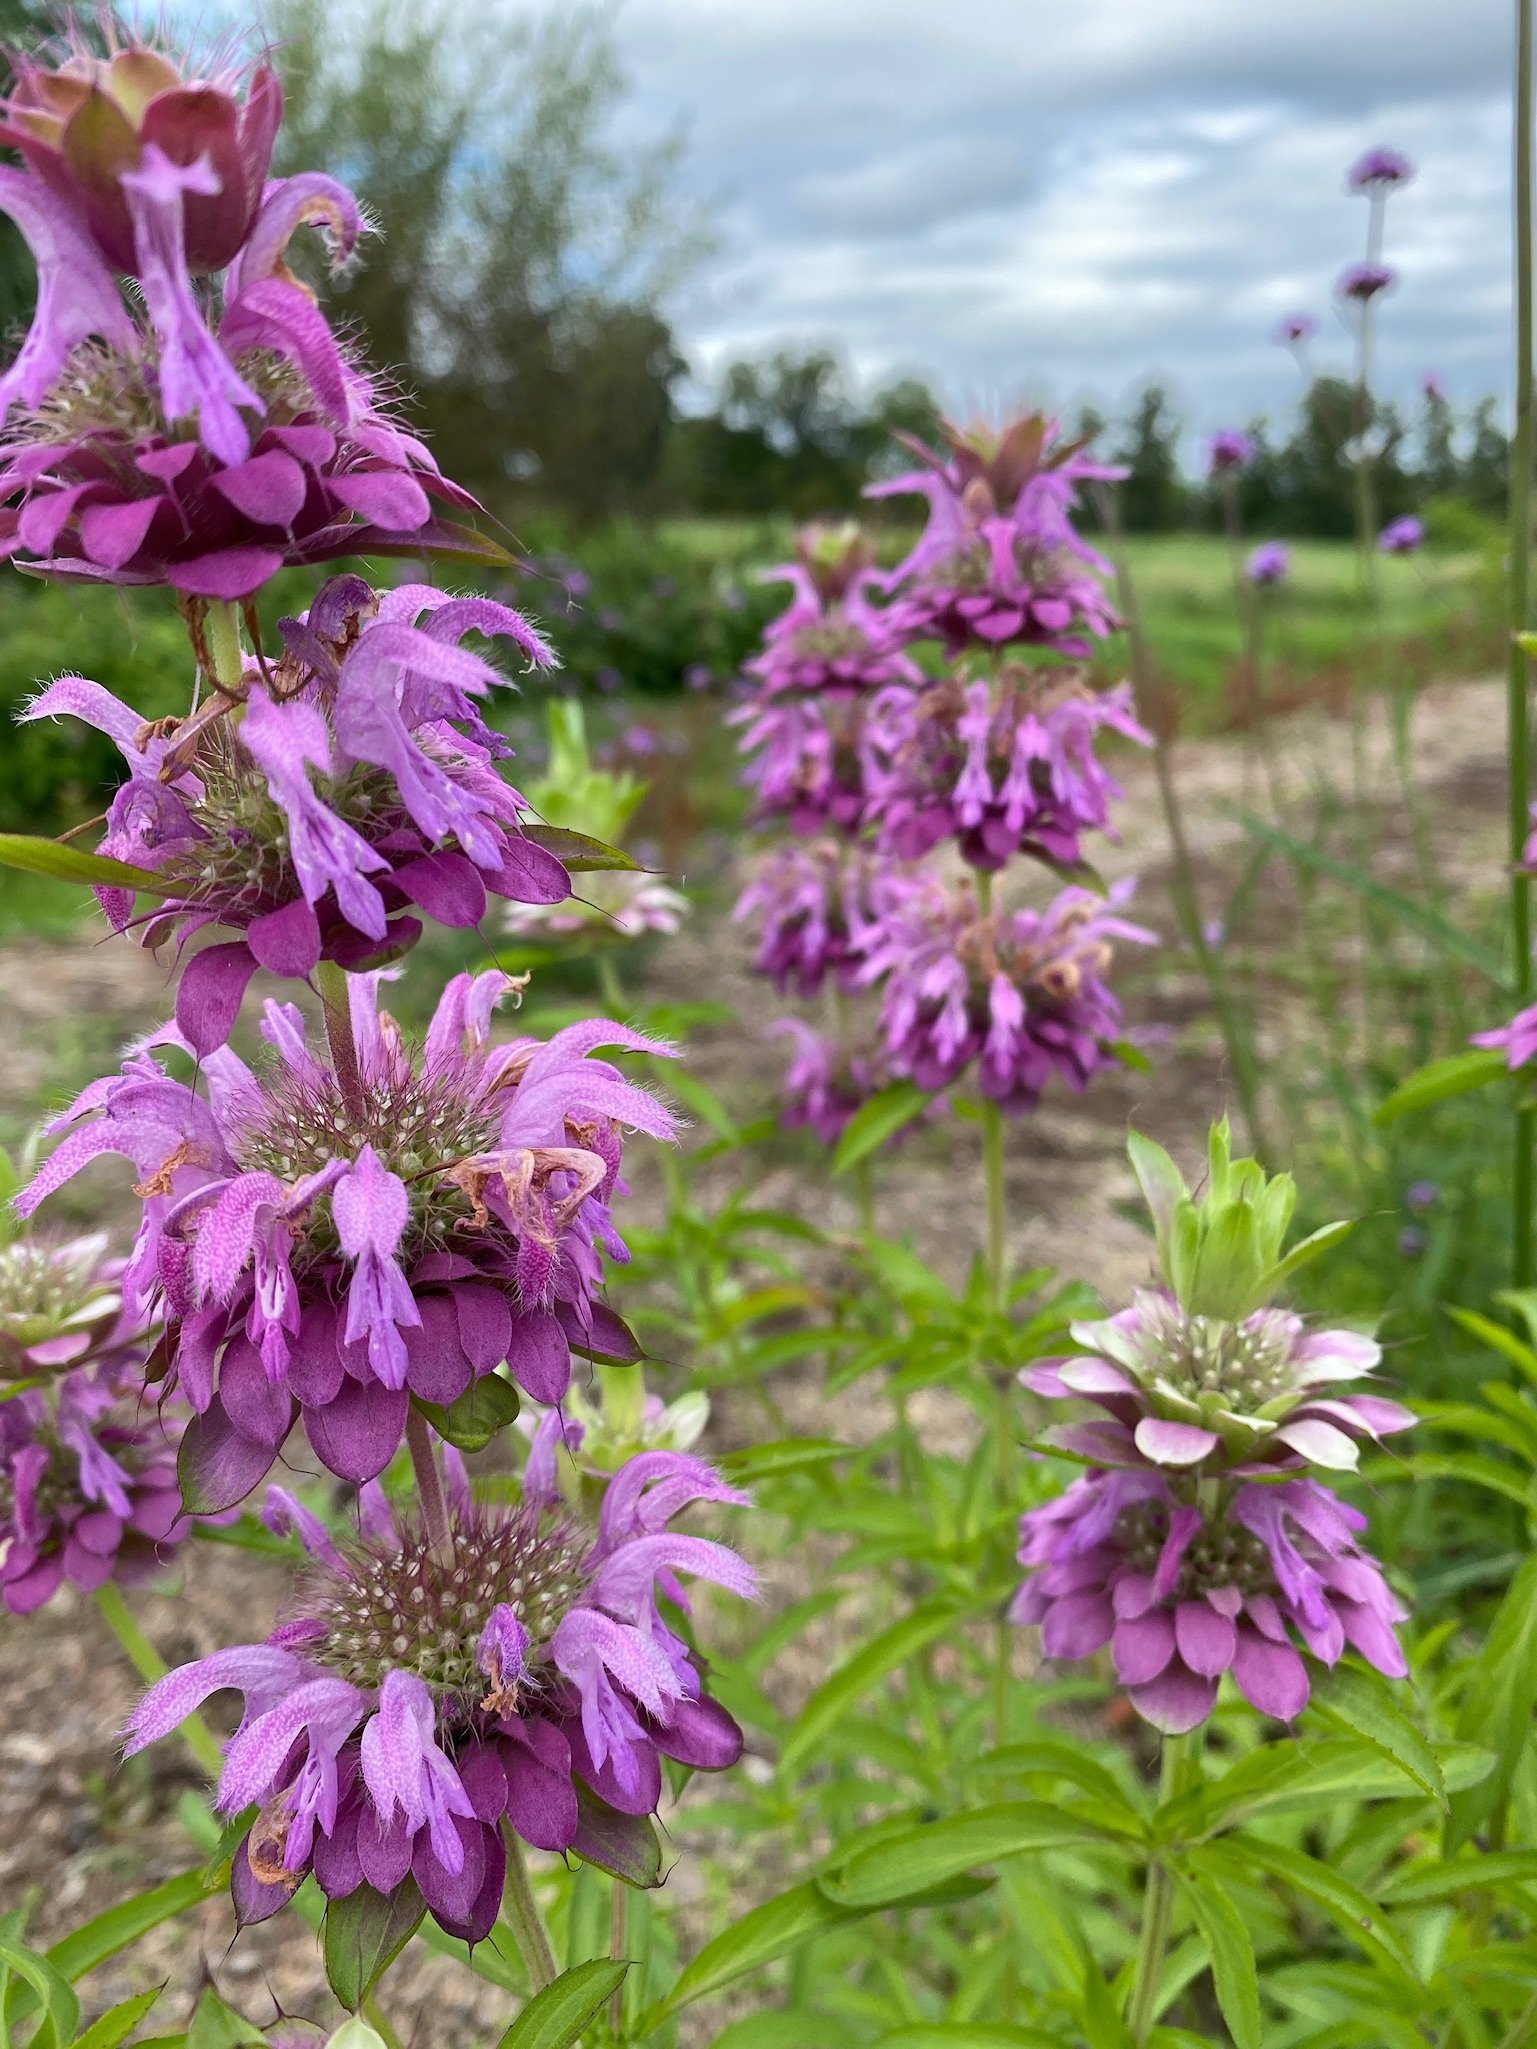
The fourth member of the lemon-scented Mint family is lemon bergamot (Monarda citriodora), with no relation to the citrus plant Bergamot orange. This plant has a lovely upright habit and tall pink flower spikes that pollinators adore. Use the leaves and flowers in tea, where it offers a lemony, floral aroma with a hint of spice, although less potent than its cousins, lavender and scarlet bee balm. Unlike those species, M. citrodora is an annual, although it may self seed in the garden. Try planting alongside Verbena bonariensis and clary sage for a riot of fragrance and pollinator attraction.

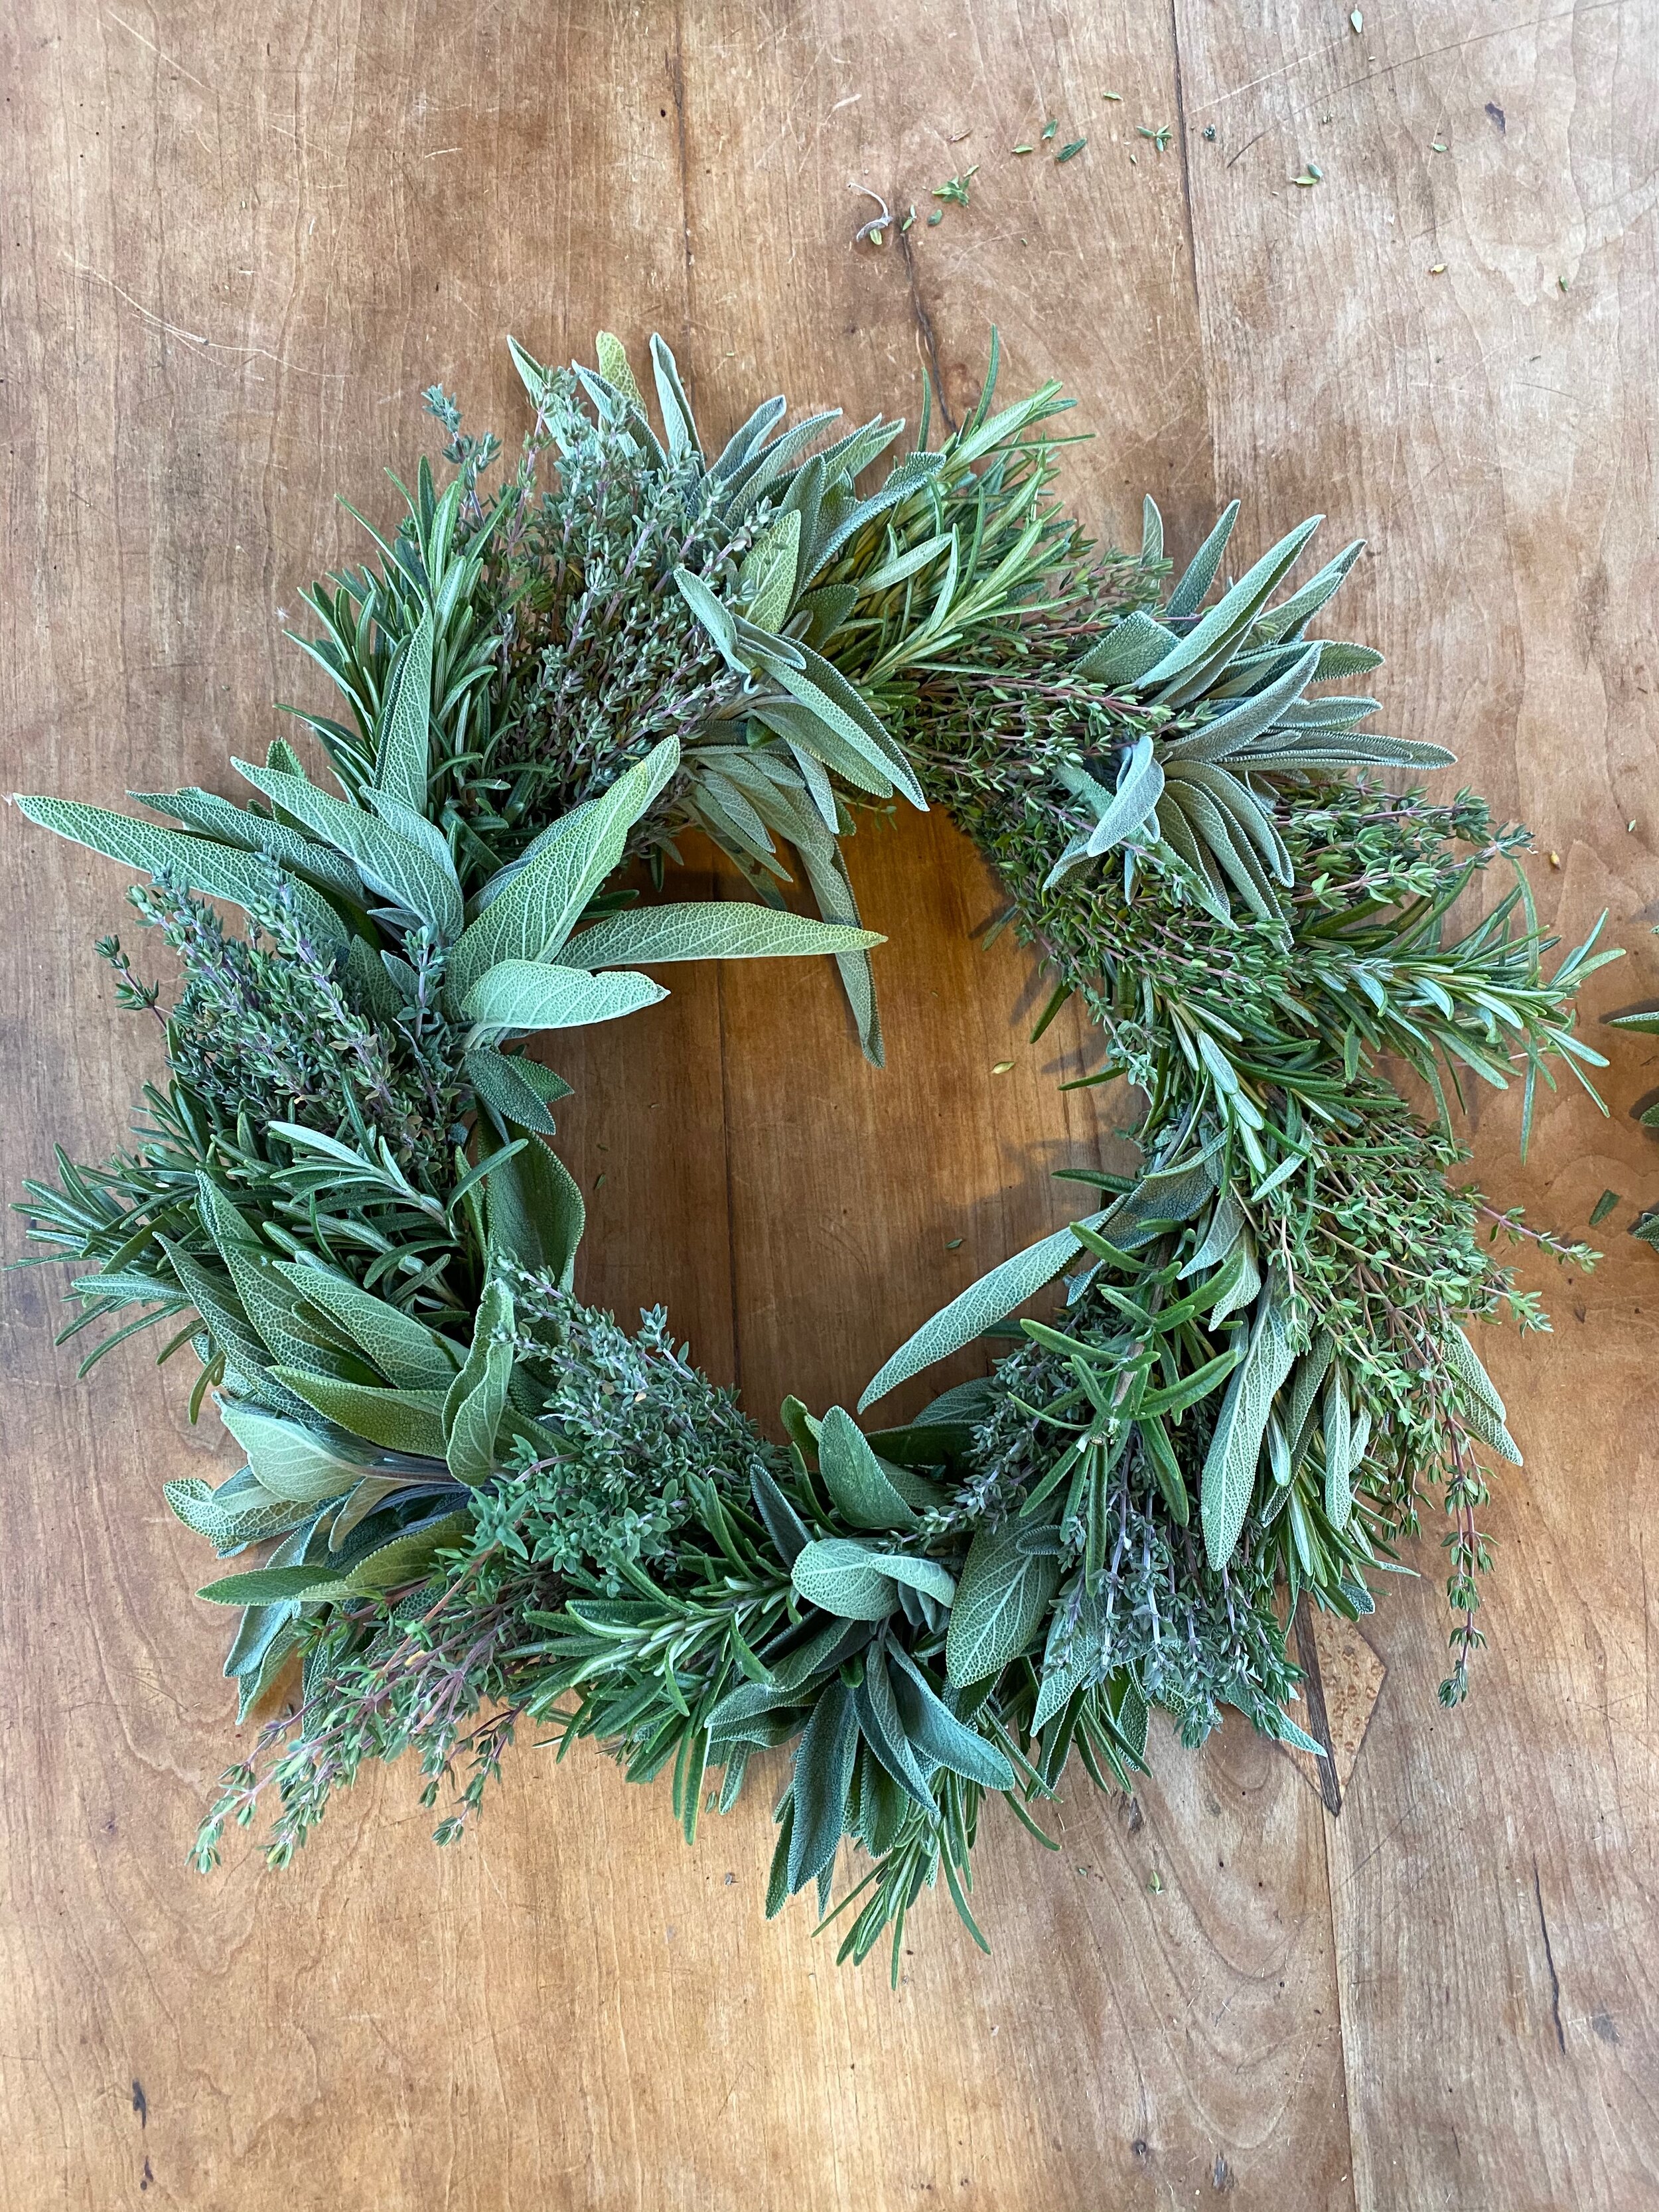
Lemon verbena (Aloysia tryphilla) is one of the most potently fragrant lemon-scented herbs. Grown as a woody perennial in warmer climates, in Vermont it does well in a pot, brought inside to overwinter. The coarse, lanceolate leaves are full of citrusy aroma and flavor. Bring bunches inside to perfume the home, and blend into teas and simple syrups. For a very Mediterranean tea blend, toss a few lemon verbena leaves and a sprig of fresh rosemary into a cup and fill with hot water. It’s a simple afternoon pick-me-up with no caffeine and a delicious, easy-to-love flavor.


Perhaps the most well known lemony herb is lemongrass (Cymbopogon citratus). While the cool Vermont summer doesn’t produce stems that are quite as thick as what you will see in stores, it’s still easy to grow this grassy annual in a pot or herb garden for fresh use. To best retain the full flavor, cut back and freeze the stalks at the end of the season- you will capture more of the citrusy essence than with dried leaves. The leaves have a tough texture, so they’re best used similarly to a bay leaf and removed after cooking. We like to infuse coconut milk with homegrown lemongrass before adding it to soups and curries.

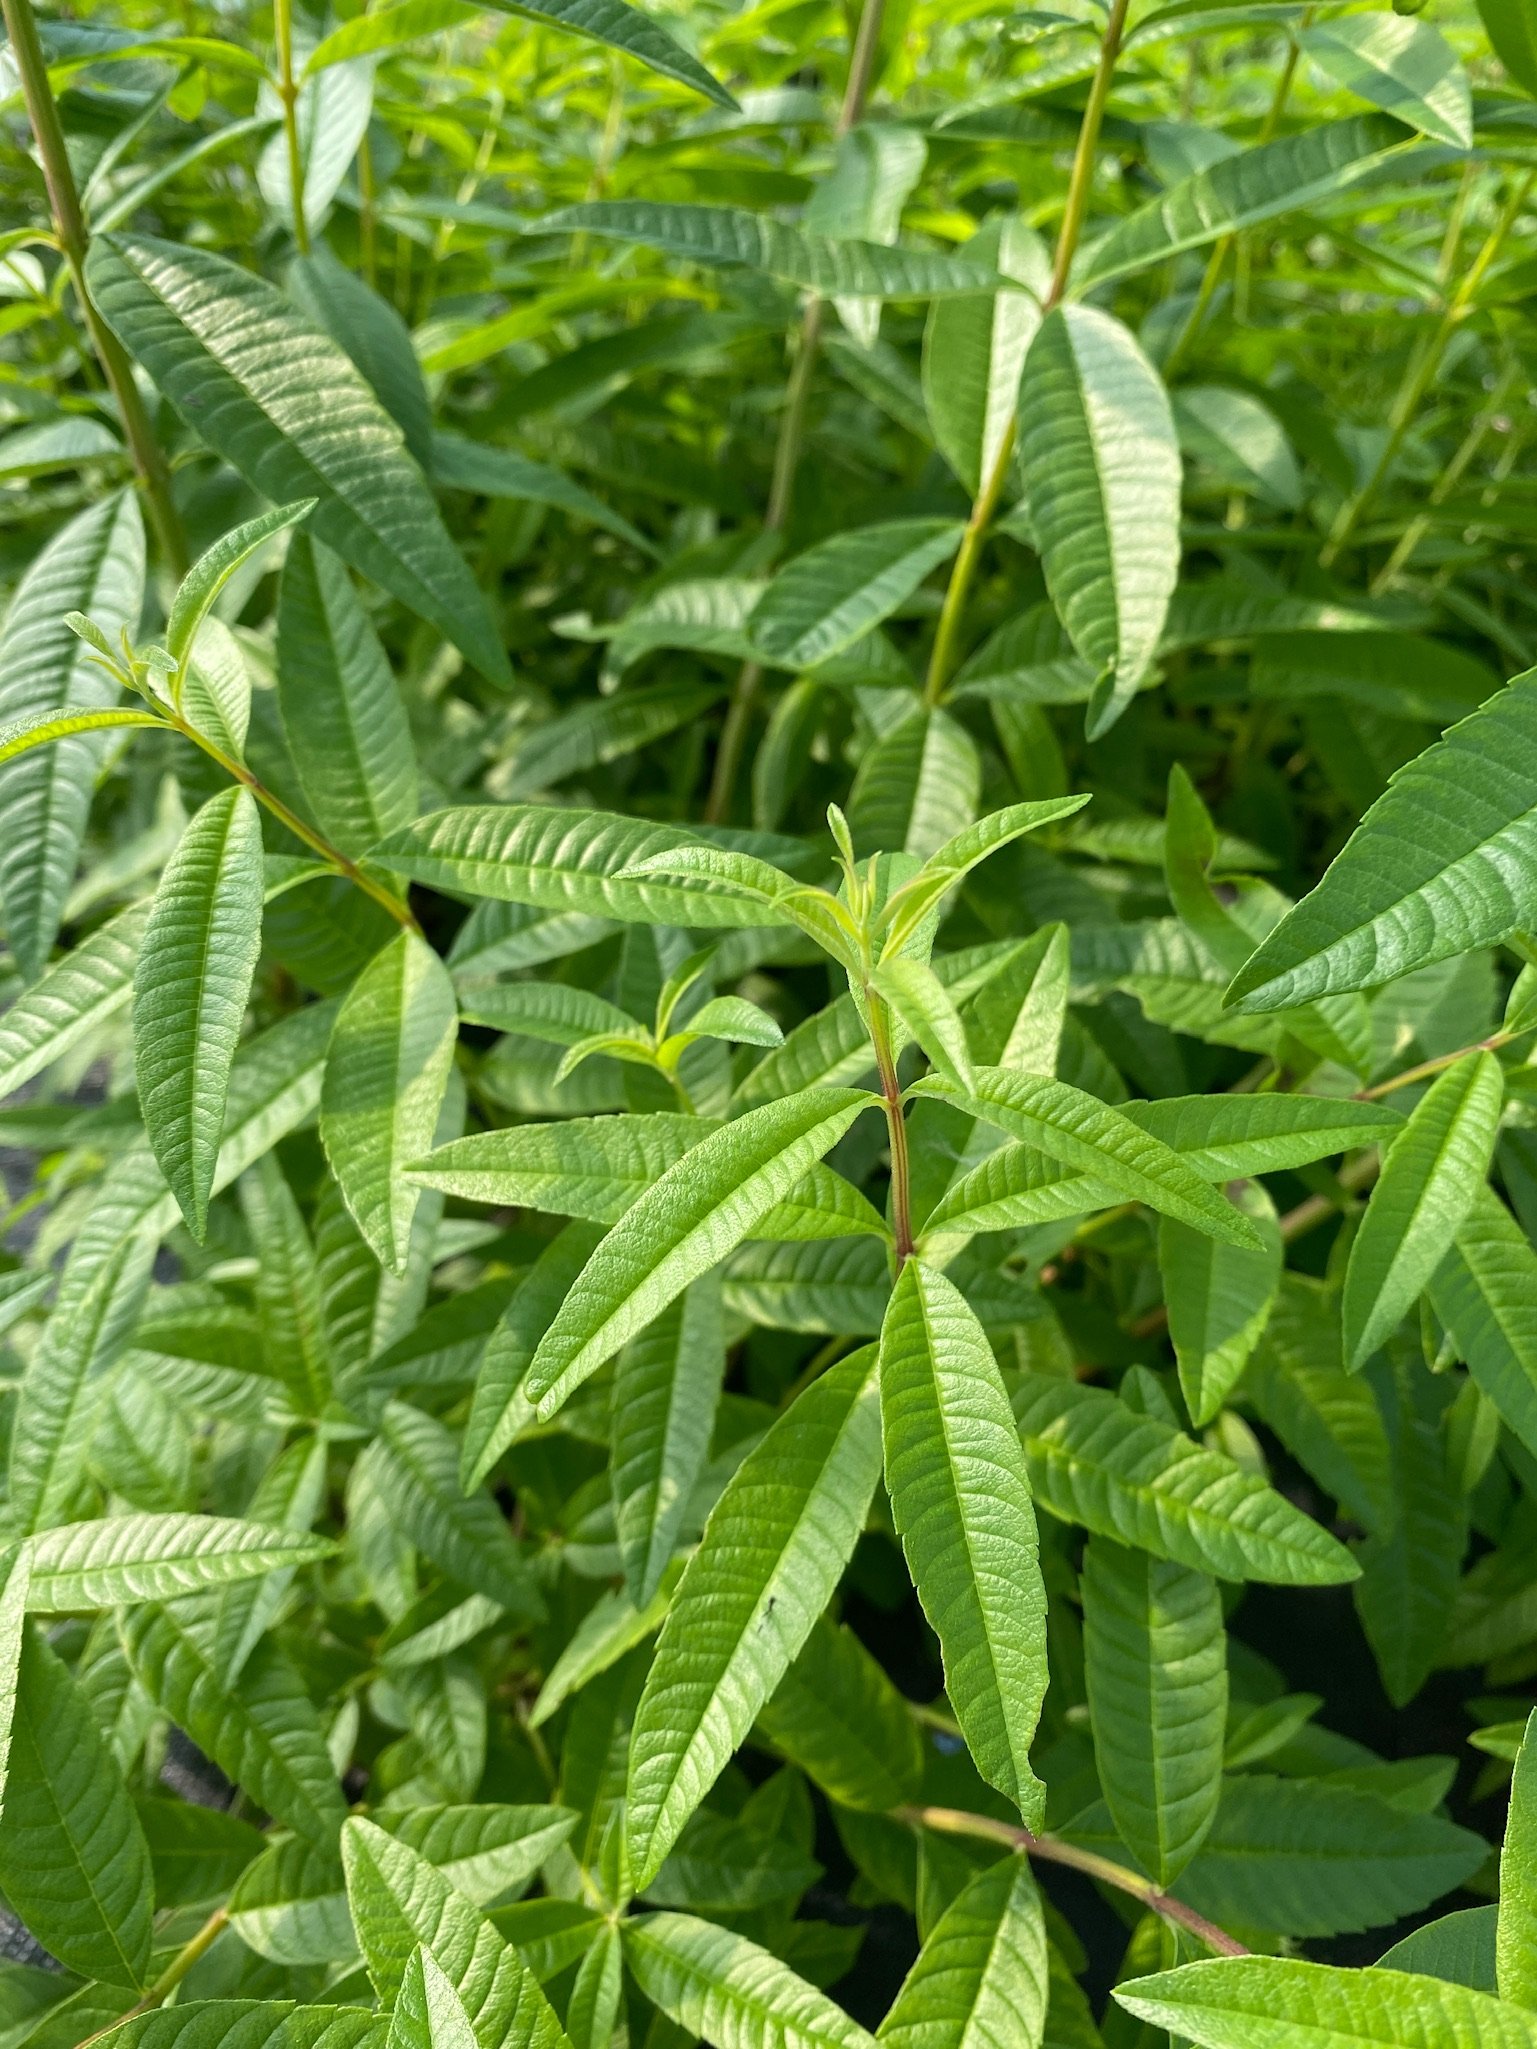
Lemon verbena in our high tunnel

This blog post was written by Sophie Cassel, Red Wagon’s wholesale coordinator and community outreach team member. Sophie is an herbalist and educator. You can find her workshops here.

Grow a Purple Food Garden

Purple Napa cabbage ‘Merlot’

If you thought that color-coordination was reserved for the flower garden, try expanding your palette (and your palate) this year. These purple-hued veggie and herb varieties combine to make a dramatic edible display, whether grown together or interspersed in the garden. In addition to being stunners in the garden, highly pigmented foods tend to contain high levels of antioxidant anthocyanins, elevating healthful eating from garden to plate.

Early in the season, tuck vivid purple alyssum alongside herbs and salad greens like ‘Red Batavia’ lettuce, one of our favorite head lettuces for its vibrant color and sweet tender leaves. The alyssum will continue to bloom even as spring lettuces are replaced by summer herbs. Purple basil and purple shiso are both grown in a similar manner- pinch back after transplanting to encourage bushier growth, harvest leaves for culinary use or allow them to flower for a more ornamental look. Purple basil is used just like green Genovese basil, and shiso is a popular Japanese herb with a flavor like cumin and clove. Use the leaves to make lettuce wraps or color radish pickles a vibrant red.

If you have the room and patience, cauliflower offers a fun payoff, and the ‘Graffiti’ variety boasts a wild purple head peeking out from blue-green leaves. Cauliflower can be sown in spring as long as they are kept watered through summer (and maybe offered some purple shade using ‘Hopi Red Dye’ amaranth); sow mid-summer for a fall harvest.

While traditional red cabbage always deserves a place in the garden, this year we are thrilled to be growing purple Napa cabbage, which offers all the versatility and crunch of green Napa in a stunning wine color. We can’t wait to chop it into colorful slaws and kimchi later this year.

Freshly dug garden potatoes are easy to grow and very rewarding, and digging up ‘Adirondack Blue’ potatoes really feels like unearthing buried jewels from the garden. The reddish-purple skin reveals violet flesh that holds its color even when cooked, making for stunning roasted or mashed potatoes.

Another unusual addition to the purple garden is the ‘Colorado Star’ artichoke, whose spiny 1-3’ tall plants produce a relatively high yield of buds in a range of purple hues. This artichoke variety matures earlier than others, making it a good option for our relatively short season. Grow them as an annual, and combine with purple-topped Verbena bonariensis and flavorful bronze fennel to create height and architectural interest in a garden that transcends the boundaries between edible and ornamental.

Verbena bonariensis

This blog post was written by Sophie Cassel, Red Wagon’s wholesale coordinator and community outreach team member. Sophie is an herbalist and educator. You can find her workshops here.

Plants of the Week: It's all about the HERBS!

Welcome to the basil forest!

Welcome to the basil forest!

It’s official- harvesting plant medicine has begun in earnest and, depending on who’s in your garden, won’t stop until first frost. This time of year it’s all about the Aster and Mint families.

Blossoms like calendula, chamomile, echinacea and yarrow all benefit from regular deadheading, and create small consistent harvests that lend themselves well to infusions in oil or apple cider vinegar to create soothing topical applications for all manner of skin ailments. Infuse a pint of oil (local sunflower, olive or jojoba are lovely) with freshly-wilted chamomile, calendula and yarrow, then blend with local beeswax for tins of salve. You’ll be the hero of every chapped lip and dry hand you know!

Mint family plants like lemon balm, tulsi, basil, peppermint and spearmint should be harvested when the bottommost flowers on their spikes have begun blooming, or slightly before. Cutting at this time encourages bushy regrowth, and gives you the highest quantity of aromatic leaves and flowers without a lot of stem or seed. Be sure to make yourself a half gallon of fresh mint tea to have on hand in the fridge- plants with high volatile oil content (read: nice and smelly) will last the longest in the fridge, as the volatile oils do double duty inhibiting fermentation. This also clues us in to their amazing ability as general support for our immune system. Harvest on a hot, sunny day and dry quickly in a breezy, warm spot to get the highest volatile oil content from your plants.

Tulsi drying on racks in our greenhouse

Tulsi drying on racks in our greenhouse

We are doing a big sale this week- buy one herb pot, get one free! Culinary staples, perennials, and tea herbs are all available and will continue to produce well into early fall. Come by the greenhouses between 8-6 every day to stock up on herbaceous joy this week!

This is a great time to bulk up your herb garden with a new-to-you plant or more of your favorites. Include a couple of lemon verbena and rosemary plants to make Sophie’s favorite “lazy tea”: Just add a few whole leaves of lemon verbena and a sprig of rosemary to the bottom of your cup, then cover with hot water and steep five minutes. It’s the perfect afternoon pick-me-up, and is even better when steeped overnight and served on ice.

No more room for herbs in the garden? We’ve got you covered! We are now offering bulk fresh herbs for pickup at our greenhouse. Dry sage and thyme for holiday gifts, brew tulsi and anise hyssop tea for your whole cookout, make a cool mint bath for your sunburn… the possibilities are endless!

Building mesh screens to sift dried herbs

Building mesh screens to sift dried herbs

We have some upcoming classes for the herbal enthusiast (registration required):

July 20th: Know and Grow your Chicory. Julie and I are teaming up to talk all things chicory- from its use as an ancient medicinal herb, to coffee substitute, to revered Italian vegetable and everything in between. Taste tests included!

August 5th: First Thursdays in the Garden: Chad will be talking integrated pest management this month- how we do it at RWP and how you can at home. Julie will offer a behind-the-scenes tour of our greenhouses. I’ll also be hosting our September 2nd edition to talk about fall herbs!

August 21st: Harvesting and Processing Medicinal Herbs. We’ll dive deep into the different ways to preserve and use the herbal bounty in this hands-on three-hour class, so bring your questions and jars!

Let us know what you’re making from the season’s bounty, and of course come by any day 8-6 with questions, concerns, and success stories. We’re happy to help and love hearing about your garden journeys.

Herbes Salées - a Traditional Quebequois Preservation Method

Recipe for Herbes Salées (adapted from Spruce Eats)

Here is a traditional Quebequois way to preserve large amounts of herbs to use all winter.

Suggested uses: A teaspoon in hot water makes a soothing and instant herbal broth. Stir into soups and stews, mix into salad dressings and tomato sauce, mix with cream cheese, yogurt or cottage cheese for dips, spreads and snacks….the uses are endless and a jar of these preserved herbs will be a welcome reminder of summer’s freshness during the depths of winter.

  • 1 cup chives (fresh, chopped)

  • 1 cup savory (fresh, chopped)

  • 1 cup parsley (fresh, chopped)

  • 1 cup chervil (fresh, chopped)

  • 1 cup carrots (grated)

  • 1 cup celery leaves or lovage or cutting celery (chopped)

  • 1 cup green onions (chopped)

  • 1/4 to 1/2 cup coarse salt

    In a large bowl, combine chopped chives, savory, parsley, chervil, carrots, celery leaves, and green onions.. Layer 1 inch of herb mixture in the bottom of a crock or glass bowl and sprinkle with some of the salt. Repeat layers until all of the herb mixture and salt is used.

    Cover and refrigerate for 2 weeks. Drain off accumulated liquid and pack herb mixture into sterilized jars. Refrigerate until ready to use. Can keep for up to a year in the refrigerator.

Herbes Salées photo by Kate Bentley

Herbes Salées photo by Kate Bentley

Plant(s) of the Week: A power trio

Tulsi with bee friend. Photo by Sophie Cassel

Tulsi with bee friend. Photo by Sophie Cassel

Happy Solstice! We are finally beginning to see the fruits of our early season labor, as the chamomile and calendula come into full flower, the mints begin to really take off, and the perennial valerian and angelica stand tall. I have been absolutely flabbergasted by the way my second-year lemon balm and catnip plants have bushed out, and have begun cutting them back to dry for winter teas. Any time I harvest plants for drying, I also make a batch of fresh herbal tea. This weekend I gathered

I chopped them all into a half-gallon mason jar and let it steep in the sunshine for a few hours before straining over ice for a perfect “sun tea”. A tea like this only exists at a unique moment, and in a unique garden. This snapshot of the season is a great way to get to know your individual herbs.

This week, in our retail greenhouse, we are offering a trio of herbs as our “Plant(s) of the Week”

  • Anise Hyssop

  • Tulsi (which we have a blog post about)

  • Chamomile.

These are a perfect sun tea trio. All three are plants that you’ll definitely want more than one of in your garden, and when you buy these three staple medicinal herbs, you get three free!

You can find me in the garden drinking sun tea, reading, and hanging out with the plants,

Sophie Cassel

Medicinal Herb Bundles for 2021

2021 is going to be a big year for medicinal herb growing! With ever more people finding joy and solace in tending to plants, many folks are also realizing that home gardening can be more than just tomatoes and pansies. At Red Wagon we’re branching out as well, and growing even more herbs with traditional medicinal uses. Maybe you’re feeling ready to dive in to the world of healing herbs but a little overwhelmed at all the choices available (don’t even get me started on how *all* plants are medicinal!) Our specially tailored herb bundles are a great way to fill your garden with plants that you know you’ll use and enjoy. Additionally, we’ll offer support through educational videos and recommendations all season.

Our pre-made bundles are only available through our online store; you can also find the individual plants in our retail greenhouses when you come to shop in-person.

To help you get to know the herbs, we’ve made introductory videos for all four bundles; check them out on our Youtube channel. In the video descriptions you’ll also find some book recommendations, many of whose authors have their own super-informative youtube channels. Let these resources be a jumping-off point for your own personal experiences and kitchen experiments with the herbs!

Garden Tea Time Bundle: This kit is full of only the tastiest herbs for making fresh and dried teas. If you’re working with herbs and children, this bundle offers kids a safe and yummy way to pick their own medicine.

Skin Care Herb Bundle: This kit makes a great gift for that glowing garden goddess in your life! Infuse oils for salves and make at-home hydrosols (floral waters) with the vibrant herbs in this bundle.

Sweet Dreams Herb Bundle: Whether you need help counting sheep or just a little support getting through the stresses of the day, the herbs in this kit have got your back.

Basic Home Apothecary Bundle: If you’re ready to form long-term relationships with some perennial herbs, this bundle is full of highly regarded medicinal plants that can be harvested from for years to come. These are great herbs to use when learning how to make tinctures (shelf-stable infusions using alcohol, vinegar or glycerine).

s655787569362225896_p3471_i4_w3241.jpeg

You might be wondering how to start working with herbs early this season, in addition to planning and planting the garden. One thing I do in the spring is go through the dried herbs I still have from seasons past. Now is the time to blend up those random dried herbs to make room for this year’s bounty. I also find it much easier to drink a daily herbal infusion when I have it already mixed up in a pretty jar on the counter. Right now, I’m drinking a blend of garden staples like lemon balm, wood betony and peppermint mixed with some early spring wild plants that will be ready to harvest soon: self-heal, nettles, and red clover. These herbs are mineral rich and help support the healthy liver and lymph function to ease the transition from winter into spring.

If you still have a bunch of dried culinary herbs, try mixing them up to use on roast chicken, spring soups (Nettle and potato soup anyone?), or sprinkled on toast with butter and the first radishes of the year. And remember, culinary herbs are good medicine, too!

2021 can be the year you work more deeply with herbs as a part of your everyday life. We look forward to offering more resources, and hearing about your experiences in the garden this growing season!

New Medicinal Herbs for 2021

marshmallow.jpeg

By Sophie Cassel

Note: The plants discussed here have long histories of use, and the information included does not constitute medical advice. Be sure to check in with your medical provider before using any new herbs long-term. 

This year I have the honor of introducing you to some of our newest additions to the Red Wagon Plants medicinal herb family. In addition to the many medicinal herb starts we grow every year, we have added some plants that are tried and true herbal allies, if not as common in the modern Vermont garden. 

Medicinal herbs tend to be very closely related if not identical to their “wild” counterparts, with very little breeding done by humans for horticultural production. In this way, the most adaptable and hardy plants tend to thrive, and those very compounds that aid the plant’s survival also serve to act medicinally in the human body. Horticultural plant breeding is often targeted towards things like bloom time and flower color, so medicinal constituents may decrease as the plant adjusts in favor of these showy adaptations. For those of us who appreciate a more natural looking perennial garden, the wild beauty of the unmodified plants is part of their charm, and an assurance that we are growing high-quality medicine as well. 

Another trick to medicinal plant growing is germination. Many of these more wild plants have adaptations to ensure seed viability which actually make them much more difficult to reliably germinate at home. Replicating the plant’s natural experience, such as letting the seeds go through a period of cold stratification (for northern climate plants) or nicking the seed coats to mimic the passage through an animal’s intestine, will help increase germination. They’ll never behave quite like a tomato or spinach seed, because these medicinal plants have not adapted to rely on human propagation. This means that buying established plant starts is a great way to ensure success this year, and you’ll be able to save seed to experiment with expanding your patch in years to come. 

You’ll notice that a couple of these plants have the species name “officinalis”, as do other herbs that we grow; that’s a clue to the fact that these plants were historically included in official pharmacopeias and monastic apothecaries well before Linnaeus’s time in the early 18th century. 

Without further ado, here are some of the newest additions to the Red Wagon medicinal herb family:

Marshmallow (Althea officinalis): A relative of hollyhock and hibiscus, this pale-pink flowering beauty lives up to its name, thriving in wet or dense soils. It will also do just fine in garden soils with enough moisture. Growing 3-5’ tall, plant marshmallow towards the back of your perennial beds, but still within easy enough reach to harvest the flowers and soft, velvety leaves for tea. All parts of this plant, including the 2+ year old roots, are valuable for their soothing mucilaginous qualities, which smooth out digestion and soften skin. A great herb for the kid’s garden!

Wood Betony (Stachys officinalis): This plant used to be a staple in old European herb gardens, and has been venerated for centuries as a panacea to “preserve the liver” and ease emotional malaise. Well-behaved clumps of deep green leaves form attractive mounds for the front of the garden, with stately 2’ spikes of purple flowers that will continue to sprout as you harvest through the season. Clip back stems, leaves and flowers and dry for a subtle, earthy tea that can clarify the mind and support healthy digestive function.

Skullcap (Scutellaria lateriflora): As our retail manager and fellow herb aficionado Lily said, “After 2020, everyone could use some skullcap!” A native wetland herb in the Mint family, skullcap will happily sort itself around plants like marshmallow and valerian, growing 1-2’ tall with petite periwinkle-colored flowers appearing along the stems. One of our most valued herbs for relaxing muscle tension and general anxiousness, this plant is used both to support sleep and simply find ease through the day. Cut back a few times over the season and dry for tea or infuse in alcohol to make a tincture. Skullcap doesn’t have much of a flavor, so it plays well with other aromatic family members like lemon balm, peppermint, and tulsi. 

Elecampane (Inula helenium): Do you ever wish your sunflowers had a little more sass and came back every year? Elecampane is your answer! Growing up to 6’ tall, elecampane sports finely-petaled yellow flowers born on thick bracts, with large clasping leaves that are a showstopper in the garden. Named after Helen of Troy, the root of this plant has been long revered as a pungent digestive tonic with a camphorous aroma that lends itself well to infused honeys and cordials. It’s valuable in supporting lung health and getting out stuck “gunk” wherever it may be lodged. 

California Poppy (Eschscholzia californica): We’re bringing back the California state flower to our collection this year. While related to the other garden poppies, Eschscholzia flowers later and requires far less in terms of soil quality to thrive. The only annual on this list, plant California poppy alongside other self-seeding annuals like chamomile and calendula, or tuck it around the front of a sunny perennial border that you don’t have time to mulch or fertilize. The whole plant is used medicinally, including the striking red root and attractive long seed pods (which also make excellent everlasting bouquet additions). Tincture the plant in vinegar or alcohol to make a tonic for sleep that is impeded by either pain or discomfort of body and mind alike.

Herb Wreath How To

Here is a little project that is easy to do and uses up herbs from your garden (or purchase one of our kits). Lily and Julie made some herb wreaths this week to give you a sense of how to do it. We instantly felt better after doing a creative project like this, and my wreath is in the kitchen smelling and looking great. Check out this video for a tutorial on how to do it. And if you would like to purchase one of our kits, you can find them here for purchase (we will contact you to arrange pick up at our Hinesburg location).

IMG_2193.jpeg

Calendula

calendula sophie.JPG

Calendula (Calendula officinalis), historically also known as Pot Marigold, is one of those cheery plants that has successfully transcended the gap between herbal medicine and ornamental gardening. Its sunny blossoms start blooming early in the summer if transplanted, and will proliferate all season long and even after frost, as long as the flowers are picked before going to seed. Like others in the Asteraceae family, pollinators flock to this plant, which provides a valuable long-term nectar source. While there are many types of ornamental calendula available on the market, highly medicinal varieties include Resina, Alpha, and Erfurter Orangefarbige. You’ll know you’ve got a potent calendula if when you pick the blossom (snapping it from the stem and removing the flower head and green bracts) your fingers get sticky with resin.

If you’re growing calendula and deadheading the plants regularly, you’ll find yourself with a wealth of flower heads to use. Luckily, there are endless ways to make use of this beautiful and powerful plant! 

Calendula occupies a unique and important place in any herbal medicine chest. Powerful yet gentle, it’s listed as an active ingredient in balms for everything from cracked hands to rashy baby bums. Calendula enjoys a long history of use as a venerated wound healer and anti-inflammatory herb, soothing and repairing injuries and ulcerations of all kinds. As it also has documented immune-stimulating affects (through its work on the lymphatic system), calendula is also useful when dealing with skin issues that stem from some kind of infection. At the start of gardening season, I can often be found soaking my roughed-up hands in strong calendula tea to heal cracked cuticles and scraped knuckles. 

But we can’t talk about skin without mentioning the skin that lines our insides- the digestive tract! In the same way that calendula heals external wounds, it is equally as powerful when taken internally to alleviate the effects of inflammation in the gut. Allergic reactions both inside and out can benefit from application of this herb, and it is gentle enough to use every day in a variety of ways. I love including calendula in mouthwash formulas to heal irritation and inflammation in the gums.

There’s no reason to relegate calendula to the first-aid kit, though. It is also a wonderful tool in the kitchen, adding color and beauty to baked goods and salads as the “poor man’s saffron”. To use, simply pluck the petals off the flower head, and sprinkle into your batter or lettuce mix. The center of the heads, with their sticky resin, tend to leave an uncomfortable feeling on the back of the throat when consumed raw, so it’s best to save those for tea infusions, or thrown into soups and bone broths where you’ll get the benefit of the herb and the visual delight as well. 

Now that you’ve harvested your blossoms and dreamed up all the ways you’ll use your calendula, make sure to dry some for winter use. Flowers should be picked in the height of the day, when they have fully opened and any dew has dried. Dry flowers in baskets or on newspaper, spread in a single layer so that they are not touching (you can also use a dehydrator on the lowest setting). Calendula flowers hold lots of moisture, so it’s important to let them dry fully before storing, lest they get moldy on you. The center of the head should snap apart easily when dry. As the season wanes, leave some flowers to go to seed on the plant. You can harvest these fossil-like structures once they’ve turned brown and come off easily in your hand. 

Calendula is an excellent and safe introduction into the world of herbal medicine, and with its myriad uses, it’s one of the most reliable plants you can keep on hand throughout the year. 

Basic Calendula Oil, Two Ways:

  • Calendula flowers, wilted for a few days or completely dried

  • High quality oil, such as olive, sunflower, grapeseed, almond, or jojoba

Roughly chop calendula flowers and pack into jar, then fully cover with oil (add an extra glug or two to make sure flowers stay submerged). Label with contents and date, then leave to steep in a dry, shady place for 2-4 weeks. Different herbalists have different habits, and some prefer to let their oils steep in the sunshine, while I keep mine out of direct sunlight. 

If you’re in a rush, you can quickly make an infused oil by heating the oil and flowers slowly in a double boiler, making sure that you stay well below the smoke point for that oil. Heat gently for an hour or two. In either case, when you’re finished infusing the oil, strain out and compost the flowers, label your oil, and store in a dark place for up to a year. You can use this oil to make salves, lotions, and creams, or apply directly to skin. 

Gut-Healing Tea (make with fresh or dry herbs):

  • Calendula flower

  • Chamomile flower

  • Plantain leaf (Plantago spp.)

  • Fennel seed

  • Peppermint leaf

Blend equal parts of all herbs. Infuse about a handful (approx. ¼-½ cup) of herbs in 1 quart of boiled water, and allow to steep for an hour or overnight. Enjoy hot or iced, and drink daily as part of a regimen to help with digestive upset (can also be enjoyed as part of a healthy-skin regimen, too!)

Resources:

Calendula Monograph: https://www.herbrally.com/monographs/calendula

Henriette’s Herbal: https://www.henriettes-herb.com/blog/yell-calendula.html

Drying Herbs for the Home Apothecary


By Sophie Cassel, herbalist, gardener, educator, and RWP employee. 

drying herbs photo.JPG

So, you’ve planned out the garden beds, planted your herbs, tended dutifully to their new growth, and now you’ve got a garden full of medicinal flowers and bushy growth, beginning to attract the attention of busy pollinators and your awe-struck neighbors. What next? Of course, you could leave the plants as ornamentals, or allow them to go to seed in hopes of expanding the garden next year. But if you’re interested in harvesting plant medicine, you’ll want to have all the tools you need to gather, dry, and store your bounty. Read on for some tips on tools and methods for keeping on top of the harvest, and you’ll be rewarded with aromatic and delicious herbs that will store well through the winter months!

Harvesting

First, a note on harvest. Medicinal plants have been used and revered for as long as humans have been humans, and we can and should show gratitude to the plants for all they offer us. While it bears repeating that wild plants should always be collected with utmost respect and caution towards the continuity of the stand or the species, even our own gardens can be the site of conscious harvest. Remember that maintaining a healthy pollinator population is essential for maintaining a healthy garden, and leave at least a third of flowers for the little critters who make all that abundance possible. With many commonly grown medicinals, leaving flowers for the bugs and birds will also promote seed production, which can then be gathered from in the fall to save for next year or offer to friends. Dead standing seed heads also provide important food sources to birds in the winter, which is another way to pay forward the bounty of the garden. 

That said, it’s helpful to have some key tools to make the harvest go smoothly:

  • Baskets: Wide woven baskets are ideal for harvesting big bunches of herbs. They also make good places to dry the plants, since they provide plenty of surface area for air flow. If your basket has an open weave, line it with newspaper to prevent leaves and flowers from falling through the gaps.

  • Clippers: Small snips are best for quickly and cleanly trimming off leaves and small stems, especially with plants whose stems don’t snap off cleanly. Make sure to keep your clippers clean to prevent the spread of disease from plant to plant. 

  • Rubber bands: Save your old bands and twist-ties from produce and use them to make small bunches of herb sprigs- the diameter of the bunched stems should be between nickel- and quarter-sized to allow for air flow through the leaves. 

When it comes to drying herbs, there are a few different methods, and they work well for different plants, depending on the moisture content of the material you’re harvesting. Small-leaved and twiggy plants like thyme or lavender dry quickly in a bundle, whereas juicier plants like tulsi or calendula flowers need time and lots of air flow. Generally speaking, you want to create an environment that is warm, dry, breezy, and out of direct sunlight. That may be a corner of your kitchen, under the eaves of a garage or barn, or hanging from the ceiling of a three-season porch. Here are some methods you can consider, depending on the type of plant you’re collecting.

  • Hanging: Tied up in those small bundles, herbs that are cut by the stem can be hung from a clothesline or string around the house. If it’s a plant that tends to shed its leaves as it dries, like tulsi or bee balm, you can hang the plant inside of a paper bag, so that as the leaves dry down they fall into the bag. Be sure to check bundles regularly to make sure they are drying evenly, without excess moisture in the inside of the bundle.

  • Baskets and Racks: This method works best for flower heads, leaves, and anything with soft or short stems that won’t hold up to bunching. Spread your herbs in a single layer on your basket (lined with newspaper if needed) and place somewhere dry and warm. If you do place your herbs in direct sun, be sure to check them regularly and bring them in before they get too crispy or bleached out. I like to swirl the herbs around in the basket every day or so to make sure they are drying evenly- this is also a good time to remove any thicker stems that are drying more slowly than the other plants. For juicy flowers like calendula or red clover, be sure to check that their middles are fully dry (the centers should snap apart). If you’d like to build your own simple drying screens, there’s a great tutorial here. I set up a wooden clothes drying rack in my living room and place these screens on it, which creates vertical space for drying that doesn’t tie up counter space. 

  • Dehydrator: Only use a dehydrator that has a temperature adjustment, as most standard dehydrators will run too hot for delicate plant material. Models like the Excalibur are pricey, but if you already own one for food preservation, they make great herb dryers. Make sure your temperature is on the lowest setting, and check the plants often to make sure they don’t overdry or begin to cook. It may help to chop the herbs a bit first so that they fit on the trays and don’t crowd each other.

Whichever drying method you use, make sure to label your plants, particularly the leafy green herbs that may only be identifiable by taste or smell. Label the drying plants with their name and when they were harvested- this way you’ll also develop a sense of how long it takes for each herb to dry down. Things like ambient temperature and humidity can dramatically lengthen the time it takes for herbs to dry.

After the plants have dried fully, it’s time for the most satisfying step with the funniest name: Garbling! Garbling is the process of stripping and shredding the useful medicinal leaves and flowers from the woody stems, resulting in a finished product that is uniform and easy to use. The best way to garble is to rub the dried plants against a screen (just like the drying screens above) made with half-inch hardware cloth, which will allow the crumbled herbs to pass through into a bucket or bowl below. You can also of course also do this by hand, in one of your big baskets or a large bowl. 

Once your herbs have been processed fully, store them in a sealed plastic bag or glass jar to prevent moisture moving in. Label well and keep in a dark place to preserve their shelf life. Stored this way, home grown herbs will last well over a year. If you’re unsure of whether the herbs are still useful, use your nose and eyes as guides: If the plants look bleached out or yellowy, or if they have no fragrance (or a funky/moldy one), it’s time to add them back to the compost. If you’ve dried them properly, your dried herbs will stay fresh-looking and aromatic, and provide you with an abundance of medicinal and culinary delights well after the garden has been put to bed. 

Resources:

Herbal Vinegar Infusions

By Sophie Cassel, herbalist, gardener, educator and RWP employee. 

herbal+vinegar+photo.jpg

Of all the ways of preserving herbs, I think that vinegar infusions really capture the essence of summer in a way that lasts all year. At its foundation, a vinegar infusion is super simple: Chop up flavorful herbs, pack them into a jar, and cover with apple cider vinegar. Let the herbs infuse into the vinegar for a couple weeks, then strain for a punchy liquid that is versatile, healthful, and pretty tasty. 

Apple cider vinegar (ACV) is the vinegar of choice, but other vin aigre (translated to “sour wine”) like red wine, white or balsamic are also viable options, depending on what your final product will be. Vinegars are a natural product of the fermentation and winemaking process, and have been used across cultures and generations to preserve and flavor food and beverages. In the northeastern US, apples were originally grown to produce cider and apple jack, and so cider vinegar has been our locally abundant source of acetic acid, the chemical responsible for that puckery tang that is so indispensable to our salads and pickles. 

Many folks are familiar with infusing vinegars for salad dressings- adding a couple sprigs of rosemary and thyme and a few cloves of garlic into the vinegar bottle can add complexity to a simple oil-and-vinegar dressing. But did you know that infused vinegars also lend themselves to sweet concoctions?

The first time I fell in love with an herbal vinegar was when a friend, faced with a glut of tulsi flowers from her garden and uninterested in drying the lot, shoved the herb bunches into a jar with apple cider vinegar and let them sit on her kitchen counter until she almost forgot about them. Weeks later, she gave me a sample of the strained liquid. The vinegar had absorbed and preserved all the delicate floral flavors of the tulsi, and it tasted just like we were back in the heat of July. 

Since then, I’ve been getting creative with different herb combinations, and adding honey or molasses to amp up the sweetness of my “elixirs”. When made in small batches, infused vinegars are a fun way to let your inner flavor wizard come through, and delicious local vinegar is inexpensive and easy to come by. Let yourself be guided by the bounty in your garden and your tastebuds, and you’re sure to come up with some successful combinations of your own. Below are a few traditional styles of vinegar infusions, with some ideas for herbs and spices to use. 

  • Switchel: Also known as “haymaker’s punch”, this is a classic beverage drunk by northern farm workers while working through the heat of the day. Switchel usually includes ACV, honey or maple syrup, and water, with herbs steeped in for flavor. It functions much like a home-made sports drink, with the vinegar and sweetener providing much-needed electrolytes and salt. Try infusing a jar of vinegar with ginger, thyme and lemon, and keeping it on your counter, ready to add to your sweetener and water for a refreshing beverage that can be drunk throughout the day, even if you’re not making hay. 

  • Shrub: These vinegars are infused with seasonal fruit and honey to make a luscious syrup. Added to cocktails or sparkling water, shrubs are tart, sweet, and deeply refreshing on a hot summer’s day. Added to a bit of hot water in the winter, it brings to mind the flavors of summer. Try a combination of strawberries and thai basil, or blackberries and raspberries with anise hyssop. The color of the berries will seep into the vinegar, adding a visual element to any beverage.

  • Fire Cider: This spicy concoction has been a staple of the kitchen medicine community for generations, receiving added attention in past years as the fight to prevent the trademarking of the name went national. Kitchen staples like onion, garlic, horseradish, cayenne and black pepper are chopped and added to vinegar and honey, then strained when the brew is nicely potent. Taken by the spoonful or added to a hot toddy, Fire Cider is sure to clear the cobwebs from your immune system and provide some internal warmth in the depths of winter. If you’re excited about Fire Cider, a new book compiled by Rosemary Gladstar dedicated to the topic will give you ample recipe ideas and inspiration.

Infusing herbs in vinegar is so quick and simple, you’ll soon find yourself making a new batch every week, capturing the seasonal shifts of your garden. Make sure to label every jar with the date you made it and the herbs you added in. Infused vinegars are safe for everyone when diluted, and make an excellent offering to kiddos or folks who aren’t drinking alcohol. They also can help jump start digestion before a meal. The possibilities are as varied and abundant as your garden!

Further resources:

Folk Medicine: A Vermont Country Doctor’s Guide to Good Health. Dr. D.C. Jarvis. 1950’s book, makes some wild claims but is a fun read and a portal back in time. His office is preserved at the Shelburne Museum!

Salt, Fat, Acid, Heat. Samin Nosrat, 2017. Specifically the chapter on acid, but this entire book is a treasure trove.

Fire Cider! 101 Zesty Recipes for Health-Boosting Remedies Made with Apple Cider Vinegar. Rosemary Gladstar, 2019. The “godmother of Western herbalism” and the originator of Fire Cider, Rosemary is an enormous resource to the beginning herbalist.

Pesto Time

photo by Kate Bentley

photo by Kate Bentley

PESTO for eating fresh or freezing


In food processor, blend until coarsely chopped:

2 cups fresh basil leaves, packed (can sub half the basil leaves with baby spinach)
1/2 cup freshly grated Romano or Parmesan-Reggiano cheese (about 2 ounces)
1/3 cup pine nuts (can sub chopped walnuts)
3 garlic cloves, minced (about 3 teaspoons)
Slowly drizzle in:
1/2 cup extra virgin olive oil
Do not over blend, the heat from the food processor will bring out the bitterness in the oil and the basil.
Taste, and season with
1/4 teaspoon salt, or more to taste
1/8 teaspoon freshly ground black pepper, or more to taste

Ashwagandha, aka Winter Cherry or Indian Ginseng, Withania somnifera, Solanaceae

ashwaganda.jpg

If you’ve been tracking the various “wellness” industries in the past few years, or even just perused the supplement section at your local grocery store, you’ve likely noticed the name of Withania somnifera, commonly called ashwagandha or winter cherry. A powerful herb popularly used in Indian Ayurvedic medicine (among other medicinal traditions of southeast Asia and Africa), ashwagandha root has become something of a darling in the West, used in expensive skincare regimes and “biohacking” diets that pledge eternal life to the devoted. As a member of the class of herbs known as “adaptogens”, ashwagandha has been traditionally used to help with sleep, build adrenal reserves, and improve overall vitality. However, like any exotic remedy, there are very real concerns around the sustainability and ethical production of plants grown far away once an unprecedented demand for them has been created. 

Lucky for us, ashwagandha is a fun and relatively simple herb to grow in the home garden, and its very real health benefits provide an opportunity to easily upgrade your medicine chest. A member of the Solanaceae family, ashwagandha shares some characteristics with other family members like eggplants and peppers. It produces husk-enclosed fruits that look like tiny tomatillos, and appreciates plenty of heat and sunshine. However, ashwagandha is adapted to grow in sandy, dry conditions, and doesn’t need much in the way of water or fertility, just sweet, well-draining soil. Ashwagandha is prized for its long, tough roots, so well-worked soil is imperative to good root growth. The plants should be started indoors or purchased from a nursery (like Red Wagon) to give you a jump start on the season, and only transplanted outside or into a greenhouse once the soil has fully warmed up. I like to space my plants about a foot apart, which provides room for root growth but allows the plants to support each other once they reach their mature height of two to three feet tall.

Ashwagandha grows well alongside Tulsi or other sturdy mint family members like lemon balm, especially those that don’t mind a little shade cast by the ashwagandha leaves. I’ve planted calendula around my plants as well, but the calendula can become a bit leggy if they’re spaced too closely together. The same beetles that like to snack on tomatillo plants (called tomatillo beetles or three-lined potato beetles) will attempt to feast on your ashwagandha leaves. Check the leaves regularly for the tell-tale orange eggs, and if necessary put on some gloves and squash the mating adults and larvae when you see them. Even with a fair amount of leaf damage, the ashwagandha plants will soldier on, but I think it makes for better medicine when the plants are lovingly defended. While the flowers are fairly drab, the husked fruits make for a beautiful backdrop as they turn red in early fall.

Ashwagandha and Tulsi have similar cultural needs: they are warm-climate perennial plants that really thrive as annuals in our short northern summers. Plant ashwagandha in early June, and watch it take off through the whole summer, right up until frost. Harvest by loosening the soil and pulling the whole plant up, making sure not to break the roots in the process. Roots should be sprayed clean and chopped up immediately (a sharp pair of pruners will do the job). The first year I grew ashwagandha, I pulled up a plant and neglected to chop it up for a couple days. That was four years ago, and I still have that same root hanging as an ornament in my house- it grew so rock-hard that processing quickly became an impossible task. Once the roots have been chopped, you have a few options. You can use them whole (added to chai blends or tinctured in vodka), or you can further powder the root and add it to everything from drinks to baked goods. 

Honestly, the first time I smelled fresh ashwagandha root, I thought it smelled like a swimming pool. Since falling in love with its gentle, nourishing qualities, I now associate the smell with the plant’s own charisma. Once dried, the smell is reduced, and you’re left with a potent medicinal herb that carries the extra benefits of being locally grown and lovingly harvested.

Many of the constituents in ashwagandha are best extracted in a bit of fat, so I usually simmer it in a bit of milk or coconut oil when preparing it. Below is a simple recipe for hot chocolate. Try drinking before bedtime to ease into a restful sleep, or as a midday boost without added caffeine! And of course, always talk with your health care practitioner about any herbs or supplements you’re regularly utilizing.

Ashwagandha Hot Cocoa:

  • Ashwagandha root, chopped and dried

  • Cocoa powder

  • Dark chocolate chunks

  • Milk (cow or non-dairy, but make sure it has some fat in it)

  • Cinnamon

  • Sweetener of your choice (I like maple syrup)

    • Toss a handful of chocolate chunks into a saucepan, cover with water, and stir while simmering, until chocolate has thoroughly melted into the water. 

    • Add ashwagandha root (about a tablespoon per serving) and simmer for 5-10 minutes.

    • Add cocoa powder, milk, and cinnamon, and continue to cook on low heat for another 5-10 minutes.

    • Add sweetener to taste, strain out ashwagandha, and serve! The cooked roots can be reused a couple of times before composting. 

Resources:

Ashwagandha monograph: https://www.herbrally.com/monographs/ashwagandha 

Cech, Richo. Making Plant Medicine. Herbal Reads, 2000

Plant Profile: Lemon Balm, Melissa officinalis

By guest blogger, Sophie Cassel, herbalist and Red Wagon Plants team member

Organic Lemon Balm

Lemon Balm, Melissa officinalis

Lemon balm, cousin to some of our more famous mint family plants, has a historical reputation that far exceeds its diminutive nature and ease of growth in the garden. Herbalists and philosophers since ancient times have revered Melissa officinalis for its bright scent and flavor and ability to brighten and revive the spirit. The latin name Melissa refers to the plant’s association with honey bees, and the species officinalis tips us off that this plant has been used medicinally for so long that it was part of the official pharmacopeia in monasteries. We can take our cues from the bees and the ancients, and make Melissa a part of our medicinal herb gardens. 

Native to the Mediterranean and parts of Asia, lemon balm was brought to the Americas during colonial times and has naturalized somewhat, particularly on the west coast. Like most mints, it’s easiest to start lemon balm from cuttings or divisions, but it can also be started by seeds, which are light dependent. It isn’t fussy to grow and can tolerate a bit of shade, but it does prefer moist, well drained and fairly fertile soil without much competition, spaced about a foot apart. Unlike the more aggressive perennial mints, lemon balm tends to form clumps and spreads fairly slowly, making it a more friendly addition to any perennial mix or tea garden. There’s speculation that the high volatile oil content of lemon balm makes it a good companion plant, working to deter pests with its strong scent. 

It’s best harvested just before flowering- cut the top third of the plant on a hot afternoon for the highest concentration of aromatic volatile oils. It will continue to branch and grow over the course of the summer, but be sure to let it set flowers at some point to attract its namesake bees to dine on its exquisite nectar. 

Once harvested, the sky is the limit when it comes to lemon balm recipes. As a freshly infused tea, it can’t be beat. Simply pour boiling water over the fresh leaves and steep for 5-10 minutes, or place in a jar with cool water and let steep in the sunshine for a few hours, and you’ll be rewarded with a bright and delicate solar infusion that really captures the essence of the plant.  Lemon balm dries easily- spread out in a basket in a warm dry spot for a couple days. You can then use it for a delicious, relaxing tea throughout the winter. Or take a cue from the seventeenth-century Carmelite nuns and infuse lemon balm and other herbs in alcohol to make a delicious cordial; drunk before meals it aids digestion and brings levity to any dinner party. 

Medicinally, Melissa’s applications are broad. An easy way to think of the signature of lemon balm’s medicine is for ailments “like bees”. Busy, buzzing, unable to settle or slow down enough to rest or digest, that’s where lemon balm comes in. Equally beneficial for a disquieted mind as a rumbly tummy, try lemon balm tea to prepare for bedtime, or to quiet the nerves before a big presentation. It makes a great after-dinner drink, and is safe for both children and elders alike. Rosemary Gladstar uses lemon balm in a wonderful “Colic Remedy” tea that she notes is actually helpful for “anyone with digestive disturbances due to nervous stress, but is especially helpful for infants and those elders who have stomach problems”: 

Colic Remedy: 

  • 3 parts lemon balm leaf

  • 2 parts chamomile flower

  • 1 part dill seed and leaf [or substitute for fennel seed and frond for a sweeter option]

Steep herbs in freshly boiled water for 10-30 minutes, depending on desired strength. The tea will become slightly more bitter as it steeps, which increases its efficacy for digestive troubles but may be less tasty to sensitive palates. 

Plant some lemon balm in your garden this spring, and you will be rewarded with the accolades of bees and delicious medicine all year long. 

Resources:

Gladstar, Rosemary (2012). Medicinal Herbs: a beginner’s guide. North Adams, MA: Storey Publishing, 

Grieve, Maude (1931). A Modern Herbal. NY: Dover Publications.

Fennel, Foeniculum vulgare, Apiaceae family

by Sophie Cassel, guest blogger, herbalist, and Red Wagon team member

fennel.jpg

With these plant profiles, my hope is to inspire gardeners to consider growing and using some of the lesser known herbs that Red Wagon propagates, both for their beauty in the garden and their myriad uses in the kitchen and medicine cabinet. Fennel definitely fits the bill here. At Red Wagon, we grow two varieties of Foeniculum vulgare- bulb fennel, which is grown as a vegetable and also known as Florence fennel, and bronze leaf fennel, which is grown as an ornamental and culinary herb with potent medicinal uses. 

If people are unfamiliar with bulb fennel in the garden or on the table, they are usually even less aware of bronze leaf fennel, but both of these varieties deserve a spot in the garden. In terms of medicinal usage, we’ll focus on bronze leaf fennel, which is actually quite a bit easier to grow than its bulbous relative, offering interest and uses throughout the growing season.

But first, we should acknowledge the long and celebrated history of fennel across cultures and healing modalities. The emperor Charlemagne reportedly required the cultivation of fennel on all imperial farms, and ever since Holy Roman conquerors introduced their favorite herbs to Anglo-Saxon Europe, western herbalists have extolled the virtues of this plant. My first introduction to fennel seeds, as a digestif following a rich Indian meal, points to its trusted use in Indian Ayurvedic medicine as well. In Longfellow’s 1842 poem “The Goblet of Life”, he too references the plant’s historic values:

Above the lowly plants it towers,

The fennel, with its yellow flowers,

And in an earlier age than ours

Was gifted with the wondrous powers,

   Lost vision to restore. 

It gave new strength, and fearless mood;

And gladiators, fierce and rude,

Mingled it in their daily food;

And he who battled and subdued,

   A wreath of fennel wore. 


Even if you’re not planning on going into battle or restoring sight to the blind this summer, fennel still deserves a place of honor in your herb garden. These days, it is chiefly used in all manner of digestive complaints like cramping, bloating, and that weighty feeling that comes after eating something that may not sit well. Like many of its cousins in the Apiaceae or Umbelliferae family (i.e. dill, coriander) fennel is considered carminative, meaning it helps to relieve gas and bloating. I have also seen this work in a similar way to alleviate the cramping that comes with premenstrual symptoms. Traditionally, the seeds of the plant have been the most trusted part for medicinal use, the feathery fronds and flowers also make an excellent tea or addition to salads and fresh summer dishes. 

From a gardener’s perspective, bronze leaf fennel is much easier to grow than its finicky vegetal sibling, bulb fennel. While bulb fennel requires consistent adequate moisture, fertility, and mulch,  bronze leaf fennel can thrive in a wider variety of soils and tolerates dry conditions. Sow or transplant once the ground has warmed, and offer plenty of sunshine, although some afternoon shade doesn’t seem to slow this plant down much. It can grow up to 2 feet high before flowering, and looks wonderful as a backdrop supporting other sturdy flowers, such as calendula or marigolds. 

Once the fronds have begun shooting skyward, you can harvest the leaves continuously for culinary use and bouquets, but make sure to let some go to flower. Insects (including swallowtails) adore the flowers, and as the they mature you can delight in the flavor of the slowly ripening seeds. Be sure to harvest dried seed before frost, unless you’d prefer a garden full of bronze leaf fennel in subsequent years because they self-seed generously. But with its copious culinary and medicinal uses, that wouldn’t really be such a bad thing. 

Using fennel for medicine is as easy as popping a pinch of the seeds in your mouth following a rich meal. I like to toast them a little before using to bring out their aroma and offer a pleasant crunch, and you can also fry the seeds in a small amount of honey to candy them and increase palatability. They also brew into a lovely tisane, steeped for 10 minutes in hot water (bonus points for your belly if you add some chamomile flowers to the brew). Fennel is very safe, and has been used for colicky babies as well as to promote lactation following birth. Fresh (or freshly dried) fennel is often considered decently palatable even to folks who have an aversion to the sticky-sweet taste of anise, another Apiaceae cousin of the plant.

Let this be the year you let fennel into your garden, your kitchen, and your heart!


References:

Ken Adams and Dan Drost, Fennel in the Garden, March 2012. https://digitalcommons.usu.edu/cgi/viewcontent.cgi?referer=https://www.google.com/&httpsredir=1&article=1267&context=extension_curall

Longfellow, H.W. Ballads and Other Poems, 1842. Found at https://www.hwlongfellow.org/poems_poem.php?pid=75 

Rohde, Eleanour Sinclair. The Old English Herbals. Originally published 1922: Longmans, Green and Co.


Grieve, M. A Modern Herbal. Originally published 1931: Harcourt, Brace & Co.

Tulsi (aka Holy Basil)

This is the first installment in our medicinal herb series by Sophie Cassel, Red Wagon Plants employee and Burlington herbalist. Please check our events calendar for her medicinal herb workshops this year.

sophie+with+tulsi.jpg

Tulsi (aka Holy Basil), Ocimum tenuiflorum Ocimum sanctum, Lamiaceae

While you won’t find Tulsi- also known as Holy Basil and Tulasi- in any classic English herb gardens or older western herb books, it has risen to prominence over the years both for its medicinal benefits and relative ease of growth, even while our northern climate is far removed from its native habitat on the Indian subcontinent. There, pots of perennially-blooming Tulsi bless the doorways of houses, where the plant is considered sacred by many. What a gift, then, that those of us far away in the western hemisphere can experience the joy of growing and using this plant!

Tulsi basil is in the same genus as our culinary basils, and within the umbrella of Ocimum tenuiflorum there are multiple subtypes and varieties, including Rama, Vana, and Kapoor Tulsi. While all three can theoretically be grown in Vermont, I have found that Kapoor Tulsi is consistently the easiest and most rewarding to grow, and that is the variety we grow and sell at Red Wagon Plants. Since I began growing Kapoor Tulsi in my gardens in 2015, I have become completely, utterly hooked on this plant. From watching its little paw-print shaped leaves evolve as seedlings, to inhaling its heady perfume as the flowers open, to sipping the tea of its dried leaves in the winter, I keep Tulsi close at hand all year long.

From a medicinal perspective, Tulsi is compelling as one of the easier “adaptogenic” plants to grow- adaptogen referring to plants that have been used to regulate and support our nervous systems and have a wide range of positive actions on our body, mind and spirit. While the uses and impacts of adaptogens are too complex to dive into here (although I like Jim McDonald’s credit card analogy), it’s worth noting that Tulsi can be helpful to both calm an overactive system, as well as provide some energy to a burnt-out one. It’s packed with antioxidants and is strongly anti-inflammatory. Plus, it tastes amazing- I often hear folks liken the flavor to an herbaceous bubblegum, and its sweetness makes it palatable to basically everyone, picky kiddos included. The Indian medical system known as Ayurveda considers Holy Basil a “rasayana”, translated as “to lengthen the lifespan” in Sanskrit. Most of what we in the West know about its uses stems from what Ayurveda has taught us from a 3000 year history of use and reverence. 

Growing Holy Basil is quite similar to growing other types of culinary basils- it prefers fertile garden soil with decent moisture and full sun, although it’s not as moisture-dependent as the Italian basils. It’s important to wait for the ground to fully warm up before planting Tulsi, so start seeds indoors or purchase plants to give yourself a leg up. Once established, you can get up to three or four big harvests over the season- once the plant has started to set flowers, cut down to about a foot and watch it spring back, bushier than before. However, its important to leave plenty of flowers for the bees, who go absolutely bananas for this plant. I have spent delightful stretches of time lying belly-down on the warm summer ground, watching the insect cacophony surround my row of Tulsi plants. If you’re really lucky and observant, a blissed-out bee will leave you a little red pollen sac on one of the leaves- a tiny treat! Left to drop seed, Tulsi may actually volunteer back into your garden, but don’t expect to see seedlings until early July when it’s finally warm enough to resemble the plant’s natural growing conditions.

The real question with Tulsi is what to do with your bounty once it’s been harvested. The high water content makes it a little finicky to dry. I’ve had the best luck in a dehydrator on low heat, but it can also be hung in small bunches in a warm, well ventilated area until the leaves can be stripped from the stems, which take much longer to dry. 

The easiest way to enjoy Tulsi is to use the fresh leaves and flowers. Fresh Tulsi sun tea is a transcendent experience on a hot summer afternoon. Simply place a handful of bruised leaves in a mason jar, cover with cool water, and leave in a sunny spot for a few hours (with the lid on to keep in all those aromatic oils!) It also makes a stellar vinegar infusion:

Tulsi Vinegar

  • 4-5 big handfuls of Tulsi leaves and flowers, chopped

  • Apple cider vinegar

  • Honey (optional)

Pack leaves and flowers into a jar, then cover with apple cider vinegar and steep for 2-3 weeks. Strain, add honey to taste, and bottle. Use this sweet, floral vinegar in salads, or mix with seltzer water for a summer-infused sparkling beverage. This will keep for at least 3-4 months, indefinitely in the refrigerator. 


Let Tulsi into your garden, and you’ll reap its blessings and benefits all year long!

tulsi.JPG


Resources:


De la Foret, Rosalee. Health Benefits of Tulsi. https://www.herbalremediesadvice.org/health-benefits-of-tulsi.html 

8 Plants to Grow for Your Home Medicine Chest

Thyme. Photo courtesy of Lisa Cassel Arms

Thyme. Photo courtesy of Lisa Cassel Arms

8 Plants for Your Medicine Chest

This year, make the commitment to add plant-based, home grown remedies to your life! Whether in the bathroom cabinet, the first aid kit, or the spice rack, medicinal herbs deserve a place in your home. Below are eight easy-to-grow herbs that you can grow and process to provide your family with plenty of herbal TLC. If you’re looking for more guidance on growing and using herbs this year, we’ll be discussing medicinal gardening in full on March 28th from 10-12 in the Red Wagon classroom!

  1. Yarrow (Achillea millefolium): This common roadside “weed” is actually a treasured medicinal wunderkind. The genus refers to its alleged use by the warrior Achilles, who brought the plant into battle to staunch the sword wounds of his soldiers. Swords aside, yarrow is the premier first aid herb for all sorts of cuts and scrapes. It is both styptic (staunching bleeding) and antimicrobial, so it is quite safe to put directly on a wound. When fresh, the leaves and flowers can be mashed or chewed into a juicy poultice and put directly on the skin. For year-round use, simply dry the aerial parts of the plant (as flowers begin to open), and powder the leaves and flowers. This can be stored in a first aid kit for easy access, and will keep for a couple years. Yarrow is a popular ornamental, so while the wild white variety is traditionally used medicinally, the brightly colored ornamental varieties can also be used in a pinch.

  2. Calendula (Calendula officinalis): Sunny, cheery “pot marigold” is one of the first flowers to burst forth in June, and one of the last to die back as frost looms in October. Harvesting is as simple as plucking the flowers from the stem as they open and drying them for a couple days in a warm, sunny location, then storing in a dark place. Once the plants start flowering, harvest can happen as frequently as every other day, which helps keep the plant in bloom consistently. Calendula is healing to all damaged tissue, internal and external, and can help foster immunity and a bright spirit in the depths of winter. Deb Soule of Avena Botanicals in Maine encourages everyone to “Grow a Row” of calendula as a way of supporting folks healing from abuse and trauma. 

  3. Echinacea (Echinacea purpurea, angustifolia): Many folks already have Echinacea growing as an easy native ornamental in their perennial gardens, but haven’t harvested it before. A favorite of nectar-seeking butterflies, both the flowers and roots of the plant are harvested for medicine. Pop the matured flower heads off the stalk through the late summer (leaving plenty for the pollinators), and either dry for tea or chop up and cover with vodka to make your own immune-boosting tincture. Harvest roots in late fall and add to the vodka, and in a month you’ll have enough Echinacea tincture to keep your loved ones healthy through the winter! 

  4. Tulsi (Ocimum sanctum, tenuiflorum): A relative of basil, tulsi brings joy to the garden with its heavenly scent and flower stalks that attract all manner of pollinating insects. Tulsi leaves and flowers can be harvested fresh for tea, or hung in a dry, warm place to dry, then stripped off their stems and stored for a burst of sweetness throughout the year. Though native to farm warmer climates, this plant thrives through our northern summers and is a favorite tea plant for children and adults alike.

  5. Thyme (Thymus vulgaris): We offer a few varieties of thyme at Red Wagon, and this culinary staple is equally useful as infection-fighting medicine. My favorite to dry for tea is the French variety, which is a bit more floral and sweet than the German variety. Harvest by giving the plant a “haircut” right as it begins to set blossoms, and dry in a basket or paper bag, then strip from the stem. Strong thyme tea with a bit of honey provides welcome warmth during cold and flu season, and it can be added to biscuits and other baked goods for a dash of herbaceous brightness.

  6. Rose (Rosa spp.): Growing roses can be as simple or as complicated as you like, but harvesting their bounty is easy regardless of the species you cultivate. As the flowers bloom, pluck the petals and allow to dry in a basket out of the sun. You can certainly harvest the buds, but that robs the pollinators of the nectar, and reduces the showiness of your plants. Often once the bloom has been pollinated, it will begin to drop its fragrant petals on its own, and you can come along with your basket to catch them! Rose petals brighten and sweeten any tea blend, add luxury to chocolate treats, and are a classic skin-soothing secret. To learn more about using roses in skincare, join us June 30th for a Make-and-Take skin spray class at RWP!

  7. Mint (Mentha spp): This year at Red Wagon we’re growing fifteen different kinds of mint varieties, all with distinct aromatic profiles! I’m personally a big fan of the Kentucky Colonel and Chocolate mints, but it’s tremendously fun to plant a variety (in pots if you’re concerned about spreading) and see which types work best in your kitchen. Mint dries well, and I often will combine a few varieties into a tea blend for greater depth of flavor. In addition to settling digestion and brightening the spirit, mint can be used to literally cool down in the heat of summer- a strong mint tea can be chilled, and applied with a washcloth to the face and neck after sun exposure (as well as drunk for maximum cooling!)

  8. Lavender (Lavandula spp.): What could be more classic in the garden than lavender? With its beautiful purple blossoms and sturdy upright habit, it’s the definition of classic English gardening. We have quite a few lavender varieties in the greenhouses. For harvesting, the Phenomenal (L. intermedia) type seems to be a frontrunner in terms of quantity and fragrance of blooms, but Hidcote and Provence also work well. Cut flower stalks in early bloom and make a fresh lavender wand, or dry flowers and leaves to crush for homemade sachets. I also love infusing lavender into bath salts, and drying to use in the winter for uplifting facial steams


I hope this list piques your interest in planning your herb garden this year! There’s more inspiration to be found on the Red Wagon Herbs We Grow list, so be sure to peruse before the planting season begins!

Herb Thoughts

Herb garden planning is not a lot of work, but here are some thoughts I have put together on the topic. Herbs are easy to grow for the most part, but they are a big category of plants (we grow 100 varieties of herbs) and it helps to break them down and organize them into categories. This will help any gardener plant the right plant in the right place and give it the preferred amount of water, sunlight, food, and water.

Why grow herbs? For flavor, fragrance, and beauty - it is the easiest way to improve the flavor of what you cook. It is also one of the easiest ways to have a container garden on your porch or deck.  Herb gardening is intimate - you get close to the plants, smell them, taste them, see them respond to regular clippings. They are a perfect way to better understand plant physiology and the best short cut to great food made with little effort.

Propagation: Plants vs. Seeds

All herbs can be planted from plants, and some can be planted directly into the ground as seeds. The herbs that you can seed directly in the ground and expect great results are: cilantro, dill,  and chamomile. Everything else will do much better if you start the seeds in containers in a sheltered environment. You can start your own herb transplants easily if you have grow lights and a heat mat. Many herbs take a long time to germinate and many herbs are propagated only from cuttings. Making your own rooted cuttings is possible too, but that takes a little more of a sophisticated set up with misters, rooting hormone of some sort, and humidity domes. For those herbs, it is generally easier to purchase the plants.

Herbs from Seed:

  • Parsley
  • Chives
  • Cilantro
  • Dill
  • Chamomile
  • Savory (winter and summer)
  • Marjoram
  • Basil (all kinds)
  • Common Mint
  • Sage
  • Catnip
  • Chervil
  • Oregano (basic varieties)
  • Thyme (basic varieties)
  • Shiso
  • Sorrel
  • Lovage
  • Lemon Balm
  • Fennel
  • Salad Burnet

Herbs from Cuttings:

  • Rosemary
  • Lavender
  • Mints that are true to type (spearmint, peppermint, pineapple mint, etc)
  • Tarragon
  • Specialty Thymes (lemon, variegated, silver, etc)
  • Specialty Oregano (golden, ‘Hot and Spicy’, variegated, etc)
  • Specialty Sage (purple, tricolor, golden, etc)

Containers vs. in the Ground

Some plants love to be planted in the ground and others would prefer to be in pots.  Generally speaking, the herbs that like it dry and warm will prefer to be in a clay pot that breathes like Italian terra cotta. Plants that like it wet and cool might prefer to be in the ground, but they can also be grown in pots if the right conditions are given (more watering, a glazed or plastic pot, heavier potting soil, a little shade).

Herbs that like to grow easily in the ground in Vermont:

Cilantro, Dill, Parsley, Rosemary, Savory, and Chervil

Herbs that prefer to be in containers in Vermont: EVERYTHING ELSE!

This does not mean that you cannot grow herbs in the ground, it just means that in containers, it can be a little easier.

Some herbs do really well as tiny shoots for micro-greens: chervil, dill, cilantro, basil, fennel are our favorites.  And they are easy to grow indoors year round – just pat down some moist potting soil in a shallow container (only need 2” or so of soil) with holes in the bottom, press in the seeds, cover very lightly with a thin layer of soil, and keep moist. When the first set of true leaves begin to emerge, they are ready to eat. You can also grow pea shoots and sunflower sprouts this way. A south facing, sunny window is sufficient.

You can bring in potted herbs in the fall and keep them in a sunny window for use during the winter. The herbs that do best with this treatment: sage, parsley, rosemary, thyme, and savory. Basil can be brought in as well, but it won’t be terribly happy unless you have grow lights for it.  If you had some of these herbs planted in the ground, you can dig them up and slowly acclimate them to being in a pot and being indoors.

Herbs can be dried or frozen or infused in vinegar or simple syrup for year round use. Pesto or herb pastes made with oil or water can be frozen in small containers.  Drying is very simple or very elaborate – you choose! A dehydrator can be used, and the leaves can be stripped off of the stems once dried and stored in jars in a dark place. Or you can go the simple route and just harvest whole branches of the woody herbs such as thyme, oregano, rosemary, sage, and winter savory. Place the branches in woven baskets and keep in a dark, well-ventilated space. They will dry just fine on their own, and you can keep them covered with paper bags or kitchen linens and use as needed.

Related Upcoming Events

Cooking with Herbs with Molly Stevens and Julie Rubaud – a class and dinner.

South End Kitchen, Burlington, Vermont

March 19th.,  6pm

Red Wagon Plants pre-season Open House

April 4th 10 am to 3 pm. Tour the greenhouses and see behind the scenes.

Herbal Cocktail Party with Caledonia Spirits

April 17th, Red Wagon Plants 6 pm to 9 pm

Help us kick off our season with a bang!

Red Wagon Herbs

What's a greenhouse grower to do when the spring season winds down and there is still plenty of great weather for summer growing and the greenhouses are empty? Well, start a new business, that is what. We are so happy to introduce to you our new sister business, Red Wagon Herbs. We are growing Certified Organic herbs for year round harvest and selling to local stores, restaurants, and food hubs. Our focus is on the popular culinary herbs for now, but we are likely to branch out into the more unusual once we have had a chance to explore our markets and have gotten familiar with our new growing practices. This is a perfectly natural extension of our plant business since we already partner with fantastic stores and we love to grow herbs more than anything else. As a matter of fact, the plant business, in its earliest days, was just a potted herb business. In a way, we are going to back to those days and loving the continuity, evolution, and expansion.

Our herbs are grown using three different methods: in the ground for summer and fall harvest, in a new, unheated greenhouse (paid for in part by a grant from NRCS EQIP) for fall, winter and spring harvest, and in our existing, heated houses for those coldest months. We are excited to be the only Vermont farm offering organic herbs year round and hope you enjoy cooking with them as much as we enjoy growing them.

Please be on the look out for an Open House this fall so we can show you what we have been up to and give you a chance to smell, touch, taste, and see it all.

Our current line up consists of :

  • Basil (March through November only)
  • Chives
  • Cilantro 
  • Dill
  • Curly and Flat Parsley
  • Sage
  • Thyme
  • Oregano
  • Tarragon
  • Rosemary
  • Savory
  • Marjoram
  • Spearmint
  • Bouquet Garni ( a mixture of aromatic herbs for roasting, stocks, and more)