herbs

Plant of the Week: Buckets and Baskets and Crates, Oh My!

5FBEAEC8-F174-4C45-8DC8-52F1B89D0C80.jpeg

This week we’re featuring one of our best deals yet: Buy one large planter, get one free! If you need some late season color for the porch or patio, we’ve got you covered with vining hanging baskets, gorgeous sap bucket planters, and locally made apple crates from our neighbors at Clifford Lumber that are overflowing with blooms.

Our friend and retail staff member Hope Johnson is to thank for designing many of our annual combinations. Hope brings a keen eye and a mastery of color and form to everything she does, whether it’s arranging planters or designing her stunning bee quilts. We’re lucky to have an artist like Hope on our team.

Below is a list of the many containers we have available. Prices range between $15.99 and $60, so finding symmetry in your patio garden is particularly economical this week!

  • Thunbergia: Also known as Black-eyed Susan Vine, with pops of butter yellow and orange flowers that peek out from draping foliage. Place in a hot, sunny spot where it can trellis along a fence or drape down from the hanging basket.

  • Mandevilla: A tropical plant with bold pink blooms that we eagerly anticipate every summer. These plants love the heat, but can also be brought indoors to overwinter.

  • Passionflower: We have two varieties of this stunning vine- “Aphrodite’s Nightie'‘ + “Blue Bahama”. Both will produce lush climbing foliage and totally unique blooms through the summer and fall. And did you know it has a calming effect when used as a tea herb?

  • Lophospermum: This year we are finally carrying this sweet flowering vine in “Wine Red” and it could not be easier to grow. Just place the basket in part to full sun and enjoy the burgundy flowers all season long.

  • Nasturtium: A kid favorite! Edible flowers and leaves cascade out of these sweet baskets. Infuse into vinegar for a spicy salad dressing, or pickle the seed pods for a highly local take on capers.

  • Herb Trios: 12” oval pots that feature mixed basil varieties and classic culinary herbs. Bring to your next potluck and place in the center of the table for on-demand garnishes.

  • Tomato Buckets: Trellised in 3 gallon pots, these tomatoes are great for patio snacking or adding some additional cherry tomato varieties to your collection. For folks who are summering in Vermont, they also offer a late planting opportunity.

  • Shade Baskets: If you’re working with part to full shade, fear not. Our fiber baskets are full of sturdy foliage and flowers that look good through the season. Our friends at Stone Soup fill their awning with them every year for long-lasting color and texture.

  • Sap Buckets and Apple Crates: These make wonderful gifts, as they come ready to display and provide cut flower options close by when placed near an entrance or by the kitchen door. This week, you can find the perfect one for a friend- and get one free to keep for yourself.

Passionflower “Blue Bahama”

Passionflower “Blue Bahama”

In the Garden

Have you been cutting back your annual flowers? While it’s important to leave some blossoms for the pollinators to enjoy, cutting annual flowers prolongs their bloom time and provides you with fresh backyard bouquets every day. Additionally, flowers that have been pollinated tend not to last nearly as long in a vase as those that are cut before the insects find them. Now is a good time to scan your cutting garden and prune back any spent flower heads or those that have gone to seed- think of it as a haircut for your garden.

With all the rain we’ve been getting, it’s a good idea to add fertility to your flowers and vegetables now, especially if you have loamy or sandy soil. We like to use Vermont Compost Company’s Compost Plus for gentle, long-lasting feedings that will keep the produce and flowers in peak production.

As always, our retail greenhouses are open from 8-6 every day, and we’re happy to answer questions and help you find your new favorite plants. You can join us in person on August 5th for our free First Thursday event; this month Chad will be talking about pests and diseases of the home garden.

Happy gardening,

Sophie

P.S. If your kitchen ambitions are larger than what your garden can provide, we have bulk fresh herbs available to purchase: Use the secret code BASIL for $5 off your order of Sweet Genovese Basil.

Plants of the Week: It's all about the HERBS!

Welcome to the basil forest!

Welcome to the basil forest!

It’s official- harvesting plant medicine has begun in earnest and, depending on who’s in your garden, won’t stop until first frost. This time of year it’s all about the Aster and Mint families.

Blossoms like calendula, chamomile, echinacea and yarrow all benefit from regular deadheading, and create small consistent harvests that lend themselves well to infusions in oil or apple cider vinegar to create soothing topical applications for all manner of skin ailments. Infuse a pint of oil (local sunflower, olive or jojoba are lovely) with freshly-wilted chamomile, calendula and yarrow, then blend with local beeswax for tins of salve. You’ll be the hero of every chapped lip and dry hand you know!

Mint family plants like lemon balm, tulsi, basil, peppermint and spearmint should be harvested when the bottommost flowers on their spikes have begun blooming, or slightly before. Cutting at this time encourages bushy regrowth, and gives you the highest quantity of aromatic leaves and flowers without a lot of stem or seed. Be sure to make yourself a half gallon of fresh mint tea to have on hand in the fridge- plants with high volatile oil content (read: nice and smelly) will last the longest in the fridge, as the volatile oils do double duty inhibiting fermentation. This also clues us in to their amazing ability as general support for our immune system. Harvest on a hot, sunny day and dry quickly in a breezy, warm spot to get the highest volatile oil content from your plants.

Tulsi drying on racks in our greenhouse

Tulsi drying on racks in our greenhouse

We are doing a big sale this week- buy one herb pot, get one free! Culinary staples, perennials, and tea herbs are all available and will continue to produce well into early fall. Come by the greenhouses between 8-6 every day to stock up on herbaceous joy this week!

This is a great time to bulk up your herb garden with a new-to-you plant or more of your favorites. Include a couple of lemon verbena and rosemary plants to make Sophie’s favorite “lazy tea”: Just add a few whole leaves of lemon verbena and a sprig of rosemary to the bottom of your cup, then cover with hot water and steep five minutes. It’s the perfect afternoon pick-me-up, and is even better when steeped overnight and served on ice.

No more room for herbs in the garden? We’ve got you covered! We are now offering bulk fresh herbs for pickup at our greenhouse. Dry sage and thyme for holiday gifts, brew tulsi and anise hyssop tea for your whole cookout, make a cool mint bath for your sunburn… the possibilities are endless!

Building mesh screens to sift dried herbs

Building mesh screens to sift dried herbs

We have some upcoming classes for the herbal enthusiast (registration required):

July 20th: Know and Grow your Chicory. Julie and I are teaming up to talk all things chicory- from its use as an ancient medicinal herb, to coffee substitute, to revered Italian vegetable and everything in between. Taste tests included!

August 5th: First Thursdays in the Garden: Chad will be talking integrated pest management this month- how we do it at RWP and how you can at home. Julie will offer a behind-the-scenes tour of our greenhouses. I’ll also be hosting our September 2nd edition to talk about fall herbs!

August 21st: Harvesting and Processing Medicinal Herbs. We’ll dive deep into the different ways to preserve and use the herbal bounty in this hands-on three-hour class, so bring your questions and jars!

Let us know what you’re making from the season’s bounty, and of course come by any day 8-6 with questions, concerns, and success stories. We’re happy to help and love hearing about your garden journeys.

Herbes Salées - a Traditional Quebequois Preservation Method

Recipe for Herbes Salées (adapted from Spruce Eats)

Here is a traditional Quebequois way to preserve large amounts of herbs to use all winter.

Suggested uses: A teaspoon in hot water makes a soothing and instant herbal broth. Stir into soups and stews, mix into salad dressings and tomato sauce, mix with cream cheese, yogurt or cottage cheese for dips, spreads and snacks….the uses are endless and a jar of these preserved herbs will be a welcome reminder of summer’s freshness during the depths of winter.

  • 1 cup chives (fresh, chopped)

  • 1 cup savory (fresh, chopped)

  • 1 cup parsley (fresh, chopped)

  • 1 cup chervil (fresh, chopped)

  • 1 cup carrots (grated)

  • 1 cup celery leaves or lovage or cutting celery (chopped)

  • 1 cup green onions (chopped)

  • 1/4 to 1/2 cup coarse salt

    In a large bowl, combine chopped chives, savory, parsley, chervil, carrots, celery leaves, and green onions.. Layer 1 inch of herb mixture in the bottom of a crock or glass bowl and sprinkle with some of the salt. Repeat layers until all of the herb mixture and salt is used.

    Cover and refrigerate for 2 weeks. Drain off accumulated liquid and pack herb mixture into sterilized jars. Refrigerate until ready to use. Can keep for up to a year in the refrigerator.

Herbes Salées photo by Kate Bentley

Herbes Salées photo by Kate Bentley

Medicinal Herb Bundles for 2021

2021 is going to be a big year for medicinal herb growing! With ever more people finding joy and solace in tending to plants, many folks are also realizing that home gardening can be more than just tomatoes and pansies. At Red Wagon we’re branching out as well, and growing even more herbs with traditional medicinal uses. Maybe you’re feeling ready to dive in to the world of healing herbs but a little overwhelmed at all the choices available (don’t even get me started on how *all* plants are medicinal!) Our specially tailored herb bundles are a great way to fill your garden with plants that you know you’ll use and enjoy. Additionally, we’ll offer support through educational videos and recommendations all season.

Our pre-made bundles are only available through our online store; you can also find the individual plants in our retail greenhouses when you come to shop in-person.

To help you get to know the herbs, we’ve made introductory videos for all four bundles; check them out on our Youtube channel. In the video descriptions you’ll also find some book recommendations, many of whose authors have their own super-informative youtube channels. Let these resources be a jumping-off point for your own personal experiences and kitchen experiments with the herbs!

Garden Tea Time Bundle: This kit is full of only the tastiest herbs for making fresh and dried teas. If you’re working with herbs and children, this bundle offers kids a safe and yummy way to pick their own medicine.

Skin Care Herb Bundle: This kit makes a great gift for that glowing garden goddess in your life! Infuse oils for salves and make at-home hydrosols (floral waters) with the vibrant herbs in this bundle.

Sweet Dreams Herb Bundle: Whether you need help counting sheep or just a little support getting through the stresses of the day, the herbs in this kit have got your back.

Basic Home Apothecary Bundle: If you’re ready to form long-term relationships with some perennial herbs, this bundle is full of highly regarded medicinal plants that can be harvested from for years to come. These are great herbs to use when learning how to make tinctures (shelf-stable infusions using alcohol, vinegar or glycerine).

s655787569362225896_p3471_i4_w3241.jpeg

You might be wondering how to start working with herbs early this season, in addition to planning and planting the garden. One thing I do in the spring is go through the dried herbs I still have from seasons past. Now is the time to blend up those random dried herbs to make room for this year’s bounty. I also find it much easier to drink a daily herbal infusion when I have it already mixed up in a pretty jar on the counter. Right now, I’m drinking a blend of garden staples like lemon balm, wood betony and peppermint mixed with some early spring wild plants that will be ready to harvest soon: self-heal, nettles, and red clover. These herbs are mineral rich and help support the healthy liver and lymph function to ease the transition from winter into spring.

If you still have a bunch of dried culinary herbs, try mixing them up to use on roast chicken, spring soups (Nettle and potato soup anyone?), or sprinkled on toast with butter and the first radishes of the year. And remember, culinary herbs are good medicine, too!

2021 can be the year you work more deeply with herbs as a part of your everyday life. We look forward to offering more resources, and hearing about your experiences in the garden this growing season!

New Medicinal Herbs for 2021

marshmallow.jpeg

By Sophie Cassel

Note: The plants discussed here have long histories of use, and the information included does not constitute medical advice. Be sure to check in with your medical provider before using any new herbs long-term. 

This year I have the honor of introducing you to some of our newest additions to the Red Wagon Plants medicinal herb family. In addition to the many medicinal herb starts we grow every year, we have added some plants that are tried and true herbal allies, if not as common in the modern Vermont garden. 

Medicinal herbs tend to be very closely related if not identical to their “wild” counterparts, with very little breeding done by humans for horticultural production. In this way, the most adaptable and hardy plants tend to thrive, and those very compounds that aid the plant’s survival also serve to act medicinally in the human body. Horticultural plant breeding is often targeted towards things like bloom time and flower color, so medicinal constituents may decrease as the plant adjusts in favor of these showy adaptations. For those of us who appreciate a more natural looking perennial garden, the wild beauty of the unmodified plants is part of their charm, and an assurance that we are growing high-quality medicine as well. 

Another trick to medicinal plant growing is germination. Many of these more wild plants have adaptations to ensure seed viability which actually make them much more difficult to reliably germinate at home. Replicating the plant’s natural experience, such as letting the seeds go through a period of cold stratification (for northern climate plants) or nicking the seed coats to mimic the passage through an animal’s intestine, will help increase germination. They’ll never behave quite like a tomato or spinach seed, because these medicinal plants have not adapted to rely on human propagation. This means that buying established plant starts is a great way to ensure success this year, and you’ll be able to save seed to experiment with expanding your patch in years to come. 

You’ll notice that a couple of these plants have the species name “officinalis”, as do other herbs that we grow; that’s a clue to the fact that these plants were historically included in official pharmacopeias and monastic apothecaries well before Linnaeus’s time in the early 18th century. 

Without further ado, here are some of the newest additions to the Red Wagon medicinal herb family:

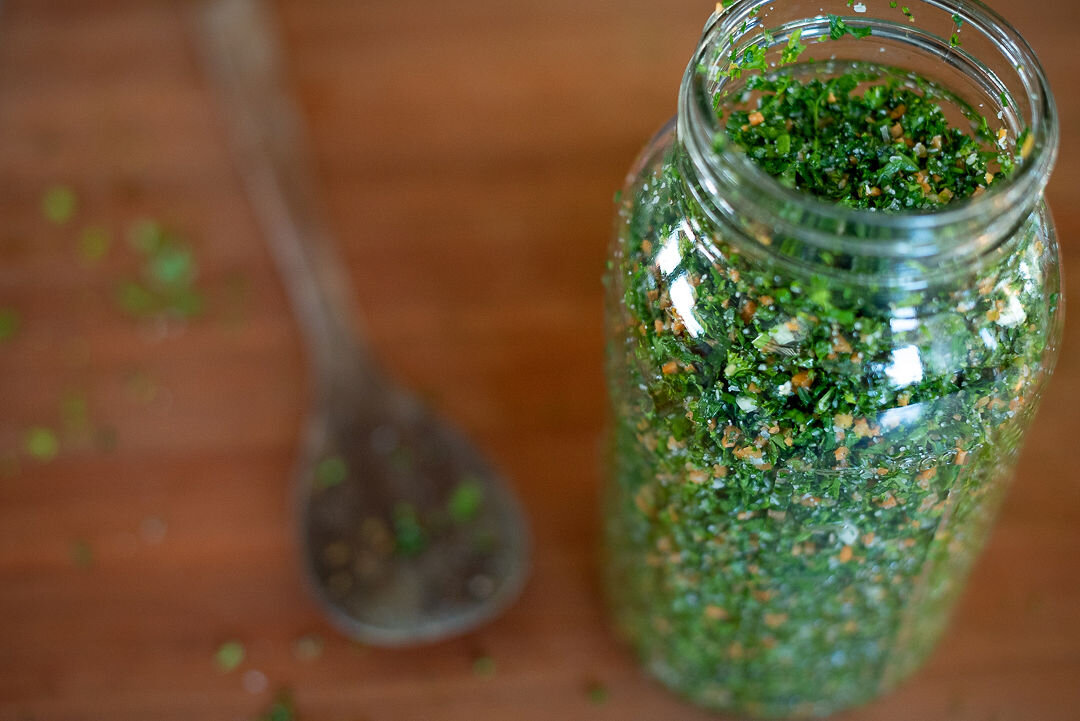
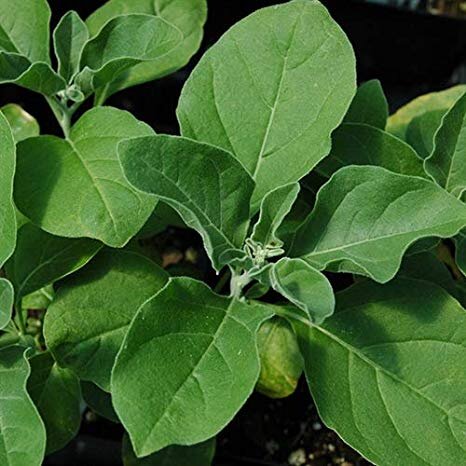
Marshmallow (Althea officinalis): A relative of hollyhock and hibiscus, this pale-pink flowering beauty lives up to its name, thriving in wet or dense soils. It will also do just fine in garden soils with enough moisture. Growing 3-5’ tall, plant marshmallow towards the back of your perennial beds, but still within easy enough reach to harvest the flowers and soft, velvety leaves for tea. All parts of this plant, including the 2+ year old roots, are valuable for their soothing mucilaginous qualities, which smooth out digestion and soften skin. A great herb for the kid’s garden!

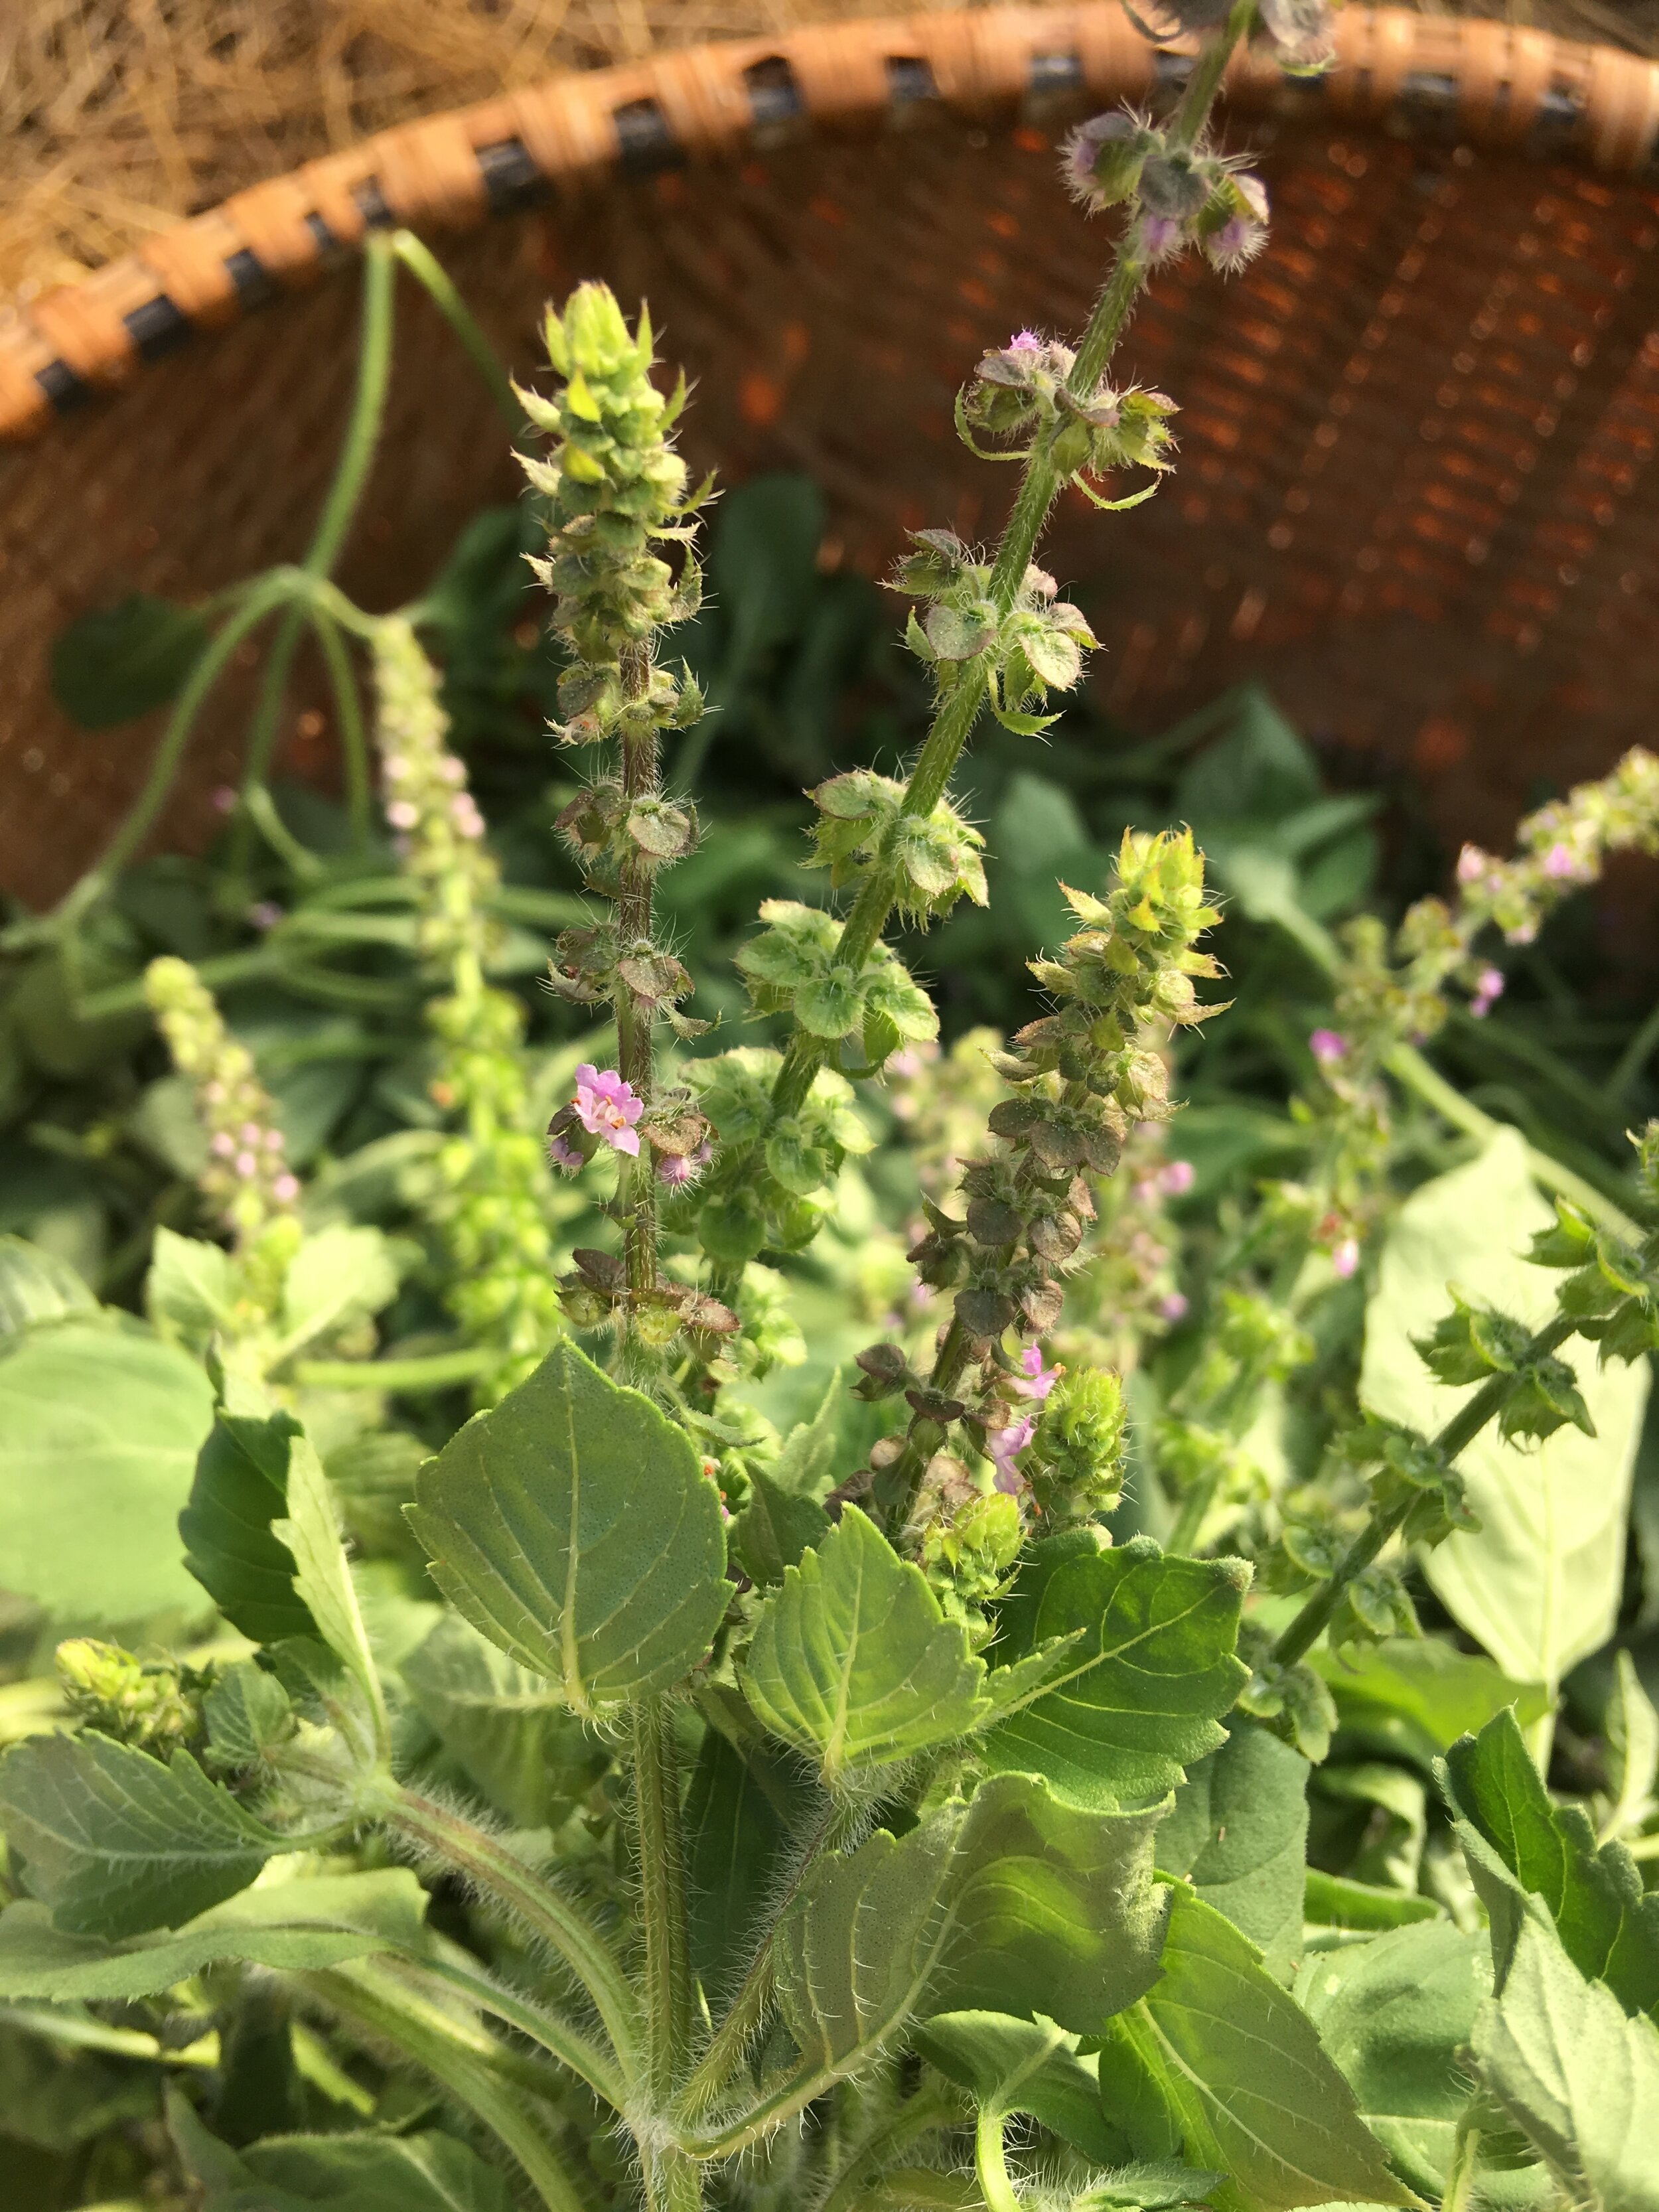
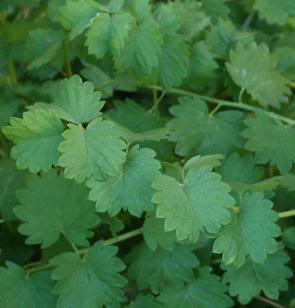
Wood Betony (Stachys officinalis): This plant used to be a staple in old European herb gardens, and has been venerated for centuries as a panacea to “preserve the liver” and ease emotional malaise. Well-behaved clumps of deep green leaves form attractive mounds for the front of the garden, with stately 2’ spikes of purple flowers that will continue to sprout as you harvest through the season. Clip back stems, leaves and flowers and dry for a subtle, earthy tea that can clarify the mind and support healthy digestive function.

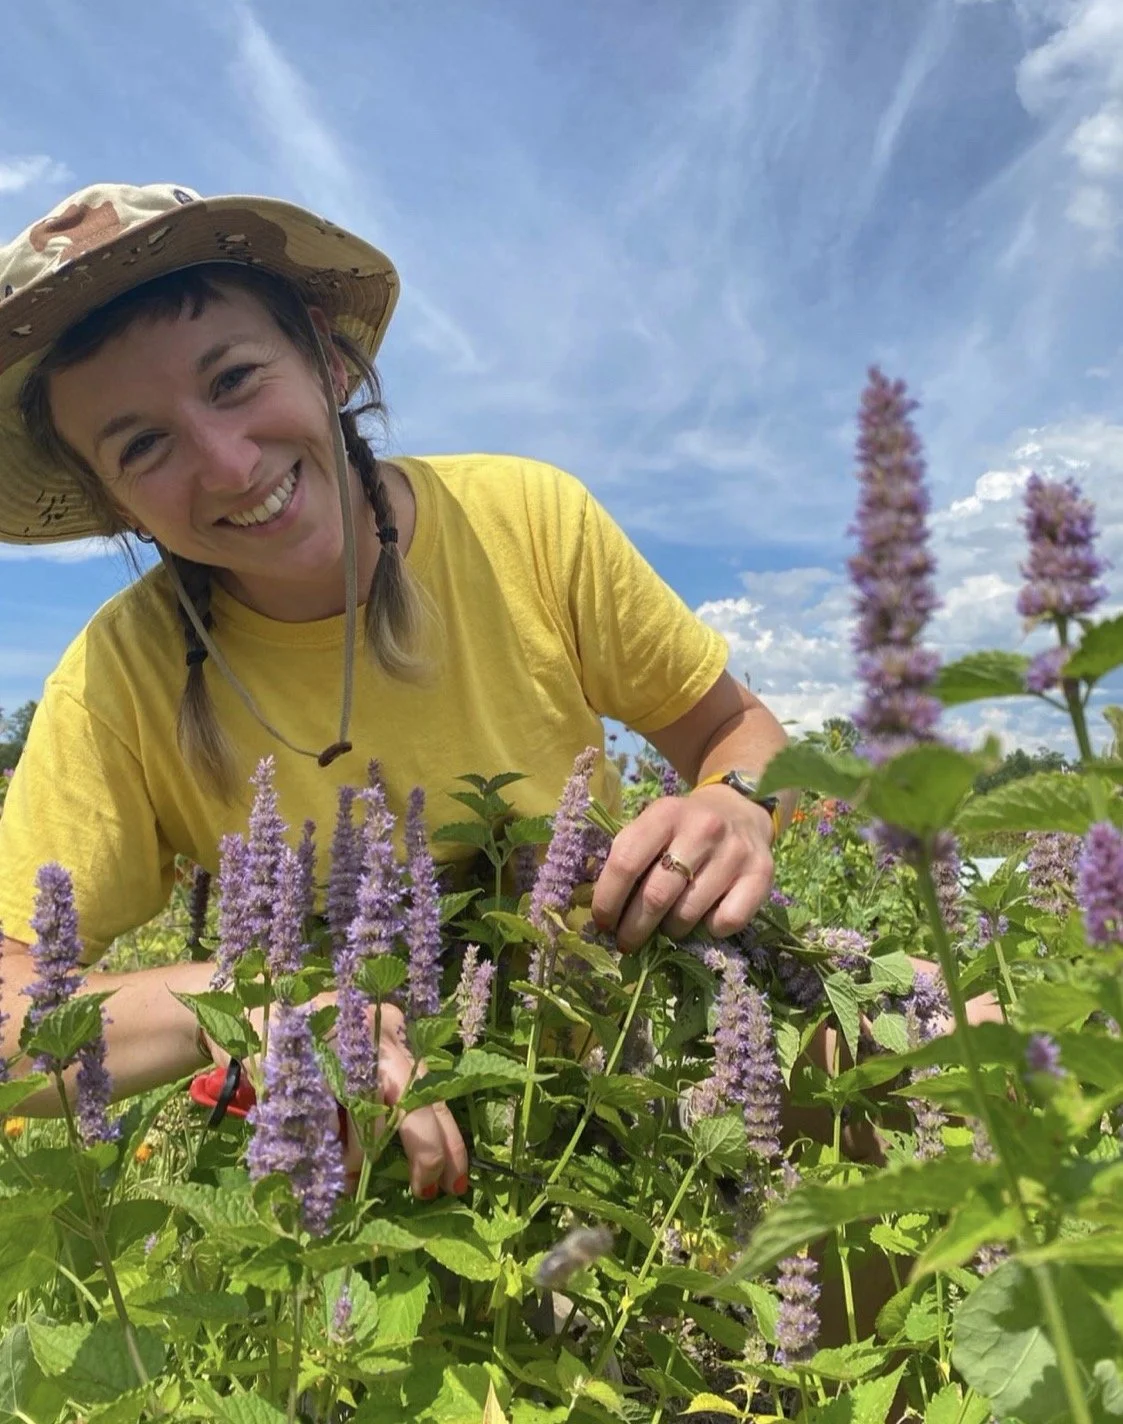
Skullcap (Scutellaria lateriflora): As our retail manager and fellow herb aficionado Lily said, “After 2020, everyone could use some skullcap!” A native wetland herb in the Mint family, skullcap will happily sort itself around plants like marshmallow and valerian, growing 1-2’ tall with petite periwinkle-colored flowers appearing along the stems. One of our most valued herbs for relaxing muscle tension and general anxiousness, this plant is used both to support sleep and simply find ease through the day. Cut back a few times over the season and dry for tea or infuse in alcohol to make a tincture. Skullcap doesn’t have much of a flavor, so it plays well with other aromatic family members like lemon balm, peppermint, and tulsi. 

Elecampane (Inula helenium): Do you ever wish your sunflowers had a little more sass and came back every year? Elecampane is your answer! Growing up to 6’ tall, elecampane sports finely-petaled yellow flowers born on thick bracts, with large clasping leaves that are a showstopper in the garden. Named after Helen of Troy, the root of this plant has been long revered as a pungent digestive tonic with a camphorous aroma that lends itself well to infused honeys and cordials. It’s valuable in supporting lung health and getting out stuck “gunk” wherever it may be lodged. 

California Poppy (Eschscholzia californica): We’re bringing back the California state flower to our collection this year. While related to the other garden poppies, Eschscholzia flowers later and requires far less in terms of soil quality to thrive. The only annual on this list, plant California poppy alongside other self-seeding annuals like chamomile and calendula, or tuck it around the front of a sunny perennial border that you don’t have time to mulch or fertilize. The whole plant is used medicinally, including the striking red root and attractive long seed pods (which also make excellent everlasting bouquet additions). Tincture the plant in vinegar or alcohol to make a tonic for sleep that is impeded by either pain or discomfort of body and mind alike.

Herb Wreath How To

Here is a little project that is easy to do and uses up herbs from your garden (or purchase one of our kits). Lily and Julie made some herb wreaths this week to give you a sense of how to do it. We instantly felt better after doing a creative project like this, and my wreath is in the kitchen smelling and looking great. Check out this video for a tutorial on how to do it. And if you would like to purchase one of our kits, you can find them here for purchase (we will contact you to arrange pick up at our Hinesburg location).

IMG_2193.jpeg

Thank you, How to Find our Plants and Herbs, plus a Recipe

Thank you from all of us for an incredible, memorable, and unique season!

Thank you from all of us for an incredible, memorable, and unique season!

As our regular retail hours for 2020 end today at 5pm, our team would like to thank you for a wonderfully unique season. We are closing a little earlier than usual, but will keep up a once a week pick up with online sales and will continue twice a week deliveries to our wholesale partner stores. Read below to find out more!

During the month of August, we will be doing curbside pick up once a week, on Fridays between noon and 5. If you would like to order plants, please do so here, and we will have it ready the following Friday as long as orders are placed before midnight on Wednesday.

Our online store will carry an assortment of veggies and herbs for the fall kitchen garden, perennials, and houseplants. For the first time, we will also be offering directly to you the herbs and herbal products coming from our herb farm: freshly harvested herbs in bulk quantities for your drying and processing needs, herb salts, herbal vinegars, and pesto. Please check the website every Saturday for the latest updates, and place your orders by the following Wednesday at midnight for Friday pick ups between noon and 5.

If you need something sooner than the following Friday, just let us know and we can make another arrangement.

Confused? Have questions? Drop us a line at info@redwagonplants.com.

Thanks for a fantastic season in weird times. We are just so grateful for all of the orders and purchases you made this year. You kept our crew going, and you planted gardens like never before. We loved hearing from you and seeing you in person once we opened for shopping.

You can continue to find our plants at our wholesale partner stores:

  • Shelburne Supermarket

  • Gardeners Supply, Intervale and Williston locations

  • Healthy Living

  • CIty Market, South End and Downtown locations

  • Bibens Ace Hardware, North Ave location

Recipe for Herbes Salées (adapted from Spruce Eats)

Here is a traditional Quebecois way to preserve large amounts of herbs to use all winter.

Suggested uses: A teaspoon in hot water makes a soothing and instant herbal broth. Stir into soups and stews, mix into salad dressings and tomato sauce, mix with cream cheese or cottage cheese….the uses are endless and a jar of these preserved herbs will be a welcome reminder of summer and freshness during the depths of winter.

  • 1 cup chives (fresh, chopped)

  • 1 cup savory (fresh, chopped)

  • 1 cup parsley (fresh, chopped)

  • 1 cup chervil (fresh, chopped)

  • 1 cup carrots (grated)

  • 1 cup celery leaves or lovage or cutting celery (chopped)

  • 1 cup green onions (chopped)

  • 1/4 to 1/2 cup coarse salt

    In a large bowl, combine chopped chives, savory, parsley, chervil, carrots, celery leaves, and green onions.. Layer 1 inch of herb mixture in the bottom of a crock or glass bowl and sprinkle with some of the salt. Repeat layers until all of the herb mixture and salt is used.

    Cover and refrigerate for 2 weeks. Drain off accumulated liquid and pack herb mixture into sterilized jars. Refrigerate until ready to use. Can keep for up to a year in the refrigerator.

Herbes Salées photo by Kate Bentley

Herbes Salées photo by Kate Bentley

Pesto Time

photo by Kate Bentley

photo by Kate Bentley

PESTO for eating fresh or freezing


In food processor, blend until coarsely chopped:

2 cups fresh basil leaves, packed (can sub half the basil leaves with baby spinach)
1/2 cup freshly grated Romano or Parmesan-Reggiano cheese (about 2 ounces)
1/3 cup pine nuts (can sub chopped walnuts)
3 garlic cloves, minced (about 3 teaspoons)
Slowly drizzle in:
1/2 cup extra virgin olive oil
Do not over blend, the heat from the food processor will bring out the bitterness in the oil and the basil.
Taste, and season with
1/4 teaspoon salt, or more to taste
1/8 teaspoon freshly ground black pepper, or more to taste

Ashwagandha, aka Winter Cherry or Indian Ginseng, Withania somnifera, Solanaceae

ashwaganda.jpg

If you’ve been tracking the various “wellness” industries in the past few years, or even just perused the supplement section at your local grocery store, you’ve likely noticed the name of Withania somnifera, commonly called ashwagandha or winter cherry. A powerful herb popularly used in Indian Ayurvedic medicine (among other medicinal traditions of southeast Asia and Africa), ashwagandha root has become something of a darling in the West, used in expensive skincare regimes and “biohacking” diets that pledge eternal life to the devoted. As a member of the class of herbs known as “adaptogens”, ashwagandha has been traditionally used to help with sleep, build adrenal reserves, and improve overall vitality. However, like any exotic remedy, there are very real concerns around the sustainability and ethical production of plants grown far away once an unprecedented demand for them has been created. 

Lucky for us, ashwagandha is a fun and relatively simple herb to grow in the home garden, and its very real health benefits provide an opportunity to easily upgrade your medicine chest. A member of the Solanaceae family, ashwagandha shares some characteristics with other family members like eggplants and peppers. It produces husk-enclosed fruits that look like tiny tomatillos, and appreciates plenty of heat and sunshine. However, ashwagandha is adapted to grow in sandy, dry conditions, and doesn’t need much in the way of water or fertility, just sweet, well-draining soil. Ashwagandha is prized for its long, tough roots, so well-worked soil is imperative to good root growth. The plants should be started indoors or purchased from a nursery (like Red Wagon) to give you a jump start on the season, and only transplanted outside or into a greenhouse once the soil has fully warmed up. I like to space my plants about a foot apart, which provides room for root growth but allows the plants to support each other once they reach their mature height of two to three feet tall.

Ashwagandha grows well alongside Tulsi or other sturdy mint family members like lemon balm, especially those that don’t mind a little shade cast by the ashwagandha leaves. I’ve planted calendula around my plants as well, but the calendula can become a bit leggy if they’re spaced too closely together. The same beetles that like to snack on tomatillo plants (called tomatillo beetles or three-lined potato beetles) will attempt to feast on your ashwagandha leaves. Check the leaves regularly for the tell-tale orange eggs, and if necessary put on some gloves and squash the mating adults and larvae when you see them. Even with a fair amount of leaf damage, the ashwagandha plants will soldier on, but I think it makes for better medicine when the plants are lovingly defended. While the flowers are fairly drab, the husked fruits make for a beautiful backdrop as they turn red in early fall.

Ashwagandha and Tulsi have similar cultural needs: they are warm-climate perennial plants that really thrive as annuals in our short northern summers. Plant ashwagandha in early June, and watch it take off through the whole summer, right up until frost. Harvest by loosening the soil and pulling the whole plant up, making sure not to break the roots in the process. Roots should be sprayed clean and chopped up immediately (a sharp pair of pruners will do the job). The first year I grew ashwagandha, I pulled up a plant and neglected to chop it up for a couple days. That was four years ago, and I still have that same root hanging as an ornament in my house- it grew so rock-hard that processing quickly became an impossible task. Once the roots have been chopped, you have a few options. You can use them whole (added to chai blends or tinctured in vodka), or you can further powder the root and add it to everything from drinks to baked goods. 

Honestly, the first time I smelled fresh ashwagandha root, I thought it smelled like a swimming pool. Since falling in love with its gentle, nourishing qualities, I now associate the smell with the plant’s own charisma. Once dried, the smell is reduced, and you’re left with a potent medicinal herb that carries the extra benefits of being locally grown and lovingly harvested.

Many of the constituents in ashwagandha are best extracted in a bit of fat, so I usually simmer it in a bit of milk or coconut oil when preparing it. Below is a simple recipe for hot chocolate. Try drinking before bedtime to ease into a restful sleep, or as a midday boost without added caffeine! And of course, always talk with your health care practitioner about any herbs or supplements you’re regularly utilizing.

Ashwagandha Hot Cocoa:

  • Ashwagandha root, chopped and dried

  • Cocoa powder

  • Dark chocolate chunks

  • Milk (cow or non-dairy, but make sure it has some fat in it)

  • Cinnamon

  • Sweetener of your choice (I like maple syrup)

    • Toss a handful of chocolate chunks into a saucepan, cover with water, and stir while simmering, until chocolate has thoroughly melted into the water. 

    • Add ashwagandha root (about a tablespoon per serving) and simmer for 5-10 minutes.

    • Add cocoa powder, milk, and cinnamon, and continue to cook on low heat for another 5-10 minutes.

    • Add sweetener to taste, strain out ashwagandha, and serve! The cooked roots can be reused a couple of times before composting. 

Resources:

Ashwagandha monograph: https://www.herbrally.com/monographs/ashwagandha 

Cech, Richo. Making Plant Medicine. Herbal Reads, 2000

Tulsi (aka Holy Basil)

This is the first installment in our medicinal herb series by Sophie Cassel, Red Wagon Plants employee and Burlington herbalist. Please check our events calendar for her medicinal herb workshops this year.

sophie+with+tulsi.jpg

Tulsi (aka Holy Basil), Ocimum tenuiflorum Ocimum sanctum, Lamiaceae

While you won’t find Tulsi- also known as Holy Basil and Tulasi- in any classic English herb gardens or older western herb books, it has risen to prominence over the years both for its medicinal benefits and relative ease of growth, even while our northern climate is far removed from its native habitat on the Indian subcontinent. There, pots of perennially-blooming Tulsi bless the doorways of houses, where the plant is considered sacred by many. What a gift, then, that those of us far away in the western hemisphere can experience the joy of growing and using this plant!

Tulsi basil is in the same genus as our culinary basils, and within the umbrella of Ocimum tenuiflorum there are multiple subtypes and varieties, including Rama, Vana, and Kapoor Tulsi. While all three can theoretically be grown in Vermont, I have found that Kapoor Tulsi is consistently the easiest and most rewarding to grow, and that is the variety we grow and sell at Red Wagon Plants. Since I began growing Kapoor Tulsi in my gardens in 2015, I have become completely, utterly hooked on this plant. From watching its little paw-print shaped leaves evolve as seedlings, to inhaling its heady perfume as the flowers open, to sipping the tea of its dried leaves in the winter, I keep Tulsi close at hand all year long.

From a medicinal perspective, Tulsi is compelling as one of the easier “adaptogenic” plants to grow- adaptogen referring to plants that have been used to regulate and support our nervous systems and have a wide range of positive actions on our body, mind and spirit. While the uses and impacts of adaptogens are too complex to dive into here (although I like Jim McDonald’s credit card analogy), it’s worth noting that Tulsi can be helpful to both calm an overactive system, as well as provide some energy to a burnt-out one. It’s packed with antioxidants and is strongly anti-inflammatory. Plus, it tastes amazing- I often hear folks liken the flavor to an herbaceous bubblegum, and its sweetness makes it palatable to basically everyone, picky kiddos included. The Indian medical system known as Ayurveda considers Holy Basil a “rasayana”, translated as “to lengthen the lifespan” in Sanskrit. Most of what we in the West know about its uses stems from what Ayurveda has taught us from a 3000 year history of use and reverence. 

Growing Holy Basil is quite similar to growing other types of culinary basils- it prefers fertile garden soil with decent moisture and full sun, although it’s not as moisture-dependent as the Italian basils. It’s important to wait for the ground to fully warm up before planting Tulsi, so start seeds indoors or purchase plants to give yourself a leg up. Once established, you can get up to three or four big harvests over the season- once the plant has started to set flowers, cut down to about a foot and watch it spring back, bushier than before. However, its important to leave plenty of flowers for the bees, who go absolutely bananas for this plant. I have spent delightful stretches of time lying belly-down on the warm summer ground, watching the insect cacophony surround my row of Tulsi plants. If you’re really lucky and observant, a blissed-out bee will leave you a little red pollen sac on one of the leaves- a tiny treat! Left to drop seed, Tulsi may actually volunteer back into your garden, but don’t expect to see seedlings until early July when it’s finally warm enough to resemble the plant’s natural growing conditions.

The real question with Tulsi is what to do with your bounty once it’s been harvested. The high water content makes it a little finicky to dry. I’ve had the best luck in a dehydrator on low heat, but it can also be hung in small bunches in a warm, well ventilated area until the leaves can be stripped from the stems, which take much longer to dry. 

The easiest way to enjoy Tulsi is to use the fresh leaves and flowers. Fresh Tulsi sun tea is a transcendent experience on a hot summer afternoon. Simply place a handful of bruised leaves in a mason jar, cover with cool water, and leave in a sunny spot for a few hours (with the lid on to keep in all those aromatic oils!) It also makes a stellar vinegar infusion:

Tulsi Vinegar

  • 4-5 big handfuls of Tulsi leaves and flowers, chopped

  • Apple cider vinegar

  • Honey (optional)

Pack leaves and flowers into a jar, then cover with apple cider vinegar and steep for 2-3 weeks. Strain, add honey to taste, and bottle. Use this sweet, floral vinegar in salads, or mix with seltzer water for a summer-infused sparkling beverage. This will keep for at least 3-4 months, indefinitely in the refrigerator. 


Let Tulsi into your garden, and you’ll reap its blessings and benefits all year long!

tulsi.JPG


Resources:


De la Foret, Rosalee. Health Benefits of Tulsi. https://www.herbalremediesadvice.org/health-benefits-of-tulsi.html 

Secret Sauce to Remember the Herb Garden in Winter

Photo by Kate Bentley

Photo by Kate Bentley

This blog post is guest written by Sophie Cassel, Red Wagon Team member and herbalist educator. Thanks, Sophie!

As much as I love ripe tomatoes and blooming flowers, high summer to me is all about the fresh herbs. While this time of year you’ll find me outside snipping chives and parsley to add to my meals, it’s also a great time to prepare for a day when we don’t have a bouquet of fresh herbs outside our doorstep. Dried herbs have their purpose in the kitchen, but fresh-frozen herbs can add a whole new depth of flavor and color to any midwinter meal. The easiest way to do this is by employing some ice cube trays and a little creativity to make what I like to call my “secret sauce cubes”. 

If you’ve ever made fresh pesto, you’ll recognize the general technique, but the beauty of this technique is that you can really let your imagination, as well as your garden, guide your recipe.

Basic Recipe:

  • Gather your herbs from the garden or farmer’s market. This is a great time use up the leaves from those woody basil plants or the kale that’s looking a little bug-eaten but still has good flavor. Try to pick a selection of flavorful plants and good bases like spinach, parsley, or kale. You’ll need somewhere between 2-3 largeish bunches of herbs per ice cube tray.

  • Roughly chop herbs and remove woody or tough stems. Rinse everything and shake the excess water off, but don’t dry the herbs out.

  • Toss it all in the blender! Now’s the time to add things like garlic, ginger, chili flakes or citrus zest. You can also add a little salt to taste, but I keep mine salt free so I don’t have to worry about the extra salt when I’m throwing the cubes in my cooking.

  • Pulse in the blender until everything is evenly pureed, scraping down the sides as necessary. Add just a little water to emulsify, a tablespoon at a time.

  • Spoon your herb puree into ice cube trays and freeze for a few hours or overnight.

  • Transfer the frozen cubes to a plastic bag that is labeled with all ingredients, and store in the freezer for a snowy day! 

  • To use the cubes, thaw on the counter while you’re preparing your food. You can add them in while you’re sweating onions at the beginning of a dish, or toss in towards the end to lend a bright green hue and tons of flavor. Remember that if the cubes are still cold, they will lower the cooking temperature of your dish, so slowly bring it back up to heat through. 

If you’re the type to can fresh tomatoes for winter sauces, adding a couple cubes of fresh-frozen oregano and parsley when it comes time to make pasta will result in a transcendent trip back to summer. Many a meager rice-and-vegetable stir fry was elevated this past winter using chef Amanda Cohen’s “Secret Weapon Stir Fry Sauce” (from the New York Times) which was my inspiration for breaking out of the basic basil pesto mold. Amanda Cohen’s delicious Asian-inspired blend is just one of many combinations based on what you have on hand throughout the season. Cohen recommends blanching her ingredients before blending, but I’ve found that you can also keep things raw if you’d rather not boil water in the heat of summer. Below I’ve included some combination ideas, but feel free to experiment! Your future self will thank you.  

Amanda Cohen’s Secret Weapon Stir-Fry Sauce:

  • Cilantro

  • Parsley

  • Thai basil or other basil

  • Spinach

  • Garlic, peeled

  • Fresh ginger


Pesto inspired

  • Basil

  • Parsley (about 1/4th the amount of basil)

  • Garlic cloves

    • I prefer to keep my pesto basic at this stage, and leave room for adding cheese or nuts during cooking. 

Chimichurri inspired:

  • Parsley

  • Arugula

  • Oregano

  • Garlic or shallots, chopped

  • Chili flakes

    • Add lime juice, oil and a little rice vinegar when cooking

“Scarborough Faire”:

  • Parsley

  • Sage

  • Rosemary

  • Thyme

  • Oregano

  • Marjoram

    • Make sure to strip leaves off any tough or woody stems

EASY Sage Recipes

sage.jpg

This cool rainy weather has me reaching for sage a little more. It adds warmth and depth to so many dishes. 
Here is a super quick and easy soup you can make any night of the week: 
Simmer whole leaves of sage in broth in a pot, on low on the back of the stove. In another pot, sauté onions, garlic, carrots until tender and starting to caramelize. Remove (and discard) the sage from the broth and add the infused broth to the vegetables. Add any of these options: shredded cooked chicken, cooked beans, small pasta or rice (cooked), diced tempeh or tofu. Just before serving, add a handful or two of fresh spinach, chopped parsley, and a few grates of lemon zest. Very easy weeknight soup. 

I also love to use sage with roasted meats, chicken and vegetables. I stuff whole handfuls of sage inside the cavity of a chicken before roasting it. Add a lemon, a few cloves of garlic, salt and pepper, and it will add tons of flavor to your chicken. I also like to finely chop 5 or so leaves of sage along with 2 cloves of garlic, a teaspoon or two of lemon zest, and and a 1/2 teaspoon of coarse salt. I just smash and chop it all into a paste right on the cutting board, but you could also put it in a food processor or use a mortar and pestle. Then I toss washed and chopped root vegetables with this mixture, drizzle everything with olive oil, toss again, and roast in a preheated 400F oven for about 40 -45 minutes, until soft and caramelized. Or I will take the lemon / sage mixture and rub it all over a pork roast or beef roast before it heads into a hot oven.

These are all simple things to make in big batches so that you can use leftovers for lunches or hurried week night dinners. 


If you aren't able to harvest sage out of your own garden, you can find ours at  Market, Healthy Living Market and Cafe, Shelburne Supermarket, Lantman's MarketNatural Provisions Market & Deli, and Hunger Mountain Co-op. Warm up and enjoy! We will sell bulk herbs (1/2 a pound or more)directly to customers if you arrange it ahead of time. We have thyme, rosemary, sage, savory, marjoram, oregano, and mint. This is a great way to dry and put away herbs for the winter. I keep paper bags of herbs loosely closed all winter long.

Sweet Potatoes Slip Sale 2016

sweet_potatoes_3.jpg

Sweet Potato Slip Sale

June 11th and 12th, 2016

8:00 to 6:00 pm

 Red Wagon Plants greenhouses

2408 Shelburne Falls Rd  * Hinesburg, VT

Proceeds from the sale benefit the educational programs of Vermont Community Garden Network.

For more information, call 482-4060

Sweet potatoes can be grown in Vermont. Under ideal conditions they thrive and can yield up to 5 pounds per slip. During this benefit sale, we will be selling sweet potato slips in 4" pots, with three slips per pot. These get transplanted 18" apart, in loose, well drained soil. You can also grow them in containers. They like warm, southern exposure, and can be trellised to save space.

Here are some resources for more information on Sweet Potatoes:

The Vermont Community Garden Network has information on their programs and the sweet potato sale here.

This  article on the Mother Earth News website highlights growing methods for northern gardeners and best ways to store the tubers.

 Here is a photo essay on how some ingenious customers are growing their sweet potatoes in Starksboro.

Recipe for Roasted Sweet Potato Fries with Herbs

2 large sweet potatoes, peeled and cut into 1/3 inch batons

3 TBS olive oil

salt and pepper

1/3 cup finely chopped parsley, chives, and or cilantro

2 cloves of garlic, finely chopped

1 small pinch of cayenne

1 tsp lemon juice

  • Preheat the oven to 450 F. Place 2 large cookie sheets in the oven so they are pre-heated as well
  • Toss the cut sweet potatoes with the olive oil and salt and pepper in a large bowl
  • Arrange them on the hot pans in a single layer.
  • Roast for 20 minutes, and flip them over with a spatula, and return to the oven for another 20 minutes, or until tender and browned.
  • Meanwhile, toss the herbs, garlic, cayenne and lemon juice together in the same bowl
  • When the hot fries come out of the oven, sprinkle the herb mixture on the fries and serve immediately

Growing Instructions for Sweet Potatoes

Sweet potato slips are cuttings that come from a parent vine. The slips grow best in a loose, sandy or silty soil that drains well. If sweet potatoes are grown in a rich dark soil they may discolor but are still good to eat. • Transplant the slips into garden beds during June, preferably in the late afternoon or on an overcast day. When transplanting, lay the slips on their sides with 2/3 of the slip buried a half inch under the soil. Water enough to keep the soil moist, but not saturated. • Plant the slips 10 to 18 inches apart in rows that are three to four feet apart. The rows or raised bed should be elevated 4 to 8 inches above the ground level to allow the sweet potatoes room to form. • Keep the cuttings watered while they are getting established. The leaves that were originally on the planted slips will dry up and fall off leaving just the vine stem. New leaves will emerge from the cuttings as the slips become established. • The sweet potato vines will cover the ground reaching 5 to 10 feet in length. Hoe around the vines to cultivate weeds and mulch with hay if desired. • Deer love sweet potato leaves, so be sure your planting area is fenced if deer are aproblem. A flying gold colored beetle may chew round holes in the leaves. The vines are tough and will keep growing despite insect damage. • Sweet potatoes are dug and harvested in late September through mid October, a day or two before the first predicted frost. Most of the sweet potatoes will be just below the parent plant. Each plant can produce up to six sweet potatoes. • After harvesting, dry the sweet potatoes on the ground for two or three hours. Allow them another 10 to 14 days to cure at room temperature or above, before storing the sweet potatoes at a temperature between 50 and 60 degrees F. • Unlike Irish potatoes, sweet potatoes should not be kept cold in a garage, refrigerator or outbuilding. If properly cured and stored, they will keep until April. Enjoy!

Herb Thoughts

Herb garden planning is not a lot of work, but here are some thoughts I have put together on the topic. Herbs are easy to grow for the most part, but they are a big category of plants (we grow 100 varieties of herbs) and it helps to break them down and organize them into categories. This will help any gardener plant the right plant in the right place and give it the preferred amount of water, sunlight, food, and water.

Why grow herbs? For flavor, fragrance, and beauty - it is the easiest way to improve the flavor of what you cook. It is also one of the easiest ways to have a container garden on your porch or deck.  Herb gardening is intimate - you get close to the plants, smell them, taste them, see them respond to regular clippings. They are a perfect way to better understand plant physiology and the best short cut to great food made with little effort.

Propagation: Plants vs. Seeds

All herbs can be planted from plants, and some can be planted directly into the ground as seeds. The herbs that you can seed directly in the ground and expect great results are: cilantro, dill,  and chamomile. Everything else will do much better if you start the seeds in containers in a sheltered environment. You can start your own herb transplants easily if you have grow lights and a heat mat. Many herbs take a long time to germinate and many herbs are propagated only from cuttings. Making your own rooted cuttings is possible too, but that takes a little more of a sophisticated set up with misters, rooting hormone of some sort, and humidity domes. For those herbs, it is generally easier to purchase the plants.

Herbs from Seed:

  • Parsley
  • Chives
  • Cilantro
  • Dill
  • Chamomile
  • Savory (winter and summer)
  • Marjoram
  • Basil (all kinds)
  • Common Mint
  • Sage
  • Catnip
  • Chervil
  • Oregano (basic varieties)
  • Thyme (basic varieties)
  • Shiso
  • Sorrel
  • Lovage
  • Lemon Balm
  • Fennel
  • Salad Burnet

Herbs from Cuttings:

  • Rosemary
  • Lavender
  • Mints that are true to type (spearmint, peppermint, pineapple mint, etc)
  • Tarragon
  • Specialty Thymes (lemon, variegated, silver, etc)
  • Specialty Oregano (golden, ‘Hot and Spicy’, variegated, etc)
  • Specialty Sage (purple, tricolor, golden, etc)

Containers vs. in the Ground

Some plants love to be planted in the ground and others would prefer to be in pots.  Generally speaking, the herbs that like it dry and warm will prefer to be in a clay pot that breathes like Italian terra cotta. Plants that like it wet and cool might prefer to be in the ground, but they can also be grown in pots if the right conditions are given (more watering, a glazed or plastic pot, heavier potting soil, a little shade).

Herbs that like to grow easily in the ground in Vermont:

Cilantro, Dill, Parsley, Rosemary, Savory, and Chervil

Herbs that prefer to be in containers in Vermont: EVERYTHING ELSE!

This does not mean that you cannot grow herbs in the ground, it just means that in containers, it can be a little easier.

Some herbs do really well as tiny shoots for micro-greens: chervil, dill, cilantro, basil, fennel are our favorites.  And they are easy to grow indoors year round – just pat down some moist potting soil in a shallow container (only need 2” or so of soil) with holes in the bottom, press in the seeds, cover very lightly with a thin layer of soil, and keep moist. When the first set of true leaves begin to emerge, they are ready to eat. You can also grow pea shoots and sunflower sprouts this way. A south facing, sunny window is sufficient.

You can bring in potted herbs in the fall and keep them in a sunny window for use during the winter. The herbs that do best with this treatment: sage, parsley, rosemary, thyme, and savory. Basil can be brought in as well, but it won’t be terribly happy unless you have grow lights for it.  If you had some of these herbs planted in the ground, you can dig them up and slowly acclimate them to being in a pot and being indoors.

Herbs can be dried or frozen or infused in vinegar or simple syrup for year round use. Pesto or herb pastes made with oil or water can be frozen in small containers.  Drying is very simple or very elaborate – you choose! A dehydrator can be used, and the leaves can be stripped off of the stems once dried and stored in jars in a dark place. Or you can go the simple route and just harvest whole branches of the woody herbs such as thyme, oregano, rosemary, sage, and winter savory. Place the branches in woven baskets and keep in a dark, well-ventilated space. They will dry just fine on their own, and you can keep them covered with paper bags or kitchen linens and use as needed.

Related Upcoming Events

Cooking with Herbs with Molly Stevens and Julie Rubaud – a class and dinner.

South End Kitchen, Burlington, Vermont

March 19th.,  6pm

Red Wagon Plants pre-season Open House

April 4th 10 am to 3 pm. Tour the greenhouses and see behind the scenes.

Herbal Cocktail Party with Caledonia Spirits

April 17th, Red Wagon Plants 6 pm to 9 pm

Help us kick off our season with a bang!

Salad Burnet Dressing Recipe from a Customer

Ruth Henry, one of our many loyal customers, came in a little while ago asking for salad burnet. This is not one of our most popular herbs, and frankly, one that I never grow because I never know what to do with it. She assured me that it is amazing in a special salad dressing she makes. Naturally, this peaked my curiosity and she promised to send along the recipe. Here it is! And now I finally have a reason to plant this pretty little herb that tastes like cucumbers.

Thank you, Ruth, for sharing your "secret" recipe with us! Mum's the word!

" As promised this is my family's recipe for salad dressing using Salad Burnet......It's a big hit with lots of flavor! Enjoy"

Herb Salad Dressing 1 cup salad oil 1 cup honey 1/2 cup basil vinegar 1 clove crushed garlic 1 tsp salt 1 cup of finely chopped green herbs such as burnet, basil, chives, parsley 1  tsp celery seed 1 Tbsp paprika

Shake everything in a jar. Keeps in the refrigerator for a week or so.

Celebrate Spring with us at our Cocktail Party and Greenhouse Tour Friday April 18th, 5pm to 7pm

Please join us April 18th, our opening day, for an evening tour of the greenhouses and a cocktail party with our friends from Caledonia Spirits. We will start at 5:00, take a walk around the greenhouses at 6:00, and get to see old and new friends to kick off our season with a spring celebration. Heidi Mahoney will be serving up some delicious herb-themed snacks, Caledonia Spirits will be serving sample tastes of their award winning vodka and gin, and we will have a cash bar featuring a special cocktail made with our herbs and more of that special gin and vodka.

I first met Todd Hardie, owner of Caledonia Spirits, in 2001. At the time, he had another very special business called Honey Garden Apiaries. Todd and his staff kept bee yards throughout the Champlain Valley and the St Lawrence Valley and they would extract the honey and bottle it raw and unfiltered. It was the most powerful food, full of the bees' adventures and vitality. His operation was based right next to where Red Wagon Plants is currently located. When I needed a little something extra to do that winter 15 years ago, a friend suggested I talk to Todd about helping him with extracting honey. I fell in love with honey and made a life long friend. As Todd would say, it was a fruit example of cross-pollination as our conversations were instantly filled with all of the possibilities of plants, honey, bees, and all of the various ways these things can interplay. Todd's creativity, energy and brilliance have no bounds. He went on to make incredible plant and honey based medicines as part of his business, which was part apiary and part apothecary. While he has moved on to the world of finely distilled spirits, one thing has not changed: Todd is always making products that vibrate with the powerful energy of bees, plants and people. There is an inspired quality in all he makes that can be tasted and felt, and that sets it apart from all the others. 

Please let us know you are coming so that we can plan accordingly. RSVP.

Please join us for a special evening and help kick off the 2014 garden season with a wonderful celebration. 

- Julie and the crew

Sage Cookies


I first made these cookies when a group of us from Red Wagon Plants took an herb cooking class with Jessica Bongard of Sweet Lime Cooking Studio last summer. We had such a fun time making herbal treats together, and I thought I would share this recipe. I just made it for our Open House and it was such a tasty way to use sage in a not-too sweet treat.

Sage Cookies 

1 3/4 cups all purpose flour 1/3 cup sugar 1/4 cup yellow cornmeal 1/2 cup butter (one stick), room temp 2 Tbsp chopped fresh sage 6 Tbsp milk 1 egg white, beaten with 1 Tbsp water (egg wash) fresh little sage leaves coarse sugar to sprinkle

  • Preheat oven to 375
  • Whisk together flour, sugar, and cornmeal in medium bowl
  • Cut in butter using a fork, until fine crumb forms
  • Stir in chopped sage
  • Add milk stir with fork
  • Make dough into 2 balls
  • Roll out to 1/8 inch thick
  • Use 2 inch cookie cutter, onto cookie sheet
  • Brush with egg wash, add sage leaf or two, brush with egg wash again to seal
  • Sprinkle with sugar
  • Bake 12 minutes, until edges brown, turning pan halfway through

Enjoy!