garden almanac

What is Hope up to in the Garden?

Here is a little update from Hope Johnson about what she has been up to in her garden. Hope is an unmatched talent in many departments and creative ventures including quilt making, garden design, and as an advocate for bees and pollinators. We always look to her for inspiration and now you can too!

She says:

Turned the compost which is now thawed enough to do so.

Pruned back and reduced the bed size of the Fall Gold Raspberries. Added a dusting ofwood ash (not enough to alkalize but good for potassium), lightly weeded and mulched a lot.

After a very positive experience growing winter squash last year, I am expanding my vegetable beds in the sunny area of my yard since the star magnolia has turned my kitchen garden into a part-shade environment with the consequence of inadvertently growing miniature vegetables.
NO DIGGING. Put down a generous layer of partly decomposed horse manure and bone meal, then wet cardboard, and a layer of locally sourced leaves (from my lawn) and straw. By planting time in late May, I think the microbes and invertebrates will have done their thing and I'll addhomemade compost to each planting hole.
The garlic is up and I planted two new varieties this year, Duganski and Vietnamese Red.


Last Week of the 2021 Season

IMG_0968.jpeg

Our last week of the season!

Thank you for gardening this year, and for supporting us in all the incredible ways that you do. .

Thank you for gardening this year, and for supporting us in all the incredible ways that you do. Without all of your interest in gardening and plants, we would not be here. Our work is fun, and meaningful in every way, and attracts such a great team of people, both as workers and as customers. I am so grateful to each of you for another wonderful season. July and August have been a little more quiet than normal, and I am guessing it is because of the rain and the ability to travel and visit. I know my own garden has suffered its share of neglect due to its absentee owner. But this week, I am vowing to turn that around and spend 3 early morning sessions cleaning up, cutting back, and putting in a few new plants. Maybe you are feeling a little need to tame the jungle too? I welcome you to follow along and help keep me accountable in this late August push. I am happy to help you do the same. Share your goals and projects with us. You can tag us on social media, or send us an email, or even better, come in this week and give us an update. We love to hear from you.

In the Garden

My 4 projects this week in the home garden:

  • Redo my herb planters for fall. I am ripping out old basil, cilantro, dill and planting fresh for fall.

  • Cut back some very tired looking perennials that melted in the rain.

  • Pull out some thugs, and replant with some better behaved plants.

  • Rein in some of the plants along my gravel path - mainly Geranium ‘Rozanne’ (Cranesbill) and Stachys ‘Helen von Stein’ (Lambsear)

I will take some photos before and after each session. Feel free to follow along on Instagram or Facebook.

In the vegetable gardens at work, I will continue to lay in successions of greens for the fall. I am harvesting tomatoes, eggplants (finally) and peppers non-stop.

In the Kitchen

I have been making lots of yummy things with all the produce:

  • Refrigerator pickles with the hot peppers. I use them in everything! The pickling mellows out the heat, and I take out a whole pepper, chop it fine, and add it to morning eggs, tacos, ricotta for stuffing other veggies, etc.

  • Bread and butter pickles with cucumbers

  • Eggplant parmesan

  • Baba Ganoush

  • Roasted eggplant, fennel, sweet onion, tomatoes, herbs and garlic for the freezer

  • Peach Jam

  • Plum Jam

  • Peach Bourbon BBQ Sauce

  • Brandied peaches

  • Frozen blueberries

  • Blueberry tart

  • Blueberry sauce

Full disclosure - I have purchased eggplant and cucumbers and blueberries. Thank you, Old Road Farm, Steph, Adams Berry Farm and Sweet Roots Farm! I did not have great success with the eggplant in our heavy clay soils this year due to all of the rain. And our cucumbers all died due to a virus early in the season. Yes, these things happen to everyone and I we are fortunate to have fabulous farms in this area who work magic with soil and seeds no matter the weather. And a giant thank you to my friends Amy, Matt and Yvan for the peaches and plums. I am very lucky to have exceedingly generous friends with thriving home orchards.

I am happy to share recipes if you would like any.

In the Greenhouses

Our “Plant of the Week” deal is once again a whole group of plants, not just one. Here is the scoop: you buy 3 perennials and or shrubs, and we give you a fourth 1 free. It is ok to mix and match, and the lowest priced item will be the freebie. It is a great time to stock up on plants for the future planting projects (keep them watered until you get to them) that can happen a little later. Maybe once the kids are back in school, you can steal away into the garden for a few hours and pop in your new plants.

We are cleaning up, and starting the maintenance projects that keep our crew busy into the fall and winter. The herb farm continues to produce beautiful and fragrant harvests twice a week, and the indoor herbs are doing really well in their new beds.

Mid-August News, Shuffling Priorities and Plant of the Week

Heliopsis - one of our quart sized perennials that we are giving away with every purchase this week.

Heliopsis - one of our quart sized perennials that we are giving away with every purchase this week.

The days are numbered for drinking coffee in the garden while the sun comes up. If you enjoy that kind of thing, I hope that you are getting plenty of it. I find myself doing a mental inventory much of the day, re-organizing the list of things I have to make time for while summer lasts. Lots of swimming, lots of outdoor meals, and that precious early morning coffee in the garden.

The fall garden calls, and I continue to plant more veggies each week for late season harvest. This week: spinach, scallions, lettuce. I was at the Shelburne Farmers’ Market this week, and bought 2 heads of lettuce for my mom. I had failed to plant lettuce a while back and am now in between generations. I am vowing to have every green thing I want ready in the garden between now and December. It is possible. This Succession Planting article is helpful if you want to learn more about working the edges of the season to your advantage.

New in the greenhouse this week: spinach, chard, cabbages, sprouting broccoli, kohlrabi, kales, and lots of new chicories and lettuces. All are cold hardy, and all will create bounty in the fall garden.

Our Plant of the Week is really a Deal of the Week. It is mid-August and we are closing on August 29th, so highlighting just one plant doesn’t seem fair. This week, with every purchase of $25 or more, we will offer you a free quart sized perennial. There are lots to choose from: yarrow, salvia, coral bells, catmint, heliopsis (pictured above), rattlesnake master, boneset, and more. I hope you take advantage of this deal and pop in a few new perennials when you stock up on those fall veggies.

We have had a few requests for a recipe I have been making for years, slow roasted tomatoes for the freezer. if you are curious, you can read about it here. This is one of the main ways I preserve tomatoes. Super easy - just roast tomatoes, garlic, herbs, olive oil, salt and pepper overnight at a very low temperature, and then, in the morning, slide the mix into freezer bags for good winter eating. I also do a version with eggplant, peppers, onions, tomatoes etc as a roasted, deconstructed ratatouille. That also freezes quite well.

I hope to see some of you in the next couple of weeks. I will be working in the greenhouse this Friday afternoon - come say hi!

Thank you for your support and your garden enthusiasm,

Julie

Herb Salts, Plant of the Week, Garden and Kitchen Update

herb salt bowls from above.jpeg

YUM. We are very excited to share this week’s Plant of the Week deal. Any remaining berry plants we have, are available for the Buy One, Get One Free promotion. This includes the following:

  • Strawberries - Alpine strawberries in 4-packs that can be used for edible landscaping, and as a perennial ground cover in sun to part-shade; and ‘Mara des Bois’, French ever-bearing strawberries that are in hanging baskets, but can be planted in the ground for years of enjoyment.

  • Raspberries- a few varieties, including summer bearing and fall bearing

  • Elderberries- hardy, easy to grow native plants that are good for making plant medicine as well as attracting wildlife, creating a hedgerow, and for their fragrant flowers that can be eaten or turned into tea or cordials.

  • Blackberries - a hardy, thornless variety that produces huge blackberries

  • Gooseberries - an old-fasihoned fruit that is great for jams and preserves

August is a great time to plant berries of all kinds, and leaves them plenty of warm days to establish healthy root systems so that will support them for years to come. Our “Plant of the Week” promotion lasts until Sunday, or while supplies last, whichever comes first. Quantities are limited.

In the Garden

The next few weeks are the funnest part of the gardening calendar in my mind. The weeds are under control, we are in harvest mode, and there are lots of empty spots to fill in with plants for the autumn bounty. Going in this week: more escarole, radicchio, lettuce, scallions, spinach, cabbage, broccoli and sprouting broccoli.

I have harvested garlic, shallots and sweet onions. If you haven’t done it yet, you probably should this week. The storage onions - yellow, red, and cipollini - look almost ready in our garden. I will check them later in the week, and if I see that lots of the tops are laying down, I will pull them all out of the soil. I usually wait for about half of them to be fallen over as a sign that they are mature enough to cure well and develop those papery skins that allow them to stay firm in storage all winter long. If you are not sure if your onions are ready, send a photo and we can help you decide.

In the flower garden, Lily has been deadheading her zinnias and recommends making a bouquet to give to someone. It feels good. She has a new baby niece who turned one week old today, and was the lucky recipient of said bouquet. So adorable.

Sara says to check for hornworms in the tomato patch. The earlier you catch and destroy them, the less chance of a full on invasion. Good luck.

In the Kitchen

I have started freezing and canning in earnest, with a big batch of Roma beans taking center stage this weekend. If you have not grown these or eaten them, I encourage you to put them on your list for next year’s garden, or stop by a farmers’ market or farm stand to stock up while summer is still with us. Trillium Hill Farm in Hinesburg has them currently.

Eggplants and peppers are finally abundant in the garden (the rain slowed them down) and I just made a simple dinner with roughly chopped peeled eggplant, shallots, peppers of all kinds, halved cherry tomatoes, torn herbs, minced garlic, a glug of olive oil, and chunks of feta. I laid everything out on a sheet pan and roasted it for about 45 minutes at 375F. What an easy summer dinner, served warm on the deck, or at room temperature for a picnic by the lake. Preferably with an icy cold rosé and a baguette from O’bread or this easy recipe for pita from King Arthur. I spent a good part of the pandemic winter making pita, and I am not mad about that new skill.

Our herb salts and vinegars are now available! We have been busy harvesting and chopping herbs, and curing them in salt for maximum flavor and fragrance. I recommend them all right now, especially to elevate simple garden meals of cucumbers, tomatoes, greens, and grains into something special every night of the week. They are also great for the grilling and entertaining you might be doing outdoors while the getting is good. You can find them at our Hinesburg greenhouses, at City Market, Hunger Mountain Coop, Farmers to You, Intervale Food Hub, Sweet Roots Farm, Trillium Hill Farm, and Philo Ridge Farm. And here online. We are set up to ship herb salts and vinegars. Maybe you would like to make someone’s day by sending some as a gift?

Enjoy the week, enjoy each other.

Julie

Plant of the Week (POW)

This week’s plant of the week is actually a whole group of plants. We are offering flowering vines, and if you buy ONE, you will get THREE free! They’re a bit tangled together at this point, but they are healthy and dark green, and with a little patience can be untangled and turned into an almost instant trellised green wall. Or make a teepee out of bamboo and let them climb all over the structure. Cover an old fence, create a privacy screen, pull down the gone-by spring peas and replant with flower vines. You get the picture - there are lots of fun uses for flowering vines. Please note, that this is while supplies last. If we run out of vines, we will switch to something else for our Plant of the Week (POW). The selection includes

  • Cypress VIne

  • Morning Glories (3 different kinds)

  • Hyacinth Bean Vine

  • Sweet Peas

  • Scarlet Runner Beans

IN THE GARDEN

Maintenance pruning and weeding in the perennial gardens

The rain has been such a blessing this past week. We are now seeing lots of weeds and quick new growth and jungle feeling is real! May I suggest our sickle weeder and our small snips as tools to help you in that endeavor? When the garden is growing so quickly, it becomes harder to get weeds with a hoe, so I turn to my hand tools for a quick cultivation run through when the weeds are small.

If your strawberries have finished producing fruit, it is time to renovate them

  1. mow it down (the whole thing, with a line trimmer)

  2. rototill the edges of the beds to keep the growth in the center of the bed, and out of the walking paths

  3. fertilize the strip of stubble that will remain and become next year’s bed and water it well if we have another dry spell.

Check your garlic. It is ready to harvest when about ⅔ to ¾ of the leaves have turned brown. We will probably harvest ours next week.

Wash and prep your vegetables as soon as you harvest them. Lettuce greens store so much better when they have been washed and dried first. I try to prep everything I harvest as soon as I bring it into the kitchen. Bags of dirty, hot greens just wilt and get ignored, but if I trim, wash, and dry salad greens, I am much more likely to eat a salad with every meal. I have been blanching chard and kale as I bring it home too. I then have an easy cooked green to eat with eggs or add to a taco, or a grain bowl. It makes meal planning a lot easier.

Vegetable Garden Planning - Seeds vs Transplants

romaine.JPG

It can be confusing to know which vegetables and herbs you start from seed directly in the ground and which ones you start as seedlings that have been started indoors or in a greenhouse. Here is a handy guide to help you with those decisions when planning this year’s garden.

seed rack.jpg


Garlic Ritual

Planting garlic in Vermont is a great way to extend the gardening season and gives you a crop that is perfect in so many dishes, stores well all winter long and even generates its own seed. It is a perfect way to tune into the cycles of the gardening season and feel like you are growing an important part of your diet. Garlic is expensive to purchase so there are savings to be had with your own garlic crop. Please follow this guide for easy, step-by-step instructions that will give you a garlic patch for life. I have been growing out my own garlic for 18 years and usually do not need to ever buy seed stock or garlic in the grocery store. The pleasures of garlic growing are abundant and I encourage you to get familiar with this wonderful and simple crop.

When to start the cycle?

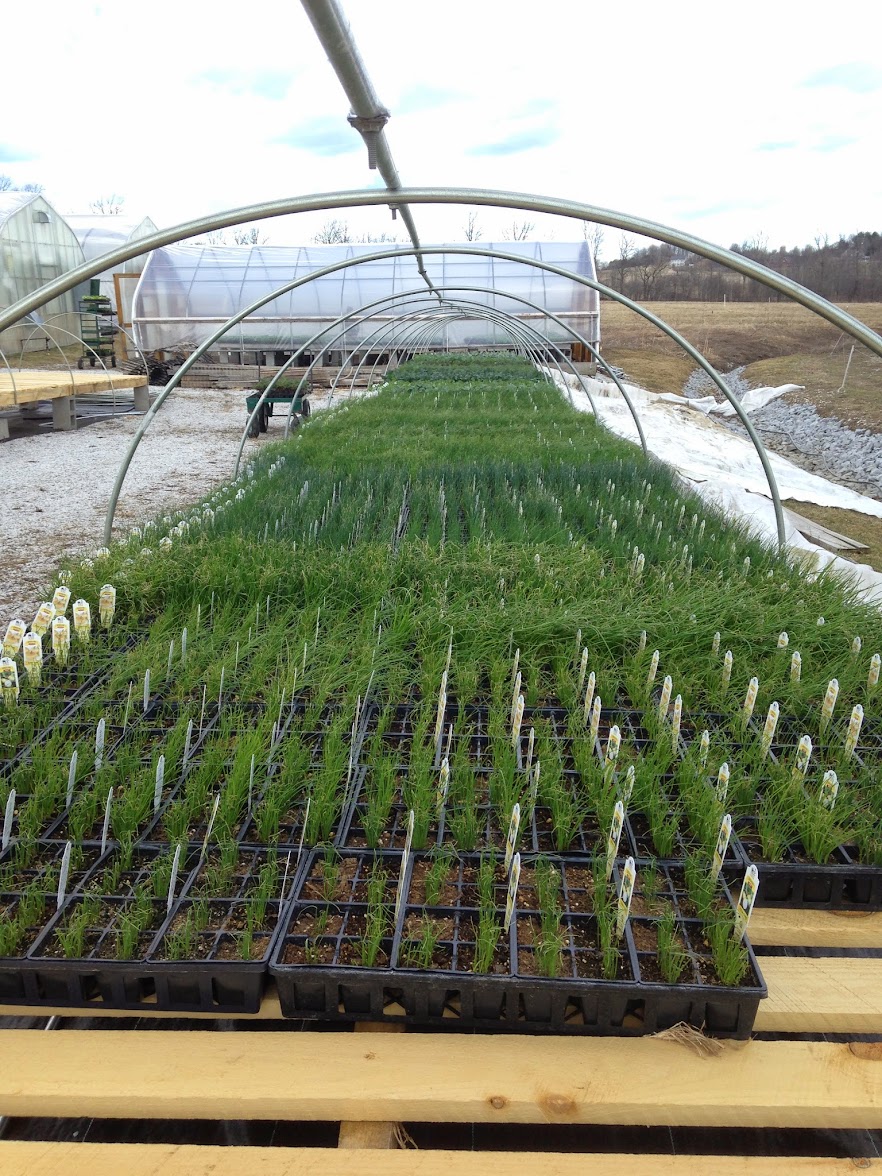
Planting dates in Vermont are anytime between mid October and late October. It is best to wait until then, because if you plant too early, the bulbs will break out of dormancy too soon and this weakens the plant going into our harsh winters. If you plant the cloves during those last two weeks of October, it gives them just the right amount of time to take root and hunker down until spring, but not send out any top growth.

To plant garlic, you need to follow a few easy steps.

1. Bed preparation.

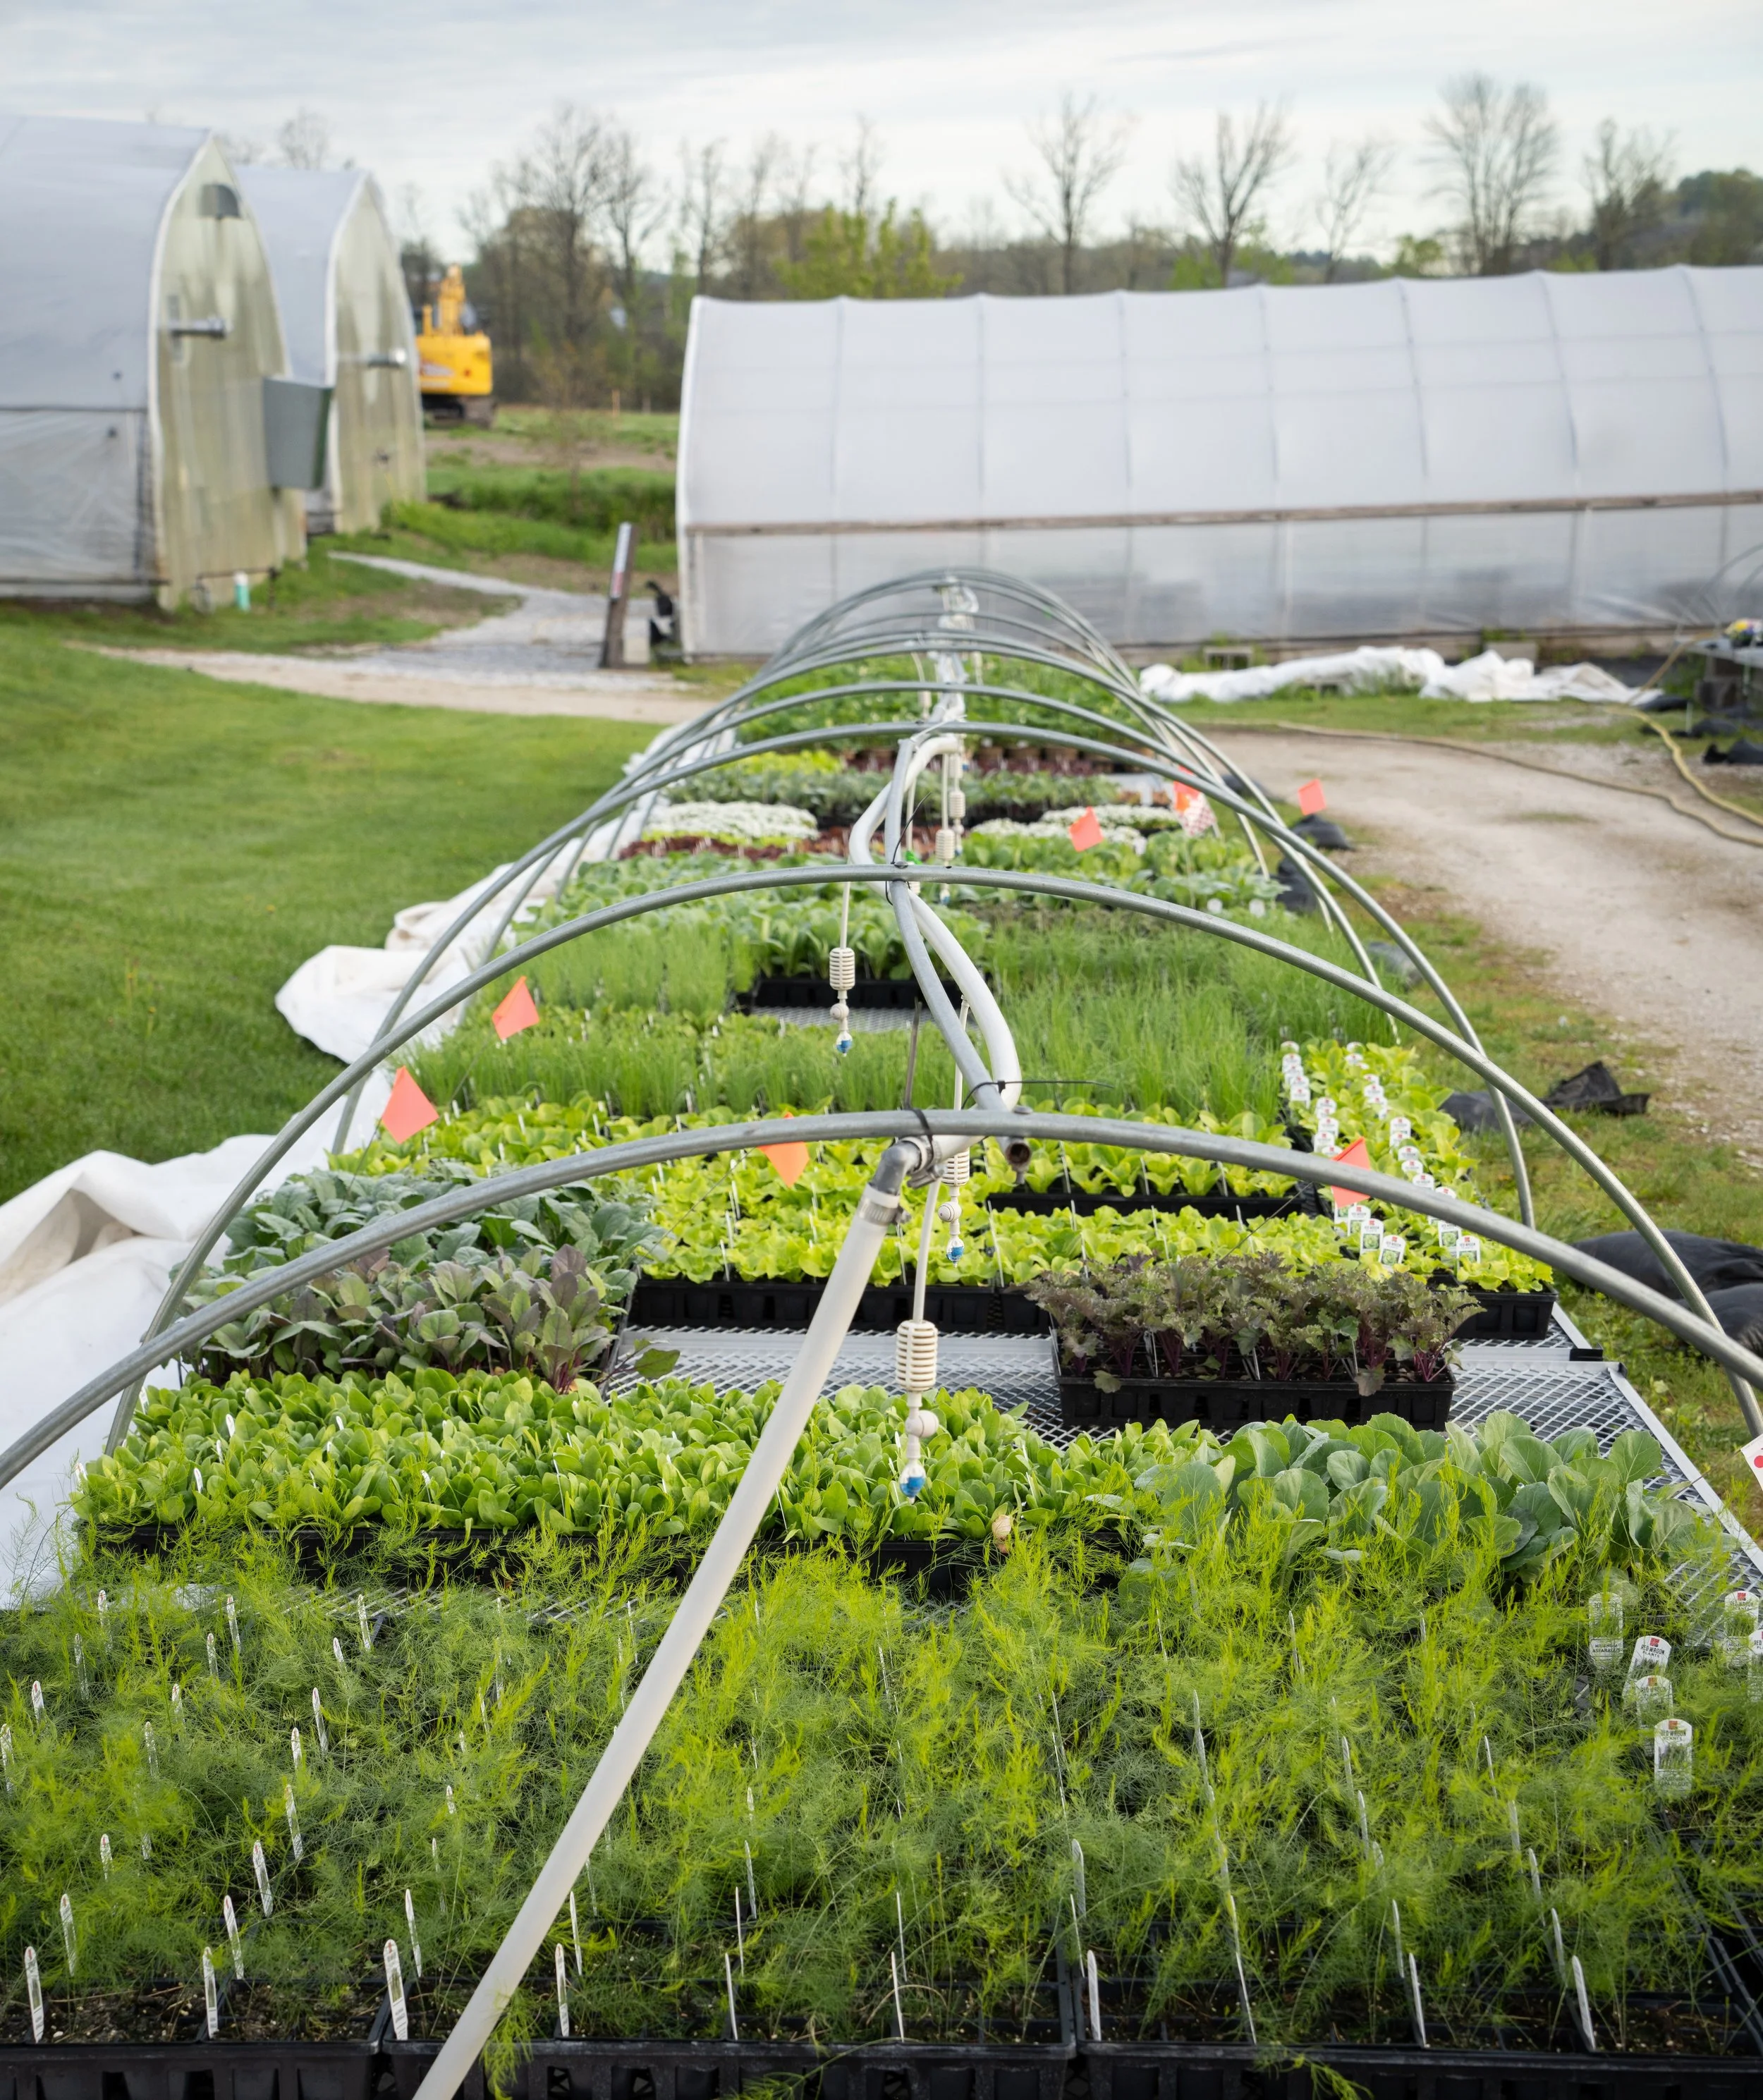
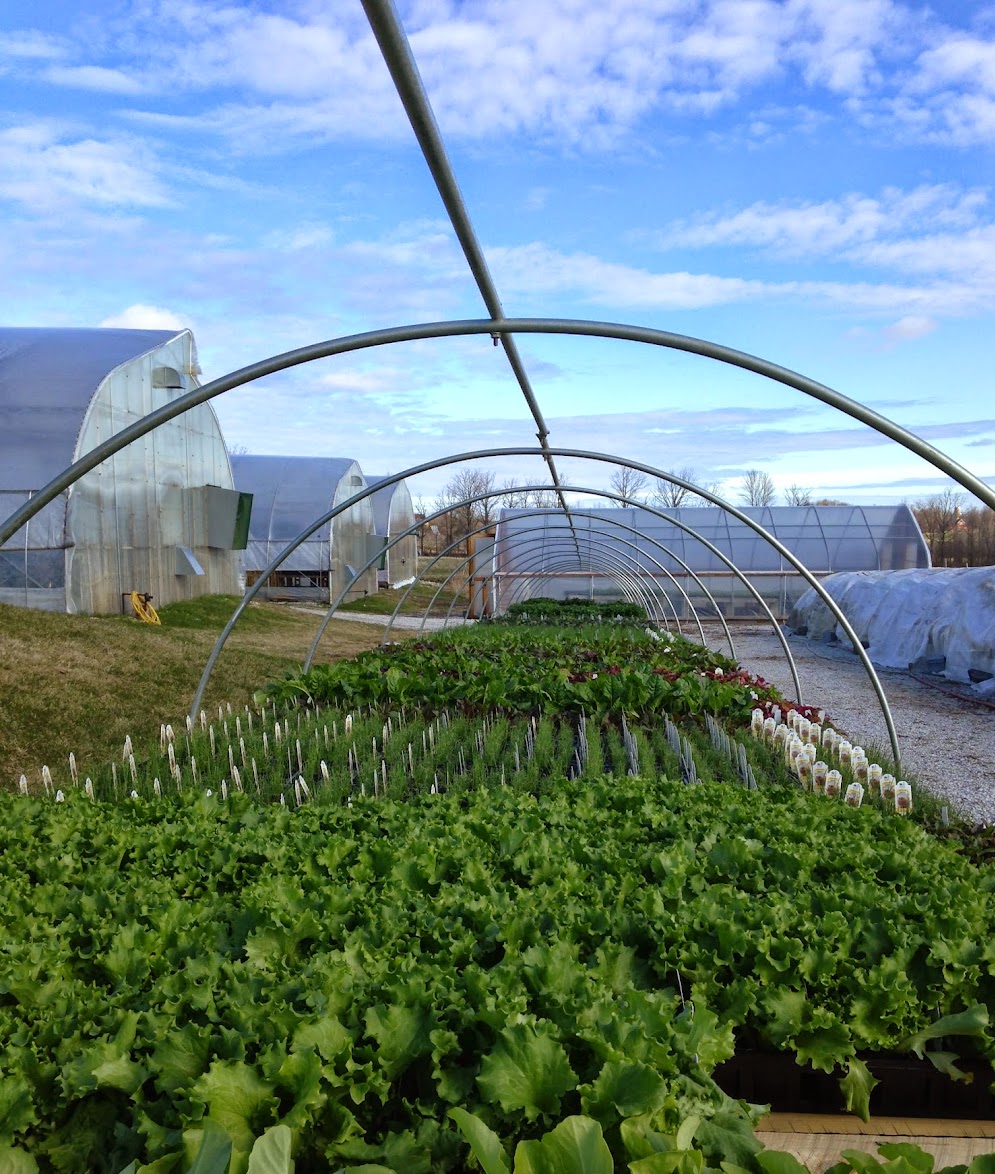
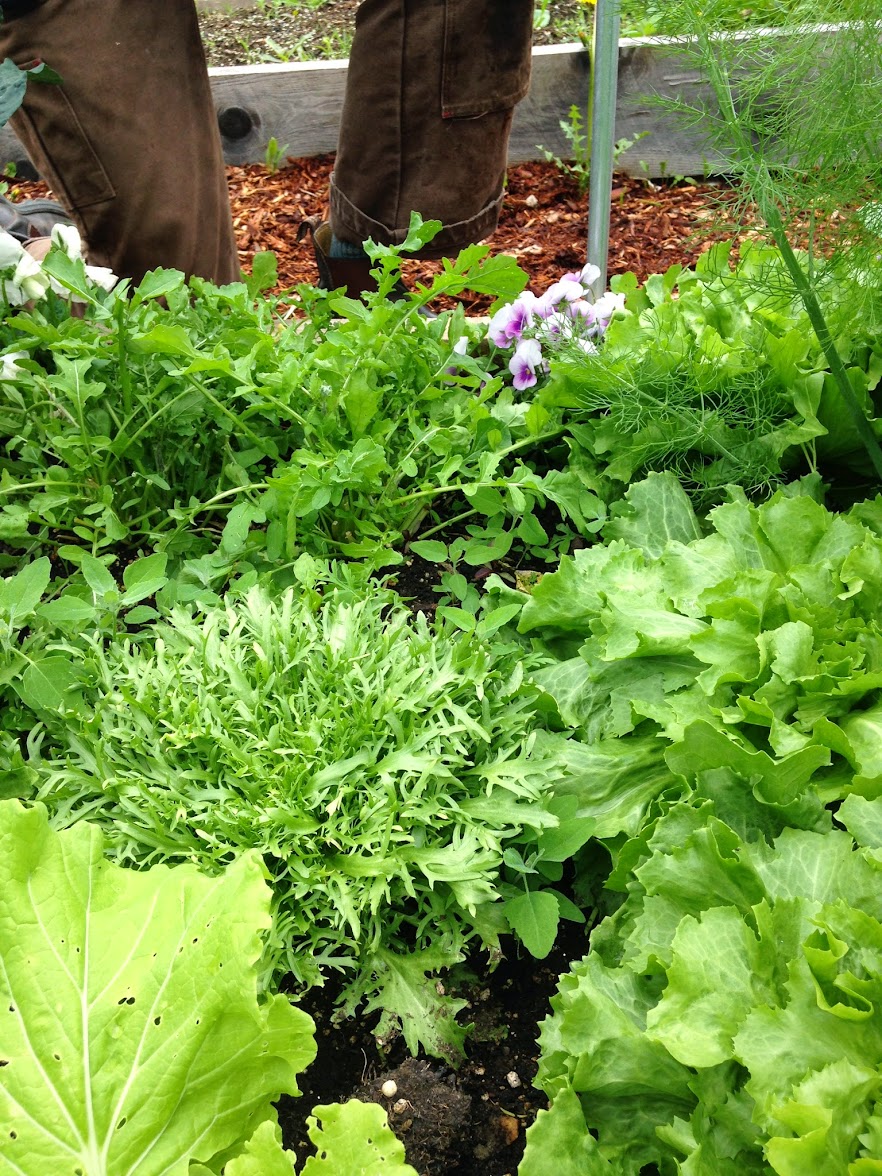
This is the act of making your garden soil ready for garlic planting. You want a nice patch of garden, that is worked deeply so that the soil is loose about a foot down in depth. If your garden is very compacted and hard, the garlic will not be able to grow well and you will be sure to end up with small heads of garlic that are tedious to peel and not all that satisfying. You can prepare the bed with a 3 prong fork by digging in straight down, tilting the handle of the fork back and forth, and loosening the hard pan. This is a good work out! Don’t hesitate to get dirty here by kneeling in the earth and breaking up the clods of soil with your hands so they are not chunky at all. Add a bit of well rotted manure or compost at this time. Not too much. For a 5 by 10 bed, maybe a 5 gallon bucket’s worth. You don’t want to over feed the garlic roots in the fall, but a little compost will add organic matter and that will help the structure of the soil, keeping it loose, able to retain some moisture without staying too wet.

Take your time and your garden will reward you. I always look at garlic planting as a soulful moment in the gardening cycle. It is saying goodbye to summer and embracing the dormancy of winter, when seeds deep below the surface slowly get ready for their spring emergence. Living in a climate with such long winters, I need these small, but important, rituals to remind me that spring will come and the cold barren winter is a necessary part of it all. The seed garlic is planted in the fall because it needs to send roots far into the earth in order to feed itself the following year. I take this as a metaphor for my own winter activities that feed me all year long - catching up on sleep, feeding my mind with more reading time, eating great, nourishing foods, and spending more time with friends and family.  I digress here, but these are the thoughts I have as I plant garlic, and after many years of doing it, I find that it is a necessary part of my mental preparation for winter.

2. Mark the rows with a hoe, or hand tool. I usually keep the rows about 12 inches apart and since my beds are about 4 feet wide, I keep 3 rows per bed and can easily reach the center. Just drag your tool - the sharp tip of a hoe or the narrow edge of a hard rake works well - through the soil to delineate the rows. You can use string and stakes if it is important to be straight, but I don’t bother with that at all.

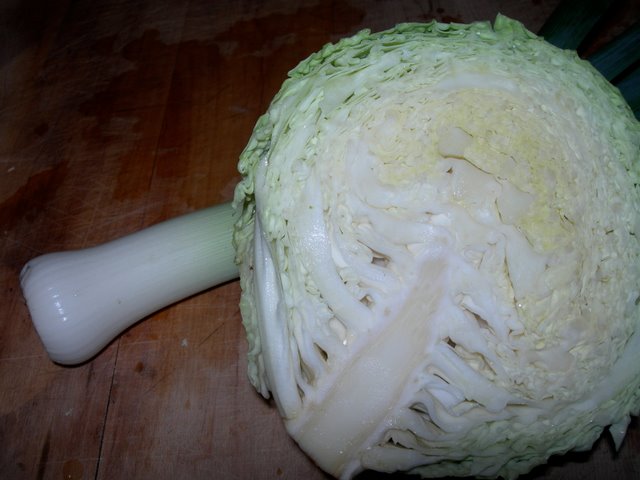
3. Break up the garlic heads into individual cloves. Do not peel! And notice that one end is the root end and one end is the stem end. This will be important for planting right side up with the root end pointing straight down and the stem end pointing straight up.

4. Space out the cloves. Lay the cloves on the top of the soil, following the line you have just drawn in the soil.  Allow about 6 inches between all the cloves.

5. Planting, spacing, and yields

Now you can start to plant. I always kneel down and take my time to feel the earth under me at this point. It just feels good and is a way to say goodbye to the garden before winter! Then, take a bulb planting tool, or a sturdy,  sharp pointed stick, or your hand if your soil is soft and pliable, and poke a hole about 4 to 6 inches down. Shove the clove of garlic deep down, root end down, and cover up with the soil. Continue down the row and repeat until all is planted. Three  heads of garlic will turn into about 24 heads next spring - assuming your garlic has about 8 cloves per head. . And with 6” by 12” spacing, a 5’ x 10’ patch of garlic will yield about 60 heads of garlic. That is enough to enjoy one head of garlic per week, all year long, and still have some left over for planting. To plant a patch this big, you will need to plant the equivalent of 7 to 10 heads of garlic.

6. Compost and mulch. I usually add another 4” of compost or well rotted horse manure to the bed. I then leave it like that for about 6 weeks. Then in mid to late December, I cover the bed with a thick layer of straw. You can also use leaves here, but straw is the best insulator with hollow stems that trap air and keep everybody warm down below. Another advantage of straw is that it usually does not have weed seeds in it; mulch hay, straw’s poor cousin,  should be avoided since it is laden with all sorts of perennial grass and weed seeds. The straw moderates the winter soil temperature and prevents buckling and heaving which could push those garlic cloves up and out of the ground.

Let winter pass you by now, and next......

7. Spring time chores with garlic. 
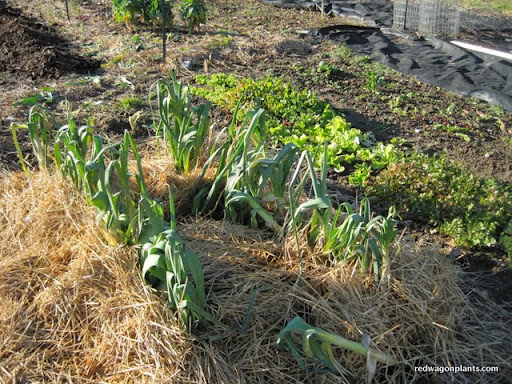
Once the snow melts and the soil warms up a bit, your garlic will break dormancy and magically pop up out of the earth. It is important to pull back the straw to let the garlic see sunlight. If you wait a bit too long, and pull back the straw only to see a bunch of yellowing stems, don’t worry! The garlic shoots will green up in no time and will look fabulously sturdy after a week or so of direct sunlight. I usually pull the straw into the garden path, let it pile up there and then replace it around the growing garlic to block out weeds once the garlic plants are about 8 inches high. I often will add a little granular fertilizer at this time, before putting the mulch back in place. For a 5 by 10 garlic patch about 3 cups of Pro-Gro from North Country organics or one bag of Compost Plus from Vermont Compost Company is just about right. This will insure you get large, easy to peel cloves that taste great.

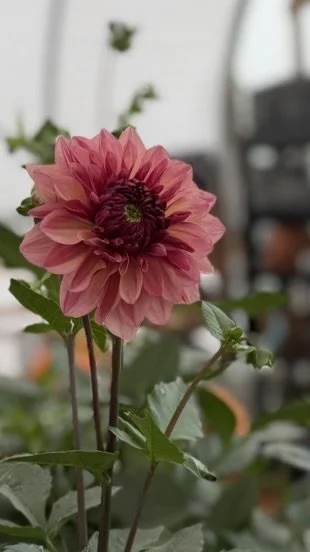
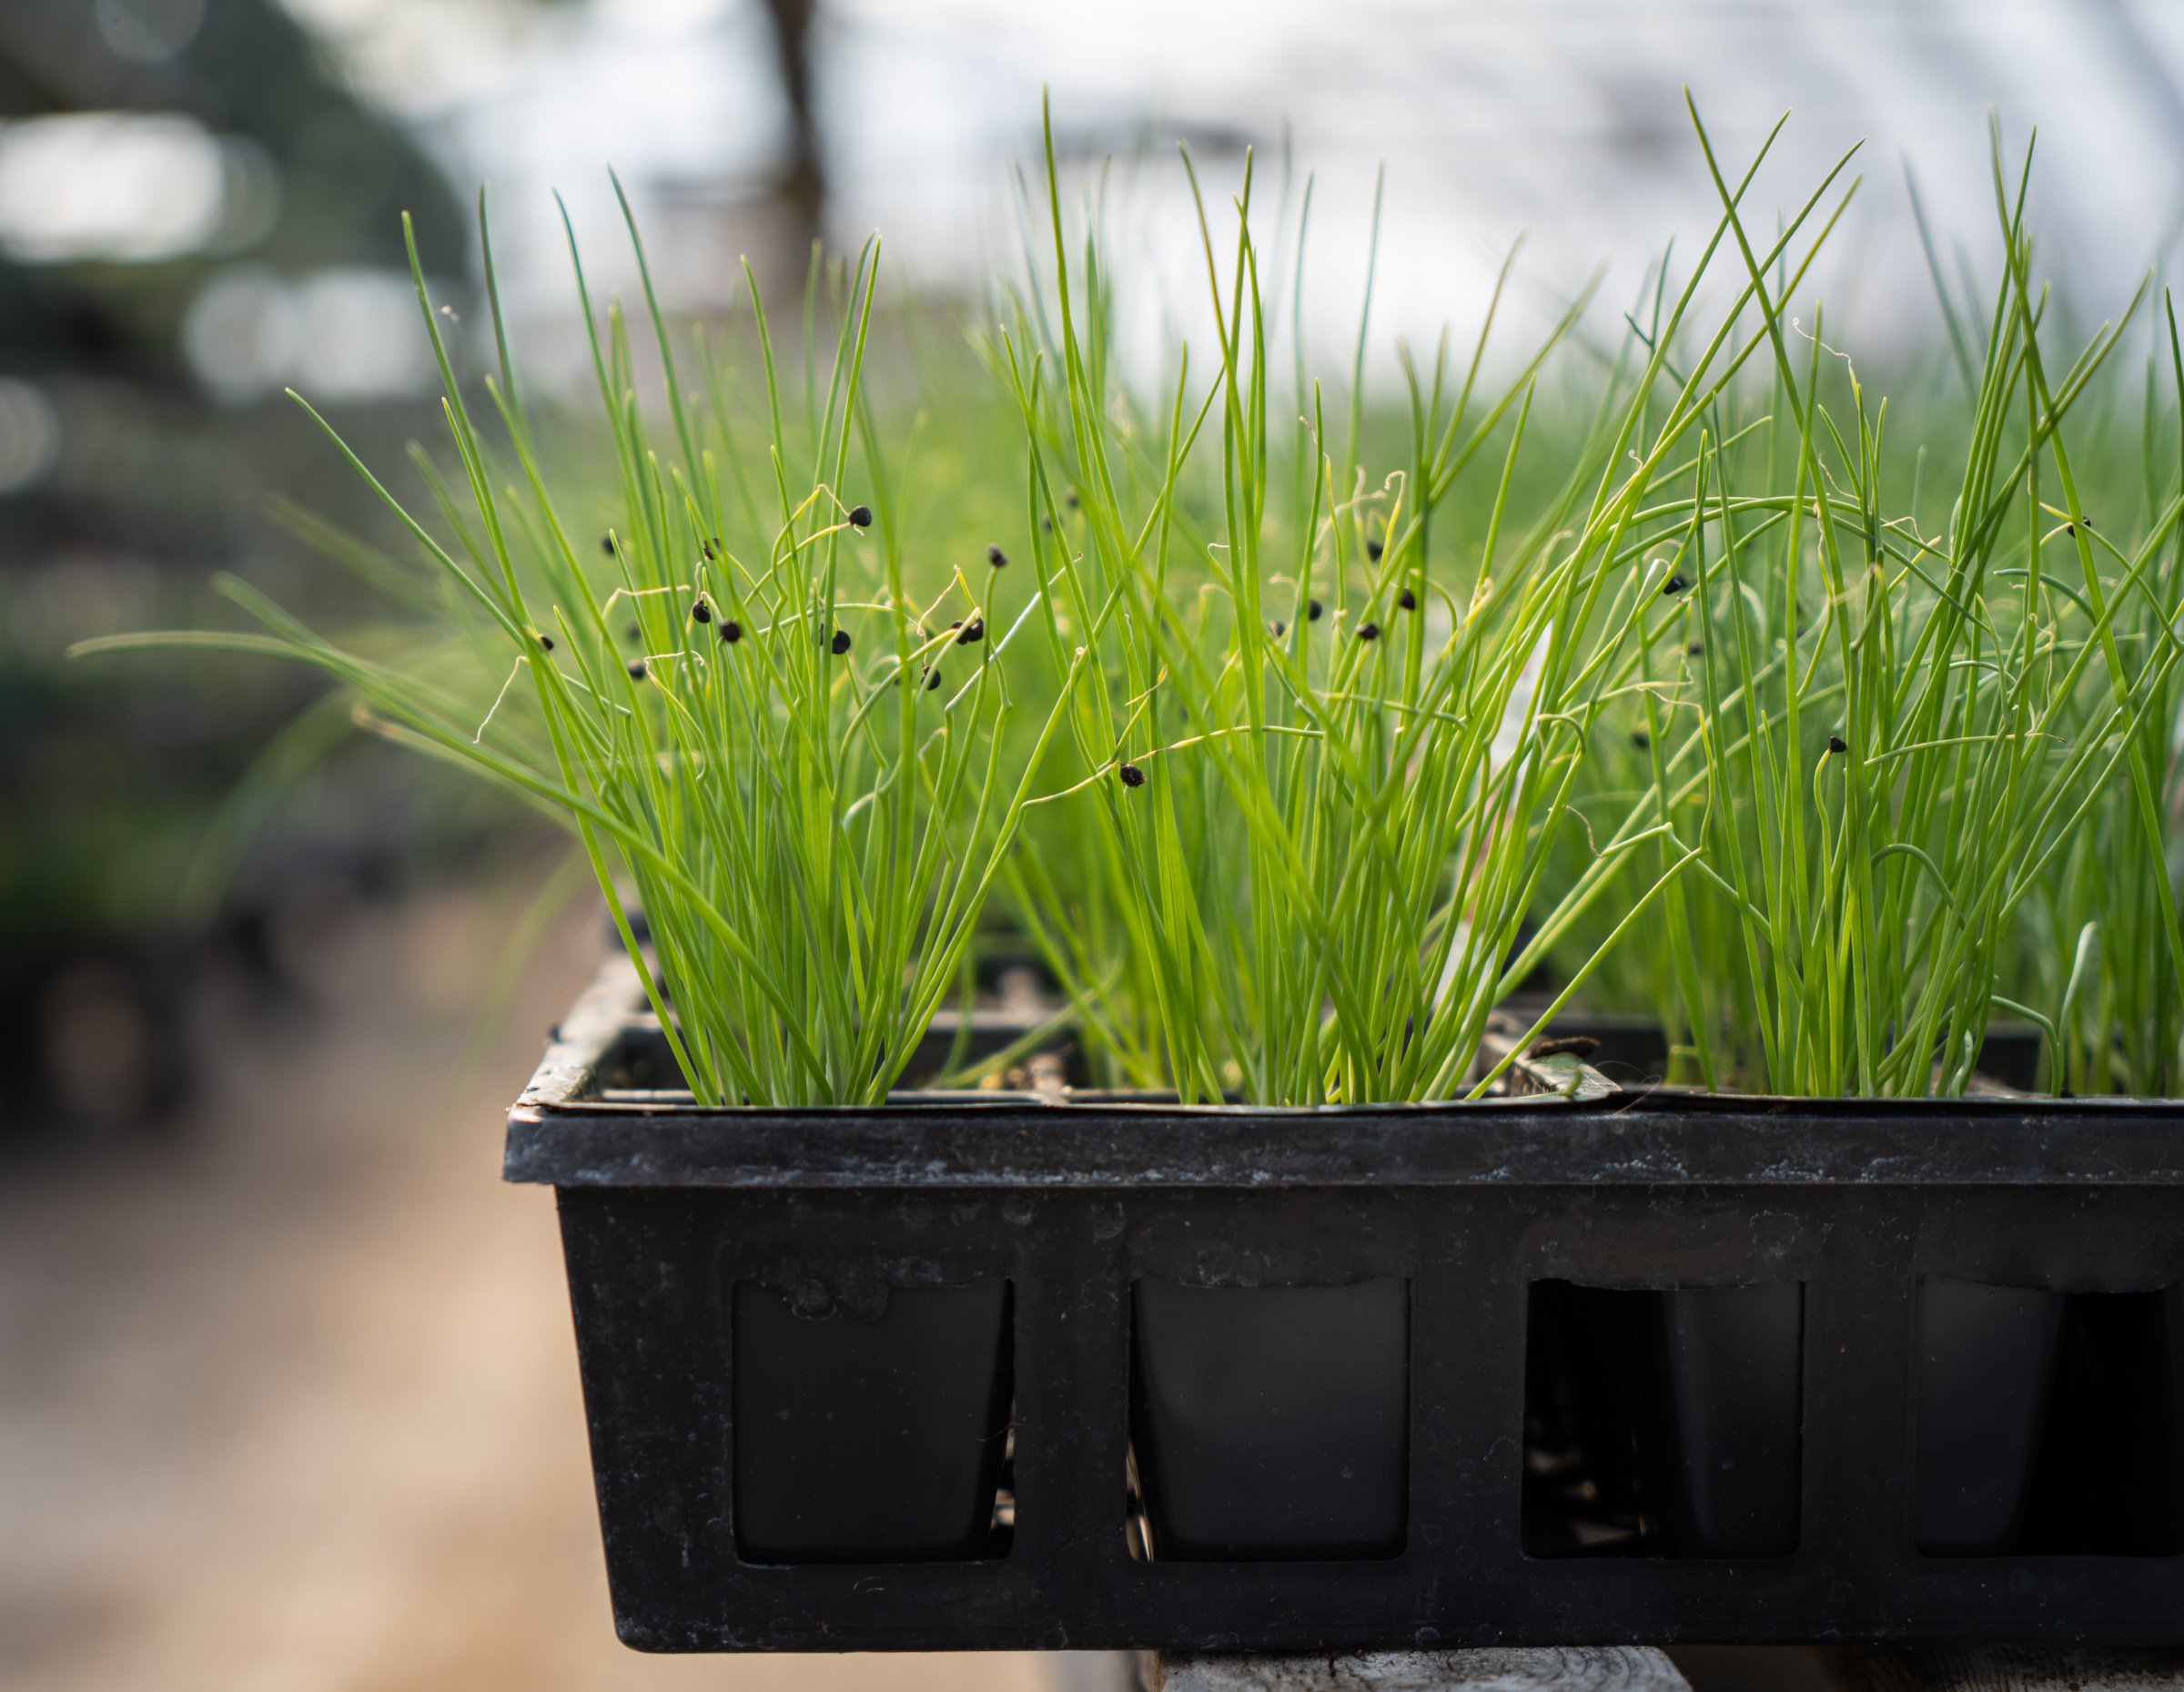
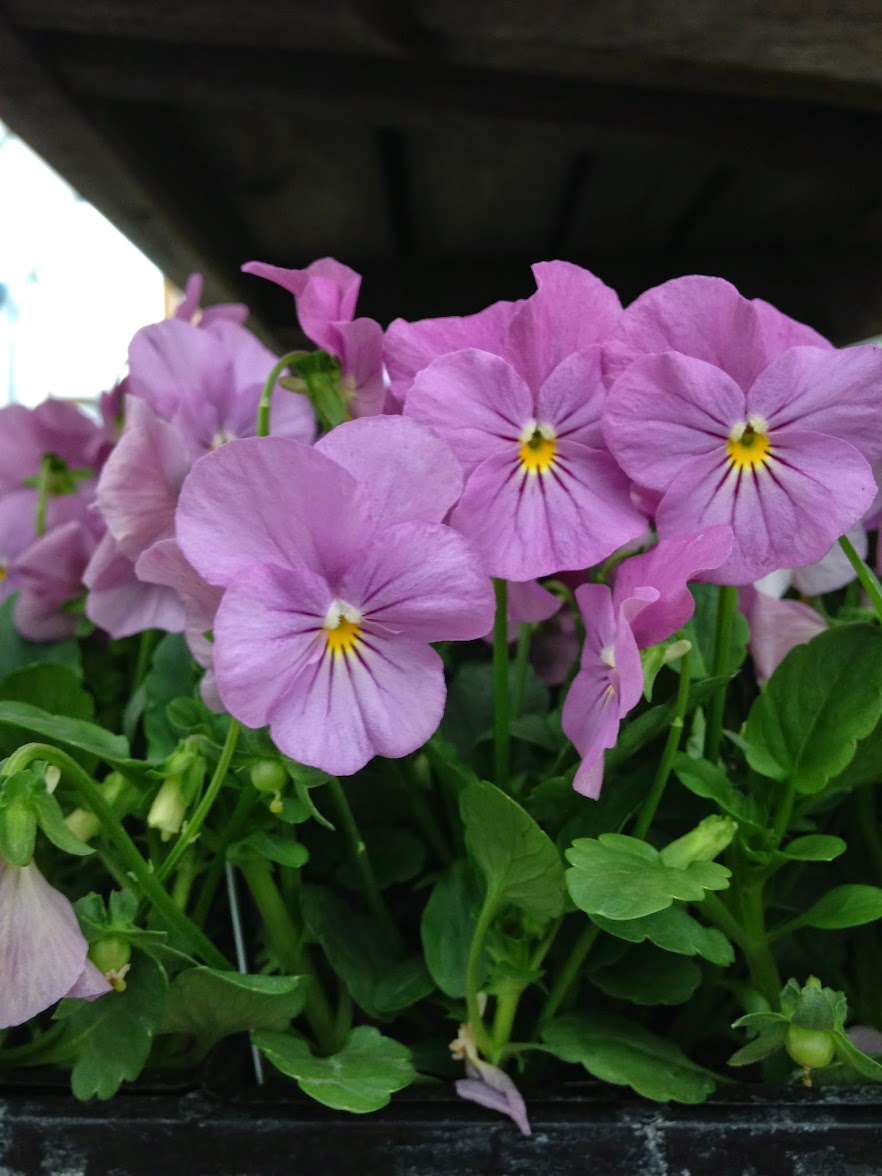
8. Garlic scapes will appear on stiff neck garlic around late May. These look like green curly cues with a pointy end that gracefully swoops down and around, waving in the breeze. This is the budding and flowering portion of the garlic plant. It should be removed to help the plant spend its energy on sizing up the goods below ground. If it is allowed to flower, the plants’ strength will go towards the flower and the garlic forming below ground will be the weaker for it. The good news here is that the “scapes” as they are called, are good to eat. I usually cut off the pointy tip - it is rubbery and inedible, and then slice up the round stem and use it in stir fries, stews, pasta dishes, or pickles. When cooked, it has the texture of a nice green bean and the flavor of mild garlic. It is absolutely delicious and a once a year treat that marks the beginning of summer - a harbinger of good things to come.

9. When to harvest? Garlic is ready to harvest when about 70% of its leaves have turned yellow. This is somewhat subjective, and should be taken as not a hard and fast rule, but rather a guide. You can dig up one head of garlic and look for signs of well formed skin, plump cloves, and individuation (cloves that are individually formed, and not one big mass). This is usually some time in late July. In very wet and rainy years, sometimes it makes more sense to take the garlic our of the ground a little early so that the skin does not rot in the damp earth.
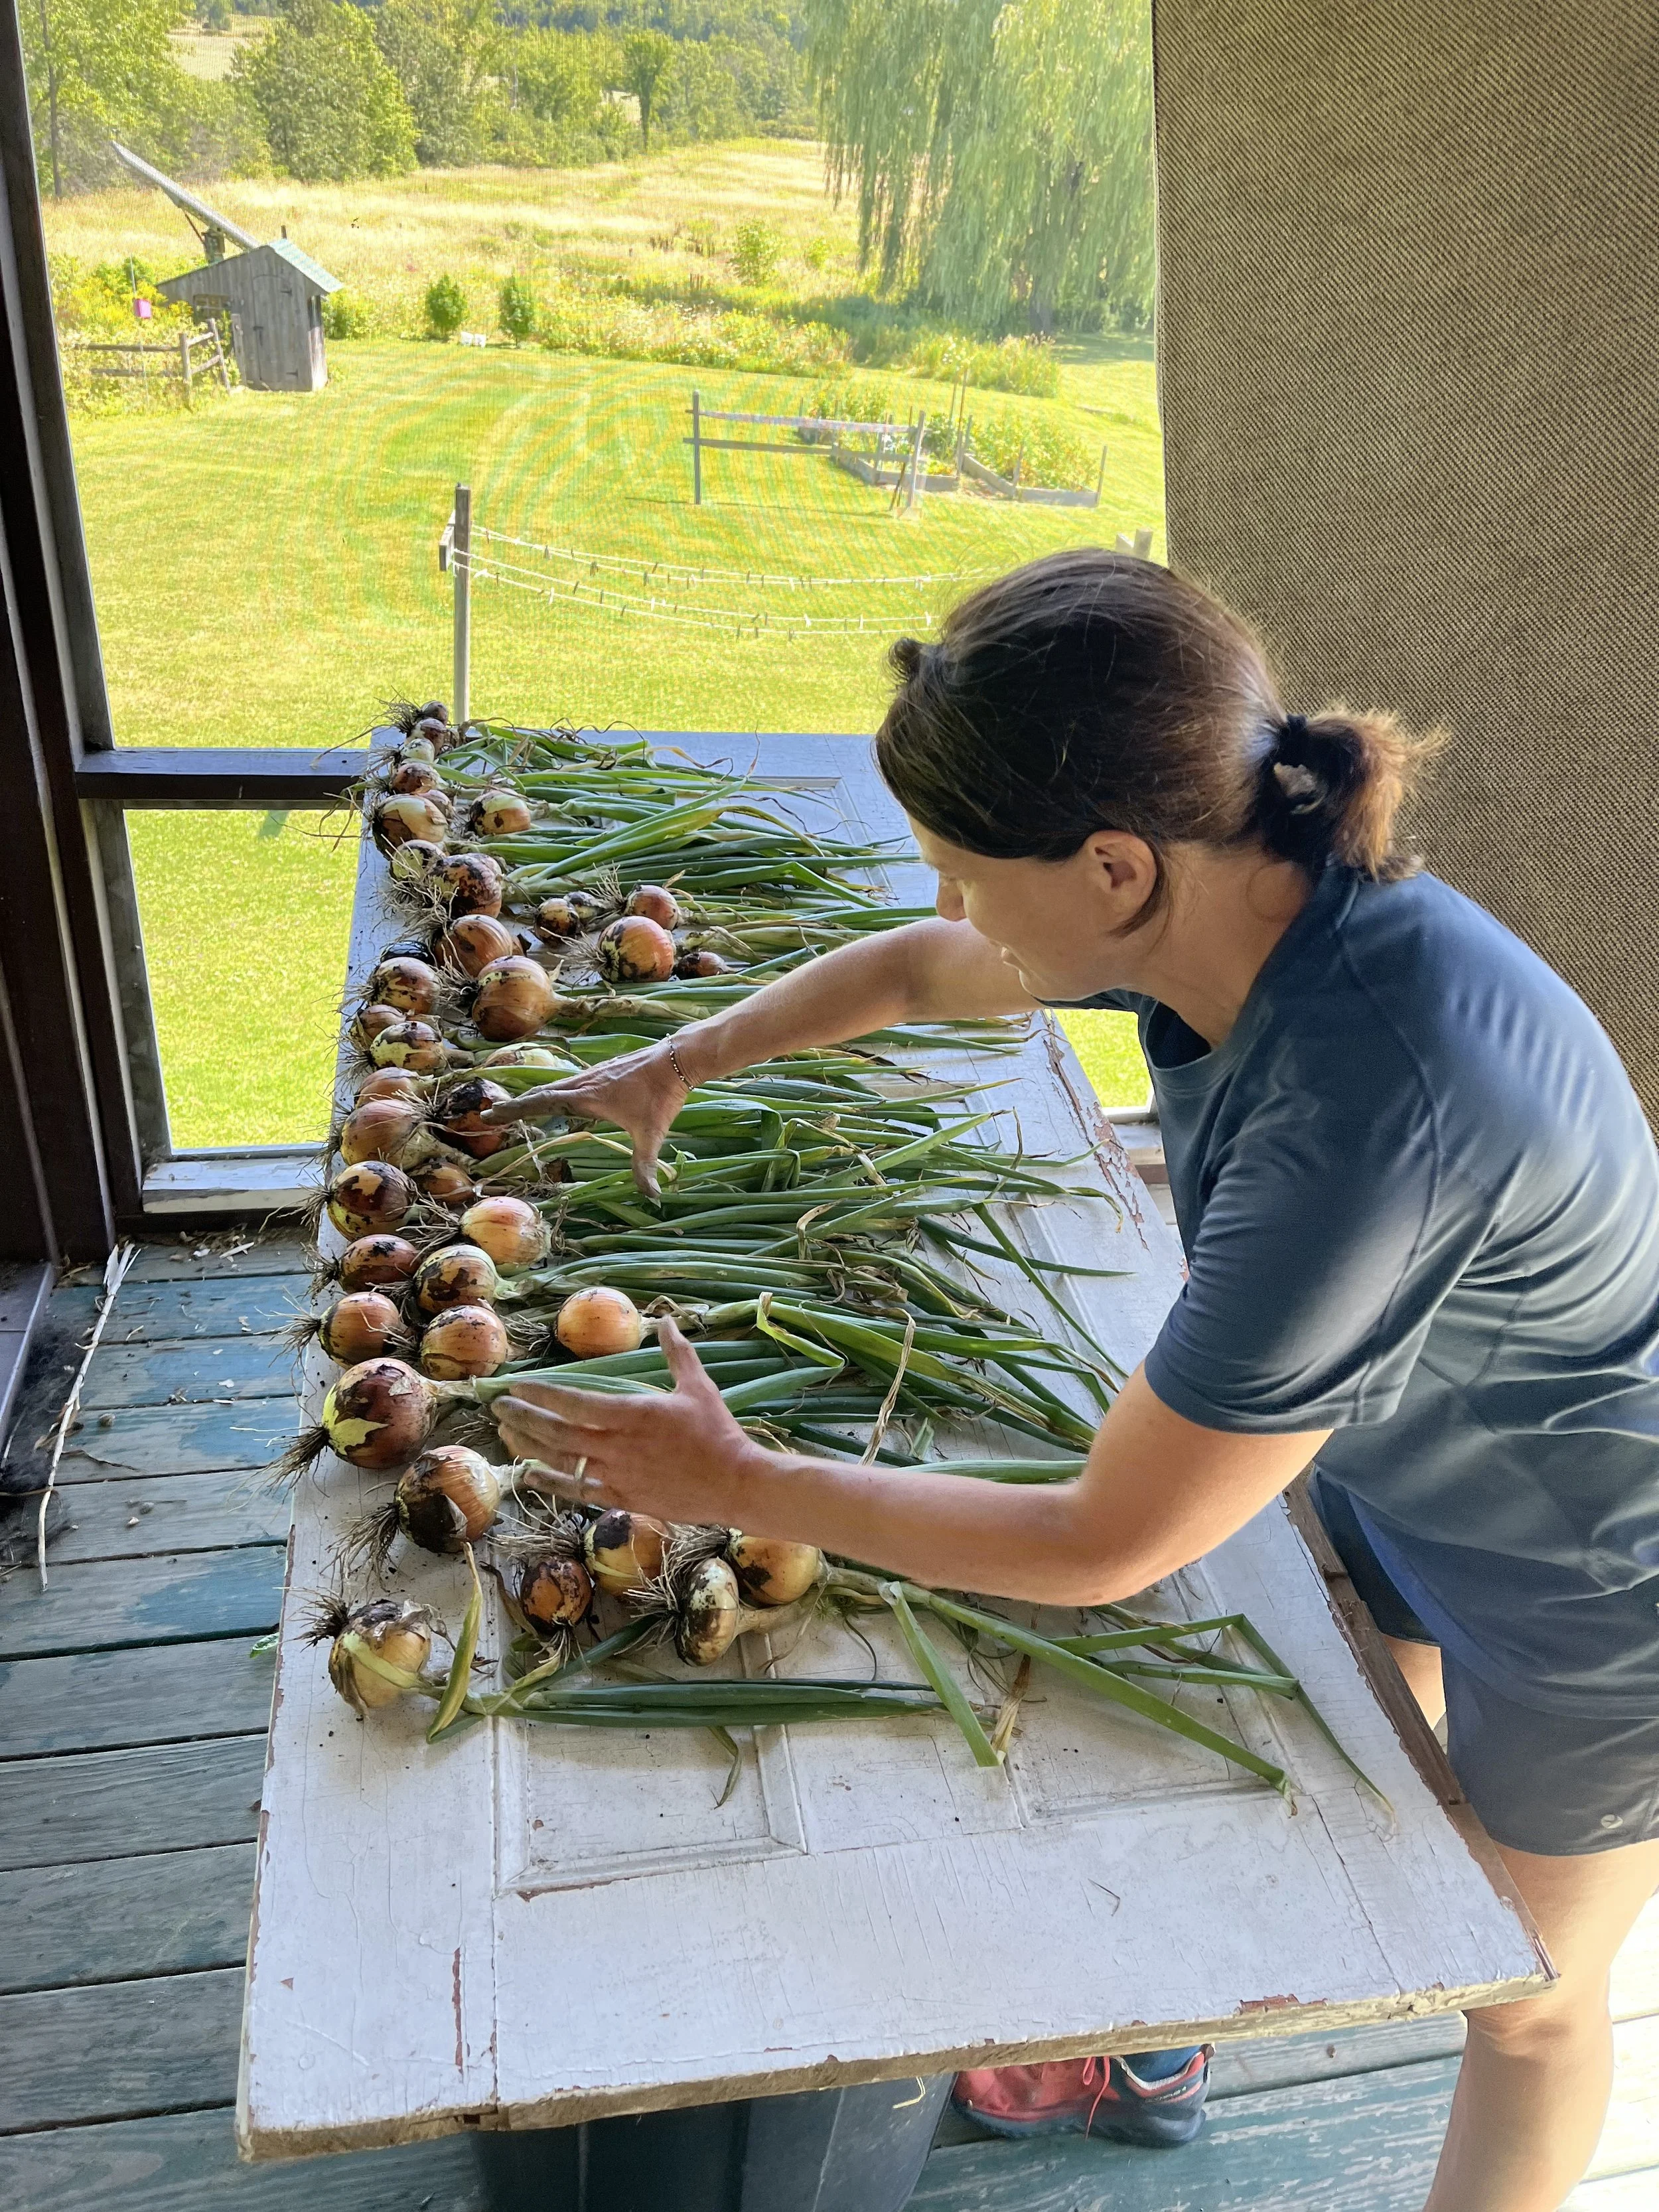
10. How to harvest? Take out your three prong fork again and use it to loosen the soil around the outside edges of each garlic row. This will break up the soil enough to allow you to pull out each plant with a firm yank. (If the stems break off, it is likely you waited too long and the skin and stems are starting to rot. At that point, just dig up the cloves with a spade and they will be okay in taste; they just won’t store well. ) Lay the plants on the surface of the soil so that they start to dry off. Once all the garlic is pulled up, wipe it with a towel or rag, and get ready to tie it into bundles. I usually take about 8 plants, hold them together in one hand, and with the other hand, wrap twine around the whole bundle. Tie off the twine and then hang the bundle in a dark airy space. The rafters of a garage, shed or barn work well. If you don’t have that type of space, just find a place out of the rain, out of direct sunlight and with good air circulation - a covered porch? a dry basement with a fan running? a spare bedroom that can get a little dirty? (no shag rugs please!).

11. Curing the garlic Curing is the process of letting the garlic dry which makes the papery skin that allows the garlic to keep all winter. The stems will turn brown and brittle and the exterior of the bulbs will become dry and paper-like, just like garlic in the store. At this point, it is okay to cut off those dry stems, wipe off any remaining dirt, cut off the roots, and place your garlic in a crate to store it. This can be done anytime from 3 to 6 weeks after you initially hang up the garlic to dry.

12. Storing the garlic Once the garlic is cured, cleaned and trimmed, you are ready to store it for eating all winter long. Garlic is best stored in the dark. In an airy, dry, cool place. I use milk crates, covered with a piece of burlap, and keep the crate in a very cool part of the basement. Ideal garlic storing temperatures are between 35 and 45 degrees, but a refrigerator is too humid, so please don’t be tempted to use that as a storage method. Other good places to store garlic (and onions for that matter) are unheated attics, attached garages that don’t freeze, but are not heated, or 3 season porches that do not freeze. Root cellars are great, but most of us don’t have one. If well stored, garlic will last until April or May - almost right in time for the garlic scape harvest!

13. Finding seed stock.

Until you build up your own supplies, you will have to purchase seed garlic. There are many great resources for garlic and for finding garlic seed, I recommend Johnny’s Selected Seeds, or locally, Last Resort Farm in Monkton, Hudak Farm in Saint Albans, or any farmer at your local farmers market who has nice looking seed stock. Seed stock is basically sorted out of the garlic harvest and selected for the following the following traits:

      • good size
      • evenly formed cloves
      • strong stem
      • well formed skin
      • great flavor
      • ability to store for a long time

If you have been growing out your garlic in your garden, you can pick out the best cloves at cleaning and storing time. Set these aside in a safe place where they will not be eaten and come October, experience the joy of planting your own seed garlic.

14. Plant garlic. Repeat Step 1. above and the cycle starts all over again!

April 26th Photo Gallery

Lettuce 'Forellenschluss' 

Marigold, French Bonanza

Catnip 4" Pots

Dusty Miller 'Silver'

Snapdragon Rocket 4-Packs- Pink, Red, and Yellow

Cosmos 'Sensation Mix' 4 packs

Mara des Bois Strawberry - everbearing French variety that is prized for its outstanding flavor. 

Lobelia Regatta Midnight Blue

Bidens 'Namid'

Echeveria Holy Gate

Rose Cascade Ivy Geranium

Thai Basil

Patriot Bright Red Zonal Geranium - Blurry picture, but lots of our geraniums are breaking into color like this. 

Arugula

Cold Frame with lettuce, chard, onions, kale - everything is hardening off nicely.

Spinach and most of our leafy greens are seeded fresh every week, so they are never old and root bound.

Another cold frame with chard and onions.

Penny Yellow Viola

Lilac Ice Viola

Sweet Genovese Basil, Nufar.

Mara des Bois Strawberry. This is a French variety that has been bred for maximum flavor. It came out of breenders' greenhouses in the late 90's and came on the market in the USA only in the past few years. It has the most incredibly intense strawberry flavor and is day-neutral, which means it will bear fruit this year, and will continue to do so all summer long. Very hard to find and expensive root stock. We are lucky to be able to grow it out for our customers. 

Onions, leeks, shallots, scallions on the cold frame.

Provence Lavender. Hardy to Zone 5 reliably, but have gotten a few years out of it in Zone 4. Faster to grow then Munstead Lavdender with bigger plants and flowers. 

Penny Orange Viola

Cold Season Gardening

As soon as the ground thaws, and dries out, I will be ready to plant. After chomping at the bit through this long, never ending winter, I long to get my hands in cool dirt and ceremoniously plant the first seedlings. A cold frame helps to rush the job along, and I can't wait to open ours up, fluff up the tired soil, add some compost and amendments, and dig in. My cold season garden is pretty predictable each year. I crave certain things, stick to those, eat only that the entire period of time it is ready, and then usually it is out of mind the rest of the year. Asparagus for example. It is pretty much a part of every meal during asparagus season, and then I never think about it the other 47 weeks of the year.  And it is ready before many other things, so why not give it the star treatment it deserves?  It takes up a good chunk of my garden for a reason....homegrown asparagus absolutely cannot compare to what you buy in the store.  There are so many delicate flavors in asparagus that are lost after any period of refrigeration, and I greedily await that first harvest each year.

And then there is bok choi. For some reason, I don't think about this vegetable too much 11 months out of the year,  but it is so cold hardy and so quick to grow, that earliest spring is the only logical time to insert it into the garden and into our kitchen. We grow 4 kinds of boc choi to give our gardens a real array of size, color, and harvest time. Violetta is quick to grow to baby size, and has shiny, dark purple leaves with pale purple and white stems. It is gorgeous and delicate and ready in just 3 weeks from the time I stick it in the ground.  Shanghai Baby Bok Choi is another quick and tiny one, but the palest green, with the most tender flesh. Red Choi is a medium sized boc choi with a more mustard like flavor, and the regular boc choi we grow, Joi Choi, grows up to be huge, heavy, and gorgeous (see below). These are all delicious chopped up and stir fried with ginger, hot pepper flakes, and garlic;  or thinly slivered and eaten raw as a salad or slaw or dropped into a warm bowl of broth.

Scallions are another cold hardy, quick to grow vegetable that makes it into all my early gardens. They can be planted in little clumps in tight spaces and harvested over a long period of time. I harvest them three or four at a time and leave the rest to grow for a later picking or two.

Next up are the salad greens, bitter greens and mustards. All of these can take multiple frosts and are happy to go into the garden long before the others.

In this picture from last year, we have Tokyo Bekana mustard in the bottom left corner. It is a light green, tender mustard delicious steamed or eaten raw. I especially like it in soups and broths with soba noodles and tofu. In the center is my favorite bitter green, Frisée ('Tres Fine Maraîchère") which I love to eat with a mustardy, garlicky vinaigrette. Behind that is some arugula which really should be planted multiple times throughout the season (just rip out the old plants and sow new seeds or seedlings). In the top right corner is a little bit of bulb fennel Zefa Fino poking into the frame. This is another great option for for those of us needing cold hardy and interesting garden plants. In the kitchen, I simply slice up the bulbs into long, thick wedges and roast in a 400F oven with olive oil, herbs and seas salt. And the bottom right corner is the soldier of the spring garden: Natacha escarole. This chicory relative is huge, easy to grow, and equally perfect cooked in a braise or sautéed or eaten raw in a salad, again with that garlicky Dijon vinaigrette. Escarole withstands multiple hard frosts, grows quickly to a 3 pound head, and is frankly one of the better values in the garden. A small to medium escarole in the grocery store can cost close to $4. And from one 4 pack, you can easily have twelve times the yield for about the same amount of money.

Here we have Lily sampling a bit of Lacinato kale. also known as dinosaur kale, Tuscan kale, or cavolo negro. We love it for its nutty flavor and the fact that a few plants stuck in the ground in April will produce until December. Again, a pretty good value! In front of the kale is more boc choi, Red Choi. And in front of that is ruby red chard. Chard is the least cold tolerant of all these greens, but it can take a few light frosts. The others can survive a few dips even into the 20's and come out fine.

From seed, I like to start radishes and spinach and peas, because really, who can resist this sight:

Get ready, set, go. Spring is coming, and we want to help you get ready. And soon, we will be looking at this:

Herb Thoughts

Herb garden planning is not a lot of work, but here are some thoughts I have put together on the topic. Herbs are easy to grow for the most part, but they are a big category of plants (we grow 100 varieties of herbs) and it helps to break them down and organize them into categories. This will help any gardener plant the right plant in the right place and give it the preferred amount of water, sunlight, food, and water.

Why grow herbs? For flavor, fragrance, and beauty - it is the easiest way to improve the flavor of what you cook. It is also one of the easiest ways to have a container garden on your porch or deck.  Herb gardening is intimate - you get close to the plants, smell them, taste them, see them respond to regular clippings. They are a perfect way to better understand plant physiology and the best short cut to great food made with little effort.

Propagation: Plants vs. Seeds

All herbs can be planted from plants, and some can be planted directly into the ground as seeds. The herbs that you can seed directly in the ground and expect great results are: cilantro, dill,  and chamomile. Everything else will do much better if you start the seeds in containers in a sheltered environment. You can start your own herb transplants easily if you have grow lights and a heat mat. Many herbs take a long time to germinate and many herbs are propagated only from cuttings. Making your own rooted cuttings is possible too, but that takes a little more of a sophisticated set up with misters, rooting hormone of some sort, and humidity domes. For those herbs, it is generally easier to purchase the plants.

Herbs from Seed:

  • Parsley
  • Chives
  • Cilantro
  • Dill
  • Chamomile
  • Savory (winter and summer)
  • Marjoram
  • Basil (all kinds)
  • Common Mint
  • Sage
  • Catnip
  • Chervil
  • Oregano (basic varieties)
  • Thyme (basic varieties)
  • Shiso
  • Sorrel
  • Lovage
  • Lemon Balm
  • Fennel
  • Salad Burnet

Herbs from Cuttings:

  • Rosemary
  • Lavender
  • Mints that are true to type (spearmint, peppermint, pineapple mint, etc)
  • Tarragon
  • Specialty Thymes (lemon, variegated, silver, etc)
  • Specialty Oregano (golden, ‘Hot and Spicy’, variegated, etc)
  • Specialty Sage (purple, tricolor, golden, etc)

Containers vs. in the Ground

Some plants love to be planted in the ground and others would prefer to be in pots.  Generally speaking, the herbs that like it dry and warm will prefer to be in a clay pot that breathes like Italian terra cotta. Plants that like it wet and cool might prefer to be in the ground, but they can also be grown in pots if the right conditions are given (more watering, a glazed or plastic pot, heavier potting soil, a little shade).

Herbs that like to grow easily in the ground in Vermont:

Cilantro, Dill, Parsley, Rosemary, Savory, and Chervil

Herbs that prefer to be in containers in Vermont: EVERYTHING ELSE!

This does not mean that you cannot grow herbs in the ground, it just means that in containers, it can be a little easier.

Some herbs do really well as tiny shoots for micro-greens: chervil, dill, cilantro, basil, fennel are our favorites.  And they are easy to grow indoors year round – just pat down some moist potting soil in a shallow container (only need 2” or so of soil) with holes in the bottom, press in the seeds, cover very lightly with a thin layer of soil, and keep moist. When the first set of true leaves begin to emerge, they are ready to eat. You can also grow pea shoots and sunflower sprouts this way. A south facing, sunny window is sufficient.

You can bring in potted herbs in the fall and keep them in a sunny window for use during the winter. The herbs that do best with this treatment: sage, parsley, rosemary, thyme, and savory. Basil can be brought in as well, but it won’t be terribly happy unless you have grow lights for it.  If you had some of these herbs planted in the ground, you can dig them up and slowly acclimate them to being in a pot and being indoors.

Herbs can be dried or frozen or infused in vinegar or simple syrup for year round use. Pesto or herb pastes made with oil or water can be frozen in small containers.  Drying is very simple or very elaborate – you choose! A dehydrator can be used, and the leaves can be stripped off of the stems once dried and stored in jars in a dark place. Or you can go the simple route and just harvest whole branches of the woody herbs such as thyme, oregano, rosemary, sage, and winter savory. Place the branches in woven baskets and keep in a dark, well-ventilated space. They will dry just fine on their own, and you can keep them covered with paper bags or kitchen linens and use as needed.

Related Upcoming Events

Cooking with Herbs with Molly Stevens and Julie Rubaud – a class and dinner.

South End Kitchen, Burlington, Vermont

March 19th.,  6pm

Red Wagon Plants pre-season Open House

April 4th 10 am to 3 pm. Tour the greenhouses and see behind the scenes.

Herbal Cocktail Party with Caledonia Spirits

April 17th, Red Wagon Plants 6 pm to 9 pm

Help us kick off our season with a bang!

Garden Things to do in December

  • Mulch your garlic. Need a good source of organic straw? Call up Aurora Farms in Charlotte, VT. They grow grains for the Nitty Gritty Grains Company, and their bales of straw are just beautiful - no weed seeds, nice long strands with hollow stems to insulate from the cold, and best of all it is organic. You don't want to risk introducing persistent herbicide residues into the garden.
  • Plant bulbs before the ground totally freezes (quick!)
  • Plant some paperwhite bulbs for forcing. You can find out how right here. 
  • Give your houseplants a trim, a feed, a little love. Check them for pests, wipe them off with a little neem oil if you see anything crawling around. This is a great time of year to give houseplants a little shower. The heat source in your house is likely quite dry, and most of your green friends like the feeling of rain. Recreate it for them. You can sing to them, too, while you are at it.
  • Make a few holiday gifts from the garden - herb salts, lavender sachets, cranberry apple chutney, herbal vinegars, calendula skin oil, or rosemary short bread. If you don't have any of the necessary garden ingredients, you can always purchase them and see it as inspiration for growing your own next year. Pinterest and the internet are brimming over with ideas and directions for making all kinds of beautiful  holiday treats from the garden. The links above will get you started.
  • Make a garland, wreath or swag with stems, twigs, branches, seed pods, dried flowers, and other goodies from fields, woods and gardens. I love growing a hedge of Ilex verticulata and a small row of red osier dogwood for their berries and twigs make striking additions to winter greenery like balsam or pine or cedar.
  • Poke at the compost pile. Try to introduce some air into its nether parts so that it really heats up before the cold sets in. Add some fallen leaves, and a little manure from a horse farm or friends with chickens. You get the idea.
  • Look at seed catalogs! They are coming out now and the best therapy for  December Darkness is those spring dreams of budding life and sowing seeds.

Shorter days, winding down, and it is alright.

Our greenhouses start up in February, when we begin the bustle that does not end until the final sales of early September. During that 6 moth period, we are in constant motion, putting in 14 hour days at the beginning of our season for a solid three months and gradually tapering down to a normal 8 to 10 hour day for the remainder of the year. Work moves into the office where I am planning out next year's varieties; we are also busy with greenhouse clean up and putting everything to bed for the winter.  When the maples signal that autumn is here, I am ready for a little slowing down. A little time to enjoy the fruits of the garden, to eat those fall greens that quietly draw attention amidst shades of yellow, red, and orange. I finally have time to cook, to preserve some of the bounty with the help of the canning pot, dehydrator, root cellar and freezer.

I tend to be a creature of habit and make more or less the same things each year, because I know my family loves them and because I  am not willing to give up precious time and space with experiments that might not work, that might join the sad jars and mystery freezer bags that lay untouched. I do try one or two new things each year, but only after they have been enthusiastically recommended by trusted sources.

Here are some of the tried and true that show up every year in our winter pantry:

Sauerkraut. I use this recipe from Sandor Katz, fermentation guru, author, and person of note who just recently spent some time teaching his craft in Vermont.

Plain and easy,  roasted and frozen tomatoes. I wrote about this one last year, and you can read that here. This is the easiest way to make tomatoes that will taste great in a sauce mid-winter. I have more time to cook in the winter, so I don't bother making sauce to freeze or can during the height of summer. But if i have these in the freezer, I can turn them into sauce, soups, add them to braises, etc.

Fancier, slower, seasoned roasted tomatoes. These are a different beast. The tomatoes are slowly roasted, like 8 hours of slow, in a 240F oven with olive oil, garlic, herbs. I sometimes do different batches and label them as such so that they can be used in various dishes during the winter. For example, I make some that are sprinkled with just oregano, or just cumin. But most of them are made with olive oil, thyme, and garlic. And a little sea salt.

Here are some of the tried and true that show up every year in our winter pantry:

Pollinator Habitat Restoration for the Home Gardener, Part 1: Bees

By Hope Johnson

(Part 1 of 2. See Part 2 for information about promoting butterfly and hummingbird habitat).

Habitat loss, degradation, and fragmentation are serious threats to the survival of pollinators.  There are three basic pollinator habitat requirements:

1.  Flower-rich foraging areas and water source.

2.  Suitable host plants or nests where they can lay eggs and/or raise brood.

3. Environment free of pesticides.

This blog series will focus on the habitat needs of bees (social and native solitary), and the butterflies and hummingbirds which are the pollinators we most often encounter and recognize in our home gardens.

Bees

Of the 20,000 species of bees worldwide, 4,000 are native to the U.S. and 90% of these are solitary. These include bumble, mason, and ground-nesting bees. The domesticated honeybee is a European import.

Bees prefer purple, yellow and white flowers and see ultraviolet color patterns, such as shape and color ‘nectar guide” patterns that provide clues to the location of nectar in the flower.  Not surprisingly, sequential bloom  is important for forage all season long. So, what to plant?

Here's a list of Top Ten Perennials for bees and other pollinators from Annie White at University of Vermont:

1. Monarda fistulosa, Bee Balm.  More resistant to powdery mildew than M. didyma (red).

2. Aster Nova-angliae. late season nectar source (for Monarchs, too).

3. Eupatorium purpureum, Joe Pye weed.

4. Penstemon digitalis, foxglove beardtongue, native.

5. Veronicastrum virginicum, Culver’s root. Blooms late summer.

6. Helenium autumnale, Sneezeweed.  Deer and rabbit repellant.

7. Lupinis premis, Sundial lupine.  Host plant for butterflies and native to Vermont.

8. Lonicera sempervirens, Trumpet honeysuckle. Native and blooms June to September.

9. Echinacea purpurea, purple coneflower.  native to NY and CT, composite flower.

10. Agastache foeniculum, anise hyssop.  Native to NY and NH.

Other ways to promote habitat? Seventy percent of bees live in the ground and these include the squash bees that nest in the ground near the squash and cucumbers they pollinate.  Preserve areas of bare or sparsely vegetated well-drained soil and avoid compaction of same. Also preserve dead or dying trees and hold the fall clean-up since tunnel nesting bees rest in the debris. Create your own wooden net blocks or bundles of hollow stems.

Avoid using insecticides containing systemic neurotoxin neonicotinoids especially Imidacloprid and Clothianidin that linger in the soil and can remain active for a year or more. Neonics are absorbed by the plant and dispersed in plant tissues including pollen and nectar and they are toxic to bees and beneficial insects. Although there is conflicting evidence that neonicotinoids cause colony collapse disorder for honeybees, there is increasing evidence that topical or ingested exposure in bees retards colony growth, impairs navigation and foraging behavior and may increase their susceptibility to other pathogens such as mites, bacteria and fungal infections. See Friends of the Earth Bee Safe Gardening Tips for a full list of neonics to avoid.

Bee in squash blossom

Local Resources

“The Buzz on Designing Pollinator Friendly Landscapes”

Annie White, UVM Graduate Research Assistant.  Presented at 2013 Flower and Garden Show, Burlington, VT.  At PollinatorGardens.org, see “Top ten perennial plant choices for pollinators” and  “Designing pollinator-friendly  landscapes”.

“Enhancing Pollinator Populations for Farms and Gardens”, presentation by John and Nancy Hayden of The Farm Between at NOFA Winter Conference 2014.   At thefarmbetween.com, see full powerpoint presentation and info on June 30th, 2014 Pollinator Workshop.

“Attracting and Conserving Native Pollinators”, presented by Anne Dannenberg, Pollinator Habitat Consultant, a One Night University class at Access CVU, 3/10/14. Contact:  acd@gmavt.net

Echinacea purpurea

What to Plant in Late June

Has your garden been producing lots of vegetables yet? We have been harvesting for a while thanks to some season extension and some early plantings.  Boc choi, lettuce, escarole, radishes, asparagus, chard and kale have all been making regular appearances in our meals and keeping us out of the produce aisle at the grocery store. So now, there is a little room in the garden where some of these plants have been harvested. What to plant next? There are so many options, and we like to take these "gaps" as a time to experiment, or add some diversity to the garden, or take advantage of short season crops that can be ready before planting a fall crop, or put in another generation of a warm weather crops to ensure a healthy harvest for as long as possible. Here are a few ideas......

Experiment

An empty spot or two is the perfect place for planting something new. Preferably something that does not take up too much room, and something that grows vertically so that it does not crowd its neighbors. Celery, fennel, scallions, boc choi and chard are all great candidates. Or a new variety of lettuce, or some arugula or mustard green you've been wanting to try. These are all crops that are fairly quick to harvest and will help maximize your harvest  in that precious garden real estate.

Add some diversity

Small spots are just perfect for adding flowers to the garden that will attract pollinators, provide habitat for beneficial insects, and will give you blooms to enjoy in the garden or in a bouquet. There are many great annual flowers that grow well in tight places and they break up the wide expanse of vegetable plants. By punctuating the garden with blossoms, you make it harder for predator insects to find your vegetables and you create a more diverse ecosystem, in miniature. Going for the most diversity possible in a small space is a great move in your over all pest control strategy. Some flowers we recommend for tight spaces:

Cosmos

Verbena Bonariensis

Zinnias

Sneak in a short season crop

Arugula, baby boc choi, spinach, lettuce, radishes, dill, cilantro and scallions all grow quickly and can take a bit of shade from their neighbors. This means you can plant them in close proximity to taller plants, and they won't mind one bit. They even enjoy the shade in the heat of summer. These can all be started from seed or transplants this time of year, and are a great way to add something to your table that you may not have planned on. Keep salads fresh with new lettuces, don't keep eating those bitter old ones! Same with arugula that has bolted or is too holy from flea beetle damage.....start with some fresh ones for those July salads.

Add a second generation of a warm weather crop

This is a great time to plant another round of cucumbers, cantaloupe, a short season tomato, hot pepper, summer squash or zucchini. You can try out a new variety to mix it up, and even grow a vining crop on a trellis to save space. The plants were planted a month ago are going to be producing pretty soon, and when they get tired out or have a pest or disease issue, your new plants will be just maturing and ready to provide you with a new round of goodies. You can maximize the bounty this way, and you won't be tempted to keep an old and diseased plant in the garden if there is a new one ready to report for duty.   This will also help with your disease and pest prevention over all.

Remember that the more you keep up with the garden, the tastier your meals, and the healthier your plants. There are so many reasons to garden, and keeping the plot looking and tasting good will keep you motivated to maintain your garden and to eat really well!

Stick Season Tasks

  • Plant bulbs. Watch this video with Charlie Nardozzi if you don't know how.  Gardener's Supply in Burlington, Williston and on line, has a great selection of flowering bulbs that will wow you in the spring.

  • Mulch your perennials with leaves. No need to think of leaves as waste...they are loaded with carbon and a perfect way to add organic matter to your gardens. They will offer some winter protection too.  Here are some other leafy ideas.
  • Cut back annuals if you have not done so yet. Or leave the sturdier ones such as sunflowers and amaranths since they make lovely perches for song birds. Not everything needs to be so tidy.


  •  Build a raised bed for next year
  • Weed and cut back perennial beds.
  • About all that food you diligently canned and froze all summer - start eating it!

  • Let us know what varieties worked well for you. You can contact us through this website.
  • If you want to make a new garden for 2013, now is a great time to mark it, remove the sod, and amend with compost.
  • Turn the compost pile.


  • Clean off tools, oil them, put them away neatly, and feel good about it all.


  •  Store garlic and onions in a cool, dark, dry place.
  • Make a pot of potato leek soup.
  • Mulch your leeks and root crops, if you have some in the ground still, with straw, so that you can harvest them after frost comes.

  • Sit by the fire if you have one, light some candles if you don't, and enter the time of contemplation and restoration.


Lori and Doug's Garden: Construction

Meet Lori and Doug, two of our longtime customers and friends. Last year, they visited the greenhouses repeatedly, making large purchases of vegetable plants, it seemed every day. I finally asked them if they were starting a small farm, and they admitted that they were having some problems. Apparently, everything kept turning black and dying. This does not usually happen to our plants, so I offered to visit their garden, which happens to be on the way home, and they happen to have very nice wine to offer, so it seemed like a win-win. Lo and behold, their beautiful garden site was also the low lying spot where their entire property drains. The plants were sitting in standing water (remember all the rain last year?) and were drowning. I advised them to just start over, sad as that is, because there was just no way to grow in that site.

They asked us to help them build a big beautiful raised bed garden, so we set our expert carpenter and all around handyman, Eric Denice, to the task. Here's what they created together.

In the fall, Lori and Doug planted garlic, which is now growing beautifully, and each week, they come in to let us know what they are up to and we help them pick out plants that are appropriate for the weather. It has been such a fun project and we are grateful to Lori and Doug for including us!

Please keep checking back for updates as we chronicle the progress of this great garden and its people.

Home orchard, here I come.

Last Saturday, we were lucky to have a visit from Charlie Nardozzi, garden educator, author, TV and radio personality, and garden coach. He provided us with two hours of entertaining and information packed advice on growing fruit at home - a project which can feel like a daunting commitment, but which he explained so clearly, that it felt like a task we must all embrace...right now. I have to admit, I have been living in the same house for 6 years and have yet to plant much in terms of fruit trees. I keep studying my property and imagining where the trees would go, but every year, another chance passes and my trepidation leaves me fruitless yet again. I have planted a few blueberry bushes and raspberries and currants far from the house, but no trees save for one orphaned plum tree a couple of years ago. Growing fruit trees always seemed like more work and maintenance than I have time for, but after learning some of Charlie's simple strategies, I feel armed and prepared. Here are a few of the general tips Charlie shared with us.....

  • Trees are grafted, unless you dig them up out of the woods. Which is not a good idea, since you would be getting something not bred for fruit production and possibly disease laden. Trees are grafted in order to provide strong root stock in combination with a "top" that is bred primarily for eating quality. In addition, apple trees are often grafted onto a "dwarfing" root stock which will keep the tree from towering above you, fruit out of reach.  When planting, look for what is called the "graft union" - it is a slight bulge at the base of the trunk where the root stock and the top meet. This union should be about 1" above the soil line once planted. If you plant it too deeply, you may trigger the root stock to take over the top growth and this would not provide you with the best eating fruit.
  • At planting time, use only the native soil in the planting hole. Dig the hole so that it is 2 to 3 times wider than the tree's container or root ball. Do not go deeper than the container or you risk planting the tree too deeply.  If you add compost to the planting hole, the roots will never have to reach out and search for food in the native soil and the tree's root system will never develop fully.
  • When purchasing a tree, look for even lateral branching (called "scaffolding").
  • The first two years of a fruit tree's life are the non-bearing years. It is important that the tree puts its energy into being strong and vigorous, not into making fruit. So, sadly enough, you must pick off the blossoms so that fruit does not form.  This difficult task will reward you with bigger and better fruit on a healthy tree in years to come. After Charlie's talk, I dutifully went home and stripped my plum tree of its recently formed flowers.
  • Spacing of trees is equal to their height. In other words, if a tree is going to be 15' tall, you need to plant it 15' from its closest neighbor.
  • Pitted fruits like plums, cherries, peaches, and apricots do not do as well on clay as apples and pears do.  If you are like me, and live in a clay pit, look for the best drained site and consider digging some trenches to direct the water away from the orchard.
  • Amend the soil by layering in compost and other nutrients on the soil surface (not right up against the trunk though) after planting. This should include compost, some additional nutrients based on soil test results, woodchips from hard woods (which promote beneficial fungal activity), and a little woodash (only about 1 cup per tree).  Vermont Compost Company's Perennial Blend is a perfect material for mulching around the base of the fruit trees. It includes compost, micro-nutrients, macro-nutrients (NPK), and an extra shot of bark, which is high in lignans and which promote the beneficial fungal activity trees love.
  • A north facing slope is the best spot for a home orchard - it heats up a little later in the spring and keeps the trees a dormant a little longer. This delays bud formation which lowers the risk of a frost zapping those early flowers.  A north facing slope also has good air circulation and frost tends to blow away before settling into a valley or dip.
  • Fruit trees are best planted in pairs, and their planting partner should be a different variety or cultivar. This diversity leads to better pollination which equals more fruit formation.  For example, a Liberty apple, should be planted near a Honeycrisp, or a  Parker pear should be planted with a Summercrisp pear.

I think I will try a few cherry trees and  pears  this year. I have a spot picked out, on the north facing slope outside our kitchen window. And maybe once those are in, I will start to imagine some blueberries and raspberries nearby....closer to the house than the ones I planted when we first moved here.  One thing I am glad about....my years of procrastination with the back yard means that I have a blank slate and the home orchard can be very close to the house; it will be landscape and larder, all in one.


What to plant now?

Given that our spring has been pretty mild over all, many gardeners are eager to get in the garden and plant a little earlier than normal. While the temptation is huge, it is also a good idea to remember that a hard frost can still come anytime in the next month or so and the ground is not all that warm. So what can go in the ground now? Lots of cold hardy vegetables and herbs are ready to go including onions, broccoli, cabbages, kales, mustards, boc choi, and more. It is best to harden off the plants for a few days before transplanting them - this means letting them get used to the cold, the wind, and the direct sunlight. Most of our plants will come to you already hardened off, but other nurseries may not take care to do that, so it is best to do it yourself. You can also use some row cover to create a small micro-climate for the young plants. We use hoops made out of 9-gauge wire to hold up the fabric off of the plants. This will give the plants a breathable, water permeable house to grow under during their initial weeks in the garden. The growth rate will be about double the rate of plants grown without row cover.

You can read more about hardening off  here.

Another great thing to plant now are crops you direct seed and that can germinate in cold conditions - spinach, carrots, beets, turnips, radishes, scallions, peas, and fava beans.

If you have a spot in your garden that you are not going to use this year, you might want to consider spreading some cover crop seed. this will help ensure that the soil is fed during it's fallow period. The cover crop is essentially plants that are grown just for the soil's on going health. For cold weather sowing, you might want to try a cow pea and vetch mixture or oats or an annual clover .  This will smother out weeds and add lots of organic matter to your garden.

FAQ #20: Do I have enough sunlight for this plant?

First you need to determine if you have full sun, partial sun, or full shade in the area you are considering. The best way to do this is to spend a day (with a clear sky) at home and note which areas come into sun and when, and when they are in shade again. Do this in spring when you have a realistic amount of sunlight, not in summer when the day is longest.

Full sun means at least 6, but preferably 8 hours of direct sun each day. Sun loving plants can usually survive with less but will not bloom as much.

Part sun and part shade plants prefer 3-6 hours of direct sunlight per day; however part sun plants can usually take more heat than part shade plants, which will want relief from strong afternoon sun.

Full shade means zero to 3 hours of direct sunlight. These plants do NOT want total darkness but rather filtered, or indirect light, such as that provided by a deciduous forest.

FAQ #8: How much/often do I need to compost?

If your garden soil is naturally rich in organic matter, an inch or so of compost at the beginning of the season and again in midsummer is probably plenty. If you have very sandy or nutrient-depleted soil, provide as much compost as possible - several inches at the beginning of the season, a few handfuls for each plant at transplanting time, and a thick re-application in midsummer. If you have very poor soil it is also a good idea to rotate the growing area and grow nitrogen-fixing cover crops to increase the organic matter and nutrient content of the soil. The best way to determine your nutrient needs is to do a soil test. Soil can be tested using  a simple test from the garden garden center, but a professional soil test will provide more detailed information and recommendations for amendments. Soil samples can be sent to UVM Extension for soil testing for about $14. Find out more about soil testing here.