garden season extension

The 2024 Season is Opening and we are Celebrating!

Red Wagon Plants is opening for the season on Friday, April 12 at 8am.

Join us on our opening day to enjoy the colors and fragrance of our Spring crops growing. We will have many cold hardy flowers, herb and vegetable starts for sale, as well as all the seeds, soil, pots and tools you need to get the season started. We will open at 8 am.

Stay (or come back) for an evening of music, food and drinks during our opening day party!

Opening Day PARTY starts at 5pm

  • Live music by the Thaya Zalewski Jazz Quartet

  • Farmers & Foragers Food and Drinks

  • Las Hermosas Tacos

  • Caledonia Spirits Cocktails

and of course, good company with many friends, neighbors and gardeners excited to talk about plants.

We aren’t selling tickets for this event, but parking is limited. So please carpool, if you can.

Free flowers for full cars!

Our parking attendants will hand out 4-packs of pansies to every car with 3 or more people. Please carpool with your friends and neighbors because our parking is limited.

Starting April 12 we will be open 8AM - 6PM every day. We look forward to seeing you.

Hardening Off Those Plants

Curious about what "hardening off" means and why it's important? Here's a blog from our archives to help you prep your cold-season transplants for the great outdoors. 

Plants need to be hardened off before being transplanted. What does this mean? It is the process you take them through to get used to direct sunlight, wind, cold, heat, dryness, and any other weather conditions they will be asked to live through during their lives. When plants are started in the greenhouse, in trays or pots, their world is sheltered and comfortable; food is readily available in the compost-fortified soil, and the temperatures are carefully regulated. Once it is time to go out into the harsh world of the garden, the goods and services become a little more scarce for those baby plants and they go through a bit of withdrawal known as "transplant shock."  Hardening them off gives them a gradual adjustment to this new world.  It is best to start out by putting the plants outside for a few hours, and then bringing them back in; this gives them a small taste of direct sunlight. In any greenhouse, the plastic film filters out 10 to 25% of the sun's rays and the tender plants are literally sun-burned when they first encounter that unmediated light.  Here is how I do it at my house. When you buy plants that were grown by Red Wagon Plants, they have already been hardened off and you can put them right in the ground. The following method is important to follow if you are working with plants that you know are not hardened off yet.

Once they have gotten used to a few hours of sunlight at a time, they can stay outside overnight, but under a protective row cover.

The cover comes off in the daytime and the plants are acclimated to being where they will be planted for a few days.

If the temperatures drop down below freezing, cover them again. Cold hardy plants such as broccoli, cabbage, kale, hardy lettuces, hardy herbs, escarole, scallions, onions can take a frost without a problem, but they will do it with more grace and strength if they have been gradually introduced to those temperatures.

Once the plants have had a few cold nights, under cover, they can have a couple more nights without cover, and then are properly hardened off and ready to go in the ground.

It's also a good idea to give cold-weather transplants a little extra compost or a fish/seaweed emulsion watering at transplant time. It is hard for plant roots to uptake nutrients in cool weather and this will aid their transition as well.

Planting the Fussy Onion

Onions are some of the first things to go in the ground each spring. You may not know this, but onions are finely tuned creatures with a rigid hormonal profile. They are completely and utterly dependent on the sun's cycle to grow into the lovely round orbs we think of as onions. Those plump layers only grow in relationship to the lengthening days of spring. If onions are planted too late, they will never bulb out and become big and round. An onion that has been planted too late, let's say after the middle of May, will never quite size up, but will create a thick stem, and a barely bulbous orb. The engorged stem will not create rounded layers at all but rather look more like a slightly ovate leek. These are still fine to eat, but won't really be onions you can store through the winter.

We recommend that people plant onions in mid-April. When it is muddy, and cold, and you think there is no way a plant wants to go into the garden, well guess what? The onions really want to go into that cold earth. The way we grow onion plants for sale is that we seed about 80 plants into a 4 pack, and your job as the gardener is simple:

  • Prepare a bed in the garden - deep, well worked, rich soil is best. I prepare my onion beds in the fall, that way they are ready for onion plants first thing in the spring.
  • Gently pull the clumps of soil and roots and plants out of the 4 pack.
  • Separate each plant and shake off the excess soil. The individual plants are like tiny blades of grass, but each one will grow into a big onion plant.
  • Make a trench about 4 inches deep the length of your planting area. Onion rows can be about 8 inches apart, so depending on the size of your bed, you can plant up to 4 rows of onions in one bed and still reach across the bed to weed comfortably.
  • Plant the individual plants in the trench, about 4 to 6 inches deep. Only a few inches of the thin green stems will be above ground. You should have about 2-3 inches between plants.
  • Tamp the earth tightly around each plant.

The onions plants won't grow much at first, but they are just hanging out in the cold soil, programming themselves to grow once the soil warms up. It is these cold, long days that help make onions nice. I know, it is hard to believe that they prefer this, but they do. Southern growers, who have shorter summer days than northern growers, have entirely different onion varieties than we do. That illustrates just how much onions are day-length sensitive. A few degrees difference in latitude necessitates a whole different set of genetics.

The other things to keep in mind with onions:

  • Keep them well watered. Water and day length is what makes onions big. Some straw mulch applied in late June is a good idea for keeping the moisture even and consistent.
  • Keep them well weeded. Onions plants are slender and upright. They do not create any shade, therefore weeds like to grow near them, in the sunny under-story of the onion patch and because onions really don't want to compete for food, water and sunlight. They are not good at sharing.
  • Keep them well fed. An application of Compost Plus in May is a good idea. It will help them get big and strong.
  • Growing onions in black plastic mulch is a good option if you want to eliminate weed pressure and heat up the soil. Once onions are big, they like it hot.
  • Harvest onions once the tops start to flop over. You can eat them fresh, as "green onions" or you can cure them by laying them out in a dry, airy place, away from direct sunlight. This usually happens in late July or early August. It depends on the varieties you grow and on the kind of weather we are having.

Onions are best stored in a dark, cool, airy place. A damp basement is not a good storage spot. A cold, dry, dark attic is better. Or an unheated closet, or a garage that does not get too cold. Ideal onion storing temperature is about 35F. That is pretty cold - colder than most basements.

Some onion relatives can be planted later in the season. This includes scallions, mini-purplette onions, pearl onions, and shallots. Leeks are also tolerant of a later planting, and can be planted multiple times throughout the gardening season if you would like to harvest baby leeks. 

The onion varieties we grow each year:

Cipollini Gold Coin - a flat, disc like onion that stores very well in the winter. It is a strong flavored onion which mellows when cooked and is delicious caramelized, glazed, or roasted. One of our favorites for flavor.

Yellow Storage Cortland - a huge, good keeper which means that it stores well all winter. Dry the onion once harvested in a cool, airy spot, and you will be eating it until March or April of next year. 

Red Storage Onion Mars - also quite big, and also a good winter keeper. Slightly milder in flavor than Cortland and can be eaten raw when sliced thinly. Red Onions develop their red interior only once they have been cured. Once harvested, coll in an airy dark spot until the tops are completely dried and can be pulled off by hand. That is the curing process for all storage onions.

Sweet Onion Walla Walla and Ailsa Craig - both are gigantic sweet onions. They do very well with lots of water and mulch. Sweet onions do not keep over the winter. They do not need to be cured, but rather get refrigerated once harvested. They are delicious roasted, grilled, or eaten raw in sandwiches. 

Scallions - These can be planted in clumps of 10 or so plants. They can be planted every few weeks for a continuous harvest. If you do not want to buy scallion plants or seeds, you can eat young onion plants as scallions.

Shallots - These store very well after being cured like onions. They add a sweet and complex flavor to winter dishes, marinades, and dressings. 

Mini-purplette - these are lovely purple pearl onions that are delicious in a spring braise with salad turnips and peas. They can be planted in clumps of 4 to 6 plants and can be planted multiple times throughout the season for more than one harvest. They also make great pickles. About 1" to 2" across.

Herb Thoughts

Herb garden planning is not a lot of work, but here are some thoughts I have put together on the topic. Herbs are easy to grow for the most part, but they are a big category of plants (we grow 100 varieties of herbs) and it helps to break them down and organize them into categories. This will help any gardener plant the right plant in the right place and give it the preferred amount of water, sunlight, food, and water.

Why grow herbs? For flavor, fragrance, and beauty - it is the easiest way to improve the flavor of what you cook. It is also one of the easiest ways to have a container garden on your porch or deck.  Herb gardening is intimate - you get close to the plants, smell them, taste them, see them respond to regular clippings. They are a perfect way to better understand plant physiology and the best short cut to great food made with little effort.

Propagation: Plants vs. Seeds

All herbs can be planted from plants, and some can be planted directly into the ground as seeds. The herbs that you can seed directly in the ground and expect great results are: cilantro, dill,  and chamomile. Everything else will do much better if you start the seeds in containers in a sheltered environment. You can start your own herb transplants easily if you have grow lights and a heat mat. Many herbs take a long time to germinate and many herbs are propagated only from cuttings. Making your own rooted cuttings is possible too, but that takes a little more of a sophisticated set up with misters, rooting hormone of some sort, and humidity domes. For those herbs, it is generally easier to purchase the plants.

Herbs from Seed:

  • Parsley
  • Chives
  • Cilantro
  • Dill
  • Chamomile
  • Savory (winter and summer)
  • Marjoram
  • Basil (all kinds)
  • Common Mint
  • Sage
  • Catnip
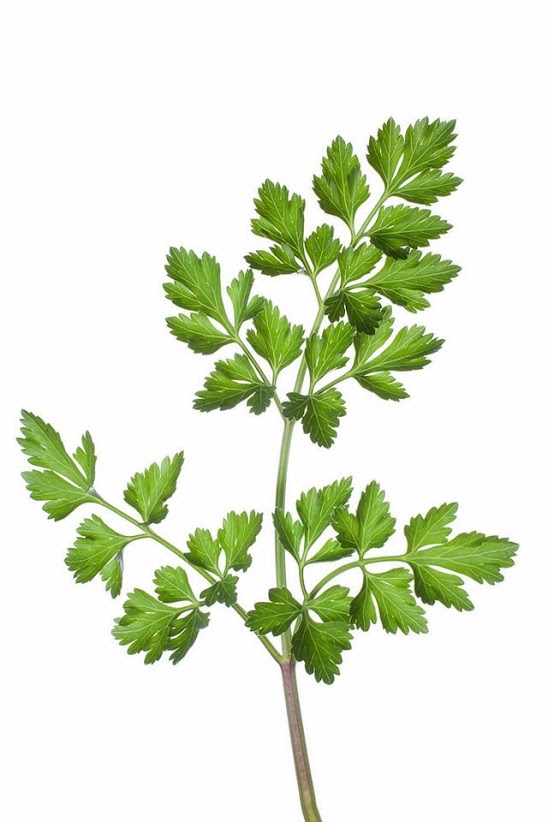
  • Chervil
  • Oregano (basic varieties)
  • Thyme (basic varieties)
  • Shiso
  • Sorrel
  • Lovage
  • Lemon Balm
  • Fennel
  • Salad Burnet

Herbs from Cuttings:

  • Rosemary
  • Lavender
  • Mints that are true to type (spearmint, peppermint, pineapple mint, etc)
  • Tarragon
  • Specialty Thymes (lemon, variegated, silver, etc)
  • Specialty Oregano (golden, ‘Hot and Spicy’, variegated, etc)
  • Specialty Sage (purple, tricolor, golden, etc)

Containers vs. in the Ground

Some plants love to be planted in the ground and others would prefer to be in pots.  Generally speaking, the herbs that like it dry and warm will prefer to be in a clay pot that breathes like Italian terra cotta. Plants that like it wet and cool might prefer to be in the ground, but they can also be grown in pots if the right conditions are given (more watering, a glazed or plastic pot, heavier potting soil, a little shade).

Herbs that like to grow easily in the ground in Vermont:

Cilantro, Dill, Parsley, Rosemary, Savory, and Chervil

Herbs that prefer to be in containers in Vermont: EVERYTHING ELSE!

This does not mean that you cannot grow herbs in the ground, it just means that in containers, it can be a little easier.

Some herbs do really well as tiny shoots for micro-greens: chervil, dill, cilantro, basil, fennel are our favorites.  And they are easy to grow indoors year round – just pat down some moist potting soil in a shallow container (only need 2” or so of soil) with holes in the bottom, press in the seeds, cover very lightly with a thin layer of soil, and keep moist. When the first set of true leaves begin to emerge, they are ready to eat. You can also grow pea shoots and sunflower sprouts this way. A south facing, sunny window is sufficient.

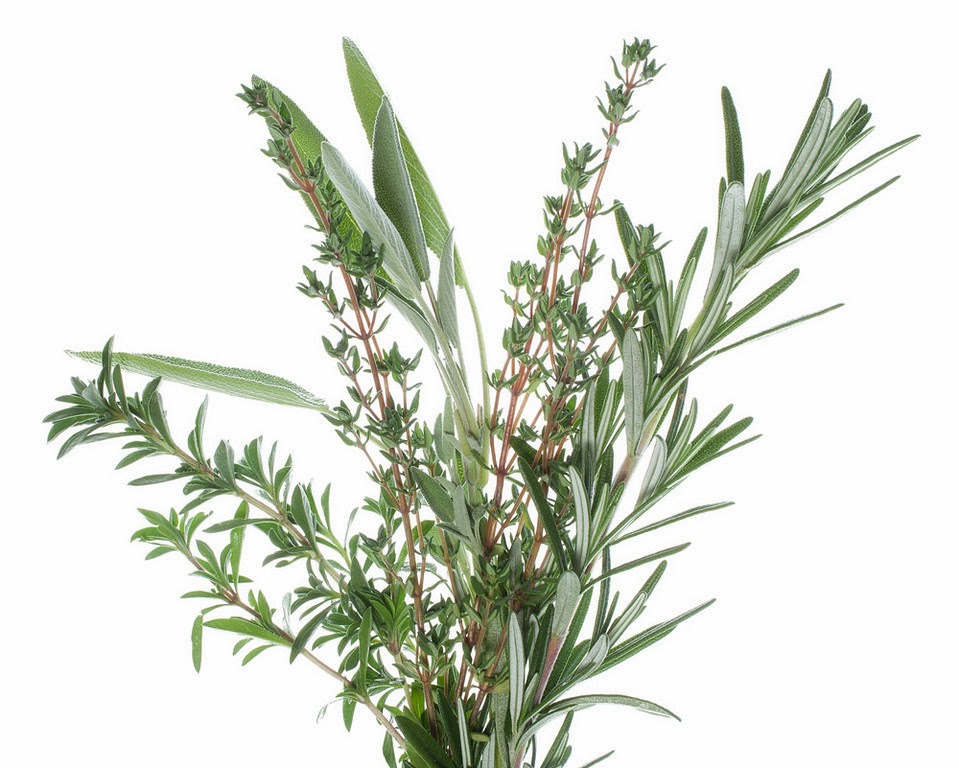
You can bring in potted herbs in the fall and keep them in a sunny window for use during the winter. The herbs that do best with this treatment: sage, parsley, rosemary, thyme, and savory. Basil can be brought in as well, but it won’t be terribly happy unless you have grow lights for it.  If you had some of these herbs planted in the ground, you can dig them up and slowly acclimate them to being in a pot and being indoors.

Herbs can be dried or frozen or infused in vinegar or simple syrup for year round use. Pesto or herb pastes made with oil or water can be frozen in small containers.  Drying is very simple or very elaborate – you choose! A dehydrator can be used, and the leaves can be stripped off of the stems once dried and stored in jars in a dark place. Or you can go the simple route and just harvest whole branches of the woody herbs such as thyme, oregano, rosemary, sage, and winter savory. Place the branches in woven baskets and keep in a dark, well-ventilated space. They will dry just fine on their own, and you can keep them covered with paper bags or kitchen linens and use as needed.

Related Upcoming Events

Cooking with Herbs with Molly Stevens and Julie Rubaud – a class and dinner.

South End Kitchen, Burlington, Vermont

March 19th.,  6pm

Red Wagon Plants pre-season Open House

April 4th 10 am to 3 pm. Tour the greenhouses and see behind the scenes.

Herbal Cocktail Party with Caledonia Spirits

April 17th, Red Wagon Plants 6 pm to 9 pm

Help us kick off our season with a bang!

What to Plant in Late June

Has your garden been producing lots of vegetables yet? We have been harvesting for a while thanks to some season extension and some early plantings.  Boc choi, lettuce, escarole, radishes, asparagus, chard and kale have all been making regular appearances in our meals and keeping us out of the produce aisle at the grocery store. So now, there is a little room in the garden where some of these plants have been harvested. What to plant next? There are so many options, and we like to take these "gaps" as a time to experiment, or add some diversity to the garden, or take advantage of short season crops that can be ready before planting a fall crop, or put in another generation of a warm weather crops to ensure a healthy harvest for as long as possible. Here are a few ideas......

Experiment

An empty spot or two is the perfect place for planting something new. Preferably something that does not take up too much room, and something that grows vertically so that it does not crowd its neighbors. Celery, fennel, scallions, boc choi and chard are all great candidates. Or a new variety of lettuce, or some arugula or mustard green you've been wanting to try. These are all crops that are fairly quick to harvest and will help maximize your harvest  in that precious garden real estate.

Add some diversity

Small spots are just perfect for adding flowers to the garden that will attract pollinators, provide habitat for beneficial insects, and will give you blooms to enjoy in the garden or in a bouquet. There are many great annual flowers that grow well in tight places and they break up the wide expanse of vegetable plants. By punctuating the garden with blossoms, you make it harder for predator insects to find your vegetables and you create a more diverse ecosystem, in miniature. Going for the most diversity possible in a small space is a great move in your over all pest control strategy. Some flowers we recommend for tight spaces:

Cosmos

Verbena Bonariensis

Zinnias

Sneak in a short season crop

Arugula, baby boc choi, spinach, lettuce, radishes, dill, cilantro and scallions all grow quickly and can take a bit of shade from their neighbors. This means you can plant them in close proximity to taller plants, and they won't mind one bit. They even enjoy the shade in the heat of summer. These can all be started from seed or transplants this time of year, and are a great way to add something to your table that you may not have planned on. Keep salads fresh with new lettuces, don't keep eating those bitter old ones! Same with arugula that has bolted or is too holy from flea beetle damage.....start with some fresh ones for those July salads.

Add a second generation of a warm weather crop

This is a great time to plant another round of cucumbers, cantaloupe, a short season tomato, hot pepper, summer squash or zucchini. You can try out a new variety to mix it up, and even grow a vining crop on a trellis to save space. The plants were planted a month ago are going to be producing pretty soon, and when they get tired out or have a pest or disease issue, your new plants will be just maturing and ready to provide you with a new round of goodies. You can maximize the bounty this way, and you won't be tempted to keep an old and diseased plant in the garden if there is a new one ready to report for duty.   This will also help with your disease and pest prevention over all.

Remember that the more you keep up with the garden, the tastier your meals, and the healthier your plants. There are so many reasons to garden, and keeping the plot looking and tasting good will keep you motivated to maintain your garden and to eat really well!

Mini Raised Bed Greenhouses for Sale

Look at these great greenhouses Eric Denice has built. We are offering four of them for sale this spring.  And can deliver them to you, too. We have used the same materials that go into our production greenhouses...6 mil plastic, hoops bent at just the right angle to shed water and snow, polycarbonate end walls, wiggle wire and extruded metal track for securing the plastic closed, and pipes that act as a "brake" for keeping the sides just where you want them. We are happy to give you a demo....or come and peek at ours that is all planted and growing along nicely.

You can roll up the sides, you can close it securely and easily, or even take the plastic all the way off once the weather warms up. The frame can act as part of a trellis system for tomatoes giving them a warm and dry environment as they size up, and then you can take the plastic all the way off and let them grow through the top of the frame. Just add a few horizontal lines of twine and, voila, instant tomato trellis!

Plants are nicely tucked in and cozy warm, no matter what the weather! You can easily get a 2 to 3 week jump on the season with this kind of season extension. The raised bed means that the soil is dry and warm long before garden beds, and the tight, plastic cover gives you warmth on cold nights. You can keep the sides rolled down on chilly, cloudy days, but it is best to roll them up a bit in the morning. It can get quite warm in there when the sun pops out. This type of greenhouse will allow you to harvest greens almost year round. It can also be used as a spot to start seeds, harden off plants, and gives you an extra zone of warmth if you would like to grow a perennial that is not usually hardy here.

We can deliver, bring you soil, plants, and have your instant garden ready in just an hour or so! Just add water.

Dimensions: 4' by 10' 

Base boards are made of 2" by 10" hemlock

Price $425

What can you plant now?

Lots of things can go in the garden now. Take advantage of some season extension, gentle April rains, and your spring garden eating will be taking place a little sooner. Season extension - row covers, cold frames, and mini greenhouses......

Crops that like it cold.....

Cabbage

Leeks

Onions

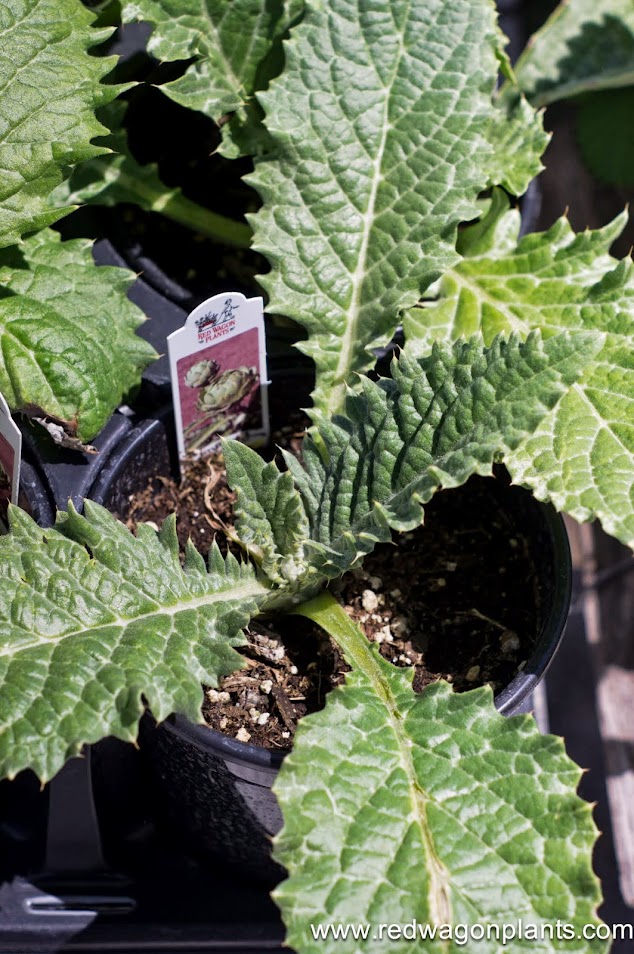
Artichokes

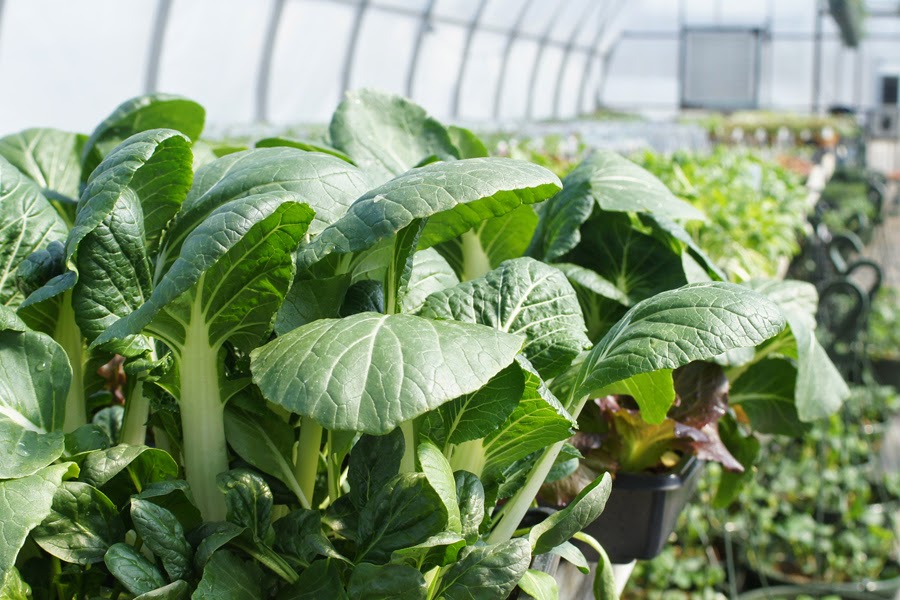
Bok Choi

Kale

Spinach

You can use row covers to extend the season and create a little spring heat in this cold year. We use a white, floating row cover (called Reemay sometimes) over hoops made out of 9 gauge wire, which can be found at farm supply stores. You can buy fancier hoops in garden centers, but the home made wire hoops work really well and cost a fraction of the price. You will need bolt cutters to cut the wire.

Happy cold time gardening, and please don't hesitate to get in touch if you have any questions!

Mud Season Salad Club

The days are getting longer, and we are all eager for a little fresh food in our diet. Get a jump on spring with lovely living salads. For the month of April alone, we are offering a Mud Season Salad Club. Sign up now and get an assortment of living salad greens each week. The salads come ready to harvest and are planted in easy to carry containers. Take home trays full of luscious, ready to eat greens such as arugula, mache, lettuce, bok choi, pea shoots, sunflower sprouts, and tender herbs. If you would like to be part of this fun salad adventure, send an email to Julie@redwagonplants.com. The best thing about this salad club is that the greens are still alive when you pick them up, and you cut them only when you're ready to eat. No more rotting greens in the fridge! Elevate your salads to the countertop where you can feast on them with all your senses.  Here are the details:

Cost:  $100 for the month of April and we guarantee enough salad greens for 4 side salads a week for two salad eaters. That comes to about $3.00 a serving for the freshest greens you can find.

Pick up: at our Hinesburg Greenhouses at 2408 Shelburne Falls Road on Friday afternoons between 3 and 6pm. If you cannot make it then, no problem. Just email us and we will set them aside for you.  Bring your pots and trays back to us after you have cut the greens. We will compost the soil and use it in our gardens. The first pick up will be Friday, April 4th and the last pick up will be Friday, April 25th.

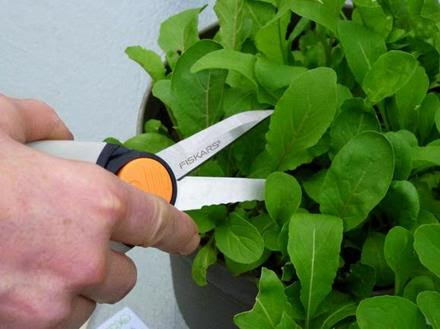
At home: All you need is room for three trays, about 10" by 20" each. It can be near a window, but that is not absolutely necessary since you will be harvesting them within a week. When you are ready for a salad, just snip the greens at the base with a paring knife or scissors, rinse and dry them, and toss with a very light dressing. We prefer a simple dressing of a good salad oil such as extra-virgin olive oil, hazelnut oil or walnut oil; a squeeze of lemon or splash of sherry vinegar; and a pinch of Maldon sea salt. These greens are so fresh, that you want to be able to really taste them. Keep the bottled dressing for those fridge greens! These are the counter top greens and they deserve top-shelf treatment.

To find out more, email julie@redwagonplants.com

If you are ready to sign up, send a check for $100 to:

Red Wagon Plants

2408 Shelburne Falls Rd

Hinesburg, VT 05461

Thanks so much. Bring in the bounty!

-Julie and the crew

Red Wagon Herbs

What's a greenhouse grower to do when the spring season winds down and there is still plenty of great weather for summer growing and the greenhouses are empty? Well, start a new business, that is what. We are so happy to introduce to you our new sister business, Red Wagon Herbs. We are growing Certified Organic herbs for year round harvest and selling to local stores, restaurants, and food hubs. Our focus is on the popular culinary herbs for now, but we are likely to branch out into the more unusual once we have had a chance to explore our markets and have gotten familiar with our new growing practices. This is a perfectly natural extension of our plant business since we already partner with fantastic stores and we love to grow herbs more than anything else. As a matter of fact, the plant business, in its earliest days, was just a potted herb business. In a way, we are going to back to those days and loving the continuity, evolution, and expansion.

Our herbs are grown using three different methods: in the ground for summer and fall harvest, in a new, unheated greenhouse (paid for in part by a grant from NRCS EQIP) for fall, winter and spring harvest, and in our existing, heated houses for those coldest months. We are excited to be the only Vermont farm offering organic herbs year round and hope you enjoy cooking with them as much as we enjoy growing them.

Please be on the look out for an Open House this fall so we can show you what we have been up to and give you a chance to smell, touch, taste, and see it all.

Our current line up consists of :

  • Basil (March through November only)
  • Chives
  • Cilantro 
  • Dill
  • Curly and Flat Parsley
  • Sage
  • Thyme
  • Oregano
  • Tarragon
  • Rosemary
  • Savory
  • Marjoram
  • Spearmint
  • Bouquet Garni ( a mixture of aromatic herbs for roasting, stocks, and more)

What to plant now?

Given that our spring has been pretty mild over all, many gardeners are eager to get in the garden and plant a little earlier than normal. While the temptation is huge, it is also a good idea to remember that a hard frost can still come anytime in the next month or so and the ground is not all that warm. So what can go in the ground now? Lots of cold hardy vegetables and herbs are ready to go including onions, broccoli, cabbages, kales, mustards, boc choi, and more. It is best to harden off the plants for a few days before transplanting them - this means letting them get used to the cold, the wind, and the direct sunlight. Most of our plants will come to you already hardened off, but other nurseries may not take care to do that, so it is best to do it yourself. You can also use some row cover to create a small micro-climate for the young plants. We use hoops made out of 9-gauge wire to hold up the fabric off of the plants. This will give the plants a breathable, water permeable house to grow under during their initial weeks in the garden. The growth rate will be about double the rate of plants grown without row cover.

You can read more about hardening off  here.

Another great thing to plant now are crops you direct seed and that can germinate in cold conditions - spinach, carrots, beets, turnips, radishes, scallions, peas, and fava beans.

If you have a spot in your garden that you are not going to use this year, you might want to consider spreading some cover crop seed. this will help ensure that the soil is fed during it's fallow period. The cover crop is essentially plants that are grown just for the soil's on going health. For cold weather sowing, you might want to try a cow pea and vetch mixture or oats or an annual clover .  This will smother out weeds and add lots of organic matter to your garden.

The Kitchen Garden: Abundant Harvest in Small Spaces

The following is a hand out that accompanied a workshop I presented at the NOFA conference Feb 12, 2012. -Julie


An abundant harvest in a small space can seem like a challenge, but by understanding a few concepts, you can make the most of your small garden so that it meets your needs and brings you joy. Observing plants is the best way to develop garden awareness; making good choices is the best way to avoid “garden guilt.” Abundant harvests have to do with efficiency:

  • The efficiency of the plant taking up nutrients
  • The efficiency of the amount of time it takes for the plant to mature.
  • The efficiency of minimized waste.
  • The efficiency of using your space to its maximum potential.

These are not hard and fast rules, but can be applied at your discretion in any area of the garden you would like to improve. These ideas can work for the spontaneous or lazy gardener (like me) or for the hyper-planner who maps it all out on graph paper ahead of time (like my neighbor). Think of it as cooking without a recipe - once you know a few techniques and concepts, you can explore and have decent results most of the time. And there is no such thing as garden failure - it is just a lesson waiting to be learned. The big factors:

  • Soil - texture, nutrients, compost, fertilizer
  • Shape - raised bed, containers, or “in ground”, bed prep
  • Water - drip, overhead, by hand, on timers, etc
  • Cultivation - weeds, mulching,  pests and diseases, season extension, spacing and timing, succession planting, shape of plants
  • Harvest - understanding life cycle of plants, post-harvest handling, when to try for multiple harvest or when to cut your losses, cleaning up plant debris.

Soil should be loose and rich and deep.  In a container it should be a pre-mixed potting soil, not garden soil. If the container is large (1 gallon or more) it should have some drainage material in the bottom. Many things work well for this - styrofoam packing peanuts, crushed up plastic pots, gravel, etc. If a pot is very lare (3 gallons or more) the drainage material can be a little deeper, up to the bottom third of the pot. It is a good idea to cover the drainage material with a piece of burlap, an old pillow case, or some other type of screen or fabric to keep the soil from washing down into the material that should remain porous.

In a raised bed, it can be a combination of materials including pre-made finished compost, leaf mold (rotted leaves - make a pile in the fall, it’s good to go in the bottom of the raised bed in the spring), peat moss, rotted manure/bedding (a good source is horse farms), garden soil,  sand and pre-mixed top soil / compost combinations. The key is to have a mixture of ingredients to re-create the complexity of a living soil system.

In the garden, the soil should be worked deeply with a 4 or 5 pronged fork, and loosed by hand or with a hoe. Even if you use a rototiller in the garden, the plants will benefit from having the soil loosened more deeply than where the rototiller tines reach. It is a good idea to shovel out the paths of the garden and put the extra soil onto the beds. This essentially makes a raised bed and will allow the roots to grow quickly and deeply in their search for food. Nutrients can come from compost, granular fertilizer, “Compost Plus” and/or  mineral inputs. It is a good idea to get a soil test in your in-ground garden or raised bed. If you are using materials in the raised bed that you know are of good quality, you can skip this, but if your plants look deficient during the growing months, you may opt to do a test after all.  Applying granular fertilizer or “Compost Plus” is best done after the plants have had a chance to grow out - either a month or so after seeding or two weeks or so after transplanting. Water is best done through drip irrigation - either soaker hoses or drip tape. A good source of drip tape is Dripworks. Next best watering choice is by hand since you can aim the hose nozzle at the soil, and not get the foliage wet. Third best choice (and not a good one, sorry) is overhead sprinklers: they require less of your time and labor, but they get the foliage wet. Two reasons to avoid getting the foliage wet with overhead irrigation (sprinklers and incorrect hand watering):

  1. it rots the plants, and disease can set in. Dry plants tend to be healthier plants.
  2. the plants take up water with their roots, not their leaves. You waste a lot of water and the leaves act as a nice umbrella for the roots, making it wasteful. You have to water more than necessary for the roots to actually start drinking. Getting the plants wet and watering the garden are two different things, and it is best not to confuse them.

Watering is best done in the morning - it gives the plants a chance to dry off before night time and supports their busy daytime growth. Watering at the end of the day is not recommended since disease spreads most during humid summer nights.  You can water the garden during the middle of the day, and the plants will still have time to dry off by sunset. Cultivation is simply the act of caring for plants. In larger scale farming, to “cultivate” means to scuff up the soil in such a way that you are removing weeds, usually involving a tractor and some sort of implement. Here we use the term “cultivate” in a broader sense meaning a general discussion of the cultural requirements of common garden plants. The “cultural requirements” of a plant are all the things that a plant needs from humans in order to thrive. For example, the site, the water, the tilth or texture of the soil, the space and  the nutrients are all a part of a plant’s cultural needs. To understand what a plant needs, you have to look at these factors:

  1. what is it’s shape? Shape of plants, physiological structure, and type of cells that make up the roots and the foliage all give you clues to what the plant needs. Thin fibrous roots dry out more than thick, tuberous roots (think of an onion plant vs. a tomato plant). Waxy, shiny leaves are more drought tolerant than matte, thin leaves (think of a succulent like aloe vs.a leafy plant like lettuce). Large plants with broad leaves have very different requirements than skinny tall plants (think brcocolli vs onion). The canopy a plant creates is also a clue - plants with a small canopy (onions, celery, leeks) do not cast much of a shadow. This makes them very vulnerable to weeds. Plants that create a large canopy (squashes, cabbages, broccoli, eggplant) cast a large shadow which slows down weed growth. Understanding the shape or growth habit of a plant also helps you maximize the potential of your small garden.
    1. A tall, vining plant can be trellised.
    2. A low growing, sprawling plant can be planted on the edge where it spills onto a lawn.
    3. A tall, skinny plant can be tucked into tight spots.
    4. A pretty, decorative plant can be planted in the flower bed.
  2. how hungry is it? Plants that need a lot of fertility are often referred to as “heavy feeders”. One common point amongst most heavy feeders is their life span. A baby lettuce plant that is in the ground for 20 days is going to be a light feeder. A giant, prize winning pumpkin in the ground for 130 days is going to be a heavy feeder. Plants that produce fruit such as tomatoes, zucchini, squash, peppers and eggplant are best fed when in a vegetative state (all green leaf growth, earlier in the first 45 days of transplanting); once those plants are in their fruiting state, it is best to lay off the fertilizer or compost which support green growth, not fruit growth. The plant has only so much energy, and if it is putting it into leaf growth, it won’t also put it into fruit growth. It is a balancing act since the green growth needs to happen quickly and in a lush manner in the earlier part of the season in order to support healthy fruiting in the latter part of the season.
  3. how thirsty is it? As in the discussion of shape, a plant’s water needs have to do with its structure, but also with weather and soil type. A garden in sandy soil will always need more water than a garden in clay soils. You can look for cues of thirstiness in a plant and water just as needed. These clues include very slight curling of leaves, a blue-like hue that creeps in (this is very sublte), or a very subtle droop in the way flowers are angled. This type of “reading the garden” takes some observation to understand, but gardening is a lifetime project with countless places to learn. Fruiting vegetables tend to taste better with less water. Leafy vegetables tend to taste better with more water. It is entirely possible to water tomatoes only once every two weeks, even in a drought, and get very tasty fruit. If you did that with lettuce, it would be bitter at best, but more likely it would simply be dead.
  4. how well does it share? A plant that knows how to share light, water, and nutrients with its neighbors is a plant that does well in small spaces. Radishes are a good example. They can be sown alongside just about any other crop, and they do quite well because of their short life span, lower light requirements, and broader leaves that shade out weeds. Radishes can share. Other examples of plants that cooperate nicely: arugula, baby lettuce, scallions (they are skinny and can go in nooks), cilantro, curly parsley or smaller varieties of Italian parsley, strawberries and wild strawberries, and pansies. Notice....with the exception of scallions, all these plants are low growing, have broad leaves that create a canopy that shades out weeds, and can tolerate a bit of shade that might be thrown by a neighboring canopy.
  5. how well does it compete? Plants that compete well are plants that are not easily thwarted by dry conditions, weedy conditions, temperature extremes, or low nutrition. You can always increase your harvest and increase your efficiency by knowing which plants have these characteristics. It basically allows you to prioritize garden tasks -you can make the less competitive plants a priority, and save the more tolerant, tough plants for a day when you have a little more time.  Working smarter in the garden can increase the harvest, and save you some “garden guilt”, just by knowing when to say “it’s okay if that is weedy, it can wait until the weekend.”

Succession planting is another way to increase your yields. This is the act of planting multiple generations of plants so that you have a continuous harvest. The trick with succession planting is to know a few numbers

  1. the date of the average last frost in spring
  2. the date of the average  first frost in fall
  3. the amount of time it takes for a plant to be harvestable (a.k.a. “days to maturity)

and two cultural factors:

  1. is the crop frost tolerant or not?
  2. is it a “multiple harvest” crop or a one time harvest?

Once you know these numbers and the frost tolerance of a plant, you can make some simple calculations based on your season length to determine how many generations of a particular plant you can grow. For example, head lettuce has about a 40 day life cycle from transplant time to harvest time, and it can tolerate a light frost. This means you can start transplanting it in early May (in Burlington, average last frost is last week of May)  or so, and you can repeat the planting of it every week or so, until early September. (in Burlington, average first frost is first week of October). Head lettuce is something you harvest only once, so if you want a nice head of lettuce every two days or so, you would plant 4 heads of lettuce a week, every week from early May to early September. This will give you a continuous harvest from early June until mid-October. If you are the kind of gardener who “puts in the garden” on Memorial Day and then you never replant, it is likely that you have a big glut of produce at certain times, and then none that is fresh and good at other times. By planting multiple generations of plants, you insure high yields and great flavor. A patch of bush green beans only produces good quality beans for about 2 to 3 weeks. After a while, the beans are tough and sparse on the plant. If you replant a new patch every couple of weeks, you will always have high-yielding, tasty beans. Abundant harvest happen on healthy plants at their prime, and gardens in small spaces require a certain amount of decision making. You always have a choice to pull out tired plants and to replant with new seeds or plants - this is often the most efficient way to have better yields. Mulch is a great way to keep weeds at bay, and to keep moisture near the root zone. It can also build soils, heat the soil, or cool the soil - all depending on your goal and what the plant needs. You can mulch paths and/or growing beds. Raised beds that are constructed out of wood can also be mulched and the paths around the raised beds can be mulched to minimize lawn mowing if you would like. If you use materials that naturally break down such as paper, cardboard, burlap bags, straw or bark, the mulched paths can become mini compost piles. By layering in materials that block out weeds, you are creating a layer of organic matter that will decompose over the course of a year and can then be shovelled onto the growing beds the following spring. Some mulch materials carry weed seeds so beware. They can still be used effectively in the garden, but best as a layer that is covered up with another barrier such as cardboard or burlap. As it breaks down and heats up over time, the weed seeds lose their viability and will not be a problem the following year. Plastic mulches heat the soil and are great for the heat-loving, fruiting crops. Harvest and post-harvest handling are other factors that affect the yield in your garden. Being able to plan or predict when you harvest a crop depends on your knowing the life cycle or days to maturity of that crop. It is entirely possible, to plan a garden harvest around certain dates or to plan for having no harvest during vacation times. An abundant harvest is one that happens when you want it. An unwanted harvest is a hassle - you have to get your neighbors to help, or find volunteers for a school garden, etc. Sometimes that works, but it is possible to minimize unwanted work, and under-appreciated produce by timing the plantings and knowing how much to plant of each crop. There are many charts on the internet that can help you gauge the garden harvest and how much to plant of each crop and when. Johnny’s Selected Seeds has some wonderful on-line tools, as does our own Red Wagon Plants website. Post-harvest handling includes everything from time of day you harvest, how you pack it into your basket or boxes, and how you store it. Morning is generally the best time to harvest since the field heat has not had too much time to affect the leafy green plants. Fruiting plants can be harvest later in the day. Again, this is a place where you can make a choice by harvesting the right plant at the right time of day. If you only have a few minutes to harvest in the morning, do the leafy greens. The fruiting plants can usually wait until later in the day or even a couple of days. Once a plant is cut or picked, it is best to wash it and refrigerate it right away. Again, this is related to an abundant harvest because anything that improves quality reduces waste. Lettuce that is wilted and dirty in the bottom of the fridge drawer is just not as appealing as lettuce that is crisp, clean and ready to eat. A small garden is not a productive garden if what you harvest ends up under-utilized. A good trick is to harvest the lettuce, and when you get in the house, soak it in a basin or large bowl of cold water right away. This takes out the field heat, the leaves absorb some water making them more crisp, and the dirt drops down to the bottom. Lift the leaves out, re-soak once or twice depending on the amount of dirt, and then spin the leaves in a lettuce spinner or by layering between some clean towels. Lettuce treated this way is sure to get eaten, promise! Plants like broccoli, beans, and tomatoes produce more the more they are harvested. Broccoli will generally make one big head, and then produce what is called side shoots all summer long. These shoots are the perfect size for cooking or eating raw and the more you remember to cut them, the more the plant will produce. Often a broccoli plant that goes into the garden in late April will continue to produce side shoots into mid-December - talk about a high yield! Most fruiting plants (tomatoes, cucumbers, squash, peppers and eggplant) will also produce more the more they are picked. These do not need immediate refrigeration, and tomatoes and basil should never go in the fridge. A basket full of cukes and zukes can stay on the counter until a time later in the day when you have had a chance to make room in the fridge or have time to make pickles,etc. Again, a high yield can be a burden or a blessing, depending on how it fits into your life. With a little planning, a very small garden such as a 4’ x 8’ raised bed can include 2 tomato plants, a cucumber plant and a season’s worth of greens. This is often plenty for a single person or a couple. Abundant harvesting is about making choices that lead to efficiency and no waste., beauty and no guilt.  If you use your minimal space for vegetables that you will not use, then the space is wasted, if instead that small space is regularly turned over with fresh plants, and old plants are removed, then you will have a high yield of well loved produce. It is always a better choice to remove the garden debris (think bolted lettuce, cabbage stumps, woody radishes) than to let it limp along, tempting disease and pests.

Some good sources of information

  • Our website has an extensive list of resources in the “Garden Journal”
  • Johnny’s Selected Seeds, High Mowing Seeds, Territorial Seeds, Seed Savers Exchange and Botanical Interests are all reputable seed companies with lots of educational materials on their websites and in their catalogs. These are great sources of free information.
  • Cornell Extension has a website for home gardeners that is very helpful
  • Elliot Coleman’s books are geared towards vegetable farmers but have very clear explanations of succession planting, timing and spacing
  • Barbara Damrosch, The Garden Primer is my favorite all around basic gardening book
  • UVM Extension offers soil tests, a plant pathology lab, and a pest identification lab
  • Burlington Permaculture
  • Charlie Nardozzi offers a garden coaching program and gives weekly talks on VPR about gardening.
  • Friends of Burlington Gardens offers support to school gardens, community gardeners, and anyone interested in learning how to grow food. They offer a season long course at Ethan Allen Homestead that provides brand new gardeners all the support necessary to achieve success in their first year.

.

Frost Dates in Vermont - South Hero is the Winner!

Here is a great chart that analyses all the temperature data collected in Vermont over the years and gives us the probability of dates for first and last frosts around the state. South Hero and the lake Champlain Islands have Vermont's longest growing season (measured by number of frost-free days according to N.O.A.A).  Take a look and prepare your garden for those first frosty nights. Here is what I do at my house to prepare for those first frosts:

If it is a really early frost, (September in Hinesburg), I will harvest all the ripe fruit on the heat loving plants (squashes, tomatoes, peppers, eggplant, etc) and if the plants still look healthy and have lots of unripe fruit, I will cover the plants with row cover. You can use sheets, blankets, plastic sheeting, etc. If the frost is coming at a later point, I often won't bother with the plant protection - just harvest all the fruit (green tomatoes can ripen indoors) and call it a day!

I don't bother to protect lettuce unless the first frost is very cold and very early. Lettuce can handle a few light frosts, so it is usually not a problem early on. Later in the season, I set up some simple wire hoops and keep the lettuce under row cover for the remainder of the season. This allows fresh lettuce to be harvested for salads well into November. It is good idea to seed or plant fresh lettuce in late summer and early fall so that the protected plantings of fall are fresh and tender. It is not really worth it, from a culinary perspective, to keep old or bitter lettuce alive. Plus it won't do as well if it is past its prime and won't fend off the cold like a younger planting can.

Hardy greens like kale, mustard greens, collards, etc do not need row cover and can live, unprotected, into December. You can always put some sort of protection over them in November to increase the harvest period past December, but it can be difficult to do with the taller plants. The wind dessicates them and makes them unappealing, and without a larger structure like a cold frame or mini-greenhosue, it can be difficult to give them adequate shelter.

All these attempts at fall crop protection will leave you grateful for the sweet rewards of fresh salads, tomatoes coming out of the cellar ripened and tasty, and nutritious leafy greens sweetened by the kiss of cold.

Fall Planting Guide

Mid-August is rolling around, and with it comes some vegetable planting possibilities that will feed you late into autumn and early winter. This is a great time to clean out some of the garden beds that have finished producing and replant them with some fresh crops for late season harvest. Here are a few options that you might want to consider incorporating into your later summer gardening routine.

A note on flea beetles and row cover. Flea beetles are little, black and jump around on your plants while making tiny little holes. They love anything in the brassica family - cabbage,broccoli, arugual, mustards, collards, etc. Row cover is a white fabric used to keep out insects and/or to warm up the soil and air around the plants. It does not hurt to use row cover to speed things along and to keep out the flea beetles. Broccoli - seed a small amount directly into garden beds, or buy transplants up to mid-August. If you are direct seeding into a garden bed, remember to thin or prick out and replant the broccoli babies so that they have proper spacing (15” or so). Cabbage - same as broccoli. Choose shorter day varieties. Seed packets usually list the days to maturity for all crops. In early August, you can usually get away with planting a 60 day cabbage that will be ready in early October. Kale - this is a great time to put in a few more kale plants or seeds, they will size up before snow flies, and will withstand lots of wintery weather. The good thing about kale, is that once it is full grown, it will just stand around in the garden waiting to be picked. It does not get “too old” or bolt (jump into seed production mode). This makes it a great early winter crop and a joy to harvest under snow fall. Collards can be treated this way as well. Arugula - a nice addition to salads, this tender green with a mustard-like flavor is also a great survivor of cold temperatures. It can withstand many hard frosts and will continue to add a little spike to your salads well into November and December. You can put row cover on it to keep away the flea beetles and to give it a little extra protection from cold winds that can dry it out. If it starts to turn a little purple in the colder temps, don’t worry about it, it is still fine to eat. This is just a symptom of not being able to absorb phosphorous in cold conditions. Turnips - a short season salad turnip can still be sown in August. I like the Hakurei variety from Johnny’s. It is delicious raw in salads, sliced thinly or finely diced, or sauteed in a little butter with fresh herbs (winter savory makes a special appearance at my house, often in this dish in particular). People who think they hate turnips will just be shocked when they taste these buttery slices that just melt in your mouth. Spinach - in the first half of August, it is a good idea to plant a large patch of spinach. It will germinate in the cooler night time temperatures (spinach does not like to germinate in the heat) and will last a long time in the field in the cool temperatures of October and early November. Carrots - fall carrots are best seeded right around July 4th. This gives you a chance to do an early batch of carrots for late spring, early summer eating, and then a second (or third) batch for fall eating. Fall carrots are considerable sweeter than spring seeded carrots and are definitely worth the trouble. Boc Choi - this is another crop that does really well in the cooler temperatures of fall. It is not a heat lover, and therefore should only be planted in April and May and then again in mid to late August for fall harvest. This benefits from row cover if you have a lot of flea beetle pressure. There are quite a few different versions of boc choi, and if you like the crunchy texture and delicate flavor of this crucifer, then please consider trying baby boc choi, red boc choi, or full sized boc choi. While it is easier to start with plants, it is certainly possible to direct seed this crop. Beets - fall time beets are sweet, tender, and do not have that “dirt” taste of beets grown in full summer heat. Last planting date for fall beets is around August 10th. They should be direct seeded in the garden and then thinned to one plant per 2 to 3 inches. You can space the rows 10 to 12 inches apart and fit about 3 rows in an average bed with a 4 ft width. The greens are tasty too, and the little delicate plants you pull out when thinning are a great addition to sauteed greens, soups, or even salads if very young.

Cilantro and Dill - these herbs can be planted directly in the garden from seed as late as mid-August. They grow well in the cold, and actually prefer it. The cold slows them down and prevents them from going to seed. Plant a good sized patch since you can harvest the plants well into December. They can take a frost, a snow fall and still will bounce right back.

Mustard Greens - these can be planted just like arugula. See instructions above.

Radishes - are a great addition to the late season garden. They can be planted right up to early September, and will maintain a high level of quality right up until it snows.

Lettuce - you can direct seed certain varieties of lettuce for fall harvest. Some do better than others in the cold. I like to plant Merveilles des Quatres Saisons and Tango for their beauty, taste, and cold hardiness.

Parsley - this herb can take very cold temperatures, so make sure, in mid-July or so that you have a nice patch of this going into fall and later summer. If this is an herb that you use frequently, it does not hurt to plant two or three different patches over the course of later April to mid - July. It is a slow grower, so after mid-July you can only plant it from transplants, not seed.


Things to Plant Now. You Will be Glad You Did.

August is rolling around, thundering ahead,  and with it comes some vegetable planting possibilities that will feed you late into autumn and early winter. This is a great time to clean out some of the garden beds that have finished producing and replant them with some fresh crops for late season harvest. Here are a few options that you might want to consider incorporating into your later summer gardening routine.

Broccoli

- seed a small amount directly into garden beds, or buy transplants up to mid-August. If you are direct seeding into a garden bed, remember to thin or prick out and replant the broccoli babies so that they have proper spacing (15” or so).

Cabbage

- same as broccoli. Choose shorter day varieties. Seed packets usually list the days to maturity for all crops. In early August, you can usually get away with planting a 60 day cabbage that will be ready in early October.

Kale -

this is a great time to put in a few more kale plants or seeds, they will size up before snow flies, and will withstand lots of wintery weather. The good thing about kale, is that once it is full grown, it will just stand around in the garden waiting to be picked. It does not get “too old” or bolt (jump into seed production mode). This makes it a great early winter crop and a joy to harvest under snow fall. Collards can be treated this way as well. A note on flea beetles: It does not hurt to use row cover to speed things along and to keep out the flea beetles. They are little biting insects that make little holes in the leaves and generally slow down a plant’s growth by stressing it a bit. All vegetables in the brassica family are susceptible to flea beetles - broccoli, kale, cabbage, mustards, arugula, collard greens, and boc choi are all in this family.

Arugula -

a nice addition to salads, this tender green with a mustard-like flavor is also a great survivor of cold temperatures. It can withstand many hard frosts and will continue to add a little spike to your salads well into November and December. You can put row cover on it to keep away the flea beetles and to give it a little extra protection from cold winds that can dry it out. If it starts to turn a little purple in the colder temps, don’t worry about it, it is still fine to eat. This is just a symptom of not being able to absorb phosphorous in cold conditions.

Turnips

- a short season salad turnip can still be sown in August. I like the Hakurei variety from Johnny’s. It is delicious raw in salads, sliced thinly or finely diced, or sauteed in a little butter with fresh herbs (winter savory makes a special appearance at my house, often in this dish in particular). People who think they hate turnips will just be shocked when they taste these buttery slices that just melt in your mouth.

Spinach

- in the first half of August, it is a good idea to plant a large patch of spinach. It will germinate in the cooler night time temperatures (spinach does not like to germinate in the heat) and will last a long time in the field in the cool temperatures of October and early November.

Overwintered Spinach - overwintering means keeping a vegetable alive through the winter for spring harvesting and eating. Not all vegetables can survive our VT winters, but the few that can include spinach, parsnips, leeks, garlic, and parsley. Spinach for early spring eating (mid to late April) should be sown in the first two weeks of September. Once it germinates, allow it to grow without harvesting or touching it. You can eat a little if you want, but ideally you will leave as much of the plant in the ground as possible. Once very cold weather hits, in early to mid-December, you can protect the spinach under a layer of straw, or leaves, or a few layers of row cover. In the spring, as soon as the ground has thawed out, remove the layers of protection and you will see the spinach come to life, long before any other plants begin to stir. This is such a delicious treat for early spring and really worth the trouble. A future post will be just about overwintered vegetables, so if this is something you have been wanting to try in your garden, check back here in a few days!

Cilantro and Dill

are good herbs for fall planting since their cold-hardiness is unmatched, and it will give you something to add to autumn salsas, salads, and pickles. Just sprinkle some seed into a shallow trench, press them in, and lightly cover with soil. The planting depth is very shallow here, just 1/4 inch or so. One of the most common problems with crops seeded directly into garden soil, is that they get planted too deeply. Remember this basic rule of thumb: the seed needs to be planted only 2 times deeper than its own size. Cilantro and dill will live until the first snow! They thrive in the cold. They are true soldiers of season extension.

Let us know if you feel inspired to try your hand with some of this season extension - we love to hear about it!

What Can I Plant for a Little Early Color Around the House?

It's been a pretty cold spring in Vermont this year. I cannot remember a spring like this in recent memory, with night temperatures dipping into the twenties in mid-April and day time temperatures hovering in the low 40's. Many of our customers are ready for some color around the house, and it's still not safe to put out hanging baskets, or most annuals for that matter.

What I suggest for early spring containers is a selection of cold hardy plants, especially the ones that seem unusual in containers, but will feed the need for signs of life around the yard!

The following plants are just great for a year like this and look really cute mixed together.

  • Violas and pansies
  • Allysum
  • Cold hardy herbs such as parsley, chervil, mint (ginger mint cascades down the side of the container), cilantro, dill. The textures and different greens at dimension to the arrangements. Plus you can snip at them and bring them into the kitchen for some spring time flavor boosts.
  • Colorful kales such as Redbor and Red Russian.
  • Fennel - the bulb kind or the bronze herb kind
  • Lettuces - especially the green oak, red oak, and cherokee red batavian
  • Frisee endive - it has a lovely frilled edge, and an unusual lime green color.

The beauty of this kind of planter is that it is multi-purpose. The violas and pansies and their "companion" foliage are all edible. What a nice gift for someone special, or a treat for yourself to celebrate the slow unfurling of spring.

Do You Want a Little Spring in the Kitchen?

We start selling herbs in pots long before the ground is ready to work. Many of you still have snow on the ground; some of you may be lucky enough to live someplace where the snow is melted, but we all are worried more is on the way. Anyhow, when the snow first melts, the ground looks barren and dirty save for a few bulbs trying to poke through. Poor things. This has been such a cold spring, and while I don't want to complain too much, it would be nice if we had a little warm weather right about now. If you are wanting just a little reminder of what is coming down the road, you could grow a little window sill herb garden for now. All you need are a few herbs, a sunny window, and not much else. If you want to get fancy, you could pot up those herbs into pretty pots or mix them together in an indoor window box, but there is no need to really. Just some 4" pots are fine for now, and soon enough the plants can go outside, either in the ground or in bigger pots. We just started to deliver plants to a few stores, so consider picking some up for a little cheer. The scent alone is enough to lift anyone's spirit.

A group of Bhutanese farmers came to visit our greenhouses this week - it's the second group that has come by. When I saw the look on their faces when they were smelling the herbs - mint, rosemary, cilantro, lavender - I was reminded of why I do this work. It takes the edge off of those long end of winter weeks and brings hope and love into my being. It's an honor to share it all.

- Julie

Planning for a Full Harvest all Season Long

Growing vegetables in your backyard, community garden or in some containers by the kitchen door is a great way to feed yourself -- whether it be just a few ripe tomatoes in August or a full fledged homesteaders garden, you are on the right path to feeding yourself and your family.  Gardening is a great way to improve how you eat while spending some contemplative time outside. With all of these benefits in mind, it is easy to jump into gardening enthusiastically, and you will reap even more rewards with a little bit of planning. In Vermont, our gardening season seems short but can be stretched year round with a few simple tips.  I always recommend that people take a look at how their vegetable gardens have been in the past and find just one or two things they would like to improve so that they can grow more of it for a longer season.  For example a common questions I hear is "how can I keep cilantro from bolting?"  Well, in short, you can't! But with a few changes in your gardening practices, you can grow it all spring, summer, and fall without ever seeing it go to seed.  The trick is to understand the life cycle of each food crop and how to best plant it to maximize it's harvest.  With certain crops, like zucchini, it is best to understand how prolific they are and to plant them conservatively so that the entire garden (and thereby your diet and your neighbors' diet) is not taken over with just one thing.  It is also helpful to plant things seasonally so that the harvest is not so overwhelming in August with little to eat before or after. Succession Planting for Successful Gardening Certain crops should be planted multiple times throughout the season to ensure a continuous harvest.  How often you plant is a matter of taste and space and time. The following list describes the maximum you could do with each crop, but adjust according to your needs and priorities -- this is just a guide.

Lettuce can be planted from seed or from transplants.  Seed grown lettuce is often grown in a row that can be cut and will re-grow a few times.  Transplanted lettuce can be grown for full heads like what you find in the store.  Both methods require regular planting every week or two for a continuous harvest.  It can be planted from seed in mid-April to mid-August for cut greens and transplanted for full heads from late April through early August.  Some people will transplant a few plants and plant some seeds at the same time in a different area; this method provides two generations of lettuce.  Once the cut lettuce becomes bitter in the heat of summer, it is best to pull it up, recondition the soil and plant something else.  If the goal is to always have fresh lettuce and it is very simple to do if you remember to replant.

Cilantro is very similar to lettuce in its growing habits.  It will grow up to a point and then goes to seed, or bolts.  It i will bolt more quickly in summer heat and, conversely, will stand ready to harvest for many weeks in the cool weather of spring and fall--even early winter.  It can be transplanted or grown from seed.  Like lettuce, it is simple to do both at the same time, thereby giving the gardener two generations.  Cilantro seed is coriander, so it does have a use if you enjoy that flavor.

Dill can be treated just like cilantro, and like coriander seed, dill seed heads have a use in the kitchen, so it is fine to let some of the dill patch go to seed.

Basil can be planted multiple times for best results.  Plants can be pinched to slow down the flowering, but best flavor will come from newly replanted basil plants.  Heat loving. Should only be planted once soil temps are in the upper 50's.

Cucumbers, cantaloupes, and zucchini and summer squash are best in quality when well tended. Just a single plant or two of any of those is usually enough for the home gardener, but by planting it three different times, the quality will always be good. The dates are: June 1st (or last week in May if you are in a warm spot), July 1st and July 15th.  This method will ensure a continuous harvest of prime looking vegetables.  Just remember to pull out and discard the pest and disease prone plants.  If your compost gets very hot and is well managed, it is okay to compost these plants.  Pest problems will diminish when the older, less healthy plants are removed.

Arugula, Cress, and other cutting greens for salads are best if sown or transplanted on a weekly or biweekly basis.  Again, a small amount can be seeded next to the transplanted crops in order to give you 2 generations at once.  This way you can have smaller quantities coming in at various times. Broccoli gives the gardener a couple of options.  It is best if transplanted and can be planted 3 dates in the spring and 3 dates in late summer for a continuous harvest.  I would choose late April, early May and mid May for the spring plantings and then Early August, mid August and early September for the fall plantings.  Full heads can be harvested and the plants can stay in the ground to produce side shoots. Green Beans -- are best when fresh and young.  The seed is relatively cheap, so it is better to rip out old plants and have new ones coming along regularly.  Having multiple plantings also means that no on is stuck picking beans for ours on end.  Sow new seeds when the previous or first generation is about 6 inches high.

Boc Choi, Cabbage, Scallions, Cauliflower -- these can also be planted multiple times.  Cabbage holds well in heat and can be planted every couple of weeks late April through early August.  Boc Choi and Cauliflower are not as heat tolerant and should be planted around the same dates as broccoli (see above). It is best to use row cover like reemay on these young transplants so that flea beetles do not destroy the plants. Spinach is another one that does not do well in the heat, but can be planted multiple times in spring and late summer.  It can also overwinter with a little straw mulch for very early spring eating.  Date to plant are (up to every week) mid April to early June and then early August to mid September. The last plantings in September are the ones which will be over-wintered and eaten the following spring.

Beets, Carrots, Turnips can be planted every two or three weeks from mid-April until about the third week in July.  Summer carrots are not the same as fall carrots and certain varieties do better in summer than in fall. Celery and Celeriac are slower growing and can be planted 2 to 3 times during the season.  Mid May until early July.  These need lots of water and benefit from straw mulch.

Bulb fennel and radishes are similar to lettuce -- they can be planted each week if really loved, but they bolt in the heat and do best in cooler temperatures of spring and fall.  Best if planted late April to early June and then again late August to mid September.  Very cold tolerant and hold well in late fall,  radishes are sown from seeds and fennel is best transplanted. Corn -- it is possible to do multiple plantings over different weeks, but an easier method is to plant all at once, but with various varieties that have different days to maturity.  There can be a 40 day span between early and late varieties. Peas -- can be planted every week, but this requires a lot of harvesting, irrigating, trellising, and variety research.  It is possible though.  More practically, the home gardener can sow 2 or 3 varieties in late April with various days to maturity.  Fall plantings are sometimes successful but weather dependent. These should be done in mid August.

The following are generally planted just once a year, but the harvest can be staggered with a few tricks: Tomatoes, Peppers, Eggplant -- try a few varieties of each in order to not have everything at once.  Determinate tomatoes will provide you with a big harvest all at once which is a good thing for people who make big batches of sauce for canning or freezing.

Onions and Potatoes are generally planted all at once, and again a few different varieties will provide you with a longer period of fresh eating.  Both onions and potatoes can be stored for long periods of time in cool and dark conditions.  Both can also be eaten fresh. Winter Squash is another crop that is just planted once and stored.  Best if cured for a week or two in a warm spot before eating.

Spring Time and Season Extension

We are busy happily working in the greenhouses! Early spring is an active time for seed planting. Some vegetables need to be planted in  a greenhouse and nurtured along as the Vermont summer is just not long enough for them to be planted directly in the garden. The germination of the earliest vegetables is a thrill to us and we know that they will thrill you in your gardens. With a few simple strategies for season extension, Spring can  be a rewarding time to see a few early flowers and even to grow some cold tolerant greens. Containers are a great way to do this. They can be kept indoors on the coldest days and nights, covered up with row covers, blankets or plastic sheeting on the mildly cold nights, and left out all day and night once the weather permits. Any crate, or large pot with holes in the bottom can be filled with good quality potting soil such as Vermont Compost Company?s “Fort V” and then planted with an array of salad greens and edible blossoms such as pansies that you can cut from once they reach a few inches high. You can cut and harvest these plants and allow them to re-grow for multiple harvests, allowing you a gorgeous salad while it is still too cold to be out in the garden.

As soon as the soil can be worked in your garden, it is possible to get a jump on our seemingly late warm weather by building a simple shelter out of Number 9 gauge wire and some row cover or even old blankets and plastic sheeting. If you cut the wire into 6 foot lengths, plant each end into the ground (making a hoop) and repeat every few feet, you now have a very quick and easy tunnel frame upon which to drape your fabric. This creates a lovely shelter for some very hardy greens. With this type of simple tunnel, a version of a cold frame, it is most important to cover it at night and uncover it in the morning. The plants can get very hot unless you use special row cover designed to stay on night and day.

The most cold tolerant food crops we can grow here are things like kale, spinach, collards, arugula, mustard greens, mache (corn salad), and many herbs such as cilantro, dill, sorrel, and chives. Certain lettuces are very cold hardy, but they cannot take the frost quite as well as the plants mentioned above--good cold hardy varieties include the French heirlooms, “Reines des Glaces” and “Merveiles des Quatres Saisons.” These most tender and delicate looking lettuces can take quite a beating when it comes to cold weather. Overall, early spring is a great time to satisfy the need for green, fresh foods that are grown locally after a long winer of leafy foods trucked in from far away. The difference in taste and the level of satisfaction you will experience is well worth the effort.

Bringing in Herbs for the Winter

Herbs are one of the key ingredients in summer cooking that make the food really stand out, but we don't have to stop once winter comes.  The key, in my mind, to things tasting good is to layer in flavors using various simple techniques.  Herbs are the fastest and simplest of those methods, other than say, adding salt.

We have had such a warm November that I am still clipping herbs right out of the garden and the herbs in pots are still doing well on the back porch.  I have also started to bring in herbs from the garden to dry them.  The simplest method is to cut whole branches of  the woody herbs such as thyme, sage, winter savory, and rosemary and tie them into bundles and hang them in a dark, well ventilated place.  I usually leave them hanging for a month or so, and then place all the bundles into a large basket lined with a clean dishcloth.  I use a large amount of herbs all winter, by the handful, in simmering stews, soups, under and over roasted meats, inside the cavity of roasted poultry, etc.  I just can't think of a simpler and more effective way to add depth to whatever is cooking.

The leafier herbs, such as basil, cilantro, parsley and chives can be frozen for year round use.  This is best done with the aid of a food processor.  I take handfuls of washed herbs (stems removed) and pulse them in the bowl of the processor until they are finely chopped. I then drizzle in a little olive oil while the machine runs. Once it all looks like a nice green mush, I scoop it all into freezer bags and shape it into a thin, flat layer before placing the bags (lying down) into the freezer.  This allows the herb puree to freeze in a thin sheet that can be broken into smaller pieces when you are ready to use it. This frozen herb puree is a great addition to soups, stews, sauces, roasted or steamed veggies, and salad dressings.  I simply toss in a chunk of the herb popsicle at the end of the cooking time of whatever I am making so that the fresh flavor really comes through.

You can also bring herbs inside in pots for the winter and place them near a sunny window.  I keep a few herbs in pots all summer just for this purpose, but you can dig up whole plants out of the garden and repot them with some good potting soil. These are nice herbs to use as garnish, or chopped into a fresh salad.  These are not the herbs I use by the handful, but when I want just a teaspoon of fresh, chopped herbs to add a final punch to a dish.  Some of the herbs that work well for bringing indoors are thyme, parsley, rosemary, sage, oregano and basil.  The sunnier the window, the better luck you will have. You can also use some grow lights on a timer for even better results.  It's best to water these indoor herbs about once a week, but since they are in a semi dormant stage, they don't need to stay as moist as they would in the summer. The herbs won't always look great, but they will always smell good and have enough flavor boosting powers to earn their keep.