Enter at Your Own Risk: DIY Wedding Flowers. Part 1

Last summer, I must have helped at least half a dozen customers who were looking for some help in planting a garden specifically for home-grown wedding flowers. I often warn people that growing for a specific date is fairly technical and requires weekly plantings, regular harvesting all summer long to keep the plants blooming until the event, and most of all, a very flexible attitude. People who have a specific color scheme or variety in mind are not always good candidates for home grown wedding flowers since those types of flowers may be very hard to grow and getting the right color on the right day means planting about 10 times more than you think you will need in hopes that one of the plantings will be just perfect on the correct day. For those who are planning an event and are willing to look at the flowers as a fun and flexible component, then growing your own is a great option. I have listed below some varieties that are particularly well suite to a DIY flower program.  Full disclosure: I have talked about as many people out of growing their own wedding flowers as I have talked into doing it. It really is not a good fit for everyone, but for those who are willing and able, here is a little help to get you started....

ANNUALS

Verbena bonariensis - reliable and a lovely purple bloom with long wiry stems that hold up well to handling and mixing into all kinds of arrangements. Zinnias - come in all shapes and colors, are best suited for August or later. Require deadheading all summer long, but will branch out and be very productive once well established. Sunflowers - there are lots of sunflower varieties that are designed specifically for cut flowers. Some of our favorites are Giant Sungold Teddy Bear, Sunbright Supreme and Soraya. The only tricky thing is getting the timing just right. They only are perfect to harvest for about 10 days, after that their single blossoms start to drop their petals. Ageratum - blue,  can be tall if planted correctly - a little closer together. Needs deadheading all summer long if you are planning for a late summer or fall event. Very productive if well established and well taken care of. Agrostemma has a lovely, floating quality that gives a lot of life to mixed bouquets. It's airy and delicate, comes in purple or white and produces lots of good, long stems all summer long. Again, needs constant picking and deadheading to produce all summer long.

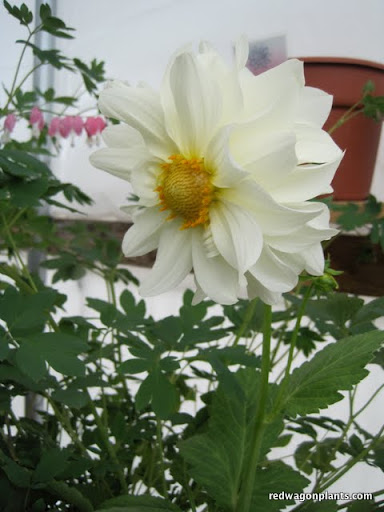
Ammi - this is a beautiful filler in mixed bouquets or in all-white arrangements. Easy to grow from transplants and produces, nice, tall stems.

Cosmos - come in a variety of textures and lengths, best suited for mid-August or later. While they are beautiful, they do take up a lot of room for not always a lot of stems.

Snapdragons - another multi-colored option or can also be grown as strains of single colors. We offer many options of snapdragons. The stems can sometimes be a little short, but with good fertility and 6" spacing, they will grow straight and tall.

Celosias - come in many shapes, sizes or colors. These are a hardy, easy to grow and more forgiving than others. And they can be dried for long-term keep sakes.

All of these annuals will give you a good place from which to start. Do-it-yourself flowers can always be supplemented with florist purchases the week of the event  if the budget allows it. We will cover more on home grown flowers in subsequent posts, so if this peaks your interest, please stay tuned. Part two will be about which perennials are easy to grow and use for cut flowers. Part Three will be about different tactics to make your cutting garden as prolific as possible.

The Year to Come

by Julie One of my favorite aspects of running a greenhouse business is the ability to create. Not only is the act of growing plants very creative - we get to choose what we grow, how we grow it, how we market it, and how to make it all look beautiful and inspiring (we hope!); but in addition to that is the fact that this is a business like any other.  Ever since I was a little girl, my favorite toys have been my graph paper and my schedules; so a greenhouse business that gives me about 6 months of planning time is really fun for someone like me. I get to think it all through, improve systems, find ways to do more in the community, and create a nice work environment for all of the amazing people at Red Wagon Plants.

Here are some projects and improvements we are hatching (germinating?) at Red Wagon Plants this winter. Our mission is to increase the bounty in our community and this year, we plan to focus on the community part of that mission. We have built up such a wonderful group of customers, both wholesale and retail, and it feels like the right time to get to know everyone a little better!

Our 2011 Goals

  • Promote our community partners. Every year, we donate thousands of plants to schools, non-profits, community gardens, and civic gardening projects. We want to share information about all of these wonderful organizations with our customers.
  • Create a "Grower Station" at our retail store where people can learn about some simple growing techniques that are appropriate for the home scale, back yard garden.  Many of the staff at Red Wagon have worked on commercial scale vegetable farms and there are so many time-saving and crop-improving methods applied on those farms that easily cross over to the home garden.  This can really help increase the bounty in our customers' backyards and make gardening affordable from a money and time perspective.
  • Have an end of year harvest dinner with the bounty from our gardens. We can sit at the table together, share our love of gardening and enjoy the food and spirit of our efforts.
  • Invite people to come relax in the greenhouses in the winter. There is no place like a warm greenhouse in winter when the snow is falling and the wind is howling and inside feels like a tropical wonderland of green. How about sharing this with the community? Sunday morning coffee and bagels? Bring your knitting! Hang out with the plants and breath in the smell of dirt and fresh green growth. It seems like every time I tell someone what I do for a living, they say "oh it must be so nice in there on a snowy day!" Well, it is. It's really nice and it takes about 1 month off of winter's length for all of us who have the honor to work here, so we want to share that opportunity and invite others to join in the pleasure!
  • Visit customer gardens. We really do love hearing from our customers and want to make more of an effort to see the gardens they tell us about. It would be so fun to roam around in the van and visit all these lovely places where people grow their own food and make their homes beautiful and colorful. What more inspiration does a person need?

So those are a few thoughts, and as always, we love to hear your suggestions, so please feel free to comment.

Gratitude

I woke up today feeling grateful and recharged with a blue sky blasting through the window and a full night of sleep behind me (the first in a while.) Here are a few pictures I took with the early morning sun casting a bittersweet glow on everything. What to make of that late fall look? Winter is coming, summer has produced all it can, and it is time to settle back and enjoy the dark days ahead. The dormant days ahead work for the seeds that need it in order to crack into life come spring - it can work for us too. It is a just fine time of year for sinking into the couch, making soups, catching up on reading, and over all feeling gratitude for the cycles of the seasons, the sweetness in the people around us. While the basement is full of jars of applesauce, tomatoes, jams, chutneys and pickles, I also try to keep a few things going in the garden as long as possible.

Like these .....

The straw keeps the soil from freezing around the leeks so that I can harvest them even in deep snow. The lettuce, arugula, cilantro and dill behind them will keep going a little while longer. I can cover them up with row cover, but most likely they will be eaten before I even need to do that. I will plant 2 or 3 times more next year so that I can have enough to take us through December.

I love this close up of dill with all of its fine texture.

Dill is one of the hardiest herbs to grow in cold weather and gives such brightness to late fall salads, potatoes, eggs, and fish. I use it quite a bit this time of year after pretty much ignoring it all summer long except for using it in a pickle jar or two or three.

I always bring in a few baskets of herbs. I don't do anything to them except cut them, pile them into a basket and leave them around the house. They smell great and love to go to work by the handful when I am making soups, broths and stocks. I don't think they object to being stuffed into a poultry cavity every now and then either. There is nothing like using herbs in big bunches of branches to feel like I am living a rich and luxurious life.

I want to say thanks to compost too.

Parts of the garden are ready for spring, and parts still have a ways to go, but there is so much satisfaction in seeing the raised beds awaiting next year. Soil building organisms busy making teeming, hot life. The ones who really get some of the credit for this are these lovelies......

Enjoy your next few days of rest if that is your luck and your lot. And thank you, deeply, for being a part of all this beauty and grace, coldness, sunshine, poop, and all.

Fresh Start

We are busy preparing for the 2011 season and this includes counting everything in sight such as seeds, pots, trays, tags, and signs as well as ordering seeds, cutttings, pots, trays, tags, soil, and anything else we may need to make everything tick. But the most exciting preparation is the new grading and gravel in the greenhouses. When we first built the greenhouses 6 years ago, we had to cut some corners (that money thing, you know) and it meant that we did not spread and compact gravel before building the greenhouses. Well, over time, the native clay sunk and became a wet, weedy mess which unfortunately can harbor pathogens and pests. This fall, Linda Gionti of Gionti Stone Works, and Parker Excavation have been working together to bring us brand new, beautiful gravel floors which we are covering with brand new landscape fabric. This will keep weeds down and create a clean surface that can be swept and kept clean. It feels just great to have such team work (thanks to Eric, Jonathan, Allison and Buddy) hauling everything out of the houses and then setting it all back up again. Here are a few photos to give you a taste of the job.

It's kind of like getting a spa treatment for the buildings.

The Very Fragrance

Hope Johnson, whom many of you know from our retail greenhouse, brought me this plant this summer, while muttering something about "bringing coals to Newcastle" and said it was a red morning glory she had started from seed.....well here it, a few months later, and just a beautiful morning riser. It only opens for a short while, maybe if it had been planted with mroe of a south eastern exposure it would stay open longer, but I just love it. It is a dark pink, not a true red (this often happens with flower color description), and the flowers are about the size of a silver dollar. Should we grow and sell this next year?

These Kennebecs have provided me with the most satisfying harvest of my potato growing life. They were planted in the best soil in my garden, the site of an compost pile, and I did not even hill them. They were virtually maintenance free save for some periodic weeding.

This corn was transplanted in late July from seeds that had been started in mid-July. I somehow did not make time for corn any earlier this year. As Elise and I transplanted, I kept wishing for some October corn and a warm fall. Well wishes do come true: while the ears are not terribly big, the flavor is sweet and the texture is just right. This has been going into a fabulous corn salsa recipe I have been canning.

This makes it all worth the toil. I heard this line from a Rilke poem yesterday:

Is not impermanence the very fragrance of this world?

A good thought for autumnal transitions.

Corn and Poblano Chowder

One of our customers, Michelle Reiter,  sent us this recipe which sounds and looks so incredibly great. She was making a hot soup during that broiling weather we had last week, so you know it has to be great! Thanks, Michelle! And this reminds me to make a note to grow some poblano's next year! The plants sold out before I could get one in the garden, and yet again, I am poblano-less. They are one of the varieties that seem to get more and more popular each year as people plant them and come back for more the following season.

Poblano Corn Chowder

Cut kernels from: 10 ears sweet corn (5 cups)

Puree in a blender: 3 cups corn kernels 1 cup whole or 2% milk Saute in 2 Tablespoons vegetable oil over medium heat in soup pan: 2 poblano chiles, seeded and diced 1 ½ cups white onion, diced 1 teaspoon garlic, minced Cook 4-5 minutes

Add: 2 cups chicken broth 2 cups corn kernels 1 teaspoon sugar 1 teaspoon kosher salt ½ teaspoon cayenne Simmer 5 minutes

Stir in: Pureed corn 1 ½ cups tomato, diced ¼ cup feta cheese, crumbled Simmer to heat through and melt cheese, about 3 minutes Garnish servings of soup with choice of avocado, lime, and/or cilantro

What are some of your favorite varieties this year? What are you making with them? Let us know and we can post your recipes, suggestions, ideas. This is the time of year when we start picking out the seeds for next season, so speak up, please!

On Vacations and Onions

Last week, I came back from our ocean vacation, the one during which I  tried not to think about the garden for a week. This was preceded by some fast and furious hours hoeing, weeding, mulching, watering and generally preparing all plants for a week of neglect. Everyone survived, tomatoes are in high production mode, spitting out ripe orbs faster than I can use them; and the peppers and eggplant are jumping into harvest baskets, big and ripe. Potatoes are ready to be dug, garlic is cured after a couple of weeks hanging from the barn rafters. Onions are next on the harvest and cure list. I never seem to have enough onions to last through the winter even though I plant so many of them each spring. I think the culprit this year was poor bed preparation prior to planting. I try to get onions in as soon as possible in April, the same time that coincides with peak greenhouse production and growing wholesale orders. So yes, once again, the onions are on the small side because we planted them into some soil that was a little compacted and not rich enough in composted donkey manure.  What do I love most about gardening? Being able to say, "there is always next year."

Onions: harvest the onions by pulling up the whole plant once the tops die back and start to lie on the ground. It's best to pull them up on a sunny, breezy day so that they can spend a few hours drying in the sunshine and wind. Before night falls, on that same day, bring them inside, out of direct sunlight so that they may cure for a few weeks. The curing process is what turns the outside layer of the onion into the paper-like skin. This outer layer, when dried properly, is what gives onions their real staying power as a storage crop. It is best to place onions in an airy, dark place - a garage with airflow but no direct light, an attic with air circulation, a shed, or even an extra bedroom with the curtains drawn and the windows open. You can braid the onion tops, bundle them into bunches and hang them up from the ceiling or rafters. You can also leave them in a single layer on the floor, but they must be turned over at least once a week. Once the tops are completely dried and the outer layer is paper-like, you can pull off the tops and store the onions in baskets, brown paper bags (with slits cut for ventilation), milk crates, apple crates, or cardboard boxes. Again, the important thing is to make sure the onions are in a dark place and it is well ventilated. Basements are often too humid for onion storage. In the winter, onions can go down to the low thirties and be fine. Colder temperatures better for onion storage than warmth with the ideal storage temperature being 35 to 45 degrees F.

Impatient Tomato Tastings

The first tomatoes of the season are always a bit of an anti-climax. We wait all year for the fruit to come out of the back yard as opposed to some distant clime, and then take a bite. It's not as sweet as the memory, not as drippingly hot and gushy as the movie running through my brain. The first tomatoes aren't the best ones. That is all there is to it. I tend to pick them a little early, eager for a bite and am met with a disappointing crunch when there should be a mush. In a week or two, I won't be so impatient, the vines will be dripping with ripe fruit, and I will eat them three meals a day, going from scarcity to abundance in a flash. Soon, every slice of bread will be adorned with a smear of mayo (the junky kind, not the healthy kind. Sorry) a thick, red, juicy slice of tomato and a sprinkle of good salt. This will be all I eat for a while. I know it's coming. But for now, I decided to document the earlier tomatoes and taste them, giving them a ritualistic importance of sorts. I try to put blinders on in the face of their slight un-ripeneness and photograph them, carefully laid out on the counter. Soon there will be baskets of tomatoes, heaping, unnamed and tangled together. But for now. We will carefully label, taste, and report. Here goes.

Pink Beauty is just an iconic tomato - it always perfectly shaped, blemish free and has an almost electric dark pink hue. The Purple Russians tend to crack a little, but nothing too detrimental (their good sides are showing for the photo shoot). The Juliet, as many of you know, is my favorite all-around tomato. It has huge yields of oval fruit that are great raw, for snacking, salads, sandwiches, and salsa (not too watery); but the real charm is that they work really well as a cooked sauce tomato too. The Viva Italia is a very pretty paste tomato - early and blemish free and very disease resistant. The Glacier is an heirloom, super early, does well in very cold climates (Huntington, Lincoln, Ripton - no problem), and is the one tomato you will be eating weeks before others ripen.

We tried them all, carefully slicing, chewing, thinking.....

All were slightly under-ripe and slightly lacked that "I've been baking in the hot sun" flavor and texture. We have had some rain the past couple of days, and the flavor is affected by that. But they were good - not middle of August good, but good. The Pink Beauty has a really nice balance of sweet and acid flavors, a slippery, silky texture and makes beautiful shiny slices.

The Purple Russian was a winner, flavor wise and texture wise. It is juicy, especially for a paste tomato, and has the most buttery complex taste that lingers on the tongue and leaves me wanting more. The plants are nothing pretty - they always look shaggy and stringy somehow, so I have never gotten too excited about putting them in my garden, but customers rave about them, and now I know why. Sweet, unctuous and complex. A new favorite and you will hear me raving about this one in the greenhouse next year. It would be perfect raw or cooked, and I am sure any sauce made from these would be a deep purple red color.

The Juliets were a little bland compared to the first two, but still full of good, bright flavor - lively on the tongue and a nice meaty texture.

Viva Italia were lacking in distinctive flavor (a little too acidic for my taste), but in all fairness,  they are much nicer when cooked. We will have to do another taste test with just paste tomatoes, cooked simply in some olive oil and lightly salted.

The Glacier is cute as a button: plump little orbs, slightly mis-shapen and full humble darlingness. The flavor is great for an early tomato - they are a little bigger than a cherry tomato, can be sliced for salads or sandwiches or cooked down for a quick sauce. They tend to ripen 3 or 4 at a time, a nice feature since they are so small and just one of them won't take you far. I would put this at the top of the list for early tomatoes. But if you only have room for a couple of plants, there could be some better choices.

I would love to hear what you are loving or not loving in your tomato selections. Any varieties you want to recommend for next year? Any you think should be discontinued? Let us know. And we love pictures! I will do this taste test again, later, when the plants are loaded and the fruit is at peak flavor!

The Garden in July, a Few Tips on Creating Micro-climates, and a Beach Picnic.

This summer, the weather has been garden perfect for many crops. All the heat lovers are thriving and the crops that like it cool and moist are doing well where they have been watered and are getting a little shade. I have a nice stone wall thanks to Charley of Queen City Soil and Stone, and the shady side of the wall is a perfect place for crops like celery, mid summer lettuce, artichokes, and boc choi. They benefit from the afternoon shade the wall creates. Additionally,  the moisture that builds up at the base of the wall from the terraced soil above it creates a perfect micro-climate within the garden. You can easily achieve this in any garden with strategic rock placement - not a full-fledged wall necessarily, but a few stones stacked up to retain moisture on a slope or to allow for  north-side shade in a fully exposed garden. Look around your garden for other mico-climates like tall plants that can be used to create shade for summer plantings of lettuce. Right now, I have lettuce planted in odd spots throughout the garden - under a  sunflower, at the base of the stone wall, and under some tomato plants.

The eggplant has been tremendous this year and last night, we had a great meal of marinated eggplant while sitting at the lake, scooping up piles of the salad with pieces of pita and a little feta. Here is the recipe. I used a combination of the Gretel and Machiaw eggplants (pictured above).

Marinated Eggplant adapted from smitten kitchen.com

  • 1 lb long, Asian eggplant, sliced 1/3 inch thick
  • 3 tbs olive oil, divided
  • salt and pepper to taste
  • 2 TBS red wine vinegar
  • 2 TBS capers, rinsed
  • 1/4 cup mint, finely chopped
  • 1/4 cup of feta, crumbled

Pre-heat oven to 400 degrees. Coat a cookie sheet with a layer of oil and layer the eggplant slices in a single layer.

Bake them until soft (about 20 minutes), turning once and drizzling with a little more olive oil about half way through.

Blend the vinegar, remaining olive oil, salt and pepper, capers, and mint together. Place eggplant into a bowl, drizzle with the dressing, and stir to combine. Let rest for at least a half hour or place in fridge (up to one day). When ready to eat, sprinkle with feta. Eat with flatbread, while sitting near a cool body of water.

Beautiful, Edible Flowers Workshop

We were a small but enthusiastic bunch that gathered to learn new uses for edible flowers last Saturday. Cheryl Herrick, who helps us with marketing and is a freelance writer and food blogger, took us through some of her favorite ways to use blossoms from the garden.  We started by talking about safety, and making sure that any flowers you want to use for eating are non-toxic and are grown safely.  She stressed that if you're feeling experimental, channel it by finding new uses for the flowers that you know are safe for consumption.

The first thing we made was a simple canape with sliced cucumbers, a small dab of creamy goat cheese, and a nasturtium flower or leaf or viola bloom on top.   (If you're averse to cucumbers, sliced zucchini would be a fine substitute.)

Next we talked about liqueurs.  Alcohol extracts all sorts of compounds from plants, so that flowers or herbs or fruits soaked in it can sometimes have strong and surprising flavors.   Because of this, it's good to keep things simple if you decide to experiment - one flower or herb at a time in either vodka or brandy or bourbon, saving simple brisk flavors (think thyme, or mint, or anise hyssop) for vodka, and stronger ones for soaking in the others.  Then we put together a Nasturtium-Bourbon Liqueur - but now we have to let it sit for three months to age!

Nasturtium Liqueur Recipe 1 pint

  • 1 c. bourbon
  • 1/2 c. nasturtium blossoms
  • 1/2 c. fruit, chopped, optional (we used a handful of blueberries)
  • 1/2 c. simple syrup

Mix, cover well, let sit for 3 months.

Then it was on to Imperial Rolls, which are an uncooked spring roll made with a rice paper wrapper, and can be filled with a variety of ingredients.

Imperial Rolls makes 8 (enough for a snack for 4)

  • 8 rice paper wrappers, soaked one at a time for about 15 seconds in cold water, just before you're ready to make them
  • 4 cups well-washed lettuce
  • 1 cup shredded carrot
  • 1 cup diced extra firm tofu
  • 1 T. chopped cilantro or basil
  • ~1 T. fish sauce (or substitute umeboshi vinegar or tamari)
  • 8 edible flowers (we used nasturtiums, violas, and borage)
  • sweet chili sauce or more fish sauce for dipping

Make by placing one soaked wrapper in front of you on a plate or cutting board.  Place about 1/2 cup lettuce, some shredded carrot, basil or cilantro and cubed tofu in a line on the wrapper.  Drizzle over just a little bit of fish sauce.   Fold one edge over the filling, tucking the filling in so that you can roll tightly.  Tuck in the other sides, and place a flower on the open part of the wrapper.   Roll the wrapper, which will stick to itself, while using your fingers to compress the filling so it can be rolled fairly neatly.  Cover with a damp towel until the others are done, then serve with your preferred dip.

Finally, we made some candied flowers by brushing flowers with some reconstituted powdered egg white, and sprinkling on sugar twice.

The sugar should have been superfine (which you can make at home by pulsing regular granulated sugar in your food processor for 10 seconds or so), but we tried it with what we had.  They then need to sit for at least 24 hours to dry, depending on the weather.

And then we packed up our goodies and were done.  It's going to be hard to wait three months for the liqueur, but we're told it'll be worth it!

Our next workshop is going to be a fantastic one on canning with no added pectin with Robin Berger on August 7.   Robin is a fantastic canner and cook who worked with us this summer and blogs at hippoflambe.  Give us a call to register at 802-482-4060.

Bay Laurel in Vermont

If you ask me what my favorite plant is in my garden I would tell you about my bay laurel tree.  Many folks are excited by the plants that add beauty to their surroundings.  Personally I love the plants that I can use in the kitchen and my bay tree adds value year round.  (The fact my favorite plant is a culinary herb would be no surprise if you follow my blog, Hippo Flambe). The difference between a leaf picked off my tree seconds before using it is far removed from the dry, dusty leaves in the spice section of your supermarket.  Plus my bay laurel has the added benefit of being easy to care for. It was a rather  inauspicious start to my bay laurel tree farming. I was given the tree by a friend who had decided to "euthanize" her tree. Her tree had developed a sticky residue on the leaves and she did not want to spend the time cleaning the leaves. In addition it had clearly outgrown its 23 inch pot and she had visions of it taking over her house. I immediately jumped at the chance to own my own bay laurel tree and told her not to kill it, I would adopt it instead.  When I arrived at her house one day in the pouring rain I stared at the giant tree and I began to wonder how well this was going to work out.  The first problem was how to get it in the back of my station wagon, even with the rear seats folded down it was far to big. So we went after the tree with clippers, ruthlessly cutting back every limb. In the end the tree had lost considerably more then 50% of its branches and I remembered the advice to never prune a tree back that far. I shrugged and figured what was the worst that could happen, even if it died the tree was free to me, I had nothing to lose.

That winter we kept the tree in an upstairs South facing window and miraculously it began growing new leaves almost right away. I did not give it any artificial light or fertilizer, we just opened the blind from 7 AM until it was dark.  The room it was in only gets passive heat from the other rooms, so the room temperature is often as low as 59 degrees.  The tree was severely pot bound as even in a 23 inch pot 1 qt of water would come rushing out the bottom almost immediately.  Every week it put out tiny new shoots and leaves and I began to take more leaves to cook with.  After using the leaves a few times I began to care more about my bay tree.

That spring we began to search for a larger pot. I was told at many locations that I could get a larger ceramic pot but not plastic. It had taken 2 of us to slowly inch the tree upstairs in a plastic pot, ceramic and its extra weight was clearly out. Finally one nursery suggested I try bonsai-ing the roots. She explained bonsai tress are removed from their pots and then pie shaped wedges are removed all the way around the root ball so more soil can be packed in and the tree can stay in a smaller pot.  So I bought some high quality soil and we hacked out 4 pie shaped wedges all the way around the root ball.  When I returned the tree to its pot I was amazed at how much water it could now hold.  After a few weeks of new growth it was clear the plant was much happier.

Taking care of my Bay Laurel tree is remarkably simple, especially as I am often a house plant slayer.  In the Fall, sometime in October, we bring the tree indoors. Once indoors we water sparingly about once a week, although I know there are stretches where we just forget.  In the spring we take the tree back outside, where it does not need watering unless there is a really extended dry spell. If you prune it a little in the spring it will produce new growth.  Use well drained, fertile soil.  I just recently applied some of my favorite tomato fertilizer to the soil. The next time it becomes pot bound I will again bonsai the roots. The sticky residue that my friend found on the leaves is caused by scale insects.  If this occurs just wash the leaves with an insecticidal soap and use your nail to scrape away any insect bodies on the leaves and stems. You can also spray with alcohol.  The sticky residue is not usually deadly to your tree but it will inhibit new growth.  Try to keep it in a humid area but do not over water.  Humid in Vermont in the winter is hard, just keep it out of drafts and away from the heating vents, misting them occasionally with water if you want.

The great thing about growing a bay laurel is you only want the leaves, which are the easiest part of a plant to maintain.  If I was starting over with a smaller tree I would not allow it to become as big as mine is, this would make it easier to bring it in and out of the house every year.  When cooking with it remember the fresh leaves are much stronger and more flavorful then dried. When a recipe calls for 2 leaves I only ever use 1. If I just want a slight bay flavor I use a smaller leaf.  One of my favorite uses for the leaves is to flavor a pot of red lentils. I just add one leaf to a pot of simmering red lentils with kosher salt and cook until the lentils are tender.  To serve I simply drain the lentils, drizzle with flavorful extra virgin olive oil and sprinkle with freshly ground pepper.

Meet RWP's Allison

Allison Lea is one of the terrific staffers at RWP.  And not only is she a master of plant production here, but she's also a gardener and home herbalist in her own right. This weekend she'll be offering a workshop at which she'll share techniques for making lip balms, infused oils for health and beauty, and nourishing skin salves.   By way of introducing her, we asked her to send along some photos from her own Addison County garden.

yarrow
yarrow
IMG_2826
IMG_2826
IMG_2815
IMG_2815
IMG_1465
IMG_1465

Hollyhock close-up

IMG_2836
IMG_2836

Lemon Thyme

There are still a couple of spaces in her Saturday, June 26 "Gifts from the Garden: Herbal Body Care"  workshop.  The cost is $25 per person, and you'll leave with a selection of the the goods you'll learn to create ... and some hands-on practice making gifts from your own garden.  Give us a call at 802-482-4060 to register.

Butter Lettuce, I love you

Green butter lettuce has to be my all time favorite lettuce....perfect texture, a color that can only be described as translucent and pearly, and a delicate flavor that truly is butter-like. I eat it in all sorts of situations and for all sorts of meals. Breakfast is toast with a thin spread of butter, snipped chives, some shavings of cheddar and a pile of butter lettuce leaves. Lunch is butter lettuce with a white wine vinaigrette, a piece of bread, and maybe a little tuna with herbs. Dinner will always include a butter lettuce salad with lots of snipped chervil. Or perhaps some grilled flank steak with butter lettuce, cilantro, thai basil, shallots, and a little hot pepper drizzled with a light sesame dressing.

Late May and June are the butter lettuce weeks. I plant a four pack of the lettuce every week from mid- April through August and I am rewarded with huge, green and white pillow-like heads of tenderness.  Here is a blog recipe from David Leit, who also appreciates this delicacy.

He is recommending a blue cheese dressing, which will be great later in the summer, but for now I cannot get enough of the delicate flavor and taste, so I will stick to my lighter dressings.

Sweet Potatoes in a Customer's Garden

We had some very innovative customers today who showed us photos of their garden, including some homemade containers for sweet potato vines. Here are the photos. Take a look and please know that we love to see what you are up to!  There is so much to learn from each other....

You can follow their whole process by seeing the pbotos and reading the caption in this photo album. Inspiring and informative!

What's Happening This Week in the Greenhouses

I have been spending more time in the retail greenhouse this week and I am just awed by the beauty of some of the flowers. Here are a few photos to get you in the mood too. Delicate folds and perfect gradations of pigment make for some intricate and dazzling begonias: Here is a dahlia that I am in love with:

These orange miniature roses are incredibly sweet near a stone wall or in patio conatiners:

And we have a full array of hot peppers now including:

And....

These Vanilla Marigolds are pretty special as well - very tall, upright and a creamy delicious....

What to do with Sweet Potato Slips

We're so excited for this weekend's sale of sweet potato plants, and want to make sure everyone has what they need to enjoy these wonderful plants.

Here's a link to the information we'll be handing out to everyone who comes out to the greenhouses for the sale.

You can grow them in containers too.  They look beautiful in containers and whiskey barrels, apple crates, five gallon buckets with holes drilled out for drainage are all great, low cost options.

We recommend Fort Vee as a growing medium for containers, as we do for all container plants.  Sweet potatoes need a loose and well-drained soil, whether in a container or in the ground.

By now you're wondering how many plants you should get, and how many things you can cook with your sweet potatoes.  Here are some recipes to tempt you:

We hope to see you this weekend!

Sweet Potatoes are Coming!

Cheryl says: I spent the Memorial Day weekend gathering containers, amending soil, watering, and otherwise getting my garden planted.

And now, with a few days of rain my plants are looking fabulous and happy, while I'm on a second mad search for containers so I can take advantage of the Sweet Potato Slip Sale this weekend.

A few of the things looking especially terrific right now:

garden skinny pancake 004

Apparently a deer thought so too:

garden skinny pancake 014

The Cherry Bomb pepper was full of flowers and now is setting fruit:

garden skinny pancake 008

And the okra and pickling cucumbers are settling beautifully into their hanging bags.  I'm excited for when they start to vine.  The cucumbers are about to flower:

garden skinny pancake 011

My next project is to get myself 4 containers and a bunch of Fort Vee for sweet potato culture, consulting thesetwo Julie-approved links.   More to come.

Sweet Potato & Milk Recipe Contest

We are holding our Second Annual Sweet Potato Slip Sale to benefit Friends of Burlington Gardens this Saturday and Sunday (6/5/10 & 6/6/10)  from 10 am to 6 pm both days.   We will provide 4.5" pots of rooted sweet potato slips (4 to a pot) for $5.00 each. This will provide you with tremendous yields of this delicious "super-food." Also on Saturday, June 5th, our neighbors at Family Cow Farmstand will be holding an open house from 11 am to 3 pm. You can meet their adorable cows, taste their creamy, rich, raw milk and even help build the new stone calf corral with Charley MacMartin from Queen City Soil and Stone.  It's a great way to meet all the great businesses based here at 2408 Shelburne Falls Rd in Hinesburg.

crop food tour burlington 017

To celebrate this joint effort, we are holding a fun and friendly contest. Everyone is invited to submit a recipe that uses both sweet potatoes and milk by 5:00 on Friday 6/4 - online via email at julie(AT)redwagonplants(DOT)com or on Facebook. We will post all of the recipes on our website, and on Saturday morning we will announce the winner of the contest.   The winner will receive a $25 gift certificate to Red Wagon Plants and a free gallon of milk from Family Cow Farmstand.

Here is the first recipe we have received so far.

Creamy Sweet Potato Soup Recipe

from Carin Laughlin Hoffman (5/31/10) INGREDIENTS 2 Tbsp (1/4 stick) butter 1 cup chopped onion 2 small celery stalks, chopped, greens reserved 1 medium leek, sliced (white and pale green parts only) 1 large garlic clove, chopped 1 1/2 pounds red-skinned sweet potatoes (yams), peeled, cut into 1-inch pieces (about 5 cups) 4 cups chicken stock or canned low-salt chicken broth (use vegetable broth for vegetarian option) 1 cinnamon stick 1/4 teaspoon ground nutmeg 1 1/2 cups half and half 2 Tbsp maple syrup The leafy tops of the celery stalks, chopped METHOD 1 Melt the butter in a large, heavy-bottomed pot over medium-high heat. Add the chopped onion and sauté for about 5 minutes. Add chopped celery stalks and leek, sauté about 5 minutes. Add garlic and sauté 2 minutes. 2 Add sweet potatoes, chicken stock, cinnamon stick, and nutmeg; bring to boil. Reduce heat and simmer uncovered until potatoes are tender, about 20 minutes. 3 Remove cinnamon stick and discard. Working in batches, puree soup in blender until smooth. Return to pot. 4 Add half and half and maple syrup and stir over medium-low heat to heat through. Season soup to taste with salt and pepper. (Can be prepared 1 day ahead. Cool soup slightly. Cover and refrigerate soup and celery leaves separately. Bring soup to simmer before continuing.) Ladle into bowls. Sprinkle with celery leaves. Serves 6 to 8.

Here is an another recipe from Melissa Meese  (6/1/10)

Sweet Potato Buttermilk Biscuits 1 C. of mashed sweet potatoes 1 Tbs. baking powder... See More 2 Tbs. packed brown sugar 1 tsp. of salt 1/2 C. butter, room temp 1/2 tsp. baking soda 2 cups all-purpose flour 3/4 C. buttermilk

Heat oven to 425 degrees F. Combine flour, baking powder & salt in a large bowl. In a mixing bowl, combine sweet potato, brown sugar and butter. Beat at low-med. speed until fluffy. Dissolve baking soda in buttermilk. Stir buttermilk & sweet potato mixture alternately into dry ingredients. Roll dough 1" thick. Cut with floured 2" round cutter.

Place on ungreased baking sheet. Bake at 425 degrees for 15-20 minutes.

Sweet Potato and Corn Chowder

From Nora Doyle-Burr (of Last Resort Farm - a great farm stand and pick-your own berry farm)

(serves 6-8) 8 ears corn, husked and silked 6 cups vegetable or chicken broth 2 tablespoons butter 1 leek, white and tender green parts, thinly sliced 1 garlic clove, minced 1 large sweet potato, peeled and diced Salt 1 1/2 cups milk 1 tablespoon sugar, or to taste Freshly ground black pepper

1) Strip the kernels from the corn and set aside. Combine the broth and corncobs in a large pot and bring to a boil. Reduce the heat and simmer for 30 minutes. Strain, discarding the cobs and reserving the broth. It should now be infused with corn flavor.

2) Melt the butter over medium heat in a large saucepan. Add the leek and saute until softened, about 3 minutes.  Add the garlic and saute for another 2 minutes.  Add the stock, corn kernels, sweet potatoes, and salt to taste.  Bring to a boil, lower the heat, and simmer for 25 to 30 minutes, until the potatoes are tender.

3) Add the milk and sugar.  Season with the pepper.  Taste and season with more salt, sugar, and pepper, if desired. Simmer for 5 minutes. Serve hot.

Adapted from "Serving Up the Harvest:  Celebrating the Goodness of Fresh Vegetables" by Andrea Chesman

From Clare Joy of Shelburne, VT

Sweet Potato Bake Ingredients: 3 sweet potatoes, sliced thinly 1 lb Emmentaler (Swiss) Cheese, grated 1 pint cream Some herbs of your choice, optional (I like a little lemon thyme) Salt & pepper

Directions: Layer the sweet potatoes sprinkling over the cheese and seasonings as you go.  Top with a layer of cheese.  Pour the cream slowly in one corner so it spreads across the bottom of the dish but not over the top of the other ingredients. Bake covered for 1 hour at 350 degrees then remove the cover and bake a further 15-30 mins.  until all the liquid is absorbed. Enjoy!

from Carolyn Siccama

Velvety Squash (and Sweet Potato) Soup

1 (3 pound) butternut squash (*I have used many different types of squash in this recipe, Delacata is particularly good) 1 (2 pound) acorn squash* 1 sweet potato 2 cups chopped onion 2 tsp canola oil 5 cups veggie broth 2/3 cup apple cider (when I don't have cider I use applesauce and it works just as well) 2 tablespoons molasses 1 tsp curry powder 3/4 tsp salt 1/8 tsp ground red pepper 2/3 cup milk

Peel and cut squash and sweet potato into small cubes and cook in boiling water until soft.

In another pan, saute onion until soft. Add cooked squash & sweet potato. Stir in broth and next 5 ingredients (through pepper). Reduce heat. simmer 5 minutes.

Place half of squash mixture into a blender and blend until smooth.  Repeat until all soup is blended (I do like to leave a few chunks of squash and potato un-blended).  Return everything to the pan. Stir in milk.  Cook over medium heat until thoroughly heated.  Enjoy!

Vermont Sweet Potato Milkshakes & Creamsicles

From Deirdre Holmes

1 sweet potato (med-sized) 2 cups milk 1 tablespoon maple syrup (or maple liqueur) 3-4 ice cubes crystalized ginger (optional) lime or lemon juice (optional)

1. Bake washed whole sweet potato in a 400º oven for approximately 45 minutes or until soft. 2. Remove peel and put insides into blender or food processor. 3. Add Lindsay's finest whole milk including cream layer, maple syrup and ice cubes, and pulse until smooth. You can adjust the consistency by adding more milk or ice cubes. 4. If you're agreeable to adding a few non-local ingredients, several pieces of crystalized ginger, juice of 1/4 of a lime or lemon, and/or your favorite pumpkin pie spices make delicious additions. 5. For Creamsicles, pour this mixture into a popsicle mold and freeze.

Garden Tips: Tomato Planting

Now that tomato planting weather is upon us, I want to write a little about some questions we often receive from customers. One of them is "When can I plant tomatoes?"

Tomatoes are best planted when the soil is warm (night time temperatures are 50F or above) and all danger of frost has gone by. In Burlington that is generally the end of May or the first week in June.  The best planting method for tomatoes involves digging a shallow trench and laying them in it. You can break off the leaves on the bottom 2/3 of the plant and bury the whole stem horizontally in the warm top layer of soil. The buried stem will turn into a huge and healthy root system. The top of the plant is gently bent upwards and soil is patted around the base.  Tomatoes must be trellised for best results; it keeps the plant healthy, off the ground, and the fruit stays clean.

Here are some photos of a tomato planting that happened recently in our display garden:

The language that describes tomato plants can be a little confusing. Here are a few tomato terms explained: Hybrid - a tomato that is a cross between two different types of tomatoes. Seeds from these tomatoes will not grow out true to type, but will revert back to one of the parent tomato varieties. Hybrids are not genetically modified, they are just a simple cross between two types. For example, one tomato with good disease resistance is crossed with another variety that is known for good flavor in hopes of producing a healthy yet tasty tomato. Some of our favorite hybrids are Big Beef and Early Girl. Open Pollinated - a tomato that is the product of two parents that are the same variety. The seeds from these tomatoes will be true to type. All of our "heirloom" tomatoes are open pollinated and the seeds could be saved from those fruit. Heirloom - a variety with a story. These are plants which have been handed down, brought to the new world in various ways, found in distant parts, or in your neighbors back yard. These are all open pollinated. Heirloom is not a botanical terms, it just means that it is an older variety with a lot of flavor or other appealing characteristic like color of shape. Sometimes heirlooms are less disease resistant than hybrids, but they make up for it with flavor. Heirlooms are sought after by home gardeners since those types of tomatoes are not found in conventional grocery stores. Around here they are easily purchased at farmers markets, but it is always nice to eat something harvested just seconds ago from your own garden. Determinate - a tomato that only grows to a certain height and then all of the fruit ripen at once and then the plant dies. This is a good option for people who can or freeze tomatoes so that they will have a big batch ready to use all at once. Some of our favorite determinate tomatoes are Glacier (which is also an heirloom and very early to boot) and Celebrity. Indeterminate - a tomato that grows and grows, with the fruit ripening in various stages. The plant grows until it is killed by frost or disease. In a warm climate these plants would grow into woody vines.  Most of the tomatoes we grow are indeterminate. They require staking or cages, and there are many different methods for doing so. I've seen hockey sticks used in community gardens in Montreal!  Concrete reinforcement wire can be cut into 6 foot sections and bent into a tube shape - this makes once of the strongest and largest cages possible. There are lots of great trellising and caging systems available at Gardeners' Supply Company and your local hardware store will have simple wooden stakes and twine. Professional vegetable growers oftenuse a method called "bakset weaving" which is simple, efficient and affordable.  Here is a description from the University of New Hampshire Extension Service:

•Remove suckers (new shoots that develop in the leaf axils) before they reach an inch in length. • Leave the first sucker that grows below the first flower cluster, removing all others below the first flower cluster; allow suckers above first flower cluster to grow. • Pinch off tops once plants reach a few inches above stake. • Use 4 ft. sturdy wooden stakes, with double stakes at end of each row for strength. • Set stakes six inches deep, one stake for every two plants, as soon as seedlings are transplanted. • Begin supporting tomato seedlings after they have set the first flower clusters. • Tie sturdy, untreated twine at one end of row, about 18” up from soil level. Weave twine between tomato plants, wrapping twice around each stake down the row. After reaching the end- stakes, weave twine back up the row in the opposite direction, alternating with the weave-pattern of the first strand so each plant stem is encircled by twine. • As plants grow, weave another layer of twine every 6-8 inches to keep plants well supported. Four layers of twine will support most varieties.

Hope this information helps, and as always feel free to stop by our greenhouses where our staff can always talk to your about your tomato growing concerns. Happy gardening!