Planning Your Ornamental Landscape
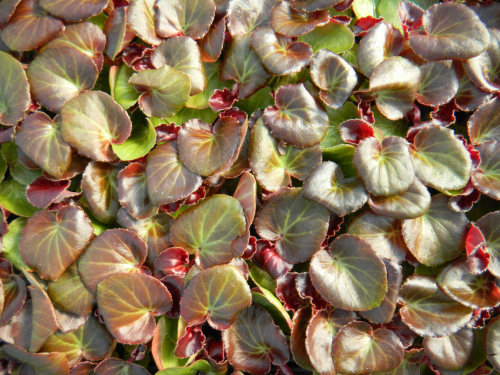
Landscaping your property yourself may seem like a daunting task, but it's easier than you think. In an ornamental landscape, it's important to consider how plants go together - color, texture, size, and shape are important aspects of creating a beautiful and interesting landscape. Using contrast helps bring out complementary features of the different plants. An example of color contrast could mean using plants with flowers from opposite sides of the color wheel, such as blue and orange or yellow, or light and dark colors next to each other. You can also create contrast with texture by using plants with different types of foliage - a plant with lacy foliage could go next to one with glossy leaves - for example, amsonia with heartleaf bergenia.
The Right Plant in the Right Place
One of the most important things to consider when planning your landscape is what plants are suitable for your microclimates. Take a walk around your yard and house and you will undoubtedly find areas that are shady, others that receive salt from driveways or paths, some that are perpetually wet, and yet others that may be very windy, sunny, or cold. It is easy to look at these as "problem" areas where you cannot grow the plants you would most like to. Another way of looking at these areas is as opportunities to create a more diverse landscape and get to know unfamiliar plants. Below you will find examples of some of the plants we grow that fit well in these microclimates.
Salt-Tolerant Plants (good for near the road where the salt truck spray in the winter) : Common Thrift, Sea Holly, Daylilies, Artemisia, Heuchera
Juglone Tolerant Plants (many plants won't grow near trees in the walnut family): Hollyhocks, Daylilies
Cold-Tolerant (superhardy) Plants: Campanula, viola, sedums, Lady's Mantle
Shade-Tolerant Plants: brunnera, hosta, heuchera, dicentra, Goat’s Beard, white baneberry, astilbe, cimicifuga, heartleaf bergenia
Water-Loving Plants: Joe Pye Weed, Highbush Cranberry, ligularia, Chinese Globeflower,
Low-Maintenance Plants
If you are a very busy person (as I know I am), it is wise to choose plants that require little or no maintenance in order to look beautiful and survive. These plants require little pruning or deadheading, and can fill your landscape with color, texture, and wildlife.
Woody Ornamental Plants
This year we are offering an expanded selection of ornamental shrubs for your landscaping projects. Many of these are also dual-purpose, providing a number of other benefits such as privacy screening, coppice material, shade, windbreak, food and shelter for wildlife, nectar for birds and insects, erosion control, and more. Some examples include:
‘Winter Red’ and ‘Southern Gentleman’ Winterberry Hollies – Plant these two together for a stunning year-round show! Female plants are deciduous, with leaves that turn yellow in the fall and are replaced by masses of large scarlet berries that provide winter food for birds.
‘Summer Wine’ Physocarpus – A beautiful, fast-growing perennial with arching stems covered with dark purple-bronze foliage. White, button-like flowers appear in June and provide pollen for insects. Makes a great privacy screen.
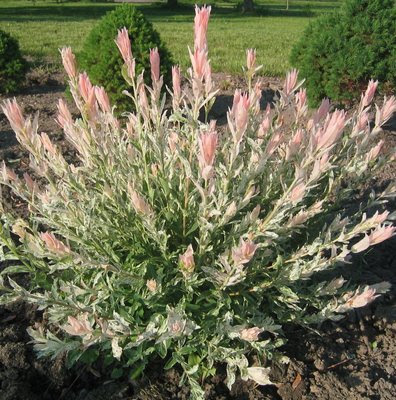
‘Hakuro Nishiki’ Dappled Willow – A gorgeous ornamental plant with pink shoots that open to green and white variegated leaves. Yellow flowers appear in April and stems turn red in winter. Flowers provide pollen for insects. A fast-growing plant that makes a great privacy screen.
These are all some of the easiest plants to grow. Once you are armed with a list of simple plants, just keep in mind these other factors:
Once you understand what kind of plants like what type of conditions, you will feel confident to play with plants like a painter plays with colors. It is all about the right place for the right plant; so learn to identify the micro climates within your yard, come up with lists of plants that fit each micro climate, and create your own box of paints!
If this is hard for you, remember, we are here to help you!
 WE HAVE FILLED THIS POSITION! (3/17/11)
When people walk into our greenhouse, they are greeted by knowledgeable gardeners, like-minded fanatics, or people who have experience as commercial vegetable growers or as landscape professionals. Whether a customer is a veteran gardener with Latin names rolling off their tongue or a first time tomato plant purchaser, our staff and our customers share a love of plants, food and flowers. We welcome all of our customers into an environment that is helpful and practical. If this description peaks your interest, we may have a good opportunity for you to work in our retail greenhouse.
Here is a little more about the job.....It would entail all aspects of working in the retail greenhouse such as
If this sounds appealing to you, please send us a version of a resume that explains your gardening experience. Let me know what your favorite heirloom tomatoes are, or which annuals do best out by the mailbox at your house. Or maybe you can tell me a story about the first time you new you were addicted to gardening. Basically, we are looking for someone who is very at ease talking about gardening and who has a lot of gardening knowledge easily accessible in their brain because they live and breathe plants. We love our customers and want to continue giving them the service they deserve.
The work dates are roughly April 15th to July 3rd, and the position is for about 20 to 30 hours a week. We realize this is a short time commitment, but if you are a gardening enthusiast with years of experience, and you want a chance to be around beautiful plants and wonderful people, this might be a good opportunity for you.
Contact us with your garden stories and garden resume by email: julieATredwagonplants.com.
Thanks!
Our friends at Lincoln Peak Vineyard have been holding knitting nights at their winery all winter long and have told us what a fun event it has been for them. I have been thinking about this all winter and imagining a group of people sitting around the cozy wood stove, sipping wine, and eating the famous flour-less chocolate cake. We often have customers, friends, and neighbors who want to come by the greenhouse and just hang out in the warmth and the greenery while winter still blows outside, so when I heard about Lincoln Peak's knitting nights, I thought wouldn't it be nice to offer people a chance to do something they love in a setting that is so special during these end-of winter days. I told my friend Meghan O'rourke about this and she very kindly offered to teach two classes in the greenhouses. Meghan is a very talented artist and craft person who will teach you to make something completely unique and full of your own personal touches. And you'll get to do it in the beauty of a greenhouse full of green, green life. Here is a description of the two classes:

Knowledge of basic knit and purl stiches needed and a willingness to finish up the hat on your own. Learn how to size and pattern this classic, stylish and fitting cap for the cool spring days. You need to bring 5 size 7 double pointed needles and at least two colors of the yarn of your choice, preferably a worsted weight.
Please call 482-4060 to register. $15 fee per participant. We will provide coffee, tea, and snacks. Space is limited, so please be sure to register

Learn the art of amigirumi, the Japanese art of creating cute crocheted creatures. A basic knowledge of simple chain stitching is helpful (many tutorials are available online!!) Bring your own crochet hook and a favorite color of cotton yarn. I will supply the eyes and stuffing! Bonus: if you took the hat making class feel free to bring your project along for some finishing tips after we bring our cute creatures to life. Again, you will have a chance to relax in the Red Wagon Plants greenhouses.
Please call 482-4060 to register. $15 fee per participant. We will provide coffee, tea, and snacks. Space is limited, please preregister.

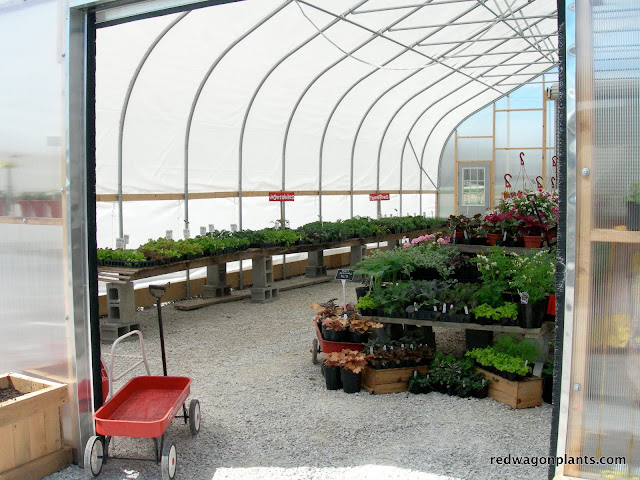
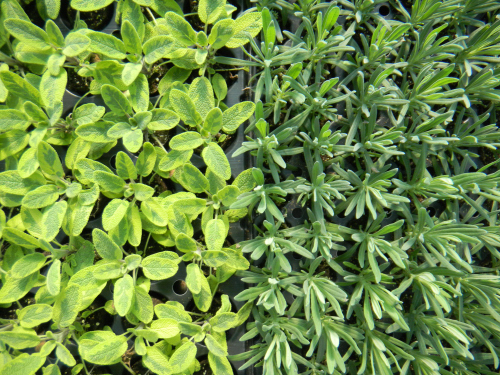
It is finally that glorious time of year when work in the greenhouses begins. Our first cuttings have arrived and we have started potting them up, giving each plant new room to grow in wonderful Vermont Compost Company potting mix. (See note below) We can imagine that they feel the same way we do upon first entering the greenhouse, as they shed their cardboard boxes and we our many winter layers. At first the sunshine pouring down dazzles us, and we squint in the brightness. But soon we are all reveling in the lovely feeling of the rich soil, the moist, 85 degree air on our skin, and the intoxicating scent of rosemary. Within a few days this greenhouse will be filled to bursting with vigorously growing young plants.


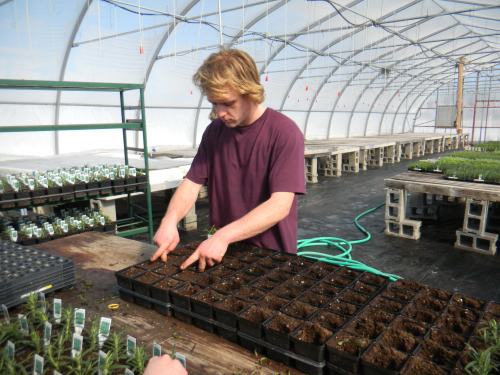


By Sophia
Note: "Cuttings" are plants that can only be started from rooted stems. Instead of the plant producing seed and being propagated from a seed, plants that are 'vegetatively propagated' (as it is called) are only true to type from the stem cuttings. In some cases, this means that they are cloned hybrids - a cross between two plants and they would revert back to looking like one of their parents if you planted the seed. Another reason plants are propagated this way is because they are too slow to germinate and in our climate, they would be hard to establish. We buy in our rooted cuttings because making them ourselves would require heating a greenhouse all winter long and for now it is more efficient to buy in these beautiful cuttings from growers in Quebec and Massachusetts who specialize in this kind of greenhouse production. And just to be clear, this is old-fashioned plant breeding and propagating - these are not test tube babies or genetically modified organisms.
A New Focus on Landscaping This year Red Wagon is pleased to offer a variety of new landscape plants that have been requested by our customers. We are working with Cobble Creek Nursery in Monkton to provide a wide variety of Vermont grown edible and ornamental trees and shrubs. Our staff can help you choose the right plants for your project and give you the information you need to grow them successfully. We can also do on-site garden consultations at your home.
Ecological Landscaping: How to Make the Landscape Work for You
When it comes to landscaping, we believe in a natural, practical approach. There are a number of ways you can make your landscape more functional for you and for the ecosystem simply by choosing the right plants. One way is to plant trees and shrubs that produce edible fruit. The fruit can feed you and your family for years to come, and provide food and habitat for wildlife. Many of these plants have still other benefits, such as ornamental interest, providing shade in summer, as windbreaks, or as privacy screens. Here are some examples of edible landscape plants we are growing this year. For descriptions and growing tips for all the plants we are growing this season, click on “Our Plants”. For some great information on edible landscaping, check out Rosalind Creasy's website or see our "Resources" section.
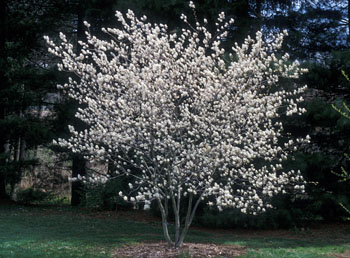
NEW ‘Autumn Brilliance’ Apple Serviceberry – A native plant that produces white flowers in spring that provide pollen for a wide variety of insects. Flowers are followed by edible red berries that are adored by birds. Leaves turn orange and red in the fall for ornamental interest. Also a coppice species.
NEW ‘Darrow’ Blackberry – A very reliable, cold-hardy blackberry that bears huge sweet berries in July. 4-5' tall. Provides great habitat and food for wildlife. Produces suckers, creating a fast-growing hedgerow that works well as a privacy screen or windbreak.
‘Patriot’ Blueberry – A super-hardy half high blueberry that tolerates wet soils and produces delicious berries for birds and people. White blossoms in spring and orange leaves in fall offer year-round ornamental interest. These are underused as landscape plants, and we want to promote their use. A hedge of blueberries in the fall is absolutely stunning!
NEW ‘Red Lake’ Currants – A very hardy shrub that produces tart red berries in July. Delicious for jams, jellies, and pies. A great food and shelter plant for wildlife. Flowers that bloom from April to May have ornamental interest and provide nectar for a wide variety of insects.
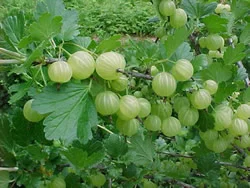
‘Pixwell’ Gooseberry – Very easy to grow and low-maintenance, with round green berries that are picked like blueberries. Provides food and shelter for wildlife, and flowers provide nectar for pollinators.
NEW ‘Reliance’ Grape – Beautiful pink seedless grapes are excellent for fresh eating! These vigorous climbers can provide needed shade or a privacy screen in summer, as well as food and pollen for wildlife.
NEW ‘Parker’ Pear – A very hardy pear with medium sized reddish-brown fruit, lovely white flowers in spring, and dark purple foliage in fall for year-round ornamental interest. Requires a second variety nearby for pollination. Flowers provide nectar for pollinators, and the tree can be coppiced to produce wood for craft projects or scions.
NEW ‘Shiro’ Plum – Tree produces abundant gold fruit from July to August. Flowers provide nectar to a wide variety of insects.
NEW ‘Fall Gold’ Raspberry – An ever-bearing variety with yellow fruit that produces two crops, in June and August-October. A very hardy and tough plant with a wide variety of uses – plants provide food and shelter to wildlife and pollen to insects, brambles form a hedgerow for privacy or a windbreak, leaves can be used to make tea, and the berries are considered a super-food.
NEW ‘Black Beauty’ Elderberry – A wonderful ornamental and edible plant with year-round interest. Dark purple foliage is complemented by huge pink flowers in midsummer that provide nectar for native pollinators. Dark purple fruit appears in fall, and is great for making jam. Plant provides both food and shelter for wildlife. We will also be carrying a strain of elderberry that was bred by Lewis Hill - a Vermonter who was the authority on fruit production in the northeast. Lewis unfortunately passed a way a few years ago, but the plants he bred and propagated are his living legacy.
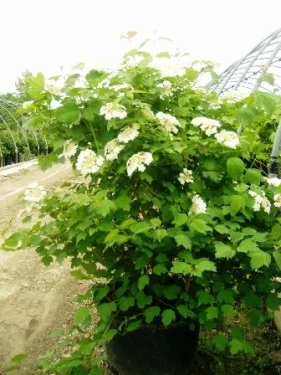
NEW ‘Alfredo’ Highbush Cranberry – This colorful edible ornamental gives a year-round show. Foliage opens red, then turns green, yellow, and then red again in fall. Red berries appear in fall and persist all winter, providing forage for wildlife. Large white to yellow flowers appear in spring and provide nectar for native pollinators. A very hardy plant that is deer and rabbit resistant. This makes a beautiful privacy hedge, growing thick and tall and just covered in cheery red berries in the fall.
Let us know your plans for your garden this year; perhaps a few well placed edible plants can add beauty to your yard and bounty for your table.
by Sophia and Julie
It might be 5 below, but we've got plants to grow! We put new plastic on our third greenhouse last Wednesday, a cold, but beautifully sunny morning.


When the first delivery of potting soil comes to our greenhouses, I usually take a moment to stop what I am doing and just dig my hands in the dirt. This year, I have been a bit busier than normal, so I had to wait a few days to do it, but the feeling is the same. It means winter is winding down; that the seeds that are waiting patiently in the storage bins will have a springboard for their magical emergence; and that flowers, greenery, and fresh food will soon be in our lives again.
Winter used to be a difficult time for me, but I have learned to accept its slowness and constricting nature. I spend time outside as much as possible and try to rest; something about hitting 40 makes me understand the value of Doing Nothing more than I used to I suppose. But during those earlier years, when winter was more difficult for me, I always marked the first soil delivery on my calendar and that became the date towards which I would count all winter long. When that day finally came, Dennis, who delivers for VT Copmost Company would drive his truck into the barn and the big pile would spill out of the dump truck and I would wait politely for him to leave before taking off my boots and socks, pulling up pant legs and sleeves, and just dig into that fluffy warm pile. A thawing takes place, a deep, deep thawing, and gratitude just settles in.
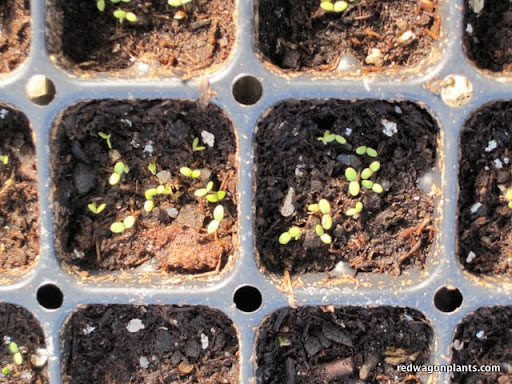
There are lots of times when people ask me why they should buy plants instead of just starting their own seeds. I always answer that plants need good light conditions, ventilation, great soil, proper watering, pest monitoring, and disease control. If they want to do all of that, then the plants will be just fine. It's really fun to see seeds germinate and pop up out of the soil, especially if you have kids in the house. The only problem with starting your own seeds is that if those steps are not all followed pretty well, you can end up with less than ideal plants, put them in the garden anyhow, and since they started life a little under duress, they won't thrive in the great outdoors where direct sun light, wind, disease pressure, temperature fluctuations and insect infestations await them. It's like raising children, the way they start out in life is really important to their overall health. If you can't have the correct set up for seed starting, I would still encourage you to try something with your kids so that they can see the magic of emerging seeds. Even though I have seen this most of my life, thanks to an avid gardener for a father, my heart still flutters when I notice the first signs of life poking through the soil. Something in our mammalian brain is wired to be excited about new life, so please don't let the description of the "proper technique" turn you off from starting a few seeds at home. I am writing out the steps to proper home seed starting so that people who really want to improve their chances of a great garden can do so if they choose. And if it doesn't work out well, you can always find a few plants to purchase!
Get set up for proper seed starting.
Lights, soil, trays, water, air circulation.


Let us know if you try this or what your experience has been like with seed starting at home. We love to hear about your projects!


Flowers for bouquets are often grown in their own gardens, in tidy straight rows, and exist not to beautify your yard, but to kick out lots of stems that are promptly cut just as the blossoms begin to unfurl. These "cutting gardens" are not necessarily the nicest to look at, but they sacrifice their beauty for the vase, where they can provide up to a few weeks of enjoyment in a portable format. If you lack the space for a proper cutting garden, you can always dip into the front yard flower beds for a stem or two and no one will know the difference but you. In fact, many perennials will produce for a longer season and in a more robust fashion if they have their stems cut now and then. Here are some favorite perennials and woody ornamental shrubs that are forgiving of the cutting shears and a boon in the bouquet.
Hydrangea paniculata 'Limelight'. Most hydrangeas do really well in vases, they act as a delicate, feminine filler and are long lasting. Can be dried for everlasting arrangements as well.


All of these shrubs and perennials can be found at our retail greenhouse in Hinesburg, but if you are not in the area, they are fairly common varieties, readily available in any well-stocked garden center. The varieties above are easy to grow and add beauty to your home with staggered bloom times, varying heights and light requirements. Let us know what some of your favorite perennials are for bouquets!And remember, if you are planning to grow your own flowers for an event (wedding?!), be flexible and have fun. Let the season and your climate guide you.
Last summer, I must have helped at least half a dozen customers who were looking for some help in planting a garden specifically for home-grown wedding flowers. I often warn people that growing for a specific date is fairly technical and requires weekly plantings, regular harvesting all summer long to keep the plants blooming until the event, and most of all, a very flexible attitude. People who have a specific color scheme or variety in mind are not always good candidates for home grown wedding flowers since those types of flowers may be very hard to grow and getting the right color on the right day means planting about 10 times more than you think you will need in hopes that one of the plantings will be just perfect on the correct day. For those who are planning an event and are willing to look at the flowers as a fun and flexible component, then growing your own is a great option. I have listed below some varieties that are particularly well suite to a DIY flower program. Full disclosure: I have talked about as many people out of growing their own wedding flowers as I have talked into doing it. It really is not a good fit for everyone, but for those who are willing and able, here is a little help to get you started....


Verbena bonariensis - reliable and a lovely purple bloom with long wiry stems that hold up well to handling and mixing into all kinds of arrangements. Zinnias - come in all shapes and colors, are best suited for August or later. Require deadheading all summer long, but will branch out and be very productive once well established. Sunflowers - there are lots of sunflower varieties that are designed specifically for cut flowers. Some of our favorites are Giant Sungold Teddy Bear, Sunbright Supreme and Soraya. The only tricky thing is getting the timing just right. They only are perfect to harvest for about 10 days, after that their single blossoms start to drop their petals. Ageratum - blue, can be tall if planted correctly - a little closer together. Needs deadheading all summer long if you are planning for a late summer or fall event. Very productive if well established and well taken care of. Agrostemma has a lovely, floating quality that gives a lot of life to mixed bouquets. It's airy and delicate, comes in purple or white and produces lots of good, long stems all summer long. Again, needs constant picking and deadheading to produce all summer long.

Ammi - this is a beautiful filler in mixed bouquets or in all-white arrangements. Easy to grow from transplants and produces, nice, tall stems.
Cosmos - come in a variety of textures and lengths, best suited for mid-August or later. While they are beautiful, they do take up a lot of room for not always a lot of stems.
Snapdragons - another multi-colored option or can also be grown as strains of single colors. We offer many options of snapdragons. The stems can sometimes be a little short, but with good fertility and 6" spacing, they will grow straight and tall.

Celosias - come in many shapes, sizes or colors. These are a hardy, easy to grow and more forgiving than others. And they can be dried for long-term keep sakes.
All of these annuals will give you a good place from which to start. Do-it-yourself flowers can always be supplemented with florist purchases the week of the event if the budget allows it. We will cover more on home grown flowers in subsequent posts, so if this peaks your interest, please stay tuned. Part two will be about which perennials are easy to grow and use for cut flowers. Part Three will be about different tactics to make your cutting garden as prolific as possible.
by Julie One of my favorite aspects of running a greenhouse business is the ability to create. Not only is the act of growing plants very creative - we get to choose what we grow, how we grow it, how we market it, and how to make it all look beautiful and inspiring (we hope!); but in addition to that is the fact that this is a business like any other. Ever since I was a little girl, my favorite toys have been my graph paper and my schedules; so a greenhouse business that gives me about 6 months of planning time is really fun for someone like me. I get to think it all through, improve systems, find ways to do more in the community, and create a nice work environment for all of the amazing people at Red Wagon Plants.
Here are some projects and improvements we are hatching (germinating?) at Red Wagon Plants this winter. Our mission is to increase the bounty in our community and this year, we plan to focus on the community part of that mission. We have built up such a wonderful group of customers, both wholesale and retail, and it feels like the right time to get to know everyone a little better!
So those are a few thoughts, and as always, we love to hear your suggestions, so please feel free to comment.
I woke up today feeling grateful and recharged with a blue sky blasting through the window and a full night of sleep behind me (the first in a while.) Here are a few pictures I took with the early morning sun casting a bittersweet glow on everything. What to make of that late fall look? Winter is coming, summer has produced all it can, and it is time to settle back and enjoy the dark days ahead. The dormant days ahead work for the seeds that need it in order to crack into life come spring - it can work for us too. It is a just fine time of year for sinking into the couch, making soups, catching up on reading, and over all feeling gratitude for the cycles of the seasons, the sweetness in the people around us. While the basement is full of jars of applesauce, tomatoes, jams, chutneys and pickles, I also try to keep a few things going in the garden as long as possible.
Like these .....
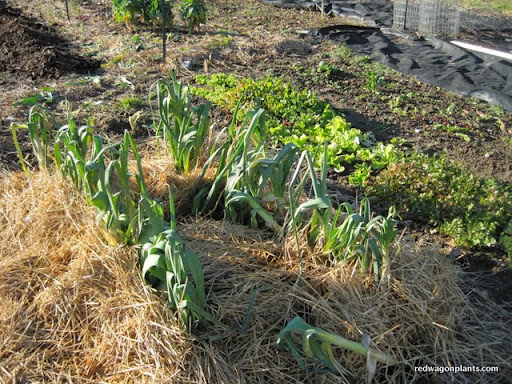
The straw keeps the soil from freezing around the leeks so that I can harvest them even in deep snow. The lettuce, arugula, cilantro and dill behind them will keep going a little while longer. I can cover them up with row cover, but most likely they will be eaten before I even need to do that. I will plant 2 or 3 times more next year so that I can have enough to take us through December.
I love this close up of dill with all of its fine texture.

Dill is one of the hardiest herbs to grow in cold weather and gives such brightness to late fall salads, potatoes, eggs, and fish. I use it quite a bit this time of year after pretty much ignoring it all summer long except for using it in a pickle jar or two or three.

I always bring in a few baskets of herbs. I don't do anything to them except cut them, pile them into a basket and leave them around the house. They smell great and love to go to work by the handful when I am making soups, broths and stocks. I don't think they object to being stuffed into a poultry cavity every now and then either. There is nothing like using herbs in big bunches of branches to feel like I am living a rich and luxurious life.
I want to say thanks to compost too.

Parts of the garden are ready for spring, and parts still have a ways to go, but there is so much satisfaction in seeing the raised beds awaiting next year. Soil building organisms busy making teeming, hot life. The ones who really get some of the credit for this are these lovelies......

Enjoy your next few days of rest if that is your luck and your lot. And thank you, deeply, for being a part of all this beauty and grace, coldness, sunshine, poop, and all.
We are busy preparing for the 2011 season and this includes counting everything in sight such as seeds, pots, trays, tags, and signs as well as ordering seeds, cutttings, pots, trays, tags, soil, and anything else we may need to make everything tick. But the most exciting preparation is the new grading and gravel in the greenhouses. When we first built the greenhouses 6 years ago, we had to cut some corners (that money thing, you know) and it meant that we did not spread and compact gravel before building the greenhouses. Well, over time, the native clay sunk and became a wet, weedy mess which unfortunately can harbor pathogens and pests. This fall, Linda Gionti of Gionti Stone Works, and Parker Excavation have been working together to bring us brand new, beautiful gravel floors which we are covering with brand new landscape fabric. This will keep weeds down and create a clean surface that can be swept and kept clean. It feels just great to have such team work (thanks to Eric, Jonathan, Allison and Buddy) hauling everything out of the houses and then setting it all back up again. Here are a few photos to give you a taste of the job.


It's kind of like getting a spa treatment for the buildings.

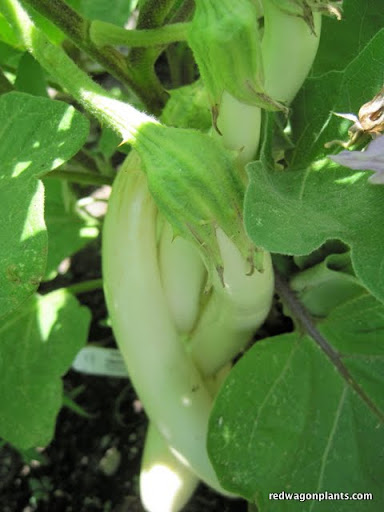
Hope Johnson, whom many of you know from our retail greenhouse, brought me this plant this summer, while muttering something about "bringing coals to Newcastle" and said it was a red morning glory she had started from seed.....well here it, a few months later, and just a beautiful morning riser. It only opens for a short while, maybe if it had been planted with mroe of a south eastern exposure it would stay open longer, but I just love it. It is a dark pink, not a true red (this often happens with flower color description), and the flowers are about the size of a silver dollar. Should we grow and sell this next year?

These Kennebecs have provided me with the most satisfying harvest of my potato growing life. They were planted in the best soil in my garden, the site of an compost pile, and I did not even hill them. They were virtually maintenance free save for some periodic weeding.

This corn was transplanted in late July from seeds that had been started in mid-July. I somehow did not make time for corn any earlier this year. As Elise and I transplanted, I kept wishing for some October corn and a warm fall. Well wishes do come true: while the ears are not terribly big, the flavor is sweet and the texture is just right. This has been going into a fabulous corn salsa recipe I have been canning.

This makes it all worth the toil. I heard this line from a Rilke poem yesterday:
A good thought for autumnal transitions.

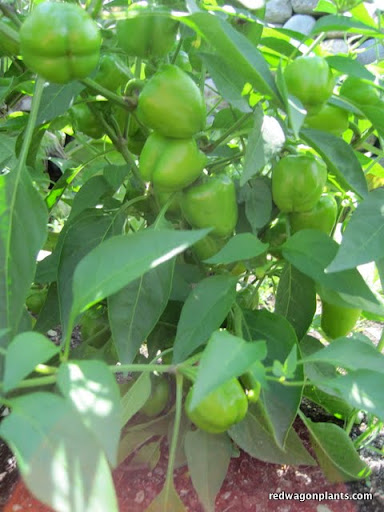
One of our customers, Michelle Reiter, sent us this recipe which sounds and looks so incredibly great. She was making a hot soup during that broiling weather we had last week, so you know it has to be great! Thanks, Michelle! And this reminds me to make a note to grow some poblano's next year! The plants sold out before I could get one in the garden, and yet again, I am poblano-less. They are one of the varieties that seem to get more and more popular each year as people plant them and come back for more the following season.

Cut kernels from: 10 ears sweet corn (5 cups)
Puree in a blender: 3 cups corn kernels 1 cup whole or 2% milk Saute in 2 Tablespoons vegetable oil over medium heat in soup pan: 2 poblano chiles, seeded and diced 1 ½ cups white onion, diced 1 teaspoon garlic, minced Cook 4-5 minutes
Add: 2 cups chicken broth 2 cups corn kernels 1 teaspoon sugar 1 teaspoon kosher salt ½ teaspoon cayenne Simmer 5 minutes
Stir in: Pureed corn 1 ½ cups tomato, diced ¼ cup feta cheese, crumbled Simmer to heat through and melt cheese, about 3 minutes Garnish servings of soup with choice of avocado, lime, and/or cilantro
What are some of your favorite varieties this year? What are you making with them? Let us know and we can post your recipes, suggestions, ideas. This is the time of year when we start picking out the seeds for next season, so speak up, please!
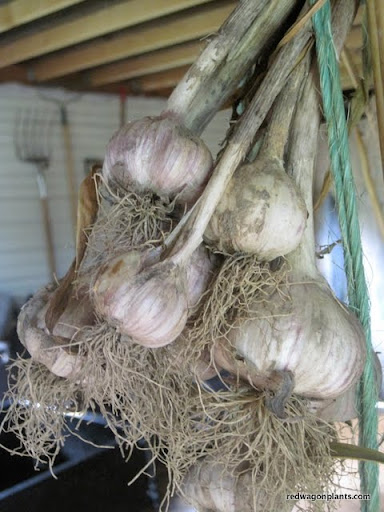
Last week, I came back from our ocean vacation, the one during which I tried not to think about the garden for a week. This was preceded by some fast and furious hours hoeing, weeding, mulching, watering and generally preparing all plants for a week of neglect. Everyone survived, tomatoes are in high production mode, spitting out ripe orbs faster than I can use them; and the peppers and eggplant are jumping into harvest baskets, big and ripe. Potatoes are ready to be dug, garlic is cured after a couple of weeks hanging from the barn rafters. Onions are next on the harvest and cure list. I never seem to have enough onions to last through the winter even though I plant so many of them each spring. I think the culprit this year was poor bed preparation prior to planting. I try to get onions in as soon as possible in April, the same time that coincides with peak greenhouse production and growing wholesale orders. So yes, once again, the onions are on the small side because we planted them into some soil that was a little compacted and not rich enough in composted donkey manure. What do I love most about gardening? Being able to say, "there is always next year."
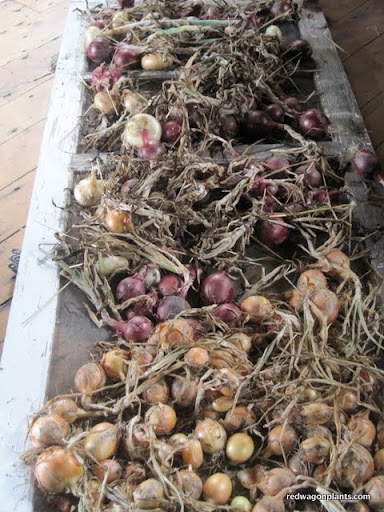
Onions: harvest the onions by pulling up the whole plant once the tops die back and start to lie on the ground. It's best to pull them up on a sunny, breezy day so that they can spend a few hours drying in the sunshine and wind. Before night falls, on that same day, bring them inside, out of direct sunlight so that they may cure for a few weeks. The curing process is what turns the outside layer of the onion into the paper-like skin. This outer layer, when dried properly, is what gives onions their real staying power as a storage crop. It is best to place onions in an airy, dark place - a garage with airflow but no direct light, an attic with air circulation, a shed, or even an extra bedroom with the curtains drawn and the windows open. You can braid the onion tops, bundle them into bunches and hang them up from the ceiling or rafters. You can also leave them in a single layer on the floor, but they must be turned over at least once a week. Once the tops are completely dried and the outer layer is paper-like, you can pull off the tops and store the onions in baskets, brown paper bags (with slits cut for ventilation), milk crates, apple crates, or cardboard boxes. Again, the important thing is to make sure the onions are in a dark place and it is well ventilated. Basements are often too humid for onion storage. In the winter, onions can go down to the low thirties and be fine. Colder temperatures better for onion storage than warmth with the ideal storage temperature being 35 to 45 degrees F.
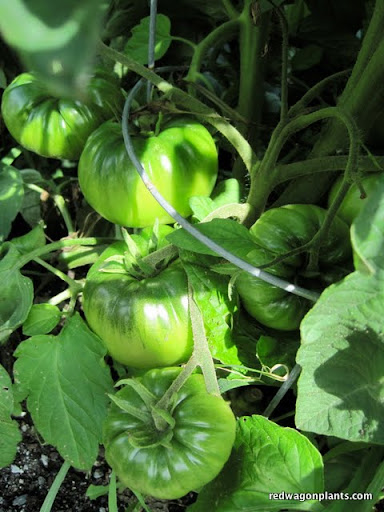
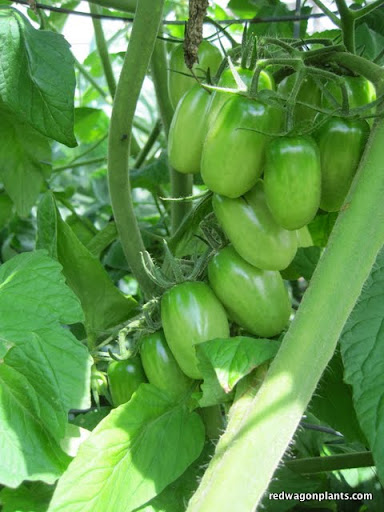
The first tomatoes of the season are always a bit of an anti-climax. We wait all year for the fruit to come out of the back yard as opposed to some distant clime, and then take a bite. It's not as sweet as the memory, not as drippingly hot and gushy as the movie running through my brain. The first tomatoes aren't the best ones. That is all there is to it. I tend to pick them a little early, eager for a bite and am met with a disappointing crunch when there should be a mush. In a week or two, I won't be so impatient, the vines will be dripping with ripe fruit, and I will eat them three meals a day, going from scarcity to abundance in a flash. Soon, every slice of bread will be adorned with a smear of mayo (the junky kind, not the healthy kind. Sorry) a thick, red, juicy slice of tomato and a sprinkle of good salt. This will be all I eat for a while. I know it's coming. But for now, I decided to document the earlier tomatoes and taste them, giving them a ritualistic importance of sorts. I try to put blinders on in the face of their slight un-ripeneness and photograph them, carefully laid out on the counter. Soon there will be baskets of tomatoes, heaping, unnamed and tangled together. But for now. We will carefully label, taste, and report. Here goes.

Pink Beauty is just an iconic tomato - it always perfectly shaped, blemish free and has an almost electric dark pink hue. The Purple Russians tend to crack a little, but nothing too detrimental (their good sides are showing for the photo shoot). The Juliet, as many of you know, is my favorite all-around tomato. It has huge yields of oval fruit that are great raw, for snacking, salads, sandwiches, and salsa (not too watery); but the real charm is that they work really well as a cooked sauce tomato too. The Viva Italia is a very pretty paste tomato - early and blemish free and very disease resistant. The Glacier is an heirloom, super early, does well in very cold climates (Huntington, Lincoln, Ripton - no problem), and is the one tomato you will be eating weeks before others ripen.
We tried them all, carefully slicing, chewing, thinking.....

All were slightly under-ripe and slightly lacked that "I've been baking in the hot sun" flavor and texture. We have had some rain the past couple of days, and the flavor is affected by that. But they were good - not middle of August good, but good. The Pink Beauty has a really nice balance of sweet and acid flavors, a slippery, silky texture and makes beautiful shiny slices.
The Purple Russian was a winner, flavor wise and texture wise. It is juicy, especially for a paste tomato, and has the most buttery complex taste that lingers on the tongue and leaves me wanting more. The plants are nothing pretty - they always look shaggy and stringy somehow, so I have never gotten too excited about putting them in my garden, but customers rave about them, and now I know why. Sweet, unctuous and complex. A new favorite and you will hear me raving about this one in the greenhouse next year. It would be perfect raw or cooked, and I am sure any sauce made from these would be a deep purple red color.
The Juliets were a little bland compared to the first two, but still full of good, bright flavor - lively on the tongue and a nice meaty texture.
Viva Italia were lacking in distinctive flavor (a little too acidic for my taste), but in all fairness, they are much nicer when cooked. We will have to do another taste test with just paste tomatoes, cooked simply in some olive oil and lightly salted.
The Glacier is cute as a button: plump little orbs, slightly mis-shapen and full humble darlingness. The flavor is great for an early tomato - they are a little bigger than a cherry tomato, can be sliced for salads or sandwiches or cooked down for a quick sauce. They tend to ripen 3 or 4 at a time, a nice feature since they are so small and just one of them won't take you far. I would put this at the top of the list for early tomatoes. But if you only have room for a couple of plants, there could be some better choices.
I would love to hear what you are loving or not loving in your tomato selections. Any varieties you want to recommend for next year? Any you think should be discontinued? Let us know. And we love pictures! I will do this taste test again, later, when the plants are loaded and the fruit is at peak flavor!
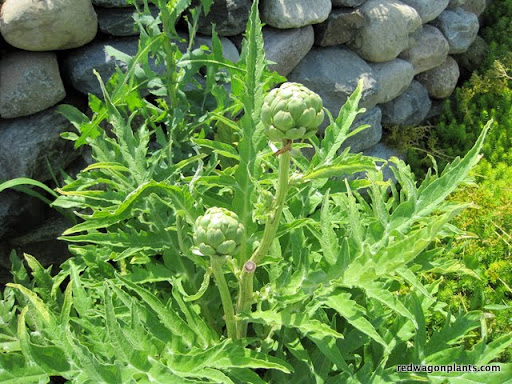

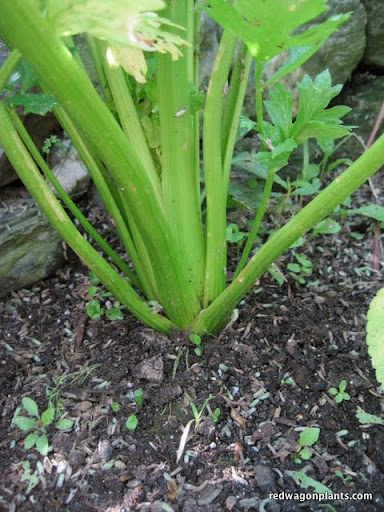
This summer, the weather has been garden perfect for many crops. All the heat lovers are thriving and the crops that like it cool and moist are doing well where they have been watered and are getting a little shade. I have a nice stone wall thanks to Charley of Queen City Soil and Stone, and the shady side of the wall is a perfect place for crops like celery, mid summer lettuce, artichokes, and boc choi. They benefit from the afternoon shade the wall creates. Additionally, the moisture that builds up at the base of the wall from the terraced soil above it creates a perfect micro-climate within the garden. You can easily achieve this in any garden with strategic rock placement - not a full-fledged wall necessarily, but a few stones stacked up to retain moisture on a slope or to allow for north-side shade in a fully exposed garden. Look around your garden for other mico-climates like tall plants that can be used to create shade for summer plantings of lettuce. Right now, I have lettuce planted in odd spots throughout the garden - under a sunflower, at the base of the stone wall, and under some tomato plants.
The eggplant has been tremendous this year and last night, we had a great meal of marinated eggplant while sitting at the lake, scooping up piles of the salad with pieces of pita and a little feta. Here is the recipe. I used a combination of the Gretel and Machiaw eggplants (pictured above).
Marinated Eggplant adapted from smitten kitchen.com
Pre-heat oven to 400 degrees. Coat a cookie sheet with a layer of oil and layer the eggplant slices in a single layer.
Bake them until soft (about 20 minutes), turning once and drizzling with a little more olive oil about half way through.
Blend the vinegar, remaining olive oil, salt and pepper, capers, and mint together. Place eggplant into a bowl, drizzle with the dressing, and stir to combine. Let rest for at least a half hour or place in fridge (up to one day). When ready to eat, sprinkle with feta. Eat with flatbread, while sitting near a cool body of water.