Plants

Garlic Ritual

Planting garlic in Vermont is a great way to extend the gardening season and gives you a crop that is perfect in so many dishes, stores well all winter long and even generates its own seed. It is a perfect way to tune into the cycles of the gardening season and feel like you are growing an important part of your diet. Garlic is expensive to purchase so there are savings to be had with your own garlic crop. Please follow this guide for easy, step-by-step instructions that will give you a garlic patch for life. I have been growing out my own garlic for 18 years and usually do not need to ever buy seed stock or garlic in the grocery store. The pleasures of garlic growing are abundant and I encourage you to get familiar with this wonderful and simple crop.

When to start the cycle?

Planting dates in Vermont are anytime between mid October and late October. It is best to wait until then, because if you plant too early, the bulbs will break out of dormancy too soon and this weakens the plant going into our harsh winters. If you plant the cloves during those last two weeks of October, it gives them just the right amount of time to take root and hunker down until spring, but not send out any top growth.

To plant garlic, you need to follow a few easy steps.

1. Bed preparation.

This is the act of making your garden soil ready for garlic planting. You want a nice patch of garden, that is worked deeply so that the soil is loose about a foot down in depth. If your garden is very compacted and hard, the garlic will not be able to grow well and you will be sure to end up with small heads of garlic that are tedious to peel and not all that satisfying. You can prepare the bed with a 3 prong fork by digging in straight down, tilting the handle of the fork back and forth, and loosening the hard pan. This is a good work out! Don’t hesitate to get dirty here by kneeling in the earth and breaking up the clods of soil with your hands so they are not chunky at all. Add a bit of well rotted manure or compost at this time. Not too much. For a 5 by 10 bed, maybe a 5 gallon bucket’s worth. You don’t want to over feed the garlic roots in the fall, but a little compost will add organic matter and that will help the structure of the soil, keeping it loose, able to retain some moisture without staying too wet.

Take your time and your garden will reward you. I always look at garlic planting as a soulful moment in the gardening cycle. It is saying goodbye to summer and embracing the dormancy of winter, when seeds deep below the surface slowly get ready for their spring emergence. Living in a climate with such long winters, I need these small, but important, rituals to remind me that spring will come and the cold barren winter is a necessary part of it all. The seed garlic is planted in the fall because it needs to send roots far into the earth in order to feed itself the following year. I take this as a metaphor for my own winter activities that feed me all year long - catching up on sleep, feeding my mind with more reading time, eating great, nourishing foods, and spending more time with friends and family.  I digress here, but these are the thoughts I have as I plant garlic, and after many years of doing it, I find that it is a necessary part of my mental preparation for winter.

2. Mark the rows with a hoe, or hand tool. I usually keep the rows about 12 inches apart and since my beds are about 4 feet wide, I keep 3 rows per bed and can easily reach the center. Just drag your tool - the sharp tip of a hoe or the narrow edge of a hard rake works well - through the soil to delineate the rows. You can use string and stakes if it is important to be straight, but I don’t bother with that at all.

3. Break up the garlic heads into individual cloves. Do not peel! And notice that one end is the root end and one end is the stem end. This will be important for planting right side up with the root end pointing straight down and the stem end pointing straight up.

4. Space out the cloves. Lay the cloves on the top of the soil, following the line you have just drawn in the soil.  Allow about 6 inches between all the cloves.

5. Planting, spacing, and yields

Now you can start to plant. I always kneel down and take my time to feel the earth under me at this point. It just feels good and is a way to say goodbye to the garden before winter! Then, take a bulb planting tool, or a sturdy,  sharp pointed stick, or your hand if your soil is soft and pliable, and poke a hole about 4 to 6 inches down. Shove the clove of garlic deep down, root end down, and cover up with the soil. Continue down the row and repeat until all is planted. Three  heads of garlic will turn into about 24 heads next spring - assuming your garlic has about 8 cloves per head. . And with 6” by 12” spacing, a 5’ x 10’ patch of garlic will yield about 60 heads of garlic. That is enough to enjoy one head of garlic per week, all year long, and still have some left over for planting. To plant a patch this big, you will need to plant the equivalent of 7 to 10 heads of garlic.

6. Compost and mulch. I usually add another 4” of compost or well rotted horse manure to the bed. I then leave it like that for about 6 weeks. Then in mid to late December, I cover the bed with a thick layer of straw. You can also use leaves here, but straw is the best insulator with hollow stems that trap air and keep everybody warm down below. Another advantage of straw is that it usually does not have weed seeds in it; mulch hay, straw’s poor cousin,  should be avoided since it is laden with all sorts of perennial grass and weed seeds. The straw moderates the winter soil temperature and prevents buckling and heaving which could push those garlic cloves up and out of the ground.

Let winter pass you by now, and next......

7. Spring time chores with garlic. Once the snow melts and the soil warms up a bit, your garlic will break dormancy and magically pop up out of the earth. It is important to pull back the straw to let the garlic see sunlight. If you wait a bit too long, and pull back the straw only to see a bunch of yellowing stems, don’t worry! The garlic shoots will green up in no time and will look fabulously sturdy after a week or so of direct sunlight. I usually pull the straw into the garden path, let it pile up there and then replace it around the growing garlic to block out weeds once the garlic plants are about 8 inches high. I often will add a little granular fertilizer at this time, before putting the mulch back in place. For a 5 by 10 garlic patch about 3 cups of Pro-Gro from North Country organics or one bag of Compost Plus from Vermont Compost Company is just about right. This will insure you get large, easy to peel cloves that taste great.

8. Garlic scapes will appear on stiff neck garlic around late May. These look like green curly cues with a pointy end that gracefully swoops down and around, waving in the breeze. This is the budding and flowering portion of the garlic plant. It should be removed to help the plant spend its energy on sizing up the goods below ground. If it is allowed to flower, the plants’ strength will go towards the flower and the garlic forming below ground will be the weaker for it. The good news here is that the “scapes” as they are called, are good to eat. I usually cut off the pointy tip - it is rubbery and inedible, and then slice up the round stem and use it in stir fries, stews, pasta dishes, or pickles. When cooked, it has the texture of a nice green bean and the flavor of mild garlic. It is absolutely delicious and a once a year treat that marks the beginning of summer - a harbinger of good things to come.

9. When to harvest? Garlic is ready to harvest when about 70% of its leaves have turned yellow. This is somewhat subjective, and should be taken as not a hard and fast rule, but rather a guide. You can dig up one head of garlic and look for signs of well formed skin, plump cloves, and individuation (cloves that are individually formed, and not one big mass). This is usually some time in late July. In very wet and rainy years, sometimes it makes more sense to take the garlic our of the ground a little early so that the skin does not rot in the damp earth.

10. How to harvest? Take out your three prong fork again and use it to loosen the soil around the outside edges of each garlic row. This will break up the soil enough to allow you to pull out each plant with a firm yank. (If the stems break off, it is likely you waited too long and the skin and stems are starting to rot. At that point, just dig up the cloves with a spade and they will be okay in taste; they just won’t store well. ) Lay the plants on the surface of the soil so that they start to dry off. Once all the garlic is pulled up, wipe it with a towel or rag, and get ready to tie it into bundles. I usually take about 8 plants, hold them together in one hand, and with the other hand, wrap twine around the whole bundle. Tie off the twine and then hang the bundle in a dark airy space. The rafters of a garage, shed or barn work well. If you don’t have that type of space, just find a place out of the rain, out of direct sunlight and with good air circulation - a covered porch? a dry basement with a fan running? a spare bedroom that can get a little dirty? (no shag rugs please!).

11. Curing the garlic Curing is the process of letting the garlic dry which makes the papery skin that allows the garlic to keep all winter. The stems will turn brown and brittle and the exterior of the bulbs will become dry and paper-like, just like garlic in the store. At this point, it is okay to cut off those dry stems, wipe off any remaining dirt, cut off the roots, and place your garlic in a crate to store it. This can be done anytime from 3 to 6 weeks after you initially hang up the garlic to dry.

12. Storing the garlic Once the garlic is cured, cleaned and trimmed, you are ready to store it for eating all winter long. Garlic is best stored in the dark. In an airy, dry, cool place. I use milk crates, covered with a piece of burlap, and keep the crate in a very cool part of the basement. Ideal garlic storing temperatures are between 35 and 45 degrees, but a refrigerator is too humid, so please don’t be tempted to use that as a storage method. Other good places to store garlic (and onions for that matter) are unheated attics, attached garages that don’t freeze, but are not heated, or 3 season porches that do not freeze. Root cellars are great, but most of us don’t have one. If well stored, garlic will last until April or May - almost right in time for the garlic scape harvest!

13. Finding seed stock.

Until you build up your own supplies, you will have to purchase seed garlic. There are many great resources for garlic and for finding garlic seed, I recommend Johnny’s Selected Seeds, or locally, Last Resort Farm in Monkton, Hudak Farm in Saint Albans, or any farmer at your local farmers market who has nice looking seed stock. Seed stock is basically sorted out of the garlic harvest and selected for the following the following traits:

      • good size
      • evenly formed cloves
      • strong stem
      • well formed skin
      • great flavor
      • ability to store for a long time

If you have been growing out your garlic in your garden, you can pick out the best cloves at cleaning and storing time. Set these aside in a safe place where they will not be eaten and come October, experience the joy of planting your own seed garlic.

14. Plant garlic. Repeat Step 1. above and the cycle starts all over again!

This Week in Photos: May 5, 2013

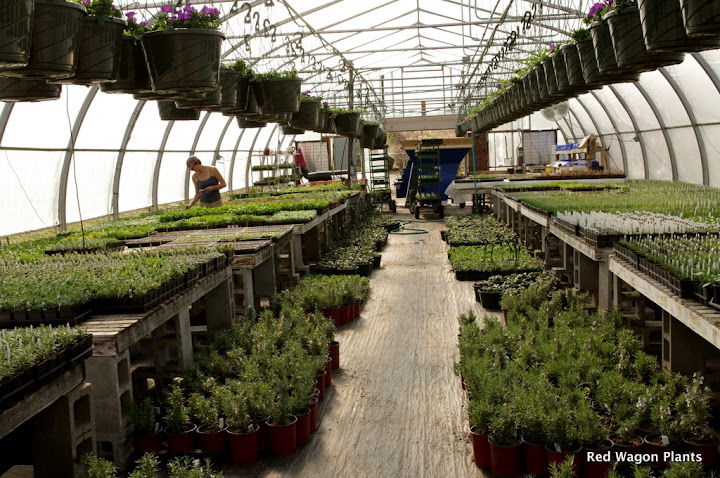
With all this sun shining lately, the plants couldn't be happier! Everything is blooming like crazy, the trees are leafing out a mile a minute, and the greenhouses are a flurry of activity. With so much going on, we have to remind ourselves to stop and smell the flowers, breathe in the spring air, and get our hands dirty in the garden. Here are a few snapshots from the last week at Red Wagon...

What's blooming in your garden?

~ Sophia

This Week in Photos: 3.3.13

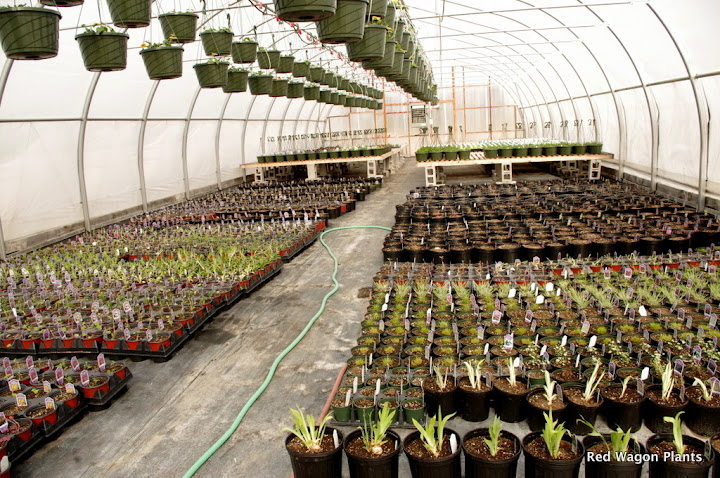
Hurrah! It's that time of year again and we're back in the greenhouses getting our hands dirty. And even though the air is filled with snowflakes outside, we'll let you in on our little secret - spring is just around the corner! Here are some of the first plants we're potting up in our cozy greenhouses.

Join us for some early plants, refreshments, and to wander our sunny greenhouses at our Open House on March 30th!

~ Sophia

This Week in Photos 5.11.12

By Sophia

This mother's day is especially important to me, because for the first time in four years I actually get to be in the same time zone with my mom! We get to celebrate our birthdays and holidays together this year, to make dinner dates and plan our gardens and do all the things we missed so much, and I feel so grateful to have her back in Vermont. Sometimes, just like the Joni Mitchell song, we don't realize how important things (or people) are to us until we don't have them around. So here's to the time we get to spend with our moms, and the chance to say thanks for their boundless love and for being just amazing.

This year we're pulling out all the stops to spoil the moms in our world - with a new play area to entertain the kids, with gooseberries, currants, hazelnuts, and quince (plus all the traditional favorites), with rose bushes and strawberry baskets, herb planters and gift cards, three new greenhouses, and too many flowers and vegetables to name. It is truly a gift to work in a place so filled with beauty and life, and to see people enjoying it is the icing on the cake.

Happy Mother's Day!

This Week in Photos: 3.27.12

The rollercoaster ride of spring at Red Wagon is in progress! We had a glorious day potting up perennials last week outside in the sun.  Fortunately the plants are oblivious to the chilly weather this week, putting up lots of new leaves and enjoying the cozy conditions in our greenhouses. And you can too! Come to our open house this Sunday, April 1st from 9am to noon and soak up some sun, pick up some adorable plants for your table or windowsill, check out the calves next door and talk to our great staff about your gardening goals! Check out the photos below to see what we've been up to...

FAQ #23: How do I have fresh lettuce all summer long? How do you keep it from being bitter?

  The trick to having fresh lettuce all summer is to choose your varieties and timing well. You will need to have a succession of different varieties planted every week or so throughout the summer to ensure a constant supply. Start with cold tolerant varieties in the spring, then plant heat- and drought-tolerant ones in the summer, and plants with good holding ability and heat tolerance in late summer and early fall. Plants turn bitter when they are starting to bolt (go to seed) and are exposed to too much heat, so choosing your variety and timing well also avoids bitterness. Here’s an example planting:

  • May: 'Tango', 'Merveille des Quatres Saisons'
  • June: 'Dark Red Lollo Rosa', 'Sylvesta', 'Red Saladbowl', ‘Cherokee’
  • July: 'Reine des Glaces', 'Two Star', 'Red Sails', ‘Romaine Parris Island Cos’
  • August: 'Reine des Glaces', 'Two Star', 'Red Sails', ‘Mottistone’, ‘Nevada’
  • September: 'Tango', 'Merveille des Quatres Saisons'

FAQ #22: Which herbs are perennial and which are annual?

Perennials: Angelica, Catnip, Chives and Garlic Chives, French Sorrel, Germander, Anise Hyssop, ‘Munstead’, 'Grosso', 'Provence'  Lavender, Lemon Balm,  Lovage, Mint, Oregano, Rue, Sage, Winter Savory, Sweet Woodruff, French Tarragon, Thyme, Valerian Annuals: Artemisia (self seeds), Basil, Chamomile (self seeds), Chervil (self seeds),  Cilantro, Dill, Fennel, Feverfew (self seeds), Lemongrass, Marjoram, Papalo, Parsley, Red Shiso, Rosemary, Summer Savory

Some herbs can be kept as houseplants over the winter. Some that do well are rosemary, thyme, sage, basil, and parsley. It is always nice to have a few pots of these in the kitchen to snip into bowls of soup, salads, scrambled eggs and roasted vegetables and meats. You can dig them up out of the garden in the fall or just grow them in pots all summer that you then bring into the house once the temperature drops.

FAQ #21: How can I keep arugula, cilantro, lettuce, and dill from bolting?

The first step to preventing bolting is to understand what causes it. Bolting, or going to seed, is a natural part of the plant's life cycle. Some plants have longer life cycles than others. Arugula, lettuce, cilantro and dill all have relatively short life cycles, so they will try to produce seed within 8 to 10 weeks of being planted. It is an inevitable part of the plant life cycle but can be postponed with good management. It can also be caused by shock during transplanting, by too much or too little water, and around the solstice when the days start getting shorter. Transplant shock can be minimized by careful hardening off and transplanting in late afternoon when the plants will not be exposed to intense midday heat. Water carefully and time your plantings so that a fresh generation is coming along before the previous generation goes to seed. Here is a helpful schedule to help you maximize the harvest:

Cilantro - plant every 3 weeks from late April to mid August. These are very cold tolerant and can be grown early and late to extend the season. If you are very eager to have cilantro for salsa, then make sure to plant some in early July so that it is ready to eat at the same time as your tomatoes are ripe. The flowers of cilantro are edible and are a lovely addition to salads and salsas.

Dill - like cilantro, is very cold tolerant and can be grown early and late in the season. This self seeds willingly, so you can always allow a patch to flower and drop its seeds giving you a perpetual patch. The flowers of dill are tasty in pickles and marinades.

Lettuce - lettuce can be grown at the baby leaf stage or the full head stage.  Please refer to our lettuce post to learn more about the timing of lettuce. It should be planted every week or two if you eat lots of salads and want fresh, non-bitter leaves on your plate. It can be planted from seeds or from plants. If you prefer the texture and flavor of full heads of lettuce, then transplant individual plants every 10" - about 4 to 8 transplants a week is plenty. If you prefer cut lettuce leaves, then use seeds, and sprinkle them in a row, about 2 or 3 seeds per inch. Cut lettuce leaves can grow back and provide you with a second harvest, but the quality goes down each time and the bitterness increases. It is best to replant a fresh row of seeds every couple of weeks.

Arugula - like lettuce, it can be grown from transplants or from seeds. It is best to plant it regularly as it does not grow back very well. Its flowers are edible, and can be a nice peppery additions to salads, sauces, and grilled fish.

FAQ #20: Which plants make good houseplants?

Red Wagon grows a number of plants that make good houseplants. The characteristics to look for are a tolerance of shade, a preference for hot conditions (such as tropical plants), and plants that are annuals (do not require cold winters). Some great choices are:

  • Colocasias (Elephant ear)
  • Banana plant
  • Sensitive plant (mimosa pudica)
  • Tuberous begonias
  • Geraniums (nice with dichondra)
  • Dracaena
  • Fuschia
  • Sempervivum (Hens and Chicks)
  • Ivy
  • Juncus
  • Boston Fern and other "annual' ferns
  • Oxalis
  • Scented Geraniums
  • Jade

FAQ #16: Which perennials bloom the longest?

Virtually all plants will bloom longer if you deadhead them.  Picking lots of blossoms encourages the plant to branch and so you get more. I’ve had especially good luck with these varieties: Heliopsis (False Sunflower), which sometimes blossoms for 10-12 weeks in the fall Rudbeckia (Black Eyed Susan) – 6-7 weeks Monarda (Bee Balm) - 8-12 weeks Coreopsis - 8-12 weeks Bleeding Heart (Dicentra) ‘Luxuriant’ - 10-14 weeks, Feverfew – 8-12 weeks if you let new plants grow and cut back the old ones

IMGP2057
IMGP2057

FAQ #13: What plants are easiest to take care of?

Annuals:

Geraniums

Imaptiens

Pansies

Marigolds

Salvias

Sunflowers

New Guinea Impatiens

Perennials:

Bleeding Heart

Astilbe

Echinacea

Garden Phlox

Sedums

Rudbeckia

Bee Balm

Lady's Mantle

FAQ #12: What perennial plants will do well in my shady garden?

Hostas are always a good choice and there are so many of them!  Using varieties with lots of yellow or white in the leaves gives “color” to the shade garden. They can can be divided each year to fill the area. Bleeding Heart - both white and pink heart-shaped flowers add a splash of color Astilbe - plumes of white or pink flowers add elegance in the spring

Sweet Woodruff  - a nice spring ephemeral with abundant tiny white flowers and shiny green foliage Pulmonaria has stunning dark green leaves with white splotches and delicate flowers in spring

Ferns and mosses are a great choice for filling in shady areas with nice textures

Brunnera - this plant comes in many shades of silver, green, and gold, and adds lovely heart shaped leaves and texture to the shade garden.

Laminum - a wonderful groundcover that with silver foliage and small blue flowers

FAQ #7: What are some easy-to-grow veggies for containers?

Most garden favorites can be grown in containers as long as they are provided with plenty of soil, good drainage, light, and fertility. It is important to remember that container plants require more regular watering than plants grown in the ground since their roots cannot seek out water by growing deeper. The same goes for nutrients - fertilize at least every two weeks during the growing season. Some varieties have been bred especially for container growing, such as the “Tiny Tim” tomato.  

  • Tomatoes should be grown one plant to a five-gallon bucket or similar container with holes drilled in the sides 2” from the bottom to create a water reservoir. Determinate varieties can use a  small stake, whereas indeterminate varieties need heavy stakes in the ground or screwed to the container.
  • Peppers and eggplants require are least 8 inches of soil, so choose a nice deep container for them. Staking is recommended for plants that produce large fruits.
  • Cukes, squash, and other vines can do very well in containers at least 12” in diameter provided there is plenty of room for their vines. Varieties with smaller fruit can be staked or trellised to save space.
  • Greens such as lettuce and spinach can be grown in containers, but it is more challenging because they prefer cool conditions. Try growing them in a window box where they will be in shade during the hottest part of the day and make sure they get plenty of water.
  • Herbs can very easily be grown in containers (since most are drought-tolerant)  and can be overwintered indoors in a sunny window.

FAQ #3: I'm new to gardening - what's the best use of a 10x12' raised bed?

Decide what you'd like to grow and eat, considering the space requirements and growth habit for each.  Vine veggies like cucumbers and squash can be planted on the periphery to spill out onto a lawn and not crowd the other plants; or they can also be trellised.

Give tomatoes at least 3 square feet, eggplant and peppers 2 square feet.   Also, consider rate of maturity; plant lettuce in one area, then after harvesting, plant beets or herbs. Planting a few edible flowers, such as nasturtium or gem marigold gives the raised bed a flower planter look. For ease of maintenance, make sure space or a path is made to reach all of the plantings.

Plants in a raised bed tend to yield more than plants in the ground because their roots are in lighter soil that is easier to grow in. It is important to only use good quality top soil and compost in the raised bed. The bottom layer can be filled with some rotted horse manure and yard waste like leaves and grass clipping.

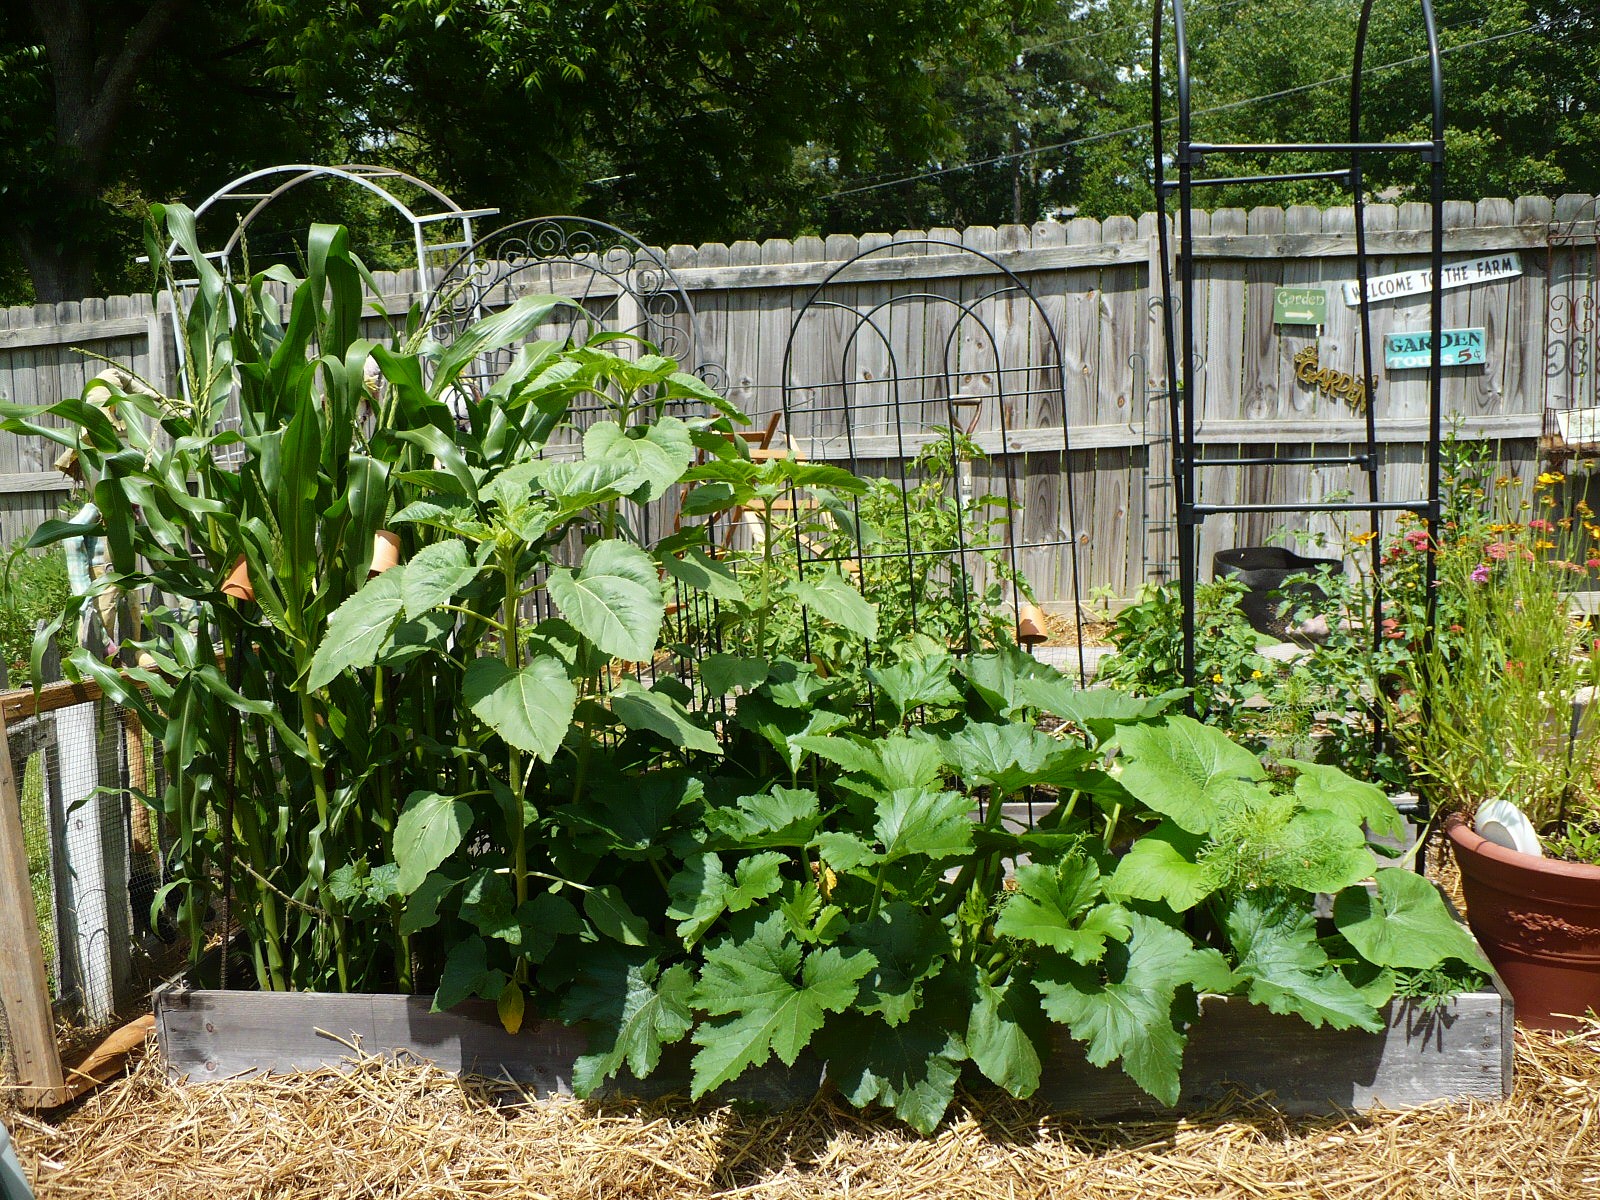
Choose varieties that do well in smaller spaces and keep re-using the space once you harvest something.  Small patches of green beans can be replanted multiple times, a small trellis with a few snap peas can be a nice addition that leaves room for summer lettuce or fall broccoli. Just keep in mind that a few plants that are well cared for will yield as much as many plants that are poorly cared for!

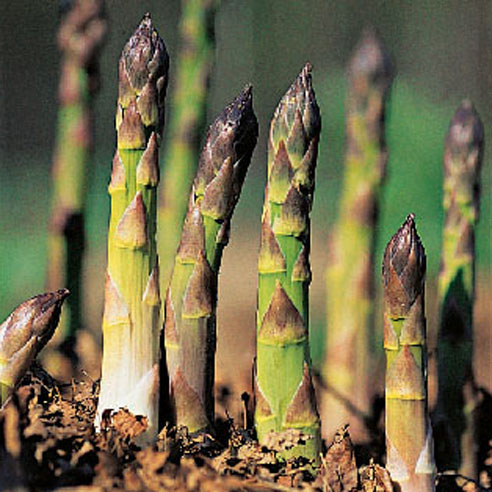
FAQ #6: How do I grow asparagus?

The ideal method for growing asparagus is to prepare the area at least one season in advance by tilling and planting a cover crop to suppress weeds. This will help reduce stress on the asparagus plants during their first few years, ensuring a healthier and more vigorous crop. A cover crop turned into the bed also increases the organic matter in the soil which is good for the plants. Since asparagus is a perennial that can last for many years, choose a well-drained site that can be dedicated to asparagus for the foreseeable future.

Asparagus is usually grown by tilling an area and then digging trenches 6-8” deep and 3-5’ apart. The crowns (roots) are placed in the trenches 8” apart for narrow spears and 14” apart for thick spears. Cover the crowns with 1-2” of soil and fertilize heavily with compost or other phosphate-rich fertilizer. Add soil to the trenches three times during the next few weeks until the soil is mounded somewhat to avoid water pooling around the plants. Keep the plants hand-weeded and fertilized until midsummer, then mulch heavily with straw or leaves to suppress weeds. The asparagus “ferns” should be allowed to grow, since they feed the plants, then cut back after they die in the fall. A moderate harvest is usually possible the first year after planting, followed by full harvests every spring thereafter.

Red and black asparagus beetles are nearly always present in summer and can be treated with organic pesticides but are better removed by hand to minimize harm to the plants. Just drop the beetles and larvae into a can of soapy water to kill them. Larvae can also be killed by gently brushing the ferns with a soft broom - they die quickly after falling to the ground.

Although asparagus is not quite as simple to grow as annual crops, it is well worth the effort! Fresh, juicy asparagus spears are unrivaled in texture and flavor.

FAQ #2: How do I know if a tomato is determinate or indeterminate? How do I support my tomatoes? Can I grow them in containers?

A determinate tomato is a type of tomato that has all of its fruit ripen at once. They usually grow to about 4 to 5 feet tall, and then stop growing while they spend all of their energy on fruit production. They are great for canning since they ensure you have a large harvest all at once. They can be grown without staking, but the fruit quality will be better if cages, stakes or a small trellis are used.  Indeterminate tomatoes keep growing until they succumb to frost or a disease. In a warm climate, they are actually perennials and can grow into trees. Indeterminates ripen all season long and give you a more sequential harvest with one or two tomatoes ripening a day during peak harvest.

In general, space tomato plants at least 2' apart, preferably 3' or more apart.  Support both kinds; pea fences or hardwood stakes work nicely on determinates; indeterminates keep growing up and out and need more support, such as hardwood stakes positioned so that as the tomatoes grow, trellising can be added with hemp twine.

Check out this video to see a method we like for trellising tomatoes:

Weaving Tomatoes

Round tomato cages are great for peppers and eggplants.  One of our customers designed a portable one-tomato planter with a five gallon bucket, drilled 3 holes about 2 inches from the bottom for a water reservoir, and screwed two hardwood stakes to opposite sides of the bucket for plant support.

New Plants for the 2012 Line Up

We have been busy at work with ordering seeds, deciding on what plants to grow for the coming year, and which ones to discontinue. We usually add about 10% new varieties each year - enough to keep it interesting, but not so much that we risk having bad inventory or unwanted expenses for a plant no one loves. This is really, really hard since the seed catalogs and plug listings each year show more and more varieties that look tempting. Not to mention the world of heirloom seeds which is so vast and so alluringly historic and charming. If the pressures of pleasing customers and breaking even were eliminated, I would probably have the type of nursery where every plant has a sign that is 12" x 12" with lots of text describing some arcane knowledge about how the variety was bred or discovered, how it was cooked in 15th century Sicily and  how it came to be a Red Wagon variety. My winter job at Red Wagon is part business manager, part HR department, and part curator. Guess which is my favorite. Take a look at the list of new plants and give us some feedback. Our favorite new variety is the kind that comes by way of a customer recommendation, so you get a vote in this process.

Happy garden planning, and check out the rest of the website for the complete plant list, we are updating it this week,

Julie

Plant Category Genus Variety or Cultivar
Annuals African Foxglove Ceratotheca triloba
Annuals Amaranth Oeschberg
Annuals Angelonia Adessa White
Annuals Balsam Impatiens Balsamina
Annuals Begonia, Tuberous Illumination Peaches and Cream
Annuals Begonia, Tuberous Non-Stop, Bright Rose
Annuals Begonia, Tuberous Pin Up Flame
Annuals Browalia Endless Flirtation
Annuals Browalia Endless Illumination
Annuals Calibrachoa Saffron
Annuals Calibrachoa Superbells Dreamsicle
Annuals Calibrachoa Superbells Peach
Annuals Calibrachoa Superbells Trailing White
Annuals Calibrachoa Tequilla Sunrise Improved
Annuals Calibrachoa Yellow
Annuals California Poppy Milkmaid
Annuals Celosia Chief Mixed Cockscomb
Annuals Celosia Cramers’ Amazon
Annuals Coleus Amora
Annuals Coleus Big Red Judy
Annuals Coleus Fishnet Stockings
Annuals coleus Glennis
Annuals Coleus Sedona
Annuals coleus Wedding Train
Annuals Cosmos Cosmic  Orange
Annuals Cosmos Cosmic Mix
Annuals Cosmos Cosmic Red
Annuals Cosmos New Choco
Annuals Cosmos Sonata Dwarf Mix
Annuals Cosmos Sonata White
Annuals Dahlia Happy Days Cream
Annuals Dahlia Happy Days Pink
Annuals Dahlia Happy Days Purple
Annuals Dahlia Happy Mystic enchantment
Annuals Dahlia Mystic Haze
Annuals Dahlia Mystic Wonder
Annuals Dahlia Salvador
Annuals Dusty Miller Silver Lace
Annuals Euphorbia Mountain Snow
Annuals Exclusively  Echeveriaa Collection
Annuals Fern Montana
Annuals Fern Collection
Annuals Floering Cabbage Osaka Mix
Annuals Four Oclock Marvel of Peru
Annuals Gaura lindiheimeri Whirling Butterflies
Annuals Gazania New Day Mix
Annuals Geranium Firestar Purple
Annuals Geranium Firestar Salmon
Annuals Geranium, Ivy Mini Cascade Red
Annuals Geranium, Ivy Sunflair Fireball
Annuals Geranium, Ivy Sunflair Neon Pink
Annuals Geranium, Ivy Sybil Holmes
Annuals Geranium, Ivy Vancouver Centennial
Annuals Geranium, Scented Lemon Fizz
Annuals Geranium, Scented P. querquifolia
Annuals Geranium, Scented Sweet Mimosa
Annuals Geranium, Zonal Brocade Happy Thoughts Red
Annuals Geranium, Zonal Brocade, Mrs Pollock
Annuals Geranium, Zonal Candy Fantasy Kiss
Annuals Geranium, Zonal Madame Salleron
Annuals Geranium, Zonal Patriot Cherry Rose
Annuals Geranium, Zonal Patriot Lavender Blue
Annuals Geranium, Zonal Patriot Salmon Chic
Annuals Geranium, Zonal Pillar Purple
Annuals Geranium, Zonal Rocky Mountain Lavender
Annuals Geranium, Zonal Rocky Mountain Magenta
Annuals Gomphrena QIS Formula Mix
Annuals Hedera Golden Child
Annuals Hedera White Mein Hertz
Annuals Hypoestes Splash Rose Select
Annuals Impatiens Super Elfin Salmon Splash
Annuals Impatiens Super Elfin XP pink
Annuals Ipomoea Desana Bronze
Annuals Juncus Blue Arrows
Annuals Juncus spiralis Unicorn
Annuals Kiss Me Over the Garden Gate
Annuals Lantana Evita Rose
Annuals Lantana Bandana Cherry Sunrise
Annuals Lantana Bandana Rose Improved
Annuals Lantana - bandana Peach
Annuals Larkspur Sublime Formula Mix
Annuals Leycesteria Jealousy
Annuals Licorice Lemon
Annuals Lisianthus Echo Lavender
Annuals Lisianthus Echo Pink
Annuals Lobularia Silver Stream
Annuals Marigold Antigua Orange
Annuals Marigold Antigua Yellow
Annuals Marigold French Janie Primrose Yellow
Annuals Marigold French Single Marietta
Annuals Marigold, French Durango Tangerine
Annuals Melampodium Derby
Annuals Morning Glory Grandpa Ott’s
Annuals Morning Glory Moonflower
Annuals Nasturtium Trailing
Annuals Nemesia Angelart Almond
Annuals Nemesia Angelart Pineapple
Annuals Ornamental Corn Field of Dreams
Annuals Ornamental Millet Purple Majesty
Annuals Osteospermum 3-D Silver
Annuals Osteospermum Astra Orange Sunrise
Annuals Osteospermum Cape Daisy Fireburst
Annuals Osteospermum Cape Daisy Purple
Annuals Osteospermum Sunset Orange
Annuals Osteospermum Zion Copper Amethyst
Annuals Oxalis Allure Burgundy
Annuals oxalis triangularis Charmed Velvet
Annuals oxalis triangularis Charmed WIne
Annuals Pansy Delta Mix Buttered Popcorn
Annuals Pansy Delta Premium True Blue
Annuals Pansy Freefall Golden Yellow
Annuals Pansy Matrix Sangria
Annuals Pansy Panola XP Mix baby Boy
Annuals Pansy Panola XP Mix Blackberry Sundae
Annuals Pansy Panola XP Mix Citrus
Annuals Pansy Ultima Blue Chill
Annuals Pansy Ultima Morpho
Annuals Petunia Bouquet Salmon
Annuals Petunia Littletunia Sweet Sherbert
Annuals Petunia Mini Strawberry pink veined
Annuals Petunia Whispers Star Rose
Annuals Petunia Cascadias Cherry Spark
Annuals Petunia Littletunia Sweet Dark Pink
Annuals petunia multiflora prostrate Easy Wave Plum Vein
Annuals Petunia multiflora prostrate Easy Wave White
Annuals Poppy White Linen
Annuals Portulaca Happy Hour Mix
Annuals Portulaca Sundial Chiffon
Annuals Portulaca Sundial Mix
Annuals Portulaca Sundial Pink
Annuals Rudbeckia Autumn Colors
Annuals Rudbeckia Cherokee Sunset
Annuals Rudbeckia Prairie Sun
Annuals Rudbeckia Denver Daisy
Annuals Salvia farinacea Victoria Blue
Annuals Sanvitalia Cuzco Yellow
Annuals Scabiosa Black Knight
Annuals Snapdragon Montego Mix Sangria
Annuals Snapdragon Rocket Mix
Annuals Snapdragon Rocket White
Annuals Spectacular Succulent Collection
Annuals Sunflower Sunny Smile
Annuals Sweet Potato Vine Bright Ideas Rusty Red
Annuals Thunbergia Arizona Dark Red
Annuals Thunbergia Lemon
Annuals Thunbergia Orange
Annuals Thunbergia Sunny Suzie Yellow Dark Eye
Annuals Thunbergia Sunny Suzy Red Orange
Annuals TRIXI COMBO Ayers Rock
Annuals TRIXI COMBO Caribean Cocktail
Annuals TRIXI COMBO Gold and Bold
Annuals TRIXI COMBO Lemon Sorbet
Annuals TRIXI COMBO Lollipop
Annuals TRIXI COMBO Sunrise
Annuals Verbena Chambray Royal superbena
Annuals Verbena Estrella Salmon Star
Annuals Verbena Lanai Twister pink
Annuals Verbena Royal Peachy Keen
Annuals Verbena Tukana Scarlet star
Annuals Viola Penny Orchid Frost
Annuals Zinnia Dreamland Mix
Annuals Zinnia Dreamland Red
Annuals Zinnia Sunbow Mix
Annuals Zinnia White
Eggplants Globe Rosa Bianca
Ferns Matteuccia struthiopteris Ostrich Fern
Foliage Alternanthera Brazilian Red Hot
Foliage Alternanthera Red Thread
Foliage German Ivy Green
Foliage Muehlenbeckia Wire Vine
Foliage Setcreasea Purple Queen
Herbs Basil Amethyst Improved
Herbs Basil Sacred, Tulsi
Herbs Basil Sweet Genovese, Aroma II
Herbs Basil Sweet Genovese, Aton
Herbs Bee Balm Wild Bergamot
Herbs Epazote
Herbs Feverfew
Herbs Flax
Herbs French Sorrel
Herbs Lavender Fern Leaf
Herbs Lemongrass West Indian
Herbs Mint Emerald and Gold
Herbs Oregano Mexican Lippia
Herbs Papalo
Herbs Red Shiso Britton
Herbs Red Shiso
Herbs Rosemary Prostrate
Herbs Sage White
Herbs Thyme Lime Golden
Herbs Thyme Orange
Herbs Thyme Wooly
Herbs Zaatar Marjoram
Peppers Hot Fish
Peppers Ornamental Hot Pepper Chilly Chilly
Peppers Sweet Pepperoncino
Peppers Sweet Round of Hungary
Peppers Sweet Sweet Banana Pepper
Perennial Adenophora Amethyst
Perennial Alchemilla Lady’s Mantle
Perennial Sedum Blue Spruce
Perennial Sedum Floriferum
Perennial Sedum Oracle
Perennial Sedum Picolette
Perennial Sedum Voodoo
Perennial Thyme Wooly
Perennials Achillea Pretty Belinda
Perennials Achillea Saucy Seduction
Perennials Achillea Strawberry Seduction
Perennials Achillea Sunny Seduction
Perennials Achillea millefolium Colorado
Perennials Acorus ‘Ogon’
Perennials ajuga Dixie Chip
Perennials Alcea rosea Chaters Double Purple
Perennials Alchemilla Molis Lady’s Mantle
Perennials Anemone sylvestris
Perennials Aquigelia Cameo Rose and White
Perennials Aquigelia Origami Mix
Perennials Artemesia Silver Brocade
Perennials Astilbe Delft Lace
Perennials Astilbe Deutschland
Perennials Astilbe Fanal
Perennials Baptisia Solar Flare Prairie Blues
Perennials Bellis Daisy Bellissima Rose
Perennials Bergenia cordifolia ‘Winter Glow’
Perennials Campanula glomerata ‘Freya’
Perennials Centranthus Cocineus
Perennials Chrysanthemum Samba
Perennials Coreopsis verticullata Early Sunrise
Perennials corydalis sempervirens
Perennials Delphinium Magic Fountains Dark Blue w Dark Bee
Perennials Delphinium Magic Fountains Sky Blue w White Base
Perennials dianthus Pomegranate Kiss
Perennials dianthus Zing Rose
Perennials Dicentra Gold Heart
Perennials Echinacea Harvest Moon
Perennials Echinacea PowWow Wild Berry
Perennials Echinacea Sundown
Perennials Eupatorium dubium ‘little joe’
Perennials Fern Barne’s Male
Perennials Gaillardia aristata Arizona Sun
Perennials geranium Rozanne
Perennials Geranium cantabrigiense ‘Bergarten’
Perennials Geranium macrorrhizum ‘Album’
Perennials Geranium maculatum ‘Espresso’
Perennials Guara Pink Fountain
Perennials Helleborus Pink Parachutes
Perennials Hemerocallis Alabama Jubilee daylily
Perennials Hemerocallis Always Afternoon
Perennials Heuchera ‘Snow Angel’
Perennials Heuchera Obsidian
Perennials Heuchera Plum Pudding
Perennials Heuchera Raspberry Regal
Perennials Heuchera Silver Scrolls
Perennials Hibiscus Luna Red
Perennials Iberis sempervivens Snowflake
Perennials Iris ‘Before the Storm’
Perennials Iris pallida ‘Argentea Variegata’
Perennials Iris sibirica Pink Haze
Perennials Joe Pye Weed
Perennials Juncus effusus ssp. Twister
Perennials laminum Beacon Silver
Perennials Lamium Orchid Frost
Perennials Lamium maculatum Beacon Silver
perennials Lathyrus latifolia Perennial sweet pea
Perennials Liatris Floristan White
Perennials Ligularia dentata Britt-Marie Crawford
Perennials Ligularia dentata Little Rocket
Perennials Lychnis arkwrightii Orange Gnome
Perennials Lysimachia punctata ‘Alexander’
Perennials monarda Petite Delight
Perennials monarda Purple Rooster
Perennials monarda Raspberry Wine
Perennials monarda didyma Jacob Cline
Perennials myosotis sylvatica Royal Blue Carpet
Perennials paeonia Duchess de Nemours
Perennials paeonia Felix Crousse
Perennials Papaver Flamenco Dancer
Perennials Penstemon digitalis Dark Towers
Perennials Perovskia Longin
Perennials Persicaria Darjeeling Red
Perennials Phlox glabberima ‘Morris Red’
Perennials Phlox paniculata David
Perennials Phlox paniculata David’s Lavender
Perennials Phlox paniculata Flame series purple ‘Barfourteen’
Perennials Physostegia Pink Manners
perennials Physostegia virginiana Alba
Perennials Phystostegia Crown of Snow
Perennials Primula Ronsdorf Strain
Perennials Salvia Caradonna
Perennials Salvia Sweet 16
Perennials Scabiosa Beaujolais Bonnets
Perennials Scabiosa Vivid Violet
Perennials Sedum Autumn FIre
Perennials Sedum Matrona
Perennials Sedum Neon
Perennials sedum kamtschaticum
Perennials sedum sieboldii
Perennials Sedum spurium Summer Glory
Perennials Tanacetum Robinsons Red
Perennials Tiarella ‘Delaware’
Perennials Tiarella ‘Lace Carpet’
Perennials Tiarella ‘Susquehanna’
Perennials Trollius chinensis Golden Queen
Perennials Veronica Giles van Hees
Perennials Viola Labradorica
Perennials Viola Striata
Perennials Salvia aregentea Artemis
Shrub Hydrangea macrophylla Endless Summer
Shrub Hydrangea paniculata Limelight
Shrub Amelanchier Autumn Brilliance Service Berry
Shrub Ilex verticulata Southern Gentleman
Shrub Ilex verticulata Winter Red
Shrub Viburnum Trilobum Alfredo
Small Fruit Blackberry Black Satin
Small Fruit Gooseberry Titan
Small Fruit Strawberry Jewel
Small Fruit Strawberry Sparkle
Tomatoes Cherry Gold Nugget
Tomatoes Cherry Green Envy
Tomatoes Cherry Isis Candy
Tomatoes Cherry Lizzano
Tomatoes Cherry Sweet Treats
Tomatoes Cherry Terenzo
Tomatoes Cherry Sweet Black Cherry
Tomatoes Container Red Husky (Patio)
Tomatoes Determinate Orange Blossom
Tomatoes Determinate Oregon Spring
Tomatoes Heirloom Black Prince
Tomatoes Heirloom Cosmonaut Volkov
Tomatoes Heirloom Costoluto Genovese
Tomatoes Heirloom Dona
Tomatoes Heirloom Earl of Edgecombe
Tomatoes Heirloom Paul Robeson
Tomatoes Heirloom Pineapple
Tomatoes Heirloom Wapsipinicon Peach
Tomatoes Hybrid Brandymaster Yellow
Tomatoes Hybrid Park’s Whopper
Tomatoes Paste Amish Gold
Tomatoes Plum San Marzano gigante III
Vegetables cantaloupe Sarah’s Choice
Vegetables Cantaloupe, French Charentais Savor
Vegetables Italian Dandelion Clio Chicory
Vegetables Lettuce Mottistone
Vegetables Lettuce Nevada Summer Crisp
Vegetables Lettuce Red Batavian Cherokee
Vegetables Lettuce Red Cross - Red Butterhead
Vegetables Lettuce Red Oak Paradai
Vegetables Mei Qing Choi (Baby Boc Choi) Boc Choi
Vegetables Mustard Greens Ruby Streaks
Vegetables Okra Millionaire
Vegetables Onion Mini Purplette
Vegetables Onion Redwing
Vegetables Radicchio Virtus
Vegetables Summer Squash Magda
Vegetables Vertus Radicchio
Vegetables watermelon Sunshine


Things to Plant Now. You Will be Glad You Did.

August is rolling around, thundering ahead,  and with it comes some vegetable planting possibilities that will feed you late into autumn and early winter. This is a great time to clean out some of the garden beds that have finished producing and replant them with some fresh crops for late season harvest. Here are a few options that you might want to consider incorporating into your later summer gardening routine.

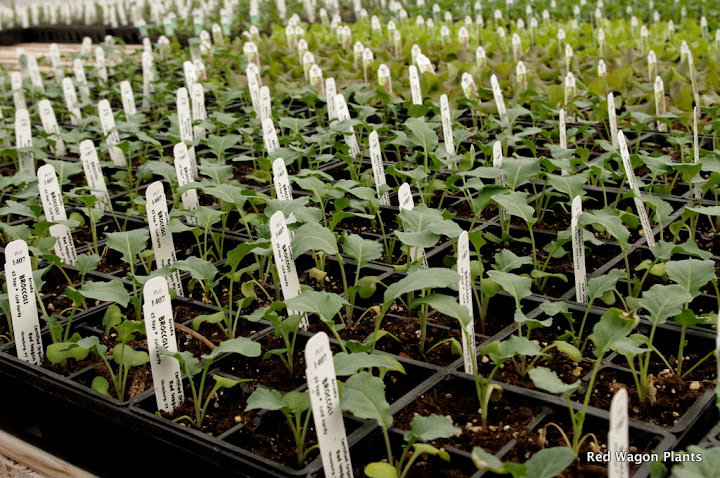
Broccoli

- seed a small amount directly into garden beds, or buy transplants up to mid-August. If you are direct seeding into a garden bed, remember to thin or prick out and replant the broccoli babies so that they have proper spacing (15” or so).

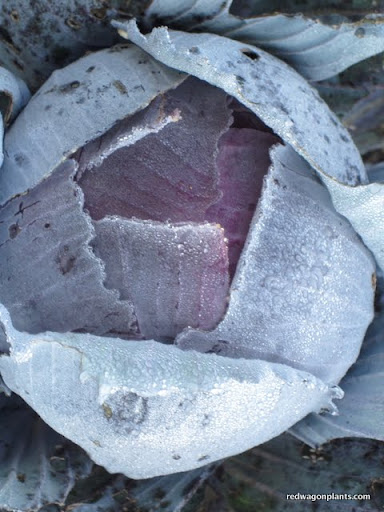
Cabbage

- same as broccoli. Choose shorter day varieties. Seed packets usually list the days to maturity for all crops. In early August, you can usually get away with planting a 60 day cabbage that will be ready in early October.

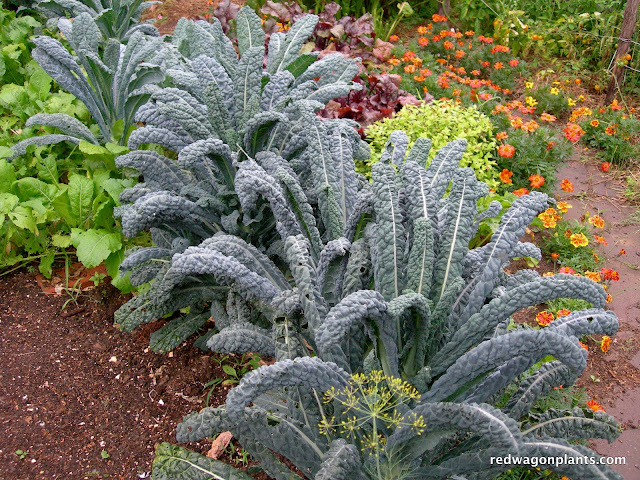
Kale -

this is a great time to put in a few more kale plants or seeds, they will size up before snow flies, and will withstand lots of wintery weather. The good thing about kale, is that once it is full grown, it will just stand around in the garden waiting to be picked. It does not get “too old” or bolt (jump into seed production mode). This makes it a great early winter crop and a joy to harvest under snow fall. Collards can be treated this way as well. A note on flea beetles: It does not hurt to use row cover to speed things along and to keep out the flea beetles. They are little biting insects that make little holes in the leaves and generally slow down a plant’s growth by stressing it a bit. All vegetables in the brassica family are susceptible to flea beetles - broccoli, kale, cabbage, mustards, arugula, collard greens, and boc choi are all in this family.

Arugula -

a nice addition to salads, this tender green with a mustard-like flavor is also a great survivor of cold temperatures. It can withstand many hard frosts and will continue to add a little spike to your salads well into November and December. You can put row cover on it to keep away the flea beetles and to give it a little extra protection from cold winds that can dry it out. If it starts to turn a little purple in the colder temps, don’t worry about it, it is still fine to eat. This is just a symptom of not being able to absorb phosphorous in cold conditions.

Turnips

- a short season salad turnip can still be sown in August. I like the Hakurei variety from Johnny’s. It is delicious raw in salads, sliced thinly or finely diced, or sauteed in a little butter with fresh herbs (winter savory makes a special appearance at my house, often in this dish in particular). People who think they hate turnips will just be shocked when they taste these buttery slices that just melt in your mouth.

Spinach

- in the first half of August, it is a good idea to plant a large patch of spinach. It will germinate in the cooler night time temperatures (spinach does not like to germinate in the heat) and will last a long time in the field in the cool temperatures of October and early November.

Overwintered Spinach - overwintering means keeping a vegetable alive through the winter for spring harvesting and eating. Not all vegetables can survive our VT winters, but the few that can include spinach, parsnips, leeks, garlic, and parsley. Spinach for early spring eating (mid to late April) should be sown in the first two weeks of September. Once it germinates, allow it to grow without harvesting or touching it. You can eat a little if you want, but ideally you will leave as much of the plant in the ground as possible. Once very cold weather hits, in early to mid-December, you can protect the spinach under a layer of straw, or leaves, or a few layers of row cover. In the spring, as soon as the ground has thawed out, remove the layers of protection and you will see the spinach come to life, long before any other plants begin to stir. This is such a delicious treat for early spring and really worth the trouble. A future post will be just about overwintered vegetables, so if this is something you have been wanting to try in your garden, check back here in a few days!

Cilantro and Dill

are good herbs for fall planting since their cold-hardiness is unmatched, and it will give you something to add to autumn salsas, salads, and pickles. Just sprinkle some seed into a shallow trench, press them in, and lightly cover with soil. The planting depth is very shallow here, just 1/4 inch or so. One of the most common problems with crops seeded directly into garden soil, is that they get planted too deeply. Remember this basic rule of thumb: the seed needs to be planted only 2 times deeper than its own size. Cilantro and dill will live until the first snow! They thrive in the cold. They are true soldiers of season extension.

Let us know if you feel inspired to try your hand with some of this season extension - we love to hear about it!