Coming Home

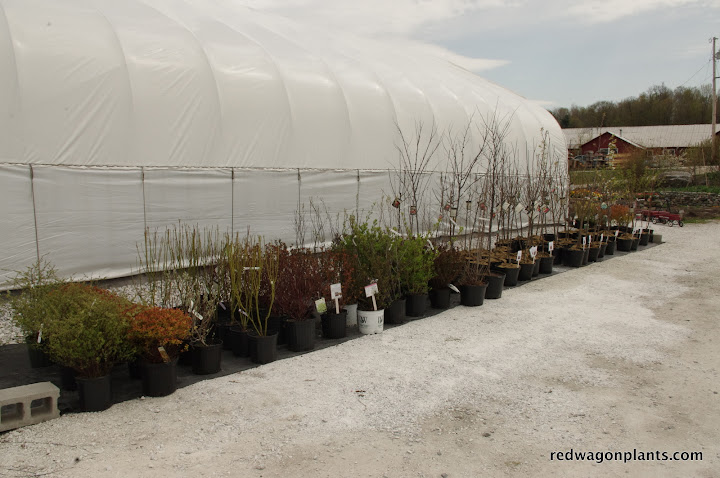
Earlier this week, I went away for a total of 48 hours. This is astounding for a couple of reasons. Not only because it is May, and who do I think I am going away for a whole two days while trying to manage a greenhouse business. No, it's astounding because of the way that I came home.  I landed. I arrived. No stress, no jumping into a chaos of activity, no guilt at being gone, no extra work piled up. I came home to a busy crew doing everything well and calmly. I came home to happy customers loading up on plants while wearing big smiles. I came home to a feeling that all is right in my little world.  Two days off in May is hard to pull off in this line of work, but what helped me so much was that everyone who works here knew what to do, they made smart decisions and I am sure they handled problems with grace.  So, thank you, crew.

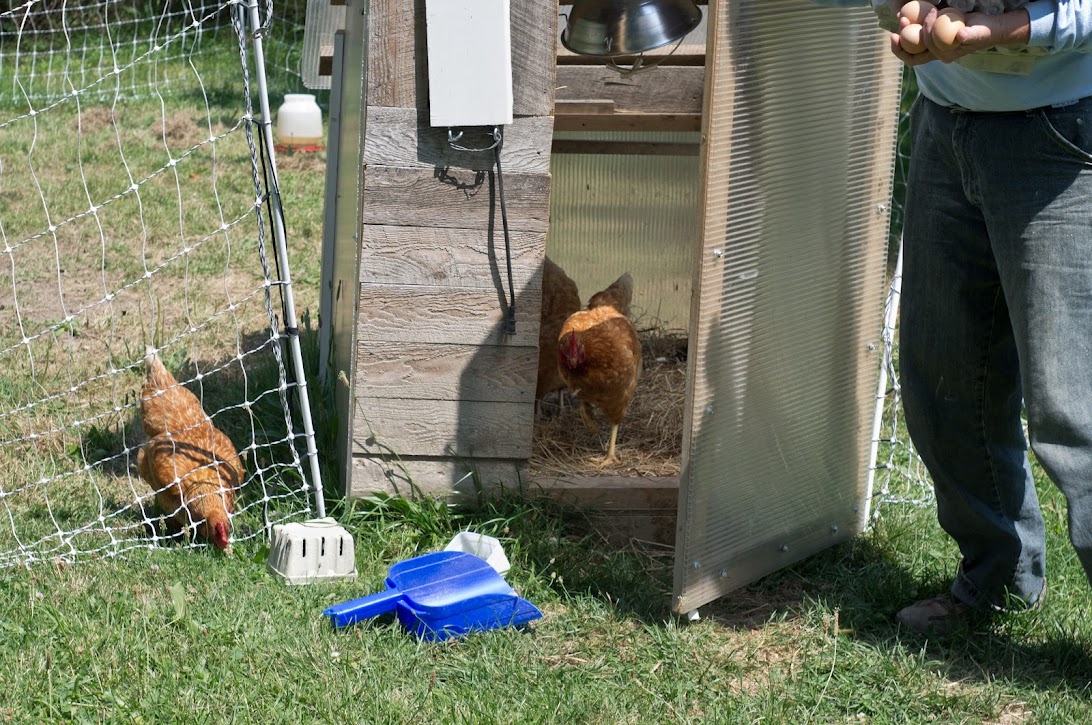
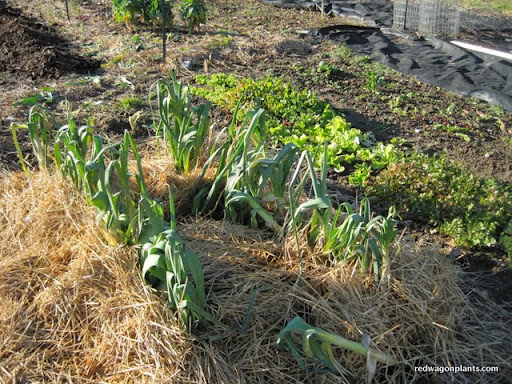
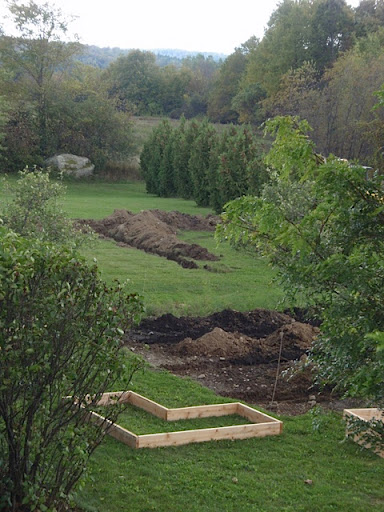
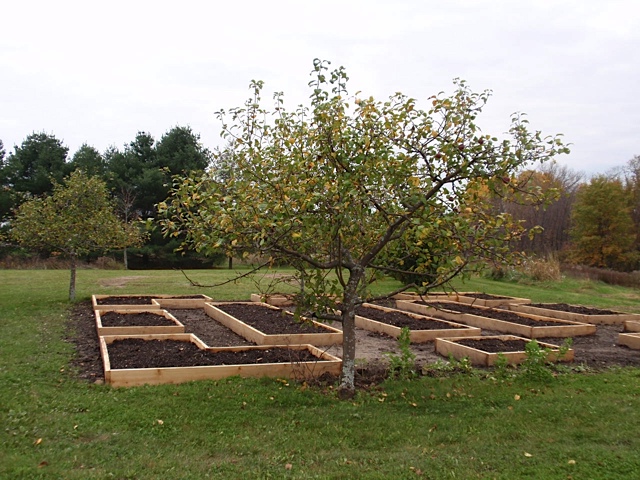
I also came home to a garden. I love my garden. The moments in the garden are rare and precious for me in May, but the first thing I did when I got out of the car, was go up to the large garden above the barn and finished planting a bed of strawberries. I harvested an armful of asparagus, collected the 4 eggs the hens had laid, picked a handful of chervil and flat full of mache, and I got to work making  dinner. I looked at my haul, as the sun was setting and felt embraced by the bounty.

We ate late. We ate well.

Egg Salad in Spring

Makes enough for dinner for 3 and leftovers for everyone's lunches. 

  • Hard boil 8 to 10 eggs.  (My method is to put cold eggs and cold water in a sauce pan. Bring to a boil, covered with a lid. Let it boil one minute. Turn off the heat, but leave the pan on the burner. Set the timer for 8 minutes. Drain and run under cold water for 5 minutes.)
  • Finely chop a handful of herbs - I used chervil and chives.
  • Finely chop a rib or two of celery - I would have used lovage had it been big enough.
  • Finely chop half a shallot or 3 scallions
  • Peel the eggs and place in a shallow bowl. Cut them up with a couple of knives or a pastry cutter.
  • Add all the other ingredients.
  • Add enough home made mayo to moisten the whole thing.
  • Stir gently.
  • Season with salt and pepper to taste.

Homemade Mayonnaise

Add to the blender:

  • 1 egg yolk
  • 2 tablespoons lemon juice
  • a dash of cayenne
  • 1/4 tsp of salt
  • 1 tsp of Dijon mustard or 1/2 tsp dry English mustard
  • Blend for a few seconds and then very slowly drizzle in 1/2 cup of olive oil, grape seed oil, or a blend of the two.  Drizzle it in a very thin stream while the blender is whirring around though the top of the blender cover. Or you can use a food processor and drizzle it in through the feeder tube. Or you can do it by hand in a bowl, with a whisk. If you do that, try to anchor the bowl by wrapping a damp towel around the base. Or get someone to help you with another set of hands to hold the bowl, or beat the eggs, or do the drizzling. Beat or blend or process until it starts to thicken up.
  • Taste for salt and add a little pepper. If it is too thin, you can add more oil, still adding it in very slowly while blending.
  • You can add fresh herbs to the mayo, a little crushed raw garlic, a little chopped poached or roasted garlic (mellower flavor), anchovies, spices, roasted peppers etc. (for cleanest flavors add just one of these other ingredients, not a combination.)

We ate this lovely egg salad with toasted Pain de Mie (or Pullman Bread) from Scratch Baking Company in South Portland, ME and the asparagus was steamed and cooled, served on the side, splashed with some lemon juice.
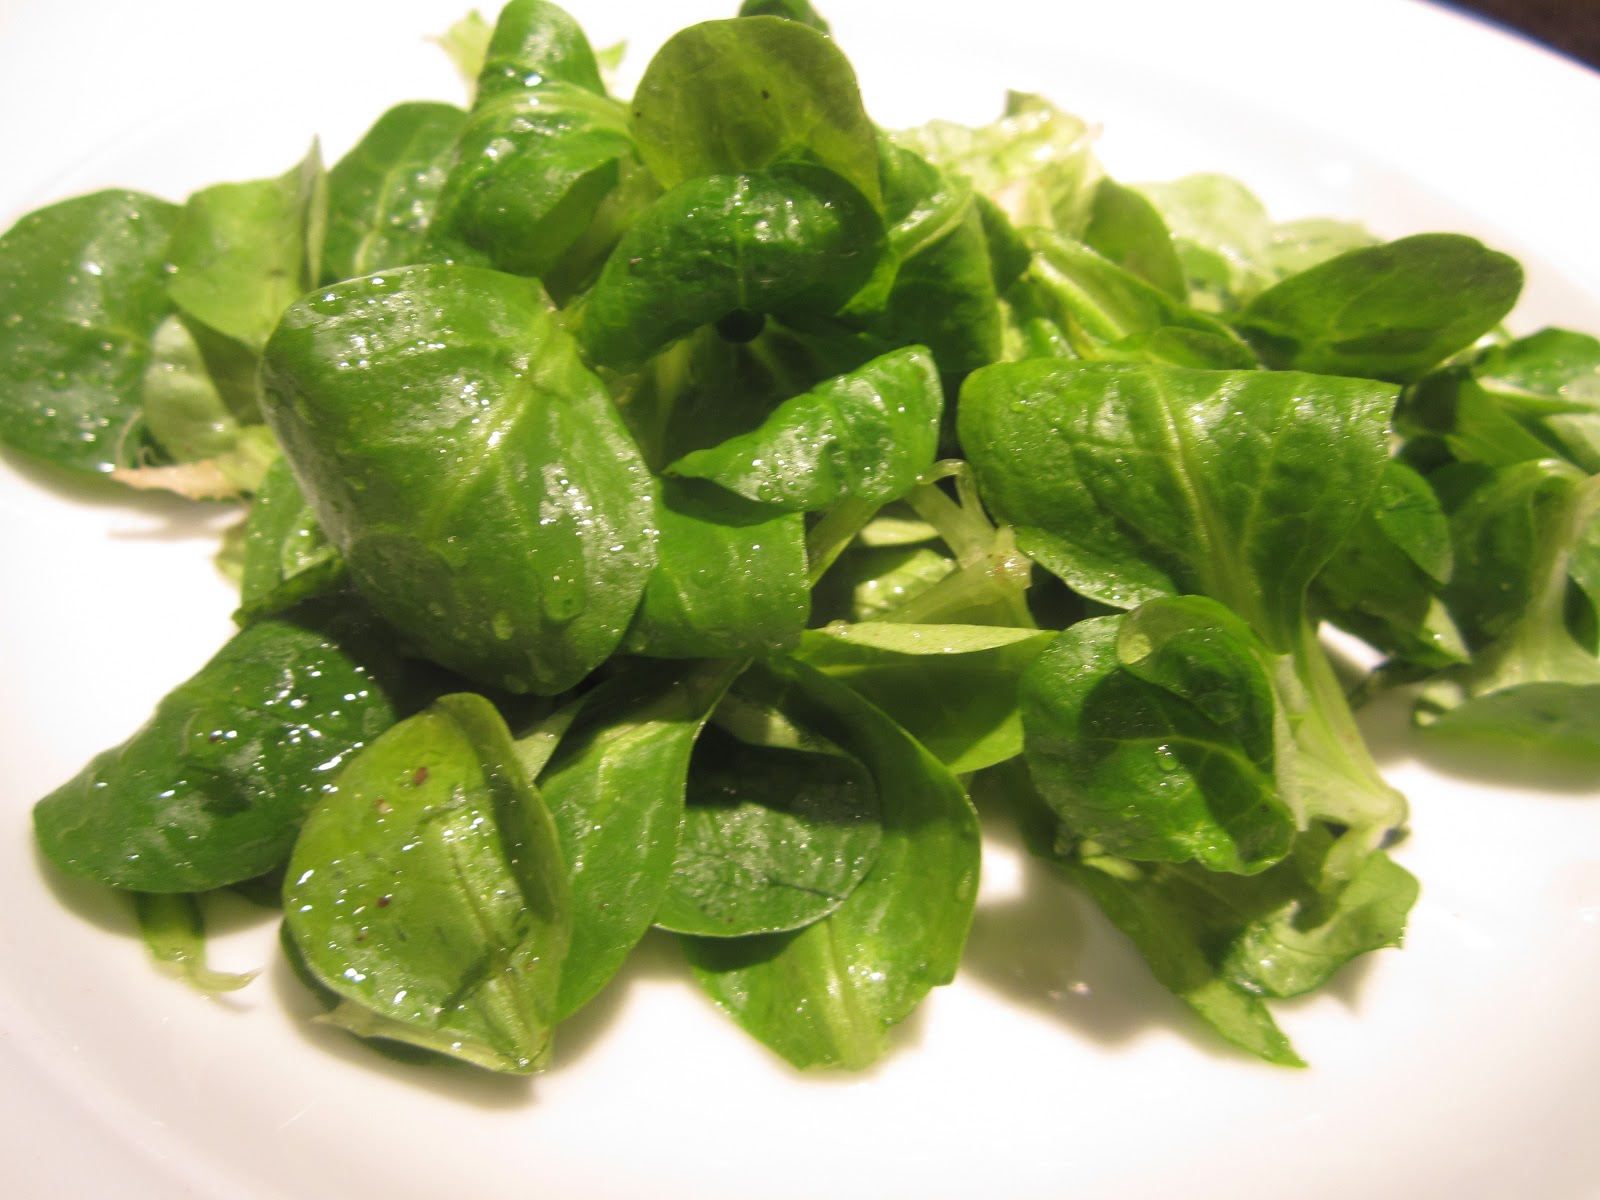
Mache Salad

Mache is also know as corn lettuce. It is a cold hardy green that germinates only in cool temperatures. We grow it in flats in the greenhouse in the winter and gorge on it from late March to late May. It is a sturdy green with a nutty flavor, and it is eaten as a whole plant, washed well under running water, and dressed lightly with hazelnut or walnut oil and a good sea salt - fleur de sel, Maldon, or sel gris. The small plants have a really interesting texture and a rich flavor that is perfect this time of year when one craves green and fresh.

To the garden, the hens, and the amazing crew at Red Wagon Plants, thanks. You make life pretty, tasty, and lovely.

-Julie


This Week in Photos: May 5, 2013

With all this sun shining lately, the plants couldn't be happier! Everything is blooming like crazy, the trees are leafing out a mile a minute, and the greenhouses are a flurry of activity. With so much going on, we have to remind ourselves to stop and smell the flowers, breathe in the spring air, and get our hands dirty in the garden. Here are a few snapshots from the last week at Red Wagon...

What's blooming in your garden?

~ Sophia

This Week in Photos: Open House 2013

We are so grateful to everyone who came out last weekend to enjoy the flowers, sunshine and fresh air inside our greenhouses. It was one of those glorious days that gave us confidence in the return of spring and reminded us how much everyone (not just us) is looking forward to it! In case you missed it, here are a few glimpses from our moment in the sun...

There's more to come! Opening day (April 19th) is right around the corner....

~ Sophia

This Week in Photos: 3.3.13

Hurrah! It's that time of year again and we're back in the greenhouses getting our hands dirty. And even though the air is filled with snowflakes outside, we'll let you in on our little secret - spring is just around the corner! Here are some of the first plants we're potting up in our cozy greenhouses.

Join us for some early plants, refreshments, and to wander our sunny greenhouses at our Open House on March 30th!

~ Sophia

January Dreaming Photo Contest

It's time to think spring and what better way than to share pictures of our gardens? We think all garden photos deserve to win, so this is not a contest in the traditional sense since we will select the winner randomly on Monday, January 31. The prize? A $20 gift certificate to be redeemed at our Hinesburg greenhouses. Send your pics to us via email (julieATredwagonplants.com) or post to our facebook page. We will publish all the photos on our website and create an album on Facebook. What could be more inspiring than thinking about what is under the snow, patiently waiting to push through. Keep warm and dream on!

Stick Season Tasks

  • Plant bulbs. Watch this video with Charlie Nardozzi if you don't know how.  Gardener's Supply in Burlington, Williston and on line, has a great selection of flowering bulbs that will wow you in the spring.

  • Mulch your perennials with leaves. No need to think of leaves as waste...they are loaded with carbon and a perfect way to add organic matter to your gardens. They will offer some winter protection too.  Here are some other leafy ideas.
  • Cut back annuals if you have not done so yet. Or leave the sturdier ones such as sunflowers and amaranths since they make lovely perches for song birds. Not everything needs to be so tidy.


  •  Build a raised bed for next year
  • Weed and cut back perennial beds.
  • About all that food you diligently canned and froze all summer - start eating it!

  • Let us know what varieties worked well for you. You can contact us through this website.
  • If you want to make a new garden for 2013, now is a great time to mark it, remove the sod, and amend with compost.
  • Turn the compost pile.


  • Clean off tools, oil them, put them away neatly, and feel good about it all.


  •  Store garlic and onions in a cool, dark, dry place.
  • Make a pot of potato leek soup.
  • Mulch your leeks and root crops, if you have some in the ground still, with straw, so that you can harvest them after frost comes.

  • Sit by the fire if you have one, light some candles if you don't, and enter the time of contemplation and restoration.


Please try this at home.

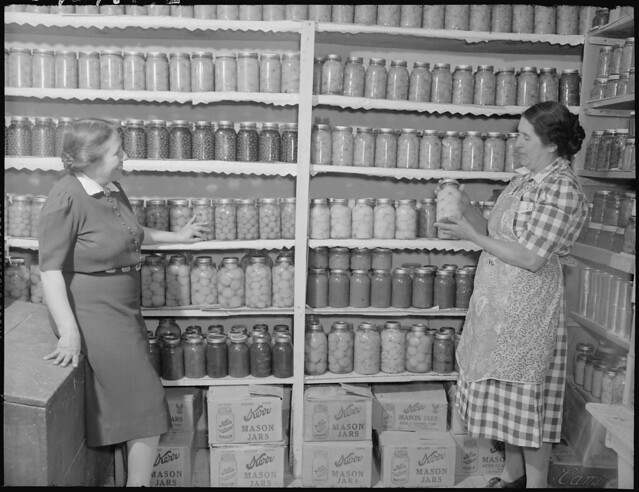
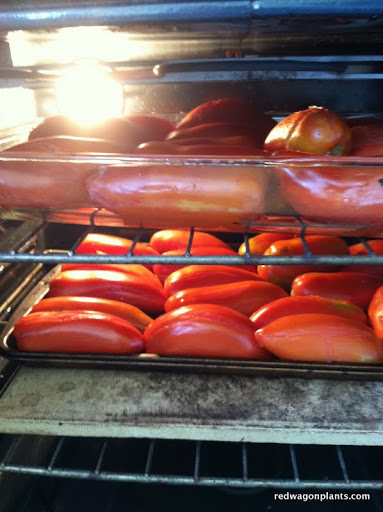
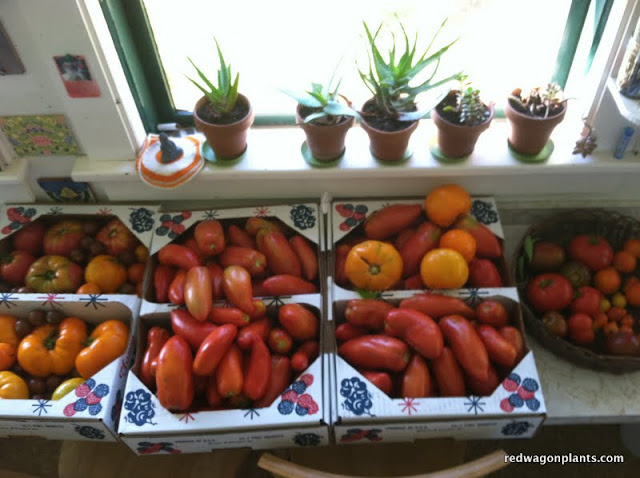
Does your counter look like this during tomato season? Do you feel pressed for time, don't want to be indoors too much with the canning pot, yet hate to see a single precious tomato go unused? Well, I can relate. I love to eat tomatoes in winter, the ones from our garden at least, but I don't love spending all that time indoors, canning and fussing. I have been trying something new this year, and I want to share it with you just because I think you will really like it.
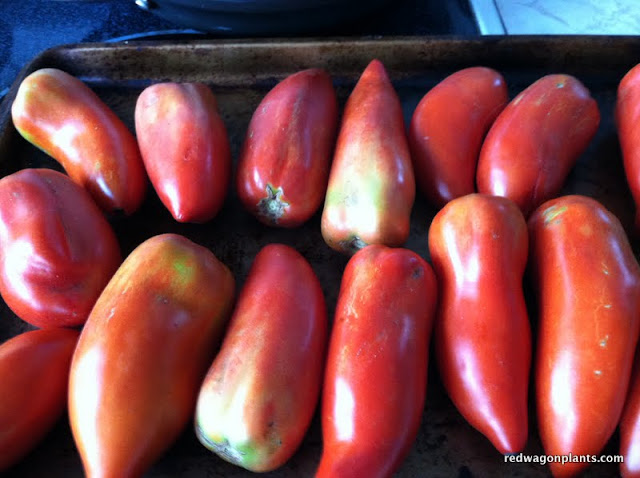
I have been roasting the tomatoes in a hot oven, peeling them, and then throwing them in ziploc bags for the freezer. This gives maximum taste for minimal work. I know you can just throw raw tomatoes in bags and throw those in the freezer, but then you are left with watery, ice shattered, flavorless blobs. I prefer to let the oven do a little work to concentrate the flavors and then have an item to pull out of the freezer that tastes special, an item that has some flavor layers already built in. I used to make this with olive oil and garlic and herbs, but realized that I can do a simpler version with naked tomatoes that is quick, easy, and lends itself well to the preserving process.

Roasting tomatoes is super easy.

You just lay out some paste tomatoes (it works with other tomatoes too, but the cooking time will be longer since they are more watery) in a single layer on a cookie sheet. Pre heat the oven to 400F.  Don't add anything - no oil, salt or anything else. We are just going for tomato flavor here. This will allow you to really customize your dish the way you want it when it is time to use the tomatoes in winter. Slide them into the hot oven. Wait 30 minutes.

After 30 minutes, take them out of the oven and flip them over. Tongs are handy for this process. If they have released a lot of water, you can drain off some of it, carefully, in the sink at this point.

Then they go back in the oven for another 30 minutes. The beauty of this recipe is that you don't have to watch over them. There is alot of what is called "passive time" in cooking and this method is chock full of passive time- I love that I can be doing other things while this is going on.

When they are done roasting, I turn off the oven, walk away and ignore them for a while until they have cooled down or I am done whatever project I started or wait until even later that night, when it is dark and the late summer sunshine is no longer tempting me out of doors. Then it is time to peel them. Just cut the tops of with a small serrated knife, and the skins just slip off in one or two quick motions. It is super simple. The fleshy, juicy, thick tomatoes have been reduced to a lovely consistency and can just go into freezer bags at this point.  I usually get two quart bags out of one cookie sheet;s worth of tomatoes.

So then what do you do with all those frozen tomatoes? Sauces, soups, stews,vegetable sautees, pizza, lasagna, and more will all benefit from these. Anytime a recipe calls for whole canned tomatoes, you can substitute these. I will be posting recipes using these tomatoes throughout the winter, so if you find yourself with a good supply and a lack of ideas of how to use them, check bag for some tips. Enjoy!


Lori and Doug's Garden, Part 3

Sophia and Lily visited Lori and Doug's garden this week to take some pictures and get an update on how all those plants are doing in their new raised beds. The garden looks beautiful, and Lori and Doug, gracious as ever, are so pleased with their abundant harvests. A few lessons have been learned along the way in this garden's history, which you can read about here and here. 

The garden is a great example of how colorful and varied a vegetable garden can be. Here an array of lettuces, marigolds, chard and kales co-mingle to create a carpet of textures, colors, and flavors. This is a perfect example of how edible gardens are also ornamental and can be featured in the center of a landscape.

Doug and Lori did a tight spacing on their potatoes at planting time, so they decided to hill with straw since there was not enough room to hill the sides of the plants with soil. This should lead to good yields, helps retain moisture and keeps disease pressure down.

They carefully stripped the plants of blossoms in the spring and are awaiting next year's harvest. By taking off the blossoms in the first year, Lori and Doug were able to help the plants concentrate their efforts on producing the lush green growth you see in the picture. A raised bed is a great way to go with strawberries - it keeps the plants under control so that they do not spread into neighboring plants, the strawberry  plants have better air circulation (therefore less disease) and it keeps the berries clean.

On a recent trip to Tuscany, Lori and Doug spied this trellising system and were able to re-create it at home. Anytime tomato plants are trellised from above, they will grow strong, tall and the fruit will be blemish free. This is the method used by greenhouse growers and in field production on small farms that really care about quality.

This small 4' x 4' bed provides plenty of space for herbs used daily in the kitchen as well as a few edible blossoms such as calendula. Lori makes a fantastic herb salt by very finely chopping sage or rosemary and mixing it with a good quality sea salt. This herb blend is great on hard boiled eggs, fish, salads, grilled meats.....pretty much anything you can think of. I felt pretty lucky when I was given a jar and have been carefully parsing it out ever since. It is also a great way to preserve herbs for winter use since the salt acts as a natural preservative.

Spaces were cleared out as crops were harvested which meant that new plantings had plenty of room to grow. The space in the back corner is being reserved for another fall planting. Lori just called today saying that she is ready to do a round of fall crops - this will include lettuces, greens, cabbage, and some cold hard herbs such as parsley, cilantro, dill. It is always a good idea to clean up gardens regularly so that old or sickly plants don't take up space that could be used for new, fresh plantings.

We just love the mixed beet plantings....the mixture of golden, cylindrical and regular beets makes for great salads.

These broccoli side shoots will keep producing into early winter. We only select varieties that produce lots of side shoots. Often one four pack is plenty to keep a small family in broccoli all summer, fall and early winter.

These peppers are great for stuffing. They have a wide, flat bottom and a large, hollow cavity. An herbed rice or a curried couscous is a lovely thing to pair with these beauties.

These are huge and lovely, and making me a bit jealous since the ones in my garden are small and not very happy.

The Benefits of Compost Tea

Before you start worrying about the fungal diseases that affect many garden crops this time of year, consider brewing up a batch of fermented compost tea. It is cheap, easy to make, and can protect your plants as well as help them out if they’re already suffering. Compost tea has been studied around the world and has been found to reduce fungal diseases by 50 to 90 percent. What do I mean by fungal diseases? These are diseases spread by spores (like microscopic seeds that germinate on leaf surfaces) and are encouraged by warm, wet conditions. This is why plants that have smooth or waxy leaves are less likely to be infected than plants that have textured or hairy leaves (which hold water). Common fungal diseases include:

  • Powdery mildew (white spots on cucumbers and winter/summer squash)
  • Early blight (brown circular spots with concentric rings on tomato and potato)
  • Late blight (irregular brown to black spots with dark outlines and fuzzy undersides on tomato and potato in late July)
  • Septoria leaf spot (small dark brown spots sprinkled over yellowing leaves of tomato and potato)

While not fully understood, compost tea is believed to be beneficial for several reasons. Fermentation creates a healthy community of fungi and bacteria, which may outcompete fungal disease and help support a plant’s natural defenses.  It also contains nutrients, which can be absorbed through foliage.

To make compost tea, mix one part mature compost that contains manure with five parts water. Allow the mixture to sit in a shady place for two weeks (it may become smelly!) Filter out large particles through cheesecloth, then spray on tops and bottoms of leaves every two weeks. The mixture will help reduce spreading of spores by infected plants, and can prevent infection of healthy plants.

- Adapted from The Gardener’s Guide to Plant Diseases, by Barbara Pleasant

Jo Ann Gardner comes for a visit

From Julie.... There are a few garden and farm writers out there that move me to no end. I have had a fascination with homesteading literature since I was a little girl and still to this day I love to pour over books, catalogs, websites and blogs that have to do with growing food, living off the land, making do with things that are around the house, etc. Within this genre, one of my absolute favorite writers is Jo Ann Gardner.

She has written eloquently about the plants she loves for decades and I have poured over some of these books countless times. She and her husband were once back to the landers in Nova Scotia, far off the beaten path, and were able to make a livelihood for themselves in a very short growing season and on very challenging soils. Her writing reads like a series of love letters to a set of handsome, rugged plants that got them through tough times. I am absolutely honored to have Jo Ann visit our greenhouses this Saturday and to share some of her plant knowledge with us. She now lives across the lake, in Essex, NY and is active in gardening efforts at home and at a local senior center. Her talk on Saturday will focus on how to use herbs in pots and containers around the home. I am sure she will bring along her wit, thrift, and cleverness and we will all be a little richer for it.

Brown Dog Books  in Hinesburg is carrying her books, and they will set up a table at our greenhouses on Saturday for those of you who may wish to purchase one or two. But be warned - Jo Ann's writing will fuel the fires of any gardening addiction. Also present on Saturday will be Jess Bongard, of Sweet Lime Cooking Studio. She will be bringing us some herb treats to sip and snack post-workshop. Coincidentally, Jess is teaching an herb class in her home kitchen on Sunday. You can read about it here. A group of us are going from Red Wagon, making it a party, I am sure.

I like June. The bulk of the spring planting is done. The porch is swept off, and it is just the right time to sip a lemon verbena iced tea, make a lovage and butter sandwich, and gaze lovingly at all the herb pots surrounding the patio. I hope to see some of you this Saturday. Psst...there are only a few slots left, so please call or email to register.

This Week in Photos 6.13.12

There's been no shortage of excitement this week! The sweet potato slip sale was a great success (and we still have some left, if you missed out). Saturday was extra amazing because of the delicious treats whipped up by Jessica Bongard of Sweet Lime Cooking Studio...seriously, this girl rocks, and if you haven't checked out her cooking classes, you should! We're also having a sale: hanging baskets are buy one, get one 50% off, and shade perennials are buy one, get one free. So come get 'em before they're gone!

Lori and Doug's Garden: Planting

Meet Lori and Doug, two of our favorite long-time customers and friends. Our skillful and talented guy, Eric Denice,  built them some beautiful raised beds and they've been busy planting.  Check out what's sprouting in their garden. These photos are from a few weeks ago, and we are updating them as we find time....so stay tuned to see more of this great progress.

I think some incredible meals will be coming out of this garden and kitchen this summer. Keep checking in to see the changes!

Lori and Doug's Garden: Construction

Meet Lori and Doug, two of our longtime customers and friends. Last year, they visited the greenhouses repeatedly, making large purchases of vegetable plants, it seemed every day. I finally asked them if they were starting a small farm, and they admitted that they were having some problems. Apparently, everything kept turning black and dying. This does not usually happen to our plants, so I offered to visit their garden, which happens to be on the way home, and they happen to have very nice wine to offer, so it seemed like a win-win. Lo and behold, their beautiful garden site was also the low lying spot where their entire property drains. The plants were sitting in standing water (remember all the rain last year?) and were drowning. I advised them to just start over, sad as that is, because there was just no way to grow in that site.

They asked us to help them build a big beautiful raised bed garden, so we set our expert carpenter and all around handyman, Eric Denice, to the task. Here's what they created together.

In the fall, Lori and Doug planted garlic, which is now growing beautifully, and each week, they come in to let us know what they are up to and we help them pick out plants that are appropriate for the weather. It has been such a fun project and we are grateful to Lori and Doug for including us!

Please keep checking back for updates as we chronicle the progress of this great garden and its people.

New North End Plant Sale

Come to the

3rd Annual New North End Plant Sale

at Bibens Ace Hardware

Ethan Allen Shopping Center, North Ave.

Burlington

IMG_0545
IMG_0545

Saturday, May 19th, 2012

9 am to 2 pm

The proceeds from this sale help scholarship applicants of the Burlington Area Community Gardens secure a garden plot for the season. Come and help out your neighborhood gardeners!

For more information, please call Dan Cahill at Burlington Parks and Recreation, 802-863-0420

The sale is a partnership of Red Wagon Plants, Bibens Ace Hardware, and Burlington Parks and Recreation

This Week in Photos 5.11.12

By Sophia

This mother's day is especially important to me, because for the first time in four years I actually get to be in the same time zone with my mom! We get to celebrate our birthdays and holidays together this year, to make dinner dates and plan our gardens and do all the things we missed so much, and I feel so grateful to have her back in Vermont. Sometimes, just like the Joni Mitchell song, we don't realize how important things (or people) are to us until we don't have them around. So here's to the time we get to spend with our moms, and the chance to say thanks for their boundless love and for being just amazing.

This year we're pulling out all the stops to spoil the moms in our world - with a new play area to entertain the kids, with gooseberries, currants, hazelnuts, and quince (plus all the traditional favorites), with rose bushes and strawberry baskets, herb planters and gift cards, three new greenhouses, and too many flowers and vegetables to name. It is truly a gift to work in a place so filled with beauty and life, and to see people enjoying it is the icing on the cake.

Happy Mother's Day!

Home orchard, here I come.

Last Saturday, we were lucky to have a visit from Charlie Nardozzi, garden educator, author, TV and radio personality, and garden coach. He provided us with two hours of entertaining and information packed advice on growing fruit at home - a project which can feel like a daunting commitment, but which he explained so clearly, that it felt like a task we must all embrace...right now. I have to admit, I have been living in the same house for 6 years and have yet to plant much in terms of fruit trees. I keep studying my property and imagining where the trees would go, but every year, another chance passes and my trepidation leaves me fruitless yet again. I have planted a few blueberry bushes and raspberries and currants far from the house, but no trees save for one orphaned plum tree a couple of years ago. Growing fruit trees always seemed like more work and maintenance than I have time for, but after learning some of Charlie's simple strategies, I feel armed and prepared. Here are a few of the general tips Charlie shared with us.....

  • Trees are grafted, unless you dig them up out of the woods. Which is not a good idea, since you would be getting something not bred for fruit production and possibly disease laden. Trees are grafted in order to provide strong root stock in combination with a "top" that is bred primarily for eating quality. In addition, apple trees are often grafted onto a "dwarfing" root stock which will keep the tree from towering above you, fruit out of reach.  When planting, look for what is called the "graft union" - it is a slight bulge at the base of the trunk where the root stock and the top meet. This union should be about 1" above the soil line once planted. If you plant it too deeply, you may trigger the root stock to take over the top growth and this would not provide you with the best eating fruit.
  • At planting time, use only the native soil in the planting hole. Dig the hole so that it is 2 to 3 times wider than the tree's container or root ball. Do not go deeper than the container or you risk planting the tree too deeply.  If you add compost to the planting hole, the roots will never have to reach out and search for food in the native soil and the tree's root system will never develop fully.
  • When purchasing a tree, look for even lateral branching (called "scaffolding").
  • The first two years of a fruit tree's life are the non-bearing years. It is important that the tree puts its energy into being strong and vigorous, not into making fruit. So, sadly enough, you must pick off the blossoms so that fruit does not form.  This difficult task will reward you with bigger and better fruit on a healthy tree in years to come. After Charlie's talk, I dutifully went home and stripped my plum tree of its recently formed flowers.
  • Spacing of trees is equal to their height. In other words, if a tree is going to be 15' tall, you need to plant it 15' from its closest neighbor.
  • Pitted fruits like plums, cherries, peaches, and apricots do not do as well on clay as apples and pears do.  If you are like me, and live in a clay pit, look for the best drained site and consider digging some trenches to direct the water away from the orchard.
  • Amend the soil by layering in compost and other nutrients on the soil surface (not right up against the trunk though) after planting. This should include compost, some additional nutrients based on soil test results, woodchips from hard woods (which promote beneficial fungal activity), and a little woodash (only about 1 cup per tree).  Vermont Compost Company's Perennial Blend is a perfect material for mulching around the base of the fruit trees. It includes compost, micro-nutrients, macro-nutrients (NPK), and an extra shot of bark, which is high in lignans and which promote the beneficial fungal activity trees love.
  • A north facing slope is the best spot for a home orchard - it heats up a little later in the spring and keeps the trees a dormant a little longer. This delays bud formation which lowers the risk of a frost zapping those early flowers.  A north facing slope also has good air circulation and frost tends to blow away before settling into a valley or dip.
  • Fruit trees are best planted in pairs, and their planting partner should be a different variety or cultivar. This diversity leads to better pollination which equals more fruit formation.  For example, a Liberty apple, should be planted near a Honeycrisp, or a  Parker pear should be planted with a Summercrisp pear.

I think I will try a few cherry trees and  pears  this year. I have a spot picked out, on the north facing slope outside our kitchen window. And maybe once those are in, I will start to imagine some blueberries and raspberries nearby....closer to the house than the ones I planted when we first moved here.  One thing I am glad about....my years of procrastination with the back yard means that I have a blank slate and the home orchard can be very close to the house; it will be landscape and larder, all in one.


This Week in Photos 4.23.12

It always feels like there is a huge buildup to opening our retail area, and it's so satisfying to see it finally being enjoyed again. Our amazing staff has been working so hard and has gotten us off to a great start! There are lots of new additions to retail this year - there are three new greenhouses open to the public, Eric is creating a cozy new area complete with benches, a sand pile for kids and raised demonstration beds, and we have lots of new trees and shrubs for turning your yard into paradise. The first step to creating a cozy outdoor space is to enclose it. Our quick and skillful jack-of-all-trades, Eric, is building us a simple and beautiful fence to make the space more comfortable.