Winter

2017-01-20 16.36.25-1.jpg

Gardening is a good way to stay on track, to remember what matters most. As Ralph Waldo Emerson wrote in his journal

I have confidence in the laws of morals as of botany. I have planted maize in my field every June for seventeen years and I never knew it to come up strychnine. My parsley, beet, turnip, carrot, buck-thorn, chestnut, acorn, are as sure. I believe that justice produces justice, and injustice injustice. 

I came across that citation while reading Mary Oliver's newest book of essays, Upstream. Like many of you,  I have been looking for order and calm lately. Her writing always hits the spot.  If gardening is a place of integrity, as in, "what you do is what you get", how do we recreate that in winter, when our gardens are frozen and under snow? I visited a friend this weekend who has a little plant corner in her kitchen. Two small seats and a few tables arranged around and in front of the seats that are covered in dozens of plants: a fig tree, a robust amaryllis, orchids, poinsettias, and more greet her each morning when she has her coffee. It is a charming and soothing place, where thoughts can wander and creativity can flourish. I am trying to recreate that in my house. Maybe you are too. 

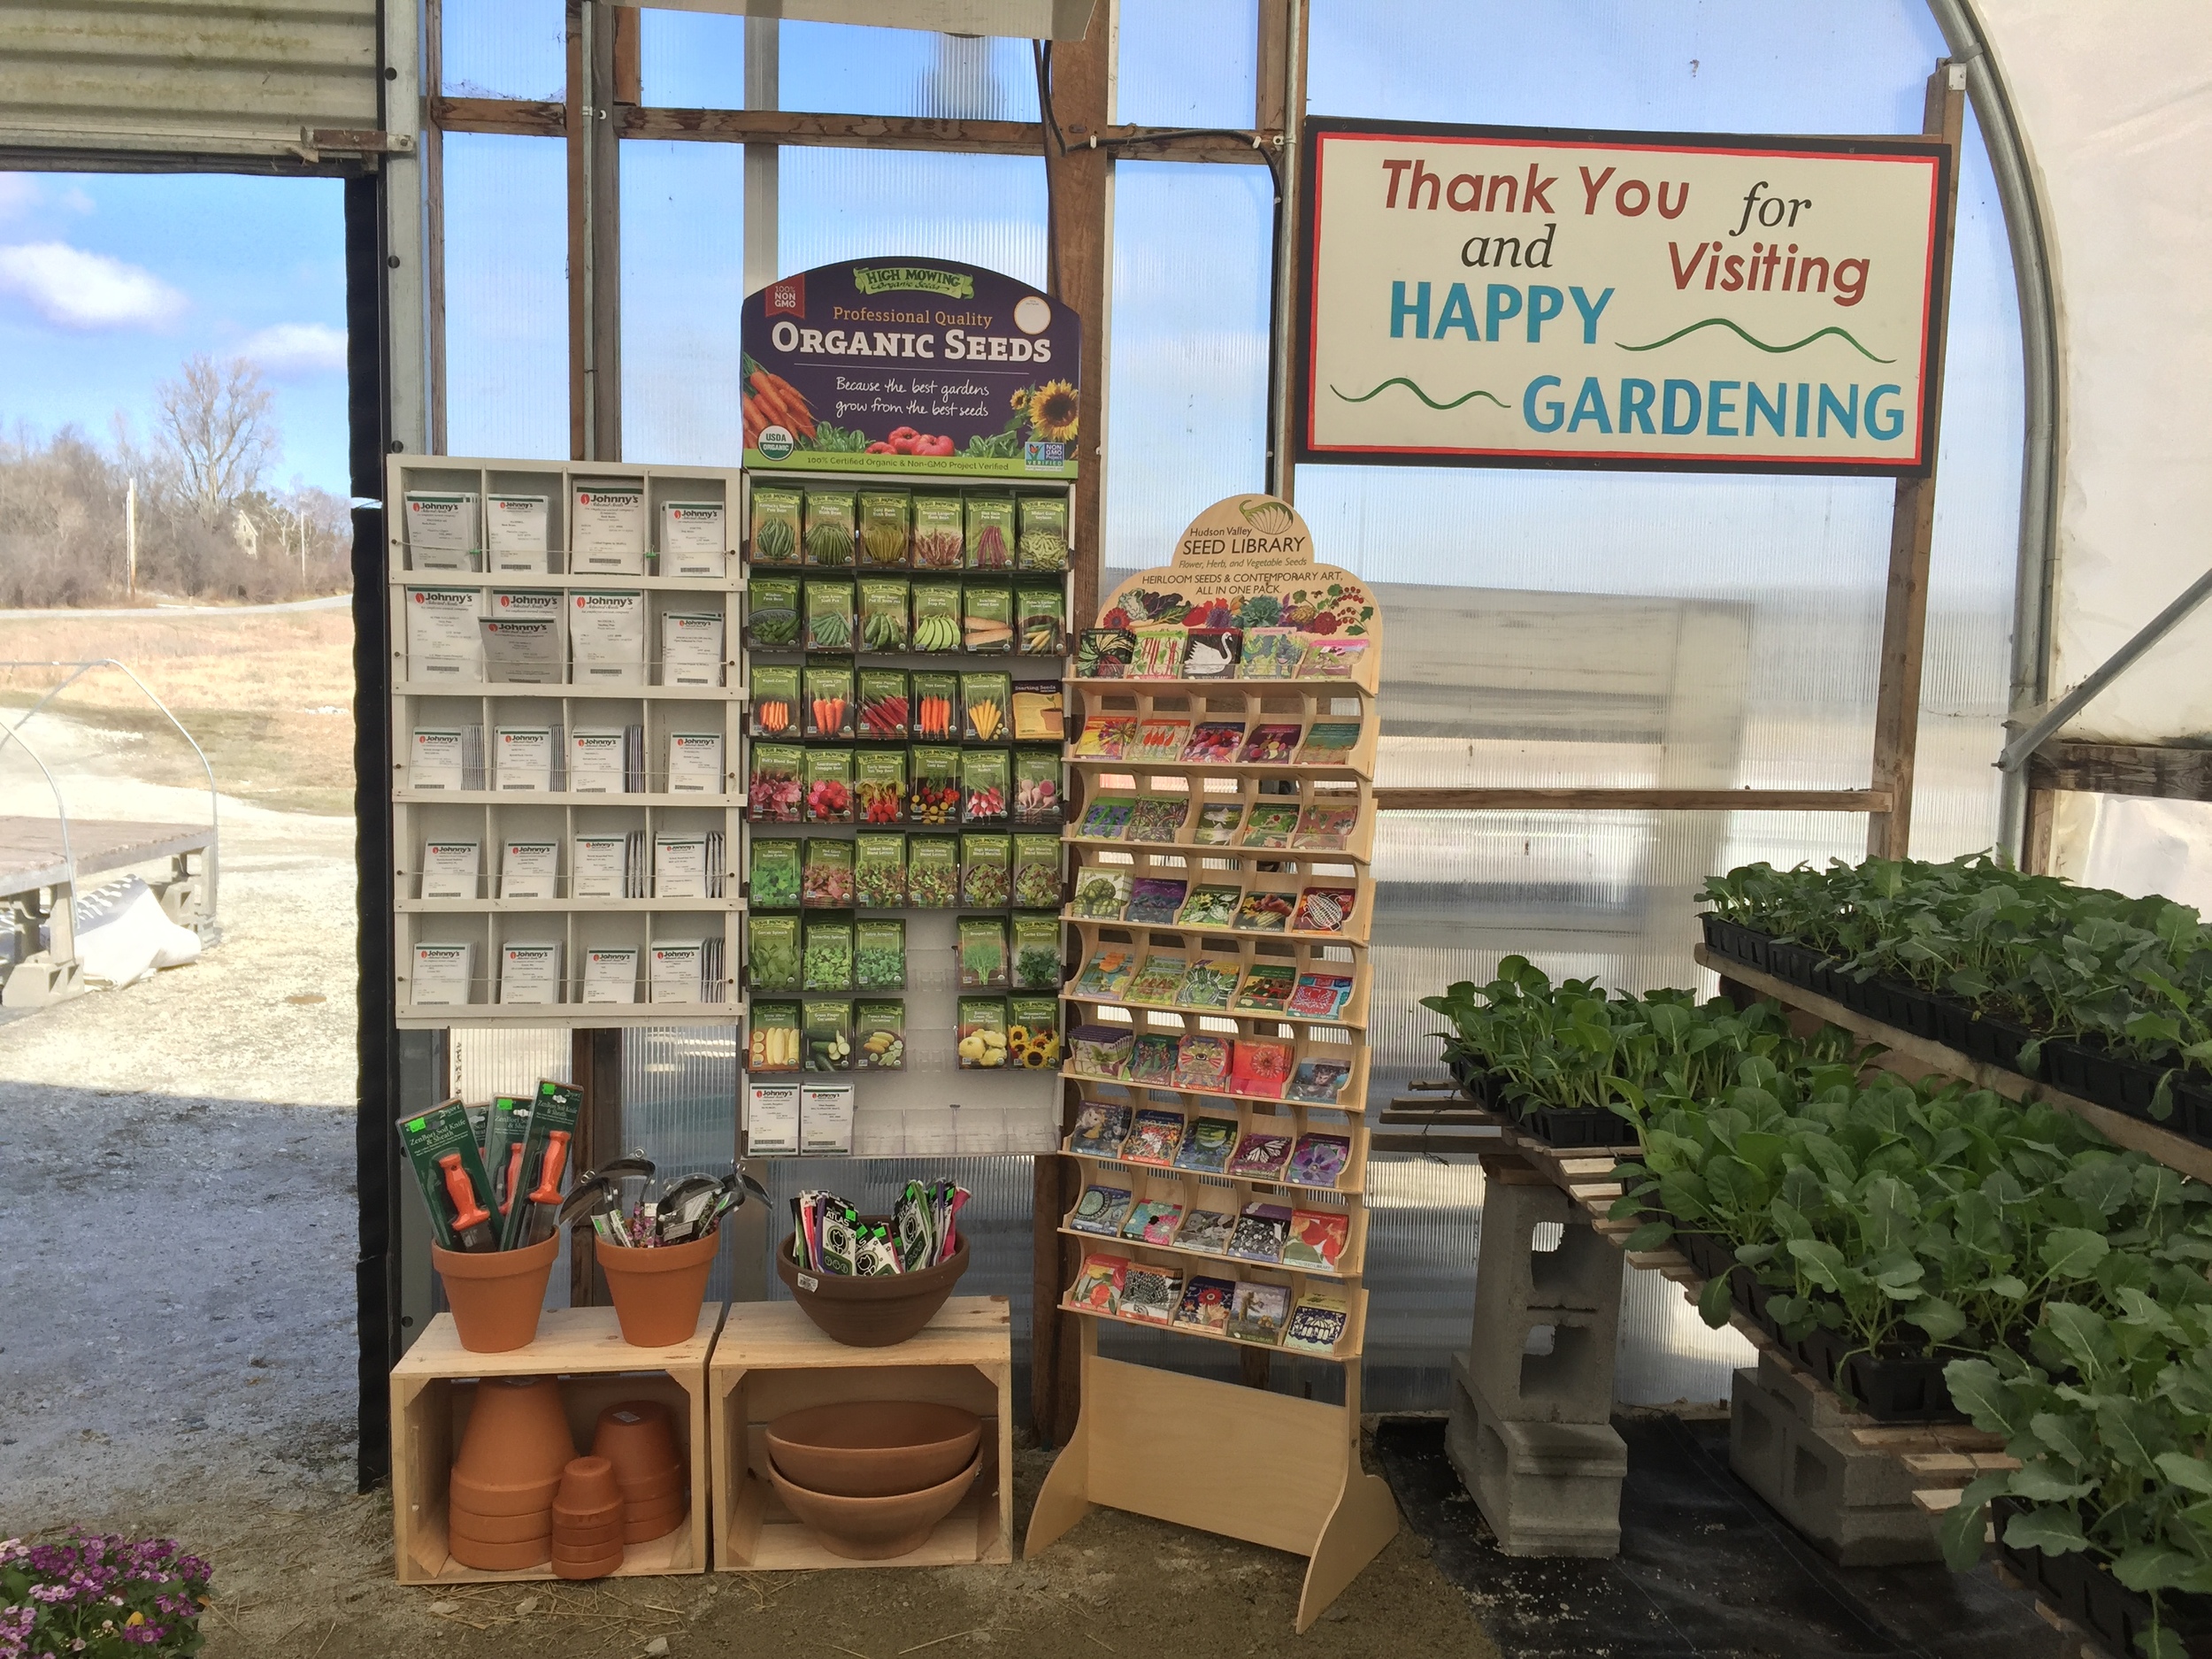
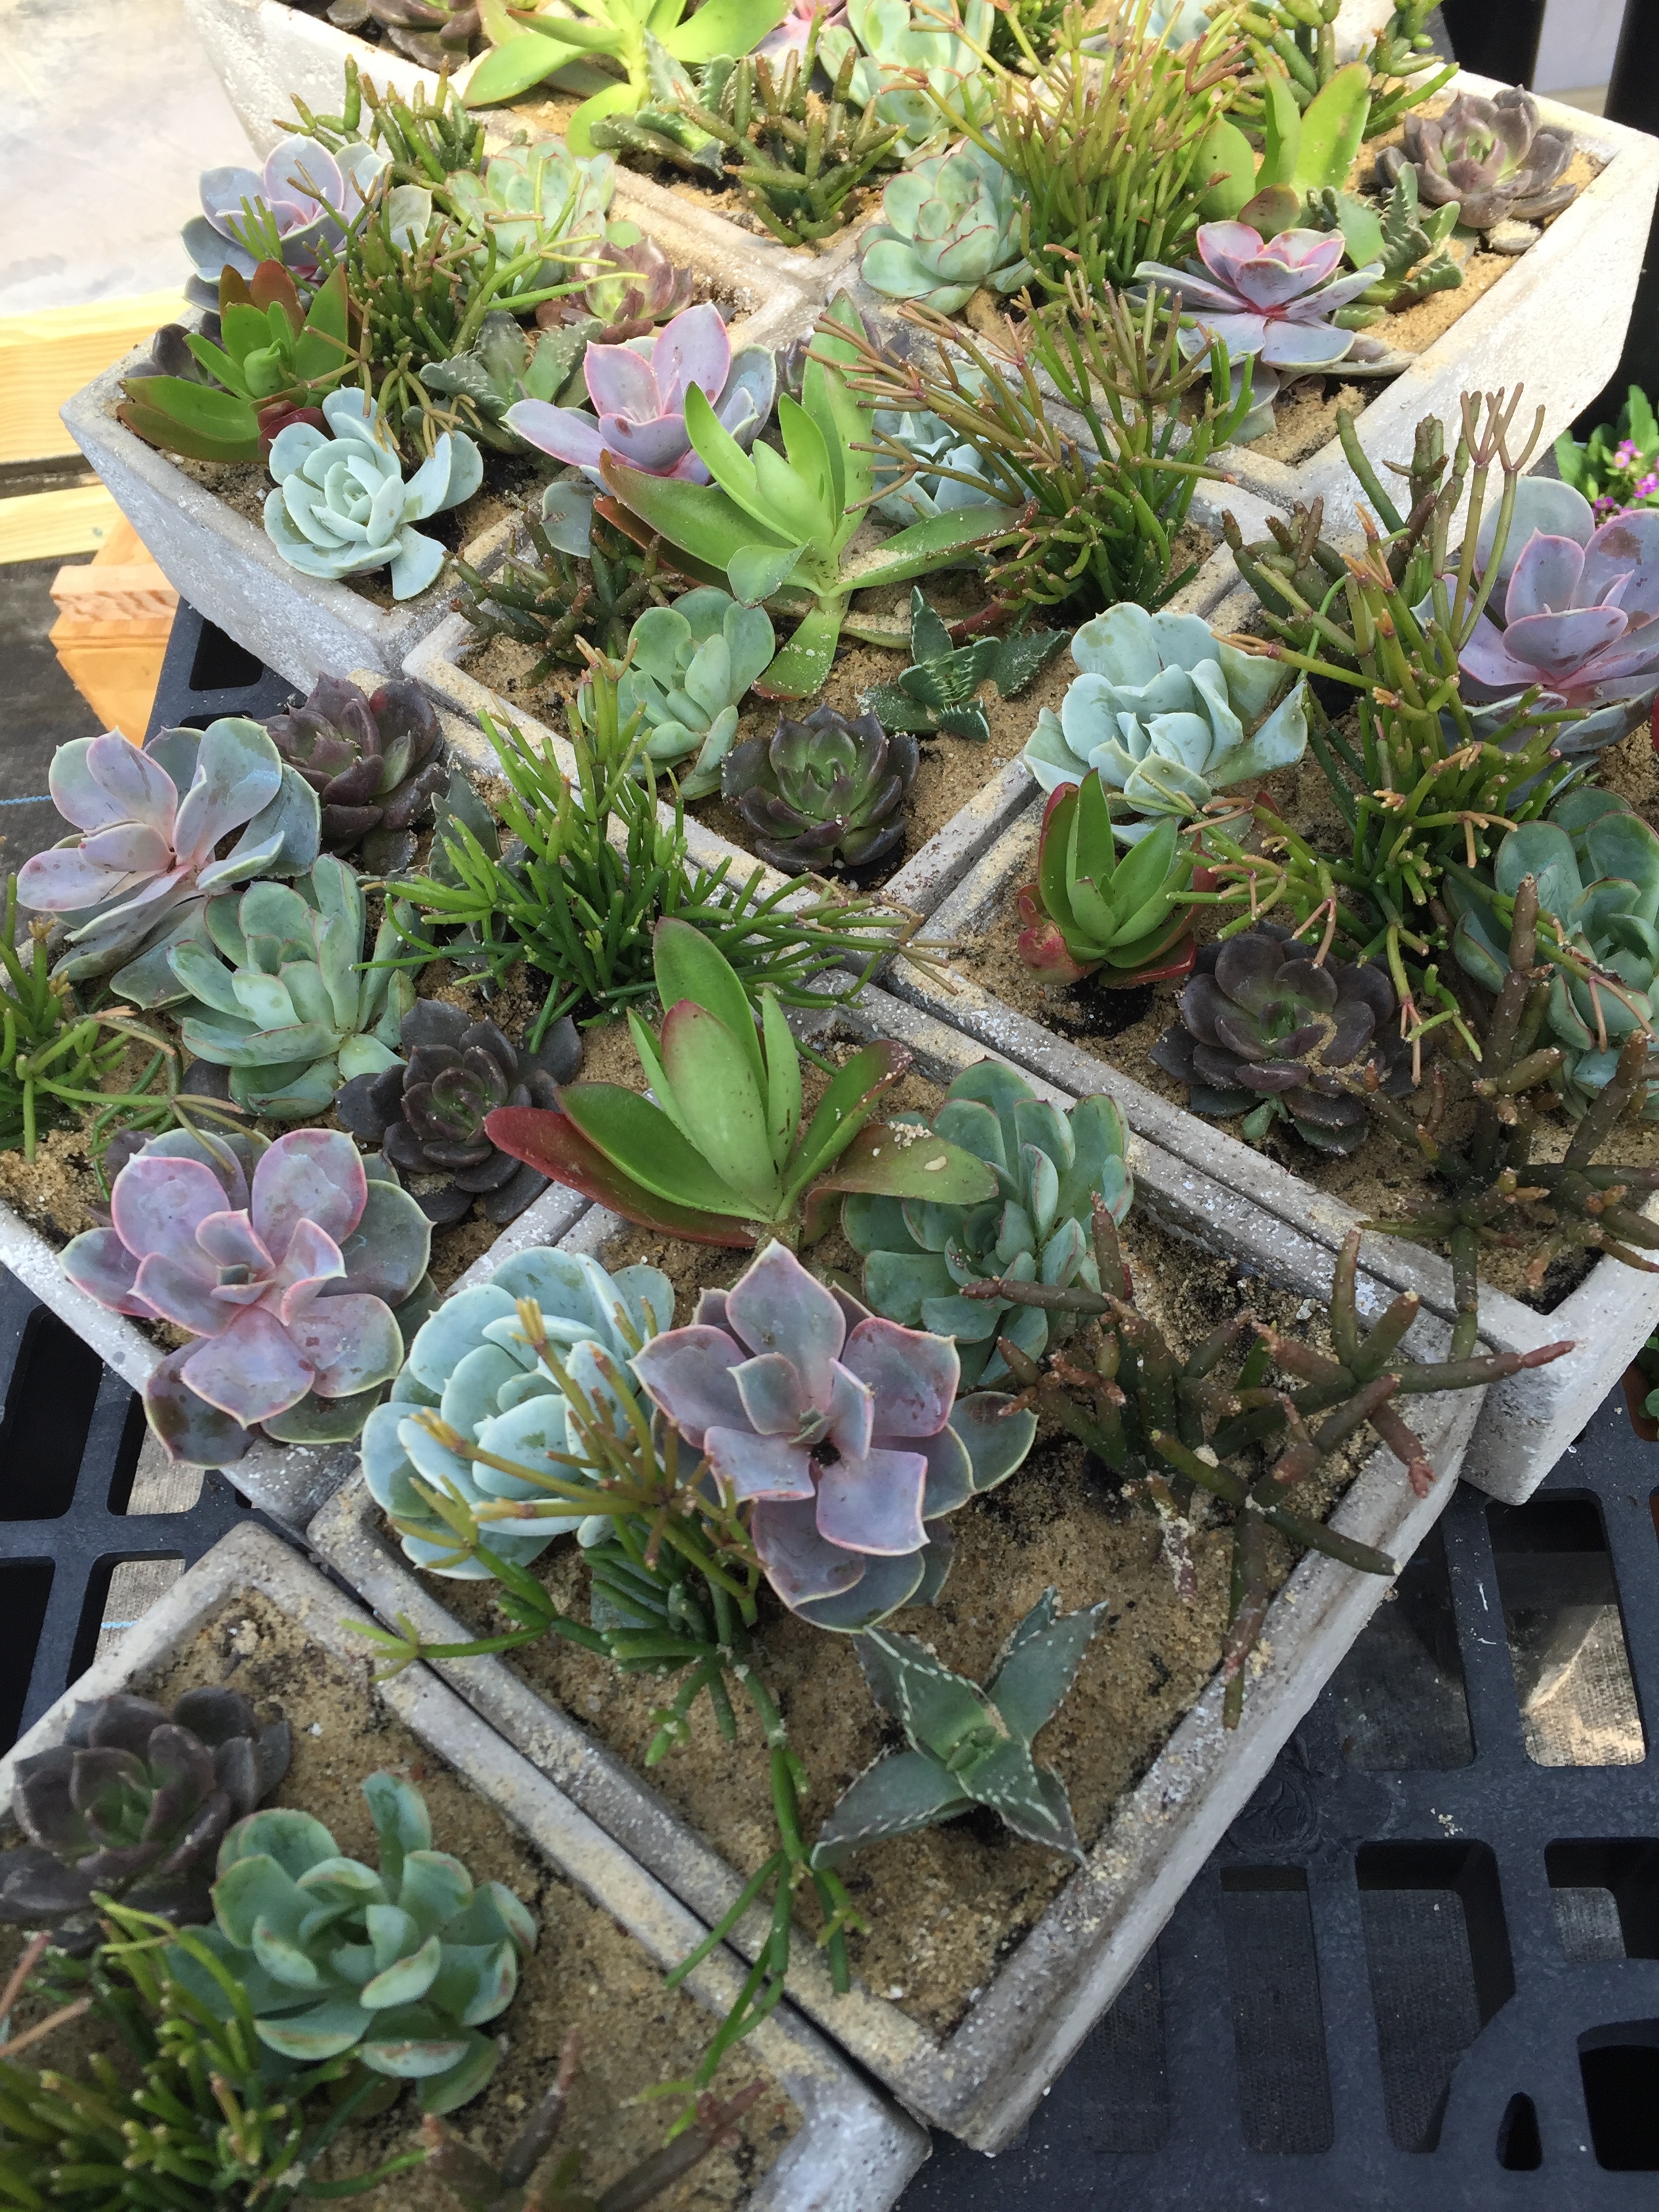
Winter is a time when ideas foment and form, taking shape in the spaces opened by rest and restoration. It is the perfect time to plan the garden, to make lists, to revisit the names of favorite plants and secure their hold in the future garden of your imagination. I hope you are pouring over catalogs as we have been. A few of our favorites: Johnny's Selected Seeds, High Mowing Seeds, Select Seeds (for unusual annuals), Seed Savers' Exchange for heirloom vegetables, Native Seeds/SEARCH, and many more. We love providing our customers with new varieties to try each year; many of them are very old varieties, but they are new to us. We love to hear suggestion too, so please let us know if there is anything you would like to see us grow. 

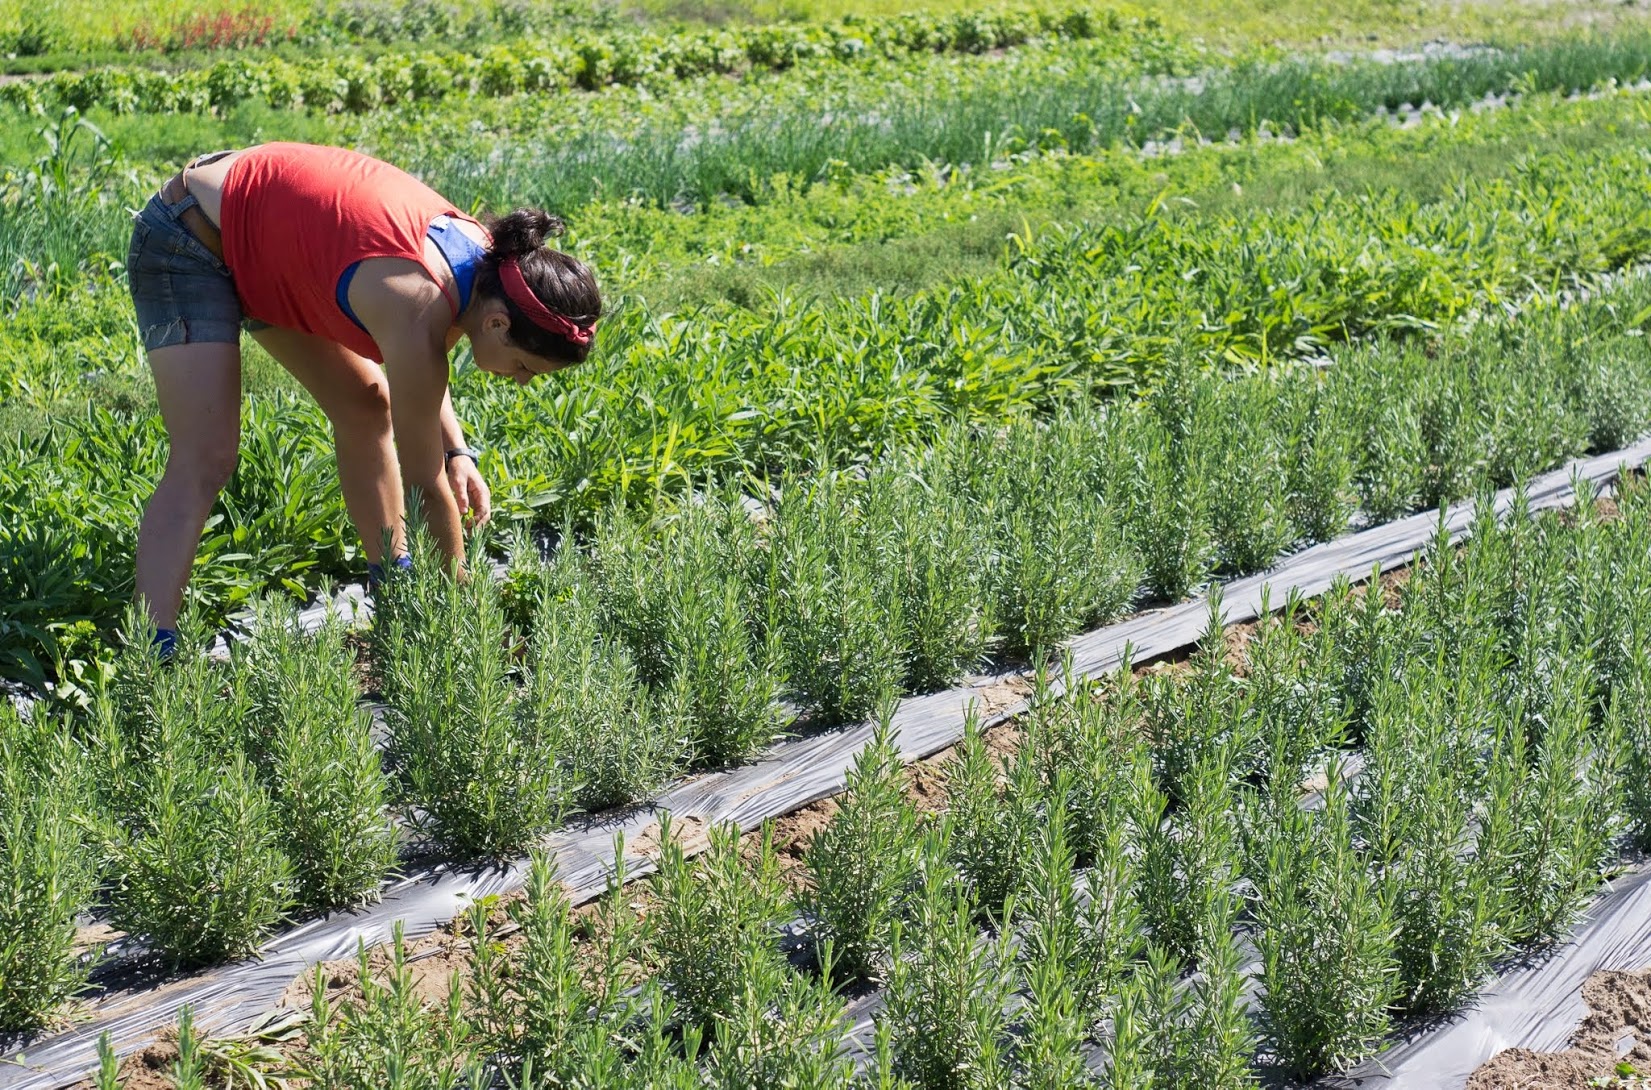
Another way I like to bring the garden inside for winter is with dried herbs.  Dried peppermint, steeped for a few minutes, is just the right thing most evenings. Lemon balm, lemon verbena, tulsi, anise hyssop, bronze leaf fennel, and nettles dried and stored in jars or paper bags are a nice addition to the pantry. They are easy to grow in the garden or in pots, and can be dried by hanging in a warm, dark, airy place like an attic or barn.  I also use dried herbs from the garden in all kinds of soups, stews, roasted meats and roasted veggies. I harvest big branches of sage, thyme, rosemary and oregano in the fall, put them in a basket, and just leave them on the counter, replenishing from a bigger stash that is stored in paper bags to stay out of the sun. 

Here are a few of our  favorite recipes this time of year that use up some of those dried herbs:

Braised Turnips with Thyme

Chicken Broth, Parsley Salad, and Reconstructed Soup

Black Bean and Butternut Squash Chili

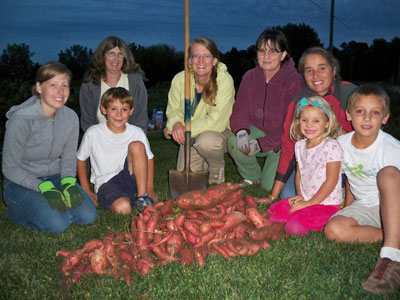
Cooking slow, flavorful meals is just part of the garden's contribution to these dark days.  This year, it all feels extra important to find time to recharge our batteries and keep clear sight of our community and values. Gardening can be civic in nature. People grow gardens for all kinds of reasons - to beautify their home and neighborhood, to feed their family healthy food, to donate to food pantries, to stay active, to stay connected to other gardeners, to teach their kids where food comes from. They are all good reasons. Whenever I travel to a city or town, I try to find a community garden to walk through, exploring the patchwork quilt of living plants and people. Community gardening is the perfect expression of our pluralistic society. We can see garden styles from all over the world in one tiny place. We can see people sharing food, land and kind words. If I had to pick one place that demonstrates, over and over, that this experiment of democracy can work, it would easily be the urban community garden. If you are a suburban or rural gardener who does not need to join a community garden, see if you can take the time this summer to walk through one of Burlington's (or Montreal's if you are headed north) vibrant community gardens. If you are already involved in community gardening, I hope you feel a renewed appreciation for all it represents.  Enjoy each other.  

And if you would like to contribute or find out more about community gardening in Burlington, please contact Vermont Community Garden Network, New Farms for New Americans or Burlington Area Community Gardens. 

French Connection

I recently spent 9 days in France, visiting family. Highlights of the trip - eating cheese and visiting some beautiful grocery stores. My sister lives in Haute Savoie, which is a region tucked between Lac Lehman (the lake that separates parts of France and Switzerland) and the French Alps. It is a beautiful place, a little like Vermont in that there are mountains and a lake, but the mountains are huge and breath taking, dominating every cloudless day with punctuation marks on the horizon that command attention. 

My brother-in-law, sister and niece are opening a cozy little restaurant in their town of Thonon-les-Bains, and I had a chance to visit the week before they officially open.  Running restaurant-related errands sent us to some gorgeous grocery stores and I just have to share a few pictures with you. Produce, in France, is treated like semi-precious stones. Vegetables are grown with strict standards, they are handled carefully during harvest and post-harvest wash, and are displayed lovingly. I found some inspiration here, and it will make the winter that much shorter. 

Herbs for November Eating, A Nod to Politics, and Finding Solace.

herbs 2016.JPG

About four years ago, we added a new activity to Red Wagon Plants, growing herbs for grocery stores and a couple of distributors and restaurants. We called it "Lady Farm" amongst ourselves because we wanted to debunk some of the stereotypes of local farming and also because we were (and are) all women running it. The "Lady Farm" name has stuck internally, but our herbs are sold under the "Red Wagon Herbs" brand. Today, while harvesting with Samantha, Sarah, and Lily, it occurred to me that while I may still be shedding a tear or two about the election, I am really proud that we have been able to start this venture and keep expanding it each year.  Our "Lady Farm" involves growing crops that are not heavy to lift, most of the tools and deliveries fit handily in the back of my car, and there is very little machinery required. While I know all of this plays into gender stereotypes, I am happy to have a farm activity that I can do into my dotage, and that each day of harvest is an immersion into aromatherapy. And frankly, we know we are not hurting anyone and we are maybe even bringing a little joy to someone's kitchen. While we haven't achieved Global Matriarchy yet, we have settled into a nice groove with Lady Farm, and for that I am grateful. 

Here are a few things I like to do with herbs around this time of year....

Herb Salts   Grind herb leaves in a mortar and pestle with coarse sea salt. Pour into cute jars, make a tag or label, and bravo to you making a perfect little hostess gift.  Herbs to try: rosemary, thyme, sage, savory, and lavender. Try just doing one herb at a time, and if you do a mix, stick to classic combinations.  Use herb salts on steamed or braised vegetables, any grain or potato dish, roasted meats, poached fish. Pretty much anywhere. Even to garnish a dressed green salad. 

Herb Butter Let a stick of butter come to room temperature until slightly softened. Finely chop parsley or sage or rosemary or thyme. Mash the finely chopped herbs into the butter, add a few pinches of salt, and a teaspoon or so of lemon zest. Scoop into a dish, cover and refrigerate; or roll into a log with plastic wrap and freeze.  I like to slather herb butter onto cooked winter squash, or finish a pasta dish with it, or toss with hot rice, or add to a baked potato, or top a piece of fish with it right before sending it under the broiler, or elevate the humble steamed vegetable. Herb butter is a great thing to have on hand. You can make it in bigger batches, and pull out the frozen log as needed, just slicing a piece off as you go. 

Herb Stock When making any kind of broth or stock (chicken, beef, vegetable), I always add handfuls of herbs for added flavor and depth. It is okay to leave the herbs in there for hours, they won't be too strong. Your whole house will smell divine and it is a great way to use the stems and stalks that might otherwise get discarded. 

Roasted Vegetables with sage, thyme, and rosemary. I drizzle olive oil, sprinkle sea salt, and crumble dried rosemary, sage, and thyme over carrots, parsnips, squash, turnips, and onions that are slated to roast at about 400F for 45 minutes. This is the easiest fall and winter side dish. And nice enough for the holiday table. 

Herbal Face Steam Try placing a few sprigs of sage or rosemary in a large bowl, fill with a quart of two of boiling water, and sit with your face above the bowl,  a towel over your head.  This is a great way to clean your pores, clear your sinuses and lift your spirits. 

Herb Bouquets Leave herbs in a small vase with about an inch or two of water on your kitchen counter. They smell great, and will be a visual reminder to use your herbs. Do not let them linger and wither in the fridge, they deserve a seat at the table. 


The Fall Garden

It is early August, and I am more excited than ever to get in the garden. Why? Because this is just the right time to spend a quick 15 to 30 minutes planting a few things that will feed you in September, October, November, and even December. We have all the plants and seeds you need to make that happen in a way that will feel really good during those cool autumn days. Here is a quick guide for the fall vegetable garden. You can also sign up for our fall gardening workshop described below if you are looking for a little more guidance. 

Spinach - you can plant either seeds or plants up until early September. Around September 10th, a row of seeds can go in the ground that you will harvest in early spring. The seeds will germinate this fall, and grow a bit, but don't harvest them. Just cover them with some straw in December, uncover them in early April, and the sweetest spinach awaits you. It is called "Overwintered Spinach". You've probably seen it in local food stores in early spring and wondered how it can be so sweet. The trick is cold weather.


Lettuce and arugula- plants can go in the ground until mid-September or so. Really. That means you have easily another 6 weeks to keep planting fresh greens for your salads. And another 3 months or more to continually harvest those greens. Seeds can go in the ground until early September / late August. 

Scallions - plants can go in the ground until early September.


Beets - you have another 3 weeks or so to transplant beets and another 10 days or so to sow them from seeds. 

Boc Choi and Napa Cabbage - transplant now, or as late as early September.


Broccoli - transplant anytime between now and late August (really). This will give you one big head per plant and tons of side shoots that you can snap off and throw into the wok or pan well into December.

Kale and Chard - plants can go in the ground until 3rd week of August or so. They will grow well in the fall, and kale can last into December easily (it will even come back in the spring if we have a mild winter again, but then it will go to seed May 2017 or so). Chard can only take a light frost, so it won't last through December, but it is nice to have a fresh patch of it for freezing and fall dinners. You can read about my chard gratin here.

Fennel - this is another cold hardy plant that you can transplant through August and into early September. 

Radicchio, escarole, frisee - these bitter greens are very rugged and do quite well in the cold. They like to be planted by the end of August for October and November harvests. They make a perfect autumn salad with fresh pears, a nice Alpine cheese like the Tomme at our next door neighbor's Family Cow Farmstand, and a few toasted walnuts tossed with a garlicky vinaigrette. 

We have all of these plants in stock from fresh plantings at our Hinesburg greenhouses. You can also find an assortment of them at City Market, Healthy Living, Gardeners' Supply, and the Montpelier Guy's Farm and Yard. 

Ramblings and a shout out to our neighbors....Late June, Early July 2016

As we transition into summer, the pace changes at the greenhouses and in the garden. The focus is on plant maintenance, fertility, pruning, culling and weeding. We are also busy transplanting at the herb farm and harvesting and selling herbs to local grocery stores and food hubs. We added the herb farm to Red Wagon Plants 3 years ago as a way to keep a few key people hired year round and to bring in revenue and activity during the months when people generally don't do any plant shopping. 

Sam weeding rosemary

Sam weeding rosemary

In the home garden, I have been busy looking for gaps in the perennials and filling in with some colorful annuals wherever I get the chance. I have learned ornamental gardening entirely by trial and error,  approaching it all as a vegetable grower, and some things work and some things don't! But one thing I have really appreciated is that garden mistakes easily turn into opportunities. As one plant gets pulled out for various reasons - not the right amount of light, planted too close to its neighbor, or any other number of oopsies- a gap is created for a new plant. For me this is often an annual flower - something that will give color all season long, will give me time to figure out what perennial to put in, and will be a good friend to its neighbors. Right now, a combination I am loving is Nicotiana langsdorfii with Gomphrena 'Strawberry Fields' and Ratbida columnifera. The Ratbida is a perennial (we have it in 4" pots so it is possible to plant en masse without breaking the bank) and the other two are annuals. I just love how the rust and green and yellow play off of each other and catch the light. 

In the vegetable garden, we are harvesting snap peas, lettuces, escarole, frisée, beets, cucumbers (out of the greenhouse), swiss chard, and lots of herbs. The early plantings of mache, napa cabbage, boc choi, and lettuce have come and gone leaving spaces to fill. In go more beets, spinach, lettuce, and green beans.

In the kitchen, I keep making the same salad dressing over and over again - a crushed clove of garlic in a one pint mason jar, 1/2 cup of red wine vinegar, a hefty teaspoon of dijon mustard, 1/4 tsp salt, a good 2-3 grinds of the pepper mill, and 1/2 cup of sunflower oil. Close tightly, shake like mad. It is perfect for everything. If you like it more or less acidic, just adjust the proportions of oil to vinegar. Olive oil is good here too, but sometimes a more neutral oil like sunflower highlights the flavor of the greens a little more.  See my rave below about the sunflower oil at Family Cow Farmstand, our neighbors on the farm. 

Garden Chores this week:

  • fertilize with Pro-Gro all of the annual flowers to give them a little boost during the heat. Sprinkle a bit around shrubs and perennials that are finished blooming too. 
  • water everything religiously in the mornings
  • weed the vegetable garden and replant as needed
  • throw a handful of Compost Plus in the flowering hanging baskets and other potted plants
  • bring (finally) all the poor and neglected house plants outside for a good shower and leave them on the screened in porch.
  • fertilize the garlic with Pro-Gro (should have been done a few weeks ago, whoops). 
  • hill the potatoes 
  • plant a row of beans
  • transplant beets, spinach, and more lettuce

Public Service Announcement! 

And finally,  I have been meaning to let you all know about our new neighbors! Family Cow Farmstand was purchased in April by Scott Hoffman and Aubrey Schatz. You may have noticed the cows sweetly grazing next to the greenhouses this spring. Please go visit Scott and Aubrey's farm stand! They are selling the cows' delicious raw milk (they do sell out, so consider signing up for a weekly membership), pork from previous Family Cow owners Lindsay and Evan (best pork chops and chorizo ever), veggies and strawberries from Shaky Ground Farm, their own eggs (the hens are pastured out with the cows), sheep's cheese from their friends in Marathon, NY, and their own pastured, organic chicken. And lots of other goodies like sunflower oil, yarn, maple syrup, caramels, etc. Some of you know me personally, and you will know that I can be a little particular about how food is produced and how it tastes (okay, not a little .... a lot). So please hear me clearly when I say that you should absolutely try everything at the Farmstand! The chicken is the best I have EVER had. Yes, EVER. It is huge, with plump, juicy meat and that iconic chicken flavor that is often masked by  poor feed or improper processing. Scott and Aubrey move the birds onto fresh grass every day and use the birds and cows together as a way to manage the grass. The sunflower oil is velvety and perfect for any dressing. The sheep's cheese is some of the best cheese I have had in the this country (the French person in me is being extra emphatic here, my hands are waving around, and I am really begging you to listen)...a blue cheese like a mild Roquefort and a sheep's Tomme that is perfectly aged and has that nutty, sparkly taste and texture unique to the best alpine cheeses. The chickens are available fresh every other Friday or in the freezer anytime. To get a fresh chicken, you have to sign up - just email Aubrey and Scott (familycows@gmail.com) or stop in and talk to them....they are often around and do their evening milking between 5:30 and 7:30.

Pardon the horrible picture, but I just wanted you to see how plump and huge these chickens are from Family Cow Farmstand. Before putting it in the oven, I took out the backbone (just slice down either side of the spine with a sharp knife) and …

Pardon the horrible picture, but I just wanted you to see how plump and huge these chickens are from Family Cow Farmstand. Before putting it in the oven, I took out the backbone (just slice down either side of the spine with a sharp knife) and split the chicken open so that it would cook faster (about 1 hour and 15 minutes) and so that the skin would be super puffed and crispy (it was, yum). I also slathered it in softened butter mixed with finely chopped fresh oregano, salt, pepper, and a little lemon zest. The whole thing got laid on a bed of sweet potatoes and sweet onions.  I roasted it in a super hot oven (450F) for 15 minutes then turned it down to 375F.  Prep time - 10 minutes. While it cooked, I ran some errands, weeded a raised bed and planted a whole tray of annuals. How easy is that? 

One more bit of business: We are starting our summer hours this week.

We will be open every Tuesday through Saturday 8 am to 6 pm. Closed Sundays and Mondays.

It has been a great season, and I hope you have enjoyed your spring and early summer with us. We certainly have loved seeing all of you. We are staying open through August this year with lots of fantastic perennials, veggie and herb plants to replenish the garden, annuals for pops of color, and houseplants and succulents for gift giving and adding to your personal collection. Come visit! 

Sweet Potatoes Slip Sale 2016

sweet_potatoes_3.jpg

Sweet Potato Slip Sale

June 11th and 12th, 2016

8:00 to 6:00 pm

 Red Wagon Plants greenhouses

2408 Shelburne Falls Rd  * Hinesburg, VT

Proceeds from the sale benefit the educational programs of Vermont Community Garden Network.

For more information, call 482-4060

Sweet potatoes can be grown in Vermont. Under ideal conditions they thrive and can yield up to 5 pounds per slip. During this benefit sale, we will be selling sweet potato slips in 4" pots, with three slips per pot. These get transplanted 18" apart, in loose, well drained soil. You can also grow them in containers. They like warm, southern exposure, and can be trellised to save space.

Here are some resources for more information on Sweet Potatoes:

The Vermont Community Garden Network has information on their programs and the sweet potato sale here.

This  article on the Mother Earth News website highlights growing methods for northern gardeners and best ways to store the tubers.

 Here is a photo essay on how some ingenious customers are growing their sweet potatoes in Starksboro.

Recipe for Roasted Sweet Potato Fries with Herbs

2 large sweet potatoes, peeled and cut into 1/3 inch batons

3 TBS olive oil

salt and pepper

1/3 cup finely chopped parsley, chives, and or cilantro

2 cloves of garlic, finely chopped

1 small pinch of cayenne

1 tsp lemon juice

  • Preheat the oven to 450 F. Place 2 large cookie sheets in the oven so they are pre-heated as well
  • Toss the cut sweet potatoes with the olive oil and salt and pepper in a large bowl
  • Arrange them on the hot pans in a single layer.
  • Roast for 20 minutes, and flip them over with a spatula, and return to the oven for another 20 minutes, or until tender and browned.
  • Meanwhile, toss the herbs, garlic, cayenne and lemon juice together in the same bowl
  • When the hot fries come out of the oven, sprinkle the herb mixture on the fries and serve immediately

Growing Instructions for Sweet Potatoes

Sweet potato slips are cuttings that come from a parent vine. The slips grow best in a loose, sandy or silty soil that drains well. If sweet potatoes are grown in a rich dark soil they may discolor but are still good to eat. • Transplant the slips into garden beds during June, preferably in the late afternoon or on an overcast day. When transplanting, lay the slips on their sides with 2/3 of the slip buried a half inch under the soil. Water enough to keep the soil moist, but not saturated. • Plant the slips 10 to 18 inches apart in rows that are three to four feet apart. The rows or raised bed should be elevated 4 to 8 inches above the ground level to allow the sweet potatoes room to form. • Keep the cuttings watered while they are getting established. The leaves that were originally on the planted slips will dry up and fall off leaving just the vine stem. New leaves will emerge from the cuttings as the slips become established. • The sweet potato vines will cover the ground reaching 5 to 10 feet in length. Hoe around the vines to cultivate weeds and mulch with hay if desired. • Deer love sweet potato leaves, so be sure your planting area is fenced if deer are aproblem. A flying gold colored beetle may chew round holes in the leaves. The vines are tough and will keep growing despite insect damage. • Sweet potatoes are dug and harvested in late September through mid October, a day or two before the first predicted frost. Most of the sweet potatoes will be just below the parent plant. Each plant can produce up to six sweet potatoes. • After harvesting, dry the sweet potatoes on the ground for two or three hours. Allow them another 10 to 14 days to cure at room temperature or above, before storing the sweet potatoes at a temperature between 50 and 60 degrees F. • Unlike Irish potatoes, sweet potatoes should not be kept cold in a garage, refrigerator or outbuilding. If properly cured and stored, they will keep until April. Enjoy!

Focus on Lily!

During our 10th anniversary season, we'll feature profiles of members of our amazing Red Wagon team. This week we interviewed Lily Belisle, our Retail Manager (above left). 

 How long have you been at Red Wagon Plants? How did you end up there and what keeps you there?

This is my sixth season at Red Wagon. I started working here because I’d grown up in Charlotte, Vermont and when I moved back here, I was looking for work that involved being outside. A friend of the family passed along the job posting. One of the application requirements was to write an essay about how you fell in love with gardening. I wrote my essay about my first landscaping job, in Washington State, and Julie liked it.

In Washington, I worked for a woman who had been a gardener her whole life, but now had some physical disabilities and needed help. She had been trained in Ikebana (the Japanese art of floral arrangement) and created flower plantings just for that. Her gardens were beautiful. I remember that she had a huge iris collection and would send me out to the garden to pick specific blooms for her arrangements. I’d go back and forth as she corrected me – not the one with the yellow throat, the one with the pink throat; or this one had too many bugs; things like that. I learned a lot. 

What keeps me here is the combination of working with people and their gardens, and working in the Red Wagon community. There’s a lot of camaraderie and tons of talking about gardens all day with our customers. I love learning from all the people that come through Red Wagon. It leaves me feeling inspired.

What’s your role at Red Wagon?

I manage the retail part of the business. A big part of my job is keeping everything looking really nice – Julie and all of us at Red Wagon have high standards for how the plants and greenhouses look. We put a lot of time into creating displays and changing the look of things, often on a weekly basis. Another major part of my job is customer service, from helping brand-new gardeners to gardeners who are really experienced. I love it when I can suit everyone’s needs and find a perfect plant for every spot!

What are your favorite Red Wagon plants?

I’m an avid veggie gardener, and the way that I have a lot of fun in my vegetable garden is by including beneficial plants and medicinal herbs, from elderberries to angelica to borage, calendula and chamomile. These herbs are really easy to grow and, unlike traditional ornamental perennials, have a wild look and spirit that I find really inspiring. A lot of them are more weedy and self-seeding, which is fun for me. Plus, they provide habitat and food for beneficial insects. And I love the ancient lore and stories that go with medicinal herbs and their traditional uses.  

What’s your home garden like? 

I garden with my mom at my parents’ house, in the garden that I grew up working in and where I learned how to garden. She and I have worked hard to expand things, and we now have a little greenhouse. I like to grow storage crops – onions, potatoes, carrots – and I’m also really passionate about beans (and climbing plants in general). I’ve been trying to experiment more with dry beans. So far, it’s been a bit of a novelty – I’ve only gotten a yield of a few cups of dry beans – but I’m keeping with it. 

When it’s time to store my onions, potatoes and carrots, I have a little closet within my garage that keeps things cool enough. 

I grow lots of tomatoes, and I like making hot sauce, so I grow hot peppers. One of my favorites is the lemon drop pepper, which we started growing at Red Wagon this year. It’s a small, bright yellow pepper, index finger size and pretty spicy. Each plant produces tons of peppers. I also really like serrano del sol and jalapenos. I grow a mix of peppers for my hot sauce because I like it to taste peppery, not just hot. It’s also got carrot puree, ginger and lime and people ask me for the recipe all the time!

Here’s Lily’s recipe for her favorite hot sauce. She uses a recipe from Tart and Sweet: 101 Canning and Pickling Recipes for the Modern Kitchen by Jessie Knadler and Kelly Geary.

Carrot Habanero Hot Sauce

Yields 4 12-ounce jars

1 ½ pounds carrots, peeled and sliced into ¼-inch coins

1 large onion, roughly chopped

1 ¼ cups water

2 tablespoons lemon juice

2 tablespoons kosher salt

3 tablespoons minced garlic

2 tablespoons finely grated fresh ginger

4 habanero peppers, seeded and chopped

2 jalapeno peppers, seeded and chopped

5 cups white vinegar

Grated zest and juice of 1 lime

Ground black pepper to taste

Combine carrots, onion, water, lemon juice, salt, and garlic in a medium nonreactive pot over medium-high heat. Cook until the carrots are very soft, about 25 minutes. Add a tablespoon or two of water if the mixture gets too dry.

Once the carrots are soft, add the hot peppers and cook for 5 minutes. Add the vinegar and lime zest and juice. Blend the mixture in the pot with an immersion blender or transfer in batches to a standing blender or food processor. Blend until smooth. Pour into a large container, cover, and refrigerate overnight to let the flavors combine.

The next day, blend the sauce again. Set a fine-mesh strainer over a bowl. Pour the mixture through the strainer, using a rubber spatula to press the liquid through. Discard any remaining chunky bits. Wipe off the spatula and scrape the underside of the strainer as well to get every last bit of sauce. Return the sauce to a pot and simmer until it’s thick and glossy, about 25 minutes.

Ladle the sauce into hot jars, leaving ¼ inch headspace. Check for air bubbles, wipe the rims, and seal. Process for 10 minutes, adjusting for elevation. 

Hardening Off Those Plants

Curious about what "hardening off" means and why it's important? Here's a blog from our archives to help you prep your cold-season transplants for the great outdoors. 

Plants need to be hardened off before being transplanted. What does this mean? It is the process you take them through to get used to direct sunlight, wind, cold, heat, dryness, and any other weather conditions they will be asked to live through during their lives. When plants are started in the greenhouse, in trays or pots, their world is sheltered and comfortable; food is readily available in the compost-fortified soil, and the temperatures are carefully regulated. Once it is time to go out into the harsh world of the garden, the goods and services become a little more scarce for those baby plants and they go through a bit of withdrawal known as "transplant shock."  Hardening them off gives them a gradual adjustment to this new world.  It is best to start out by putting the plants outside for a few hours, and then bringing them back in; this gives them a small taste of direct sunlight. In any greenhouse, the plastic film filters out 10 to 25% of the sun's rays and the tender plants are literally sun-burned when they first encounter that unmediated light.  Here is how I do it at my house. When you buy plants that were grown by Red Wagon Plants, they have already been hardened off and you can put them right in the ground. The following method is important to follow if you are working with plants that you know are not hardened off yet.

Once they have gotten used to a few hours of sunlight at a time, they can stay outside overnight, but under a protective row cover.

The cover comes off in the daytime and the plants are acclimated to being where they will be planted for a few days.

If the temperatures drop down below freezing, cover them again. Cold hardy plants such as broccoli, cabbage, kale, hardy lettuces, hardy herbs, escarole, scallions, onions can take a frost without a problem, but they will do it with more grace and strength if they have been gradually introduced to those temperatures.

Once the plants have had a few cold nights, under cover, they can have a couple more nights without cover, and then are properly hardened off and ready to go in the ground.

It's also a good idea to give cold-weather transplants a little extra compost or a fish/seaweed emulsion watering at transplant time. It is hard for plant roots to uptake nutrients in cool weather and this will aid their transition as well.

Planting the Fussy Onion

Onions are some of the first things to go in the ground each spring. You may not know this, but onions are finely tuned creatures with a rigid hormonal profile. They are completely and utterly dependent on the sun's cycle to grow into the lovely round orbs we think of as onions. Those plump layers only grow in relationship to the lengthening days of spring. If onions are planted too late, they will never bulb out and become big and round. An onion that has been planted too late, let's say after the middle of May, will never quite size up, but will create a thick stem, and a barely bulbous orb. The engorged stem will not create rounded layers at all but rather look more like a slightly ovate leek. These are still fine to eat, but won't really be onions you can store through the winter.

We recommend that people plant onions in mid-April. When it is muddy, and cold, and you think there is no way a plant wants to go into the garden, well guess what? The onions really want to go into that cold earth. The way we grow onion plants for sale is that we seed about 80 plants into a 4 pack, and your job as the gardener is simple:

  • Prepare a bed in the garden - deep, well worked, rich soil is best. I prepare my onion beds in the fall, that way they are ready for onion plants first thing in the spring.
  • Gently pull the clumps of soil and roots and plants out of the 4 pack.
  • Separate each plant and shake off the excess soil. The individual plants are like tiny blades of grass, but each one will grow into a big onion plant.
  • Make a trench about 4 inches deep the length of your planting area. Onion rows can be about 8 inches apart, so depending on the size of your bed, you can plant up to 4 rows of onions in one bed and still reach across the bed to weed comfortably.
  • Plant the individual plants in the trench, about 4 to 6 inches deep. Only a few inches of the thin green stems will be above ground. You should have about 2-3 inches between plants.
  • Tamp the earth tightly around each plant.

The onions plants won't grow much at first, but they are just hanging out in the cold soil, programming themselves to grow once the soil warms up. It is these cold, long days that help make onions nice. I know, it is hard to believe that they prefer this, but they do. Southern growers, who have shorter summer days than northern growers, have entirely different onion varieties than we do. That illustrates just how much onions are day-length sensitive. A few degrees difference in latitude necessitates a whole different set of genetics.

The other things to keep in mind with onions:

  • Keep them well watered. Water and day length is what makes onions big. Some straw mulch applied in late June is a good idea for keeping the moisture even and consistent.
  • Keep them well weeded. Onions plants are slender and upright. They do not create any shade, therefore weeds like to grow near them, in the sunny under-story of the onion patch and because onions really don't want to compete for food, water and sunlight. They are not good at sharing.
  • Keep them well fed. An application of Compost Plus in May is a good idea. It will help them get big and strong.
  • Growing onions in black plastic mulch is a good option if you want to eliminate weed pressure and heat up the soil. Once onions are big, they like it hot.
  • Harvest onions once the tops start to flop over. You can eat them fresh, as "green onions" or you can cure them by laying them out in a dry, airy place, away from direct sunlight. This usually happens in late July or early August. It depends on the varieties you grow and on the kind of weather we are having.

Onions are best stored in a dark, cool, airy place. A damp basement is not a good storage spot. A cold, dry, dark attic is better. Or an unheated closet, or a garage that does not get too cold. Ideal onion storing temperature is about 35F. That is pretty cold - colder than most basements.

Some onion relatives can be planted later in the season. This includes scallions, mini-purplette onions, pearl onions, and shallots. Leeks are also tolerant of a later planting, and can be planted multiple times throughout the gardening season if you would like to harvest baby leeks. 

The onion varieties we grow each year:

Cipollini Gold Coin - a flat, disc like onion that stores very well in the winter. It is a strong flavored onion which mellows when cooked and is delicious caramelized, glazed, or roasted. One of our favorites for flavor.

Yellow Storage Cortland - a huge, good keeper which means that it stores well all winter. Dry the onion once harvested in a cool, airy spot, and you will be eating it until March or April of next year. 

Red Storage Onion Mars - also quite big, and also a good winter keeper. Slightly milder in flavor than Cortland and can be eaten raw when sliced thinly. Red Onions develop their red interior only once they have been cured. Once harvested, coll in an airy dark spot until the tops are completely dried and can be pulled off by hand. That is the curing process for all storage onions.

Sweet Onion Walla Walla and Ailsa Craig - both are gigantic sweet onions. They do very well with lots of water and mulch. Sweet onions do not keep over the winter. They do not need to be cured, but rather get refrigerated once harvested. They are delicious roasted, grilled, or eaten raw in sandwiches. 

Scallions - These can be planted in clumps of 10 or so plants. They can be planted every few weeks for a continuous harvest. If you do not want to buy scallion plants or seeds, you can eat young onion plants as scallions.

Shallots - These store very well after being cured like onions. They add a sweet and complex flavor to winter dishes, marinades, and dressings. 

Mini-purplette - these are lovely purple pearl onions that are delicious in a spring braise with salad turnips and peas. They can be planted in clumps of 4 to 6 plants and can be planted multiple times throughout the season for more than one harvest. They also make great pickles. About 1" to 2" across.

Focus on Eric!

Eric building our pergola 

Eric building our pergola 

During our 10th anniversary season, we'll feature profiles of members of our amazing Red Wagon team. This week we interviewed Eric Denice, who’s our jack of all trades, maintaining our facilities, keeping our greenhouses running smoothly, and fabricating beautiful raised beds and retail displays. 

Like Allison Lea, you’re one of the longest term Red Wagon employees. How did you end up here? What keeps you here? 

I went to college for environmental studies but left after six months. I wanted to have my own little farm. When I was 20, I had a greenhouse in my backyard. I didn’t know a whole lot back then. 

I had known Julie for a while before I started working here. One day I was biking past Red Wagon, I popped in to say hello, and Julie said she needed [to hire] someone. The timing was right for me, and nine years later … 

What keeps me here? It’s a beautiful place, and I work well with Julie and learn a lot from her. The seasonal work fits well with my other jobs. And I’ve always loved plants.

What do you do at Red Wagon?

I build greenhouses, fix everything, do the plumbing and a little bit of electric. I build our retail displays and benches. I set up systems, like our computerized irrigation system.

I started out doing wholesale deliveries and customer service. This is the first year I'm not doing deliveries.

I have my own business in greenhouse construction and residential carpentry.

Are there any special projects you’re particularly proud of?

Well, I built the two 150-foot greenhouses out back, and I set up their computer-controlled overhead irrigation system. Working for Red Wagon, I’ve built greenhouses all over Vermont.   

What are your favorite Red Wagon plants?

We grow so many plants now – it’s really incredible. I like everything, especially our kale and tomatoes.  

What’s your home garden like?

We have raised vegetable beds and a perennial garden. It’s a lot harder to maintain a perennial garden after having a child!

How have you been reflecting on Red Wagon’s 10th anniversary year?

I’ve learned a lot at Red Wagon. Julie runs the business really well. For example, I’ve gained a lot of customer service skills, and learned how to work with people on a professional level. I’ve learned the importance of being really thorough and detail-oriented. How to think through all my projects completely. How to make things so they last – always keeping the long-term in mind. 

How to Get Your Soil Tested

Here's one of our most popular posts from the archives. If you are a new gardener or gardening in a new spot, it's well worth it to get your soil tested to ensure happy plants and bountiful harvests. 

I've always thought that getting your soil tested was going to be somehow difficult and arcane.   But I've had some challenges growing things since moving here (namely like a non-blooming hydrangea).  So since Julie said it's a good idea, I've decided to give it a try. I visited the UVM Extension Service website.

And downloaded this form to fill out.

And scooped some dirt into a bag.

Julie adds:

It's best to take samples from multiple places, digging in the first 6" of soil, mix up the various handfuls of soilin a bucket, and select your soil test sample from this mixture. It gives the soil test people a better idea of the overall make-up of your soil. Make sure the bucket and spade are very, very clean.

skillet garden 024
skillet garden 024

Tomorrow I'll send the dirt and $18 to UVM.  And in 10 - 14 days I'll get back a recommendation of what I should add to my soil to grow what what we're planning.

In the meantime, I'm watching as the plants blossom, and unfurl, and grow.

skillet garden 013
skillet garden 013

Beautiful RWP pansy.

skillet garden 012
skillet garden 012

The last day of last year's inedible sorrel.  Tomorrow I'm ripping it out to make room for the currant bushes when they come, and will throw the leaves into a Greek-flavored braise I'm making.

What Made us Smile this Week

The Shelburne Garden Club stopped by for a chat and a tour, and we had the best time talking about favorite vegetable varieties, techniques for growing vegetables in containers and best of all, why gardening is important to us. Basically, it was a complete love-fest. Can you tell by our beaming faces that we had a great time? There is nothing more filled with hope than a group of women talking about gardens in April. One person told us that gardening with our plants has changed her life because we have made it so easy and given her advice she can trust. She now sits in her garden each day and takes in the beauty around her. Others shared with us that we have made lettuce growing a joy rather than a frustration by offering such interesting varieties and explaining how to plant them in succession. But maybe best of all was meeting Mrs.Babe  Goss. Do you see her there in the center, resplendent in the purple coat. She is in her 90's and sharp as a tack and absolutely gorgeous. She told me that the secret to her glowing beauty and health is eating vegetables for 92 years and always being active in the garden.  My heart just melted. Do you see how I am smiling so hard that my face is perhaps going to break? 

And then these things happened,  along with about a million other amazing tasks accomplished by our very hard working crew....

Spring into Gardening

Opening Day is almost here and we look forward to seeing you at the greenhouses this Friday! Are your hands itching to get into the dirt? Here in the Champlain Valley, your garden is likely to be ready to plant very soon (more on that later). 

We love the early garden with its vibrant spring greens, feathery fennel fronds, and jolly pansies. Here are some of our favorite varieties that we recommend you take home with you on Friday and a few tips to get you started. 

Is My Garden Ready to Plant? 

Here’s how to tell if your garden is ready to plant. Go out to your garden beds, make a fistful of dirt, squeeze it into a clump and drop it from about knee level. If it crumbles or shatters into tiny pieces, your soil is dry. If it stays in a clump or a couple of chunks, the soil is still too wet. (For obvious reasons, sandy soils dry more quickly than clay soils.) If you identify your ground as still wet, it’s not ready to rototill, and it’s best to not even walk in the garden yet to avoid compaction.

If your soil is ready, you can move on to the next steps. You’re ready to make your garden beds. Depending on the size of your garden, you can do this by hand, but if you have to rototill you can also do so at this point. If you will be seeding right into the soil, mix in compost a week in advance to allow it to mellow.

Starting from Seed

Your beds are now ready to seed with plants that like to germinate in cool temperatures, like mache, fava beans, peas, arugula, radishes, and carrots.

Some of our favorite varieties:

  • Mache: We like “Vit.”
  • Arugula: Though we stock several types, “Astro” is our all-around favorite.  
  • Peas: Sugarsnaps! 
  • Radishes: Hands-down, “French Breakfast” is the winner. We love to eat these pretty two-toned radishes plain, with just butter and salt. “Cherriette” is a good go-to if you’re in the mood for a spicier radish to go in tacos, Mexican food, or salsa. We like to make a fruit salsa that blends mango, radish, green onion, jalapeno and lime juice. Finely chopped daikon radish is great in salsa too.

Transplanting Seedlings

When it’s warm enough to transplant, probably next week or the week after, here are some beautiful plants to kick off the kitchen garden.

How to know when it’s time to transplant? You should wait to transplant until a) soil is dry and b) nighttime temps in extended forecast are no lower than upper 20s Fahrenheit. Check the forecast for a series of days when nights are in the upper 30s, and put the plants out that first night so they can have a few nights of higher temperatures before a potential drop. Garden beds should be prepped with compost, and your plants should be hardened off.

All Red Wagon plants are sold hardened off and ready to put in the ground. But to strengthen your plants' root systems, it's good to let them dry out for a few days before planting. Even letting them get a bit wilty is OK! You want to stress them a little bit, helping them better acclimate to their new surroundings. It’s like teaching your kids to do laundry and not doing everything for them! At transplant time, they need a good soaking, though.

Our favorite varieties to transplant now:

  • Kale, bok choy, and mustard greens. Our favorite mustard green is called Tokyo Bekana. It is a pale spring green, almost yellow, and very tender. It’s delicious braised lightly in chicken broth with herbs. Use any herb you have kicking around, like savory, marjoram, or rosemary, and don’t chop it -- just throw in a couple of branches to make an infusion. The greens are so tender they don’t take long to cook; just a minute or two  will do. We love this with salmon or other fish.
  • You could try some of the hardier lettuce varieties, although they are a little more tender, temperature wise. Some of the more cold tolerant ones are green oak leaf and red buttercrunch.
  • Fennel transplants are cold hardy and a beautiful addition to your garden bed because they can tuck into little corners and tight spaces.
  • Scallions, too, are a nice thing to sneak  in a garden bed: they’re tall and bright green, and especially pretty among pansies and greens.
  • Parsley is another attractive spring green. Curly parsley is a little hardier than flat parsley, so we use it like an ornamental. Try planting pansies or violas, curly parsley, and sweet alyssum together in beds or along walkways. It’s a combination that looks great all season long, through summer and into the fall. The alyssum and pansies go dormant in July/August, but the parsley takes over and hides those plants’ “ugly duckling” phase. When it gets cool again, the pansies and alyssum kick back in, giving you a gorgeous display through December. (Don’t forget that pansies are edible flowers – use the petals or small whole blossoms in spring salads.)
  • Calendula is another cold hardy herb with edible blossoms. It looks very sweet in the spring garden.

See you on Friday! 

Focus on Allison!

Allison scouting the greenhouses for pests

Allison scouting the greenhouses for pests

During our 10th anniversary season, we'll feature profiles of members of our amazing Red Wagon team. This week we interviewed Allison Lea, who manages our Integrated Pest Management (IPM) program. 

You’re one of the longest term Red Wagon employees. How did you end up here? What keeps you here?

I started working for Julie when she was farming in Starksboro, and when she started Red Wagon I came along. I love working for Julie. She’s basically family at this point. I watched her daughter get on the  bus to kindergarten, and now she’s in her second year of college!

What keeps me at Red Wagon is that I love plants and I love what I do. I taught myself about integrated pest management (IPM) and have continued to develop that role. It’s an interesting job; I’m very much behind the scenes. It’s looking for very small pests and/or the small signs that the creatures are there, and that they might be getting out of balance. I’m tuning into a different sort of sight. I spend a lot of time by myself, looking through the plants and walking around examining things.

It’s a bit surprising because I’m an English major, not a science person. Well, I say that I’m not a science person, but when I started learning about IPM, I got interested. It’s fun to geek out on pests and their life cycles and their predators and their life cycles. The learning process is never-ending. That surprised me because I’m the kind of person who’d rather lie on the couch and read a novel than study science.

Tell us more about IPM. What is it, and why is it important?

Greenhouses are ideal habitat for pests: you don’t change location from year to year, you’re providing the ideal climate and growing all these succulent little plants. All of Red Wagon’s greenhouses are certified organic, which means that we don’t spray chemicals to keep pests in check. There are OMRI-approved sprays [meaning they are acceptable for certified organic production], but not using sprays is better for plants and everybody, even the organic sprays. 

Instead, every week I scout the greenhouses for pests, mainly aphids and thrips. These pests suck the plants’ sap, so I’m looking out for plants with puckered or shriveled leaves, or that look yellowed and droopy – really, any plants that just don’t look happy. It’s kind of a second sight.

I want to make sure that things aren’t getting out of a control. My goal is to strike a balance, so I’ll order beneficial insects like parasites that lay eggs inside of an aphid or predators that will eat an aphid entirely.

Is IPM applicable to home gardens or more relevant to commercial growers?

I’m not out to eradicate pests; I think you need balance. When you garden outside, there is just more natural balance. A greenhouse is an environment that creates potential imbalances. Outdoors, aphids kind of take care of themselves. In my own garden, I know that there are certain plants every year that are going to get aphids – I just notice it, I don’t necessarily manage it. My yarrow, my heliopsis inevitably get covered with aphids. I wipe them off and move on. 

What are your favorite Red Wagon plants?

I love our herbs! I love how aromatic they are. And I love the vegetables – for example, brassicas are hearty, perky, and they always look good, especially this time of year when the more sensitive plants aren’t quite as happy. The brassicas are strong, almost utilitarian. I like them for their strength.

What's your home garden like?

I like growing herbs. Things like sage, thyme and oregano smell and look good. I really like lavender and rosemary, which I bring inside in the winter. I also like growing herbs that attract bees. I have motherwort in my yard, which a lot of people might not like because it spreads, but the bees like it. I also grow medicinal herbs: elecampane, calendula, angelica. I have a lot of fruit trees, thanks to my partner. I’m not that meticulous. I’m not a Martha Stewart gardener by any means!

 Interview has been edited and condensed.  

The wings that feed

Much like our plants at Red Wagon, us humans need nourishing food and water to stay healthy and alive.  That’s why we love selling plants to gardeners; so they can grow their own food and cultivate their own nourishment.  Too often, though, we forget about one of the most important keys to our nourishment:  pollination. Pollination is what allows us to grow fruits and vegetables. And, while it seems hyperbolic to say, it is true that a world without pollinators is a world without food.  Many of us are learning more about the issues pesticides create for pollinators, but it is less known just how precisely important pollinators are to our food system.  An article published by the Pollinator Stewardship Council titled, “Ecosystem Service of Pollinators” pointed out that one study assigned “an economic value to the ‘ecosystem services’ provided by pollinators at approximately $167 billion”.  The study also pointed out that pollinators not only affect the quantities of food produced, but they “may also have a beneficial impact on nutritional security-the availability of essential macro-and micronutrients in the human diet”. One study focusing on the nutritional benefits pollinators have on produce found that cross-pollinated almonds had a higher ratio of oleic to linoleic acids-a desirable “cardioprotective” quality for consumers.  Another study sited showed that “bee-pollinated strawberries were more red, were heavier and firmer and had reduced sugar-acid ratios,” which proved to have higher market value and were healthier for consumers". So, while these studies are new and we still need more information, it is unarguable that pollinators are the lifeblood of our food system.  And, we should take care of them as they take such good care of us.  

A few new varieties for 2016

We are very eager to get going in the greenhouse. We will be planting the first seeds the week of February 29th, and until then have to satisfy our gardening urge by looking at some of the new varieties we are adding to our plant list in 2016. Please check back here often to get updates on new varieties for the 2016 season. Linger over plant descriptions, plan the garden, and tell us your garden dreams. 

Lemon Drop Hot Pepper

Lemon Drop Hot Pepper

Lemon Drop Hot Pepper was a new entry in our trial garden in 2015 at Lily's request. It was a great suggestion and we fell in love with these adorable plants that are completely covered in cheery yellow peppers. They look like little ornaments, or plant jewels dangling from perfectly formed, well branched plants. The flavor is hot, but complex and not at all overwhelming. 

Coeur di Bue Heirloom Tomato (aka 'Ox Heart')

Coeur di Bue Heirloom Tomato (aka 'Ox Heart')

These beautiful tomatoes first came to us as seeds from very enthusiastic customers who wanted us to grow them out and share with the Red Wagon community. We were thrilled to try them and have added them to our extensive tomato offerings. While we were not able to save seeds from the original batch given to us by our friends, we did find this Italian heirloom that closely matches the one they have been growing out for years. We hope you like its meaty flesh and hefty flavor as much as we do. 

St Johnswort 'Topas'

St Johnswort 'Topas'

This year, we are adding quite a few medicinal and tea herbs to our diverse herb line up. This St. Johnswort is particularly high in hypercin, the compound that gives this plant its healing properties. It is a plant used for anxiety, insomnia, depression. This is a prolific bloomer that tolerates drought conditions. Easy to naturalize. Other new medicinal herbs we will be growing include milk thistle (Sylibum marianum), motherwort (Leonorus cardiaca), and feverfew (Tanacetum parthenium). 


Giving Thanks with Braised Thyme and Turnips

A few years ago, I worked for the Intervale Center as a farming consultant for the New Farms for New Americans program run by the Association of Africans Living in Vermont. My job was to help new Americans, primarily refugees from Bhutan, Somalia, and Burundi, in finding markets for their beautiful produce and to help them understand and navigate the vagaries of our cold climate, on-line seed purchases, calendar planning, etc. Most of the time, probably all of the time, I was the one doing the learning. It is an experience I look back on fondly and feel thankful that I was able to get to know these smart gardeners and farmers. Every time I walk into Stone Soup in Burlington and see braised Hakueri turnips at the hot bar, I think of Michel and François who established a long term relationship with the restaurant by growing these perfect and tender roots. They still grow and sell them for Avery and Tim at Stone Soup, and it all started with a face to face meeting, in 3 languages, a seed catalog, and a warm feeling or two.

A fitting Thanksgiving side dish, don't you think?

Braised Hakurei Turnips with Thyme

Serves 6 as a side dish

1.5 pounds Hakurei turnips, the small white ones. About 2 bunches

6 healthy sprigs of thyme (about 1/2 a clamshell package or 1/3 of a bunch)

1/2 cup water

1/4 tsp salt

2 tablespoons butter

1 tablespoon honey

Salt and pepper to taste

Cut off the greens, but save them for another use. They are delicious!

Wash and scrub the turnips and cut into halves or quarters, depending on size. If very small (1 to 1.5 inch in diameter, leave whole). Each piece should be about 2 bites worth.

Add turnips to a medium saucepan with water and salt and thyme.

Bring to a boil, and immediately lower the heat to medium-low. A strong simmer, low boil. Leave the pot covered for 6 to 10 minutes. When the turnips are tender but not mushy, uncover the pot, add the butter and honey, and gently shake the pan to mix. Cook another 5 or so minutes until the water is mostly evaporated and the turnips are cooked through but not falling apart. Remove the thyme sprigs.

Taste for salt and pepper and season accordingly.

Want to grow your own? 

If you haven't grown your own white turnips, consider it for next year. They are easy to grow, last long into the fall, and are sweet and delicious. While rutabaga and traditional purple-topped turnips have their own charms, these white "salad" turnips are delicate, sweet, and can be eaten raw or cooked.

For a fall crop, sow seeds of Hakurei turnips directly into a shallow furrow in the garden in mid-August. They prefer loose, deep soil that drains well. A little compost is always a good idea, but not too much as it can stain them or create crooked  growth. When the plants are a couple of inches tall, thin to 1 plant every 2 to 3 inches. Keep well watered. That's it.  They are a perfect crop to follow an earlier planting of peas or beans or lettuces or greens.