Garden Tips and Stories

Impatient Tomato Tastings

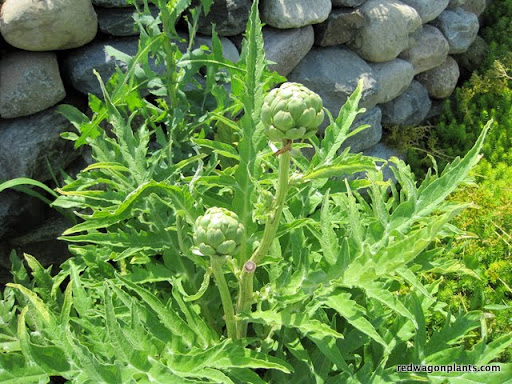
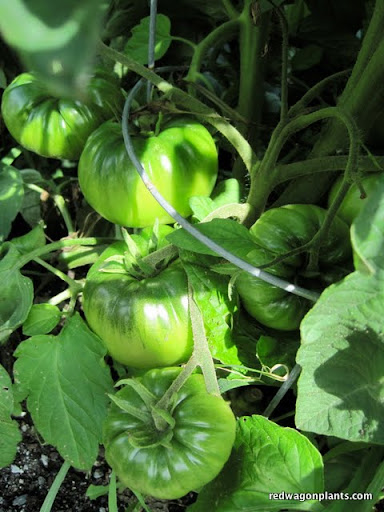
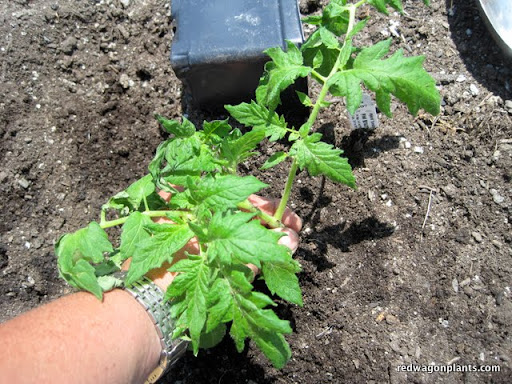
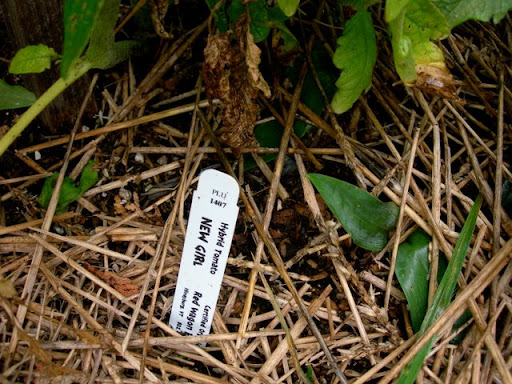
The first tomatoes of the season are always a bit of an anti-climax. We wait all year for the fruit to come out of the back yard as opposed to some distant clime, and then take a bite. It's not as sweet as the memory, not as drippingly hot and gushy as the movie running through my brain. The first tomatoes aren't the best ones. That is all there is to it. I tend to pick them a little early, eager for a bite and am met with a disappointing crunch when there should be a mush. In a week or two, I won't be so impatient, the vines will be dripping with ripe fruit, and I will eat them three meals a day, going from scarcity to abundance in a flash. Soon, every slice of bread will be adorned with a smear of mayo (the junky kind, not the healthy kind. Sorry) a thick, red, juicy slice of tomato and a sprinkle of good salt. This will be all I eat for a while. I know it's coming. But for now, I decided to document the earlier tomatoes and taste them, giving them a ritualistic importance of sorts. I try to put blinders on in the face of their slight un-ripeneness and photograph them, carefully laid out on the counter. Soon there will be baskets of tomatoes, heaping, unnamed and tangled together. But for now. We will carefully label, taste, and report. Here goes.

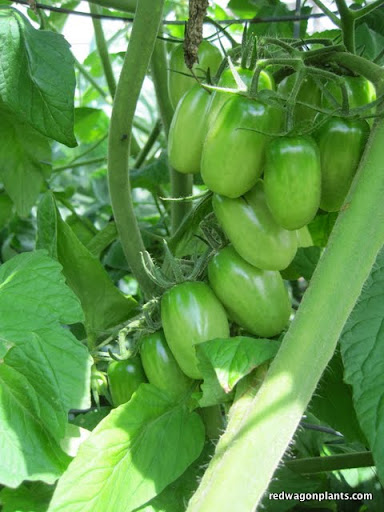
Pink Beauty is just an iconic tomato - it always perfectly shaped, blemish free and has an almost electric dark pink hue. The Purple Russians tend to crack a little, but nothing too detrimental (their good sides are showing for the photo shoot). The Juliet, as many of you know, is my favorite all-around tomato. It has huge yields of oval fruit that are great raw, for snacking, salads, sandwiches, and salsa (not too watery); but the real charm is that they work really well as a cooked sauce tomato too. The Viva Italia is a very pretty paste tomato - early and blemish free and very disease resistant. The Glacier is an heirloom, super early, does well in very cold climates (Huntington, Lincoln, Ripton - no problem), and is the one tomato you will be eating weeks before others ripen.

We tried them all, carefully slicing, chewing, thinking.....

All were slightly under-ripe and slightly lacked that "I've been baking in the hot sun" flavor and texture. We have had some rain the past couple of days, and the flavor is affected by that. But they were good - not middle of August good, but good. The Pink Beauty has a really nice balance of sweet and acid flavors, a slippery, silky texture and makes beautiful shiny slices.

The Purple Russian was a winner, flavor wise and texture wise. It is juicy, especially for a paste tomato, and has the most buttery complex taste that lingers on the tongue and leaves me wanting more. The plants are nothing pretty - they always look shaggy and stringy somehow, so I have never gotten too excited about putting them in my garden, but customers rave about them, and now I know why. Sweet, unctuous and complex. A new favorite and you will hear me raving about this one in the greenhouse next year. It would be perfect raw or cooked, and I am sure any sauce made from these would be a deep purple red color.

The Juliets were a little bland compared to the first two, but still full of good, bright flavor - lively on the tongue and a nice meaty texture.

Viva Italia were lacking in distinctive flavor (a little too acidic for my taste), but in all fairness,  they are much nicer when cooked. We will have to do another taste test with just paste tomatoes, cooked simply in some olive oil and lightly salted.

The Glacier is cute as a button: plump little orbs, slightly mis-shapen and full humble darlingness. The flavor is great for an early tomato - they are a little bigger than a cherry tomato, can be sliced for salads or sandwiches or cooked down for a quick sauce. They tend to ripen 3 or 4 at a time, a nice feature since they are so small and just one of them won't take you far. I would put this at the top of the list for early tomatoes. But if you only have room for a couple of plants, there could be some better choices.

I would love to hear what you are loving or not loving in your tomato selections. Any varieties you want to recommend for next year? Any you think should be discontinued? Let us know. And we love pictures! I will do this taste test again, later, when the plants are loaded and the fruit is at peak flavor!

The Garden in July, a Few Tips on Creating Micro-climates, and a Beach Picnic.

This summer, the weather has been garden perfect for many crops. All the heat lovers are thriving and the crops that like it cool and moist are doing well where they have been watered and are getting a little shade. I have a nice stone wall thanks to Charley of Queen City Soil and Stone, and the shady side of the wall is a perfect place for crops like celery, mid summer lettuce, artichokes, and boc choi. They benefit from the afternoon shade the wall creates. Additionally,  the moisture that builds up at the base of the wall from the terraced soil above it creates a perfect micro-climate within the garden. You can easily achieve this in any garden with strategic rock placement - not a full-fledged wall necessarily, but a few stones stacked up to retain moisture on a slope or to allow for  north-side shade in a fully exposed garden. Look around your garden for other mico-climates like tall plants that can be used to create shade for summer plantings of lettuce. Right now, I have lettuce planted in odd spots throughout the garden - under a  sunflower, at the base of the stone wall, and under some tomato plants.

The eggplant has been tremendous this year and last night, we had a great meal of marinated eggplant while sitting at the lake, scooping up piles of the salad with pieces of pita and a little feta. Here is the recipe. I used a combination of the Gretel and Machiaw eggplants (pictured above).

Marinated Eggplant adapted from smitten kitchen.com

  • 1 lb long, Asian eggplant, sliced 1/3 inch thick
  • 3 tbs olive oil, divided
  • salt and pepper to taste
  • 2 TBS red wine vinegar
  • 2 TBS capers, rinsed
  • 1/4 cup mint, finely chopped
  • 1/4 cup of feta, crumbled

Pre-heat oven to 400 degrees. Coat a cookie sheet with a layer of oil and layer the eggplant slices in a single layer.

Bake them until soft (about 20 minutes), turning once and drizzling with a little more olive oil about half way through.

Blend the vinegar, remaining olive oil, salt and pepper, capers, and mint together. Place eggplant into a bowl, drizzle with the dressing, and stir to combine. Let rest for at least a half hour or place in fridge (up to one day). When ready to eat, sprinkle with feta. Eat with flatbread, while sitting near a cool body of water.

Bay Laurel in Vermont

If you ask me what my favorite plant is in my garden I would tell you about my bay laurel tree.  Many folks are excited by the plants that add beauty to their surroundings.  Personally I love the plants that I can use in the kitchen and my bay tree adds value year round.  (The fact my favorite plant is a culinary herb would be no surprise if you follow my blog, Hippo Flambe). The difference between a leaf picked off my tree seconds before using it is far removed from the dry, dusty leaves in the spice section of your supermarket.  Plus my bay laurel has the added benefit of being easy to care for. It was a rather  inauspicious start to my bay laurel tree farming. I was given the tree by a friend who had decided to "euthanize" her tree. Her tree had developed a sticky residue on the leaves and she did not want to spend the time cleaning the leaves. In addition it had clearly outgrown its 23 inch pot and she had visions of it taking over her house. I immediately jumped at the chance to own my own bay laurel tree and told her not to kill it, I would adopt it instead.  When I arrived at her house one day in the pouring rain I stared at the giant tree and I began to wonder how well this was going to work out.  The first problem was how to get it in the back of my station wagon, even with the rear seats folded down it was far to big. So we went after the tree with clippers, ruthlessly cutting back every limb. In the end the tree had lost considerably more then 50% of its branches and I remembered the advice to never prune a tree back that far. I shrugged and figured what was the worst that could happen, even if it died the tree was free to me, I had nothing to lose.

That winter we kept the tree in an upstairs South facing window and miraculously it began growing new leaves almost right away. I did not give it any artificial light or fertilizer, we just opened the blind from 7 AM until it was dark.  The room it was in only gets passive heat from the other rooms, so the room temperature is often as low as 59 degrees.  The tree was severely pot bound as even in a 23 inch pot 1 qt of water would come rushing out the bottom almost immediately.  Every week it put out tiny new shoots and leaves and I began to take more leaves to cook with.  After using the leaves a few times I began to care more about my bay tree.

That spring we began to search for a larger pot. I was told at many locations that I could get a larger ceramic pot but not plastic. It had taken 2 of us to slowly inch the tree upstairs in a plastic pot, ceramic and its extra weight was clearly out. Finally one nursery suggested I try bonsai-ing the roots. She explained bonsai tress are removed from their pots and then pie shaped wedges are removed all the way around the root ball so more soil can be packed in and the tree can stay in a smaller pot.  So I bought some high quality soil and we hacked out 4 pie shaped wedges all the way around the root ball.  When I returned the tree to its pot I was amazed at how much water it could now hold.  After a few weeks of new growth it was clear the plant was much happier.

Taking care of my Bay Laurel tree is remarkably simple, especially as I am often a house plant slayer.  In the Fall, sometime in October, we bring the tree indoors. Once indoors we water sparingly about once a week, although I know there are stretches where we just forget.  In the spring we take the tree back outside, where it does not need watering unless there is a really extended dry spell. If you prune it a little in the spring it will produce new growth.  Use well drained, fertile soil.  I just recently applied some of my favorite tomato fertilizer to the soil. The next time it becomes pot bound I will again bonsai the roots. The sticky residue that my friend found on the leaves is caused by scale insects.  If this occurs just wash the leaves with an insecticidal soap and use your nail to scrape away any insect bodies on the leaves and stems. You can also spray with alcohol.  The sticky residue is not usually deadly to your tree but it will inhibit new growth.  Try to keep it in a humid area but do not over water.  Humid in Vermont in the winter is hard, just keep it out of drafts and away from the heating vents, misting them occasionally with water if you want.

The great thing about growing a bay laurel is you only want the leaves, which are the easiest part of a plant to maintain.  If I was starting over with a smaller tree I would not allow it to become as big as mine is, this would make it easier to bring it in and out of the house every year.  When cooking with it remember the fresh leaves are much stronger and more flavorful then dried. When a recipe calls for 2 leaves I only ever use 1. If I just want a slight bay flavor I use a smaller leaf.  One of my favorite uses for the leaves is to flavor a pot of red lentils. I just add one leaf to a pot of simmering red lentils with kosher salt and cook until the lentils are tender.  To serve I simply drain the lentils, drizzle with flavorful extra virgin olive oil and sprinkle with freshly ground pepper.

Butter Lettuce, I love you

Green butter lettuce has to be my all time favorite lettuce....perfect texture, a color that can only be described as translucent and pearly, and a delicate flavor that truly is butter-like. I eat it in all sorts of situations and for all sorts of meals. Breakfast is toast with a thin spread of butter, snipped chives, some shavings of cheddar and a pile of butter lettuce leaves. Lunch is butter lettuce with a white wine vinaigrette, a piece of bread, and maybe a little tuna with herbs. Dinner will always include a butter lettuce salad with lots of snipped chervil. Or perhaps some grilled flank steak with butter lettuce, cilantro, thai basil, shallots, and a little hot pepper drizzled with a light sesame dressing.

Late May and June are the butter lettuce weeks. I plant a four pack of the lettuce every week from mid- April through August and I am rewarded with huge, green and white pillow-like heads of tenderness.  Here is a blog recipe from David Leit, who also appreciates this delicacy.

He is recommending a blue cheese dressing, which will be great later in the summer, but for now I cannot get enough of the delicate flavor and taste, so I will stick to my lighter dressings.

What's Happening This Week in the Greenhouses

I have been spending more time in the retail greenhouse this week and I am just awed by the beauty of some of the flowers. Here are a few photos to get you in the mood too. Delicate folds and perfect gradations of pigment make for some intricate and dazzling begonias: Here is a dahlia that I am in love with:

These orange miniature roses are incredibly sweet near a stone wall or in patio conatiners:

And we have a full array of hot peppers now including:

And....

These Vanilla Marigolds are pretty special as well - very tall, upright and a creamy delicious....

Sweet Potatoes are Coming!

Cheryl says: I spent the Memorial Day weekend gathering containers, amending soil, watering, and otherwise getting my garden planted.

And now, with a few days of rain my plants are looking fabulous and happy, while I'm on a second mad search for containers so I can take advantage of the Sweet Potato Slip Sale this weekend.

A few of the things looking especially terrific right now:

garden skinny pancake 004

Apparently a deer thought so too:

garden skinny pancake 014

The Cherry Bomb pepper was full of flowers and now is setting fruit:

garden skinny pancake 008

And the okra and pickling cucumbers are settling beautifully into their hanging bags.  I'm excited for when they start to vine.  The cucumbers are about to flower:

garden skinny pancake 011

My next project is to get myself 4 containers and a bunch of Fort Vee for sweet potato culture, consulting thesetwo Julie-approved links.   More to come.

Garden Tips: Tomato Planting

Now that tomato planting weather is upon us, I want to write a little about some questions we often receive from customers. One of them is "When can I plant tomatoes?"

Tomatoes are best planted when the soil is warm (night time temperatures are 50F or above) and all danger of frost has gone by. In Burlington that is generally the end of May or the first week in June.  The best planting method for tomatoes involves digging a shallow trench and laying them in it. You can break off the leaves on the bottom 2/3 of the plant and bury the whole stem horizontally in the warm top layer of soil. The buried stem will turn into a huge and healthy root system. The top of the plant is gently bent upwards and soil is patted around the base.  Tomatoes must be trellised for best results; it keeps the plant healthy, off the ground, and the fruit stays clean.

Here are some photos of a tomato planting that happened recently in our display garden:

The language that describes tomato plants can be a little confusing. Here are a few tomato terms explained: Hybrid - a tomato that is a cross between two different types of tomatoes. Seeds from these tomatoes will not grow out true to type, but will revert back to one of the parent tomato varieties. Hybrids are not genetically modified, they are just a simple cross between two types. For example, one tomato with good disease resistance is crossed with another variety that is known for good flavor in hopes of producing a healthy yet tasty tomato. Some of our favorite hybrids are Big Beef and Early Girl. Open Pollinated - a tomato that is the product of two parents that are the same variety. The seeds from these tomatoes will be true to type. All of our "heirloom" tomatoes are open pollinated and the seeds could be saved from those fruit. Heirloom - a variety with a story. These are plants which have been handed down, brought to the new world in various ways, found in distant parts, or in your neighbors back yard. These are all open pollinated. Heirloom is not a botanical terms, it just means that it is an older variety with a lot of flavor or other appealing characteristic like color of shape. Sometimes heirlooms are less disease resistant than hybrids, but they make up for it with flavor. Heirlooms are sought after by home gardeners since those types of tomatoes are not found in conventional grocery stores. Around here they are easily purchased at farmers markets, but it is always nice to eat something harvested just seconds ago from your own garden. Determinate - a tomato that only grows to a certain height and then all of the fruit ripen at once and then the plant dies. This is a good option for people who can or freeze tomatoes so that they will have a big batch ready to use all at once. Some of our favorite determinate tomatoes are Glacier (which is also an heirloom and very early to boot) and Celebrity. Indeterminate - a tomato that grows and grows, with the fruit ripening in various stages. The plant grows until it is killed by frost or disease. In a warm climate these plants would grow into woody vines.  Most of the tomatoes we grow are indeterminate. They require staking or cages, and there are many different methods for doing so. I've seen hockey sticks used in community gardens in Montreal!  Concrete reinforcement wire can be cut into 6 foot sections and bent into a tube shape - this makes once of the strongest and largest cages possible. There are lots of great trellising and caging systems available at Gardeners' Supply Company and your local hardware store will have simple wooden stakes and twine. Professional vegetable growers oftenuse a method called "bakset weaving" which is simple, efficient and affordable.  Here is a description from the University of New Hampshire Extension Service:

•Remove suckers (new shoots that develop in the leaf axils) before they reach an inch in length. • Leave the first sucker that grows below the first flower cluster, removing all others below the first flower cluster; allow suckers above first flower cluster to grow. • Pinch off tops once plants reach a few inches above stake. • Use 4 ft. sturdy wooden stakes, with double stakes at end of each row for strength. • Set stakes six inches deep, one stake for every two plants, as soon as seedlings are transplanted. • Begin supporting tomato seedlings after they have set the first flower clusters. • Tie sturdy, untreated twine at one end of row, about 18” up from soil level. Weave twine between tomato plants, wrapping twice around each stake down the row. After reaching the end- stakes, weave twine back up the row in the opposite direction, alternating with the weave-pattern of the first strand so each plant stem is encircled by twine. • As plants grow, weave another layer of twine every 6-8 inches to keep plants well supported. Four layers of twine will support most varieties.

Hope this information helps, and as always feel free to stop by our greenhouses where our staff can always talk to your about your tomato growing concerns. Happy gardening!

Plants in the Ground

There are a few things I (Cheryl) must reiterate about my garden life. 1.  Curiosity yes.  Skills no.

2.  Everything in the garden takes me twice as long as normal people because I'm so easily distracted.

3.  I can never, ever seem to come home with enough mulch.

4.  I should not be trusted with plants who have needs that are in any way complicated.

Which is why the blueberries I planted two years ago are still these pathetic runts:

garden 002
garden 002

And why I should have resisted when Julie gave me a cardoon and an artichoke plant, which are sort of greedy plants that like lots of room and nutrients and water and stuff.

garden 003
garden 003

But I went out to the greenhouse this week and came back laden with lettuce, frisee, fennel, cilantro, broccoli raab, mustard greens,chervil, and gorgeous pansies for my more-shady eastern bed.  Julie had helped me pick these because they fit with my edible garden theme, are somewhat shade tolerant, and many are from the botanical family that's especially attractive to beneficial insects (as well as being the preferred food of the caterpillar that turns into the swallowtail butterfly - very pretty).

So I got the bed ready in the laziest possible way.  I did a fairly uninspired job of weeding, then spread mulch over as far as I could.  (Having, as usual, bought much less mulch than I needed, I could only go so far.)  With the lettuces and herbs, I put some compost in the small holes I dug in the soil.  But there was a foggy memory in a dusty corner of my brain telling me that overly fertile soil can discourage flower formation so I didn't add the compost boost to the pansies' spots.

garden 004
garden 004

Julie adds:

A gentle word on mulch.  In general, instead of bark mulch, which doesn't add anything to the soil, I'd recommend a good compost that is free of weed seeds or a product like VT Compost Company’s Perennial Blend. It is a mixture of compost and potting soil and peat moss and will create a weed barrier while adding nutrients at the same time. If a weed seed is under the compost blend, it won’t see the light of day, and in theory will not germinate.

Alternately,  I am a big believer in hoeing or using a tool to scratch up the soil surface every now and then, before the weeds germinate. I know it can be hard to fit in, but it can be kind of meditative, quick and not at all like weeding. Really.  Around food crops, it’s always best to assume you will have to do some handwork since there are no perfect and total mulch options. Close spacing, planting in rows and mulching paths works well in a more traditional plot; but in a situation like yours, where you are doing edible landscaping and not going for straight rows, weeding is inevitable.

Scratching up the soil surface before you even see the weeds is the simplest, input and money-free solution.  But if you want to invest in your gardening future, I think your beds could really benefit from the Perennial blend. For about $30 you could cover that whole eastern bed with a thin layer. That method is called “top dressing.”

Oh yeah, now that you have the mulch down, say three Hail Mary’s and come back to talk to me in a few weeks.

While I still had a ton of greens left to fit in, I went back to the greenhouse for today's grand opening and came home with some stunning annuals and very pretty perennials, as well as the most adorable basil I've ever seen.  Tomorrow morning, more mulch goes down, the rest of the plants go in.  And I now have to consider what to do with the additional bags of mulch that I bought.

red wagon grand opening 006

Raised Beds

by Julie

My home garden is often neglected. There are a few reasons for that - 1.) I am way too busy in the spring and don't have the time, and 2.) I would rather go swimming in the summer than weed. Yes, it's true. Our Vermont summers are so short, that I often make choices that don't benefit the garden come August. So in the early spring, before I get too too busy at Red Wagon, I try to make gardening choices that will entail less work come summer and get the plants off to a really good start so that they are strong enough to handle my abuse and neglect later in the season.

This year, the Red Wagon crew came over and installed some great raised beds in the back yard. My regular garden is quite shady because of some neighboring trees (not mine or I would cut them down!) so I decided to put in some raised beds in the overgrown meadow behind the house and hopefully this will help me tame the wild. It's a sloping, wet mess with a huge forest of Japanese Knotweed trying to take over everything in its path. I have dug a trench around the knotweed and Elise covered a 20 x 20' patch of it with black plastic that my neighbor, Paul,  gave me (I think he is worried it will spread to his yard, I would be too if I were him). Hopefully the combination of black-out and containment will slow it down.

About half way through the installation, the raised beds look like this:

We filled the raised beds with leaves, composted donkey manure and a thick layer of compost from Red Wagon Plants, which is mainly potting soil from years past that was given to us by the plants that did not sell. It's a great fill for raised beds, and not readily available to home gardeners, but I would recommend a mixture of top soil and compost. In the first year of a raised bed, the bottom layer can be some rough organic matter such as leaves, lawn clippings, etc. Just make sure that there is a good amount of the actual planting medium (at least 8").

I used a thick layer of cardboard and burlap coffee bags under everything to smother out the grass.

Here are the finished beds:

Our workshop on April 17th will be all about raised bed gardening with special guests Markey Read and Tim King. Please call us or email us to register. ..... 802 482 4060 or julieATredwagonplants.com.

Planning for a Full Harvest all Season Long

Growing vegetables in your backyard, community garden or in some containers by the kitchen door is a great way to feed yourself -- whether it be just a few ripe tomatoes in August or a full fledged homesteaders garden, you are on the right path to feeding yourself and your family.  Gardening is a great way to improve how you eat while spending some contemplative time outside. With all of these benefits in mind, it is easy to jump into gardening enthusiastically, and you will reap even more rewards with a little bit of planning. In Vermont, our gardening season seems short but can be stretched year round with a few simple tips.  I always recommend that people take a look at how their vegetable gardens have been in the past and find just one or two things they would like to improve so that they can grow more of it for a longer season.  For example a common questions I hear is "how can I keep cilantro from bolting?"  Well, in short, you can't! But with a few changes in your gardening practices, you can grow it all spring, summer, and fall without ever seeing it go to seed.  The trick is to understand the life cycle of each food crop and how to best plant it to maximize it's harvest.  With certain crops, like zucchini, it is best to understand how prolific they are and to plant them conservatively so that the entire garden (and thereby your diet and your neighbors' diet) is not taken over with just one thing.  It is also helpful to plant things seasonally so that the harvest is not so overwhelming in August with little to eat before or after. Succession Planting for Successful Gardening Certain crops should be planted multiple times throughout the season to ensure a continuous harvest.  How often you plant is a matter of taste and space and time. The following list describes the maximum you could do with each crop, but adjust according to your needs and priorities -- this is just a guide.

Lettuce can be planted from seed or from transplants.  Seed grown lettuce is often grown in a row that can be cut and will re-grow a few times.  Transplanted lettuce can be grown for full heads like what you find in the store.  Both methods require regular planting every week or two for a continuous harvest.  It can be planted from seed in mid-April to mid-August for cut greens and transplanted for full heads from late April through early August.  Some people will transplant a few plants and plant some seeds at the same time in a different area; this method provides two generations of lettuce.  Once the cut lettuce becomes bitter in the heat of summer, it is best to pull it up, recondition the soil and plant something else.  If the goal is to always have fresh lettuce and it is very simple to do if you remember to replant.

Cilantro is very similar to lettuce in its growing habits.  It will grow up to a point and then goes to seed, or bolts.  It i will bolt more quickly in summer heat and, conversely, will stand ready to harvest for many weeks in the cool weather of spring and fall--even early winter.  It can be transplanted or grown from seed.  Like lettuce, it is simple to do both at the same time, thereby giving the gardener two generations.  Cilantro seed is coriander, so it does have a use if you enjoy that flavor.

Dill can be treated just like cilantro, and like coriander seed, dill seed heads have a use in the kitchen, so it is fine to let some of the dill patch go to seed.

Basil can be planted multiple times for best results.  Plants can be pinched to slow down the flowering, but best flavor will come from newly replanted basil plants.  Heat loving. Should only be planted once soil temps are in the upper 50's.

Cucumbers, cantaloupes, and zucchini and summer squash are best in quality when well tended. Just a single plant or two of any of those is usually enough for the home gardener, but by planting it three different times, the quality will always be good. The dates are: June 1st (or last week in May if you are in a warm spot), July 1st and July 15th.  This method will ensure a continuous harvest of prime looking vegetables.  Just remember to pull out and discard the pest and disease prone plants.  If your compost gets very hot and is well managed, it is okay to compost these plants.  Pest problems will diminish when the older, less healthy plants are removed.

Arugula, Cress, and other cutting greens for salads are best if sown or transplanted on a weekly or biweekly basis.  Again, a small amount can be seeded next to the transplanted crops in order to give you 2 generations at once.  This way you can have smaller quantities coming in at various times. Broccoli gives the gardener a couple of options.  It is best if transplanted and can be planted 3 dates in the spring and 3 dates in late summer for a continuous harvest.  I would choose late April, early May and mid May for the spring plantings and then Early August, mid August and early September for the fall plantings.  Full heads can be harvested and the plants can stay in the ground to produce side shoots. Green Beans -- are best when fresh and young.  The seed is relatively cheap, so it is better to rip out old plants and have new ones coming along regularly.  Having multiple plantings also means that no on is stuck picking beans for ours on end.  Sow new seeds when the previous or first generation is about 6 inches high.

Boc Choi, Cabbage, Scallions, Cauliflower -- these can also be planted multiple times.  Cabbage holds well in heat and can be planted every couple of weeks late April through early August.  Boc Choi and Cauliflower are not as heat tolerant and should be planted around the same dates as broccoli (see above). It is best to use row cover like reemay on these young transplants so that flea beetles do not destroy the plants. Spinach is another one that does not do well in the heat, but can be planted multiple times in spring and late summer.  It can also overwinter with a little straw mulch for very early spring eating.  Date to plant are (up to every week) mid April to early June and then early August to mid September. The last plantings in September are the ones which will be over-wintered and eaten the following spring.

Beets, Carrots, Turnips can be planted every two or three weeks from mid-April until about the third week in July.  Summer carrots are not the same as fall carrots and certain varieties do better in summer than in fall. Celery and Celeriac are slower growing and can be planted 2 to 3 times during the season.  Mid May until early July.  These need lots of water and benefit from straw mulch.

Bulb fennel and radishes are similar to lettuce -- they can be planted each week if really loved, but they bolt in the heat and do best in cooler temperatures of spring and fall.  Best if planted late April to early June and then again late August to mid September.  Very cold tolerant and hold well in late fall,  radishes are sown from seeds and fennel is best transplanted. Corn -- it is possible to do multiple plantings over different weeks, but an easier method is to plant all at once, but with various varieties that have different days to maturity.  There can be a 40 day span between early and late varieties. Peas -- can be planted every week, but this requires a lot of harvesting, irrigating, trellising, and variety research.  It is possible though.  More practically, the home gardener can sow 2 or 3 varieties in late April with various days to maturity.  Fall plantings are sometimes successful but weather dependent. These should be done in mid August.

The following are generally planted just once a year, but the harvest can be staggered with a few tricks: Tomatoes, Peppers, Eggplant -- try a few varieties of each in order to not have everything at once.  Determinate tomatoes will provide you with a big harvest all at once which is a good thing for people who make big batches of sauce for canning or freezing.

Onions and Potatoes are generally planted all at once, and again a few different varieties will provide you with a longer period of fresh eating.  Both onions and potatoes can be stored for long periods of time in cool and dark conditions.  Both can also be eaten fresh. Winter Squash is another crop that is just planted once and stored.  Best if cured for a week or two in a warm spot before eating.

Spring Time and Season Extension

We are busy happily working in the greenhouses! Early spring is an active time for seed planting. Some vegetables need to be planted in  a greenhouse and nurtured along as the Vermont summer is just not long enough for them to be planted directly in the garden. The germination of the earliest vegetables is a thrill to us and we know that they will thrill you in your gardens. With a few simple strategies for season extension, Spring can  be a rewarding time to see a few early flowers and even to grow some cold tolerant greens. Containers are a great way to do this. They can be kept indoors on the coldest days and nights, covered up with row covers, blankets or plastic sheeting on the mildly cold nights, and left out all day and night once the weather permits. Any crate, or large pot with holes in the bottom can be filled with good quality potting soil such as Vermont Compost Company?s “Fort V” and then planted with an array of salad greens and edible blossoms such as pansies that you can cut from once they reach a few inches high. You can cut and harvest these plants and allow them to re-grow for multiple harvests, allowing you a gorgeous salad while it is still too cold to be out in the garden.

As soon as the soil can be worked in your garden, it is possible to get a jump on our seemingly late warm weather by building a simple shelter out of Number 9 gauge wire and some row cover or even old blankets and plastic sheeting. If you cut the wire into 6 foot lengths, plant each end into the ground (making a hoop) and repeat every few feet, you now have a very quick and easy tunnel frame upon which to drape your fabric. This creates a lovely shelter for some very hardy greens. With this type of simple tunnel, a version of a cold frame, it is most important to cover it at night and uncover it in the morning. The plants can get very hot unless you use special row cover designed to stay on night and day.

The most cold tolerant food crops we can grow here are things like kale, spinach, collards, arugula, mustard greens, mache (corn salad), and many herbs such as cilantro, dill, sorrel, and chives. Certain lettuces are very cold hardy, but they cannot take the frost quite as well as the plants mentioned above--good cold hardy varieties include the French heirlooms, “Reines des Glaces” and “Merveiles des Quatres Saisons.” These most tender and delicate looking lettuces can take quite a beating when it comes to cold weather. Overall, early spring is a great time to satisfy the need for green, fresh foods that are grown locally after a long winer of leafy foods trucked in from far away. The difference in taste and the level of satisfaction you will experience is well worth the effort.

Spring's Slow Awakening

Inspired by Julie's visit and emboldened by the sunshine, I went out to clear away some of the mess from last year.  I was rewarded with a peek at what's coming up ... just in time for a cold snap this weekend.

3-20-10 Dakin Bfast 001

There was the wintergreen, staying as bright as it's supposed to.

3-20-10 Dakin Bfast 002

The first shoots of the soon-to-be inedible sorrel I mentioned last week.  I'm planning to harvest its first leaves for salad before I pull it out to replace with currant bushes.

3-20-10 Dakin Bfast 006

Oh, and look - some perky German thyme from RWP last year.  This is making a roast chicken more and more likely this weekend.

And as I was looking at the bare dirt, I had the sudden thought that I have no idea what is going on with it.  Julie, should I get it tested?  What should I do next to prep it?

Cuba

I recently took a trip to the city of Havana, Cuba with the hope of seeing some of the urban agriculture I had heard so much about. First a little background: the Cuban economy was sent into a complete crisis when the Soviet system collapsed and they lost access to a major trading partner. All exports and imports ground to a screeching halt and Cubans entered what they call the "Special Period." It was during this time that Cuban agriculture shifted from an industrial, chemical intensive model to a more diversified, small scale and organic model. The learning curve was steep out of sheer necessity and now Cuba can show examples of organic agriculture at its best, in spite of the ongoing US embargo. Under the Castro system, Cuban farmers may produce some of their own crops to sell at farmers' markets; this makes farmers one of the few groups that are able to have their own small enterprise since most businesses in Cuba are owned by the government. I was extremely lucky to be able to visit the famous Alamar Organiponico in Havana. This is one of the most innovative, organic vegetable farms I have ever seen and seems to have incredible high yields off of a relatively small parcel of land (roughly 20 acres). The Alamar Organiponico is a Basic Unit of Production, which in Cuban terms means that the land is owned by the government but the produce and its proceeds are owned by the workers who work cooperatively and share the profit. With the help of translator and friend, Majel Reyes, I met with the director of the Organiponico, Miguel Salcines Lopez. He explained to us that when agriculture in Cuba was industrial and monocrop systems only, with high levels of mechanization, many rural people left the countryside because their labor had been replaced by machines and subsistence agriculture was no longer possible. This great influx into the cities made for a new cultural outlook that disdained agrarian life. Part of the importance of the Alamar project is to create a type of agriculture that is human scaled and rewarding on all levels: financial, physical and spiritual. He believes strongly that if the people do not find meaning and beauty in their work, then the plants and crops will suffer.

Miguel Salcines, director of the Alamar Organiponico

Mr. Salcines was trained as an agronomist and worked for the government in a bureaucratic job for most of his career but said his soul woke up once he was able to work on the organiponico. His joy and enthusiasm seemed contagious. The farm consists of greenhouses, screenhouses, tropical ornamental plant nurseries, small scale forage crops, composting facility, vermiculture facility, a cafe, a farmstand, and a value added facility. Every crop we saw was a healthy bursting splash of green. Most crops are grown in raised beds with four rotations per year. Since the land is farmed so intensively, soil rejuvenation is constantly in motion with the addition of worm castings, compost, and soil innoculated with  mychorrizal fungi (a beneficial fungus which is produced on site).

Vermiculture at Alamar
California Red Wrigglers
Mychorrizal Fungi production. Plants are grown in cement bunkers, soil is innoculated with benefical spores, root systmes of plants host the fungi, plants are cut down, and fungi multiplies on root systems in soil.

All of their field transplants are grown on site and their potting soil is mixed on site. It is made up of rice hulls, worm castings, and compost.

Potting soil in dump wagon
Dumped out
Potting soil for seed starting
A really healthy root system
Seedlings growing out before being transplanted
Tomatoes, young and trellised
Carrots
Lettuce and herbs
Lettuce, herbs, a pole barn under construction, and housing complex

As you can see, plant spacing is very tight, but because of careful crop rotation, use of beneficial insects, and attention to soil health, disease and insect pressure is at a minimum. I was surprised to see that crops showed no sign of disease or stress in spite of the tight spacing and lack of air circulation between plants.

There are more photos available here. I encourage everyone to consider the possibility of going to Cuba. Americans can go legally under a general license if they are conducting research pertaining to their profession. Seeing a country where the people are at once poor yet highly educated with access to all kinds of arts and culture is a truly illuminating experience. The warmth and intelligence of all the Cubans we met was a life changing experience and one that I hope to repeat.  Cuba libre!

Marigolds

Tiger Eye French Marigold

Marigolds are one of my favorite plants and I find myself often defending them. They have a reputation for being stodgy and boring, and while they are certainly ubiquitous, there are plenty of interesting varieties out there that no one needs to get bored with them.  Discoveries of unusual marigolds continue to delight me as I peruse catalogs and put the finishing touches on our seeding plans.

he first European discovery of them was by the Portuguese in Central America. I am not sure if they were cultivated by Native Americans, or just growing wild, but they were no doubt appreciated. The Portuguese brought them to Europe and India. Now they are used widely throughout the world for ornamental, medicinal, ritual, and culinary purposes. All marigolds are edible, but the small flowere tagetes type, like the gem series are best used for this purpose.

I am working out the timing of all our marigold varieties. Doing the timing means figuring out when to plant them, how often to plant them and what kind of pot they should end up in. When you buy marigolds, they usually come in 4 packs or 6 packs, and have often by treated with a hormone that induces them to bloom on short stems so that you know what they will look like once planted.

We don't use any kind of hormone sprays or growth regulators. So sometimes, we sell marigolds and other annuals while they are still green, without blooms. It involves a little more work because we have to have pictures of the marigolds around the greenhouse and we have to explain why we do it, but really it much better than using  a bunch of chemicals.

Here are some of the new varieties we are doing this year.

I really love marigolds. I know that they are not unusual or rare, but they fire up some sort of ofalctory memory center for me. Maybe my grandmother had them, or my parents planted them. I have no visual memory of them that is as strong as the scent memory. Their pungent, almost citrus-like aroma is a deterent to some and appealing to others. How do you feel about marigolds?

Anyhow, here are a few that I am excited about.

crackerjack Mix Marigold
Creamy Vanilla African Marigold
French Bonanza Flame Marigold
Jolly Jester Marigold

This last one is, Jolly Jester, is one of my favorites. It is about 4 feet tall, and not at all a typical marigold. The striped blooms are a contrasting play of lively yellow and deep orange, and they sway gently in the breeze. They do not at all have the stiff appearance of many marigolds and kids just love them. This is an old-fashioned variety - we find the seeds at Seed Savers Exchange which specializes in heirloom seeds of harder to find plants. 97 of our 679 varieties come from them.

Plants for Honey Bees

Calendula

Cleome

Cosmos

Heliotrope

Hyacinth Bean Vine

Salvia

Mints

Scarlet Runner Bean

Sorghum

Basils

Borage

Catnip

Chamomile

Chives

Cilantro

Dill

Germander

Lavender

marjoram

Oregano

Rosemary

Sage

Thyme

Savory

Clematis

Dicentra (Bleeding Heart)

Eupatorium (Joe Pye Weed)

Verbena bonariensis

Lemon Balm

Asclepias

Liatris

Ajuga

Allysum

Echinacea

Perovskia (Russian Sage)

Nepeta

Salix (Willows)

Sambucus (Elderberry)

Physocarpus (Nine Bark)

Lyng's Giant Grey Stripe Sunflower

Fennel, Bronze Leaf

In general, bees like plants whose colors have alot of contrast and they go out to feed off one type of plant at a time, so it is a good idea to plant multiple plants of one type in an area. Creating a pollinator friendly garden will not only help the bees, but will also help your yields in the vegetable and fruit garden. The more pollinators come visiting the better your results...you will see it in the fruit set of squashes, cucumbers, melons, etc. Pollinator gardens help the bees, help our food supply and add beauty to our worlds.

Please visit the resources section of our garden journal for a growing list of resources pertaining to bees and pollination.

Salix nana or the Willow Wonder

Salix nana or Arctic Blue Willow

Certain plants look just right in the snow, and since I am home so much more in the winter than in the summer, I like to make sure there is some winter appeal to our gardens. We have a hedgerow of Salix nana, or Arctic Blue Willow. They are a fast growing plant, perfect for privacy screens, bird habitat and bee forage.

Here is the same shrub in winter. I love how the snow just hangs in the branches. Birds perch here and get out of the wind. And the twiggy nature of these willows keeps them well employed as a privacy screen all year long.

Salix nana in winter

A Time of Acceptance

I love garlic planting time.  You can really learn a lot about your soil when it is fall and the garden has spent a summer being tended (or not).  This is the second burst of good intentions, the first one being the entire month of May when ideas run ecstatically through the garden plan .  Garden cleanup is a confessional time in the gardening calendar. It is a time to look at mistakes, assess and swear to never make them again, renew your commitment to gardening, and prepare to let the passage of a long winter slowly rekindle your optimism for that spring burst.   Or you can  just learn to live with your shortcomings and realize that the garden is a very forgiving place, where perfection, motivation, and execution don't have to be the priorities.  In other words, it's time to take the pressure off.  There is so much of it in our lives, why not let the garden be a place where we accept and embrace imperfection. Garlic planting is a perfect way to mark the impending doom of winter and the shortening days.  Tucking those fat cloves deep into the earth, I feel unbounded optimism, a deep sense of satisfaction that I am punctuating the calendar with an earthy tradition, full of meaning and metaphor.  The garden is a great place to create your own traditions that are in step with changing seasons; it's a place of rituals that are private and intimate,  between you and your dirt. When I plant garlic, I imagine winter as a time to prepare for spring, as a passage in the circular cycle.  The thought of those cloves, tucked into their bed and nestled in straw, remind me that it is alright to take time to just rest and renew come those cold and bleak days.

I always start by selecting a site for the garlic that will benefit both the garden, the garlic and future crops.  Garlic brings a full  9 months of cultivation to the garden, much more than other vegetable plantings.  With it also comes a deep soil work up, a thick layer of composted manure, and another thick layer of straw.  These are all great ways to treat your soil and whatever is planted in that spot, in your garden's future, will feel the love.  As part of my garden rotation, I spend the winter imagining what will be planted where the garlic once stood, which crop will benefit from the extra organic matter and nutrients and care that the garlic received.  Many people think that garlic is a healing food with all sorts of immune boosting properties....I think it does the same type of work in the garden.  Once again, I am reminded of the way gardening is a microcosm of life and of the body, following the cycle not just of the seasons, but also, of growth and acceptance.

The Rototiller and the Gym

straw in the garden

Every year, around October, I join a local gym and start to do arduous things indoors.  I don't love to exercise indoors, but it's a way to keep myself from going a little batty and  it means I can't use our foul weather as an excuse.  This year though, I am waiting a little longer to submit myself to the four walls and the machines and instead I am tilling my garden by hand.  With a fork.  You may be asking, what, pray tell has come over her? Well, two things....rototilling is bad for your soil and, yes,  I like the workout.  Those rototiller tines break up the titlth and structure of your soil, churning everything up too finely and forcing all of the organic matter to decompose too quickly, thereby not leaving the nutrients in the ground for next year's plants.  It also only works the top layer of the soil and leaves an untouched hard pan just a few inches below the surface--not ideal for root crops or any plant with a tap root. You can read about no-till agriculture here and here.  It is the newish trend in organic farming systems that copy how things were done a long time ago, before big farm machinery,  and has been proven to reduce carbon emissions by using fewer fossil fuels, and by storing carbon in plants rather than by losing it to the atmosphere when plant matter breaks down too quickly.  All this sounds like a great reason to park the rototiller permanently, but the truth is, I do it for other reasons as well.  I don't own a rottotiller; I don't like having to ask someone to do it, and I like the messy workout.  Here's how I did it this year. Back in the spring, I invested in about 20 bales of straw.  My garden is broken up into an odd assortment of rectangles connected with meandering paths.  It is a place that encourages inefficient wandering and discourages straight ahead speed. I love my garden for these qualities that make it an antithesis to the hassle and bustle of most days. And it's another reason a machine just doesn't work for me: I don't want one big rectangle with a bunch of straight rows.  Rather, I like my garden to have a series of mini gardens with their own mini rows and blocks. It makes for a beautiful patchwork quilt of vegetables.  So when I started to plant everything back in April and May, I covered up the paths and all the bare soil around the plants with lots of straw.  This did a great job of keeping down weeds and limiting the amount of water the plants needed.  I added more straw and pulled a weed here and there, but for the most part, found that the initial investment more than paid for itself in time spent swimming.

Now that the plants are done, I am going through and cutting down dead stalks, composting them in a corner along with some of Rosie and Pokey's donkey manure.  For crops that can be planted in fairly coarse soil, I will just leave the straw in place and come next spring, I will push the straw away, add a big scoop of compost, incorporate compost and soil, dig a little hoel,  and plant right into that.  I will add more straw too since so much of it will break down over the winter.

For prepping areas where I am going to be seeding first thing in the spring, I'll need a finer bed preparation which will be done in two phases.  Fall phase, now, is to push away the straw, churn up the soil with a four pronged pitchfork, smash it up a little, rake it smooth, and place the straw back on top.  This keeps the soil in place and does not allow erosion to do its thing.  Come April, I will push the straw back yet again, hoe and rake the bed to make the top layer of soil fine and not too chunky, and plant some seeds in little furrows.  The straw just waits in piles along the edge of the rectangle and gets spread out again once the seeded plants are about 6" to 8" high.  This requires a little weeding around the plants in between straw replacement times, but it's not too much.

This sounds like a lot of work, but it saves time come spring to prep as much of the garden as possible now.  I really like the benefit of seeing the soil texture improve year to year and each little rectangle of my garden seems to have its own characteristics.  It all feels very wholistic, a little messy, and not at all perfect.  I don't feel bad when some weeds get through the system because I will just pull them out or chop them down and layer them into the accumulated straw.  It's about your mulch being part of your fertility plan and it is about gadening without guilt.  The gym can wait another month while I play in the dirt a little longer.

Planting the Perfect Pumpkin

We all want that giant, magical pumpkin come harvest time.  Here are a few tips to get you there.  Pumpkins are related to cucumbers, melons, summer squash, zucchini, and winter squashes and all of the vegetables in this family will benefit from this treatment. Warm soil. In Vermont wait until early June to put out the plants--a good rule of thumb is to wait until we have had a few nights above 50 F degrees. Transplants do better than seeds since you will have a head start on the season and don't risk having seeds rot in cold soil or be eaten by the local rodent.  It's best to keep two plants together when transplanting since the larger volume of foliage will help shade out weeds later in the season.

A raised bed or mound. This will help warm the soil and improve drainage.  It also gives the plants' shallow roots a place full or looser soil to spread without strain.

Lots of fertility. Compost is a  must for successful pumpkins, squashes, cucumbers and melons.  At home, we use rotted donkey manure (thanks to Pokey and Rosy) mixed with well composted yard debris (leaves, grass clippings) and food scraps.  More can be learned about compost at the Vermont Compost Company website.  A little granular fertilizer can be used as well if you do not have access to good compost and/or very poor soils.  A soil test is always a good idea, and can be done easily at your local extension office.

Adequate water. One inch a week.  That means that if it does not rain, you should gently pour about 3 gallons of water at the base of your plants.  A slow drip irrigation system or soaker hose is a great option as well.

Full sun. There is no compromise on this one.  The plants must have at least 8 to 10 hours of full sunlight.

Lots of room.  Plants (actually, groups of 2 plants) should be at least 3 feet apart. They need that much space for proper ventilation and so that the flowers and foliage are exposed to pollinators and sunlight.

Pollination. Plant a few bee friendly plants such as calendula, borage, mint and salvias around your garden to attract bees and other beneficial insects.  Cucurbit plants have male and female flowers on each plant and have to be pollinated by insects.  Welcoming bees to your garden will help yields since more female flowers will become pollinated--the only way for them to produce fruit.

Harvest at the right time. Winter squashes and pumpkins should be harvested when the skins are hard and cannot be pierced by your thumbnail.  Summer squashes and cucumbers and zucchini should be harvested at whatever stage you like to eat them, from baby to baseball bats.  Watermelons are harvested when the tendrils on either side of the attaching stem are dead and the yellow spot on the bottom of the fruit (where it rests on the ground) is a deep yellow, and when thunking the fruit with your knuckle produces a hollow sound.  Cantaloupes are ready when they slip off the vine with a gentle tug (called the "half slip stage").  Melons take a little trial and error to learn to harvest at the right time, but a good rule of thumb is "if in doubt, wait."

The Autumn Garden: Time to Gather and Restore

With these colder days also come a chance to produce a few more late season greens in the vegetable garden. These include lettuce, kale, parsley cilantro, arugula, mustard greens and spinach. Here is a simple system that can be followed by anyone wishing to extend the fall and winter harvest.