Garden Tips and Stories

Weekend Garden Update and How to Prune a Raspberry Patch

Today's weather report - slush, sleet, slush. I am glad I got a few hours in the garden on Sunday. Here is what got done.

I oohed and aahed over the over-wintered leeks. If you peel back the outer layers, there is a sweet, leeky gem underneath. Silky and fresh in soups or braises - perfect for today's weather.

Sandy brought her mini tennis ball to the garden. She was pretty happy overall with the development of the garden work.

We said hello to the garlic.  It never got mulched this winter, but the 3 feet of snow we had all winter long seemed to do the trick. I will add a little Compost Plus to make it happy.

The Japanese Fan Tail Willow that is part of our hedgerow creating a privacy screen from the road made me pretty happy as I walked back to the house at dusk. The catkins were just calling out for a nuzzle.

The raspberry bushes got a haircut. The donkeys love to eat those prickly brambles. Hard to believe.

Raspberry patch before it gets pruned. Notice how thick it is. The trick is to cut out the growth that is two years old. Those are the "canes" that bore fruit last summer. They will not make fruit this year and just take energy away from the plant. They are pretty easy to identify because the bark peels back and the color is not as red as the 1 year old growth. When you cut them, the interior of the cane is drier and pale green. The canes that will bear fruit this year are brighter red, and when you cut them they are a brighter green and full of sap.

After pruning. The canes each have about six inches of space. I also cut the tips of the canes off, about 1 inch or so. This helps give the cane energy lower down on the cane where the fruit will size up a little more.

Fall bearing raspberries are cut right down to the ground, as you can see below.

Cannot wait to eat these, freeze them, make jam.

But first, back to the sleet.

Do You Want a Little Spring in the Kitchen?

We start selling herbs in pots long before the ground is ready to work. Many of you still have snow on the ground; some of you may be lucky enough to live someplace where the snow is melted, but we all are worried more is on the way. Anyhow, when the snow first melts, the ground looks barren and dirty save for a few bulbs trying to poke through. Poor things. This has been such a cold spring, and while I don't want to complain too much, it would be nice if we had a little warm weather right about now. If you are wanting just a little reminder of what is coming down the road, you could grow a little window sill herb garden for now. All you need are a few herbs, a sunny window, and not much else. If you want to get fancy, you could pot up those herbs into pretty pots or mix them together in an indoor window box, but there is no need to really. Just some 4" pots are fine for now, and soon enough the plants can go outside, either in the ground or in bigger pots. We just started to deliver plants to a few stores, so consider picking some up for a little cheer. The scent alone is enough to lift anyone's spirit.

A group of Bhutanese farmers came to visit our greenhouses this week - it's the second group that has come by. When I saw the look on their faces when they were smelling the herbs - mint, rosemary, cilantro, lavender - I was reminded of why I do this work. It takes the edge off of those long end of winter weeks and brings hope and love into my being. It's an honor to share it all.

- Julie

New Plants in 2011

'Zion Copper Amethyst' Osteospermum

We are so excited about our new selection of plants! Many of you have requested a wider array of edible and ornamental landscape plants, and we are happy to oblige. Below you will find a few of the new plants we love. Descriptions, growing information, and suggestions for companion plants can be found under "Our Plants".

'Zion Copper Amethyst' Osteospermum: Upright, daisy-like annual flowers in awe-inspiring amethyst/pink/orange. Plant in part to full sun 12-18" apart. Slightly trailing habit. Low maintenance, no deadheading required! Does well in containers. Allow top of soil to dry out between waterings.

'Holy Red and Green' Sacred Tulsi Basil: Striking purple and green leaves have a musky scent and mint-clove flavor. Tulsi basil has been sacred to Hindus for at least 3,000 years. It has excellent medicinal properties as a stress reliever and anti-inflammatory and makes a refreshing tea. Allison, our seed master, says it makes a wonderfully-scented oil for salves and skin creams.

'Reliance' Grape: A very hardy, vigorous variety that produces clusters of beautiful pink seedless grapes excellent for fresh eating as well as jellies and juices. Plant in full sun and moist, well-drained soil where the plant will have at least 10’ of climbing space. Prune in winter, train in summer. Makes a great privacy screen or seasonal shade.

'Banana Cream' Leucanthemum: An unusual perennial daisy that opens lemon yellow and slowly turns white as it matures. Full flowers bloom in abundance all summer. Ideal for cut flowers due to long, straight stems and extended shelf life. Looks lovely with just about anything, but especially lavender, liatris, and gaillardia. Very vigorous plants multiply easily, making a great filler. Plant in full sun 18-24” apart. Attracts butterflies.

'Niger' Black Mondo Grass: A compact, clumping grass-like plant. Foliage turns jet black when grown in full sun. Small light purple to white flowers on short stalks appear in early summer and give way to black berries in the fall. Plant in full sun to part shade 12” apart. Pair with succulents, lobelia ‘Fan Scarlet’, or Lamb’s Ear for dramatic color and texture combinations.

A note on the 'Julia Child' Heirloom Tomatoby the renowned tomato breeder, Gary Ibsen:

"Early in 2001, while having lunch with Julia Child at Bernardus Lodge in Carmel Valley, California, I told her about my having in my tomato seed trials several un-named varieties. I followed by asking her, "If I'm able to grow an heirloom tomato that's good enough to name after you, what kind would you like it to be?" I suspected she would say, "Red", or "Beefsteak", or "Yellow." However, after just a moment's hesitation, Julia looked at me and replied, "Tasty, my dear"

"'Julia Child' is an open-pollinated, heirloom tomato. The tall, indeterminate, potato-leaf plant produces lots of 4-inch, deep-pink, lightly-fluted, beefsteak fruits that have the kind of robust tomatoey flavors and firm, juicy flesh that invites tomato feasting and seed-saving. It's not a simple, sugary sweet variety, but has a bold, straight-forward character in its taste, with more than enough acidity and earthy nuances to balance its sweet, fruity flavors."

'Paul Robeson': A well loved tomato on many people’s “favorites” list. A “black beefsteak” with dark red fruit tinged with black, brown and purple flesh and skin. Rich flavor with hints of spice and red wine. Vary widely in size, but average 10 to 12 oz. each. Does well in colder temperatures. 74 days. Indeterminate, provide support. Won “Best of Show” at Carmel TomatoFest!

Today's Tips

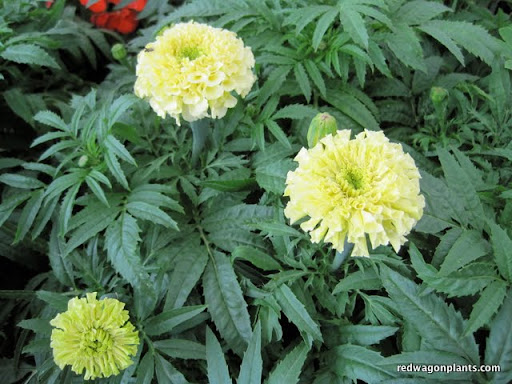
Planning Your Ornamental Landscape

Landscaping your property yourself may seem like a daunting task, but it's easier than you think. In an ornamental landscape, it's important to consider how plants go together - color, texture, size, and shape are important aspects of creating a beautiful and interesting landscape. Using contrast helps bring out complementary features of the different plants. An example of color contrast could mean using plants with flowers from opposite sides of the color wheel, such as blue and orange or yellow, or light and dark colors next to each other. You can also create contrast with texture by using plants with different types of foliage - a plant with lacy foliage could go next to one with glossy leaves - for example, amsonia with heartleaf bergenia.

The Right Plant in the Right Place

One of the most important things to consider when planning your landscape is what plants are suitable for your microclimates. Take a walk around your yard and house and you will undoubtedly find areas that are shady, others that receive salt from driveways or paths, some that are perpetually wet, and yet others that may be very windy, sunny, or cold. It is easy to look at these as "problem" areas where you cannot grow the plants you would most like to. Another way of looking at these areas is as opportunities to create a more diverse landscape and get to know unfamiliar plants. Below you will find examples of some of the plants we grow that fit well in these microclimates.

Salt-Tolerant Plants (good for near the road where the salt truck spray in the winter) : Common Thrift, Sea Holly, Daylilies, Artemisia, Heuchera

Juglone Tolerant Plants (many plants won't grow near trees in the walnut family): Hollyhocks, Daylilies

Cold-Tolerant (superhardy) Plants: Campanula, viola, sedums, Lady's Mantle

Shade-Tolerant Plants: brunnera, hosta, heuchera, dicentra, Goat’s Beard, white baneberry, astilbe, cimicifuga, heartleaf bergenia

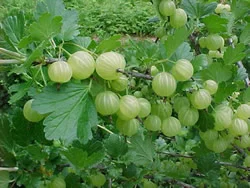
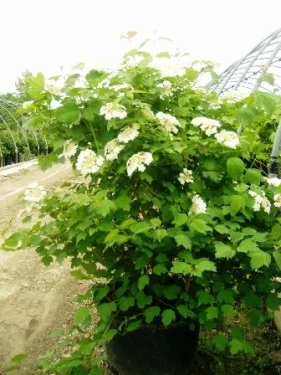
Water-Loving Plants: Joe Pye Weed, Highbush Cranberry, ligularia, Chinese Globeflower,

Low-Maintenance Plants

If you are a very busy person (as I know I am), it is wise to choose plants that require little or no maintenance in order to look beautiful and survive. These plants require little pruning or deadheading, and can fill your landscape with color, texture, and wildlife.

  • Day lillies
  • Grasses
  • Shrubs
  • Sedums
  • Perennial herbs
  • Perennial geraniums
  • Peony

Woody Ornamental Plants

This year we are offering an expanded selection of ornamental shrubs for your landscaping projects. Many of these are also dual-purpose, providing a number of other benefits such as privacy screening, coppice material, shade, windbreak, food and shelter for wildlife, nectar for birds and insects, erosion control, and more. Some examples include:

‘Winter Red’ and ‘Southern Gentleman’ Winterberry Hollies – Plant these two together for a stunning year-round show! Female plants are deciduous, with leaves that turn yellow in the fall and are replaced by masses of large scarlet berries that provide winter food for birds.

‘Summer Wine’ Physocarpus – A beautiful, fast-growing perennial with arching stems covered with dark purple-bronze foliage. White, button-like flowers appear in June and provide pollen for insects. Makes a great privacy screen.

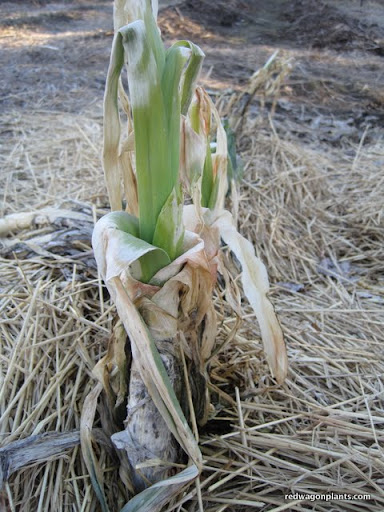
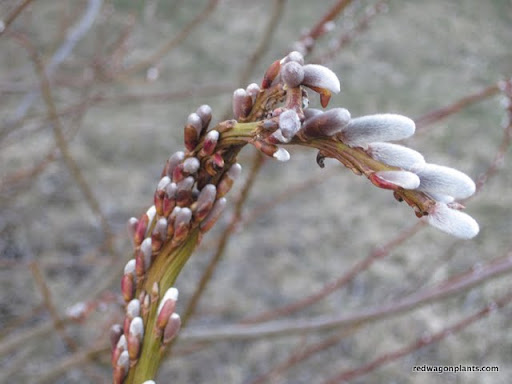
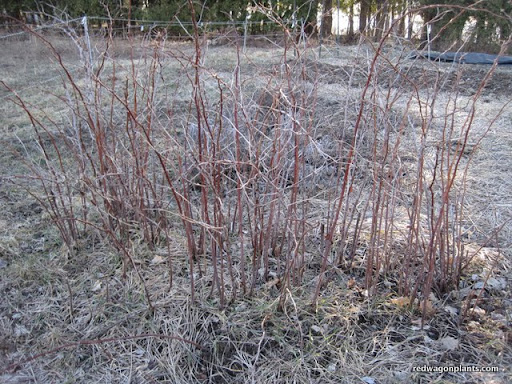
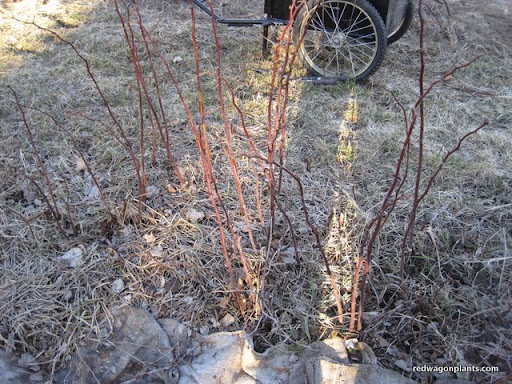
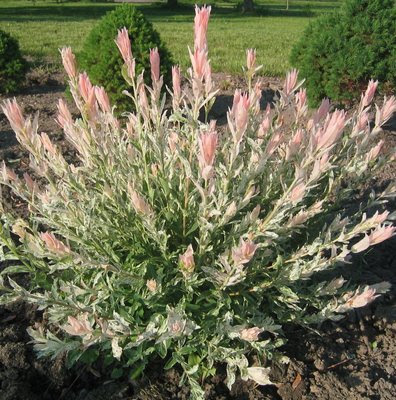
‘Hakuro Nishiki’ Dappled Willow – A gorgeous ornamental plant with pink shoots that open to green and white variegated leaves. Yellow flowers appear in April and stems turn red in winter. Flowers provide pollen for insects. A fast-growing plant that makes a great privacy screen.

These are all some of the easiest plants to grow. Once you are armed with a list of simple plants, just keep in mind these other factors:

  • Color
  • Texture
  • Placement

Once you understand what kind of plants like what type of conditions, you will feel confident to play with plants like a painter plays with colors. It is all about the right place for the right plant; so learn to identify the micro climates within your yard, come up with lists of plants that fit each micro climate, and create your own box of paints!

If this is hard for you, remember, we are here to help you!

Edible Landscaping

A New Focus on Landscaping This year Red Wagon is pleased to offer a variety of new landscape plants that have been requested by our customers. We are working with Cobble Creek Nursery in Monkton to provide  a wide variety of Vermont grown edible and ornamental trees and shrubs. Our staff can help you choose the right plants for your project and give you the information you need to grow them successfully. We can also do on-site garden consultations at your home.

Ecological Landscaping: How to Make the Landscape Work for You

When it comes to landscaping, we believe in a natural, practical approach. There are a number of ways you can make your landscape more functional for you and for the ecosystem simply by choosing the right plants. One way is to plant trees and shrubs that produce edible fruit. The fruit can feed you and your family for years to come, and provide food and habitat for wildlife. Many of these plants have still other benefits, such as ornamental interest, providing shade in summer, as windbreaks, or as privacy screens. Here are some examples of edible landscape plants we are growing this year. For descriptions and growing tips for all the plants we are growing this season, click on “Our Plants”. For some great information on edible landscaping, check out Rosalind Creasy's website or see our "Resources" section.

NEW ‘Autumn Brilliance’ Apple Serviceberry – A native plant that produces white flowers in spring that provide pollen for a wide variety of insects. Flowers are followed by edible red berries that are adored by birds. Leaves turn orange and red in the fall for ornamental interest. Also a coppice species.

Apple Serviceberry
Apple Serviceberry

NEW ‘Darrow’ Blackberry – A very reliable, cold-hardy blackberry that bears huge sweet berries in July. 4-5' tall. Provides great habitat and food for wildlife. Produces suckers, creating a fast-growing hedgerow that works well as a privacy screen or windbreak.

‘Patriot’ Blueberry – A super-hardy half high blueberry that tolerates wet soils and produces delicious berries for birds and people. White blossoms in spring and orange leaves in fall offer year-round ornamental interest. These are underused as landscape plants, and we want to promote their use. A hedge of blueberries in the fall is absolutely stunning!

NEW ‘Red Lake’ Currants – A very hardy shrub that produces tart red berries in July. Delicious for jams, jellies, and pies. A great food and shelter plant for wildlife. Flowers that bloom from April to May have ornamental interest and provide nectar for a wide variety of insects.

‘Pixwell’ Gooseberry – Very easy to grow and low-maintenance, with round green berries that are picked like blueberries. Provides food and shelter for wildlife, and flowers provide nectar for pollinators.

gooseberrypixwell_big

NEW ‘Reliance’ Grape – Beautiful pink seedless grapes are excellent for fresh eating! These vigorous climbers can provide needed shade or a privacy screen in summer, as well as food and pollen for wildlife.

NEW ‘Parker’ Pear – A very hardy pear with medium sized reddish-brown fruit, lovely white flowers in spring, and dark purple foliage in fall for year-round ornamental interest. Requires a second variety nearby for pollination. Flowers provide nectar for pollinators, and the tree can be coppiced to produce wood for craft projects or scions.

NEW ‘Shiro’ Plum – Tree produces abundant gold fruit from July to August. Flowers provide nectar to a wide variety of insects.

NEW ‘Fall Gold’ Raspberry – An ever-bearing variety with yellow fruit that produces two crops, in June and August-October. A very hardy and tough plant with a wide variety of uses – plants provide food and shelter to wildlife and pollen to insects, brambles form a hedgerow for privacy or a windbreak, leaves can be used to make tea, and the berries are considered a super-food.

NEW ‘Black Beauty’ Elderberry – A wonderful ornamental and edible plant with year-round interest. Dark purple foliage is complemented by huge pink flowers in midsummer that provide nectar for native pollinators. Dark purple fruit appears in fall, and is great for making jam. Plant provides both food and shelter for wildlife. We will also be carrying a strain of elderberry that was bred by Lewis Hill - a Vermonter who was the authority on fruit production in the northeast. Lewis unfortunately passed a way a few years ago, but the plants he bred and propagated are his living legacy.

Highbush cranberry bush

NEW ‘Alfredo’ Highbush Cranberry – This colorful edible ornamental gives a year-round show. Foliage opens red, then turns green, yellow, and then red again in fall. Red berries appear in fall and persist all winter, providing forage for wildlife. Large white to yellow flowers appear in spring and provide nectar for native pollinators. A very hardy plant that is deer and rabbit resistant. This makes a beautiful privacy hedge, growing thick and tall and just covered in cheery red berries in the fall.

Let us know your plans for your garden this year; perhaps a few well placed edible plants can add beauty to your yard and bounty for your table.

by Sophia and Julie

Starting your own Seeds

There are lots of times when people ask me why they should buy plants instead of just starting their own seeds. I always answer that plants need good light conditions, ventilation, great soil, proper watering, pest monitoring, and disease control. If they want to do all of that, then the plants will be just fine. It's really fun to see seeds germinate and pop up out of the soil, especially if you have kids in the house. The only problem with starting your own seeds is that if those steps are not all followed pretty well, you can end up with less than ideal plants, put them in the garden anyhow, and since they started life a little under duress, they won't thrive in the great outdoors where direct sun light, wind, disease pressure, temperature fluctuations and insect infestations await them. It's like raising children, the way they start out in life is really important to their overall health.  If you can't have the correct set up for seed starting, I would still encourage you to try something with your kids so that they can see the magic of emerging seeds. Even though I have seen this most of my life, thanks to an avid gardener for a father, my heart still flutters when I notice the first signs of life poking through the soil. Something in our mammalian brain is wired to be excited about new life, so please don't let the description of the "proper technique" turn you off from starting a few seeds at home. I am writing out the steps to proper home seed starting so that people who really want to improve their chances of a great garden can do so if they choose. And if it doesn't work out well, you can always find a few plants to purchase!

Get set up for proper seed starting.

Lights, soil, trays, water, air circulation.

  • Lights are an important part of home seed starting. A south facing window is what most people use, but this isn't really sufficient since the plants will always stretch towards the light. Unless you are using grow lights that give light from directly above, the plants will stretch towards the light and become leggy. This weaker, stretched out growth makes the plants more vulnerable so that they will not fight off disease and insect pressure as much.  Here is a simple light structure that you can make at home using pvc pipe. If you click on the picture it will take you to the instructions.
  • The trays you use should keep the water off the counter or table, but the plants should be grown in containers with drainage holes. At home, a simple way to do it is to use old cookie sheets or cafeteria trays to hold the plant containers.
  • The soil you use should be light and made for potting plants and germinating seeds. We use only Vermont Compost Company' Fort Vee. It is a great all-around soil that feeds the plants through all of their life stages until they go in the ground. Wet the soil a bit so that it feels damp, but is not sopping or dripping wet. Fill the containers loosely and they very lightly pat the surface down so that it is smooth and level.
  • Once your containers are filled, make a small dent in the surface of the soil with your finger or a the tip of a pencil or a chopstick.  Drop in a few seeds, the amount varies based on what it is you are starting, but as a starting point, try 3 or so seeds. When the plants are big enough, you will prick them out and put them in larger containers individually. Cover the seeds with a thin layer of dry soil and pat down gently. Water lightly so that the seeds have a chance to soak up the moisture but not so much that they float away.
  • Once the seeds are planted, keep the soil moist. When the seeds germinate (those first leaf-like sprouts are called cotelydons), it is best to water only when the surface of the soil is dry. I cannot stress enough how important it is to water properly - overwatering leads to weak growth and creates conditions that are perfect for fungal diseases and insects like fungus gnats. Think tiny fruit flies that feed on decomposing organic matter. It is actually better to under-water than to over-water. Plants that are on the dry side will send out more roots to search for water and this bigger root system will benefit the plant once it is planted outside, in the ground.
  • Air circulation is often the missing element in home seed starting. Having a regular air flow is what makes plant stems strong and sturdy. If you think about it, seeds did not evolve to germinate indoors - they are meant to be outdoor creatures primarily and we have to recreate some elements of their chosen environment when we force them to grow inside. A small oscillating fan is a good idea and will promote stronger stems and hardier plants.

Let us know if you try this or what your experience has been like with seed starting at home. We love to hear about your projects!

Perennials and Shrubs: Cutflowers, part 2.

Flowers for bouquets are often grown in their own gardens, in tidy straight rows, and exist not to beautify your yard, but to kick out lots of stems that are promptly cut just as the blossoms begin to unfurl. These "cutting gardens" are not necessarily the nicest to look at, but they sacrifice their beauty for the vase, where they can provide up to a few weeks of enjoyment in a portable format. If you lack the space for a proper cutting garden, you can always dip into the front yard flower beds for a stem or two and no one will know the difference but you. In fact, many perennials will produce for a longer season and in a more robust fashion if they have their stems cut now and then. Here are some favorite perennials and woody ornamental shrubs that are forgiving of the cutting shears and a boon in the bouquet.

  • Japanese Willow  Salix Hakaro Nishiki.This is a stunning filler. Pink, green and white variegated foliage looks like delicate petals. Shrub willows always benefit from regular cutting and on this variety, the new growth is more pink and flashy.

Hydrangea paniculata 'Limelight'. Most hydrangeas do really well in vases, they act as a delicate, feminine filler and are long lasting. Can be dried for everlasting arrangements as well.

  • Physocarpus 'Summer Wine'. Another shrub that is well suite for bouquets. Arching, dark burgundy stems and leaves, pale pink/white blossoms that cover the stem and a sweet aroma make this a lovely addition to mixed bouquets. Cut the stems long for a dramatic effect .
  • Salvia 'May Night'. A dark blue/purple with medium length stems. Cutting the stems low down near the crown of the plant will help to stimulate more blooms and will help control diseases by increasing air flow.
  • Asclepias tuberosa. This orange-flowered cultivar of milkweed is taller than the native version, long lasting in vases, and does not mind a cut here or there in the least.
  • Peony 'Sarah Bernhardt'. A pale pink bloom, nice in the vase as a simple combo with the dark burgundy stems of the  previously mentioned physocarpus shrub.
  • Rudbeckia 'goldstrum'. A cheery late summer flower that is lovely with echinacea purperea, Salvia 'May Night' and even golden rod.
  • Monarda 'gardenview scarlet'.  A cheery, red bee-balm that also benefits from frequent stem cuts. Anytime you cut out some foliage, air fow is increased and the risk of foliar disease is decreased.
  • Phlox paniculata 'David'. A  delicate white addition to early- and mid- summer arrangements. Tall stems are great for drama and the divine fragrance really fills a whole room.
  • Achillea 'Colorado' or 'Apricot Delight' or 'Sunny Seduction'. These are all well branched cultivars that produce an abundance of tall, wiry stems that are perfect for the vase. Early summer to mid summer blooming can be encouraged to bloom again in the fall with repeated pruning and cutting. Can be used in everlasting arrangements as well.

All of these shrubs and perennials can be found at our retail greenhouse in Hinesburg, but if you are not in the area, they are fairly common varieties, readily available in any well-stocked garden center. The varieties above are easy to grow and add beauty to your home with staggered bloom times, varying heights and light requirements. Let us know what some of your favorite perennials are for bouquets!And remember, if you are planning to grow your own flowers for an event (wedding?!), be flexible and have fun. Let the season and your climate guide you.

Enter at Your Own Risk: DIY Wedding Flowers. Part 1

Last summer, I must have helped at least half a dozen customers who were looking for some help in planting a garden specifically for home-grown wedding flowers. I often warn people that growing for a specific date is fairly technical and requires weekly plantings, regular harvesting all summer long to keep the plants blooming until the event, and most of all, a very flexible attitude. People who have a specific color scheme or variety in mind are not always good candidates for home grown wedding flowers since those types of flowers may be very hard to grow and getting the right color on the right day means planting about 10 times more than you think you will need in hopes that one of the plantings will be just perfect on the correct day. For those who are planning an event and are willing to look at the flowers as a fun and flexible component, then growing your own is a great option. I have listed below some varieties that are particularly well suite to a DIY flower program.  Full disclosure: I have talked about as many people out of growing their own wedding flowers as I have talked into doing it. It really is not a good fit for everyone, but for those who are willing and able, here is a little help to get you started....

ANNUALS

Verbena bonariensis - reliable and a lovely purple bloom with long wiry stems that hold up well to handling and mixing into all kinds of arrangements. Zinnias - come in all shapes and colors, are best suited for August or later. Require deadheading all summer long, but will branch out and be very productive once well established. Sunflowers - there are lots of sunflower varieties that are designed specifically for cut flowers. Some of our favorites are Giant Sungold Teddy Bear, Sunbright Supreme and Soraya. The only tricky thing is getting the timing just right. They only are perfect to harvest for about 10 days, after that their single blossoms start to drop their petals. Ageratum - blue,  can be tall if planted correctly - a little closer together. Needs deadheading all summer long if you are planning for a late summer or fall event. Very productive if well established and well taken care of. Agrostemma has a lovely, floating quality that gives a lot of life to mixed bouquets. It's airy and delicate, comes in purple or white and produces lots of good, long stems all summer long. Again, needs constant picking and deadheading to produce all summer long.

Ammi - this is a beautiful filler in mixed bouquets or in all-white arrangements. Easy to grow from transplants and produces, nice, tall stems.

Cosmos - come in a variety of textures and lengths, best suited for mid-August or later. While they are beautiful, they do take up a lot of room for not always a lot of stems.

Snapdragons - another multi-colored option or can also be grown as strains of single colors. We offer many options of snapdragons. The stems can sometimes be a little short, but with good fertility and 6" spacing, they will grow straight and tall.

Celosias - come in many shapes, sizes or colors. These are a hardy, easy to grow and more forgiving than others. And they can be dried for long-term keep sakes.

All of these annuals will give you a good place from which to start. Do-it-yourself flowers can always be supplemented with florist purchases the week of the event  if the budget allows it. We will cover more on home grown flowers in subsequent posts, so if this peaks your interest, please stay tuned. Part two will be about which perennials are easy to grow and use for cut flowers. Part Three will be about different tactics to make your cutting garden as prolific as possible.

The Very Fragrance

Hope Johnson, whom many of you know from our retail greenhouse, brought me this plant this summer, while muttering something about "bringing coals to Newcastle" and said it was a red morning glory she had started from seed.....well here it, a few months later, and just a beautiful morning riser. It only opens for a short while, maybe if it had been planted with mroe of a south eastern exposure it would stay open longer, but I just love it. It is a dark pink, not a true red (this often happens with flower color description), and the flowers are about the size of a silver dollar. Should we grow and sell this next year?

These Kennebecs have provided me with the most satisfying harvest of my potato growing life. They were planted in the best soil in my garden, the site of an compost pile, and I did not even hill them. They were virtually maintenance free save for some periodic weeding.

This corn was transplanted in late July from seeds that had been started in mid-July. I somehow did not make time for corn any earlier this year. As Elise and I transplanted, I kept wishing for some October corn and a warm fall. Well wishes do come true: while the ears are not terribly big, the flavor is sweet and the texture is just right. This has been going into a fabulous corn salsa recipe I have been canning.

This makes it all worth the toil. I heard this line from a Rilke poem yesterday:

Is not impermanence the very fragrance of this world?

A good thought for autumnal transitions.

On Vacations and Onions

Last week, I came back from our ocean vacation, the one during which I  tried not to think about the garden for a week. This was preceded by some fast and furious hours hoeing, weeding, mulching, watering and generally preparing all plants for a week of neglect. Everyone survived, tomatoes are in high production mode, spitting out ripe orbs faster than I can use them; and the peppers and eggplant are jumping into harvest baskets, big and ripe. Potatoes are ready to be dug, garlic is cured after a couple of weeks hanging from the barn rafters. Onions are next on the harvest and cure list. I never seem to have enough onions to last through the winter even though I plant so many of them each spring. I think the culprit this year was poor bed preparation prior to planting. I try to get onions in as soon as possible in April, the same time that coincides with peak greenhouse production and growing wholesale orders. So yes, once again, the onions are on the small side because we planted them into some soil that was a little compacted and not rich enough in composted donkey manure.  What do I love most about gardening? Being able to say, "there is always next year."

Onions: harvest the onions by pulling up the whole plant once the tops die back and start to lie on the ground. It's best to pull them up on a sunny, breezy day so that they can spend a few hours drying in the sunshine and wind. Before night falls, on that same day, bring them inside, out of direct sunlight so that they may cure for a few weeks. The curing process is what turns the outside layer of the onion into the paper-like skin. This outer layer, when dried properly, is what gives onions their real staying power as a storage crop. It is best to place onions in an airy, dark place - a garage with airflow but no direct light, an attic with air circulation, a shed, or even an extra bedroom with the curtains drawn and the windows open. You can braid the onion tops, bundle them into bunches and hang them up from the ceiling or rafters. You can also leave them in a single layer on the floor, but they must be turned over at least once a week. Once the tops are completely dried and the outer layer is paper-like, you can pull off the tops and store the onions in baskets, brown paper bags (with slits cut for ventilation), milk crates, apple crates, or cardboard boxes. Again, the important thing is to make sure the onions are in a dark place and it is well ventilated. Basements are often too humid for onion storage. In the winter, onions can go down to the low thirties and be fine. Colder temperatures better for onion storage than warmth with the ideal storage temperature being 35 to 45 degrees F.

Impatient Tomato Tastings

The first tomatoes of the season are always a bit of an anti-climax. We wait all year for the fruit to come out of the back yard as opposed to some distant clime, and then take a bite. It's not as sweet as the memory, not as drippingly hot and gushy as the movie running through my brain. The first tomatoes aren't the best ones. That is all there is to it. I tend to pick them a little early, eager for a bite and am met with a disappointing crunch when there should be a mush. In a week or two, I won't be so impatient, the vines will be dripping with ripe fruit, and I will eat them three meals a day, going from scarcity to abundance in a flash. Soon, every slice of bread will be adorned with a smear of mayo (the junky kind, not the healthy kind. Sorry) a thick, red, juicy slice of tomato and a sprinkle of good salt. This will be all I eat for a while. I know it's coming. But for now, I decided to document the earlier tomatoes and taste them, giving them a ritualistic importance of sorts. I try to put blinders on in the face of their slight un-ripeneness and photograph them, carefully laid out on the counter. Soon there will be baskets of tomatoes, heaping, unnamed and tangled together. But for now. We will carefully label, taste, and report. Here goes.

Pink Beauty is just an iconic tomato - it always perfectly shaped, blemish free and has an almost electric dark pink hue. The Purple Russians tend to crack a little, but nothing too detrimental (their good sides are showing for the photo shoot). The Juliet, as many of you know, is my favorite all-around tomato. It has huge yields of oval fruit that are great raw, for snacking, salads, sandwiches, and salsa (not too watery); but the real charm is that they work really well as a cooked sauce tomato too. The Viva Italia is a very pretty paste tomato - early and blemish free and very disease resistant. The Glacier is an heirloom, super early, does well in very cold climates (Huntington, Lincoln, Ripton - no problem), and is the one tomato you will be eating weeks before others ripen.

We tried them all, carefully slicing, chewing, thinking.....

All were slightly under-ripe and slightly lacked that "I've been baking in the hot sun" flavor and texture. We have had some rain the past couple of days, and the flavor is affected by that. But they were good - not middle of August good, but good. The Pink Beauty has a really nice balance of sweet and acid flavors, a slippery, silky texture and makes beautiful shiny slices.

The Purple Russian was a winner, flavor wise and texture wise. It is juicy, especially for a paste tomato, and has the most buttery complex taste that lingers on the tongue and leaves me wanting more. The plants are nothing pretty - they always look shaggy and stringy somehow, so I have never gotten too excited about putting them in my garden, but customers rave about them, and now I know why. Sweet, unctuous and complex. A new favorite and you will hear me raving about this one in the greenhouse next year. It would be perfect raw or cooked, and I am sure any sauce made from these would be a deep purple red color.

The Juliets were a little bland compared to the first two, but still full of good, bright flavor - lively on the tongue and a nice meaty texture.

Viva Italia were lacking in distinctive flavor (a little too acidic for my taste), but in all fairness,  they are much nicer when cooked. We will have to do another taste test with just paste tomatoes, cooked simply in some olive oil and lightly salted.

The Glacier is cute as a button: plump little orbs, slightly mis-shapen and full humble darlingness. The flavor is great for an early tomato - they are a little bigger than a cherry tomato, can be sliced for salads or sandwiches or cooked down for a quick sauce. They tend to ripen 3 or 4 at a time, a nice feature since they are so small and just one of them won't take you far. I would put this at the top of the list for early tomatoes. But if you only have room for a couple of plants, there could be some better choices.

I would love to hear what you are loving or not loving in your tomato selections. Any varieties you want to recommend for next year? Any you think should be discontinued? Let us know. And we love pictures! I will do this taste test again, later, when the plants are loaded and the fruit is at peak flavor!

The Garden in July, a Few Tips on Creating Micro-climates, and a Beach Picnic.

This summer, the weather has been garden perfect for many crops. All the heat lovers are thriving and the crops that like it cool and moist are doing well where they have been watered and are getting a little shade. I have a nice stone wall thanks to Charley of Queen City Soil and Stone, and the shady side of the wall is a perfect place for crops like celery, mid summer lettuce, artichokes, and boc choi. They benefit from the afternoon shade the wall creates. Additionally,  the moisture that builds up at the base of the wall from the terraced soil above it creates a perfect micro-climate within the garden. You can easily achieve this in any garden with strategic rock placement - not a full-fledged wall necessarily, but a few stones stacked up to retain moisture on a slope or to allow for  north-side shade in a fully exposed garden. Look around your garden for other mico-climates like tall plants that can be used to create shade for summer plantings of lettuce. Right now, I have lettuce planted in odd spots throughout the garden - under a  sunflower, at the base of the stone wall, and under some tomato plants.

The eggplant has been tremendous this year and last night, we had a great meal of marinated eggplant while sitting at the lake, scooping up piles of the salad with pieces of pita and a little feta. Here is the recipe. I used a combination of the Gretel and Machiaw eggplants (pictured above).

Marinated Eggplant adapted from smitten kitchen.com

  • 1 lb long, Asian eggplant, sliced 1/3 inch thick
  • 3 tbs olive oil, divided
  • salt and pepper to taste
  • 2 TBS red wine vinegar
  • 2 TBS capers, rinsed
  • 1/4 cup mint, finely chopped
  • 1/4 cup of feta, crumbled

Pre-heat oven to 400 degrees. Coat a cookie sheet with a layer of oil and layer the eggplant slices in a single layer.

Bake them until soft (about 20 minutes), turning once and drizzling with a little more olive oil about half way through.

Blend the vinegar, remaining olive oil, salt and pepper, capers, and mint together. Place eggplant into a bowl, drizzle with the dressing, and stir to combine. Let rest for at least a half hour or place in fridge (up to one day). When ready to eat, sprinkle with feta. Eat with flatbread, while sitting near a cool body of water.

Bay Laurel in Vermont

If you ask me what my favorite plant is in my garden I would tell you about my bay laurel tree.  Many folks are excited by the plants that add beauty to their surroundings.  Personally I love the plants that I can use in the kitchen and my bay tree adds value year round.  (The fact my favorite plant is a culinary herb would be no surprise if you follow my blog, Hippo Flambe). The difference between a leaf picked off my tree seconds before using it is far removed from the dry, dusty leaves in the spice section of your supermarket.  Plus my bay laurel has the added benefit of being easy to care for. It was a rather  inauspicious start to my bay laurel tree farming. I was given the tree by a friend who had decided to "euthanize" her tree. Her tree had developed a sticky residue on the leaves and she did not want to spend the time cleaning the leaves. In addition it had clearly outgrown its 23 inch pot and she had visions of it taking over her house. I immediately jumped at the chance to own my own bay laurel tree and told her not to kill it, I would adopt it instead.  When I arrived at her house one day in the pouring rain I stared at the giant tree and I began to wonder how well this was going to work out.  The first problem was how to get it in the back of my station wagon, even with the rear seats folded down it was far to big. So we went after the tree with clippers, ruthlessly cutting back every limb. In the end the tree had lost considerably more then 50% of its branches and I remembered the advice to never prune a tree back that far. I shrugged and figured what was the worst that could happen, even if it died the tree was free to me, I had nothing to lose.

That winter we kept the tree in an upstairs South facing window and miraculously it began growing new leaves almost right away. I did not give it any artificial light or fertilizer, we just opened the blind from 7 AM until it was dark.  The room it was in only gets passive heat from the other rooms, so the room temperature is often as low as 59 degrees.  The tree was severely pot bound as even in a 23 inch pot 1 qt of water would come rushing out the bottom almost immediately.  Every week it put out tiny new shoots and leaves and I began to take more leaves to cook with.  After using the leaves a few times I began to care more about my bay tree.

That spring we began to search for a larger pot. I was told at many locations that I could get a larger ceramic pot but not plastic. It had taken 2 of us to slowly inch the tree upstairs in a plastic pot, ceramic and its extra weight was clearly out. Finally one nursery suggested I try bonsai-ing the roots. She explained bonsai tress are removed from their pots and then pie shaped wedges are removed all the way around the root ball so more soil can be packed in and the tree can stay in a smaller pot.  So I bought some high quality soil and we hacked out 4 pie shaped wedges all the way around the root ball.  When I returned the tree to its pot I was amazed at how much water it could now hold.  After a few weeks of new growth it was clear the plant was much happier.

Taking care of my Bay Laurel tree is remarkably simple, especially as I am often a house plant slayer.  In the Fall, sometime in October, we bring the tree indoors. Once indoors we water sparingly about once a week, although I know there are stretches where we just forget.  In the spring we take the tree back outside, where it does not need watering unless there is a really extended dry spell. If you prune it a little in the spring it will produce new growth.  Use well drained, fertile soil.  I just recently applied some of my favorite tomato fertilizer to the soil. The next time it becomes pot bound I will again bonsai the roots. The sticky residue that my friend found on the leaves is caused by scale insects.  If this occurs just wash the leaves with an insecticidal soap and use your nail to scrape away any insect bodies on the leaves and stems. You can also spray with alcohol.  The sticky residue is not usually deadly to your tree but it will inhibit new growth.  Try to keep it in a humid area but do not over water.  Humid in Vermont in the winter is hard, just keep it out of drafts and away from the heating vents, misting them occasionally with water if you want.

The great thing about growing a bay laurel is you only want the leaves, which are the easiest part of a plant to maintain.  If I was starting over with a smaller tree I would not allow it to become as big as mine is, this would make it easier to bring it in and out of the house every year.  When cooking with it remember the fresh leaves are much stronger and more flavorful then dried. When a recipe calls for 2 leaves I only ever use 1. If I just want a slight bay flavor I use a smaller leaf.  One of my favorite uses for the leaves is to flavor a pot of red lentils. I just add one leaf to a pot of simmering red lentils with kosher salt and cook until the lentils are tender.  To serve I simply drain the lentils, drizzle with flavorful extra virgin olive oil and sprinkle with freshly ground pepper.

Butter Lettuce, I love you

Green butter lettuce has to be my all time favorite lettuce....perfect texture, a color that can only be described as translucent and pearly, and a delicate flavor that truly is butter-like. I eat it in all sorts of situations and for all sorts of meals. Breakfast is toast with a thin spread of butter, snipped chives, some shavings of cheddar and a pile of butter lettuce leaves. Lunch is butter lettuce with a white wine vinaigrette, a piece of bread, and maybe a little tuna with herbs. Dinner will always include a butter lettuce salad with lots of snipped chervil. Or perhaps some grilled flank steak with butter lettuce, cilantro, thai basil, shallots, and a little hot pepper drizzled with a light sesame dressing.

Late May and June are the butter lettuce weeks. I plant a four pack of the lettuce every week from mid- April through August and I am rewarded with huge, green and white pillow-like heads of tenderness.  Here is a blog recipe from David Leit, who also appreciates this delicacy.

He is recommending a blue cheese dressing, which will be great later in the summer, but for now I cannot get enough of the delicate flavor and taste, so I will stick to my lighter dressings.

What's Happening This Week in the Greenhouses

I have been spending more time in the retail greenhouse this week and I am just awed by the beauty of some of the flowers. Here are a few photos to get you in the mood too. Delicate folds and perfect gradations of pigment make for some intricate and dazzling begonias: Here is a dahlia that I am in love with:

These orange miniature roses are incredibly sweet near a stone wall or in patio conatiners:

And we have a full array of hot peppers now including:

And....

These Vanilla Marigolds are pretty special as well - very tall, upright and a creamy delicious....

Sweet Potatoes are Coming!

Cheryl says: I spent the Memorial Day weekend gathering containers, amending soil, watering, and otherwise getting my garden planted.

And now, with a few days of rain my plants are looking fabulous and happy, while I'm on a second mad search for containers so I can take advantage of the Sweet Potato Slip Sale this weekend.

A few of the things looking especially terrific right now:

garden skinny pancake 004

Apparently a deer thought so too:

garden skinny pancake 014

The Cherry Bomb pepper was full of flowers and now is setting fruit:

garden skinny pancake 008

And the okra and pickling cucumbers are settling beautifully into their hanging bags.  I'm excited for when they start to vine.  The cucumbers are about to flower:

garden skinny pancake 011

My next project is to get myself 4 containers and a bunch of Fort Vee for sweet potato culture, consulting thesetwo Julie-approved links.   More to come.

Garden Tips: Tomato Planting

Now that tomato planting weather is upon us, I want to write a little about some questions we often receive from customers. One of them is "When can I plant tomatoes?"

Tomatoes are best planted when the soil is warm (night time temperatures are 50F or above) and all danger of frost has gone by. In Burlington that is generally the end of May or the first week in June.  The best planting method for tomatoes involves digging a shallow trench and laying them in it. You can break off the leaves on the bottom 2/3 of the plant and bury the whole stem horizontally in the warm top layer of soil. The buried stem will turn into a huge and healthy root system. The top of the plant is gently bent upwards and soil is patted around the base.  Tomatoes must be trellised for best results; it keeps the plant healthy, off the ground, and the fruit stays clean.

Here are some photos of a tomato planting that happened recently in our display garden:

The language that describes tomato plants can be a little confusing. Here are a few tomato terms explained: Hybrid - a tomato that is a cross between two different types of tomatoes. Seeds from these tomatoes will not grow out true to type, but will revert back to one of the parent tomato varieties. Hybrids are not genetically modified, they are just a simple cross between two types. For example, one tomato with good disease resistance is crossed with another variety that is known for good flavor in hopes of producing a healthy yet tasty tomato. Some of our favorite hybrids are Big Beef and Early Girl. Open Pollinated - a tomato that is the product of two parents that are the same variety. The seeds from these tomatoes will be true to type. All of our "heirloom" tomatoes are open pollinated and the seeds could be saved from those fruit. Heirloom - a variety with a story. These are plants which have been handed down, brought to the new world in various ways, found in distant parts, or in your neighbors back yard. These are all open pollinated. Heirloom is not a botanical terms, it just means that it is an older variety with a lot of flavor or other appealing characteristic like color of shape. Sometimes heirlooms are less disease resistant than hybrids, but they make up for it with flavor. Heirlooms are sought after by home gardeners since those types of tomatoes are not found in conventional grocery stores. Around here they are easily purchased at farmers markets, but it is always nice to eat something harvested just seconds ago from your own garden. Determinate - a tomato that only grows to a certain height and then all of the fruit ripen at once and then the plant dies. This is a good option for people who can or freeze tomatoes so that they will have a big batch ready to use all at once. Some of our favorite determinate tomatoes are Glacier (which is also an heirloom and very early to boot) and Celebrity. Indeterminate - a tomato that grows and grows, with the fruit ripening in various stages. The plant grows until it is killed by frost or disease. In a warm climate these plants would grow into woody vines.  Most of the tomatoes we grow are indeterminate. They require staking or cages, and there are many different methods for doing so. I've seen hockey sticks used in community gardens in Montreal!  Concrete reinforcement wire can be cut into 6 foot sections and bent into a tube shape - this makes once of the strongest and largest cages possible. There are lots of great trellising and caging systems available at Gardeners' Supply Company and your local hardware store will have simple wooden stakes and twine. Professional vegetable growers oftenuse a method called "bakset weaving" which is simple, efficient and affordable.  Here is a description from the University of New Hampshire Extension Service:

•Remove suckers (new shoots that develop in the leaf axils) before they reach an inch in length. • Leave the first sucker that grows below the first flower cluster, removing all others below the first flower cluster; allow suckers above first flower cluster to grow. • Pinch off tops once plants reach a few inches above stake. • Use 4 ft. sturdy wooden stakes, with double stakes at end of each row for strength. • Set stakes six inches deep, one stake for every two plants, as soon as seedlings are transplanted. • Begin supporting tomato seedlings after they have set the first flower clusters. • Tie sturdy, untreated twine at one end of row, about 18” up from soil level. Weave twine between tomato plants, wrapping twice around each stake down the row. After reaching the end- stakes, weave twine back up the row in the opposite direction, alternating with the weave-pattern of the first strand so each plant stem is encircled by twine. • As plants grow, weave another layer of twine every 6-8 inches to keep plants well supported. Four layers of twine will support most varieties.

Hope this information helps, and as always feel free to stop by our greenhouses where our staff can always talk to your about your tomato growing concerns. Happy gardening!

Plants in the Ground

There are a few things I (Cheryl) must reiterate about my garden life. 1.  Curiosity yes.  Skills no.

2.  Everything in the garden takes me twice as long as normal people because I'm so easily distracted.

3.  I can never, ever seem to come home with enough mulch.

4.  I should not be trusted with plants who have needs that are in any way complicated.

Which is why the blueberries I planted two years ago are still these pathetic runts:

garden 002
garden 002

And why I should have resisted when Julie gave me a cardoon and an artichoke plant, which are sort of greedy plants that like lots of room and nutrients and water and stuff.

garden 003
garden 003

But I went out to the greenhouse this week and came back laden with lettuce, frisee, fennel, cilantro, broccoli raab, mustard greens,chervil, and gorgeous pansies for my more-shady eastern bed.  Julie had helped me pick these because they fit with my edible garden theme, are somewhat shade tolerant, and many are from the botanical family that's especially attractive to beneficial insects (as well as being the preferred food of the caterpillar that turns into the swallowtail butterfly - very pretty).

So I got the bed ready in the laziest possible way.  I did a fairly uninspired job of weeding, then spread mulch over as far as I could.  (Having, as usual, bought much less mulch than I needed, I could only go so far.)  With the lettuces and herbs, I put some compost in the small holes I dug in the soil.  But there was a foggy memory in a dusty corner of my brain telling me that overly fertile soil can discourage flower formation so I didn't add the compost boost to the pansies' spots.

garden 004
garden 004

Julie adds:

A gentle word on mulch.  In general, instead of bark mulch, which doesn't add anything to the soil, I'd recommend a good compost that is free of weed seeds or a product like VT Compost Company’s Perennial Blend. It is a mixture of compost and potting soil and peat moss and will create a weed barrier while adding nutrients at the same time. If a weed seed is under the compost blend, it won’t see the light of day, and in theory will not germinate.

Alternately,  I am a big believer in hoeing or using a tool to scratch up the soil surface every now and then, before the weeds germinate. I know it can be hard to fit in, but it can be kind of meditative, quick and not at all like weeding. Really.  Around food crops, it’s always best to assume you will have to do some handwork since there are no perfect and total mulch options. Close spacing, planting in rows and mulching paths works well in a more traditional plot; but in a situation like yours, where you are doing edible landscaping and not going for straight rows, weeding is inevitable.

Scratching up the soil surface before you even see the weeds is the simplest, input and money-free solution.  But if you want to invest in your gardening future, I think your beds could really benefit from the Perennial blend. For about $30 you could cover that whole eastern bed with a thin layer. That method is called “top dressing.”

Oh yeah, now that you have the mulch down, say three Hail Mary’s and come back to talk to me in a few weeks.

While I still had a ton of greens left to fit in, I went back to the greenhouse for today's grand opening and came home with some stunning annuals and very pretty perennials, as well as the most adorable basil I've ever seen.  Tomorrow morning, more mulch goes down, the rest of the plants go in.  And I now have to consider what to do with the additional bags of mulch that I bought.

red wagon grand opening 006

Raised Beds

by Julie

My home garden is often neglected. There are a few reasons for that - 1.) I am way too busy in the spring and don't have the time, and 2.) I would rather go swimming in the summer than weed. Yes, it's true. Our Vermont summers are so short, that I often make choices that don't benefit the garden come August. So in the early spring, before I get too too busy at Red Wagon, I try to make gardening choices that will entail less work come summer and get the plants off to a really good start so that they are strong enough to handle my abuse and neglect later in the season.

This year, the Red Wagon crew came over and installed some great raised beds in the back yard. My regular garden is quite shady because of some neighboring trees (not mine or I would cut them down!) so I decided to put in some raised beds in the overgrown meadow behind the house and hopefully this will help me tame the wild. It's a sloping, wet mess with a huge forest of Japanese Knotweed trying to take over everything in its path. I have dug a trench around the knotweed and Elise covered a 20 x 20' patch of it with black plastic that my neighbor, Paul,  gave me (I think he is worried it will spread to his yard, I would be too if I were him). Hopefully the combination of black-out and containment will slow it down.

About half way through the installation, the raised beds look like this:

We filled the raised beds with leaves, composted donkey manure and a thick layer of compost from Red Wagon Plants, which is mainly potting soil from years past that was given to us by the plants that did not sell. It's a great fill for raised beds, and not readily available to home gardeners, but I would recommend a mixture of top soil and compost. In the first year of a raised bed, the bottom layer can be some rough organic matter such as leaves, lawn clippings, etc. Just make sure that there is a good amount of the actual planting medium (at least 8").

I used a thick layer of cardboard and burlap coffee bags under everything to smother out the grass.

Here are the finished beds:

Our workshop on April 17th will be all about raised bed gardening with special guests Markey Read and Tim King. Please call us or email us to register. ..... 802 482 4060 or julieATredwagonplants.com.

Planning for a Full Harvest all Season Long

Growing vegetables in your backyard, community garden or in some containers by the kitchen door is a great way to feed yourself -- whether it be just a few ripe tomatoes in August or a full fledged homesteaders garden, you are on the right path to feeding yourself and your family.  Gardening is a great way to improve how you eat while spending some contemplative time outside. With all of these benefits in mind, it is easy to jump into gardening enthusiastically, and you will reap even more rewards with a little bit of planning. In Vermont, our gardening season seems short but can be stretched year round with a few simple tips.  I always recommend that people take a look at how their vegetable gardens have been in the past and find just one or two things they would like to improve so that they can grow more of it for a longer season.  For example a common questions I hear is "how can I keep cilantro from bolting?"  Well, in short, you can't! But with a few changes in your gardening practices, you can grow it all spring, summer, and fall without ever seeing it go to seed.  The trick is to understand the life cycle of each food crop and how to best plant it to maximize it's harvest.  With certain crops, like zucchini, it is best to understand how prolific they are and to plant them conservatively so that the entire garden (and thereby your diet and your neighbors' diet) is not taken over with just one thing.  It is also helpful to plant things seasonally so that the harvest is not so overwhelming in August with little to eat before or after. Succession Planting for Successful Gardening Certain crops should be planted multiple times throughout the season to ensure a continuous harvest.  How often you plant is a matter of taste and space and time. The following list describes the maximum you could do with each crop, but adjust according to your needs and priorities -- this is just a guide.

Lettuce can be planted from seed or from transplants.  Seed grown lettuce is often grown in a row that can be cut and will re-grow a few times.  Transplanted lettuce can be grown for full heads like what you find in the store.  Both methods require regular planting every week or two for a continuous harvest.  It can be planted from seed in mid-April to mid-August for cut greens and transplanted for full heads from late April through early August.  Some people will transplant a few plants and plant some seeds at the same time in a different area; this method provides two generations of lettuce.  Once the cut lettuce becomes bitter in the heat of summer, it is best to pull it up, recondition the soil and plant something else.  If the goal is to always have fresh lettuce and it is very simple to do if you remember to replant.

Cilantro is very similar to lettuce in its growing habits.  It will grow up to a point and then goes to seed, or bolts.  It i will bolt more quickly in summer heat and, conversely, will stand ready to harvest for many weeks in the cool weather of spring and fall--even early winter.  It can be transplanted or grown from seed.  Like lettuce, it is simple to do both at the same time, thereby giving the gardener two generations.  Cilantro seed is coriander, so it does have a use if you enjoy that flavor.

Dill can be treated just like cilantro, and like coriander seed, dill seed heads have a use in the kitchen, so it is fine to let some of the dill patch go to seed.

Basil can be planted multiple times for best results.  Plants can be pinched to slow down the flowering, but best flavor will come from newly replanted basil plants.  Heat loving. Should only be planted once soil temps are in the upper 50's.

Cucumbers, cantaloupes, and zucchini and summer squash are best in quality when well tended. Just a single plant or two of any of those is usually enough for the home gardener, but by planting it three different times, the quality will always be good. The dates are: June 1st (or last week in May if you are in a warm spot), July 1st and July 15th.  This method will ensure a continuous harvest of prime looking vegetables.  Just remember to pull out and discard the pest and disease prone plants.  If your compost gets very hot and is well managed, it is okay to compost these plants.  Pest problems will diminish when the older, less healthy plants are removed.

Arugula, Cress, and other cutting greens for salads are best if sown or transplanted on a weekly or biweekly basis.  Again, a small amount can be seeded next to the transplanted crops in order to give you 2 generations at once.  This way you can have smaller quantities coming in at various times. Broccoli gives the gardener a couple of options.  It is best if transplanted and can be planted 3 dates in the spring and 3 dates in late summer for a continuous harvest.  I would choose late April, early May and mid May for the spring plantings and then Early August, mid August and early September for the fall plantings.  Full heads can be harvested and the plants can stay in the ground to produce side shoots. Green Beans -- are best when fresh and young.  The seed is relatively cheap, so it is better to rip out old plants and have new ones coming along regularly.  Having multiple plantings also means that no on is stuck picking beans for ours on end.  Sow new seeds when the previous or first generation is about 6 inches high.

Boc Choi, Cabbage, Scallions, Cauliflower -- these can also be planted multiple times.  Cabbage holds well in heat and can be planted every couple of weeks late April through early August.  Boc Choi and Cauliflower are not as heat tolerant and should be planted around the same dates as broccoli (see above). It is best to use row cover like reemay on these young transplants so that flea beetles do not destroy the plants. Spinach is another one that does not do well in the heat, but can be planted multiple times in spring and late summer.  It can also overwinter with a little straw mulch for very early spring eating.  Date to plant are (up to every week) mid April to early June and then early August to mid September. The last plantings in September are the ones which will be over-wintered and eaten the following spring.

Beets, Carrots, Turnips can be planted every two or three weeks from mid-April until about the third week in July.  Summer carrots are not the same as fall carrots and certain varieties do better in summer than in fall. Celery and Celeriac are slower growing and can be planted 2 to 3 times during the season.  Mid May until early July.  These need lots of water and benefit from straw mulch.

Bulb fennel and radishes are similar to lettuce -- they can be planted each week if really loved, but they bolt in the heat and do best in cooler temperatures of spring and fall.  Best if planted late April to early June and then again late August to mid September.  Very cold tolerant and hold well in late fall,  radishes are sown from seeds and fennel is best transplanted. Corn -- it is possible to do multiple plantings over different weeks, but an easier method is to plant all at once, but with various varieties that have different days to maturity.  There can be a 40 day span between early and late varieties. Peas -- can be planted every week, but this requires a lot of harvesting, irrigating, trellising, and variety research.  It is possible though.  More practically, the home gardener can sow 2 or 3 varieties in late April with various days to maturity.  Fall plantings are sometimes successful but weather dependent. These should be done in mid August.

The following are generally planted just once a year, but the harvest can be staggered with a few tricks: Tomatoes, Peppers, Eggplant -- try a few varieties of each in order to not have everything at once.  Determinate tomatoes will provide you with a big harvest all at once which is a good thing for people who make big batches of sauce for canning or freezing.

Onions and Potatoes are generally planted all at once, and again a few different varieties will provide you with a longer period of fresh eating.  Both onions and potatoes can be stored for long periods of time in cool and dark conditions.  Both can also be eaten fresh. Winter Squash is another crop that is just planted once and stored.  Best if cured for a week or two in a warm spot before eating.