Garden Tips and Stories

Cabin Fever Gardening

It's the dead of winter and the weather has been...well, let's not even talk about it. The seed catalogs have poured in, they are lying all around the house, tempting us with dreams of future sunshine, dirt under the nails, baskets of produce, and all those things we are deprived of in these short, dark days.  Here are a few things I like to do to get through winter. I would love to hear other people's coping strategies, so please share your thoughts on cabin fever gardening. For one thing, meditate. Not necessarily in a formal way, but just sit still. Imagine seeds, roots, and bulbs that are buried deep in the frozen earth.  This period of short days is necessary in the life of a plant. It is a time of dormancy and rejuvenation, for plants as well as for humans. Rather than fight the dark days, embrace this as a time of year when you get to slow down, evaluate, and regenerate. I love that, because of my work, my life can follow seasonal rhythms to a certain extent. Winter is when I plan, plot, analyze, and restore.


Next, look for signs of green. As the days slowly lengthen, find a special shrub or tree to study on a regular basis. We have a row of willows along the edge of our property, and I love to check out the progress of the softening that happens very slowly, and then after mid-February, it speeds up a bit. The buds begin to swell, the color of the stems changes ever so slowly and slightly. Because plants are our best teachers, we can be the best students of plants with simple observation.

Focus on your houseplants. At our house, we neglect these poor plants all summer, but try to baby them a bit in the winter. Careful watering, cleaning, fertilizing as needed, potting into bigger pots, moving them around...these are all tasks we never have time for the rest of the year. You can also try your hand at propagating your own house plants. It is a great way to learn about plant physiology, and it gives you new plants as a bonus. Think holiday gifts for next year!  There is a great series of 15 short tutorials on You Tube that will teach you everything you need to know to multiply your houseplants. Ask friends for cuttings from their plants, diversify your own collection and learn about the various ways that all types of plants root.  Again, observation is key here, and the lesson learned in plant physiology will transfer to and inform your practical gardening knowledge outdoors.

Grow some sprouts.  There are great resources locally and on line. Here are some suggestions.


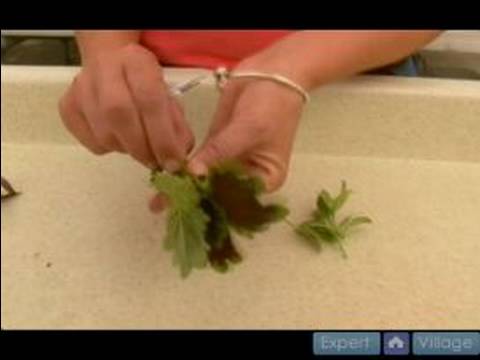
Grow some greens and shoots. You'll need a grow light, otherwise, things will be leggy and less nutritious, even in a south facing window. You will also need some trays with drain holes, about 2 inches high, some good potting soil, and some good quality seeds. You can sprinkle seeds onto the surface of the soil, press down, and cover with a very thin layer of soil. Press down again, and water very gently and evenly. Try these crops for a quick 3 weeks to harvest: arugula, tatsoi, mustard greens, boc choi. If you are willing to wait a little longer, in 5 weeks, you can harvest baby lettuce, spinach, kale, chard, cilantro, or dill.  The trick here is to stick to varieties that grow quickly. You can only cut them once, the light will just not be strong enough for them to grow again.  Here are some instructions for growing pea shoots.


You can do this so easily in any kitchen and it is a great way to add some fresh, living foods to your winter diet.

Hope this helps, and don't hesitate to get with us on facebook, twitter @redwagonplants, or leave comments here. We really want to hear your winter gardening habits, tricks, trials, and successes.

Lori and Doug's Garden, Part 3

Sophia and Lily visited Lori and Doug's garden this week to take some pictures and get an update on how all those plants are doing in their new raised beds. The garden looks beautiful, and Lori and Doug, gracious as ever, are so pleased with their abundant harvests. A few lessons have been learned along the way in this garden's history, which you can read about here and here. 

The garden is a great example of how colorful and varied a vegetable garden can be. Here an array of lettuces, marigolds, chard and kales co-mingle to create a carpet of textures, colors, and flavors. This is a perfect example of how edible gardens are also ornamental and can be featured in the center of a landscape.

Doug and Lori did a tight spacing on their potatoes at planting time, so they decided to hill with straw since there was not enough room to hill the sides of the plants with soil. This should lead to good yields, helps retain moisture and keeps disease pressure down.

They carefully stripped the plants of blossoms in the spring and are awaiting next year's harvest. By taking off the blossoms in the first year, Lori and Doug were able to help the plants concentrate their efforts on producing the lush green growth you see in the picture. A raised bed is a great way to go with strawberries - it keeps the plants under control so that they do not spread into neighboring plants, the strawberry  plants have better air circulation (therefore less disease) and it keeps the berries clean.

On a recent trip to Tuscany, Lori and Doug spied this trellising system and were able to re-create it at home. Anytime tomato plants are trellised from above, they will grow strong, tall and the fruit will be blemish free. This is the method used by greenhouse growers and in field production on small farms that really care about quality.

This small 4' x 4' bed provides plenty of space for herbs used daily in the kitchen as well as a few edible blossoms such as calendula. Lori makes a fantastic herb salt by very finely chopping sage or rosemary and mixing it with a good quality sea salt. This herb blend is great on hard boiled eggs, fish, salads, grilled meats.....pretty much anything you can think of. I felt pretty lucky when I was given a jar and have been carefully parsing it out ever since. It is also a great way to preserve herbs for winter use since the salt acts as a natural preservative.

Spaces were cleared out as crops were harvested which meant that new plantings had plenty of room to grow. The space in the back corner is being reserved for another fall planting. Lori just called today saying that she is ready to do a round of fall crops - this will include lettuces, greens, cabbage, and some cold hard herbs such as parsley, cilantro, dill. It is always a good idea to clean up gardens regularly so that old or sickly plants don't take up space that could be used for new, fresh plantings.

We just love the mixed beet plantings....the mixture of golden, cylindrical and regular beets makes for great salads.

These broccoli side shoots will keep producing into early winter. We only select varieties that produce lots of side shoots. Often one four pack is plenty to keep a small family in broccoli all summer, fall and early winter.

These peppers are great for stuffing. They have a wide, flat bottom and a large, hollow cavity. An herbed rice or a curried couscous is a lovely thing to pair with these beauties.

These are huge and lovely, and making me a bit jealous since the ones in my garden are small and not very happy.

The Benefits of Compost Tea

Before you start worrying about the fungal diseases that affect many garden crops this time of year, consider brewing up a batch of fermented compost tea. It is cheap, easy to make, and can protect your plants as well as help them out if they’re already suffering. Compost tea has been studied around the world and has been found to reduce fungal diseases by 50 to 90 percent. What do I mean by fungal diseases? These are diseases spread by spores (like microscopic seeds that germinate on leaf surfaces) and are encouraged by warm, wet conditions. This is why plants that have smooth or waxy leaves are less likely to be infected than plants that have textured or hairy leaves (which hold water). Common fungal diseases include:

  • Powdery mildew (white spots on cucumbers and winter/summer squash)
  • Early blight (brown circular spots with concentric rings on tomato and potato)
  • Late blight (irregular brown to black spots with dark outlines and fuzzy undersides on tomato and potato in late July)
  • Septoria leaf spot (small dark brown spots sprinkled over yellowing leaves of tomato and potato)

While not fully understood, compost tea is believed to be beneficial for several reasons. Fermentation creates a healthy community of fungi and bacteria, which may outcompete fungal disease and help support a plant’s natural defenses.  It also contains nutrients, which can be absorbed through foliage.

To make compost tea, mix one part mature compost that contains manure with five parts water. Allow the mixture to sit in a shady place for two weeks (it may become smelly!) Filter out large particles through cheesecloth, then spray on tops and bottoms of leaves every two weeks. The mixture will help reduce spreading of spores by infected plants, and can prevent infection of healthy plants.

- Adapted from The Gardener’s Guide to Plant Diseases, by Barbara Pleasant

This Week in Photos 6.13.12

There's been no shortage of excitement this week! The sweet potato slip sale was a great success (and we still have some left, if you missed out). Saturday was extra amazing because of the delicious treats whipped up by Jessica Bongard of Sweet Lime Cooking Studio...seriously, this girl rocks, and if you haven't checked out her cooking classes, you should! We're also having a sale: hanging baskets are buy one, get one 50% off, and shade perennials are buy one, get one free. So come get 'em before they're gone!

Lori and Doug's Garden: Planting

Meet Lori and Doug, two of our favorite long-time customers and friends. Our skillful and talented guy, Eric Denice,  built them some beautiful raised beds and they've been busy planting.  Check out what's sprouting in their garden. These photos are from a few weeks ago, and we are updating them as we find time....so stay tuned to see more of this great progress.

I think some incredible meals will be coming out of this garden and kitchen this summer. Keep checking in to see the changes!

Lori and Doug's Garden: Construction

Meet Lori and Doug, two of our longtime customers and friends. Last year, they visited the greenhouses repeatedly, making large purchases of vegetable plants, it seemed every day. I finally asked them if they were starting a small farm, and they admitted that they were having some problems. Apparently, everything kept turning black and dying. This does not usually happen to our plants, so I offered to visit their garden, which happens to be on the way home, and they happen to have very nice wine to offer, so it seemed like a win-win. Lo and behold, their beautiful garden site was also the low lying spot where their entire property drains. The plants were sitting in standing water (remember all the rain last year?) and were drowning. I advised them to just start over, sad as that is, because there was just no way to grow in that site.

They asked us to help them build a big beautiful raised bed garden, so we set our expert carpenter and all around handyman, Eric Denice, to the task. Here's what they created together.

In the fall, Lori and Doug planted garlic, which is now growing beautifully, and each week, they come in to let us know what they are up to and we help them pick out plants that are appropriate for the weather. It has been such a fun project and we are grateful to Lori and Doug for including us!

Please keep checking back for updates as we chronicle the progress of this great garden and its people.

What to plant now?

Given that our spring has been pretty mild over all, many gardeners are eager to get in the garden and plant a little earlier than normal. While the temptation is huge, it is also a good idea to remember that a hard frost can still come anytime in the next month or so and the ground is not all that warm. So what can go in the ground now? Lots of cold hardy vegetables and herbs are ready to go including onions, broccoli, cabbages, kales, mustards, boc choi, and more. It is best to harden off the plants for a few days before transplanting them - this means letting them get used to the cold, the wind, and the direct sunlight. Most of our plants will come to you already hardened off, but other nurseries may not take care to do that, so it is best to do it yourself. You can also use some row cover to create a small micro-climate for the young plants. We use hoops made out of 9-gauge wire to hold up the fabric off of the plants. This will give the plants a breathable, water permeable house to grow under during their initial weeks in the garden. The growth rate will be about double the rate of plants grown without row cover.

You can read more about hardening off  here.

Another great thing to plant now are crops you direct seed and that can germinate in cold conditions - spinach, carrots, beets, turnips, radishes, scallions, peas, and fava beans.

If you have a spot in your garden that you are not going to use this year, you might want to consider spreading some cover crop seed. this will help ensure that the soil is fed during it's fallow period. The cover crop is essentially plants that are grown just for the soil's on going health. For cold weather sowing, you might want to try a cow pea and vetch mixture or oats or an annual clover .  This will smother out weeds and add lots of organic matter to your garden.

FAQ #25: How do I create a beautiful and functional garden fence?

From Lily: Gardening has been a constant in my life for as long as I can remember. And with one constant seems to come another… Garden Critters.

We all have our stories. The deer strolled though and ate the tops off all the baby beets. The woodchucks chomped cabbage heads in half. The neighbor’s horse got loose and stampeded the entire garden. Rascally raccoons destroyed the corn crop in the night. The squirrels had family feast in the blueberry bushes. Robins pulled out every bean sprout as they emerged from the earth.  I’m all for sharing the harvest, but come on. This past spring was the last straw. I watched my own dog eat the asparagus shoots right out of the ground!

It was time to build a fence.

To install my own fence seemed like an unappealing and daunting project. I was intimidated. I like freedom, ease, and of course beauty in the veggie garden. Alas, I had to make moves. Precious asparagus was being robbed. There was no time to waste. Honestly, the dog was the main motivator. My biggest worry was that my quickie fence would be an eyesore. The final product has turned out to be nothing of the sort.

My garden comrades and I made construction choices with installation time, simplicity, and expense in mind. We decided on very basic materials that were easy to procure. Cedar posts for the corners and the entrance; installed with a borrowed posthole digger. Wooden grade stakes as the perimeter; one every 5-ish feet, pounded in with a mallet. Coated wire fencing with small holes at the bottom to keep out little critters and large holes at the top which is eye pleasing. We paid a little extra for this but I’m glad because the design is truly easy on the eyes (visually I’m not a fan of chicken wire). A staple gun came in handy to attach the fencing to the grade stakes. Lastly, a very simple wooden frame was constructed with the fencing material as the gate.

The fence has given the garden a sense of place and boundaries. It is no longer just a plot plowed out of the lawn. There is now a container to hold all the ideas, inspirations, and plans for the garden. In only a few hours we transformed the space! This year I hope to incorporate the fence more into the planting scheme of the garden by creating a narrow bed along the edge. The fence is a built in trellis. Why not plant annual climbing flowers! My favorites of course: Sweet peas, Cobaea, and Painted Lady Runner Beans.

I’ve also been dreaming up a project to build a solid gate. A gate that is structurally sound and provides an identity to the garden. Entrances hold an opportunity to set a scene, create a mood, transition from one thing to another. They are the first impressions of a space. When you pass through a gate or doorway you have the chance to leave behind what you don’t need: a chance to step into the present.

Here's some inspiration for gates and fences…

FAQ #9: What is sheet mulching and how do I do it?

Sheet mulching is a technique for creating a garden bed that does not require tilling or hand weeding. It is intended to mimic the natural mulching process that occurs on the forest floor. It is also suitable for converting a section of lawn into a garden without breaking the sod. There are a lot of different methods but here is the simplest one:

  1. Trample or cut down any large woody weeds.
  2. Put down a layer of compost to jump-start the composting process.
  3. Create a thick weed-barrier of newspaper, cardboard, or other biodegradable materials over the area you want to convert, wetting with a hose as you go.
  4. Cover the weed-barrier with weed-free compost or composted manure at least 3 inches thick.
  5. The top layer mimics the materials that fall to forest floor - nut shells, twigs, fern fronds, coffee grounds, wood chips, etc. are all good materials. Create a layer 3-5 inches thick and water in.

Plants can be transplanted directly into this bed and should be closely spaced to minimize the germination of weeds. Note: this method is not recommended for areas that are prone to flooding or waterlogging. Graphic courtesy of agroforestry.net

FAQ #23: How do I have fresh lettuce all summer long? How do you keep it from being bitter?

  The trick to having fresh lettuce all summer is to choose your varieties and timing well. You will need to have a succession of different varieties planted every week or so throughout the summer to ensure a constant supply. Start with cold tolerant varieties in the spring, then plant heat- and drought-tolerant ones in the summer, and plants with good holding ability and heat tolerance in late summer and early fall. Plants turn bitter when they are starting to bolt (go to seed) and are exposed to too much heat, so choosing your variety and timing well also avoids bitterness. Here’s an example planting:

  • May: 'Tango', 'Merveille des Quatres Saisons'
  • June: 'Dark Red Lollo Rosa', 'Sylvesta', 'Red Saladbowl', ‘Cherokee’
  • July: 'Reine des Glaces', 'Two Star', 'Red Sails', ‘Romaine Parris Island Cos’
  • August: 'Reine des Glaces', 'Two Star', 'Red Sails', ‘Mottistone’, ‘Nevada’
  • September: 'Tango', 'Merveille des Quatres Saisons'

FAQ #22: Which herbs are perennial and which are annual?

Perennials: Angelica, Catnip, Chives and Garlic Chives, French Sorrel, Germander, Anise Hyssop, ‘Munstead’, 'Grosso', 'Provence'  Lavender, Lemon Balm,  Lovage, Mint, Oregano, Rue, Sage, Winter Savory, Sweet Woodruff, French Tarragon, Thyme, Valerian Annuals: Artemisia (self seeds), Basil, Chamomile (self seeds), Chervil (self seeds),  Cilantro, Dill, Fennel, Feverfew (self seeds), Lemongrass, Marjoram, Papalo, Parsley, Red Shiso, Rosemary, Summer Savory

Some herbs can be kept as houseplants over the winter. Some that do well are rosemary, thyme, sage, basil, and parsley. It is always nice to have a few pots of these in the kitchen to snip into bowls of soup, salads, scrambled eggs and roasted vegetables and meats. You can dig them up out of the garden in the fall or just grow them in pots all summer that you then bring into the house once the temperature drops.

FAQ #21: How can I keep arugula, cilantro, lettuce, and dill from bolting?

The first step to preventing bolting is to understand what causes it. Bolting, or going to seed, is a natural part of the plant's life cycle. Some plants have longer life cycles than others. Arugula, lettuce, cilantro and dill all have relatively short life cycles, so they will try to produce seed within 8 to 10 weeks of being planted. It is an inevitable part of the plant life cycle but can be postponed with good management. It can also be caused by shock during transplanting, by too much or too little water, and around the solstice when the days start getting shorter. Transplant shock can be minimized by careful hardening off and transplanting in late afternoon when the plants will not be exposed to intense midday heat. Water carefully and time your plantings so that a fresh generation is coming along before the previous generation goes to seed. Here is a helpful schedule to help you maximize the harvest:

Cilantro - plant every 3 weeks from late April to mid August. These are very cold tolerant and can be grown early and late to extend the season. If you are very eager to have cilantro for salsa, then make sure to plant some in early July so that it is ready to eat at the same time as your tomatoes are ripe. The flowers of cilantro are edible and are a lovely addition to salads and salsas.

Dill - like cilantro, is very cold tolerant and can be grown early and late in the season. This self seeds willingly, so you can always allow a patch to flower and drop its seeds giving you a perpetual patch. The flowers of dill are tasty in pickles and marinades.

Lettuce - lettuce can be grown at the baby leaf stage or the full head stage.  Please refer to our lettuce post to learn more about the timing of lettuce. It should be planted every week or two if you eat lots of salads and want fresh, non-bitter leaves on your plate. It can be planted from seeds or from plants. If you prefer the texture and flavor of full heads of lettuce, then transplant individual plants every 10" - about 4 to 8 transplants a week is plenty. If you prefer cut lettuce leaves, then use seeds, and sprinkle them in a row, about 2 or 3 seeds per inch. Cut lettuce leaves can grow back and provide you with a second harvest, but the quality goes down each time and the bitterness increases. It is best to replant a fresh row of seeds every couple of weeks.

Arugula - like lettuce, it can be grown from transplants or from seeds. It is best to plant it regularly as it does not grow back very well. Its flowers are edible, and can be a nice peppery additions to salads, sauces, and grilled fish.

FAQ #20: Which plants make good houseplants?

Red Wagon grows a number of plants that make good houseplants. The characteristics to look for are a tolerance of shade, a preference for hot conditions (such as tropical plants), and plants that are annuals (do not require cold winters). Some great choices are:

  • Colocasias (Elephant ear)
  • Banana plant
  • Sensitive plant (mimosa pudica)
  • Tuberous begonias
  • Geraniums (nice with dichondra)
  • Dracaena
  • Fuschia
  • Sempervivum (Hens and Chicks)
  • Ivy
  • Juncus
  • Boston Fern and other "annual' ferns
  • Oxalis
  • Scented Geraniums
  • Jade

FAQ #20: Do I have enough sunlight for this plant?

First you need to determine if you have full sun, partial sun, or full shade in the area you are considering. The best way to do this is to spend a day (with a clear sky) at home and note which areas come into sun and when, and when they are in shade again. Do this in spring when you have a realistic amount of sunlight, not in summer when the day is longest.

Full sun means at least 6, but preferably 8 hours of direct sun each day. Sun loving plants can usually survive with less but will not bloom as much.

Part sun and part shade plants prefer 3-6 hours of direct sunlight per day; however part sun plants can usually take more heat than part shade plants, which will want relief from strong afternoon sun.

Full shade means zero to 3 hours of direct sunlight. These plants do NOT want total darkness but rather filtered, or indirect light, such as that provided by a deciduous forest.

FAQ #19: How can I manage powdery mildew?

From Sophia: Powdery mildew is a white powder-like fungus that particularly grows on cucurbits such as cucumbers and squash, French tarragon, bee balm, and other plants under adverse conditions. Powdery mildew does not generally kill the plants but will reduce their productivity and vigor. You can help prevent the disease by giving plants plenty of air circulation, only watering in the morning when the plants have time to dry, not planting cucurbits in the same place two years in a row, and destroying insect pests when you find them.

Once you have powdery mildew, you can manage it by removing the worst affected leaves with pruners. DO NOT put the leaves in your compost pile! Either burn them or throw them in the trash. Wash hands and tools with soapy water or dilute bleach solution after handling affected foliage and before touching other plants. Plants can be sprayed with a copper- or sulphur-based organic fungicide, or with a mixture of 1 teaspoon baking soda to 1 quart of water, once per week on the upper and undersides of the leaves until 2 weeks before harvest. This should eliminate the disease.

FAQ #18: How do I make compost?

Make some kind of container about 3’ in diameter, such as a length of chicken wire or 4 pallets hitched together to make a square.  Put a layer of sticks on the bottom, just thrown in to allow air to flow into the pile.  Add a variety of plant material, in layers if you can, but it’s not really necessary.  You need some brown material, such as leaves, and some green material, like freshly pulled weeds, grass clippings or kitchen scraps.  Top with a few handfuls of manure, if you have it, or half-done compost.  This isn’t necessary, but speeds up the process.  Sprinkle with water so the pile feels like a damp sponge.  Don’t soak it, it needs air.   The pile should heat up.  When it stops, turn it.  A compost aerator makes turning the pile an easy matter, so I do it more often, but you can also use a shovel or garden fork. Having two compost piles makes it easier to use the finished compost, since one can be allowed to finish while you’re adding to the other. Use the finished compost on your garden.  Even if it’s not be finely screened compost, it will finish decomposing in the soil.

FAQ #17: Should I plant annuals or perennials and what’s the difference anyway?

It depends on what you want! Annuals have to be planted each year because they are tender and don’t overwinter in VT, so you have to buy new ones each season.  However, once they start blooming, they do so all summer, if you take good care of them.  At the end of the summer just pull them out and throw them in the compost pile.

Perennials are long lived, often indefinitely, but only bloom for a part of the season.  In order to have color all season, you need to plant a wide variety of plants.  Some need to be cut down after blooming and you may have an empty spot in your garden.  Most perennials need dividing in order to be at their best and not look scraggly or take over the garden. Often a mix of annuals and perennials works well to ensure constant color in the garden. Biennials are plants that live for two years but behave somewhat like perennials because they flower and self-seed in their second year, and the seedlings will return year after year. Hollyhocks are a good example.

FAQ #16: Which perennials bloom the longest?

Virtually all plants will bloom longer if you deadhead them.  Picking lots of blossoms encourages the plant to branch and so you get more. I’ve had especially good luck with these varieties: Heliopsis (False Sunflower), which sometimes blossoms for 10-12 weeks in the fall Rudbeckia (Black Eyed Susan) – 6-7 weeks Monarda (Bee Balm) - 8-12 weeks Coreopsis - 8-12 weeks Bleeding Heart (Dicentra) ‘Luxuriant’ - 10-14 weeks, Feverfew – 8-12 weeks if you let new plants grow and cut back the old ones

IMGP2057
IMGP2057

FAQ #15: Should I mulch my flower beds?

How much time do you want to spend weeding?  If you love to weed as I do, you don’t need to mulch.  However, mulching will save 80% of weeding time, so most people are happier with a mulched garden.  Use a fairly thin layer (2-3 inches) and put a thinner layer on in subsequent years.  Mulching also conserves water.  Make sure the soil is moist before mulching because the mulch sometimes inhibits moisture from getting to the roots.

IMGP2865-1
IMGP2865-1
IMGP2879-1
IMGP2879-1

FAQ #14: How can I keep my garden looking good without spending all my time weeding?

First of all, gardens need some maintenance, so if you want a nice looking garden, you will need to commit some time to caring for it.  Bark or straw mulch helps to keep down weeds and makes those that do grow easier to pull up.  One good way is to edge with a shovel then use a hand cultivator to pull away the grass that is “cut off”.  Edging makes weeding easier and makes the garden look really nice when you are done.  When pressed for time, I edge, then weed in about 12 to 18 inches.  If your garden is full, the weeds in the middle won’t even show and you give an impression of a well-maintained space. Planting ground covers such as mosses, alyssum, and vinca will reduce the space that weeds can take over. You can check out a video on edging with a shovel here.