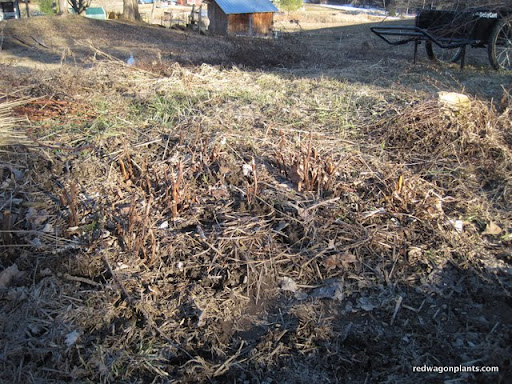
Fall Planting Guide

Mid-August is rolling around, and with it comes some vegetable planting possibilities that will feed you late into autumn and early winter. This is a great time to clean out some of the garden beds that have finished producing and replant them with some fresh crops for late season harvest. Here are a few options that you might want to consider incorporating into your later summer gardening routine.

A note on flea beetles and row cover. Flea beetles are little, black and jump around on your plants while making tiny little holes. They love anything in the brassica family - cabbage,broccoli, arugual, mustards, collards, etc. Row cover is a white fabric used to keep out insects and/or to warm up the soil and air around the plants. It does not hurt to use row cover to speed things along and to keep out the flea beetles. Broccoli - seed a small amount directly into garden beds, or buy transplants up to mid-August. If you are direct seeding into a garden bed, remember to thin or prick out and replant the broccoli babies so that they have proper spacing (15” or so). Cabbage - same as broccoli. Choose shorter day varieties. Seed packets usually list the days to maturity for all crops. In early August, you can usually get away with planting a 60 day cabbage that will be ready in early October. Kale - this is a great time to put in a few more kale plants or seeds, they will size up before snow flies, and will withstand lots of wintery weather. The good thing about kale, is that once it is full grown, it will just stand around in the garden waiting to be picked. It does not get “too old” or bolt (jump into seed production mode). This makes it a great early winter crop and a joy to harvest under snow fall. Collards can be treated this way as well. Arugula - a nice addition to salads, this tender green with a mustard-like flavor is also a great survivor of cold temperatures. It can withstand many hard frosts and will continue to add a little spike to your salads well into November and December. You can put row cover on it to keep away the flea beetles and to give it a little extra protection from cold winds that can dry it out. If it starts to turn a little purple in the colder temps, don’t worry about it, it is still fine to eat. This is just a symptom of not being able to absorb phosphorous in cold conditions. Turnips - a short season salad turnip can still be sown in August. I like the Hakurei variety from Johnny’s. It is delicious raw in salads, sliced thinly or finely diced, or sauteed in a little butter with fresh herbs (winter savory makes a special appearance at my house, often in this dish in particular). People who think they hate turnips will just be shocked when they taste these buttery slices that just melt in your mouth. Spinach - in the first half of August, it is a good idea to plant a large patch of spinach. It will germinate in the cooler night time temperatures (spinach does not like to germinate in the heat) and will last a long time in the field in the cool temperatures of October and early November. Carrots - fall carrots are best seeded right around July 4th. This gives you a chance to do an early batch of carrots for late spring, early summer eating, and then a second (or third) batch for fall eating. Fall carrots are considerable sweeter than spring seeded carrots and are definitely worth the trouble. Boc Choi - this is another crop that does really well in the cooler temperatures of fall. It is not a heat lover, and therefore should only be planted in April and May and then again in mid to late August for fall harvest. This benefits from row cover if you have a lot of flea beetle pressure. There are quite a few different versions of boc choi, and if you like the crunchy texture and delicate flavor of this crucifer, then please consider trying baby boc choi, red boc choi, or full sized boc choi. While it is easier to start with plants, it is certainly possible to direct seed this crop. Beets - fall time beets are sweet, tender, and do not have that “dirt” taste of beets grown in full summer heat. Last planting date for fall beets is around August 10th. They should be direct seeded in the garden and then thinned to one plant per 2 to 3 inches. You can space the rows 10 to 12 inches apart and fit about 3 rows in an average bed with a 4 ft width. The greens are tasty too, and the little delicate plants you pull out when thinning are a great addition to sauteed greens, soups, or even salads if very young.

Cilantro and Dill - these herbs can be planted directly in the garden from seed as late as mid-August. They grow well in the cold, and actually prefer it. The cold slows them down and prevents them from going to seed. Plant a good sized patch since you can harvest the plants well into December. They can take a frost, a snow fall and still will bounce right back.

Mustard Greens - these can be planted just like arugula. See instructions above.

Radishes - are a great addition to the late season garden. They can be planted right up to early September, and will maintain a high level of quality right up until it snows.

Lettuce - you can direct seed certain varieties of lettuce for fall harvest. Some do better than others in the cold. I like to plant Merveilles des Quatres Saisons and Tango for their beauty, taste, and cold hardiness.

Parsley - this herb can take very cold temperatures, so make sure, in mid-July or so that you have a nice patch of this going into fall and later summer. If this is an herb that you use frequently, it does not hurt to plant two or three different patches over the course of later April to mid - July. It is a slow grower, so after mid-July you can only plant it from transplants, not seed.
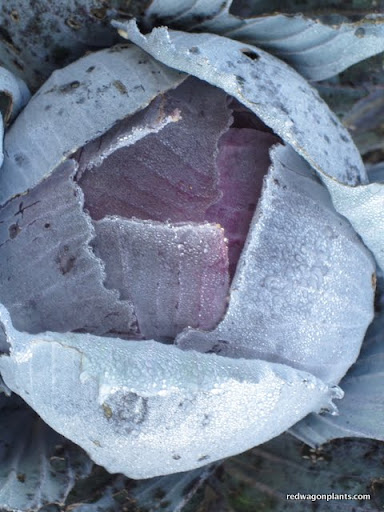
 

The Fall Garden Confessional

As the owner of a greenhouse business, my gardens are completely neglected between snow melt and late July. This is a problem. Our seasons are short enough as it is, and to lop off about 4 months of key gardening time is a pity. I try to make up for it by making time for the gardens later in the summer and I spend a lot of time on prepping the garden in the fall so that spring planting activities go smoothly and quickly. Early August is a great time to plant or replant the vegetable garden. Throw in some broccoli, lettuces, cabbage, cilantro, salad turnips, radishes, spinach, and even peas. They will be so good in September and October, and you will head into fall feeling like royalty. Rather than see the garden's decline in the heat of late August, you will see a spruced up and abundant second coming. The cool night time temperatures of late Augusst and September are key to a successful fall garden. You can also use this time to fertilize the feed the garden soil (I use Compost Plus) around the annual vegetable plants. They'll reward you with glossy, dark green foliage and scrumptious meals well into late fall.

So as I sit out and look at the raised beds behind my house, I feel better. The overgrown jungle is mowed, the beds are weeded, replanted and looking beautiful. I wish I had more time in spring, but I just don't and I have come to accept it. It's okay, gardening without guilt, right?


Things to Plant Now. You Will be Glad You Did.

August is rolling around, thundering ahead,  and with it comes some vegetable planting possibilities that will feed you late into autumn and early winter. This is a great time to clean out some of the garden beds that have finished producing and replant them with some fresh crops for late season harvest. Here are a few options that you might want to consider incorporating into your later summer gardening routine.

Broccoli

- seed a small amount directly into garden beds, or buy transplants up to mid-August. If you are direct seeding into a garden bed, remember to thin or prick out and replant the broccoli babies so that they have proper spacing (15” or so).

Cabbage

- same as broccoli. Choose shorter day varieties. Seed packets usually list the days to maturity for all crops. In early August, you can usually get away with planting a 60 day cabbage that will be ready in early October.

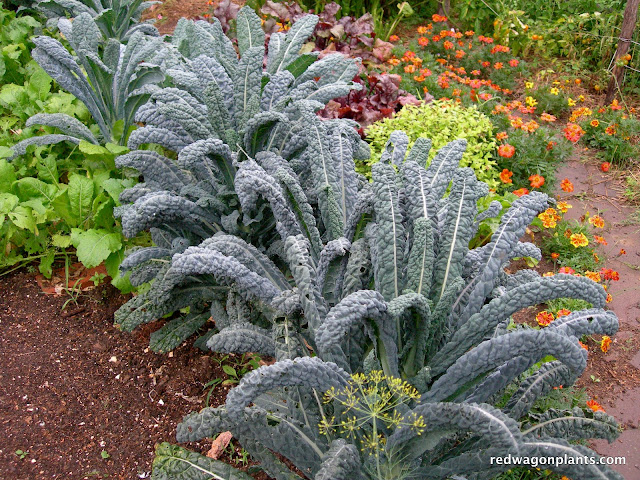
Kale -

this is a great time to put in a few more kale plants or seeds, they will size up before snow flies, and will withstand lots of wintery weather. The good thing about kale, is that once it is full grown, it will just stand around in the garden waiting to be picked. It does not get “too old” or bolt (jump into seed production mode). This makes it a great early winter crop and a joy to harvest under snow fall. Collards can be treated this way as well. A note on flea beetles: It does not hurt to use row cover to speed things along and to keep out the flea beetles. They are little biting insects that make little holes in the leaves and generally slow down a plant’s growth by stressing it a bit. All vegetables in the brassica family are susceptible to flea beetles - broccoli, kale, cabbage, mustards, arugula, collard greens, and boc choi are all in this family.

Arugula -

a nice addition to salads, this tender green with a mustard-like flavor is also a great survivor of cold temperatures. It can withstand many hard frosts and will continue to add a little spike to your salads well into November and December. You can put row cover on it to keep away the flea beetles and to give it a little extra protection from cold winds that can dry it out. If it starts to turn a little purple in the colder temps, don’t worry about it, it is still fine to eat. This is just a symptom of not being able to absorb phosphorous in cold conditions.

Turnips

- a short season salad turnip can still be sown in August. I like the Hakurei variety from Johnny’s. It is delicious raw in salads, sliced thinly or finely diced, or sauteed in a little butter with fresh herbs (winter savory makes a special appearance at my house, often in this dish in particular). People who think they hate turnips will just be shocked when they taste these buttery slices that just melt in your mouth.

Spinach

- in the first half of August, it is a good idea to plant a large patch of spinach. It will germinate in the cooler night time temperatures (spinach does not like to germinate in the heat) and will last a long time in the field in the cool temperatures of October and early November.

Overwintered Spinach - overwintering means keeping a vegetable alive through the winter for spring harvesting and eating. Not all vegetables can survive our VT winters, but the few that can include spinach, parsnips, leeks, garlic, and parsley. Spinach for early spring eating (mid to late April) should be sown in the first two weeks of September. Once it germinates, allow it to grow without harvesting or touching it. You can eat a little if you want, but ideally you will leave as much of the plant in the ground as possible. Once very cold weather hits, in early to mid-December, you can protect the spinach under a layer of straw, or leaves, or a few layers of row cover. In the spring, as soon as the ground has thawed out, remove the layers of protection and you will see the spinach come to life, long before any other plants begin to stir. This is such a delicious treat for early spring and really worth the trouble. A future post will be just about overwintered vegetables, so if this is something you have been wanting to try in your garden, check back here in a few days!

Cilantro and Dill

are good herbs for fall planting since their cold-hardiness is unmatched, and it will give you something to add to autumn salsas, salads, and pickles. Just sprinkle some seed into a shallow trench, press them in, and lightly cover with soil. The planting depth is very shallow here, just 1/4 inch or so. One of the most common problems with crops seeded directly into garden soil, is that they get planted too deeply. Remember this basic rule of thumb: the seed needs to be planted only 2 times deeper than its own size. Cilantro and dill will live until the first snow! They thrive in the cold. They are true soldiers of season extension.

Let us know if you feel inspired to try your hand with some of this season extension - we love to hear about it!

Managing Garden Pests: Cucurbits (Squash Family)

The problem with plants that taste good to us is that they also taste good to a variety of insects. These bugs can suck the juices out of the plant, chew big ugly holes, and transmit diseases.  Because plants in the squash family (melons, cucumbers, squashes, and zucchinis) are very juicy and sweet, bugs love them. But don't despair! We can help you identify and manage these pests so you can bring in the bounty. Cucumber Beetles

These pesky little creatures are about 1/4 inch long with yellow and black stripes. They love to chew cucurbit leaves until they look like lace. They fly but tend to fall off the leaf when you disturb it, so put your hand underneath to catch them. Squish the beetles and look for their orange eggs laid in the soil around the plant. You can often catch them in pollinated squash flowers, then just squish or drop in a bucket of ammonia, kerosene, or other poison. For serious infestations, spray plants with pyrethrum (a botanical pesticide) every 3-4 days.

Squash Bugs

These large bugs are often found in pairs on squash family plants. They are brown or black, shield-shaped, and about 3/4 inch long. They lay very shiny reddish eggs on the undersides of leaves. They can be easily controlled by squishing or with applications of insecticidal soap. Making a small moat of wood ashes around the plants will control the bugs as well, since they hate walking over the ashes. Just make sure not to get any ash on the plants!

Aphids

Aphids are one of the most common garden pests. They can be difficult to see because they are very small and often green or tan in color. They suck the sap of the tender young foliage and undersides of leaves. If you see ants on your squash family plants, you probably have aphids, since ants are attracted to the honeydew produced by aphids. A variety of methods for managing aphids are available. The best remedy is to squish them when you find them. You can also make "bug juice" by mixing the squished bugs with water and spraying the plants. A spray made of ground garlic, onions, or hot pepper can also be used to repel aphids. Insecticidal  soap or horticultural oil can be used as a last resort.

Flea Beetles

Flea beetles are not as common on cucurbits as they are on plants in the cabbage or mustard families, but they can do damage. They are very small, about the same size as an aphid, and shiny black. They jump like fleas when disturbed and make zillions of tiny holes in leaves. Flea beetles can be repelled using row covers, hot pepper, or garlic sprays, and as a last resort can be killed with pyrethrum.

This Week in Photos - June 29th, 2011

It's getting to be that time in the season when there's more time for fun projects - the vegetable garden is in, and with the exception of weeding and succession planting, one can finally delve into the beauty and creative freedom of flower gardening. And just in time, as if by magic, the first rudbeckia unfurls its yellow petals, the astilbe raises its frothy plumes, and the daylilies unpack their sweet blossoms as if to say, "I'm out in the world now! Come play!" Our perennials look more dazzling than ever (and with our sale,  they're also a steal)! If you'd like to learn about perennial selection and maintenance, our resident gardening expert, Hope Johnson, will be teaching a free workshop at our greenhouses on Saturday, July 16th from 9-11am. Come with your gardening questions, hopes, and dreams!

We still have lots of beautiful annuals for tumbling over window boxes, making bouquets, twisting into braids or brightening a veggie garden - whatever suits your fancy!

Managing Disease in the Garden: Powdery Mildew

Well, it's that time of year when we start getting lots of calls and questions about common garden diseases and pests. This post will be the first in a series focusing on how to manage these issues when they arise so that they don't get out of hand. It is wise to pay careful attention to your plants - sometimes small changes in their appearance can indicate a potential problem. The internet is a wonderful resource for solving your garden mysteries, but a good gardening book like Rodale's is indispensable for the serious gardener. If neither resource is available to you, don't hesitate to call us and we can help you troubleshoot! What is Powdery Mildew (PM)?

Powdery mildew is a white fungus that mainly affects plants in the squash family (cucumbers, melons, zucchinis, etc.) but can also affect other families as well. It first appears on the undersides of leaves as white dots, which expand until the whole leaf looks like it's been dusted with a white powder.

What causes PM?

Garden fungi are propagated by spores that fly on the air, which makes them difficult to prevent. The fungi are more likely to grow on plants with a lot of moisture in and on their leaves, and in humid conditions with too little air circulation. It is also carried from plant to plant by insect pests such as squash bugs, cucumber beetles, aphids, and flea beetles, so managing these pests helps reduce the prevalence of PM.

How do I prevent PM?

- Check for insect pests every few days. Squish the pests when you find them, and make sure to look for and destroy their eggs as well. A little vigilance goes a long way!

- Space plants further apart so that the sun can hit all parts of the plant, and air can move easily through.

- Only water in the morning, when plants will have plenty of time to dry during the day.

- Practice good crop rotation. Never put plants in the squash family in the same place as they were the year before.

How do I manage PM once I have it?

Powdery mildew does not usually kill a plant unless it is also suffering from pests. However, the two often go hand in hand, so it is wise to manage it when you see it. Here's what to do:

- Remove the worst-infected leaves with a pair of scissors or pruners. DO NOT put the infected leaves in your compost pile! Either burn them or put them in the trash. After pruning, wash your hands and tools with soapy water or a dilute bleach solution before touching other plants.

- Spraying with a sulfur- or copper-based fungicide once a week on the top and undersides of the leaves will eliminate most of the fungus. Follow this regimen up until 2 weeks before harvest. Alternatively, a mixture of 1 teaspoon of baking soda per quart of water can also be used. Try to spray only in the morning, when the leaves will have plenty of time to dry in the sun.

A Child's Garden

Growing up surrounded by gardeners, it was impossible not to become one myself. However, my childhood self did not always appreciate what I now consider to be relaxing activities - planting, weeding, and shelling peas were chores, plain and simple. Looking back I wish I had had a little garden space of my own - to experiment, observe, and play, without anybody ordering me around. At Red Wagon we are nurturing our inner child by creating a garden that appeals to children (and to us!)...there is a little stone path down the middle that leads up to a big boulder for climbing on, and, as of yesterday, we have a bean teepee. We put the teepee together in less than an hour with minimal materials, and it has already generated excitement among the kids visiting our greenhouse. We planted ours with purple hyacinth beans and Irish moss on the inside, to make a comfy place to sit.

If you'd like to make a bean teepee yourself, here's how:

Take three bamboo or wooden poles (ours were 8'), and push them into the ground in a triangle. It helps to have one person on a ladder holding the poles together in the middle, with the other person positioning them in the ground. Take some twine and wrap it around the three poles at the top until they're good and sturdy. Then, using more twine, make four to six strands reaching down to the ground and secure with stakes along two of the three sides of the teepee (leave one side open so little people can go in and out). Then make a net by weaving strands of twine horizontally around the poles and twine, securing to the poles as you go. When you're finished, plant your beans around the two sides of the teepee and voila, you're done!

Enjoy!

- Sophia

Our Plants in New Places

We had a great week last week and met up with lots of new customers at a few new venues. Fletcher Allen Health Care in Burlington is a leader amongst hospitals around the country for taking health, well being, and green living seriously. Their nutrition and dining services people use local foods, they have a beautiful garden on the roof top, and multiple gardens on the various campuses where herbs, salad greens and other vegetables are grown for the kitchens. The staff is dedicated and enthusiastic - so much so that they asked us to provide plants for a plant sale last week which was a huge success! Here are a few pictures from the sale:

I have to say, that when I dropped off the plants, I was sure that there were way too many, but those amazing women sold so many plants! There were only a few trays left at the end of the day. This will be an annual tradition hopefully and we can get a chance to talk gardening with all the hospital employees again next year. Ally sent along a sweet note this morning:

Hi Julie & Awesome Greenhouse Crew,

We had a blast at the hospital plant sale and so did all the employees, patients, and visitors who stopped by.  Everyone commented on how great the plants looked. Even our executive chef ended up adding some  impulse purchases to his list for the hospital's gardens!  Thanks to Eric for stopping by with more signs, and to Julie for her expert gardening advice, and to everyone at Red Wagon who contributed towards growing such healthy plants.  I've included some pictures from the first hour of the sale.  I wish we'd thought to get some shots of the empty tables at the end of the day.  Even then, with slim pickings left and the cash registers shut down, people kept trying to buy plants!  Thanks again, Ali

Gifts for Mom

Here at Red Wagon all of us know what it's like to be a mother - we have thousands of tiny baby plants that need feeding, cleaning, and protection from the harshness of life. But our babies grow up and move away in just a few short months, whereas real mothers are tasked with many years of care. It is time to celebrate the amazing mothers in our lives, and so we offer you our labor of love - gorgeous hanging baskets, hardy perennials, fruits and shrubs, vibrant flowers, high quality tools, and much more. Spring-blooming perennials, with their delicate flowers and unique foliage, help bring some early beauty into the landscape.

And then we also have a whole new selection of shrubs and perennials.

Hanging baskets are a classic choice for Mother's day - they'll bloom all summer just outside your door and require almost no maintenance.

Trees and shrubs make great long-lasting gifts and add appeal to any property.

What Can I Plant for a Little Early Color Around the House?

It's been a pretty cold spring in Vermont this year. I cannot remember a spring like this in recent memory, with night temperatures dipping into the twenties in mid-April and day time temperatures hovering in the low 40's. Many of our customers are ready for some color around the house, and it's still not safe to put out hanging baskets, or most annuals for that matter.

What I suggest for early spring containers is a selection of cold hardy plants, especially the ones that seem unusual in containers, but will feed the need for signs of life around the yard!

The following plants are just great for a year like this and look really cute mixed together.

  • Violas and pansies
  • Allysum
  • Cold hardy herbs such as parsley, chervil, mint (ginger mint cascades down the side of the container), cilantro, dill. The textures and different greens at dimension to the arrangements. Plus you can snip at them and bring them into the kitchen for some spring time flavor boosts.
  • Colorful kales such as Redbor and Red Russian.
  • Fennel - the bulb kind or the bronze herb kind
  • Lettuces - especially the green oak, red oak, and cherokee red batavian
  • Frisee endive - it has a lovely frilled edge, and an unusual lime green color.

The beauty of this kind of planter is that it is multi-purpose. The violas and pansies and their "companion" foliage are all edible. What a nice gift for someone special, or a treat for yourself to celebrate the slow unfurling of spring.

Garden Planning with Julie

Tuesday, April 26th, 7pm

At the Carpenter Carse Library in Hinesburg

Please join Red Wagon Plants' owner, Julie, for a look at simple ways to feed yourself from your garden. This is geared toward the kitchen gardener who would like to learn how to grow more of their own food in a way that is simple and not overwhelming. We will discuss how to schedule your plantings so that your vegetable harvest is spread out over the whole season and so that you can avoid the tomato jungle and the zucchini baseball bats. Simple preserving techniques will also be covered such as freezing and canning projects that you can tackle on a weeknight as part of your dinner preparation or during a couple of hours on a weekend morning. This is a free event! For more information, please contact the library at 482-2878.

This Week in Photos - April 16, 2011

Each year I am amazed by the incredible variety of new plants that are available. This is the work of plant breeders, who painstakingly cross-pollinate particular varieties until they achieve the results we want or who carefully scan their crop for particular traits they want to select. It is a time-consuming process, but gardeners are always grateful - this year, as with every other, we are treated to an array of extraordinary new plants. We hope you enjoy this week's photos!

Each plant has a unique texture, and each has its special place in the garden...

And then there are also wondrous colors and shapes...

The First Capstone: More on Charley's Wall

Charley and his herringbone wall in the morning light

April 8th

In rain or snow, sleet or sunshine, Charley is outside working tirelessly to finish his beautiful herringbone wall. You can read more about the wall in our previous post, "Charley MacMartin's Herringbone Wall". To find out more about Charley, you can visit Queen City Soil and Stone's website.

See Charley's progress?

April 14th

Charley MacMartin's Herringbone Wall

To me a stone wall has a sort of natural mystique. The way the stones hold together, without any mortar, seems almost magical, and their patterns, nooks, and crannies create an artistic union of human and natural construction. In the garden the rock wall serves other magical purposes. The sun heats the stones, which radiate warmth back to the plants long after the sun goes down, a boon to heat-loving plants like tomatoes, peppers, and basil. The spaces between the rocks can also be planted to create a vertical garden of mosses, ferns, and succulents. Our friend, Charley MacMartin of Queen City Soil and Stone , is building us yet another beautiful and unique wall to stabilize the bank beside the road and provide a canvas for our plants!

As I walked out to see Charley’s progress on the new wall on a sunny, spring-like day this past week, I was immediately struck by its unusual design. Charley was kneeling on the ground, surrounded by piles of large flat stones and buckets of softball-sized white ones, partly hidden by the wall rising before him. When I got closer he explained that this is called a herringbone wall. It is so called because the flat stones are stacked in rows on their narrow edge, creating the illusion of a spine or long ribbons of stone. He explained that this type of wall is common in places like the British Isles and Japan, where the natural stone is flat and plate-like. The herringbone wall takes much less stone to build than when flat stones are laid horizontally.

This particular stone came from Plainfield, VT, where Charley carefully chose each piece to become a part of this wall.  This is no easy task. Stonewalling is an ancient trade requiring patience, skill, and vision, each wall a monumental labor of love and dedication.  And Charley's walls are no exception - people come from miles around to learn and work alongside him.

The herringbone wall has two sides. The front side of the wall (that you see) has the vertical pattern described above, whereas the back side (holding the bank) is made of a wide variety of stones, a veritable ratatouille of shapes, sizes, and colors – “Leftovers,” said Charley, carefully choosing a large egg-shaped white rock and wedging it into place.

The two sides of the wall, front and back, taper towards the center like a cairn, so that the gravity of the stones stabilizes the wall. Every few minutes Charley pulled out a tape measure to make sure the width of the wall was just right. Between the two sides he hammered the softball-like stones into place, forming a strong core that can hold the bank, the stones, and the plants that will soon be growing there.

We'll post more pictures of the wall as it grows. For more information about Charley or Queen City Soil and Stone, visit his website, www.queencitysoilandstone.com. You can also read a wonderful article he wrote for Local Banquet called "Good Walls Make Good Gardens", which also features Red Wagon!

By Sophia Bielenberg

Weekend Garden Update and How to Prune a Raspberry Patch

Today's weather report - slush, sleet, slush. I am glad I got a few hours in the garden on Sunday. Here is what got done.

I oohed and aahed over the over-wintered leeks. If you peel back the outer layers, there is a sweet, leeky gem underneath. Silky and fresh in soups or braises - perfect for today's weather.

Sandy brought her mini tennis ball to the garden. She was pretty happy overall with the development of the garden work.

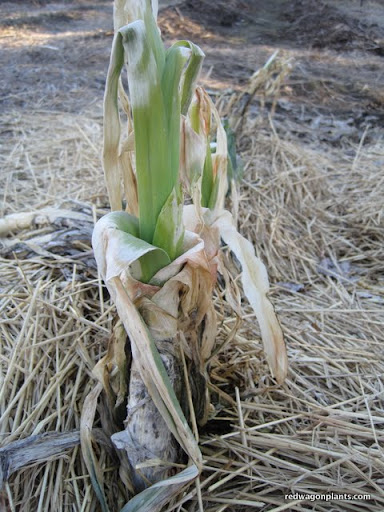
We said hello to the garlic.  It never got mulched this winter, but the 3 feet of snow we had all winter long seemed to do the trick. I will add a little Compost Plus to make it happy.

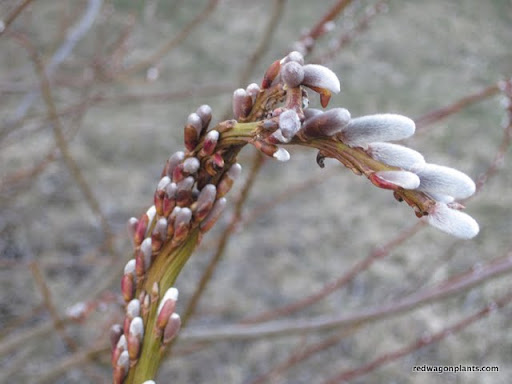
The Japanese Fan Tail Willow that is part of our hedgerow creating a privacy screen from the road made me pretty happy as I walked back to the house at dusk. The catkins were just calling out for a nuzzle.

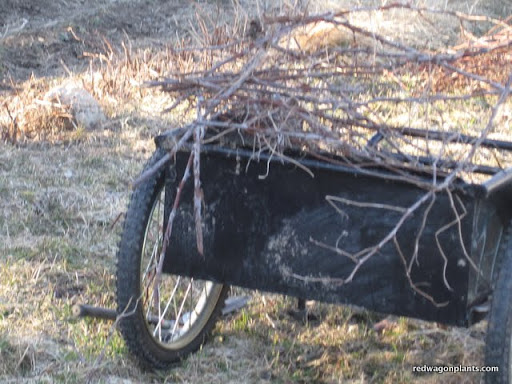
The raspberry bushes got a haircut. The donkeys love to eat those prickly brambles. Hard to believe.

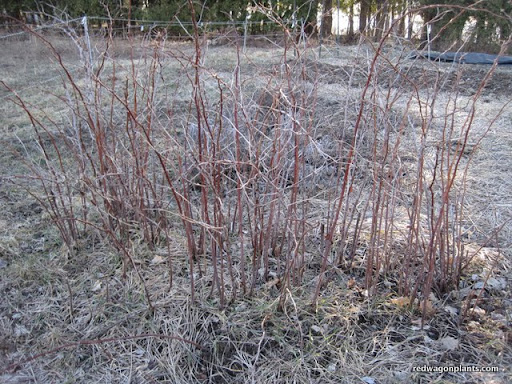
Raspberry patch before it gets pruned. Notice how thick it is. The trick is to cut out the growth that is two years old. Those are the "canes" that bore fruit last summer. They will not make fruit this year and just take energy away from the plant. They are pretty easy to identify because the bark peels back and the color is not as red as the 1 year old growth. When you cut them, the interior of the cane is drier and pale green. The canes that will bear fruit this year are brighter red, and when you cut them they are a brighter green and full of sap.

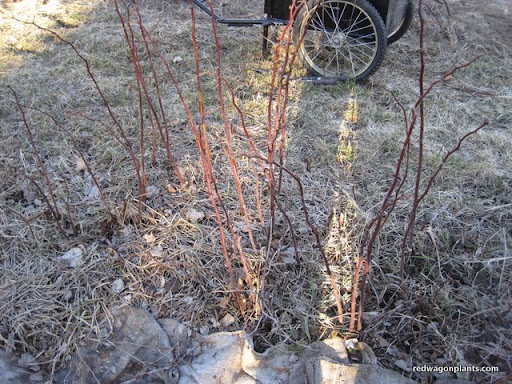
After pruning. The canes each have about six inches of space. I also cut the tips of the canes off, about 1 inch or so. This helps give the cane energy lower down on the cane where the fruit will size up a little more.

Fall bearing raspberries are cut right down to the ground, as you can see below.

Cannot wait to eat these, freeze them, make jam.

But first, back to the sleet.