Medicinal Herb Bundles for 2021

2021 is going to be a big year for medicinal herb growing! With ever more people finding joy and solace in tending to plants, many folks are also realizing that home gardening can be more than just tomatoes and pansies. At Red Wagon we’re branching out as well, and growing even more herbs with traditional medicinal uses. Maybe you’re feeling ready to dive in to the world of healing herbs but a little overwhelmed at all the choices available (don’t even get me started on how *all* plants are medicinal!) Our specially tailored herb bundles are a great way to fill your garden with plants that you know you’ll use and enjoy. Additionally, we’ll offer support through educational videos and recommendations all season.

Our pre-made bundles are only available through our online store; you can also find the individual plants in our retail greenhouses when you come to shop in-person.

To help you get to know the herbs, we’ve made introductory videos for all four bundles; check them out on our Youtube channel. In the video descriptions you’ll also find some book recommendations, many of whose authors have their own super-informative youtube channels. Let these resources be a jumping-off point for your own personal experiences and kitchen experiments with the herbs!

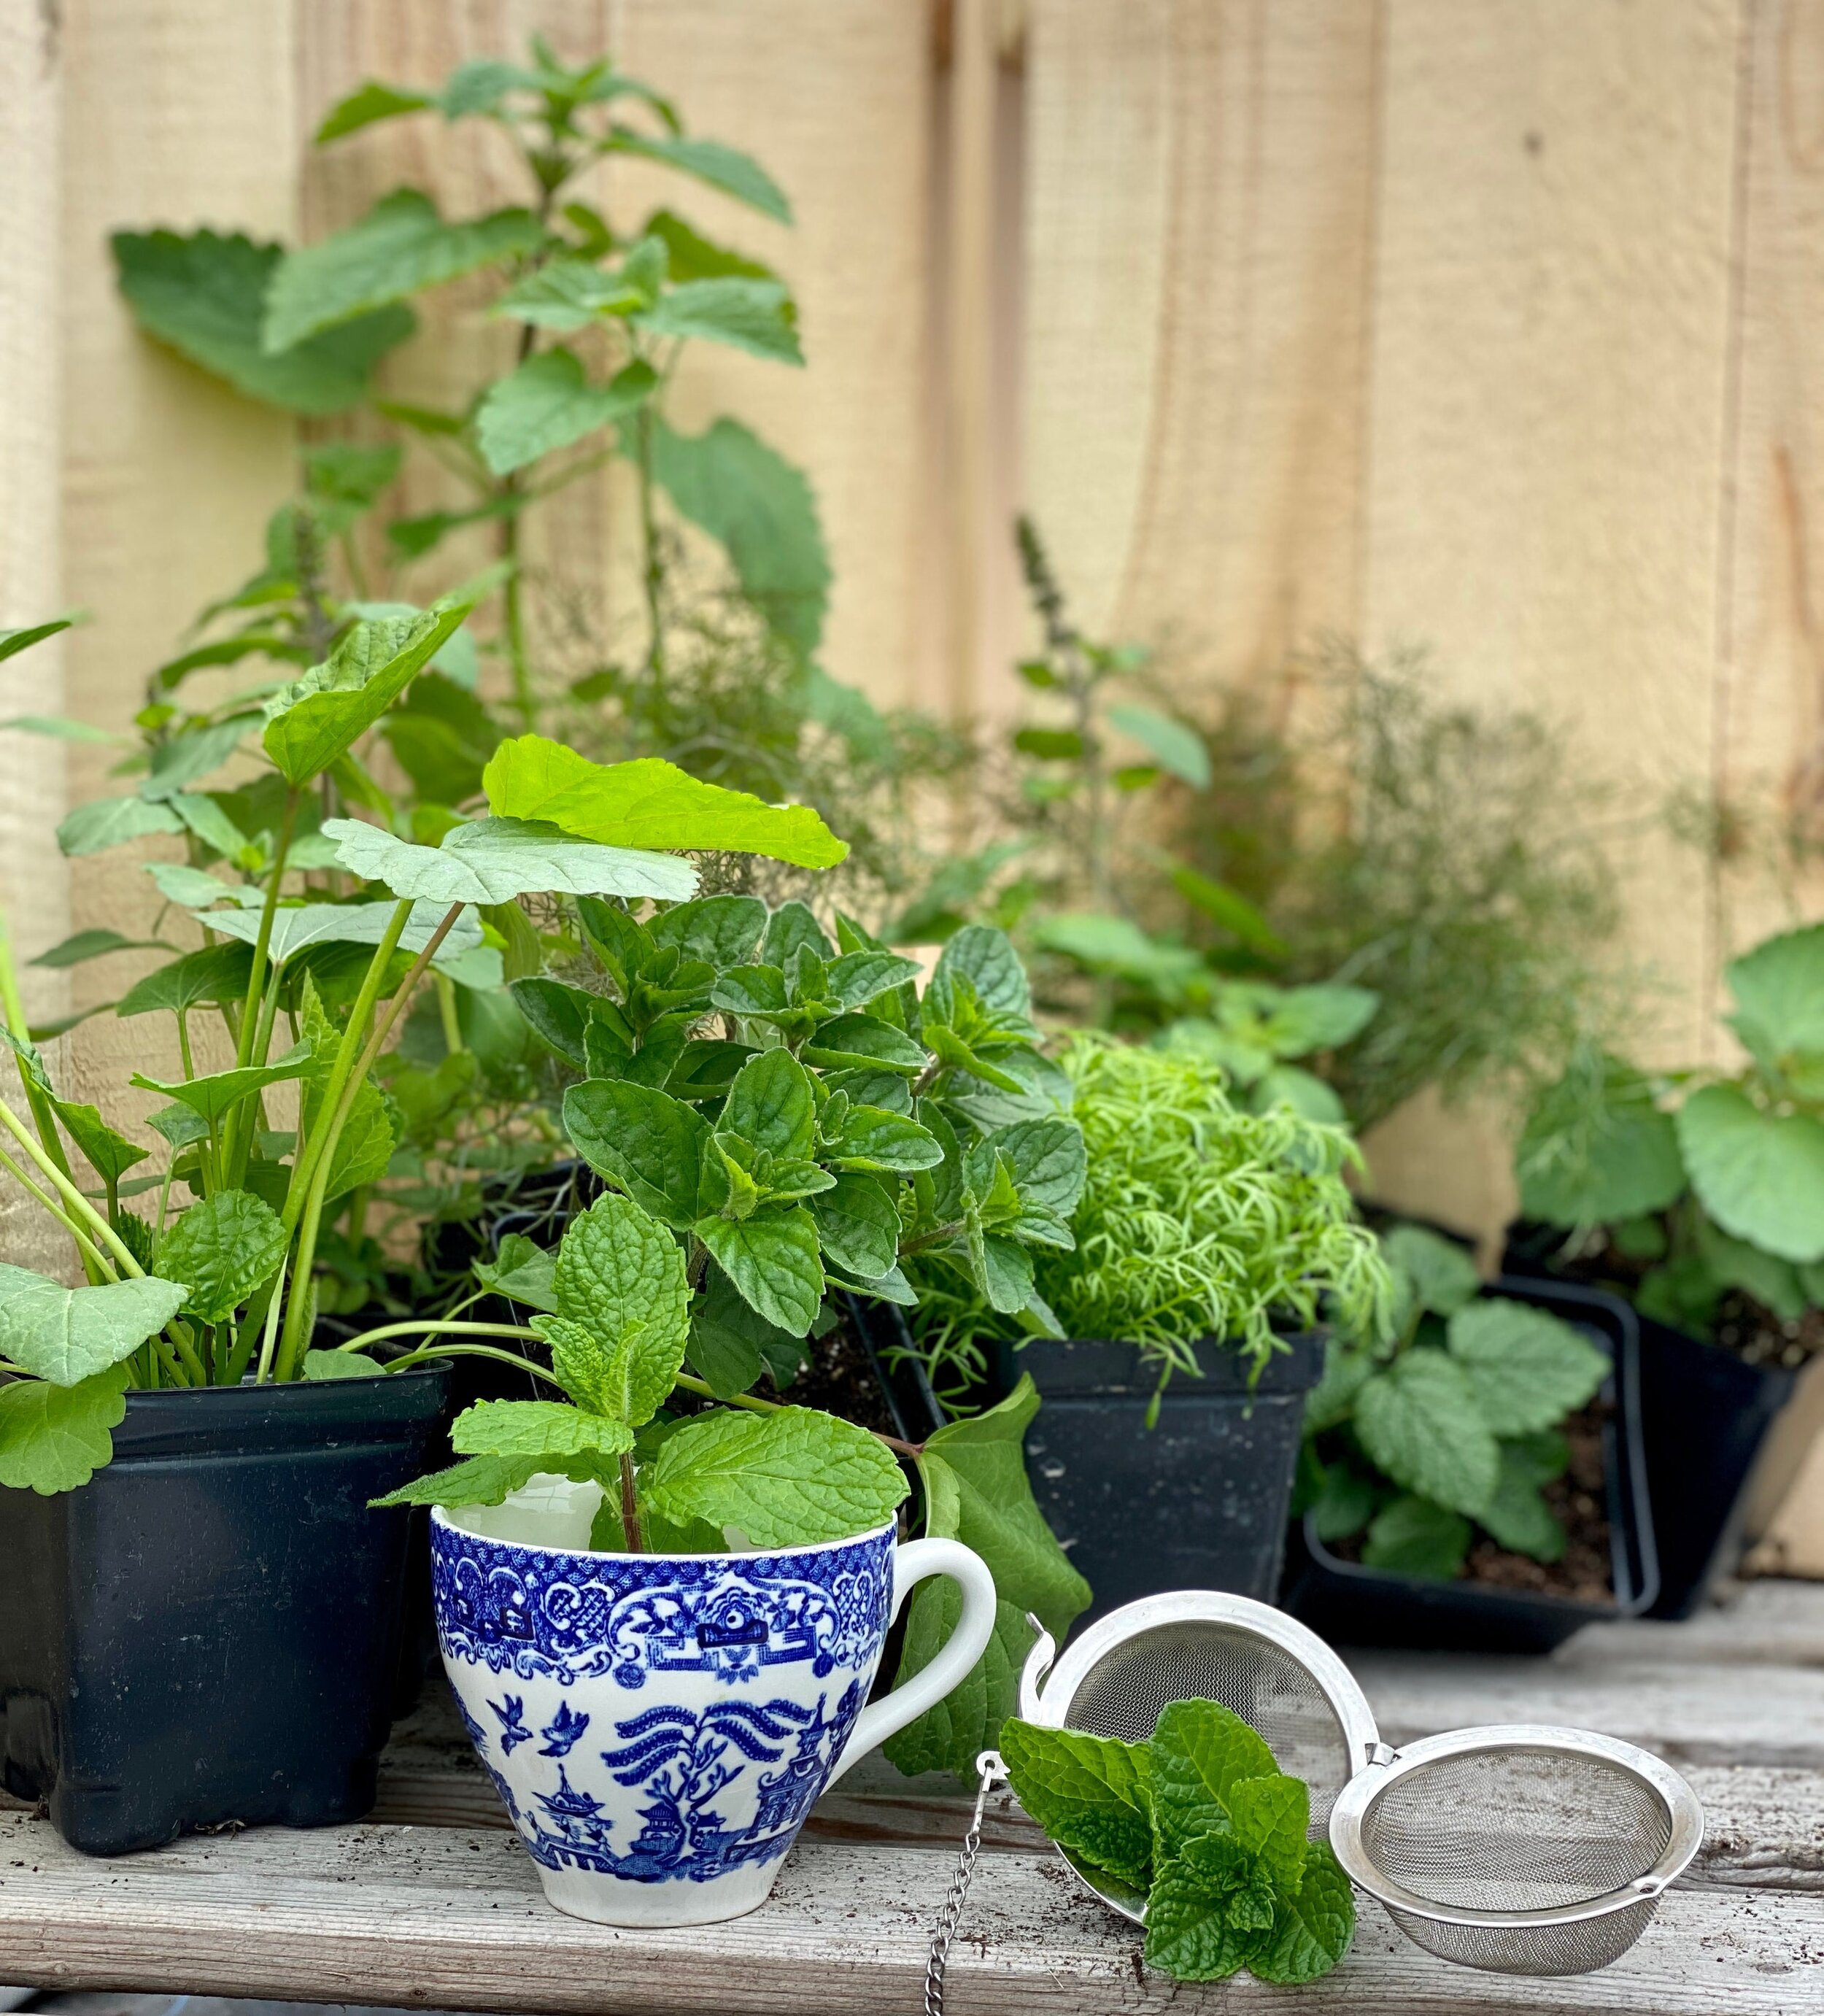
Garden Tea Time Bundle: This kit is full of only the tastiest herbs for making fresh and dried teas. If you’re working with herbs and children, this bundle offers kids a safe and yummy way to pick their own medicine.

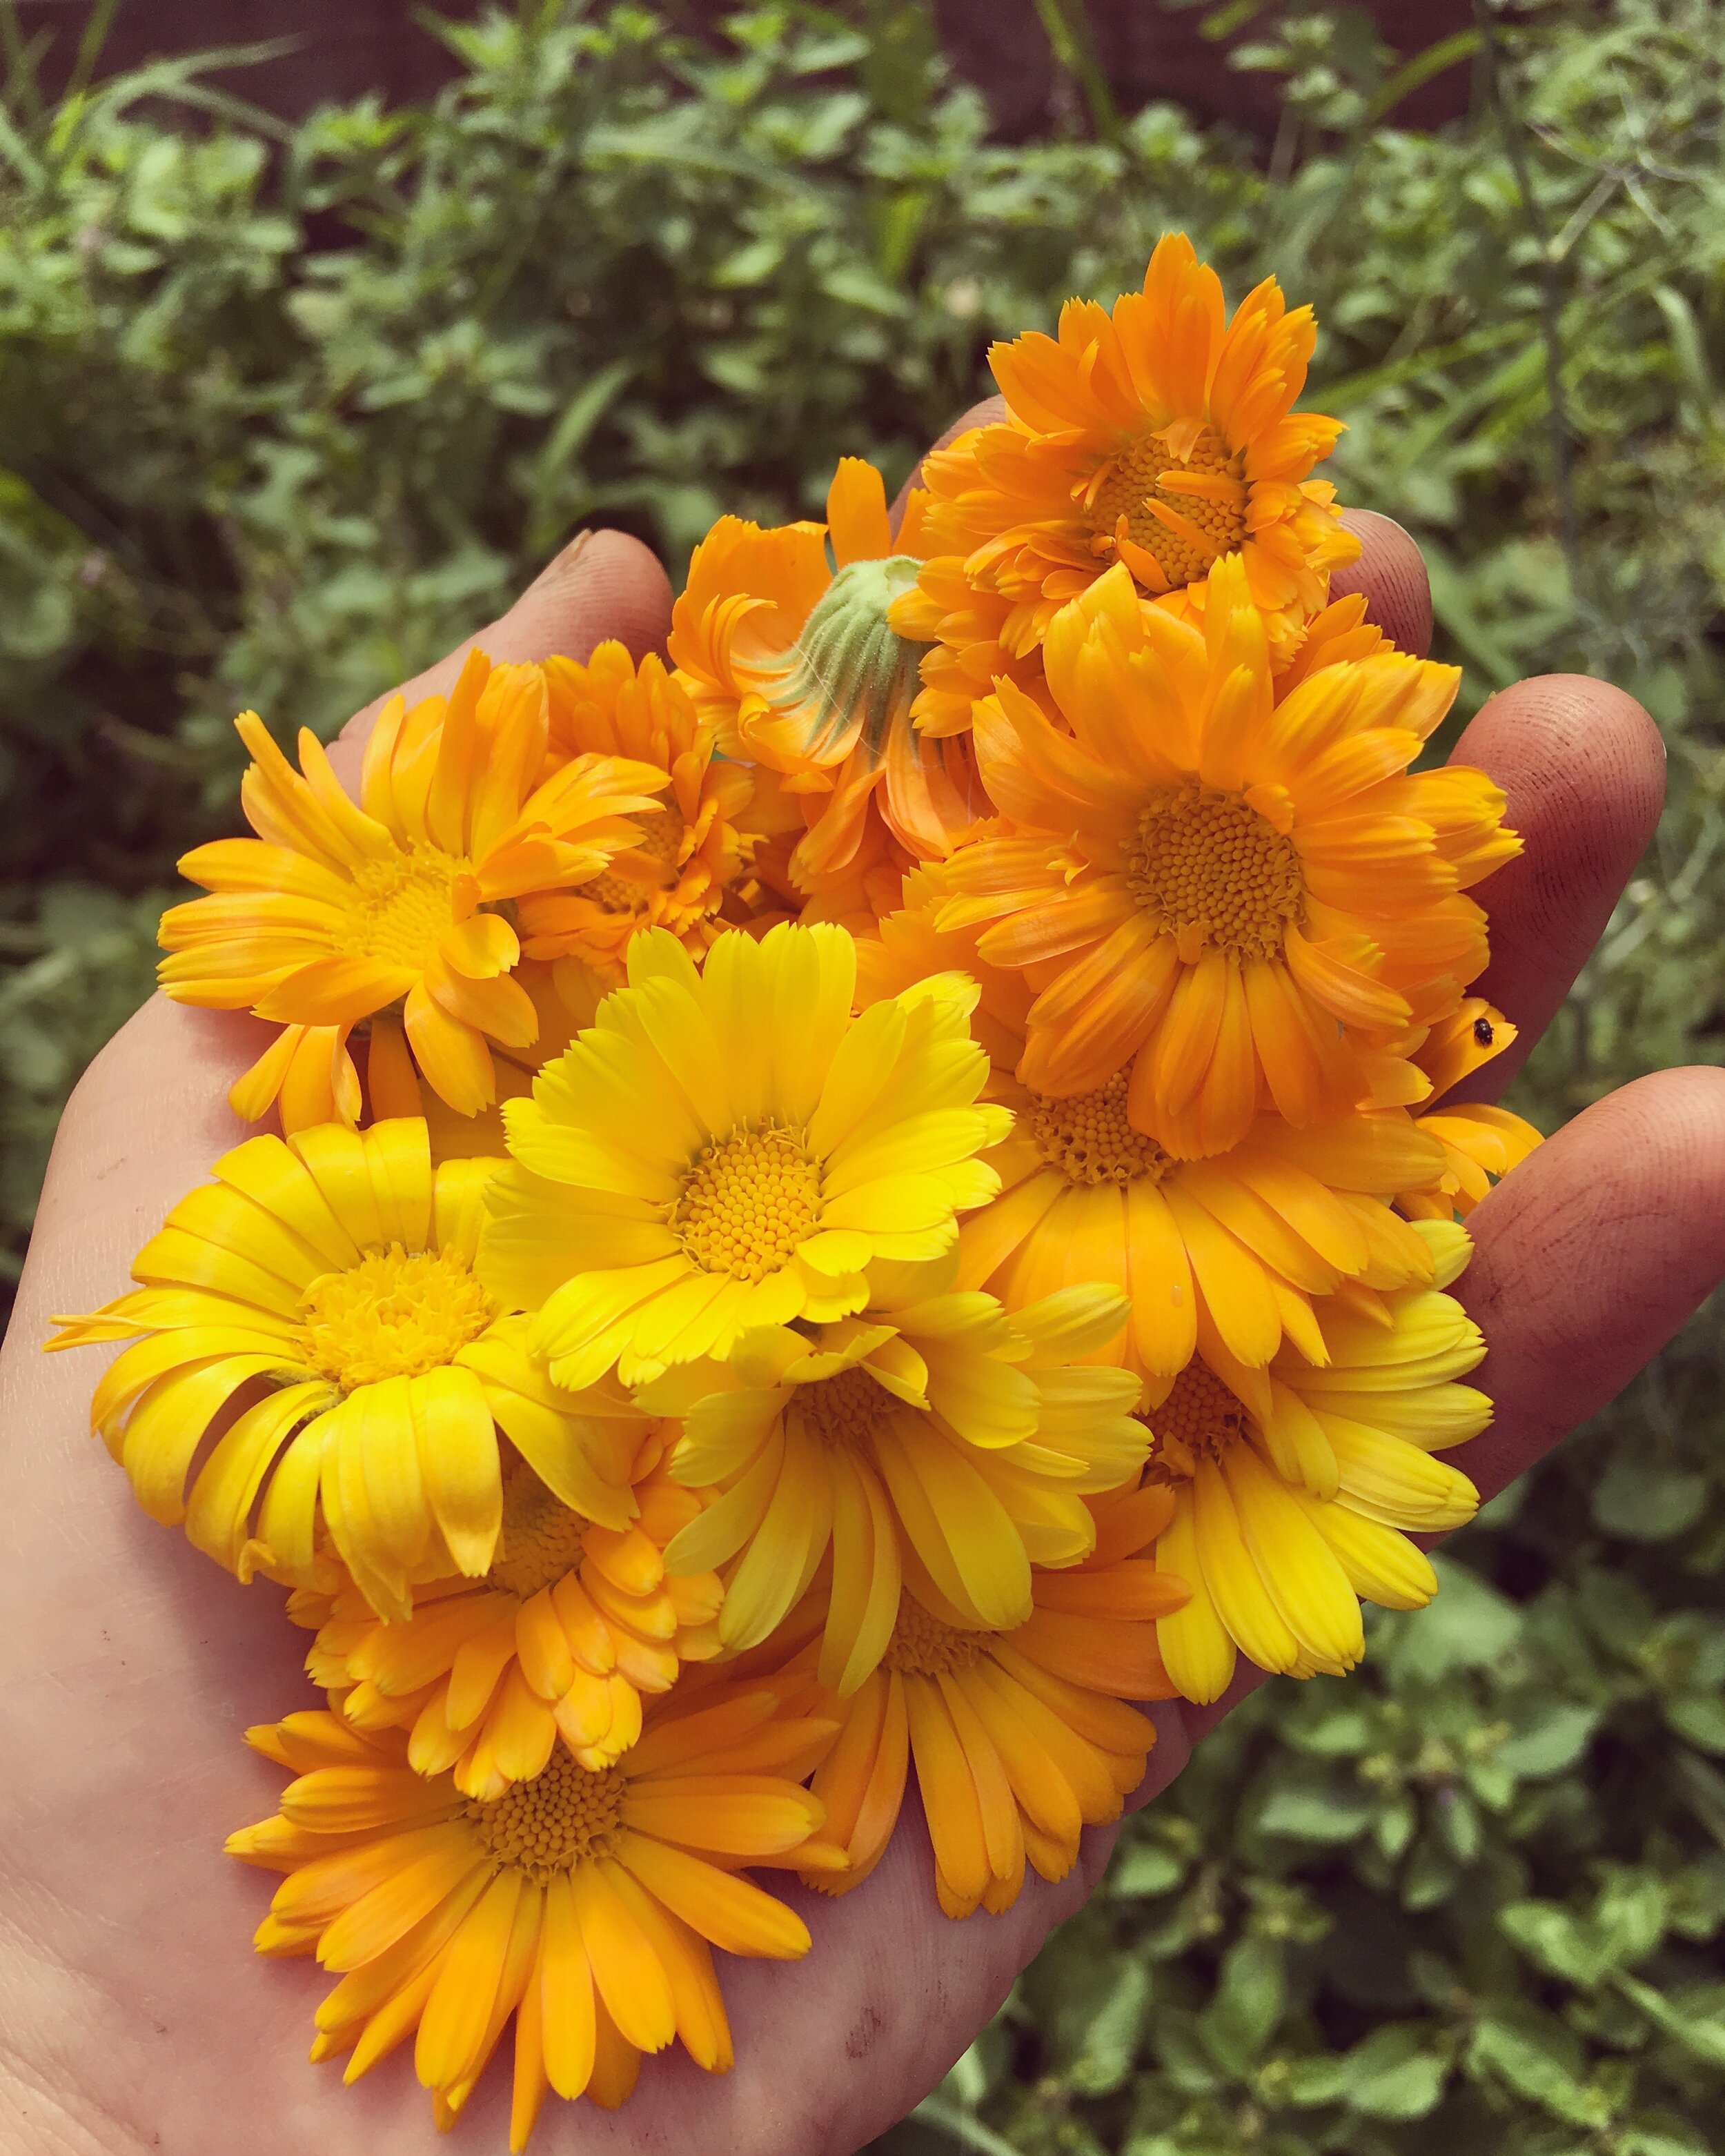
Skin Care Herb Bundle: This kit makes a great gift for that glowing garden goddess in your life! Infuse oils for salves and make at-home hydrosols (floral waters) with the vibrant herbs in this bundle.

Sweet Dreams Herb Bundle: Whether you need help counting sheep or just a little support getting through the stresses of the day, the herbs in this kit have got your back.

Basic Home Apothecary Bundle: If you’re ready to form long-term relationships with some perennial herbs, this bundle is full of highly regarded medicinal plants that can be harvested from for years to come. These are great herbs to use when learning how to make tinctures (shelf-stable infusions using alcohol, vinegar or glycerine).

s655787569362225896_p3471_i4_w3241.jpeg

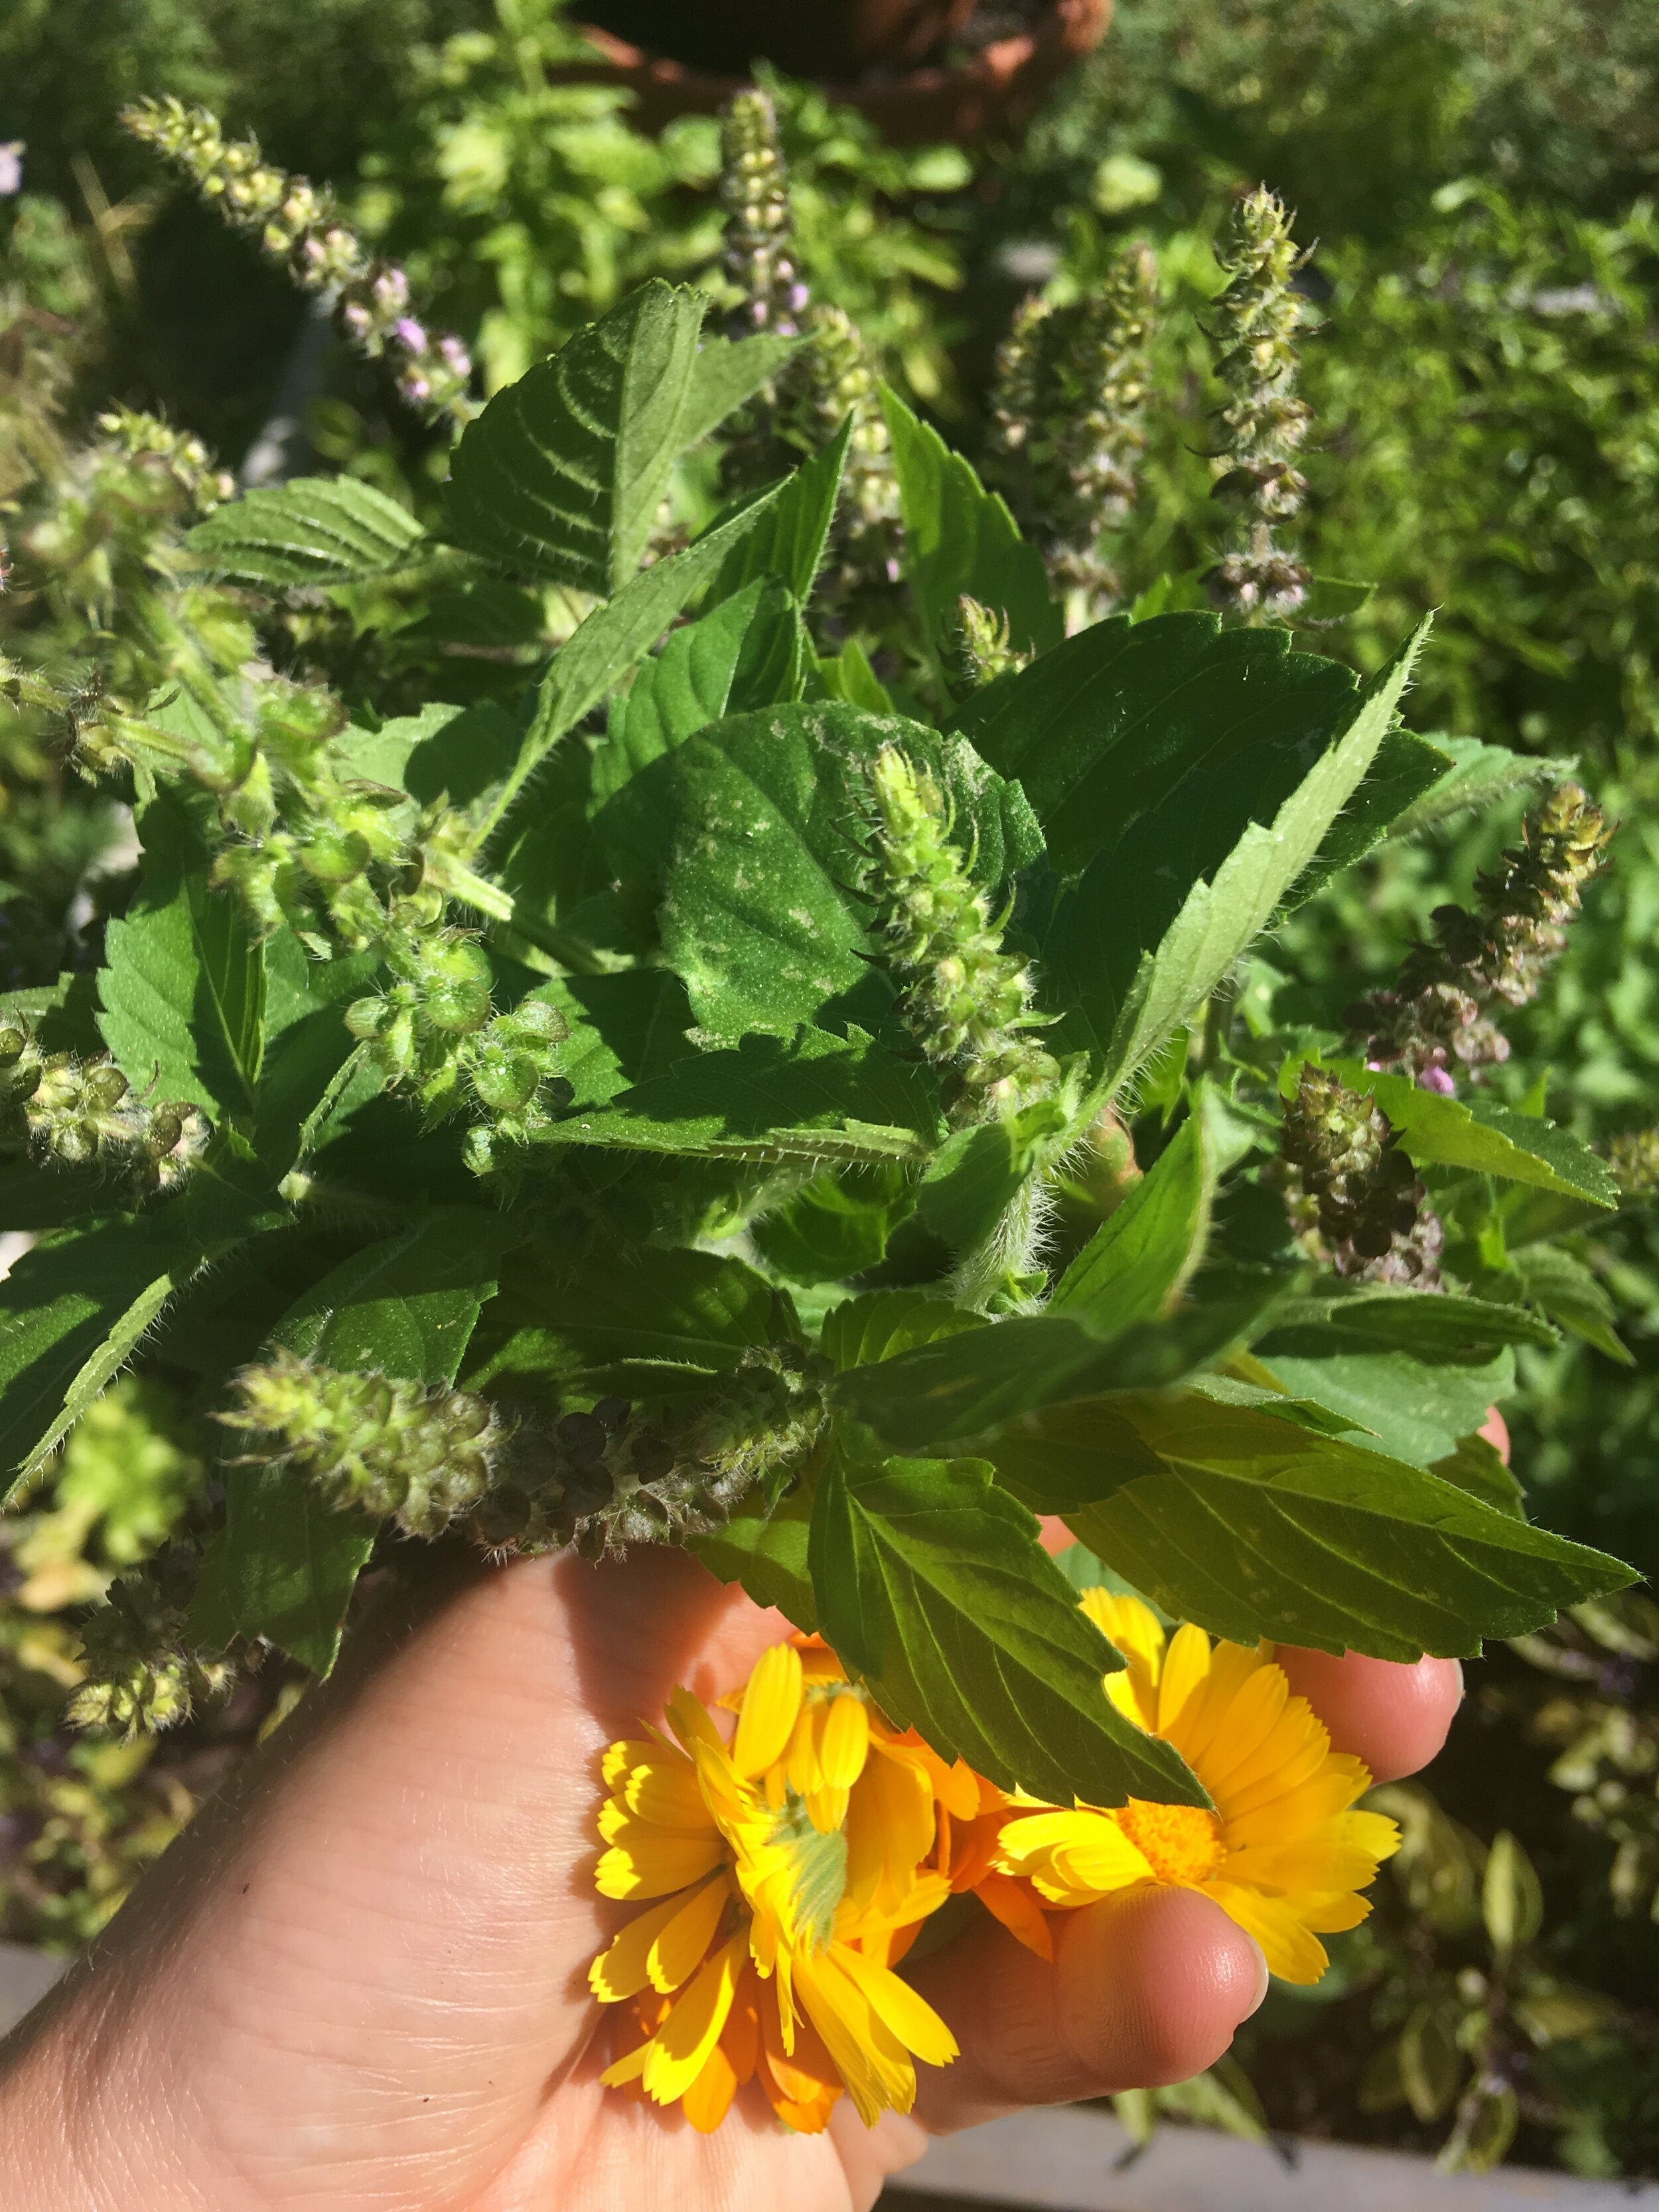
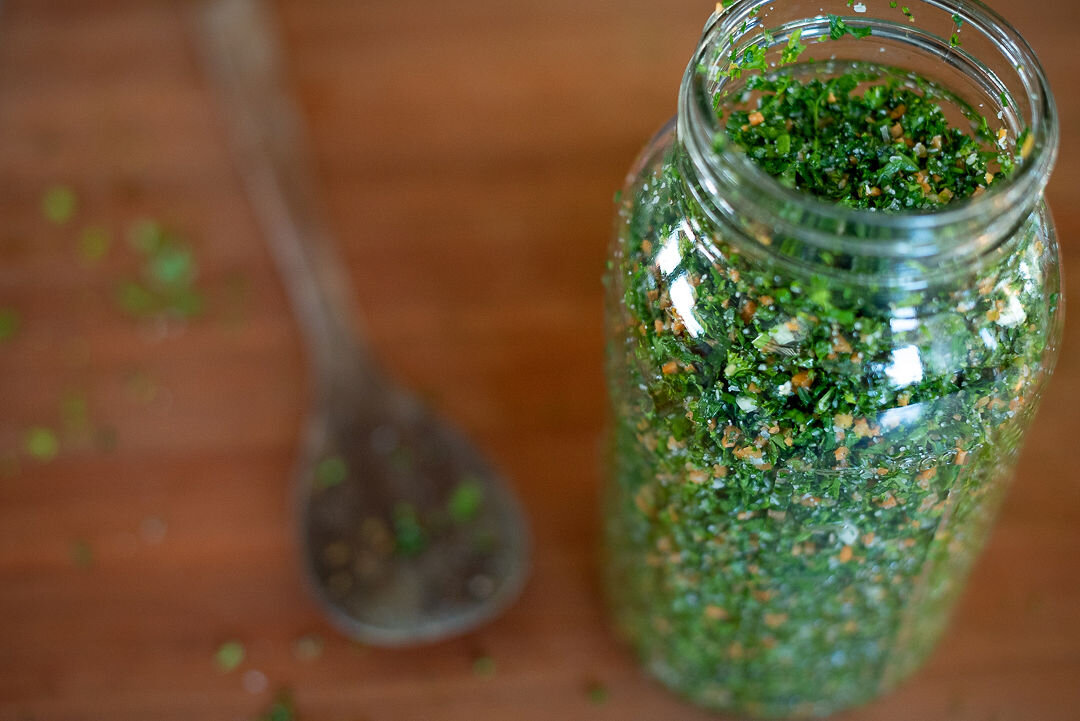
You might be wondering how to start working with herbs early this season, in addition to planning and planting the garden. One thing I do in the spring is go through the dried herbs I still have from seasons past. Now is the time to blend up those random dried herbs to make room for this year’s bounty. I also find it much easier to drink a daily herbal infusion when I have it already mixed up in a pretty jar on the counter. Right now, I’m drinking a blend of garden staples like lemon balm, wood betony and peppermint mixed with some early spring wild plants that will be ready to harvest soon: self-heal, nettles, and red clover. These herbs are mineral rich and help support the healthy liver and lymph function to ease the transition from winter into spring.

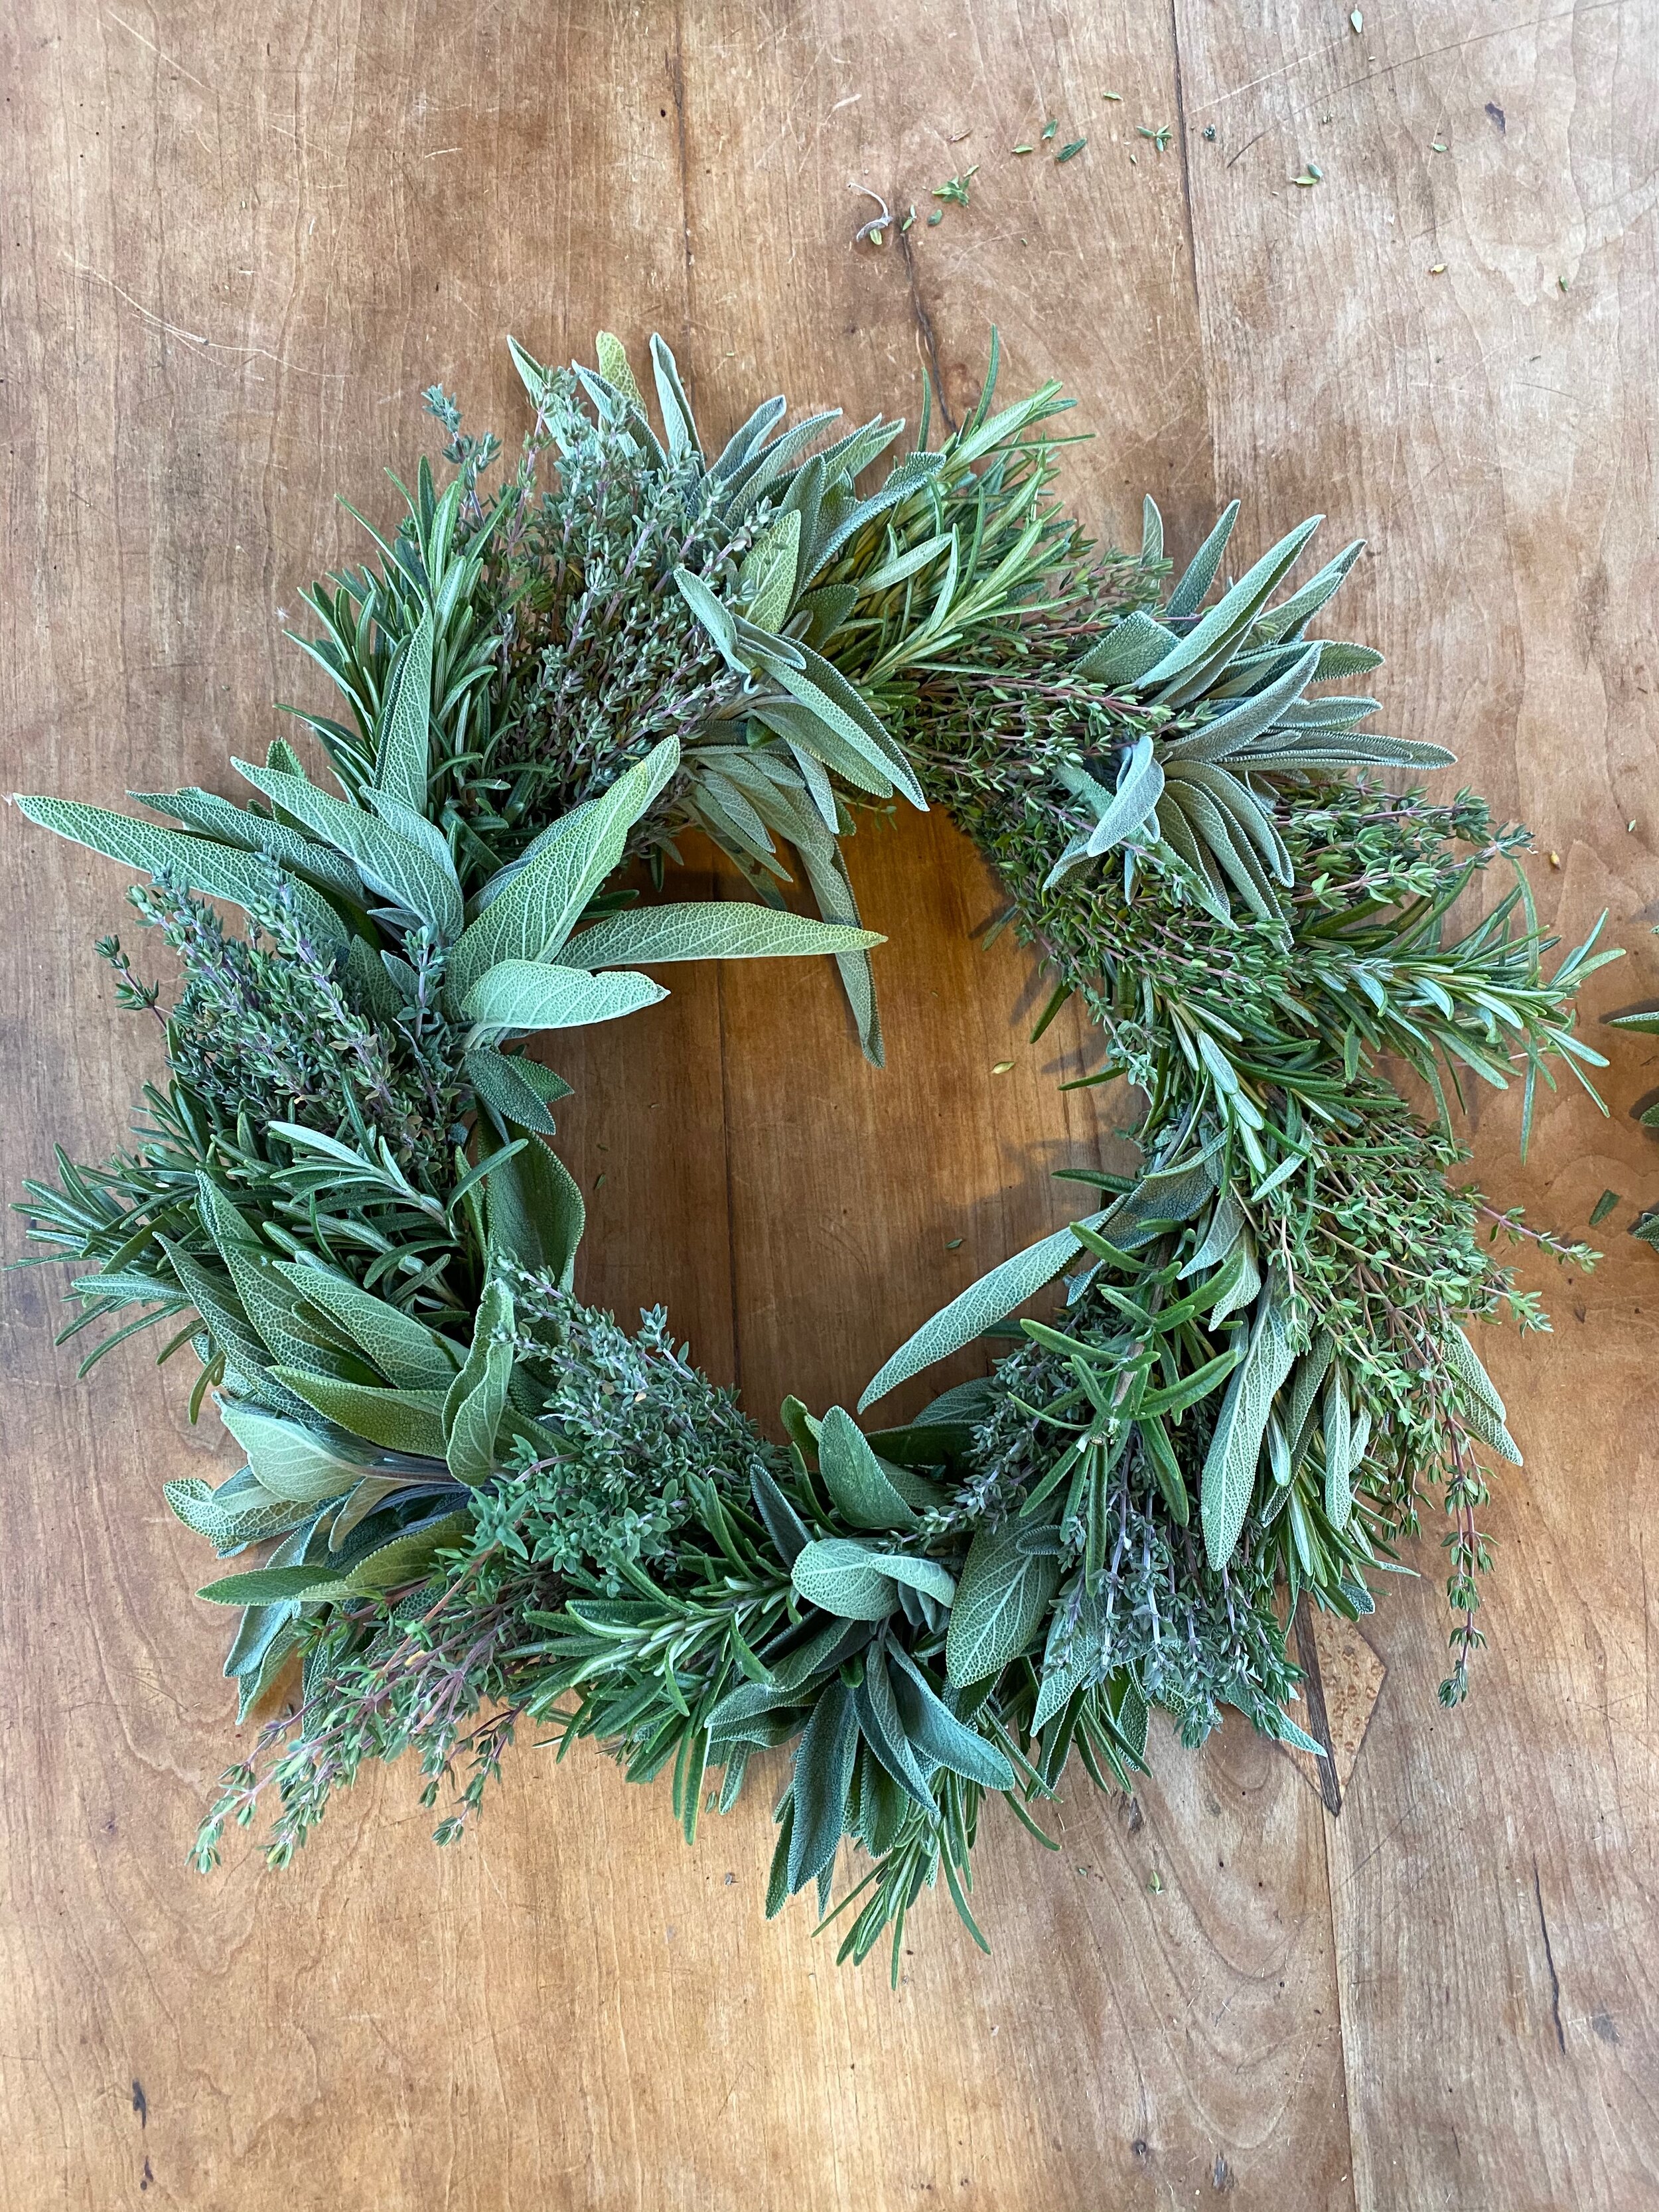
If you still have a bunch of dried culinary herbs, try mixing them up to use on roast chicken, spring soups (Nettle and potato soup anyone?), or sprinkled on toast with butter and the first radishes of the year. And remember, culinary herbs are good medicine, too!

2021 can be the year you work more deeply with herbs as a part of your everyday life. We look forward to offering more resources, and hearing about your experiences in the garden this growing season!

New Medicinal Herbs for 2021

marshmallow.jpeg

By Sophie Cassel

Note: The plants discussed here have long histories of use, and the information included does not constitute medical advice. Be sure to check in with your medical provider before using any new herbs long-term. 

This year I have the honor of introducing you to some of our newest additions to the Red Wagon Plants medicinal herb family. In addition to the many medicinal herb starts we grow every year, we have added some plants that are tried and true herbal allies, if not as common in the modern Vermont garden. 

Medicinal herbs tend to be very closely related if not identical to their “wild” counterparts, with very little breeding done by humans for horticultural production. In this way, the most adaptable and hardy plants tend to thrive, and those very compounds that aid the plant’s survival also serve to act medicinally in the human body. Horticultural plant breeding is often targeted towards things like bloom time and flower color, so medicinal constituents may decrease as the plant adjusts in favor of these showy adaptations. For those of us who appreciate a more natural looking perennial garden, the wild beauty of the unmodified plants is part of their charm, and an assurance that we are growing high-quality medicine as well. 

Another trick to medicinal plant growing is germination. Many of these more wild plants have adaptations to ensure seed viability which actually make them much more difficult to reliably germinate at home. Replicating the plant’s natural experience, such as letting the seeds go through a period of cold stratification (for northern climate plants) or nicking the seed coats to mimic the passage through an animal’s intestine, will help increase germination. They’ll never behave quite like a tomato or spinach seed, because these medicinal plants have not adapted to rely on human propagation. This means that buying established plant starts is a great way to ensure success this year, and you’ll be able to save seed to experiment with expanding your patch in years to come. 

You’ll notice that a couple of these plants have the species name “officinalis”, as do other herbs that we grow; that’s a clue to the fact that these plants were historically included in official pharmacopeias and monastic apothecaries well before Linnaeus’s time in the early 18th century. 

Without further ado, here are some of the newest additions to the Red Wagon medicinal herb family:

Marshmallow (Althea officinalis): A relative of hollyhock and hibiscus, this pale-pink flowering beauty lives up to its name, thriving in wet or dense soils. It will also do just fine in garden soils with enough moisture. Growing 3-5’ tall, plant marshmallow towards the back of your perennial beds, but still within easy enough reach to harvest the flowers and soft, velvety leaves for tea. All parts of this plant, including the 2+ year old roots, are valuable for their soothing mucilaginous qualities, which smooth out digestion and soften skin. A great herb for the kid’s garden!

Wood Betony (Stachys officinalis): This plant used to be a staple in old European herb gardens, and has been venerated for centuries as a panacea to “preserve the liver” and ease emotional malaise. Well-behaved clumps of deep green leaves form attractive mounds for the front of the garden, with stately 2’ spikes of purple flowers that will continue to sprout as you harvest through the season. Clip back stems, leaves and flowers and dry for a subtle, earthy tea that can clarify the mind and support healthy digestive function.

Skullcap (Scutellaria lateriflora): As our retail manager and fellow herb aficionado Lily said, “After 2020, everyone could use some skullcap!” A native wetland herb in the Mint family, skullcap will happily sort itself around plants like marshmallow and valerian, growing 1-2’ tall with petite periwinkle-colored flowers appearing along the stems. One of our most valued herbs for relaxing muscle tension and general anxiousness, this plant is used both to support sleep and simply find ease through the day. Cut back a few times over the season and dry for tea or infuse in alcohol to make a tincture. Skullcap doesn’t have much of a flavor, so it plays well with other aromatic family members like lemon balm, peppermint, and tulsi. 

Elecampane (Inula helenium): Do you ever wish your sunflowers had a little more sass and came back every year? Elecampane is your answer! Growing up to 6’ tall, elecampane sports finely-petaled yellow flowers born on thick bracts, with large clasping leaves that are a showstopper in the garden. Named after Helen of Troy, the root of this plant has been long revered as a pungent digestive tonic with a camphorous aroma that lends itself well to infused honeys and cordials. It’s valuable in supporting lung health and getting out stuck “gunk” wherever it may be lodged. 

California Poppy (Eschscholzia californica): We’re bringing back the California state flower to our collection this year. While related to the other garden poppies, Eschscholzia flowers later and requires far less in terms of soil quality to thrive. The only annual on this list, plant California poppy alongside other self-seeding annuals like chamomile and calendula, or tuck it around the front of a sunny perennial border that you don’t have time to mulch or fertilize. The whole plant is used medicinally, including the striking red root and attractive long seed pods (which also make excellent everlasting bouquet additions). Tincture the plant in vinegar or alcohol to make a tonic for sleep that is impeded by either pain or discomfort of body and mind alike.

Pruning Raspberries with Lily Belisle


Many trees, shrubs, vines and brambles benefit from annual pruning. Many plants have their own preferred way to be pruned. It can be difficult to gain confidence with a task you only get to do once a year. Plants are forgiving, and give second chances. So my suggestion is to watch a YouTube video and give it a try. Raspberries are a great place to start.

Raspberries are vigorous growers once the plants are established and you'll greatly improve your yield, disease resistance, and ease of harvest with annual pruning. There are 2 types of raspberries - ones that make fruit on second year canes (floricanes), these are your summer raspberries - and ones that make fruit on first (primocane) and second year canes (floricanes), these are your fall raspberries with a few fruits in the summer. I grow both types at my house and prefer to prune them all the same way.

You'll need hand pruners or loppers and gloves. These canes are prickly.


C8081F79-4F0C-4B82-85DD-B2FF13965B28.JPG

The goal is to remove all canes that are 2 years old (floricanes) and any damaged or weak canes. Cut cane down as close to the soil level as possible.

How do you tell which canes are floricanes? They will have branching, the bark will look dull and weathered, and when you cut them the wood will be dead.

C4334A97-30E1-4E9B-AED0-35CE8B0995A7.JPG

Many of my canes were damaged by rabbits, so I cut all those down too. Any very thin canes should also be removed.

19569387-DDD3-4068-9962-4DBFEB79B7EF.JPG
2516B80A-A44E-4B39-9F66-783398A7CCB4.JPG

Lastly with all the remaining canes that I'm keeping I prune them down to be about 4-5' tall.

Enjoy!

Tiny Clay Pots, Living Greens, Medicinal Herbs, and What to Do in the Garden.

The greenhouse industry once propagated and sold plants in these tiny pots.

The greenhouse industry once propagated and sold plants in these tiny pots.

For this week’s curbside pick up, happening Friday between noon and 6, we have some very sweet offerings to bring life and cheer to your weekend. First up, are these adorable viola collections. They are planted in tiny antique terracotta pots, and will make a lovely statement on your table. The greenhouse industry is full of plastic, and this year we are kicking off a year long experiment with reducing plastic use. Plants were once propagated and sold in these tiny clay pots, and by offering them to you this week, we are including you in that mission. Keep your eye out for more efforts to reduce plastic, and please give us your feedback.

Our Living Greens are so good right now. I have been making a daily salad with clipped mustard greens (mizuna, Tokyo bekana, arugula, Cheap Frills) and dressing it with just a squeeze of lemon, hazelnut oil, and our herb salts. It is just so good! When you order a tray of mustards, we will give you two kinds of each, and you will have fun textures and colors to mix into your salads. These are mild, sweet mustards. Not sharp at all.

Our greens are a living tapestry of colors, textures and flavors.

Our greens are a living tapestry of colors, textures and flavors.

IN THE GARDEN

It looks like after this weekend, the daytime temperatures will be in the 50’s, and night time temperatures will be at or just above freezing. If your garden is dry enough, towards the end of next week, you can direct seed the following into your soil:

How do you know the soil is dry enough to work?

Do this simple test: make a handful of soil into a little ball, drop it from knee height. If it shatters, you soil is dry enough But if it stays in a little ball or breaks into just 2 or 3 pieces, it is too wet. Walking, rototilling and digging in a wet garden creates compaction. This means that your soil will feel like concrete all summer, and plants won’t grow well, and certain weeds will thrive and be very hard to pull out. Think of your garden beds as fluffy pillows, and avoid doing anything that reduces the loft. For best results, please just wait until the soil is dry before working the soil, seeding and planting.

If your garden soil is too wet, or you live in a colder place, you can always scratch the garden itch by cleaning up the shed, sharpening tools, and cleaning out your containers. It is nice to get a fresh start, and have everything ready once the weather is warm enough.

MEDICINAL HERB WORKSHOP

Sophie Cassel, herbalist, Red Wagon team member, and owner of Patchwork Plants, will be teaching a Zoom class this Saturday at 10 am on growing herbs for health and wellness. I hope you join her for a fun, inspiring, and incredibly informative look at how plants can help us thrive. Sohpie’s knowledge and enthusiasm knows no bounds. You can sign up here.

UPCOMING

We will be open to the public on April 16th and we will continue to offer curbside pick up and online ordering. For the next two weeks, we will continue to offer curbside pick up on Fridays, and then, once we open, we will switch to next day pick up. Please don’t hesitate to ask if you have any questions.

For in - person shopping, we ask that everyone wear a mask and ask that you shop on weekdays if your schedule allows. We are hoping to avoid the weekend crowds, and will give away a free plant to customers who shop Monday through Thursday. Thanks so much for your consideration as we work hard to keep our staff and community safe.

For pick up tomorrow, please have your orders in by midnight tonight.

Thanks so much, and happy gardening, Julie

Pollinator Habitat Gardening

When planting a garden to attract pollinators, it is important to look at all the life cycles of the beneficial insects you are trying to help and to attract. Sometimes, we are just focused on that flashy butterfly feeding on nectar, but we need to also think about the less showy stages of the caterpillar and the cocoon. They need different plants at different stages. While focusing on the feeding stage of adult insects and butterflies is a great start, we invite you to dig a little deeper. 

Tips to  encourage a lively community of beneficial insects:

  • Have a community of plants that bloom for as long a time as possible. Think about early spring all the way to deep freeze

  • Leave debris in the garden over the winter. Do your “fall” clean up in the spring, once the soil is warm and all the eggs have hatched out of hollow stems, bark, under the leaves, and mulch.  If you feel compelled to cut back the plants in the fall, leave them in piles on the edge of the garden to keep intact the winter habitat. 

  • Instead of raking leaves in the fall, let them stay in place. they will break down and add to your garden soil. In the spring, any leaves that have  not broken down over the winter can be added to parts of the garden that need the soil built up or you can add them to the compost pile. 

Some of my favorite plants to include: 

Valerian – easy, tall, and leaves you lots of woody, hollow stems for winter shelter. The while umbel flowers are attractive, and the seed heads persist all summer long, into the fall and winter. 

Eupatorium – also known as Joe Pye Weed. This is a favorite native meadow plant that does well in heavy soils. It has huge, umbel shaped flowers in late summer, and the seed heads look great going into winter. 

Echinacea and Rudbeckia – cone flowers and black eyed susan. These are mainstays of the  perennial garden for a reason. They are easy to grow and attract many beneficial insects to the garden. Large patches of them are more effective than single plants here and there. 

Try to create a big swathes of these plants, and create variation in height and texture by interspersing them with 

Calamintah nepeta ssp nepeta               photo credit: Stonehouse Nursery

Calamintah nepeta ssp nepeta photo credit: Stonehouse Nursery

  • Calamintha nepeta  ssp nepeta

  • Salvia

  • Penstemon

  • Alium

  • Eryngium yuccafolium

  • Heliopsis

  • Helenium

  • Grasses

Finally, tuck in ground covers to help suppress weeds by covering all the bare soil:

  • Geranium maculatum 

  • Geranium sanguineum

  • Tiarella

  • Lamium

  • Carex

  • Epimedium

Zinnias, verbena bonariensis, calendula, bronze leaf fennel, and tulsi basil are annual flowers and herbs that I love to introduce into the perennial garden or the vegetable garden. They do a great job of feeding a large group of insects and butterflies and will attract many pollinators to the vegetable and fruit garden. Plus their pops of color and varying textures charm and catch the eye from a distance. 

Red Wagon resources to get you started:

  • Keep an eye out for Chad’s Beneficial Insect Seed Mix this year to try some of this at home, from seed.

  • We will be offering plant collections that include many of these varieties so that you can follow our formula without having to search each individual plant.

  • And you can take a workshop this Saturday, March 30th with Julia Parker-Dickerson to learn all about her experience making Pollinator Habitat Gardens in public spaces.

Thanks for caring about the smallest creatures.

Happy gardening,

Julie

Virtual Workshop Schedule for Spring 2021

We are so excited to share our spring workshop line up with you. This year, our three main workshops will be supplemented with an exciting array of follow up opportunities: related plant and seed collections; garden visits with presenters; tools and other merchandise that complement the topic; and late summer and fall workshops to help with harvesting, preserving and maintaining the food, medicine and gardens you will create with us this year.

Your success in the garden is our goal. Plain and simple. We will provide you with everything you need to make it work.

Julia Parker Dickerson: Introduction to Pollinator Gardens 

Saturday, March 20th from 10:00AM -11:30AM 

Delve into the importance of pollinator gardens, and prepare to create your own wildlife haven. Julia has so much inspiring, hands on experience transforming public spaces into beautiful oases for our beneficial insects and friends. Participants in this workshop can recreate this at home with our plant and seed collections and garden visits with Master Gardener Julia and members of the Red Wagon Team. Cost $15.  

Julie Rubaud: Onions 101 

Tuesday, March 23rd from 5:30PM -6:15PM 

Back by popular demand! Everything you need to know to grow, harvest and store onions. Onions need to go in the ground early. Find out why and all the other tips and tricks to growing and storing onions, leeks, and shallots. Never buy another onion! Cost $10.


Julie Rubaud: Gardening for Abundance - Vegetables 

Saturday, March 27th from 10:00AM -11:30AM 

Gain guidance and tips in creating a garden to support your definition of abundance this year. We will focus on storage crops, growing for preserving, and sharing with local food pantries. Red Wagon will offer additional support with plant and seed collections that will be available for purchase during the season, garden visits with Julie and other Red Wagon team members, and late summer and fall workshops that support your canning and freezing and dehydrating activities. We will help you partner up with local food pantries if you would like to share the abundance. Cost $15.  

Julie Rubaud: Strawberries 101 

Tuesday, March 30th from 5:30PM -6:15PM 

Plants? Bare root? What is the difference? Come find out! We are bringing back this popular workshop to help new gardeners learn all about growing strawberries. They are easy to grow as long as you know what they like and have realistic expectations. Jam, frozen berries, and countless fresh fruit can be had from the home garden. Cost $10.


Sophie Cassel: The Medicinal Herb Garden - Growing for Beauty and Wellness 

Saturday, April 3rd from 10:00AM -11:30AM 

An introduction to why and how to create and utilize your own medicinal herb garden. Sophie’s workshops are fun and filled with practical easy to follow instruction. Her understanding of medicinal plants is vast and enthusiastic. Participants can follow up with this class by purchasing our medicinal plant collections, scheduling garden visits with Sophie, and singing up for follow up workshops in late summer and fall to help you process your medicinal herb garden into products for home use. Cost $15.


Chad Donovan: Pests and Disease of the Garden 101

Tuesday, April 13th from 5:30PM -6:15PM 

Learn to prevent, identify and treat regular pests. Pro tips for garden success! Chad brings his decades of gardening and greenhouse experience to you in an accessible and easy to understand format. He is responsible for our the overall health of our plants in our greenhouses and herb farm, and does an incredible job explaining how home gardeners can achieve similar results. Cost $10.


Ben Mayock: Basketry for the Garden: Weaving the Carrying Tray

Tuesday, April 17th from 10:00AM -12:00PM 

A hands-on experience weaving your own 'Carrying Tray' garden basket with local artist and basket maker, Ben Mayock. After a winter of private Zoom workshops with Ben, we are so excited to share our experience with all of you. Space is limited, and will require a pick up of the materials prior to the workshop. Materials can be shipped for an additional cost if you are not local. Cost $55. 


Julie Rubaud: Tomatoes 101

Tuesday, May 11th at 5:30PM -6:15PM 

Back by popular demand! This is the day we release our tomato plants and answer all your questions. Julie will go over her favorite varieties, the best practices for planting and trellising and some of her favorite preservation methods. We grow 75 tomato varieties - find out why and which ones are right for you. Cost $10.

Growing Indoor Greens - a great project to do with kids.

Tokyo Bekana and Ruby Streaks

We all have the spring fever itch around late February, and it can be scratched a little by growing some edible greens indoors. We recommend mustard greens because they tolerate low light, can be eaten while small and they grow relatively quickly.

Just fill a shallow tray with good potting soil that you have moistened well. It should feel like a sponge that has just been wrung out - not drippy, but not dry either. Place seeds on top, about ¼” apart; it does not have to be exact. Gently press the seeds into the soil, and sprinkle a very small dusting of soil over the seeds. It is best to NOT bury them deeply, they don’t need that and it will just slow down the germination.

Keep the soil in the tray moist by watering regularly, and then start to eat the greens when they are anywhere from sprout sized to 4” or so in height. They probably won’t regrow much indoors, but you can experiment and see how they do. The types of seeds you use and the soil and the amount of light you have and how much you water all are factors that affect the rate of growth. Try different varieties, different watering methods and see what works best for you. You can usually have a small “micro-green” harvest within 2 to 3 weeks.

Here are some varieties we recommend for your indoor shoots and micro-greens:

Arugula

Spicy Blend

Mustards

Blast Off!

watering.jpg

The last week of February is when we typically start up the greenhouses. That means we turn on the heaters, run the water, clean up and sanitize all the surfaces of each greenhouse, and get some seeds into the soil. Our spring starts now, with more time in the greenhouse touching plants and dirt and feeling the sun warm us up. While we fast track ourselves out of winter with the help of the greenhouses, here are a few things you could do at home to follow along.

  1. Start seeds. If you have grow lights, now is a great time to start leeks, onions, shallots, and certain perennials. If you don’t have grow lights, you could sprout seeds in a mason jar or start some edible shoots in a sunny window. Mustard greens are the quickest, and the most forgiving of poor light. Here is a blog post on how to start your own shoots and micro-greens indoors. You can order seeds in our online store and pick up your order Friday afternoon (or get in touch to arrange a time that suits you). Our bagged soil has started to come in too. You can s find that here. More soil and seeds coming soon!

  2. Make a plant list. Here is what we are growing this year. This is a perfect time to get out the graph paper, the garden journal or the art supplies and dream up your garden plan. Some people make “mood boards” by cutting out pictures from garden magazines. You can create a digital version using Pinterest, Google Slides, or Powerpoint. Or, if you are like me, you can simply make lists of plant names. I just love keeping a list of plants in a notebook, or on my phone that I can keep adding to as I the mood strikes or as I learn about a new variety. There are so many ways to plan a garden, and they are all correct. Let us know if you want help!

  3. Learn about something new you would like to grow. This year, I really want to get into forcing Belgian endive. I am learning about it on You Tube and by talking to other growers. It is one of my favorite things to eat, but it requires some planning. You can learn more about how it is done on a big commercial scale here, . Chicories in general are on my list for this year. This video by Charles Dowding is a great introduction if you are curious too.

  4. Mark your calendar! We will be opening for walk in shopping on Friday, April 16th. Please keep your eye out for more information about in-person shopping, hours, and COVID protocols. We cannot wait to see you and share the greenhouses with you again.

With gratitude for all of your support,

Julie

PS.

We want to let you know that Family Cow Farmstand will be closing at the end of this week. We are so sad to say goodbye to Aubrey and Scott, and we wish them well on their next adventure. They have been the absolute best farmers, neighbors and friends. We eagerly await their next iteration. For now, come to the farm stand and stock up in the next few days.

A perfect gift from Aubrey this winter - chicories grown in Massachusetts at Kitchen Garden Farm. This photo has inspired my 2021 garden plan and set the bar quite high for improved radicchio growing in our display garden. I cannot wait.

A perfect gift from Aubrey this winter - chicories grown in Massachusetts at Kitchen Garden Farm. This photo has inspired my 2021 garden plan and set the bar quite high for improved radicchio growing in our display garden. I cannot wait.

Workshop and Story Telling Series

ferene.jpeg

Life Lessons Harvested from my Garden

A 3-part series Saturdays 2/20, 2/27, 3/6

10:00 am to 11:30 am

Virtual workshop. Zoom link provided prior to event.

We are so excited for this offering from Ferene Paris Meyer to kick off our 2021 gardening season with meaning, love and community.

Ellen Everett encourages us to live like flowers, “wild and beautiful and drenched in the sun”. During these gray, winter days, our anticipation of how our gardens will evolve serve as a light of hope. Ferene Paris Meyer, storyteller with All Heart Inspirations, will rejoin us to host a 3-week storytelling series. During our time together, we will reflect and share stories harvested from gardens. Enjoy this heartfelt space for gardening dreamers, lovers, and enthusiasts as we prepare for the new bountiful season.  

****For those in need of a subsidized registration fee, please contact Ferene allheartinspirations@gmail.com for a discounted code to register online. We encourage anyone who wants to partake in this conversation to join us, regardless of ability to pay.****

The Changing Light

Have you been home, staring out the window? Probably, right? I am certainly doing more of that than ever, and am taking delight in the little details I don’t normally slow down enough to notice. Like the way goldfinches come into their yellow plumage gradually going from buff to bright, or the angle of the sun, or the patterns of mist rising off the snow at sunset. I have picked up a watercolor hobby during this pandemic time, and am grateful for the new ways of seeing. I am learning to pick out the yellow in a blue sky or the infinite shades of purple and orange in a stone wall. It is pure magic. And our gardens are slowly awakening deep underground. The plants certainly notice that change in the sun’s angle; their life depends on it.

It is with that in mind that I wanted to update all of you with a few newsy bits:

1) We will open our greenhouses to the public this season. The survey results are in, and the outpouring of requests for us to open has been heard. We will require masks, hand sanitizing, and we will limit the amount of cars in the parking lot. Keep your eyes on this newsletter for more information as we get closer.

2) We will continue to offer plants, tools, seeds, herb farm products, and merchandise through our online store with curbside pick up. This will begin by the end of this month for anyone looking for seeds, soil, etc. Initially curbside pick up will be every Friday afternoon or by appointment on a pre-arranged day. As the season progresses, we will change to next day curbside pick up.

3) We are putting together our 2021 workshop series, and have some exciting new programs for you. To kick off the season, we are starting with a 3 part series with Ferene Paris Meyer, of All Heart Inspirations, Inc. We are so excited for this time to get together with other gardeners to talk about what gardening means to us, what is our vision, and what do we do to get there. Here is the link to sign up. See below for all the details. Ferene’s class in early December was absolutely perfect. No one wanted it to end; her energy is contagiously enthusiastic, and we can all use that right now.

ellen everett.png
ferene.jpeg

A three part series with Ferene Paris Meyer

Saturdays 10 to 11:30 am

2/20, 2/27, 3/6

During these gray, winter days, our anticipation of how our gardens will evolve serve as a light of hope. Ferene Paris Meyer, storyteller with All Heart Inspirations, will rejoin us to host a 3-week storytelling series. During our time together, we will reflect and share stories harvested from gardens. Enjoy this heartfelt space for gardening dreamers, lovers, and enthusiasts as we prepare for the new bountiful season.

****For those in need of a subsidized registration fee, please contact Ferene allheartinspirations@gmail.com for a discounted code to register online. We encourage anyone who wants to partake in this conversation to join us, regardless of ability to pay.****

Thanks for reading, and looking forward to connecting soon,

XOX

Julie

Herb Wreath How To

Here is a little project that is easy to do and uses up herbs from your garden (or purchase one of our kits). Lily and Julie made some herb wreaths this week to give you a sense of how to do it. We instantly felt better after doing a creative project like this, and my wreath is in the kitchen smelling and looking great. Check out this video for a tutorial on how to do it. And if you would like to purchase one of our kits, you can find them here for purchase (we will contact you to arrange pick up at our Hinesburg location).

IMG_2193.jpeg

Peppers

pepper pickles.JPG

We grew an abundance of peppers this year. With 35 varieties on our plant list, it is hard to not grow too many. Every variety deserves a chance and some are absolute favorites and I end up planting 6 or more plants of each, but really I am making a giant note to stop this madness next year. Every day, for the past month, I am starring at huge bags of peppers in the fridge and figuring out what to do with them. Not a bad problem to have, especially these days. Here are a few things I have been doing.

Pickled Cherry Bomb and other Hot Peppers

I make a brine that is based on this basic recipe from the cook book 6 Seasons by Joshua McFadden and Martha Holmberg. This amount is about enough for 3 pints.

½ cup rice vinegar

1 tablespoon white wine vinegar

1 ½ cups water

3 tablespoons sugar (original recipe calls for 5 TBS)

1 tablespoon plus 1 teaspoon kosher salt

Bring ingredients to a boil,

Pack washed, stemmed and seeded (optional) peppers into clean glass jars. Add a clove of garlic and a sprig of thyme to each jar.

Pour hot brine over the peppers, filling each jar to the top. Let cool to room temperature and then store in the refrigerator. Please note this brine solution is not acidic enough to preserve the peppers with a hot water bath method of canning. These are refrigerator pickles that will keep for months. I pack big ½ gallon jars of them into the back of the fridge and use them all winter, chopped into tacos, as a topping for sandwiches, stuffed, etc.

You can pickle sweet peppers too, using this method.

Hungarian Hot Wax peppers are perfect for pickling.

Hungarian Hot Wax peppers are perfect for pickling.

I also made this pepper relish recently and really liked it. You can incorporate some hot peppers into the mix if you want it spicy. This is for canning with a hot water bath method. If you have never done this, please make sure to look up a reliable tutorial, like this one.

Pepper Relish

adapted from Well Preserved by Mary Anne Dragan

6 cups of finely chopped sweet peppers, combination of colors. A few hot peppers can be included in the 6 cups for a spicy relish.

2 cups of finely chopped onion

2 cups of cider vinegar

1 cup of sugar (I used ¾)

2 tablespoons of mixed pickling spice (I did not have a pre-made blend, so made my own with coriander seed, bay leaf, a few cloves, a few black peppercorns, 2 dried chilies, and a tsp of mustard seed) in a cheesecloth bundle or a tea ball.

2 teaspoons of dried hot pepper flakes or substitute with fresh hot peppers

2 teaspoons of salt

Combine peppers and onions into a bowl, and pour boiling water over them. Let sit 5 minutes, then drain well.

Combine the remaining ingredients into a large pot, and bring to a boil. Add the vegetables, and stir to combine. Reduce the heat to medium, stirring occasionally for about 30 minutes.

Remove from the heat, take out the spice bag. Spoon the relish into hot sterilized jars, leaving ½ inch of head space. Release the air bubbles, wipe the rims of jars clean, seal according to manufacturer’s directions. Process the jars in a boiling water bath for 10 minutes. Please refer to this process here if you are not familiar with canning.

Other ways to preserve peppers

I freeze them. Just chop up raw peppers, and slide them into a freezer bag. That is it. They can be used in all kinds of stews, soups and braises over the winter.

I make a big pot of sautéed peppers and caramelized onions and freeze that in small bags. In winter, it can be turned into a tasty spread or dip by placing the thawed mixture in a blender with some walnuts, or cheese, or olives or dehydrated tomatoes.

I roast peppers, tomatoes, eggplants, onions and summer squash or zucchini with olive oil, salt, garlic and herbs at 400F for about 45 minutes. I freeze that mixture in freezer bags and then use it as a base for pasta sauces, soups, and a topping for pizza.


Fermented Fresh Salsa

by Guest blogger, herbalist, and RWP Staffer, Sophie Cassel

This is a salsa you make to eat fresh and eat in the fridge, not canned for storage.

This is a salsa you make to eat fresh and eat in the fridge, not canned for storage.

Ask anyone in my house or social circle what the big culinary wonder was last summer, and they’ll all tell you: “Fermented salsa!”. Far removed from the cooked salsa in jars, fermented salsa is like a tangy, juicy version of the popular pico de gallo type of dip. This was a technique I learned about years ago on a homestead in Maine, but started preparing last summer when faced with a constant glut of tomatoes and absolutely no desire to turn the oven on for canning.

By mid-August, I was making a half- to whole-gallon of fermented salsa per week, and we were eating it just as fast. It makes a great snack and is a tasty conversation starter when brought to backyard cookouts. Suddenly, adding fermented foods to your diet is as easy as breaking out the tortilla chips! It also makes the best topping for tacos and grilled meats. 

Below is the basic recipe. I change the proportions a little each time, based on what I have ripening in my garden or on the kitchen counter at that moment, and how much I could fit into the half-gallon jar. 

Ingredients:

  • 2-3 lbs ripe tomatoes 

  • 1 small onion

  • 1-3 cloves of garlic

  • 2-3 bell peppers

  • Hot peppers of your choice (I like my salsa more mild, so I use 1 jalapeno or 2 hungarian hot wax peppers, but the sky's the limit!)

  • Cilantro (stems included), or a mix of cilantro, pepiche, and papalo leaves

  • Salt to taste

Method:

  • Finely chop all ingredients into similar sizes and layer into a half-gallon mason jar. Add salt and taste; it should be just shy of “too salty”. Stir well (a long-handled cocktail stirrer works well), and cover loosely with the jar lid. Place jar on a plate to catch any overflow during fermentation, and leave on your kitchen counter. 

  • Shake jar (with lid tight) 2-3 times per day, loosening the lid to allow for gas to escape through the course of the day. You will start to see bubbles rising to the surface, but shaking ensures that all ingredients stay below the liquid.

  • After a day or two, taste to evaluate how the tanginess is developing. Depending on weather, it could take anywhere from 2-5 days to achieve desired levels of fermented flavor. You get to decide when you think it’s ready!

  • Eat immediately, or funnel into smaller jars and store in the fridge. It will store indefinitely, slowly building its fermented flavor, but good luck getting it to last long enough!

  • Note: If your tomatoes are really juicy, you may want to strain some of the excess liquid when transferring to storage jars. This fermented tomato juice is a refreshing drink, and makes a great addition to gazpacho or cocktails! 

Calendula

calendula sophie.JPG

Calendula (Calendula officinalis), historically also known as Pot Marigold, is one of those cheery plants that has successfully transcended the gap between herbal medicine and ornamental gardening. Its sunny blossoms start blooming early in the summer if transplanted, and will proliferate all season long and even after frost, as long as the flowers are picked before going to seed. Like others in the Asteraceae family, pollinators flock to this plant, which provides a valuable long-term nectar source. While there are many types of ornamental calendula available on the market, highly medicinal varieties include Resina, Alpha, and Erfurter Orangefarbige. You’ll know you’ve got a potent calendula if when you pick the blossom (snapping it from the stem and removing the flower head and green bracts) your fingers get sticky with resin.

If you’re growing calendula and deadheading the plants regularly, you’ll find yourself with a wealth of flower heads to use. Luckily, there are endless ways to make use of this beautiful and powerful plant! 

Calendula occupies a unique and important place in any herbal medicine chest. Powerful yet gentle, it’s listed as an active ingredient in balms for everything from cracked hands to rashy baby bums. Calendula enjoys a long history of use as a venerated wound healer and anti-inflammatory herb, soothing and repairing injuries and ulcerations of all kinds. As it also has documented immune-stimulating affects (through its work on the lymphatic system), calendula is also useful when dealing with skin issues that stem from some kind of infection. At the start of gardening season, I can often be found soaking my roughed-up hands in strong calendula tea to heal cracked cuticles and scraped knuckles. 

But we can’t talk about skin without mentioning the skin that lines our insides- the digestive tract! In the same way that calendula heals external wounds, it is equally as powerful when taken internally to alleviate the effects of inflammation in the gut. Allergic reactions both inside and out can benefit from application of this herb, and it is gentle enough to use every day in a variety of ways. I love including calendula in mouthwash formulas to heal irritation and inflammation in the gums.

There’s no reason to relegate calendula to the first-aid kit, though. It is also a wonderful tool in the kitchen, adding color and beauty to baked goods and salads as the “poor man’s saffron”. To use, simply pluck the petals off the flower head, and sprinkle into your batter or lettuce mix. The center of the heads, with their sticky resin, tend to leave an uncomfortable feeling on the back of the throat when consumed raw, so it’s best to save those for tea infusions, or thrown into soups and bone broths where you’ll get the benefit of the herb and the visual delight as well. 

Now that you’ve harvested your blossoms and dreamed up all the ways you’ll use your calendula, make sure to dry some for winter use. Flowers should be picked in the height of the day, when they have fully opened and any dew has dried. Dry flowers in baskets or on newspaper, spread in a single layer so that they are not touching (you can also use a dehydrator on the lowest setting). Calendula flowers hold lots of moisture, so it’s important to let them dry fully before storing, lest they get moldy on you. The center of the head should snap apart easily when dry. As the season wanes, leave some flowers to go to seed on the plant. You can harvest these fossil-like structures once they’ve turned brown and come off easily in your hand. 

Calendula is an excellent and safe introduction into the world of herbal medicine, and with its myriad uses, it’s one of the most reliable plants you can keep on hand throughout the year. 

Basic Calendula Oil, Two Ways:

  • Calendula flowers, wilted for a few days or completely dried

  • High quality oil, such as olive, sunflower, grapeseed, almond, or jojoba

Roughly chop calendula flowers and pack into jar, then fully cover with oil (add an extra glug or two to make sure flowers stay submerged). Label with contents and date, then leave to steep in a dry, shady place for 2-4 weeks. Different herbalists have different habits, and some prefer to let their oils steep in the sunshine, while I keep mine out of direct sunlight. 

If you’re in a rush, you can quickly make an infused oil by heating the oil and flowers slowly in a double boiler, making sure that you stay well below the smoke point for that oil. Heat gently for an hour or two. In either case, when you’re finished infusing the oil, strain out and compost the flowers, label your oil, and store in a dark place for up to a year. You can use this oil to make salves, lotions, and creams, or apply directly to skin. 

Gut-Healing Tea (make with fresh or dry herbs):

  • Calendula flower

  • Chamomile flower

  • Plantain leaf (Plantago spp.)

  • Fennel seed

  • Peppermint leaf

Blend equal parts of all herbs. Infuse about a handful (approx. ¼-½ cup) of herbs in 1 quart of boiled water, and allow to steep for an hour or overnight. Enjoy hot or iced, and drink daily as part of a regimen to help with digestive upset (can also be enjoyed as part of a healthy-skin regimen, too!)

Resources:

Calendula Monograph: https://www.herbrally.com/monographs/calendula

Henriette’s Herbal: https://www.henriettes-herb.com/blog/yell-calendula.html

Drying Herbs for the Home Apothecary


By Sophie Cassel, herbalist, gardener, educator, and RWP employee. 

drying herbs photo.JPG

So, you’ve planned out the garden beds, planted your herbs, tended dutifully to their new growth, and now you’ve got a garden full of medicinal flowers and bushy growth, beginning to attract the attention of busy pollinators and your awe-struck neighbors. What next? Of course, you could leave the plants as ornamentals, or allow them to go to seed in hopes of expanding the garden next year. But if you’re interested in harvesting plant medicine, you’ll want to have all the tools you need to gather, dry, and store your bounty. Read on for some tips on tools and methods for keeping on top of the harvest, and you’ll be rewarded with aromatic and delicious herbs that will store well through the winter months!

Harvesting

First, a note on harvest. Medicinal plants have been used and revered for as long as humans have been humans, and we can and should show gratitude to the plants for all they offer us. While it bears repeating that wild plants should always be collected with utmost respect and caution towards the continuity of the stand or the species, even our own gardens can be the site of conscious harvest. Remember that maintaining a healthy pollinator population is essential for maintaining a healthy garden, and leave at least a third of flowers for the little critters who make all that abundance possible. With many commonly grown medicinals, leaving flowers for the bugs and birds will also promote seed production, which can then be gathered from in the fall to save for next year or offer to friends. Dead standing seed heads also provide important food sources to birds in the winter, which is another way to pay forward the bounty of the garden. 

That said, it’s helpful to have some key tools to make the harvest go smoothly:

  • Baskets: Wide woven baskets are ideal for harvesting big bunches of herbs. They also make good places to dry the plants, since they provide plenty of surface area for air flow. If your basket has an open weave, line it with newspaper to prevent leaves and flowers from falling through the gaps.

  • Clippers: Small snips are best for quickly and cleanly trimming off leaves and small stems, especially with plants whose stems don’t snap off cleanly. Make sure to keep your clippers clean to prevent the spread of disease from plant to plant. 

  • Rubber bands: Save your old bands and twist-ties from produce and use them to make small bunches of herb sprigs- the diameter of the bunched stems should be between nickel- and quarter-sized to allow for air flow through the leaves. 

When it comes to drying herbs, there are a few different methods, and they work well for different plants, depending on the moisture content of the material you’re harvesting. Small-leaved and twiggy plants like thyme or lavender dry quickly in a bundle, whereas juicier plants like tulsi or calendula flowers need time and lots of air flow. Generally speaking, you want to create an environment that is warm, dry, breezy, and out of direct sunlight. That may be a corner of your kitchen, under the eaves of a garage or barn, or hanging from the ceiling of a three-season porch. Here are some methods you can consider, depending on the type of plant you’re collecting.

  • Hanging: Tied up in those small bundles, herbs that are cut by the stem can be hung from a clothesline or string around the house. If it’s a plant that tends to shed its leaves as it dries, like tulsi or bee balm, you can hang the plant inside of a paper bag, so that as the leaves dry down they fall into the bag. Be sure to check bundles regularly to make sure they are drying evenly, without excess moisture in the inside of the bundle.

  • Baskets and Racks: This method works best for flower heads, leaves, and anything with soft or short stems that won’t hold up to bunching. Spread your herbs in a single layer on your basket (lined with newspaper if needed) and place somewhere dry and warm. If you do place your herbs in direct sun, be sure to check them regularly and bring them in before they get too crispy or bleached out. I like to swirl the herbs around in the basket every day or so to make sure they are drying evenly- this is also a good time to remove any thicker stems that are drying more slowly than the other plants. For juicy flowers like calendula or red clover, be sure to check that their middles are fully dry (the centers should snap apart). If you’d like to build your own simple drying screens, there’s a great tutorial here. I set up a wooden clothes drying rack in my living room and place these screens on it, which creates vertical space for drying that doesn’t tie up counter space. 

  • Dehydrator: Only use a dehydrator that has a temperature adjustment, as most standard dehydrators will run too hot for delicate plant material. Models like the Excalibur are pricey, but if you already own one for food preservation, they make great herb dryers. Make sure your temperature is on the lowest setting, and check the plants often to make sure they don’t overdry or begin to cook. It may help to chop the herbs a bit first so that they fit on the trays and don’t crowd each other.

Whichever drying method you use, make sure to label your plants, particularly the leafy green herbs that may only be identifiable by taste or smell. Label the drying plants with their name and when they were harvested- this way you’ll also develop a sense of how long it takes for each herb to dry down. Things like ambient temperature and humidity can dramatically lengthen the time it takes for herbs to dry.

After the plants have dried fully, it’s time for the most satisfying step with the funniest name: Garbling! Garbling is the process of stripping and shredding the useful medicinal leaves and flowers from the woody stems, resulting in a finished product that is uniform and easy to use. The best way to garble is to rub the dried plants against a screen (just like the drying screens above) made with half-inch hardware cloth, which will allow the crumbled herbs to pass through into a bucket or bowl below. You can also of course also do this by hand, in one of your big baskets or a large bowl. 

Once your herbs have been processed fully, store them in a sealed plastic bag or glass jar to prevent moisture moving in. Label well and keep in a dark place to preserve their shelf life. Stored this way, home grown herbs will last well over a year. If you’re unsure of whether the herbs are still useful, use your nose and eyes as guides: If the plants look bleached out or yellowy, or if they have no fragrance (or a funky/moldy one), it’s time to add them back to the compost. If you’ve dried them properly, your dried herbs will stay fresh-looking and aromatic, and provide you with an abundance of medicinal and culinary delights well after the garden has been put to bed. 

Resources:

Thank you, How to Find our Plants and Herbs, plus a Recipe

Thank you from all of us for an incredible, memorable, and unique season!

Thank you from all of us for an incredible, memorable, and unique season!

As our regular retail hours for 2020 end today at 5pm, our team would like to thank you for a wonderfully unique season. We are closing a little earlier than usual, but will keep up a once a week pick up with online sales and will continue twice a week deliveries to our wholesale partner stores. Read below to find out more!

During the month of August, we will be doing curbside pick up once a week, on Fridays between noon and 5. If you would like to order plants, please do so here, and we will have it ready the following Friday as long as orders are placed before midnight on Wednesday.

Our online store will carry an assortment of veggies and herbs for the fall kitchen garden, perennials, and houseplants. For the first time, we will also be offering directly to you the herbs and herbal products coming from our herb farm: freshly harvested herbs in bulk quantities for your drying and processing needs, herb salts, herbal vinegars, and pesto. Please check the website every Saturday for the latest updates, and place your orders by the following Wednesday at midnight for Friday pick ups between noon and 5.

If you need something sooner than the following Friday, just let us know and we can make another arrangement.

Confused? Have questions? Drop us a line at info@redwagonplants.com.

Thanks for a fantastic season in weird times. We are just so grateful for all of the orders and purchases you made this year. You kept our crew going, and you planted gardens like never before. We loved hearing from you and seeing you in person once we opened for shopping.

You can continue to find our plants at our wholesale partner stores:

  • Shelburne Supermarket

  • Gardeners Supply, Intervale and Williston locations

  • Healthy Living

  • CIty Market, South End and Downtown locations

  • Bibens Ace Hardware, North Ave location

Recipe for Herbes Salées (adapted from Spruce Eats)

Here is a traditional Quebecois way to preserve large amounts of herbs to use all winter.

Suggested uses: A teaspoon in hot water makes a soothing and instant herbal broth. Stir into soups and stews, mix into salad dressings and tomato sauce, mix with cream cheese or cottage cheese….the uses are endless and a jar of these preserved herbs will be a welcome reminder of summer and freshness during the depths of winter.

  • 1 cup chives (fresh, chopped)

  • 1 cup savory (fresh, chopped)

  • 1 cup parsley (fresh, chopped)

  • 1 cup chervil (fresh, chopped)

  • 1 cup carrots (grated)

  • 1 cup celery leaves or lovage or cutting celery (chopped)

  • 1 cup green onions (chopped)

  • 1/4 to 1/2 cup coarse salt

    In a large bowl, combine chopped chives, savory, parsley, chervil, carrots, celery leaves, and green onions.. Layer 1 inch of herb mixture in the bottom of a crock or glass bowl and sprinkle with some of the salt. Repeat layers until all of the herb mixture and salt is used.

    Cover and refrigerate for 2 weeks. Drain off accumulated liquid and pack herb mixture into sterilized jars. Refrigerate until ready to use. Can keep for up to a year in the refrigerator.

Herbes Salées photo by Kate Bentley

Herbes Salées photo by Kate Bentley

Herbal Vinegar Infusions

By Sophie Cassel, herbalist, gardener, educator and RWP employee. 

herbal+vinegar+photo.jpg

Of all the ways of preserving herbs, I think that vinegar infusions really capture the essence of summer in a way that lasts all year. At its foundation, a vinegar infusion is super simple: Chop up flavorful herbs, pack them into a jar, and cover with apple cider vinegar. Let the herbs infuse into the vinegar for a couple weeks, then strain for a punchy liquid that is versatile, healthful, and pretty tasty. 

Apple cider vinegar (ACV) is the vinegar of choice, but other vin aigre (translated to “sour wine”) like red wine, white or balsamic are also viable options, depending on what your final product will be. Vinegars are a natural product of the fermentation and winemaking process, and have been used across cultures and generations to preserve and flavor food and beverages. In the northeastern US, apples were originally grown to produce cider and apple jack, and so cider vinegar has been our locally abundant source of acetic acid, the chemical responsible for that puckery tang that is so indispensable to our salads and pickles. 

Many folks are familiar with infusing vinegars for salad dressings- adding a couple sprigs of rosemary and thyme and a few cloves of garlic into the vinegar bottle can add complexity to a simple oil-and-vinegar dressing. But did you know that infused vinegars also lend themselves to sweet concoctions?

The first time I fell in love with an herbal vinegar was when a friend, faced with a glut of tulsi flowers from her garden and uninterested in drying the lot, shoved the herb bunches into a jar with apple cider vinegar and let them sit on her kitchen counter until she almost forgot about them. Weeks later, she gave me a sample of the strained liquid. The vinegar had absorbed and preserved all the delicate floral flavors of the tulsi, and it tasted just like we were back in the heat of July. 

Since then, I’ve been getting creative with different herb combinations, and adding honey or molasses to amp up the sweetness of my “elixirs”. When made in small batches, infused vinegars are a fun way to let your inner flavor wizard come through, and delicious local vinegar is inexpensive and easy to come by. Let yourself be guided by the bounty in your garden and your tastebuds, and you’re sure to come up with some successful combinations of your own. Below are a few traditional styles of vinegar infusions, with some ideas for herbs and spices to use. 

  • Switchel: Also known as “haymaker’s punch”, this is a classic beverage drunk by northern farm workers while working through the heat of the day. Switchel usually includes ACV, honey or maple syrup, and water, with herbs steeped in for flavor. It functions much like a home-made sports drink, with the vinegar and sweetener providing much-needed electrolytes and salt. Try infusing a jar of vinegar with ginger, thyme and lemon, and keeping it on your counter, ready to add to your sweetener and water for a refreshing beverage that can be drunk throughout the day, even if you’re not making hay. 

  • Shrub: These vinegars are infused with seasonal fruit and honey to make a luscious syrup. Added to cocktails or sparkling water, shrubs are tart, sweet, and deeply refreshing on a hot summer’s day. Added to a bit of hot water in the winter, it brings to mind the flavors of summer. Try a combination of strawberries and thai basil, or blackberries and raspberries with anise hyssop. The color of the berries will seep into the vinegar, adding a visual element to any beverage.

  • Fire Cider: This spicy concoction has been a staple of the kitchen medicine community for generations, receiving added attention in past years as the fight to prevent the trademarking of the name went national. Kitchen staples like onion, garlic, horseradish, cayenne and black pepper are chopped and added to vinegar and honey, then strained when the brew is nicely potent. Taken by the spoonful or added to a hot toddy, Fire Cider is sure to clear the cobwebs from your immune system and provide some internal warmth in the depths of winter. If you’re excited about Fire Cider, a new book compiled by Rosemary Gladstar dedicated to the topic will give you ample recipe ideas and inspiration.

Infusing herbs in vinegar is so quick and simple, you’ll soon find yourself making a new batch every week, capturing the seasonal shifts of your garden. Make sure to label every jar with the date you made it and the herbs you added in. Infused vinegars are safe for everyone when diluted, and make an excellent offering to kiddos or folks who aren’t drinking alcohol. They also can help jump start digestion before a meal. The possibilities are as varied and abundant as your garden!

Further resources:

Folk Medicine: A Vermont Country Doctor’s Guide to Good Health. Dr. D.C. Jarvis. 1950’s book, makes some wild claims but is a fun read and a portal back in time. His office is preserved at the Shelburne Museum!

Salt, Fat, Acid, Heat. Samin Nosrat, 2017. Specifically the chapter on acid, but this entire book is a treasure trove.

Fire Cider! 101 Zesty Recipes for Health-Boosting Remedies Made with Apple Cider Vinegar. Rosemary Gladstar, 2019. The “godmother of Western herbalism” and the originator of Fire Cider, Rosemary is an enormous resource to the beginning herbalist.

Pesto Time

photo by Kate Bentley

photo by Kate Bentley

PESTO for eating fresh or freezing


In food processor, blend until coarsely chopped:

2 cups fresh basil leaves, packed (can sub half the basil leaves with baby spinach)
1/2 cup freshly grated Romano or Parmesan-Reggiano cheese (about 2 ounces)
1/3 cup pine nuts (can sub chopped walnuts)
3 garlic cloves, minced (about 3 teaspoons)
Slowly drizzle in:
1/2 cup extra virgin olive oil
Do not over blend, the heat from the food processor will bring out the bitterness in the oil and the basil.
Taste, and season with
1/4 teaspoon salt, or more to taste
1/8 teaspoon freshly ground black pepper, or more to taste

Herb Salad

SaltsWorkshopPromo-4.jpg

This is a simple way to use herbs from the garden and create a delicious condiment to add to soups; grilled meats, fish or vegetables; or eat on its own. Feel free to get creative with the herbs you have, experiment, and blend types of herbs together based on what you prefer. What follows is a master recipe to use as a guide.

HERB SALAD MASTER RECIPE

2 cups roughly chopped parsley, or flat parsley leaves (individually picked off the stems)

½ cup scallions or chives, finely chopped or ¼ cup shallots very finely chopped

¼ cup additional herb of your choice (optional): lemon basil, thai basil, marjoram, oregano, etc (this is where the fun pairing with foods happens)

juice of ½ a lemon

¼ tsp finely crushed raw garlic (optional)

2 TBS olive oil

Salt to taste (I like a flaky salt such as Maldon)

Freshly cracked black pepper to taste

Combine all the ingredients in a medium bowl, and taste for salt. If it tastes too tart, a tiny sprinkle of sugar can help balance the flavors.

Other possibilities:

For tacos or beans: use cilantro instead of parsley, lime juice instead of lemon and add some finely chopped hot pepper.

With fish or chicken: : add ¼ cup of tarragon or chervil or dill to the parsley

On tomato based dishes like pizza, grilled tomatoes, or red sauced pasta: add ¼ cup marjoram or oregano. Cut back the lemon juice to just a squeeze of lemon. If you have lemon basil, this is a great place to use it. And note that the flowers of the herbs are declicious too.

On pork right off the grill: add some bronze leaf fennel flowers, finely chopped.

With pasta or potato salads: substitute red wine vinegar for the lemon juice, and add lots of basil cut into fine ribbons “chiffonade”. Stir the herb salad into the pasta or potatoes. If you increase the oil and vinegar, the herb salad becomes a dressing of sorts.

Add some finely chopped celery and carrot, and turn into a stand alone salad or spoon onto green salads.

Use as a condiment in sandwiches

Spoon on grilled or toasted bread, and shave a good parmesan or other hard cheese on the top for a simple lunch.

Use as a topping for scrambled eggs or a filling for an omelet with feta cheese

Succession Gardening for Success

savoy cabbage.jpg

Garden Planning for the Seasonal Kitchen

Growing vegetables in your backyard, community garden or in containers by the kitchen door is a great way to feed yourself - whether it be just a few ripe tomatoes in August or a full-fledged homesteader's garden, you are on the path to feeding yourself and your family. Gardening is a great way to improve how you eat while spending some contemplative time outside. With all of these benefits in mind, it is easy to jump into gardening enthusiastically, and you will reap even more rewards with a little bit of planning. In Vermont, our gardening season seems short but can be stretched almost year round with a few simple tips. I always recommend that people take a look at how their vegetable gardens have been in the past and find just one or two things they would like to improve so that they can grow more of it for a longer season. For example a common question I hear is "how can I keep cilantro from bolting?" Well, in short, you can't. But with a few changes in your gardening practices, you can grow it all spring, summer, and fall without ever seeing it go to seed.    The trick is to understand the life cycle of each vegetable or herb and how to best plant it to maximize its harvest. With certain crops, like zucchini, it is best to understand how prolific they are and to plant them conservatively so that the entire garden (and thereby your diet and your neighbors' diet) is not taken over with just one thing. It is also helpful to plant things seasonally so that the harvest is not so overwhelming in August with little to eat before or after. Or sometimes we just want fresh salads all summer, but don't replant and are left salad-less after July 1st.

Succession Planting for Successful Gardening

Certain crops should be planted multiple times throughout the season to ensure a continuous harvest. This is called succession planting. How often you plant is a matter of taste and space and time. The following list describes the maximum you could do with each crop, but adjust according to your needs and priorities - this is just a guide. If you want to make sure you have a certain vegetable all summer long, then you can follow the guidelines. If you want it a little less, then create your own modified planting schedule.

  • Lettuce can be grown from seed or from transplants. Seed grown lettuce is often grown in a row that can be cut and will re-grow a few times - think of mesclun. Transplanted lettuce can be grown to produce full heads like what you find in the store. Both methods require regular planting every week or two for a continuous harvest. It can be planted from seed in mid-April to mid-August for cut greens and transplanted for full heads from late April / early May through early August. Some people will transplant a few plants and plant some seeds at the same time in a different area; this method provides two generations of lettuce and two types of salad greens. Once the cut lettuce becomes bitter in the heat of summer, it is best to pull it up, recondition the soil with compost, and plant something else. If the goal is to always have fresh lettuce, it is very simple to do if you remember to replant it. You can even purchase a number of plants and hold some in their pots in a shady spot and only plant out a few each week. You can seed it yourself in trays or pots and follow this same method. Having several varieties, cold-tolerant ones for spring and fall plantings, and heat-tolerant ones for mid-summer, will produce the best flavor.

  • Cilantro is very similar to lettuce in its growing habits. It will grow up to a point and then goes to seed, called bolting. It will bolt more quickly in summer heat and, conversely, will stand ready to harvest for many weeks in the cool weather of fall - even early winter. It is good to time plantings so that cilantro is ready to harvest before June 21 (the solstice), and then plant more afterward. It can be transplanted or grown from seed. Like lettuce, it is simple to do both at the same time, thereby giving the gardener two generations. Cilantro seed is coriander, so it does have a use if you enjoy that flavor. There is nothing you can do to prevent cilantro from bolting entirely, but you can slow the process down by placing your mid-summer plantings in a partly-shady spot.

  • Dill can be treated just like cilantro, and, like coriander seed, dill seed heads have a use in the kitchen, so it is fine to let some of the dill patch go to seed. The seed heads can be used in pickles. you can also let them self-sow or save the fully dried seeds in a paper bag for replanting.

  • Basil can be planted multiple times for best results. Plants can be pinched to slow down the flowering, but best flavor will come from newly replanted basil plants. This is a heat loving plant. Should only be planted once soil temps are in the upper 50's - usually last week in May or first week in June. Basil's flavor is at its peak right before it starts to make flowers.

  • Cucumbers, cantaloupes, and zucchini and summer squash are best in quality when well tended. Just a single plant or two of any of those is usually enough for the home gardener, but by planting it two to three different times, spaced out, the quality will always be good. The dates are: June 1st (or last week in May if you are in a warm spot), July 1st and July 15th. This method will ensure a continuous harvest of prime looking vegetables. Just remember to pull out and discard the pest- and disease-prone older plants. If your compost gets very hot and is well managed, it is okay to compost these plants. Pest problems will diminish when the older, less healthy plants are removed. And you can use that opened up space for a quick growing crop like, lettuce, herbs, scallions, greens or fennel.

  • Arugula, mustards and other cutting greens for salads are best if sown or transplanted on a weekly or biweekly basis. Again, a small amount can be seeded next to the transplanted crops in order to give you 2 generations at once. This way you can have smaller quantities coming in at various times.

  • Broccoli gives the gardener a couple of options. It is best if transplanted and can be planted over 3 dates in the spring and 3 dates in late summer for a continuous harvest. I would choose late April, early May and mid May for the spring plantings and then Early August, mid August and early September for the fall plantings. Full heads can be harvested and the plants can stay in the ground to produce side shoots.

  • Green Beans are best when fresh and young. The seed is relatively cheap, so it is better to rip out old plants and have new ones coming along regularly. Having smaller, multiple plantings also means that no on is stuck picking beans for hours on end. Sow new seeds when the previous or first generation is about 6 inches high.

  • Boc Choi, Cabbage, and Cauliflower can also be planted multiple times. Cabbage holds well in the heat and can be planted every couple of weeks late April through early August. Boc Choi and Cauliflower are not as heat tolerant and should be planted around the same dates as broccoli (see above). It is best to use row cover like Reemay on these young transplants so that flea beetles do not destroy the plants.

  • Spinach is another one that does not do well in the heat, but can be planted multiple times in spring and late summer. It can also overwinter with a little straw mulch for very early spring eating. Frequency of planting can happen every week mid April to early June and then early August to mid September. The last plantings in September are the ones which will be over-wintered and eaten the following spring. Apply straw mulch on overwintering spinach in December once the ground is frozen.

  • Beets, Carrots, Turnips can be planted from seed every two or three weeks from mid-April until about the third week in July. Summer carrots are not the same as fall carrots and certain varieties do better in summer than in fall. The flavor of fall carrots is much sweeter, so I usually plant a larger patch in the fall. Fall carrots can also be stored all winter without going bad due to their lower moisture content. I don't love summer carrots, so I often skip those. Remember, it is all about what you like to eat.

  • Celery and Celeriac are slower growing and can be transplanted 1 to 3 times during the season, from mid May until early July. These need lots of water and benefit from straw mulch to hold the moisture evenly around the roots.

  • Bulb Fennel and radishes are similar to lettuce - they can be planted each week if really loved, but they bolt in the heat and do best in the cooler temperatures of spring and fall. They are best if planted late April to early June and then again late August to mid September. They are cold tolerant and hold well in late fall. Radishes are grown from seeds and fennel is best transplanted. Fennel also benefits from a straw mulch - even moisture around the roots is what helps it make larger roots.

  • Corn - it is possible to do multiple plantings over different weeks, but an easier method is to plant all at once, but with various varieties that have different days to maturity. There can be a 40 day span between early and late varieties.

  • Peas can be planted every week, but this requires a lot of harvesting, irrigating, trellising, and variety research. It is possible though. More practically, the home gardener can sow 2 or 3 varieties in late April with various days to maturity. Fall plantings are sometimes successful but are weather-dependent. These should be done in mid August.

The following are generally planted just once a year, but the harvest can be staggered with a few tricks:

  • Tomatoes, Peppers, Eggplant - try a few varieties of each in order to not have everything at once. Determinate tomatoes will provide you with a big harvest all at once which is a good thing for people who make big batches of sauce for canning or freezing. Determinate tomatoes are the ones that grow until a certain height and then mature all at once. Indeterminate tomatoes are the ones that grow indefinitely until the frost and the fruit ripens gradually August until frost or disease kills the plant.

  • Peppers and eggplant are best if transplanted in early June once the soil warms up. One planting is usually plenty, but again an assortment of varieties will keep the harvest varied, staggered and interesting.

  • Onions and Potatoes are generally planted all at once, and again a few different varieties will provide you with a longer period of fresh eating. Both onions and potatoes can be stored for long periods of time in cool and dark conditions. Both can also be eaten fresh as young, green onions or new potatoes. Both can be harvested, cured, and stored for eating year round, though some onion varieties store much longer than others.

  • Winter Squash is another crop that is planted just once and can be stored. It is best cured for a week or two in a warm spot before eating.

  • Watermelons are usually planted just once in the home garden (early June is best). Cantaloupes can be planted as late as early July.

Open Spots

When you harvest a crop and create an open spot in the garden, take advantage of that spot with any of the quick growing crops that you like to eat. Some easy ones to try from transplants:

  • arugula

  • baby boc choi

  • fennel

  • lettuce

  • mustard greens

  • scallions

  • kale

  • chard

  • beets

  • herbs - pretty much any herb can be planted up until early August. Cilantro, dill, parsley, chervil are all cold tolerant and can be planted as late as mid-September from plants (mid August to late from seeds)

You can also tuck in flowers that grow vertically and don’t take up too much room:

  • cosmos

  • verbena bonariensis

  • lisianthus

  • calendula

  • poppies

From seed, you can try:

  • carrots

  • beets

  • radish

  • asian greens

  • mustard greens

  • lettuce

  • bush beans