New Varieties for the New Year

We are adding so many new varieties for the new year. We will update the plant selection of the website and include all of the new selections for 2010, but for now here is a sneak peak.

This is a really fun summer squash with lovely shades of green and yellow, split right down the middle. The flavor is similar to any yellow summer squash, but the striped look is really fun in the harvest basket.

Zephyr Summer Squash

This next nasturtium is a new introduction from Johnny's Selected Seeds. It has such brilliant hues of yellows, oranges and reds. I think it will be a real standout amongst the herbs and edible blossoms in the spring garden. Nasturtiums are the work horses of the garden world - they just never stop producing their cheery blooms all season long.

Kaleidoscope mix nasturtium

A few customer have asked for this nostalgic, old-fashioned annual. It is a beautiful lime green flower with bracts and petals that dry perfectly along their regal, spiked stem. I just love these in bouquets with zinnias and ornamental grasses.

Bells of Ireland

Round of Hungary Pepper is another customer request. It's a really sweet pepper with a flatened shape that is perfect for stuffing and baking. It is an heirloom and as such carries with it a full spectrum of flavors. Perfect addition to the grilled vegetables you may be looking forward to this summer.

Round of Hungary Sweet Pepper

We will continue to update you with all the new varieties, so keep checking in to see what's coming. And as always, we love to hear your suggestions, stories of what works well for you...our plants and your gardens have a lot to share!

Snow and greenhouses

Snow removal is a big part of greenhouse maintenance in the winter. Our greenhouses are really strong, made from tubular steel, engineered by Harnois, up in Quebec, and can handle a big snow load. The problem though, is once the snow slides off, it has to be cleared away from the sides so that more snow can slide off. If it builds up too much on the sides, it can put uneven pressure on the frame, and when another heavy snow falls, the uneven pressure combined with the added weight of the snow load can cause a problem. We have a snow blower to do this, but when it gets to be too much, we call in Roger Parker, a neighbor and all around helpful person who has an excavation business and owns every great piece of large equipment a person could want. His tractor and huge rear-mounted snowblower fits in between the greenhouses just fine and they can clear away the big snow piles in a few passes. It sure beats shoveling!

From the Valentine's Day blizzard of 2007

Seed Inventory

It's a good idea, if you start your own seeds, to do a thorough cleaning out of the seed supply every year. Keeping old seed around will just lead to frustration. Here is a basic guideline for seed shelf-life:

  • 1 year: onions, parsnips, parsley, salsify, scorzonera, and spinach;
  • 2 years: corn, peas, beans, chives, okra, dandelion;
  • 3 years: carrots, leeks, asparagus, turnips, rutabagas;
  • 4 years: peppers, chard, pumpkins, squash, watermelons, basil, artichokes and cardoons;
  • 5 years: most brassicas, beets, tomatoes, eggplant, cucumbers, muskmelons, celery, celeriac, lettuce, endive, chicory.

I am never too sure about what to do with old seeds. Sometimes I throw them around on bare patches of earth to see what will come up and other times I sadly throw them into the compost or trash. Most importantly, I try to be really careful to order only what I can use within the lifetime of the seed.

Winter Work

Every day, I try to work a little and play a little. And come fall and winter, it is always a little bit of a challenge to find the right balance. I try to learn some new skill every winter and usually find a topic to study with a friend or two. This winter the skill is social media as a business tool - hence this blog and Red Wagon Plants presence on Facebook and Twitter. I am reading many interesting food blogs and a few homesteading and farming blogs, using Google reader to stay updated on these issues. It doesn't really feel like work, but I sense my slow passage up the learning curve and hope it translates into increased relationship with customers. Having a business that is only open to the public 2 months out of the year means that I spend 10 months not hearing from customers. My biggest goal with internet communication is to hear from customers more regularly throughout the year, and to track the progress of our plants.  So please, let me know. - Julie

Leek Fest

I have just used up the last of my leeks. That means we ate about 225 leeks this fall. That is a lot of leeks. We grow two different kinds for two slightly different purposes.

My favorite for flavor and beauty is Bleu Solaize, a French heirloom variety that is just majestic in the garden. It stands about 2 feet tall and has thick, blue-green leaves that make for a dramatic, palm-like display in the kitchen garden or tucked into a mixed ornamental bed. The leaves even turn a pretty violet color once cold weather hits. I think they would make a lovely back drop for some bright red ladybird poppies or mixed in with some verbena bonariensis and short sonata cosmos.  What really makes Bleu Solaize special though, is its ability to survive very cold temperatures.  If I still had some in the garden, I would start mulching them with straw right about now (early December) and would be able to harvest them all winter and even into early spring. I guess next year I will have to plant even more leeks.

The other variety we grow is King Richard (known as "King Dick" around the greenhouse work bench).  I love this variety because it is ready to eat long before the Bleu Solaize (you can start to eat them at the baby stage - see recipe below), it does not require hilling, and it easy to clean.  It has been bred to be "self-blanching" which means that the white, edible part is extra long in proportion to the green part and does not have to be buried in soil to stay white, so overall the leek stays cleaner and there is much less waste or compost to deal with. All of this ease in growing and cooking is at the cost of flavor.  These leeks are sweet and mild, but just don't pack the same rich, leeky flavor of the Bleu Solaize. I still like them a ton, though, and this is why we grow TWO kinds of leeks!

Growing and Care of Leeks:

Our plants come in 4 packs and there are about 100 plants per pack. This may seem like a lot, but since they hold in the garden for such a long time, it is really a moderate amount that can be eaten over a 3 to 6 month period. I start out by making a trench with the edge of my hoe, about 3 inches deep. You should allow for 6 inches of space per leek in rows that are about 8 to 12 inches apart. So for one 4 pack of leeks, I usually prepare three row that are 18 feet long. You can pack them in a little tighter if you don't have the space. You can also plant them in once long row, which makes them easier to hill.  You can also plant crops with a short life span (radishes, arugula, lettuce, spinach) right near them since leeks take a long time to size up and use all their alloted space.  When planting the leeks in their trench, it is important to bury them about as far down as you can and leave only a few inches of the delicate green top showing. They are really slow to grow, so you can save space by planting them in a nurse bed, where you just pack them in pretty tightly and wait a month or so to transplant them to their rows in the garden. Just keep them well watered either way. Leeks and onions need lots of water to get established and off to a good start.  And keep them well weeded too; the slow growth rate of leeks makes them very susceptible to weed pressure. Once the leeks are about a half inch in diameter, you can hill them by gently piling loose soil around their base a few inches up the plant. This is alos a great time to add compost and some straw mulch.  Once mulched and composted, the leeks become pretty much care-free other than some watering every now and then. The mulch and the compost help retain moisture, so it they are a critical component of having nice, large leeks.

Some of my favorite leek recipes

First of all, here is a nice video of how to wash leeks. It's pretty quick once you are used to it.

Leeks in Vinaigrette

3 to 4 leeks per person (if they are small) or 1 or 2 leeks per person if they are large.
about a tablespoon of this vinaigrette
Garnishes: a table spoon of capers per plate, half a chopped hard boil egg, finelly chopped tarragon, parsley or chives
Arrange leeks on indivudual serving plates, drizzle with dressing and top with garnishes.

Braised Leeks

Place washed and trimmed leeks in an oven-proof casserole dish in a single, snug layer.
Pour in enough stock (chicken, beef, veggie - your choice) to fill in half way up the leeks.
Tuck in a few sprigs of thyme, rosemary, or savory in between the leeks.
Salt and pepper  liberally, dot with a few small nuggets of butter.
Cover with tin foil and bake in a preheated 350 degree oven until soft, about 45 to 60  minutes depending on the size of your leeks.
Uncover the leeks, sprinkle with a little freshly grated parmesan and place under a preheated broiler until browned and bubbly.  You can skip the cheese and broiler phase if you want to be more wholesome about it.

Potato Leek Soup

In a large soup pot, place the following ingredients:

3 washed and trimmed leeks, roughly chopped
2 small/medium potatoes, roughly chopped
1 gallon or so of broth of your choice (chicken, beef, or veggie)
a few sprigs of rosemary or thyme
a few cloves of garlic, finely chopped
Let everything simmer on medium/low heat  until very tender, about one hour or so. Remove herb sprigs and puree in a blender or with a hand held immersion blender (much easier method).
Salt and pepper to taste.
Stir in a little heavy cream if you are feeling decadent.
Garnish with fresh pasley or chives, finely chopped.

Bringing in Herbs for the Winter

Herbs are one of the key ingredients in summer cooking that make the food really stand out, but we don't have to stop once winter comes.  The key, in my mind, to things tasting good is to layer in flavors using various simple techniques.  Herbs are the fastest and simplest of those methods, other than say, adding salt.

We have had such a warm November that I am still clipping herbs right out of the garden and the herbs in pots are still doing well on the back porch.  I have also started to bring in herbs from the garden to dry them.  The simplest method is to cut whole branches of  the woody herbs such as thyme, sage, winter savory, and rosemary and tie them into bundles and hang them in a dark, well ventilated place.  I usually leave them hanging for a month or so, and then place all the bundles into a large basket lined with a clean dishcloth.  I use a large amount of herbs all winter, by the handful, in simmering stews, soups, under and over roasted meats, inside the cavity of roasted poultry, etc.  I just can't think of a simpler and more effective way to add depth to whatever is cooking.

The leafier herbs, such as basil, cilantro, parsley and chives can be frozen for year round use.  This is best done with the aid of a food processor.  I take handfuls of washed herbs (stems removed) and pulse them in the bowl of the processor until they are finely chopped. I then drizzle in a little olive oil while the machine runs. Once it all looks like a nice green mush, I scoop it all into freezer bags and shape it into a thin, flat layer before placing the bags (lying down) into the freezer.  This allows the herb puree to freeze in a thin sheet that can be broken into smaller pieces when you are ready to use it. This frozen herb puree is a great addition to soups, stews, sauces, roasted or steamed veggies, and salad dressings.  I simply toss in a chunk of the herb popsicle at the end of the cooking time of whatever I am making so that the fresh flavor really comes through.

You can also bring herbs inside in pots for the winter and place them near a sunny window.  I keep a few herbs in pots all summer just for this purpose, but you can dig up whole plants out of the garden and repot them with some good potting soil. These are nice herbs to use as garnish, or chopped into a fresh salad.  These are not the herbs I use by the handful, but when I want just a teaspoon of fresh, chopped herbs to add a final punch to a dish.  Some of the herbs that work well for bringing indoors are thyme, parsley, rosemary, sage, oregano and basil.  The sunnier the window, the better luck you will have. You can also use some grow lights on a timer for even better results.  It's best to water these indoor herbs about once a week, but since they are in a semi dormant stage, they don't need to stay as moist as they would in the summer. The herbs won't always look great, but they will always smell good and have enough flavor boosting powers to earn their keep.

Tomato Varieties, Old and New

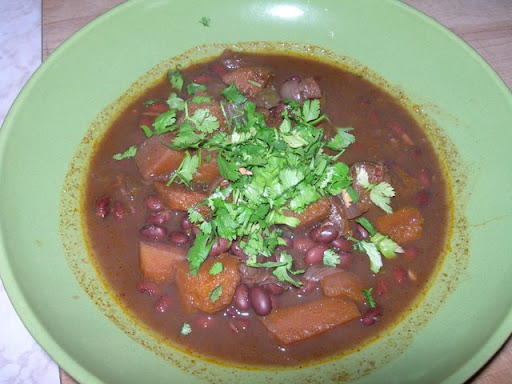
This past season was pretty hard on tomatoes.  Lots of rain, cool temperatures, and very high disease pressure made for less than ideal conditions.  At Red Wagon, we grow varieties that taste really good and that produce well.  Sometimes those two things don't always go together, and flavor is sacrificed for high yields, or the other way around. Our tomato variety list has always favored flavor; in other words, we grow lots of open-pollinated, heirloom varieties that don't always produce high yields, but whose flavor is far superior to those hard lobes lurking on grocery store shelves.  All of the 'heirloom' varieties you see in catalogs or in our plant displays have stopped being commercially produced by large farms, and while enjoying a renaissance among small, local and organic farms, their lack of shipability (too delicate) and irregular shapes and sizes will likely make sure they remain a stranger to the tractor trailer. For the sake of clarity, let me explain something about the language used to describe plant varieties. 'Heirloom' and 'hybrid' are not exactly parallel terms.  Their is no botanical definition of an 'heirloom' - that is just a folksy way of saying a certain variety has been around a long time, it is open pollinated (more on that in a second) and there is often some sort of story associated with how the seed has been saved over many generations.  The heirlooms often taste better--but not always--and sometimes the propaganda around an heirloom's attributes eclipses the reality.  A hybrid variety is a plant that has been bred from two different tomato varieties.  This gives it, in theory, hybrid vigor.  For example, one parent is known for its resistance to pathogens but has the mouth-feel of a doorknob while the other parent is famous for flavor, but withers at the sight of a fungal spore. A hybrid variety is bred with a higher degree of human intervention, than an open pollinated variety.  This simple plant breeding has been going on since the beginning of agriculture and is not to be confused with recombinant DNA breeding which is inter-specific (think fish genes in a tomato).  Open-pollinated varieties are plants with the same exact parents and are bred with the simple aid of wind, insect, or plant mechanics--i.e. humans don't have to get involved other than to isolate the plants from other varieties, and to collect the seed etc.  All 'heirloom' varieties are open-pollinated, but again, remember that 'heirloom' is not a scientific term, it's more of a literary term - think "plants with stories."

A while back, a New York Times editorial by chef and restauranteur, Dan Barber, confirmed what I had been thinking: that in order for our agriculture-and on a small scale, our back yard gardens-to thrive, we need to diversify. This past summer, those gardens that included a mix of heirloom tomatoes and hybridized tomatoes probably had better luck over all.  I know that in my garden, that was true, but I was still a little surprised that the margin between the two was pretty slim.  In spite of the harsh conditions, my tomatoes did pretty well. I gave them lots of mulch and lots of space between the plants and I regularly clipped off yellowing vegetation.  Surprisingly, some of the hybrids died really early on (they are bred for resistance to certain pathogens, but not all), and some of the heirlooms clung on for dear life until our first (very early) frost. So the lesson I learned is that the best thing to do is to have a mix of varieties, and hope for the best.  I would not suggest growing only one favorite heirloom; if there is room in your garden, grow a plant or two from each category - heirloom and hybrids of slicers, cherry, paste, early producers, late producers, etc.  I know this is not practical for small spaces, but just a guideline to use in your garden planning.

We are adding some new tomatoes for the 2010 season, and so far, here is what I have come up with.  Please feel free to leave me suggestions, that is our favorite way of trying something new.

Pink Beauty - a hybrid with firm, delicious fruit.  Pink, medium-size, 6-8 oz.  74 days to maturity.

Fantastic - A customer request. A hybrid with 3 to 5 inch round, firm slicing fruit with good shape and crack resistance. Meaty, bright red and with exceptional flavor. Indeterminate. 85 days to maturity.

Goliath - a hybrid with smooth, bright red fruit that is huge - 10 to 15 ounces each. Sweet luscious flavor and blemish free exterior. High yielding and great disease resistance. 65 days to maturity (EARLY for such large fruit)

Rutgers - a hybrid with pinkish-red saladette (2-3" diameter) size fruit with outstanding flavor that is always a favorite in taste tests.  The earliest tomato that keeps producing all season long. Cold tolerant. Determinate. 50 days

Orange Blossom -a hybrid determinate (means they don't get as tall as others and all of the fruit ripens at once)  with medium-firm, globe-shaped fruits average 6-7 oz., have a nice texture, and are mildly flavored, balanced with a little acidity. 60 days to maturity

Black Cherry -A small and pretty cherry tomato with rich, sweet flavor.  Nice in mixed tomato salads. Black tomatoes are really a deep mahogany and are known to have superior flavor.  Open-pollinated. 64 days.

Paul Robeson - An heirloom. A well loved tomatoes on many people’s “favorites” list.  Dark red fruit tinged with black, brown and purple flesh and skin. Rich flavor with hints of spice and red wine. Varies widely in size, but averages 10 to 12 ounces each. Does well in colder temperatures; seed is from Siberia. 74 days.

A Time of Acceptance

I love garlic planting time.  You can really learn a lot about your soil when it is fall and the garden has spent a summer being tended (or not).  This is the second burst of good intentions, the first one being the entire month of May when ideas run ecstatically through the garden plan .  Garden cleanup is a confessional time in the gardening calendar. It is a time to look at mistakes, assess and swear to never make them again, renew your commitment to gardening, and prepare to let the passage of a long winter slowly rekindle your optimism for that spring burst.   Or you can  just learn to live with your shortcomings and realize that the garden is a very forgiving place, where perfection, motivation, and execution don't have to be the priorities.  In other words, it's time to take the pressure off.  There is so much of it in our lives, why not let the garden be a place where we accept and embrace imperfection. Garlic planting is a perfect way to mark the impending doom of winter and the shortening days.  Tucking those fat cloves deep into the earth, I feel unbounded optimism, a deep sense of satisfaction that I am punctuating the calendar with an earthy tradition, full of meaning and metaphor.  The garden is a great place to create your own traditions that are in step with changing seasons; it's a place of rituals that are private and intimate,  between you and your dirt. When I plant garlic, I imagine winter as a time to prepare for spring, as a passage in the circular cycle.  The thought of those cloves, tucked into their bed and nestled in straw, remind me that it is alright to take time to just rest and renew come those cold and bleak days.

I always start by selecting a site for the garlic that will benefit both the garden, the garlic and future crops.  Garlic brings a full  9 months of cultivation to the garden, much more than other vegetable plantings.  With it also comes a deep soil work up, a thick layer of composted manure, and another thick layer of straw.  These are all great ways to treat your soil and whatever is planted in that spot, in your garden's future, will feel the love.  As part of my garden rotation, I spend the winter imagining what will be planted where the garlic once stood, which crop will benefit from the extra organic matter and nutrients and care that the garlic received.  Many people think that garlic is a healing food with all sorts of immune boosting properties....I think it does the same type of work in the garden.  Once again, I am reminded of the way gardening is a microcosm of life and of the body, following the cycle not just of the seasons, but also, of growth and acceptance.

Black Bean and Butternut Squash Chili

This is one of my favorite things to do with butternut squash, and every time I make it, I am reminded of my friend, Robin Holland.  She made it for a mom's group I was a part of when my daughter was a baby and a toddler.  A dozen or so of us would get together once a week, share an amazing meal and, together, relish in the joys and burdens of motherhood.  I still make this often, and every time, the flavors combine together to transport me back to those days.  There is something inherently grounding and warming about this dish.

Black Bean and Butternut Squash Chili

(enough for a crowd and easily reduced)

2 cups of dried black beans, soaked overnight, rinsed and drained (turns into about 6 cups of soaked beans

1 large butternut squash, peeled, seeded, and roughly chopped into 1" chunks

2 TBS olive oil

2 large onions, chopped

1 or 2 green or red peppers, chopped

5 cloves of garlic, finely chopped

4 bay leaves

6 TBS chili powder

1 tsp dried chili flakes

2 cups of apple cider

8 cups of water

Salt to taste (at the end)

2 to 4 TBS maple syrup

Chopped cilantro, jalapeno and lime wedges for garnish (optional)

In a large, heavy pot, heat the olive oil.  Add the onion, bell pepper, garlic, chili powder, pepper flakes, bay leaves, and stir until soft and starting to brown.  Add 1 cup of the apple cider, and scrape up the brown bits and allow it to cook down by about half the volume.  This helps to concentrate the flavors of the aromatics (onions, bay leaf, etc).

It should look something like this.

Next add the squash, and the soaked beans, the remainder of the liquid, and allow to cook over medium to low heat for about 1 1/2 hours, or until everything is soft. Finish the stew by adding the maple syrup, and about 1 TBS salt (I find the beans and the squash really need lots of salt).  Stir and wait a few minutes before tasting.  Adjust with more syrup or salt if needed.

This is great served with the garnishes, some corn tortillas or corn bread, and a piece of cheddar cheese.  The warmth and sweetness create a harmonious and satisfying balance.

Lost Potatoes and the Simple Garden Dinner

Tonight's dinner was another super easy one and I averted yet another trip to the grocery store. First, I found some feral potatoes. I was turning over a plot of soil in the garden where the potatoes once stood and there they were, gnarly and red, asking why they had been forgotten. After a good scrub down, they got tossed into a pot of cold water and gently boiled until tender. Did you know potatoes should always start their cooking in cold water? That way, their temperature rises gradually and evenly. They don't end up with the dreaded mushy exterior and crunchy interior.

While the potatoes were cooking, I did a quick cabbage braise which turned out to be luscious and silky. Here is the recipe.

Braised Green Cabbage with Leeks and Apples (for 2)

1 TBS Butter and 1 TBS olive oil

1 leek, white part only, washed and sliced into 1/4 inch rounds

1/2 macintosh apple, peeled and seeded and slice into thin crescent slices

1/2 a small green cabbage, cored and sliced thinly (about 3 cups)

1/4 cup of cider vinegar

Sea salt

another TBS butter (optional)

Heat up olive oil and butter together over medium high heat. Add leek and stir occasionally for a few minutes until leek starts to soften. Add the apple and cabbage, and stir. Cook a few minutes, add the vinegar and salt to taste. Put a lid on the pot, and cook about 15 minutes. If there is too much liquid, you can take the lid off and raise the heat to boil off the extra liquid. Finish by adding more butter if you like.

This is great spooned over simple boiled or mashed potatoes. The sweetness of the apple and leek is a nice balance to the acidity of the vinegar.

This is also delicious, for the meat eaters among us, with some salt pork, bacon, or cured sausage. Just add it in at the beginning with the leek, and then let it simmer away. Reduce some of the butter or olive oil if you do the pork ad-ins.

Bon Ap.

The Rototiller and the Gym

straw in the garden

Every year, around October, I join a local gym and start to do arduous things indoors.  I don't love to exercise indoors, but it's a way to keep myself from going a little batty and  it means I can't use our foul weather as an excuse.  This year though, I am waiting a little longer to submit myself to the four walls and the machines and instead I am tilling my garden by hand.  With a fork.  You may be asking, what, pray tell has come over her? Well, two things....rototilling is bad for your soil and, yes,  I like the workout.  Those rototiller tines break up the titlth and structure of your soil, churning everything up too finely and forcing all of the organic matter to decompose too quickly, thereby not leaving the nutrients in the ground for next year's plants.  It also only works the top layer of the soil and leaves an untouched hard pan just a few inches below the surface--not ideal for root crops or any plant with a tap root. You can read about no-till agriculture here and here.  It is the newish trend in organic farming systems that copy how things were done a long time ago, before big farm machinery,  and has been proven to reduce carbon emissions by using fewer fossil fuels, and by storing carbon in plants rather than by losing it to the atmosphere when plant matter breaks down too quickly.  All this sounds like a great reason to park the rototiller permanently, but the truth is, I do it for other reasons as well.  I don't own a rottotiller; I don't like having to ask someone to do it, and I like the messy workout.  Here's how I did it this year. Back in the spring, I invested in about 20 bales of straw.  My garden is broken up into an odd assortment of rectangles connected with meandering paths.  It is a place that encourages inefficient wandering and discourages straight ahead speed. I love my garden for these qualities that make it an antithesis to the hassle and bustle of most days. And it's another reason a machine just doesn't work for me: I don't want one big rectangle with a bunch of straight rows.  Rather, I like my garden to have a series of mini gardens with their own mini rows and blocks. It makes for a beautiful patchwork quilt of vegetables.  So when I started to plant everything back in April and May, I covered up the paths and all the bare soil around the plants with lots of straw.  This did a great job of keeping down weeds and limiting the amount of water the plants needed.  I added more straw and pulled a weed here and there, but for the most part, found that the initial investment more than paid for itself in time spent swimming.

Now that the plants are done, I am going through and cutting down dead stalks, composting them in a corner along with some of Rosie and Pokey's donkey manure.  For crops that can be planted in fairly coarse soil, I will just leave the straw in place and come next spring, I will push the straw away, add a big scoop of compost, incorporate compost and soil, dig a little hoel,  and plant right into that.  I will add more straw too since so much of it will break down over the winter.

For prepping areas where I am going to be seeding first thing in the spring, I'll need a finer bed preparation which will be done in two phases.  Fall phase, now, is to push away the straw, churn up the soil with a four pronged pitchfork, smash it up a little, rake it smooth, and place the straw back on top.  This keeps the soil in place and does not allow erosion to do its thing.  Come April, I will push the straw back yet again, hoe and rake the bed to make the top layer of soil fine and not too chunky, and plant some seeds in little furrows.  The straw just waits in piles along the edge of the rectangle and gets spread out again once the seeded plants are about 6" to 8" high.  This requires a little weeding around the plants in between straw replacement times, but it's not too much.

This sounds like a lot of work, but it saves time come spring to prep as much of the garden as possible now.  I really like the benefit of seeing the soil texture improve year to year and each little rectangle of my garden seems to have its own characteristics.  It all feels very wholistic, a little messy, and not at all perfect.  I don't feel bad when some weeds get through the system because I will just pull them out or chop them down and layer them into the accumulated straw.  It's about your mulch being part of your fertility plan and it is about gadening without guilt.  The gym can wait another month while I play in the dirt a little longer.

Dropsies Dinner and Caffeine

From frugal and fabulous to dizzying drech....that is the risk of the home cooked meal.  Sometimes food blogs just sound a little too easy and full of grace.  The photos are perfectly shot, as if a food stylist lives in house, and the recipes and anecdotes that accompany those perfect shots are always well mannered, well dressed, and say all of the appropriate food things. Precious. Well, last night's dinner wasn't like that in our house.  I set out to make use of some butternut squash leftovers and one of the 8 heads of cabbage currently in residence in my fridge drawer.  A simple cheddar/squash souffle and some vinegary coleslaw with boiled dressing sounded good.  But first let me confess....I drank coffee earlier in the day. 2 large, strong cups of the stuff.  After many weeks of being coffee free, I could easily say it was a BIG mistake.  I have to tell myself that I am allergic to the stuff, period.  Must stay away.

I approached every ingredient as if it were a wild animal needing a fast chase, a violent catch, and followed by a quick wrestle and throw down into waiting  bowl or pot.  Eggs were smashed accidentally, lumpy squash was beaten to smoothness, without success, using the help of 2 different electric tools - the immersion blender zapper and the under sized hand held mixer - to no avail and butter was scorched before the roux could even get out the door.  Many pots, pans, spatulas, whisks and spoons later, I found myself "gently" folding in the egg whites with the grace of an elephant on speed.  The batter took up two different souflfe dishes (but one of them was just a brownie pan), and I slid both into the oven.  Of course, my impatience made me check on it too often, but still they rose and looked beautiful.  At least the one I didn't drop on the open oven door looked beautiful.  The spill victim turned into a lovely mess of charred egg and squash smeared all over the window of my oven door, filling the house with a toasty burned egg aroma.

The slaw was a little better, but I did manage to get small shreds of cabbage in every nook and cranny of the kitchen and I also tatsed the boiled dressing a little too soon after the said boiling point and still can't feel my tongue.  When all was done, we sat, opened a bottle of red (the cork broke in half and I plunged it with great relish down into the bottle, and we had a funny, even tasty meal.  Many jokes were made about the crazy housewife who possessed me and the effing souffle she felt compelled to make.  All because of some squash leftovers.

Frugal and Fabulous

My pantry is small, but pretty well stocked with staples.  Between that and the garden, it's easy to spend a week without going to the grocery store.  I get milk from Family Cow Farmstand, eggs from a neighbor, and a few items at the Burlington Farmers' Market during the summer.  The main thing I go there for is the cheese from Does' Leap Farm: they make the  best chevre I have ever had.  The feta is fabulous too, and I used it in this dish.  Having a garden, visiting the farmers' market, and having a well stocked pantry (I buy stuff like pasta, beans, and olive oil in bulk, when it is on sale) means you can throw together simple meals for not much money.  We stretched Sunday's dinner to make 8 meals over two days.  That comes out to ahout .33 a meal.  Pretty good, huh? I made this escarole feast after I noticed a huge, beautiful head of the stuff in the garden (wish I had a picture).  It's one of my favorite vegetables, and has to be grown to be appreciated.  The flavor gets kind of bitter if it sits in the fridge too long, but if you cook it up right after harvesting, it is magnificent...silky, unctuous yumminess.  Frugality means not being afraid of leftovers.  Often, I will cook one large meal and then stretch it by morphing it into other things.  Shape shifting dinners.  Here's what I made on Sunday night,  and a few ideas for the leftovers. You can substitute any other greens if you must, but really, you should  give escarole a try next year in your garden...it's pest free, super cold tolerant, and gorgeous.  But for now, there might even be a head or two with your name on it at the farmer's market.

Escarole and White Beans on Pasta

1 TBS olive oil

1 medium onion, chopped or 2 leeks (for a sweeter flavor), white parts only, washed and chopped

1 jalapeno, chopped (use the seeds if you like it hot. Mine came from the garden, not to brag or anything)

3 cloves of garlic sliced, minced, or crushed (all three ways produce different results, figure out what you like).

1 large head escarole, washed, but not chopped.  (mine came from my garden...wish I had a photo, it was gorgeous) or any other green you like -- chard, kale, mustard greens, arugula

1 can white beans (butter beans are my favorite)

1 box pasta, whatever you like

Optional garnishes -- fresh squeezed lemon juice, capers, feta or parmesan, another drizzle of olive oil.

Salt and Pepper to taste

  • Get your (salted) pasta water going in a large pot.
  • While that is coming to a boil, heat the olive oil in a large skillet or dutch oven type of pot.
  • Saute the onion or leeks, garlic, and jalapeno over medium high heat, stirring.
  • After about 5 minutes, when everything is softening and realeasing its aroma, dump in all of the escarole (still wet from being washed so that it creates some steam).  Put a lid on the whole pan and ignore it for a few minutes.  Open the can of beans, rinse them if you need to, dump them on top of the escarole and put the lid back on for a few more minutes.
  • By now, you should also be cooking your pasta to the toothsome al dente point - i.e. not mushy.
  • Stir up all the escarole and beans so that they are evenly distributed, and season with the salt and pepper to taste.
  • Drain the pasta, reserving a little of the cooking liquid if you want to stir it into the finished dish later if it seems dry.
  • You can combine noodles with the vegetables in the big skillet or pot, or alternately, you can serve big shallow bowls of pasta with the veggies on top, passing the optional garnishes around at the table.

This is a great dish to serve reheated as is, or you can turn it into a stew by reheating it with some broth.  I also love it with an egg cracked on top, and steam poached: just put the lid on the pot you are using and make sure there is enough liquid or fat in the bottom of the pan so that nothing sticks.   Super simple, and super yummy.  The escarole becomes silky, with a little bit of pleasant bitternes and the garlic and jalapeno balance it all out.  Bon Ap!

Chicken Broth Medicine and Reconstructed Soup

Last night, I made 2 gallons of chicken broth using 2 chickens from Shuttleworth Farm, an armful of mixed herbs (sage, lovage, thyme, rosemary, winter savory, and parsley), the tops of many leeks, a handful of carrots, some onions, bay leaf, peppercorn, and salt.  I let everything cook very slowly on medium to low heat in a big stock pot for about 3 hours.  The key is to never let anything boil...that is what makes the chiken rubbery and the broth cloudy (I am sure there are some food science explanations, I am merely going from experience.) I strained the broth, let it cool and filled up empty yogurt containers for the freezer (leaving a few inches of head space since liquids expand when they freeze).   The broth is a rich golden, green color and will be pulled out whenever I want to make a quick soup using whatever ingredients are around during the winter.  I reserved one of the cooked chickens for last night's dinner, more on that below; and with the other bird, I took all of the meat off the bone and it will go into chicken salads and such for the rest of the week.  I think using two whole birds makes such a rich broth, but it does leave a lot of meat to use up.

For dinner, I saved about a half gallon of broth, placed it in a 7 qt pot and added whole peeled carrots, potatoes, and leeks (white part only, carefully trimmed and washed).  I let the broth and veggies come to a gentle boil, and waited about 40 minutes. I served this in shallow bowls with a parsley salad, and good sea salt. In France, there is usually dijon mustard as a condiment with this, but I am all out right now.  This is one of my favorite fall and winter meals, along with some of the poached chicken,  a sort of reconstructed chicken soup.  In French it is called Poule au Pot.  (Hen in Pot).  It is the poultry cousin to Pot au Feux, (Pot on Fire)  which is made with beef -- brisket, short ribs, chuck.  And uses the same method described above.  Using fresh vegetables cooked in strained broth is preferable eating the vegetables that have simmered in the stock pot for a few hours thus becoming a wee bit mushy.

Herb Salad is the perfect accompaniment to so many things.  Parsley is probably my favorite.

Parsley Salad

2 cups chopped parsley

3 scallion, washed and chopped finely

Juice from 1/2 a lemon

1 TBS good olive oil

Sea salt to taste

Mix everything together.  Let sit about 20 minutes before serving so that the flavors combine.

Privacy from the Traffic to the Secret City

I like to plant perennials and woody ornamentals in the fall for two reasons: one, I finally have the time to do it, and two, they benefit from the cooler temperatures and the rainy days.  Today, I am planting a privacy screen between our house and the noisy road we live on.  While it's still a country road, the traffic is such that we cannot simply tune it out. There are cars every few minutes, and they are going way too fast.   We've determined there is a secret city over the ridge and all these cars are in a terrible hurry to get there.

My privacy planting is mirroring one that I already planted on the other side of the walk way.... Nine bark - those are the tall burgundy shrubs (Physocarpus), sedums (Autumn Joy and Madrona), some ornanmental grasses, some fall pink asters, and some heuchera or coral bells (Purple Petticoats).  Underneath, I will stash a bunch of pale Pink Emperor tulips and a few white daffodils.  I love keeping color combinations harmonious season to season and this creates a nice range of pinks, deep reds and maroons.  The grasses fill in to give it a naturalistic look and it only takes about two years for everything to grow up enough to become an 8 foot screen. I will stick in a few kale and chard plants come spring for the mandatory (in my mind) edible component.  In an effort to practice Gardening Without Guilt, I grow very practical plantings that will always accomplish a few of my gardening goals -- easy maintenace (it's okay if there a few weeds in there since it all looks like it belongs), habitat for wildlife (the birds and pollinators love these groupings of plants), beauty (to my eye at least) and harmony with some lovely edible plants (in this case it will be chard, kale and a few herbs).  The closer to the house we plant edibles, the more we will eat them and tend to them.  And by using plants for a privacy screen, we are not seeing the cost of and avoiding the aesthetic impact of a tall fence.

Pokey and Rosy

My plan is to add a few wheelbarrow loads of our compost, made from donkey manure (thanks to Pokey and Rosy, above), kitchen scraps, and garden debris.  Then I will work it all into the soil which was tilled up several weeks ago (and,no, I have not kept up with the weeding in the meantime).  The planting holes should be a couple of times bigger than the root ball of the plant, that way the soil can be loosened and worked up to create a welcoming home for newly spreading roots.  I don't add any fertilizer when planting in the fall because it encourages tender new growth that will not fare well in our frigid winters.

I like these types of plantings for the simple pleasure they provide as they grow up and the effect they have of anchoring the house into its place, making it more of a home and sheltering it from all those cars speeding off to their secret city.  I'll post a picture when I am finished.

Extra! Extra! 85 pounds of food from one plant.

Help!  Today has brought in a rainy September morning and a houseful of the ubiquitous butternut squash.   I just can't believe that one plant could produce 17 (!!!) giant squashes (85 pounds).   Some will go to the food shelf and some will go to friends (watch out). The truth is, I thought that I had planted delicata squash, which is my favorite, not butternut.  Whoops.  Soups, gratins, and stuffed squash will be on our table this fall and, thankfully, the squashes keep well into winter, but I am sure my people will be tired of eating butternut long before it runs out. Here is a recipe I love, and it will use up about 1/17th of my harvest....

Butternut, Cheddar and Sage Gratin

This needs only a green salad.  It's a hearty dish.

  • one peeled and cubed (1/2" or so) butternut squash
  • 1 TBS butter
  • 1 medium onion, roughly chopped
  • 1 clove of garlic minced or pressed
  • 1/4 cup of finely sliced, fresh sage leaves
  • a drizzle of olive oil
  • salt and pepper to taste
  • 1/4 c heavy cream
  • 6 oz grated cheddar cheese (I like sharp)

Preheat oven to 350.

Melt butter in a cast iron or other heavy skillet.  Over medium heat, add onion to melted butter and stir until it begins to soften (about 4 minutes). Add sage leaves and garlic.  Drizzle in some olive oil (about 1 or 2 TBS) and stir until fragrant and onions start to caramelize. (About 12 minutes)

Add squash to a butter or oiled 9 x 13" baking dish.  Toss in the onion and sage mixture, the cream, and salt and pepper to taste. Use your hands or utensils to get a good blend of all the ingredients.  Cover with foil and bake in preheated oven for about 40 minutes.  Take out the dish, remove the foil, turn up the oven to 450, cover squash with the cheddar cheese and return to oven until brown and bubbly, about another 20 to 30 minutes.  You can even turn on the broiler for a minute or two at the end to really make the top brown.

This freezes well.  It's great for potlucks and any other time you want to feed a crowd.

Planting the Perfect Pumpkin

We all want that giant, magical pumpkin come harvest time.  Here are a few tips to get you there.  Pumpkins are related to cucumbers, melons, summer squash, zucchini, and winter squashes and all of the vegetables in this family will benefit from this treatment. Warm soil. In Vermont wait until early June to put out the plants--a good rule of thumb is to wait until we have had a few nights above 50 F degrees. Transplants do better than seeds since you will have a head start on the season and don't risk having seeds rot in cold soil or be eaten by the local rodent.  It's best to keep two plants together when transplanting since the larger volume of foliage will help shade out weeds later in the season.

A raised bed or mound. This will help warm the soil and improve drainage.  It also gives the plants' shallow roots a place full or looser soil to spread without strain.

Lots of fertility. Compost is a  must for successful pumpkins, squashes, cucumbers and melons.  At home, we use rotted donkey manure (thanks to Pokey and Rosy) mixed with well composted yard debris (leaves, grass clippings) and food scraps.  More can be learned about compost at the Vermont Compost Company website.  A little granular fertilizer can be used as well if you do not have access to good compost and/or very poor soils.  A soil test is always a good idea, and can be done easily at your local extension office.

Adequate water. One inch a week.  That means that if it does not rain, you should gently pour about 3 gallons of water at the base of your plants.  A slow drip irrigation system or soaker hose is a great option as well.

Full sun. There is no compromise on this one.  The plants must have at least 8 to 10 hours of full sunlight.

Lots of room.  Plants (actually, groups of 2 plants) should be at least 3 feet apart. They need that much space for proper ventilation and so that the flowers and foliage are exposed to pollinators and sunlight.

Pollination. Plant a few bee friendly plants such as calendula, borage, mint and salvias around your garden to attract bees and other beneficial insects.  Cucurbit plants have male and female flowers on each plant and have to be pollinated by insects.  Welcoming bees to your garden will help yields since more female flowers will become pollinated--the only way for them to produce fruit.

Harvest at the right time. Winter squashes and pumpkins should be harvested when the skins are hard and cannot be pierced by your thumbnail.  Summer squashes and cucumbers and zucchini should be harvested at whatever stage you like to eat them, from baby to baseball bats.  Watermelons are harvested when the tendrils on either side of the attaching stem are dead and the yellow spot on the bottom of the fruit (where it rests on the ground) is a deep yellow, and when thunking the fruit with your knuckle produces a hollow sound.  Cantaloupes are ready when they slip off the vine with a gentle tug (called the "half slip stage").  Melons take a little trial and error to learn to harvest at the right time, but a good rule of thumb is "if in doubt, wait."

The Autumn Garden: Time to Gather and Restore

With these colder days also come a chance to produce a few more late season greens in the vegetable garden. These include lettuce, kale, parsley cilantro, arugula, mustard greens and spinach. Here is a simple system that can be followed by anyone wishing to extend the fall and winter harvest.

Julie's Introduction

If you ask me, September is the best month in the garden.

The warm season crops are still doing well (in theory) and the colder season crops are starting to come back, thankful for the cooler nights.

The harvest basket seems to just fill itself up the minute I step into the straw mulched paths, pausing for a moment to ask if I should eat the raspberries before or after I do a little grunt work.

But while all of this pastoral musing seems idyllic enough, there are some other thoughts in the nether layers that I need to reckon with.

First of all, why is my garden so big?

Why is it that every April, the month of good intentions, I decide that this is the year I will finally find time to keep everything weeded and tended?

As we slide from April to September, my good intentions are slowly eclipsed by my desire to spend summertime in places other than the garden. I love to bike, hike, swim, row, travel, read in the hammock, and yes, I love to cook, hence the garden. But gardening feels like work when it is 95 F and the weeds are scratching my neck.

I used to feel guilty about all of this, but now I have learned to cope with the ebb and flow of my gardening enthusiasm-- what I am working on now is gardening without guilt.

While it is true that I am very passionate about gardening, I realize that there is a seasonal drive to every aspect of this hobby. Every gardener must come to terms with his or her own type of engagement in the garden. There is no right or wrong way to garden. There is beauty and purpose in every type of garden and what matters most is that a garden meets the needs of the gardener, not the other way around. Gardens without guilt are places of liberation and revelation....a place to accept both our shortcomings and our successes.

The food coming out of my garden this year is bountiful as always, and I have managed to learn a few things which have made the garden easier to manage in spite of its size. Over the next few months as we go through another autumn and winter cycle, I will reflect on what gardening means to me, what I do with the food from my garden, and how I go about deciding what to grow at Red Wagon Plants.

As I share these thoughts with you, I encourage you to share your notions about The Garden. What works well for you? What are the disasters? How does your garden fit into your life? This garden journal is a collective effort between the people of Red Wagon Plants and the family of customers created by all of those young plants going out into the world of our gardens. We hope you will share the thoughts you glean this season and keep the conversation going until we see you again in the spring.