

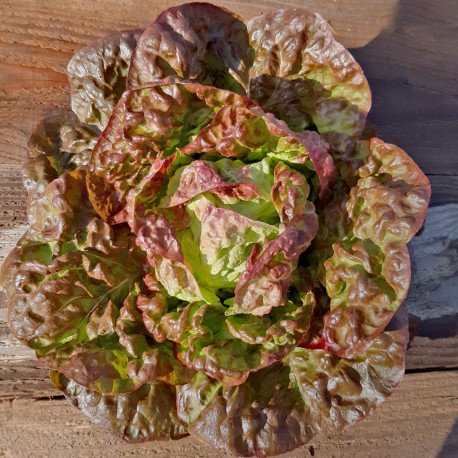
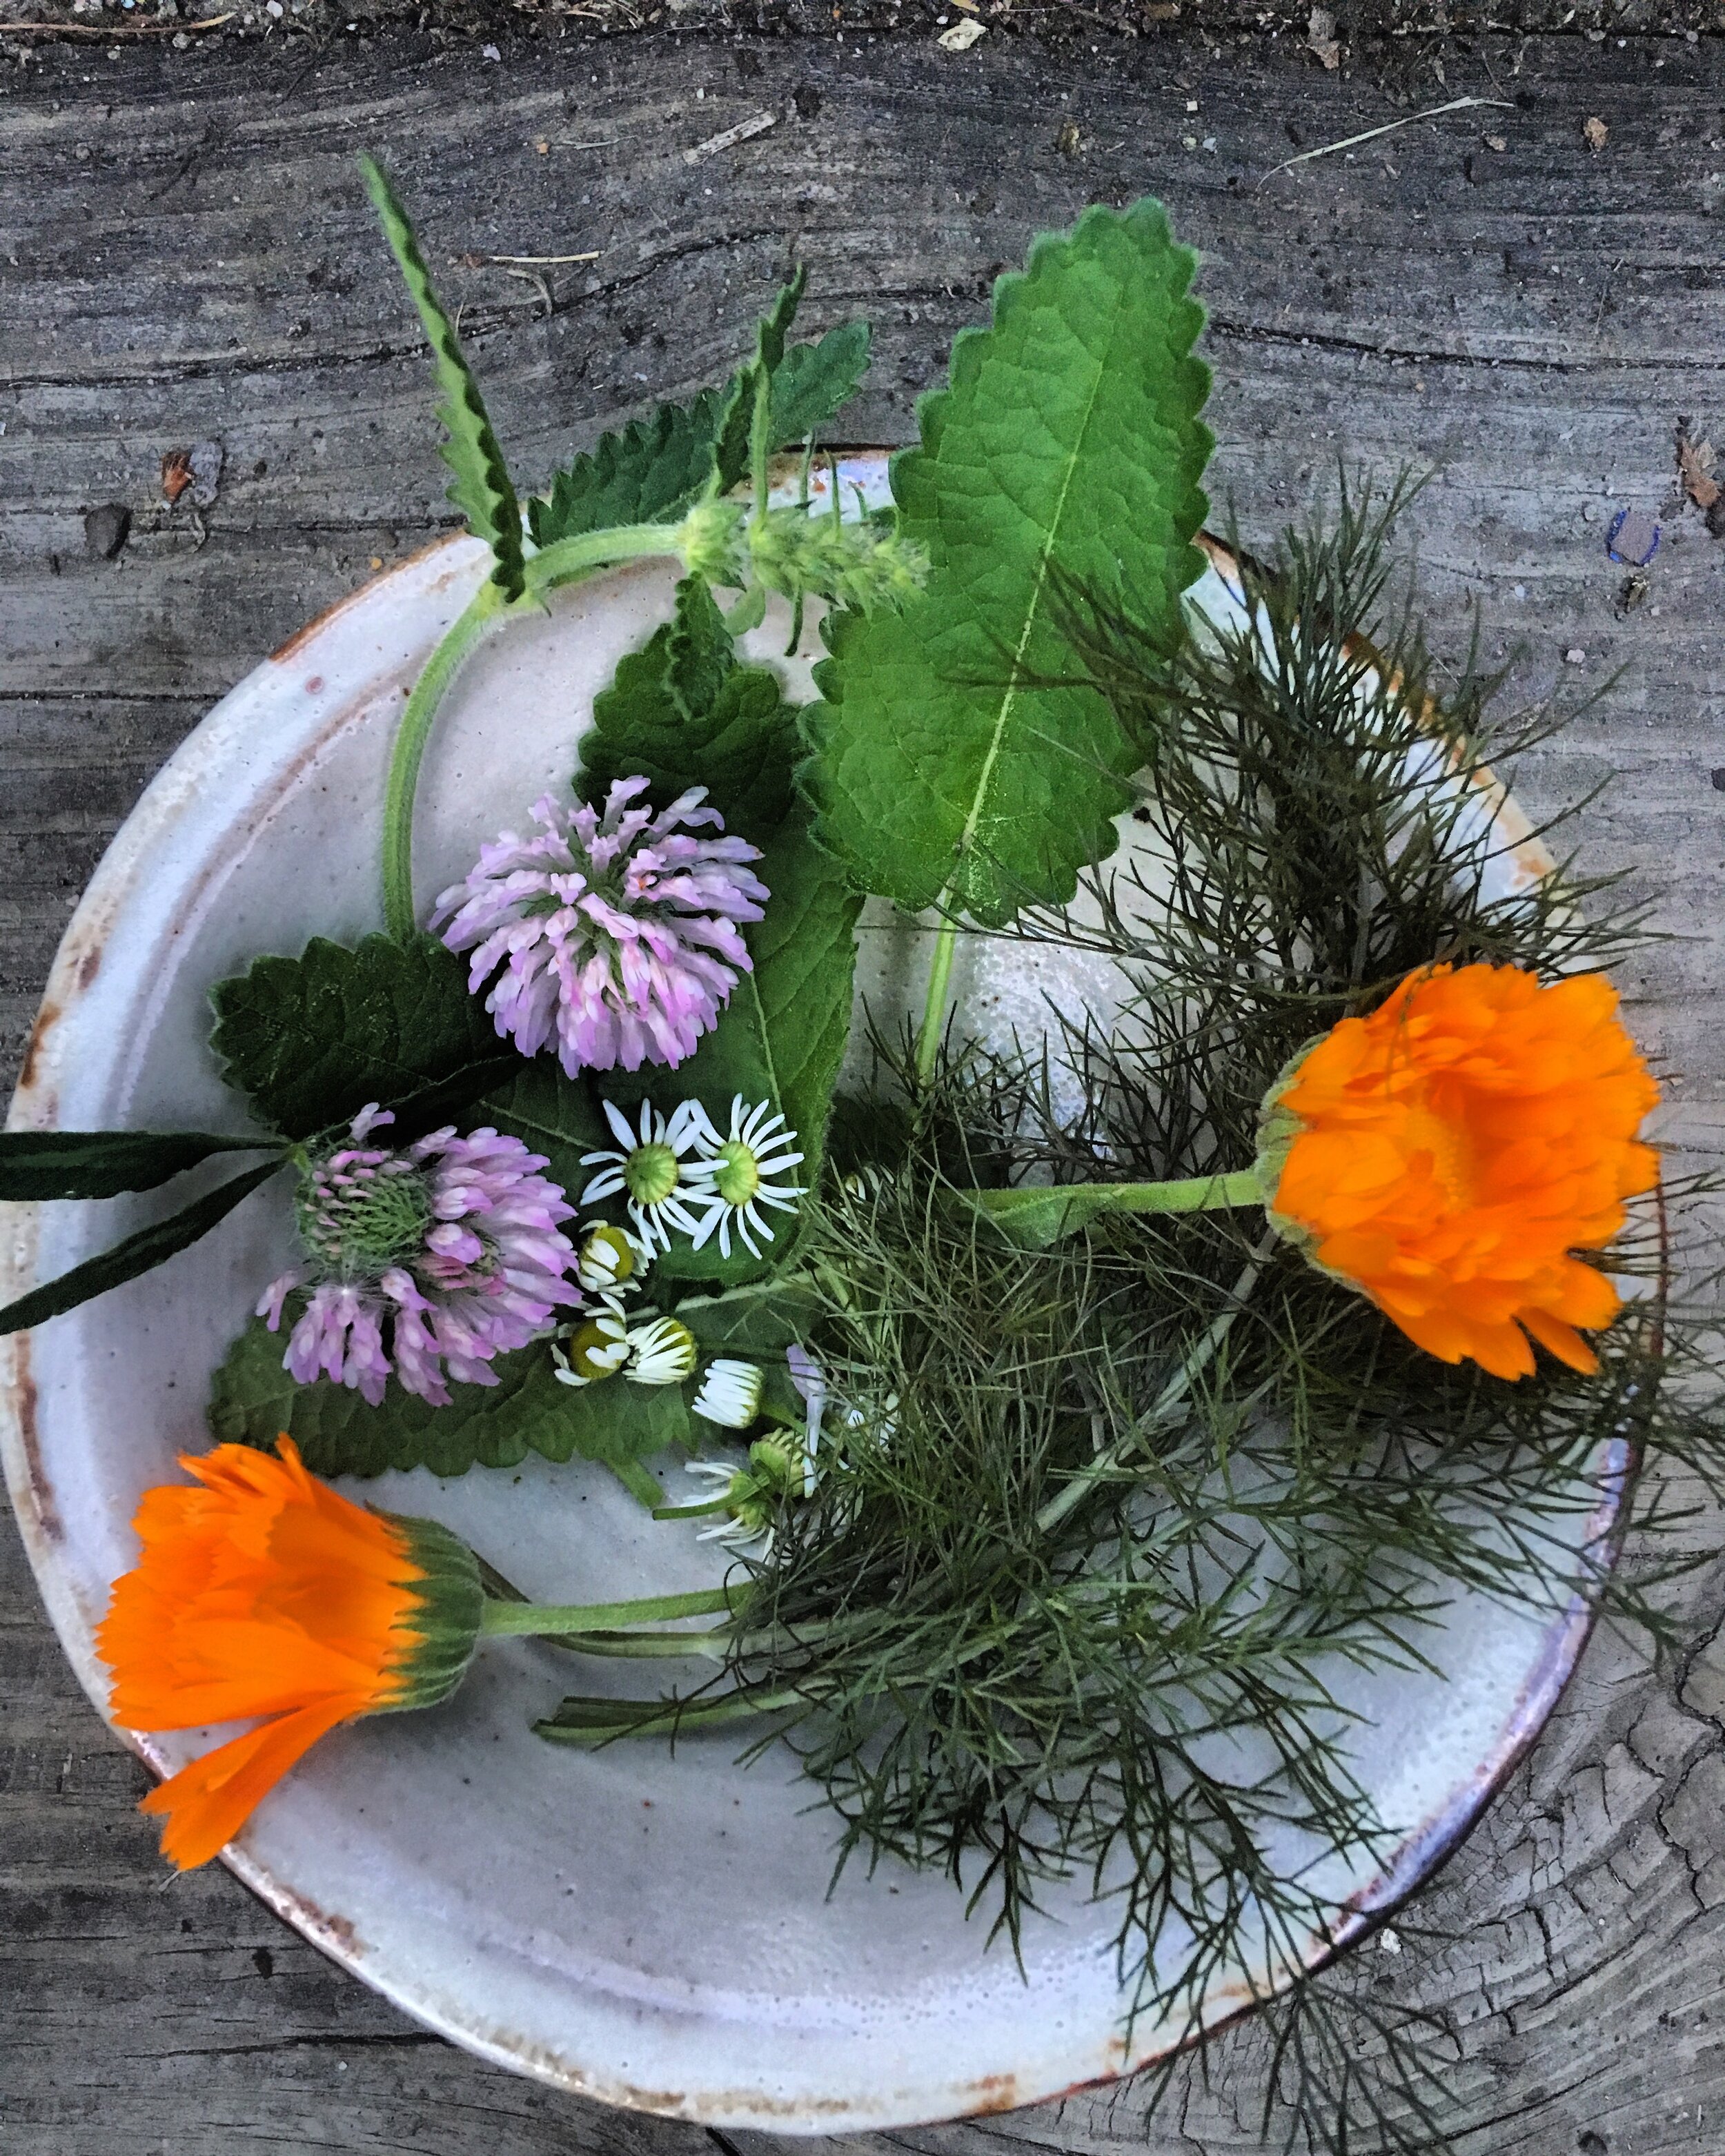
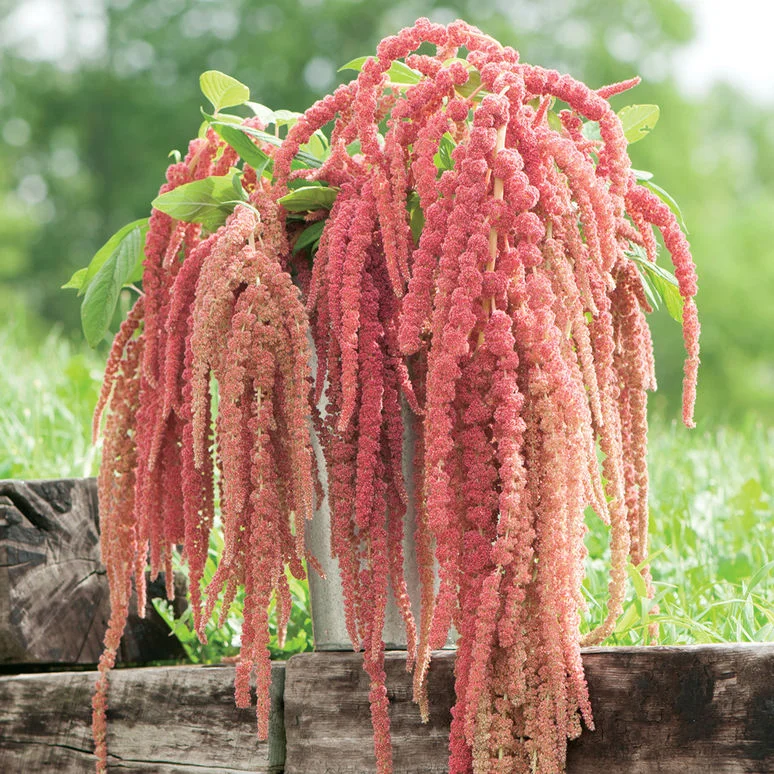
Growing Elderberries

Elderberries have become somewhat of a superstar as a home remedy for wintertime colds and flus. The berries can’t be eaten raw - they are actually toxic and cause stomach upset - but they cook down to a wonderful syrup or jelly. Elderflowers are equally delicious with their delicate floral notes and can be made into a syrup or cordial. Another way to enjoy elderflowers is by turning them into fritters and serving them as a savory snack or sweet treat.
Birds are just as excited about elderberries as we are and they will eat them all away if you don’t cover them - or you can grow them just for wildlife to enjoy.

This blog post was written by Kat Consler.
The Lemon-Scented Garden
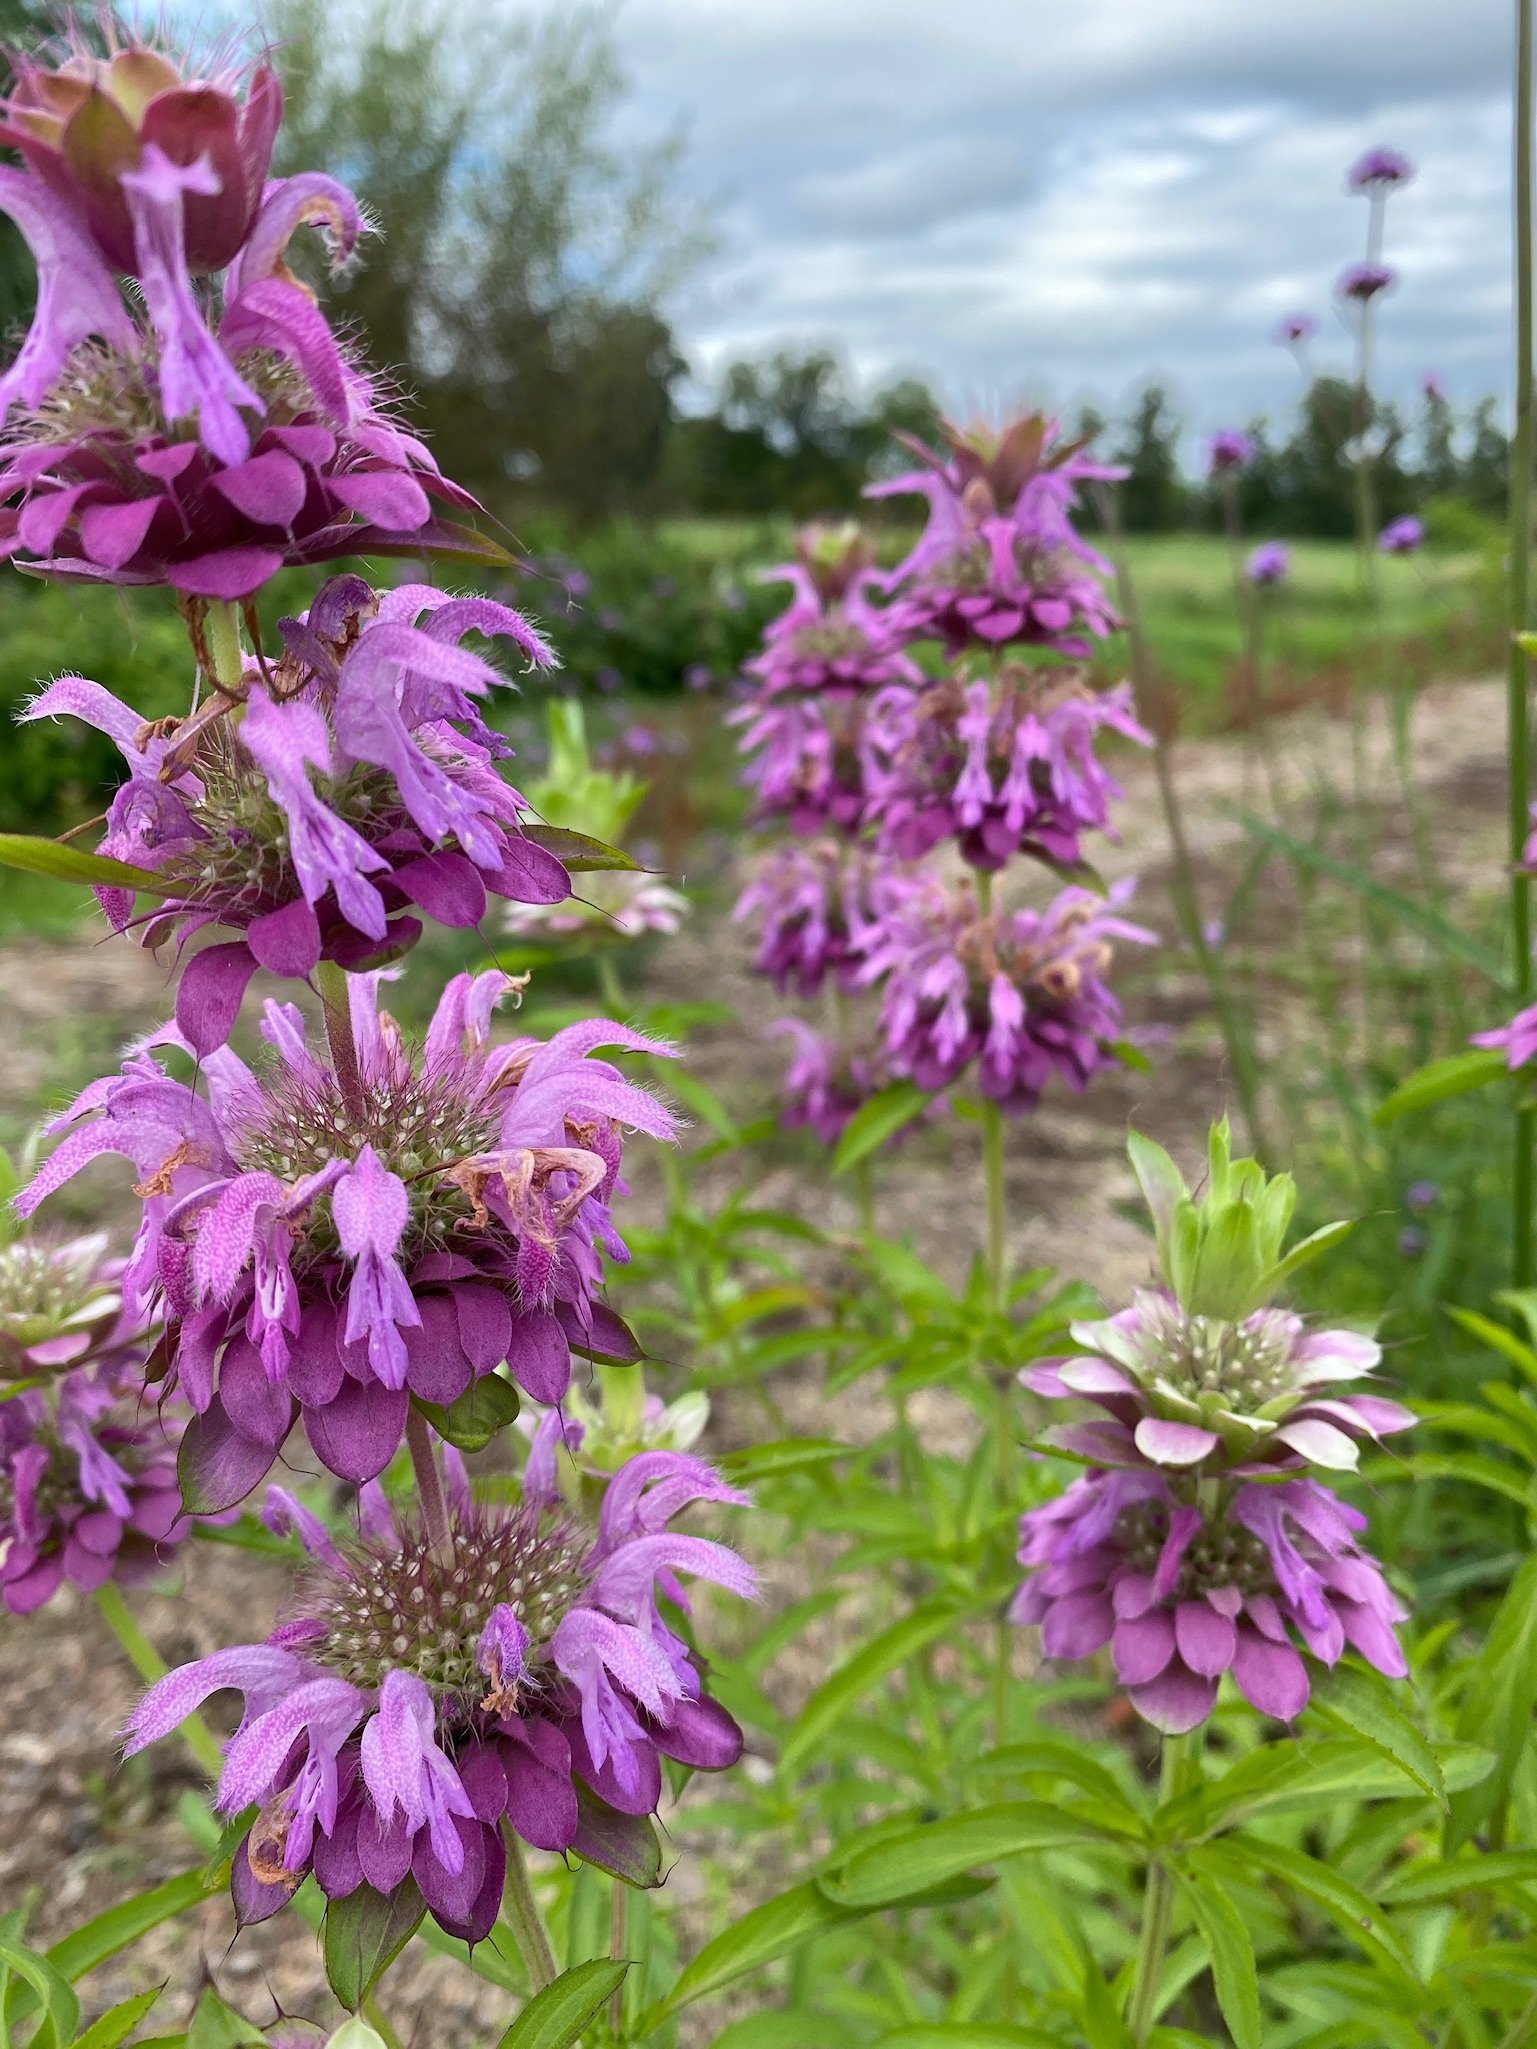
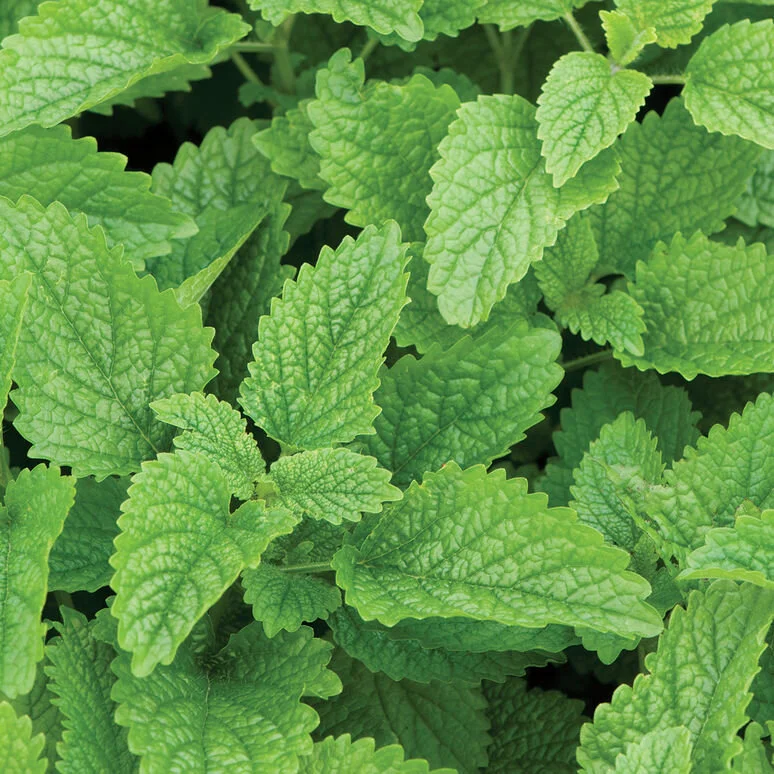
Lemon bergamot
If you wander through the herb section of our greenhouse, you’ll notice quite a few plants with “lemon” in their name. While their aromas and flavors differ slightly, these herbs all offer a bright, citrusy scent that will perfume the herb garden as well as your kitchen.
Many of these lemony herbs are actually in the mint family (Lamiaceae), a group of plants already well known for their diverse and potent aromas, thanks to high concentrations of volatile oils that are encased in bubble-like trichomes on the leaves and flowers. When the leaves are rubbed or dropped into hot water the trichomes open up, offering the heady aromas and flavors we have come to love.
Lemon balm (Melissa officinalis) is a beloved herbal remedy that is as tasty as it is healing (we love it so much we already wrote a whole blog post about it). The plant itself is a mounding perennial that grows about two feet high and up to three feet wide. Harvesting the leaves for fresh or dry tea will also help this plant keep its shape.
In the kitchen garden, lemon basil and lemon thyme are indispensable. At Red Wagon, we love layering piles of fresh lemon basil underneath a chicken before grilling or roasting it. And lemon thyme is fabulous both fresh and dried. Crumble the dried leaves into soups, rubs, and marinades to impart a citrusy zest all season long- no real lemons required. Lemon basil is an annual, but lemon thyme may perennialize if it’s happy, similarly to lavender in the northern garden.
The fourth member of the lemon-scented Mint family is lemon bergamot (Monarda citriodora), with no relation to the citrus plant Bergamot orange. This plant has a lovely upright habit and tall pink flower spikes that pollinators adore. Use the leaves and flowers in tea, where it offers a lemony, floral aroma with a hint of spice, although less potent than its cousins, lavender and scarlet bee balm. Unlike those species, M. citrodora is an annual, although it may self seed in the garden. Try planting alongside Verbena bonariensis and clary sage for a riot of fragrance and pollinator attraction.
Lemon verbena (Aloysia tryphilla) is one of the most potently fragrant lemon-scented herbs. Grown as a woody perennial in warmer climates, in Vermont it does well in a pot, brought inside to overwinter. The coarse, lanceolate leaves are full of citrusy aroma and flavor. Bring bunches inside to perfume the home, and blend into teas and simple syrups. For a very Mediterranean tea blend, toss a few lemon verbena leaves and a sprig of fresh rosemary into a cup and fill with hot water. It’s a simple afternoon pick-me-up with no caffeine and a delicious, easy-to-love flavor.
Perhaps the most well known lemony herb is lemongrass (Cymbopogon citratus). While the cool Vermont summer doesn’t produce stems that are quite as thick as what you will see in stores, it’s still easy to grow this grassy annual in a pot or herb garden for fresh use. To best retain the full flavor, cut back and freeze the stalks at the end of the season- you will capture more of the citrusy essence than with dried leaves. The leaves have a tough texture, so they’re best used similarly to a bay leaf and removed after cooking. We like to infuse coconut milk with homegrown lemongrass before adding it to soups and curries.
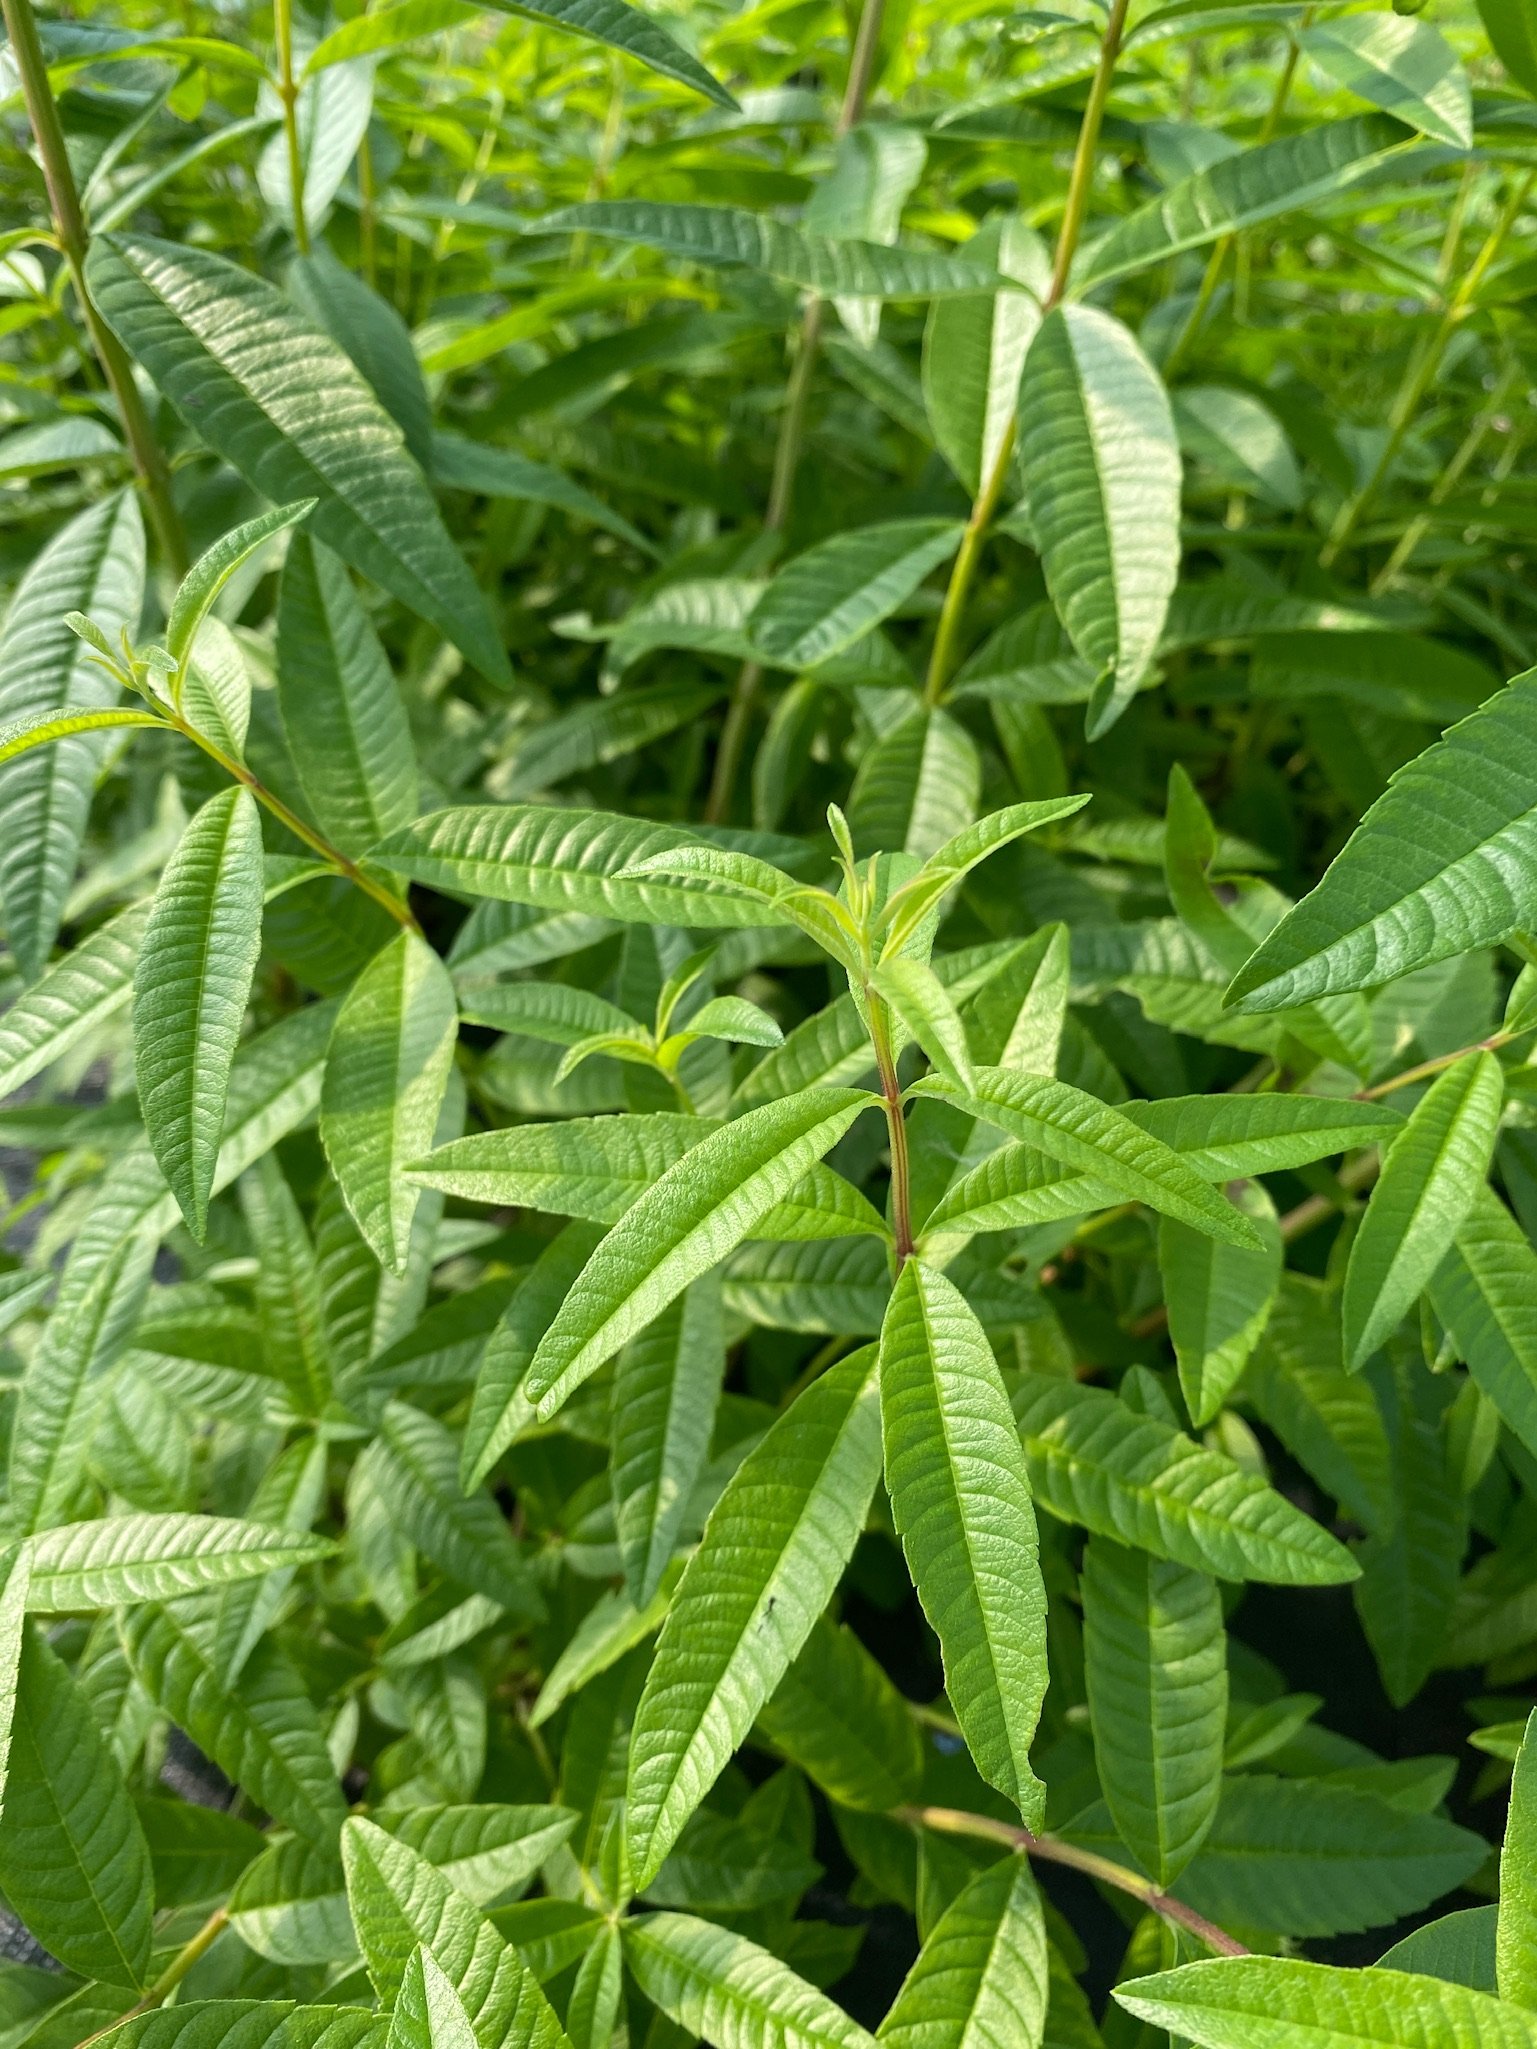
Lemon verbena in our high tunnel
Growing Gourmet Greens
We are growing some truly gourmet greens this year for you to try out in your garden. In addition to adding new flavors to your plate, many of these vegetables have better pest, disease and heat tolerance than some of the more commonly grown vegetables like spinach or arugula. If you love growing your own salad, you should pick a few of these to try this year!
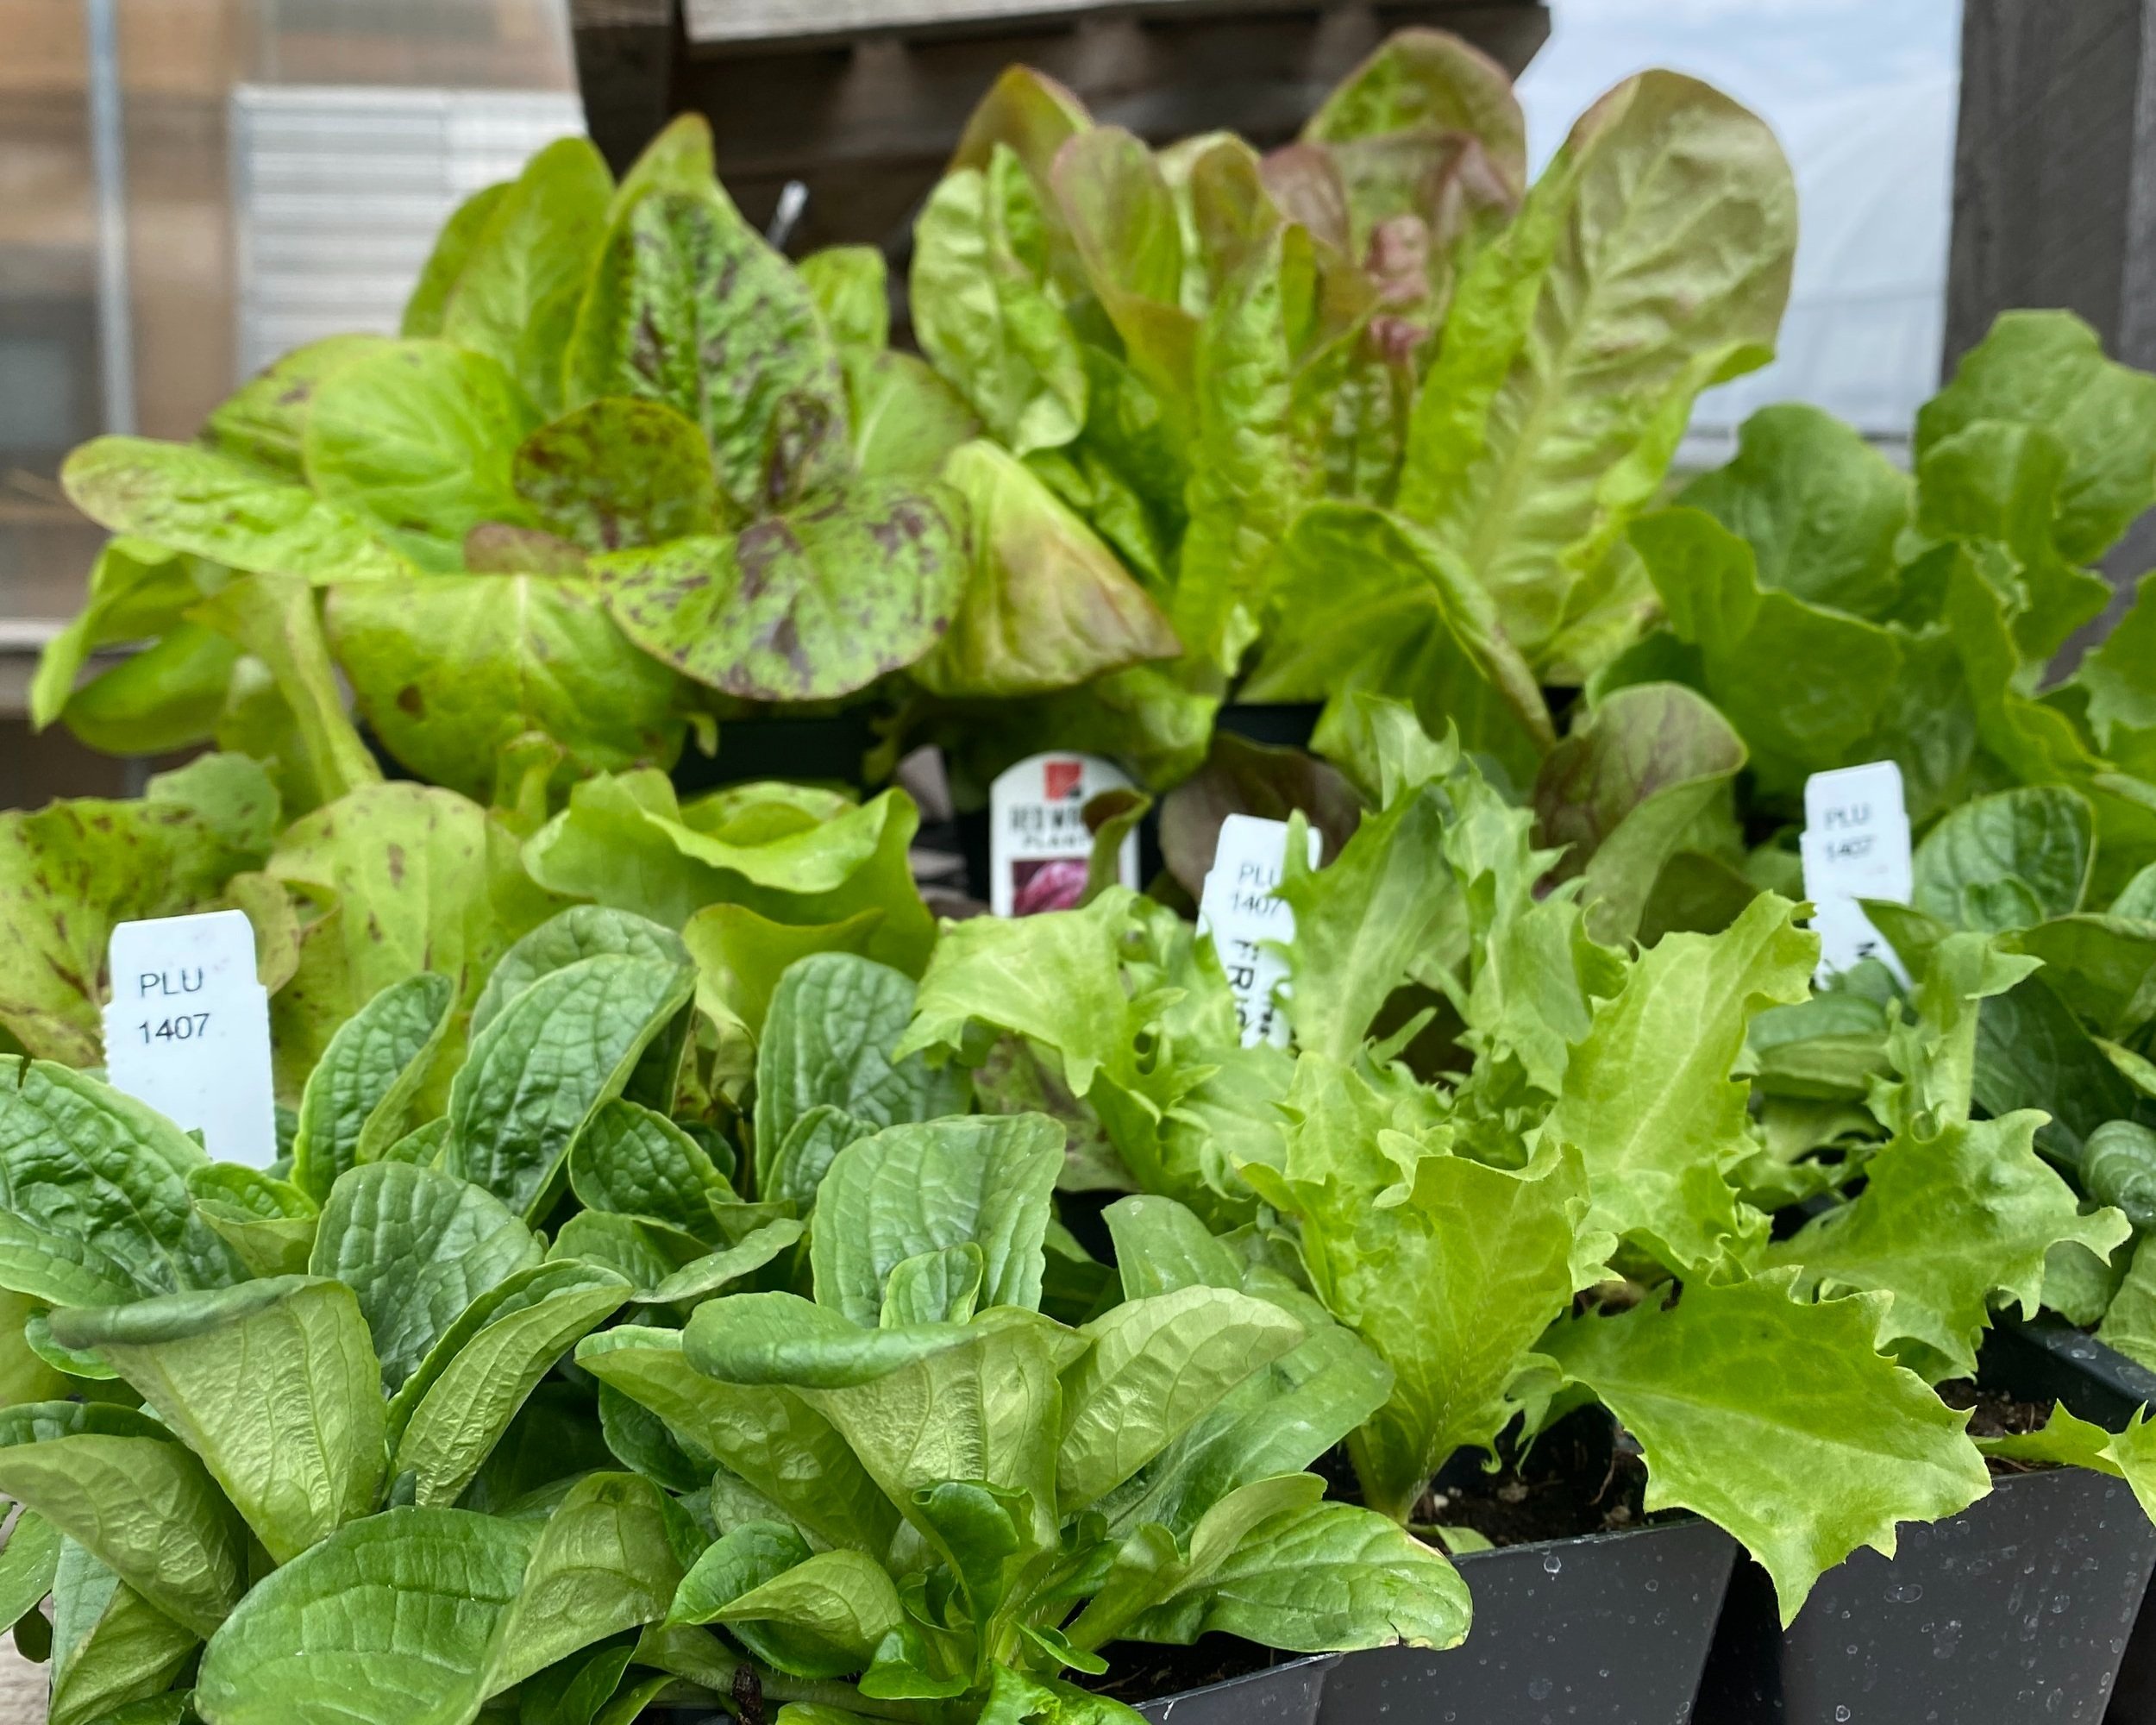
Mache- Mache is the best cold-season salad green, and woefully underutilized given our long, cold spring climate. Sweet, thickly textured glossy green leaves add depth and nutty flavor to your salads, and are best eaten as a whole plant, cut right above the roots. Wash well and dress lightly with olive oil, hazelnut oil, or walnut oil, a squeeze of lemon and some good sea salt.
Radicchio- This spring we have a few radicchio varieties available: Leonardo, Virtus, and Bel Fiore, and you should try growing them all. These chicory family members develop small, cabbage-like heads that are mildly bitter, with a delicious crunch that make them ideal for raw salads, dressed with a creamy vinaigrette. They are also delicious grilled or broiled. All radicchios prefer cooler growing temperatures and are mildly frost-tolerant, so they’re a great option for the early spring garden. Plant again in the late summer for fresh greens that will last well into the fall.
Frisée- Another member of the chicory family with frilly, finely cut leaves that mature into a giant head. Use the young leaves in salad, or allow the head to fully mature, when the center will blanch and become extra tender.
Escarole in the garden
Merveille des Quatres Saisons
Escarole- A staple of Italian cooking, escarole shines as a cooked green alongside brothy white beans. When growing, patience is an asset, as the flavor improves and the inner leaves become more tender when allowed to fully mature. Pale inner leaves are great raw in salads.
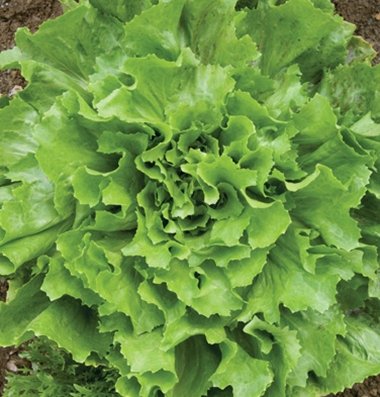
If you’d prefer to stick with the more familiar head lettuce, you can still experiment with some new varieties! Two of our favorites are Merveille des Quatres Saisons and Forellenschluss. Merveille de Quatres Saisons is a French heritage variety that translates to “Marvel of Four Seasons”, and it lives up to the name with sweet, red-tipped bibb leaves that produce in all types of weather. Forellenschluss, AKA Speckled Trout Back, is an Austrian heirloom romaine that boasts speckled leaves and grows well through the summer heat.
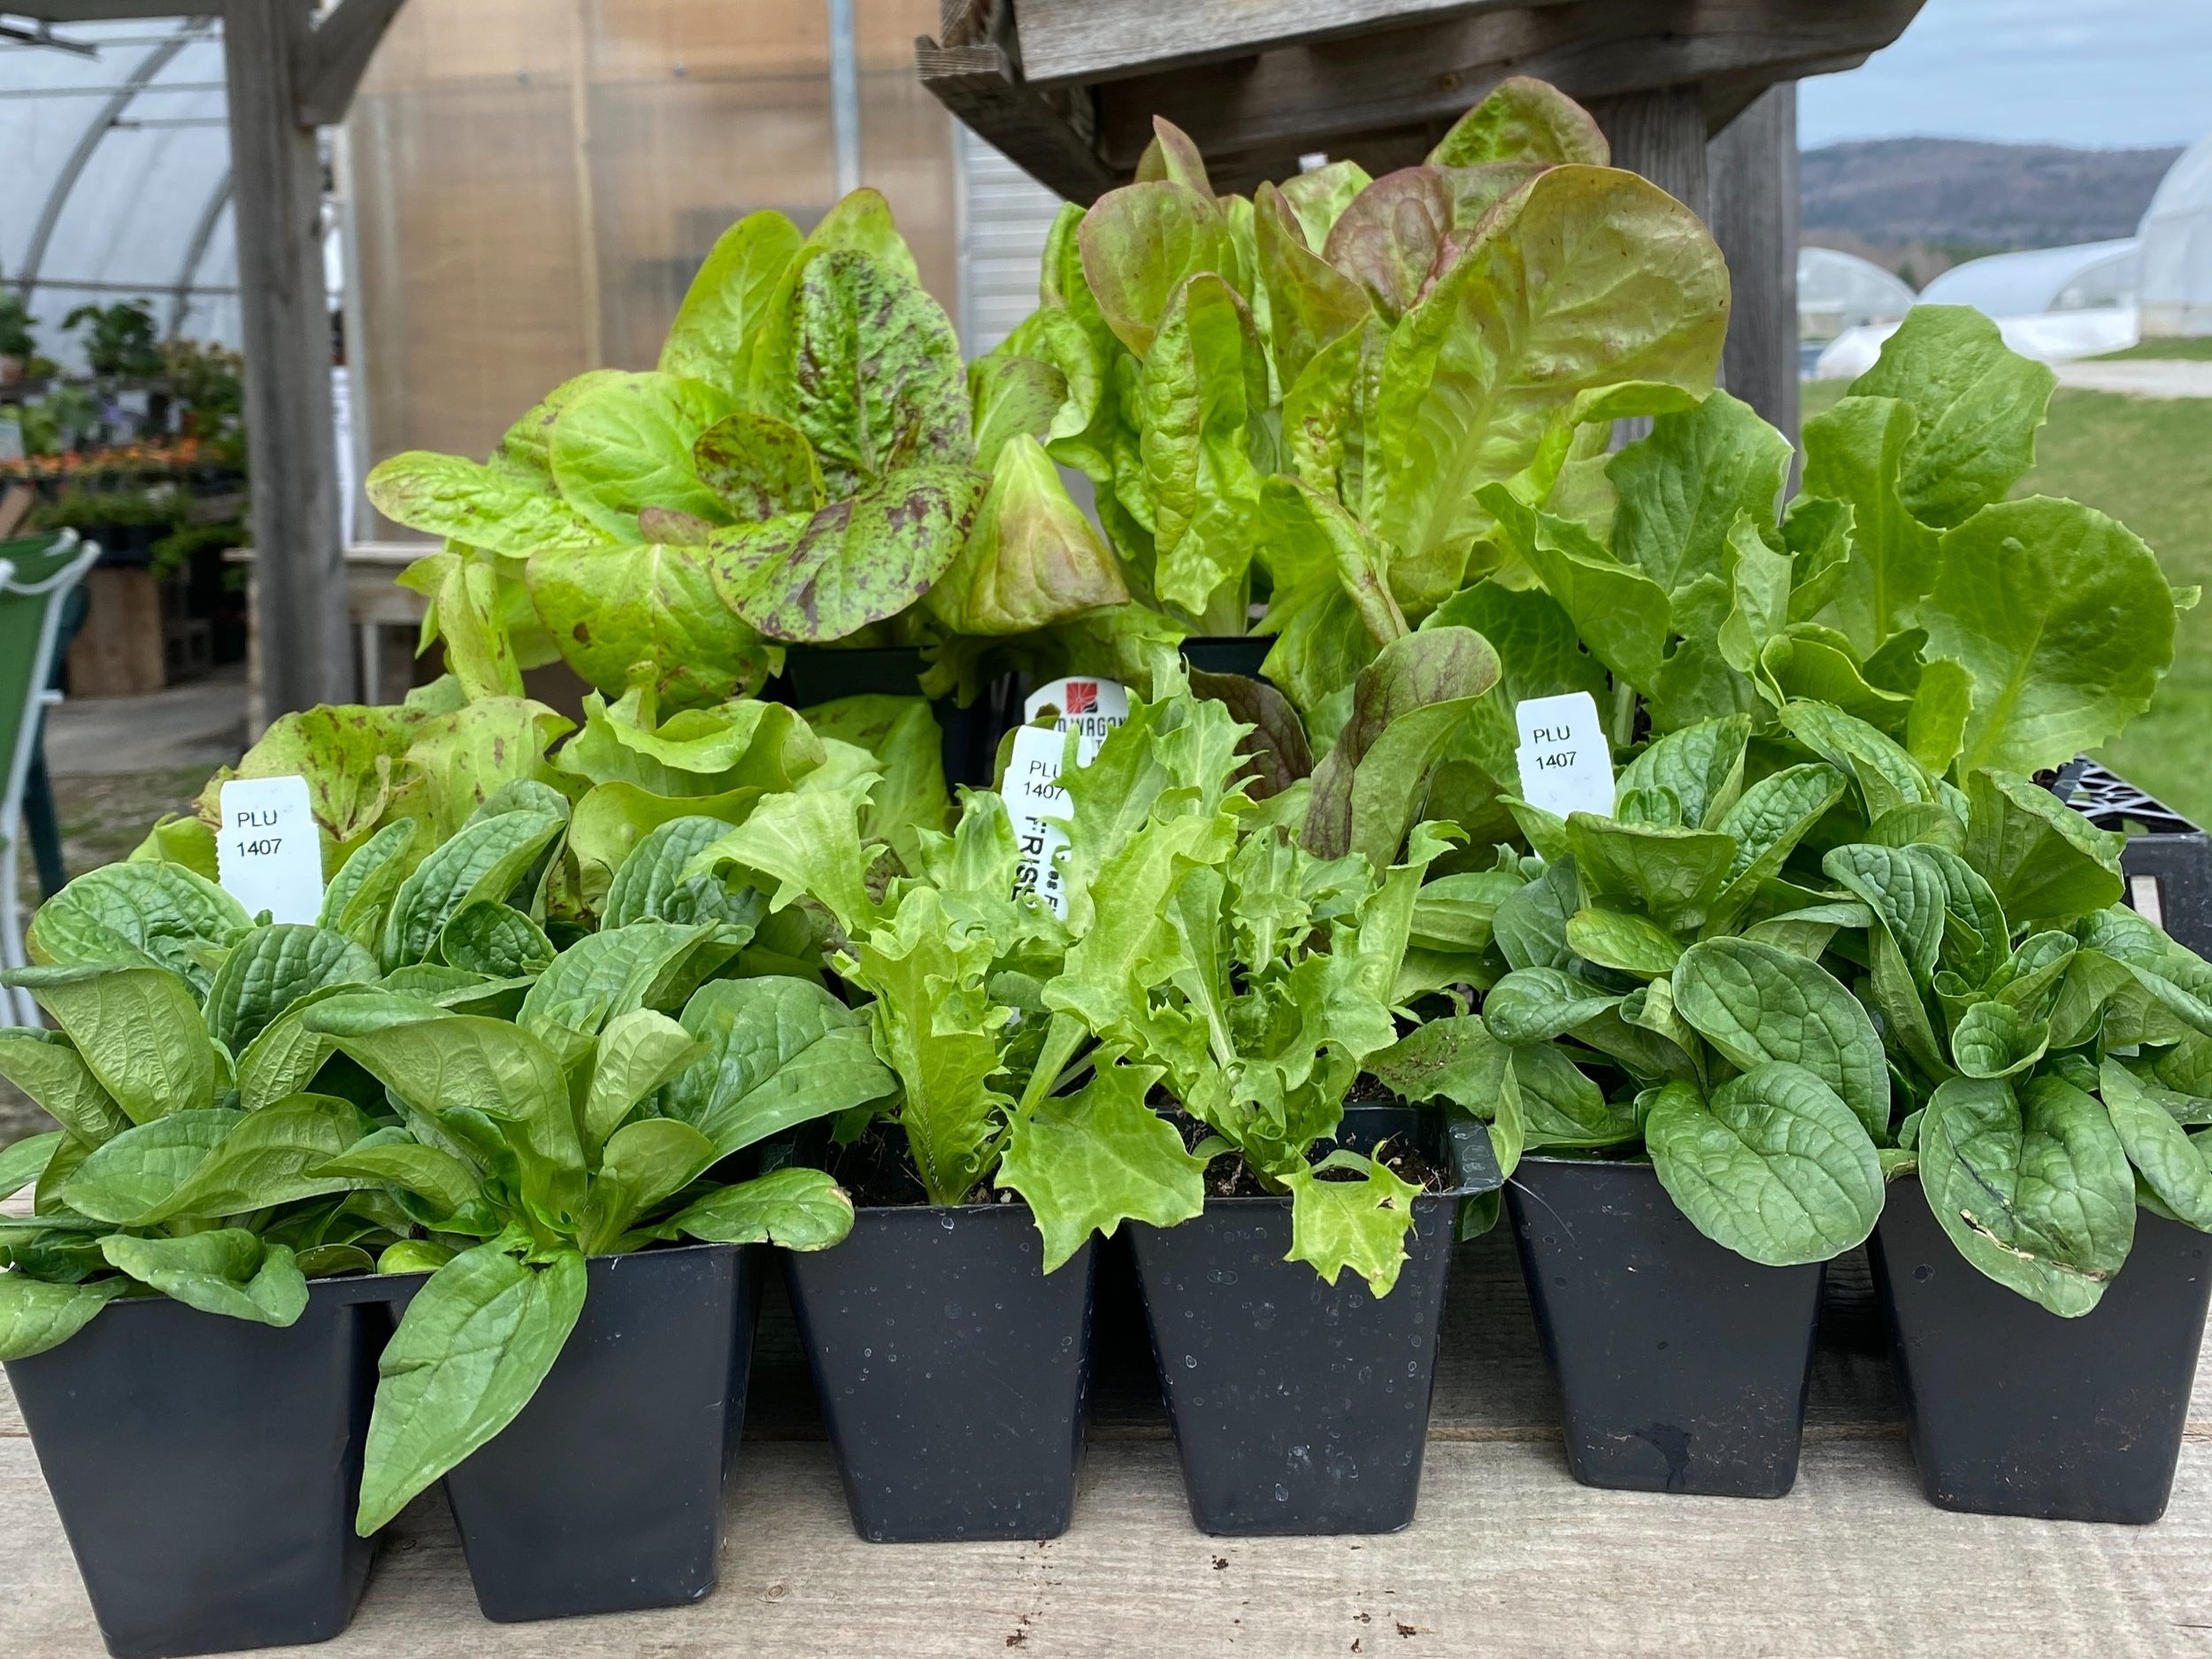
Mache, Frisée, lettuces and chicories ready for the garden
Grow a Purple Food Garden

Purple Napa cabbage ‘Merlot’
If you thought that color-coordination was reserved for the flower garden, try expanding your palette (and your palate) this year. These purple-hued veggie and herb varieties combine to make a dramatic edible display, whether grown together or interspersed in the garden. In addition to being stunners in the garden, highly pigmented foods tend to contain high levels of antioxidant anthocyanins, elevating healthful eating from garden to plate.
Early in the season, tuck vivid purple alyssum alongside herbs and salad greens like ‘Red Batavia’ lettuce, one of our favorite head lettuces for its vibrant color and sweet tender leaves. The alyssum will continue to bloom even as spring lettuces are replaced by summer herbs. Purple basil and purple shiso are both grown in a similar manner- pinch back after transplanting to encourage bushier growth, harvest leaves for culinary use or allow them to flower for a more ornamental look. Purple basil is used just like green Genovese basil, and shiso is a popular Japanese herb with a flavor like cumin and clove. Use the leaves to make lettuce wraps or color radish pickles a vibrant red.
If you have the room and patience, cauliflower offers a fun payoff, and the ‘Graffiti’ variety boasts a wild purple head peeking out from blue-green leaves. Cauliflower can be sown in spring as long as they are kept watered through summer (and maybe offered some purple shade using ‘Hopi Red Dye’ amaranth); sow mid-summer for a fall harvest.
While traditional red cabbage always deserves a place in the garden, this year we are thrilled to be growing purple Napa cabbage, which offers all the versatility and crunch of green Napa in a stunning wine color. We can’t wait to chop it into colorful slaws and kimchi later this year.
Freshly dug garden potatoes are easy to grow and very rewarding, and digging up ‘Adirondack Blue’ potatoes really feels like unearthing buried jewels from the garden. The reddish-purple skin reveals violet flesh that holds its color even when cooked, making for stunning roasted or mashed potatoes.
Another unusual addition to the purple garden is the ‘Colorado Star’ artichoke, whose spiny 1-3’ tall plants produce a relatively high yield of buds in a range of purple hues. This artichoke variety matures earlier than others, making it a good option for our relatively short season. Grow them as an annual, and combine with purple-topped Verbena bonariensis and flavorful bronze fennel to create height and architectural interest in a garden that transcends the boundaries between edible and ornamental.
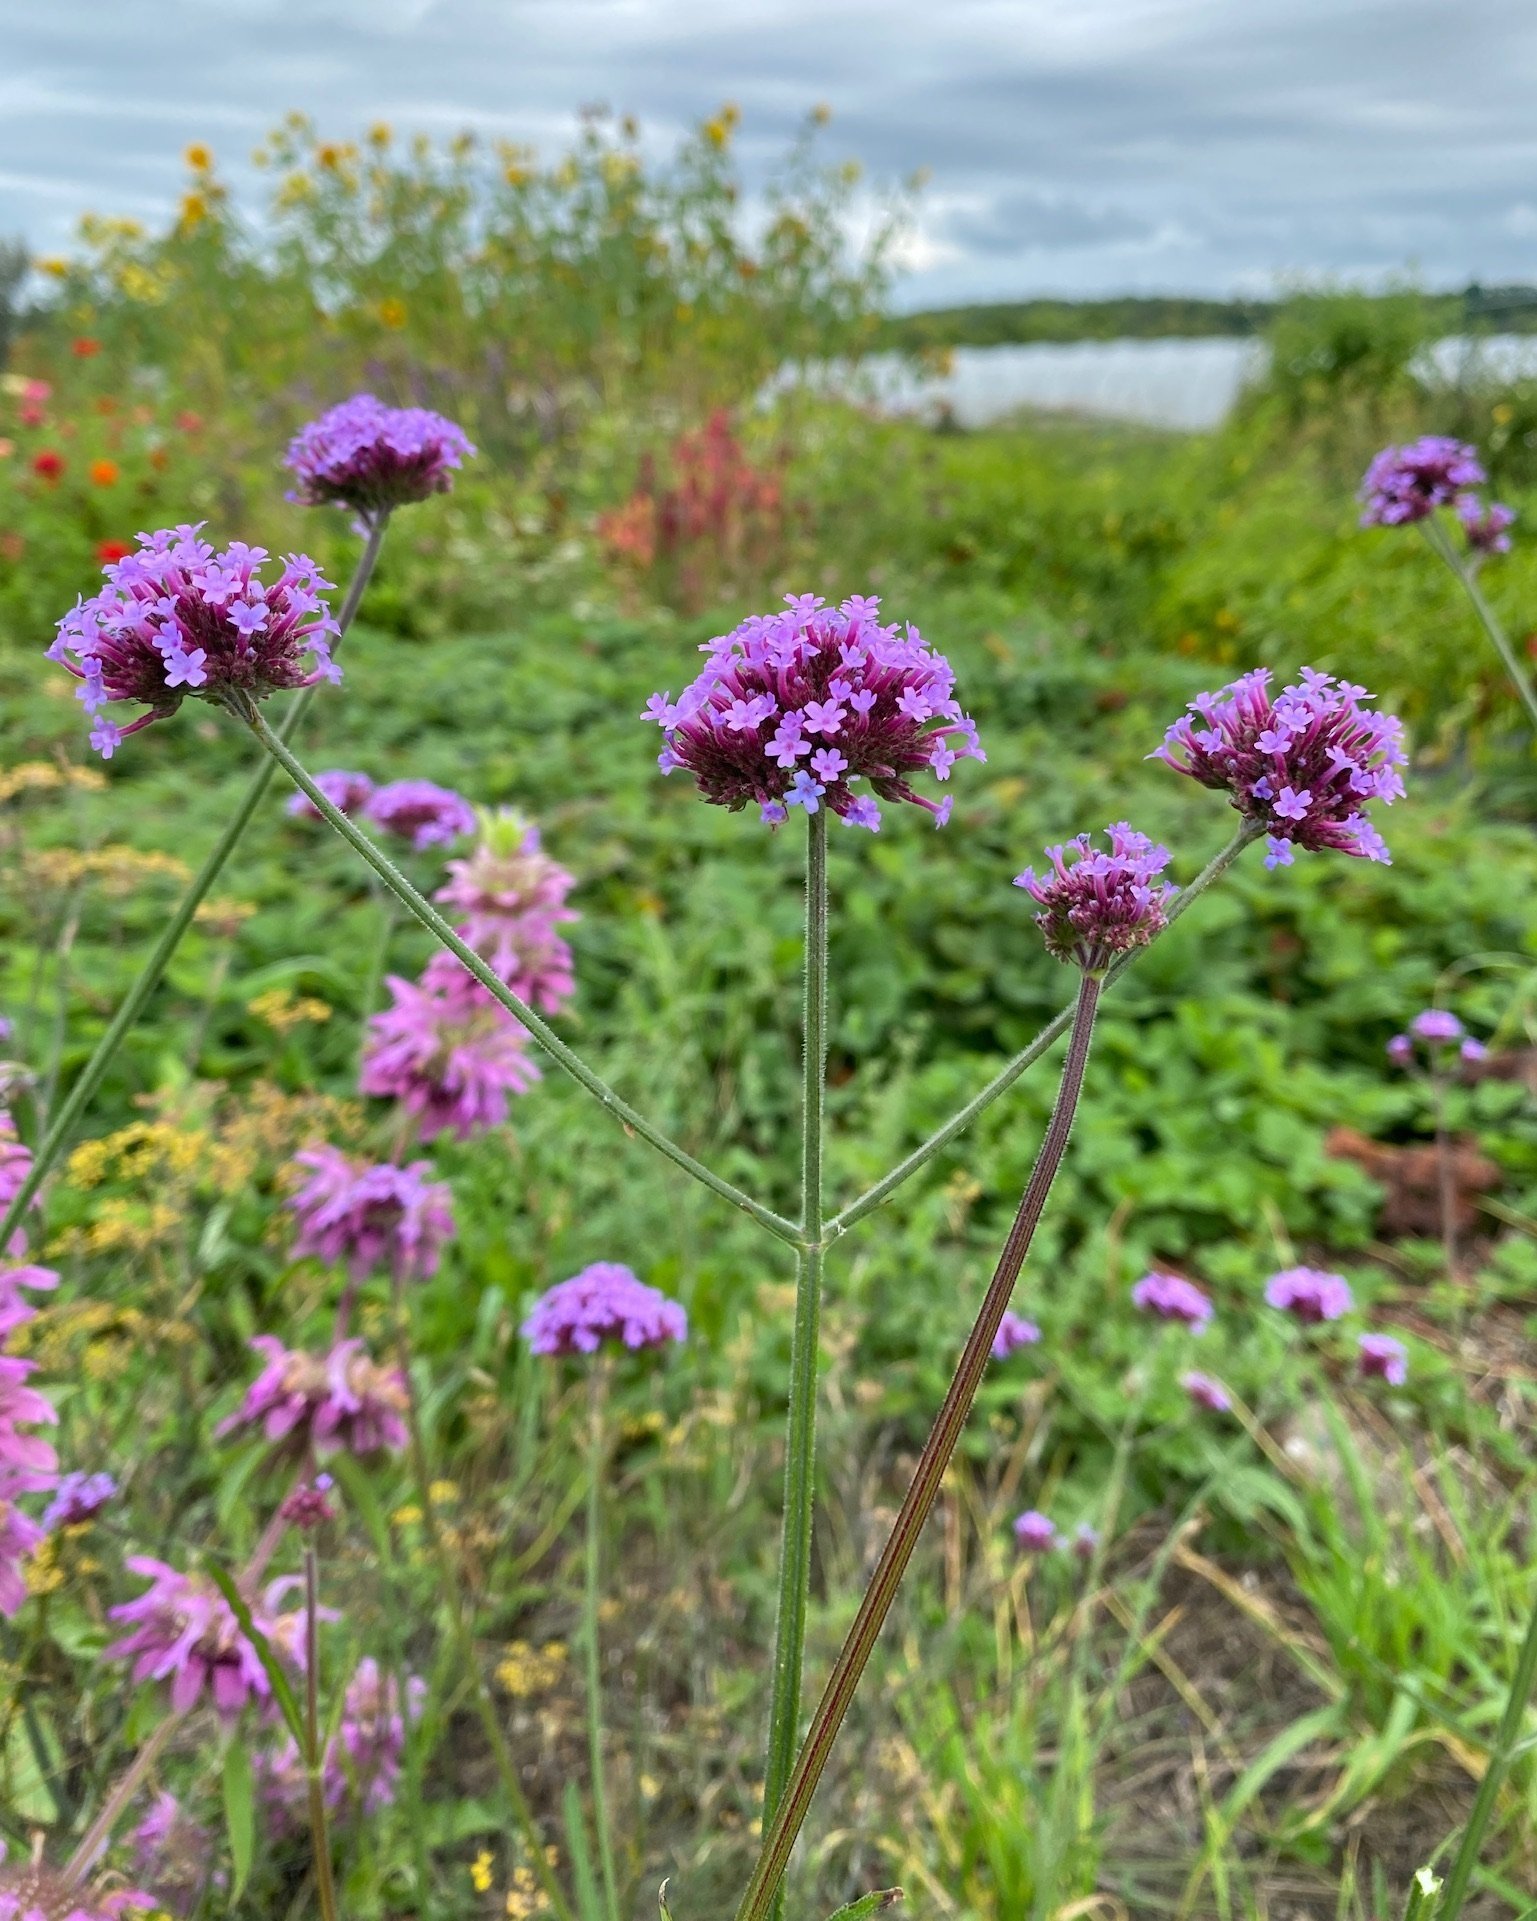
Verbena bonariensis
Many Marigolds
Giant African Marigolds in the garden of RWP friend Bob Furrer
Marigold: even the common name evokes a sense of radiance and joy, which is exactly what these plants bring to the garden. But not all members of the Tagetes genus are the same, and it can be confusing for the new gardener to know which type is best suited to which part of their planting plan. Read on to learn about some commonly confused species and a few other marigolds you’ll want to include in your garden. All marigold petals can be dried and used as a seasoning in winter time.

French Marigold
Tagetes patula, French Marigold. This cute, compact species is often planted as a companion in vegetable gardens, as it attracts beneficial insects and produces alpha-terthienyl, which helps deter nematodes and other pests. T. patula only reaches about a foot tall at most, and doesn’t have a spreading habit, so it’s easy to tuck in between tomato plants or around the edges of the garden bed. They come in a rich display of saturated sunset colors on 2” blooms, with many cultivars boasting variegation on the petals and a crested, double bloom.
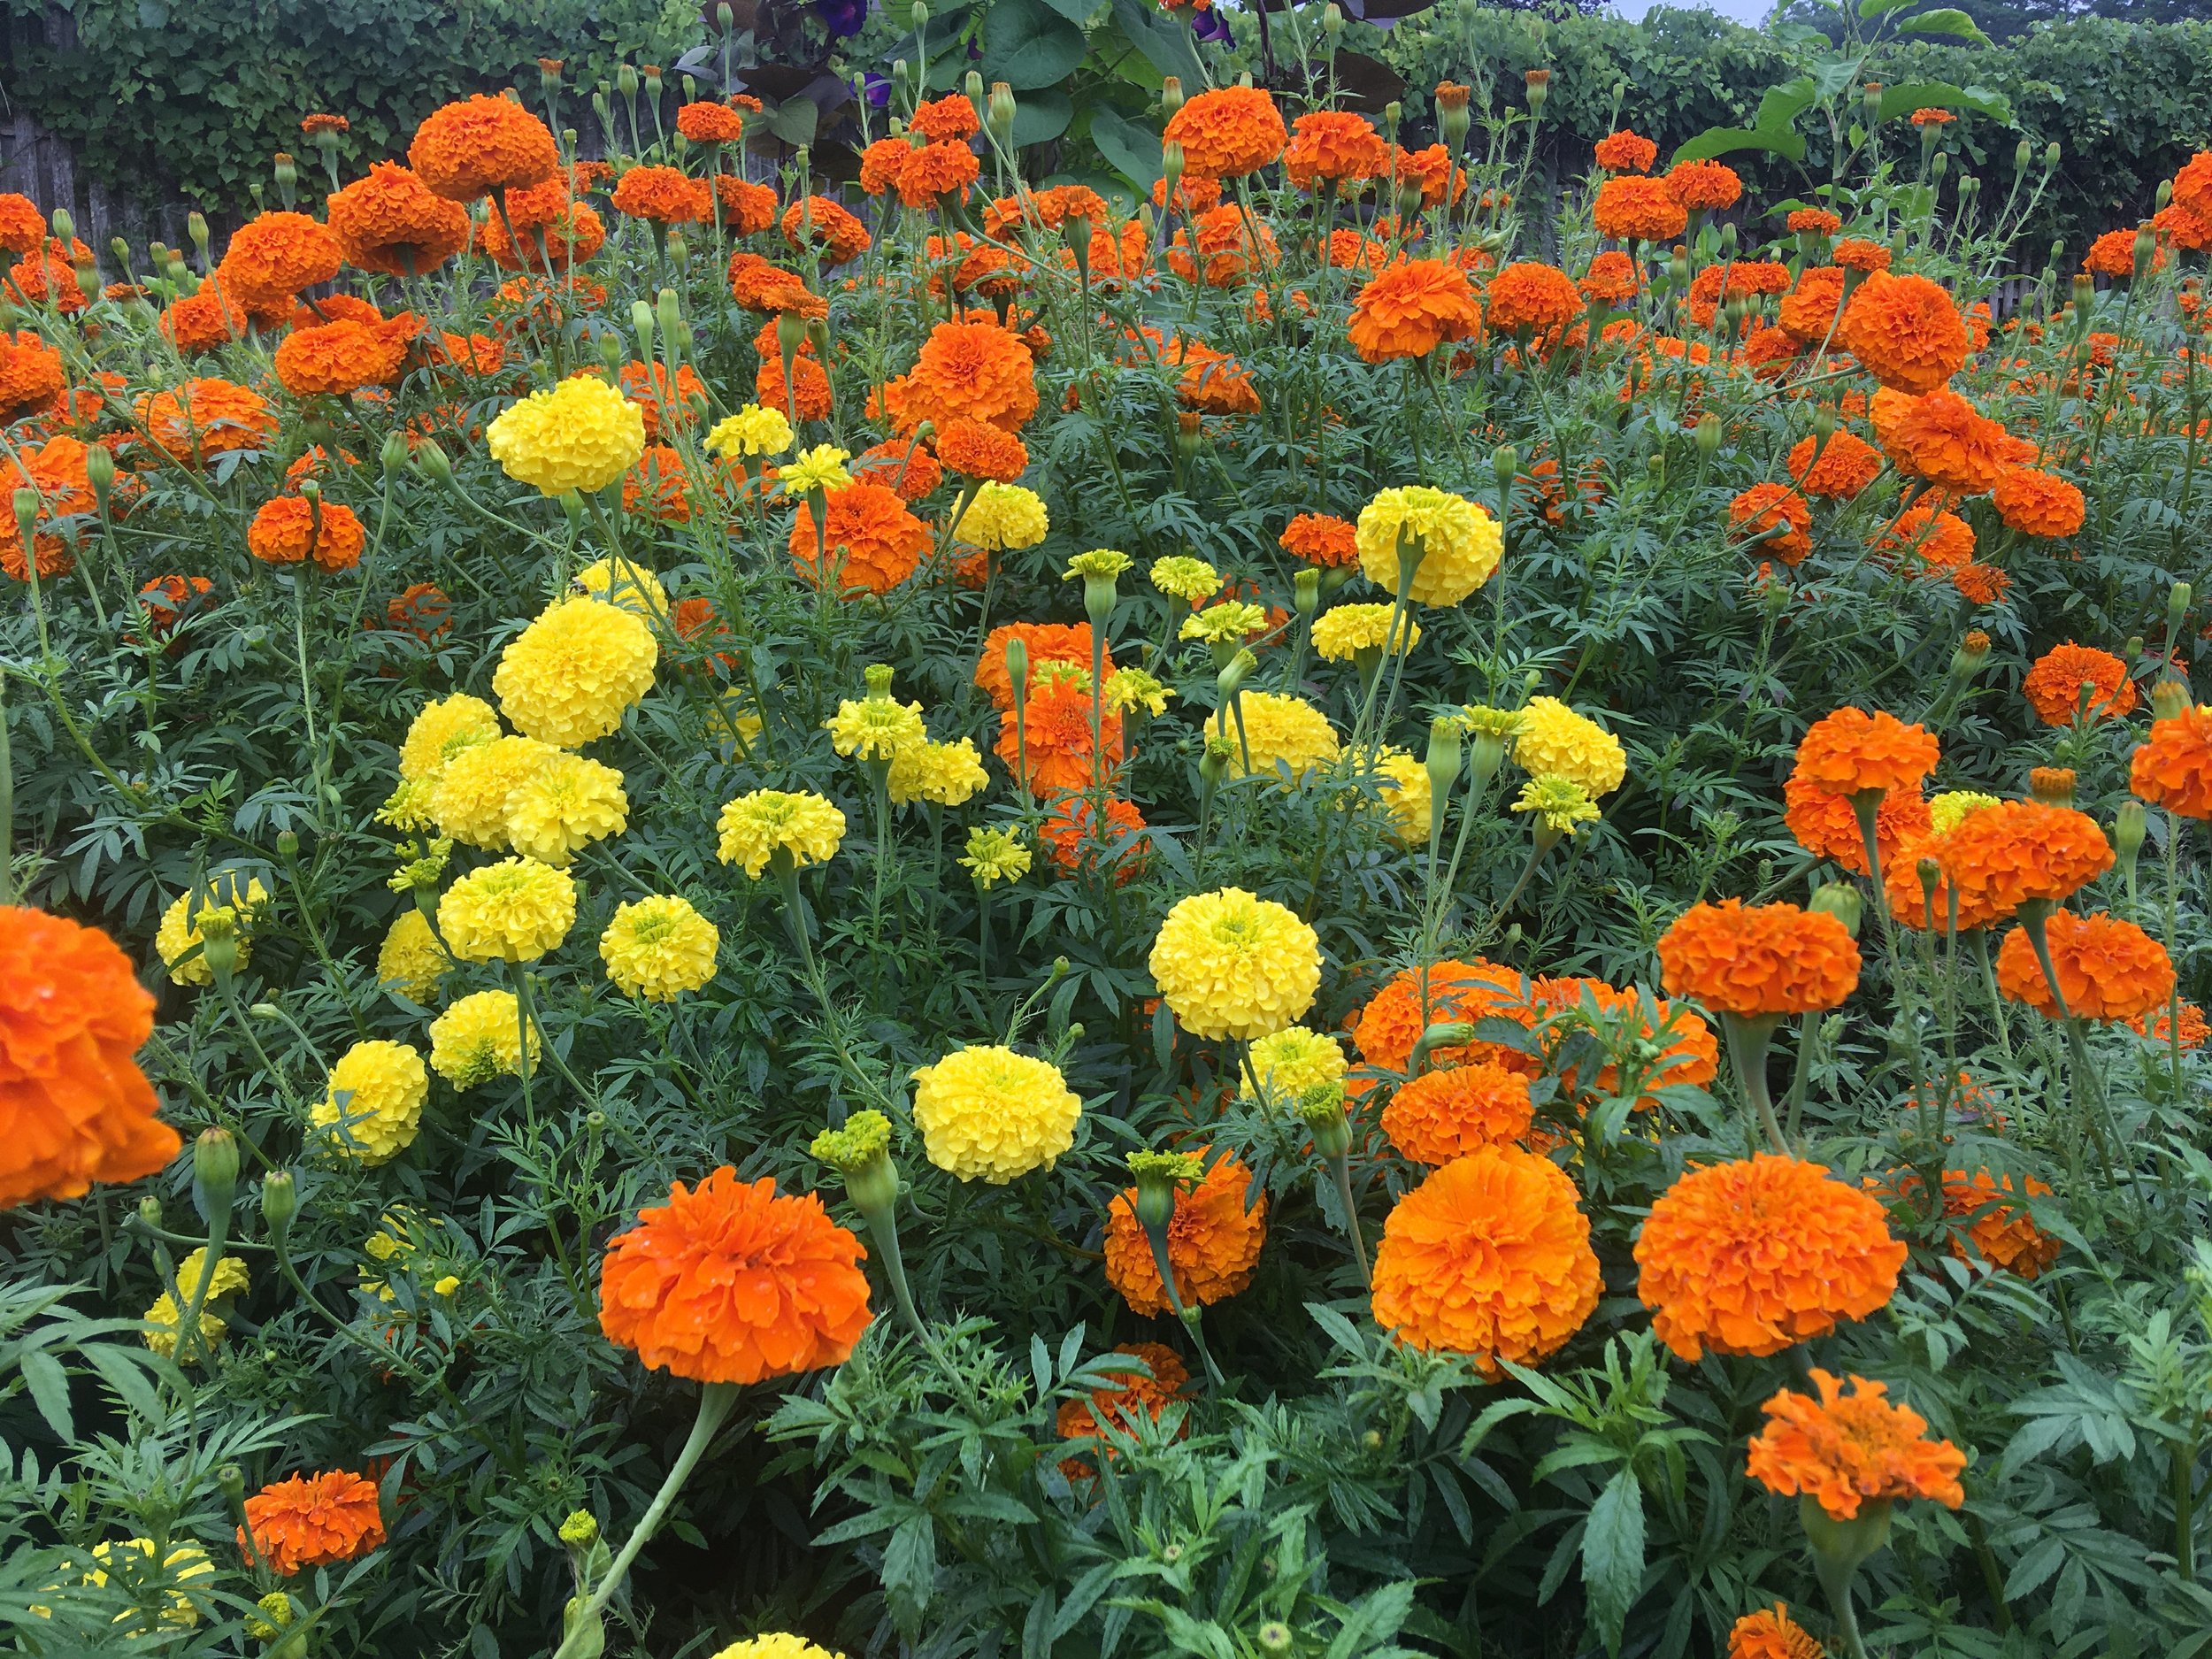
Tagetes erecta, African Marigold, American Marigold, Mexican Marigold. Also known as Giant Marigold, which is a helpful reminder that this species can grow well above 3’ tall depending on the cultivar. T. erecta has large 3” blooms with dozens of petals packed tightly together, and come in single colors of vivid yellow and orange. Strategically placed, these tall flowers can provide afternoon shade for greens like arugula and cilantro, which tend to bolt in the hot summer sun. They provide the same beneficial insect and pest protection as T. patula in a larger, showy package. They also work beautifully in a cut flower garden alongside Benary’s Giant zinnias and tall snapdragons. Pick off flowers regularly to encourage blooming all summer. Giant marigolds are especially useful as dye plants and make gorgeous flower garlands, which are important elements in marriage and death rituals around the world.
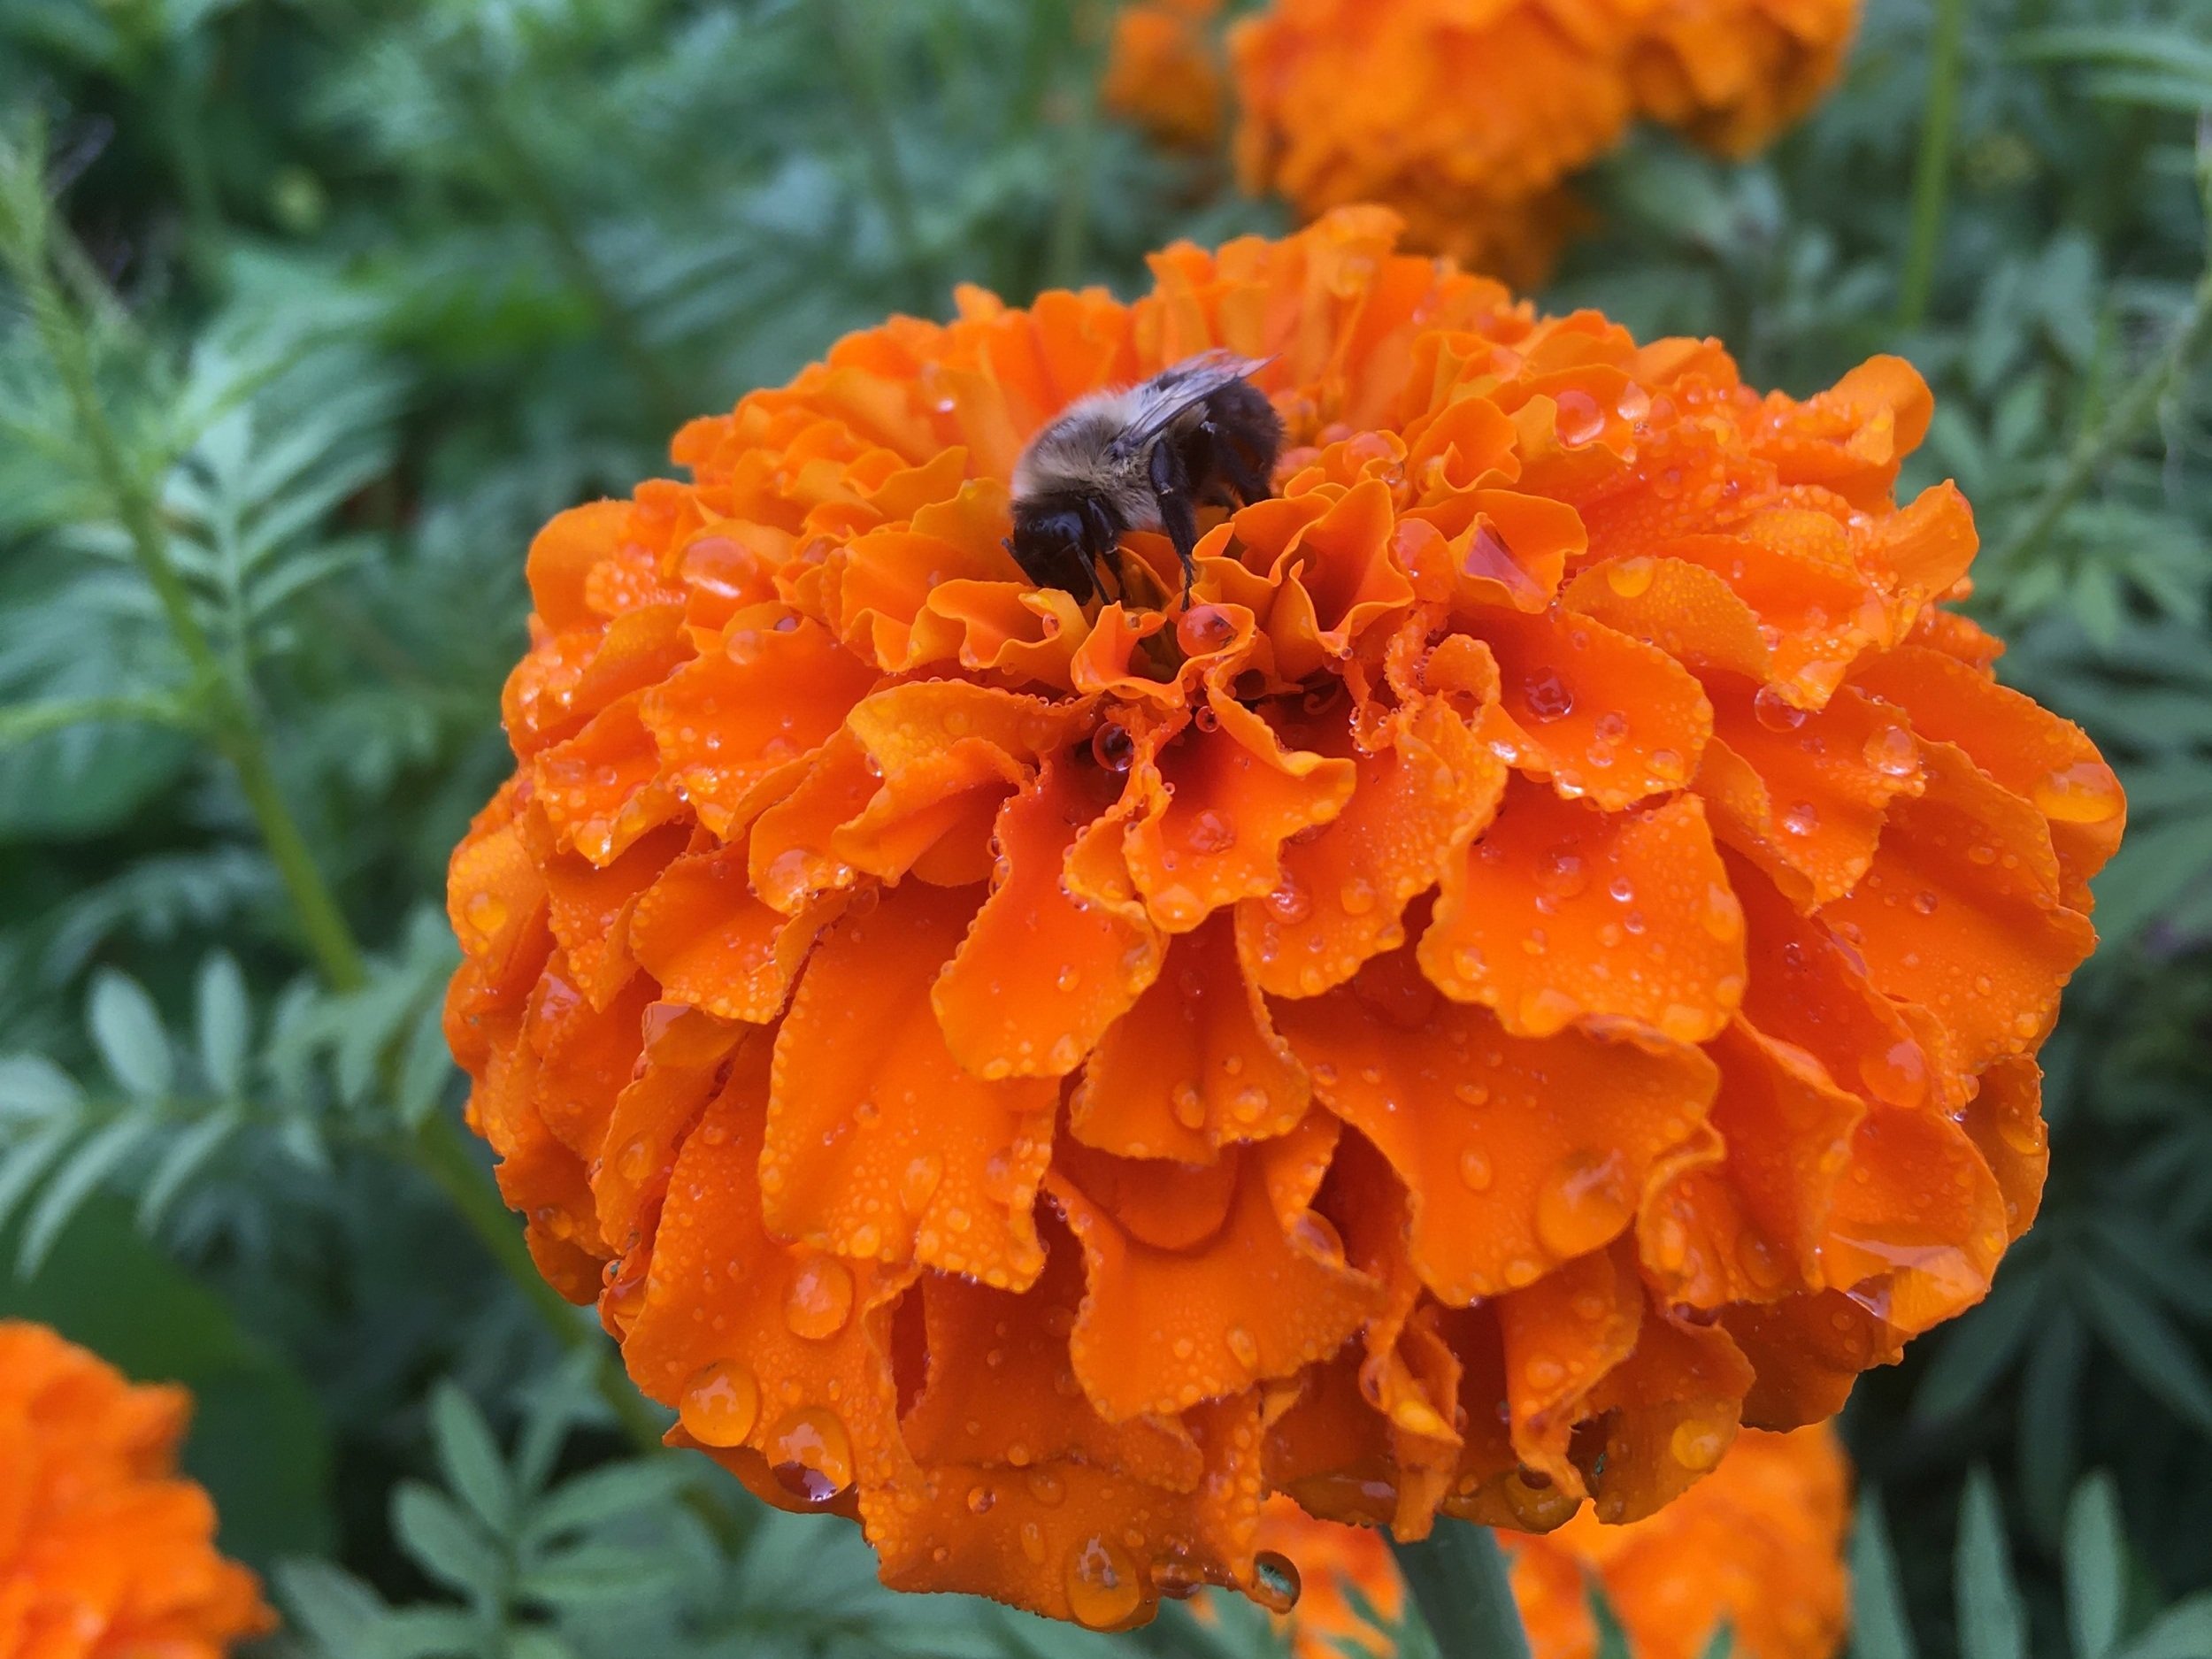
African Marigold, ‘Crackerjack’
Both of these species are technically edible, though not particularly delicious. The aromatic petals should be removed from the base of the flower, which tends to be quite bitter. Add to a pot of rice for a saffron-like effect, or include in baked goods for a splash of edible color. Read on for two more less common Tagetes species that are definitely must-haves for the edible flower garden.
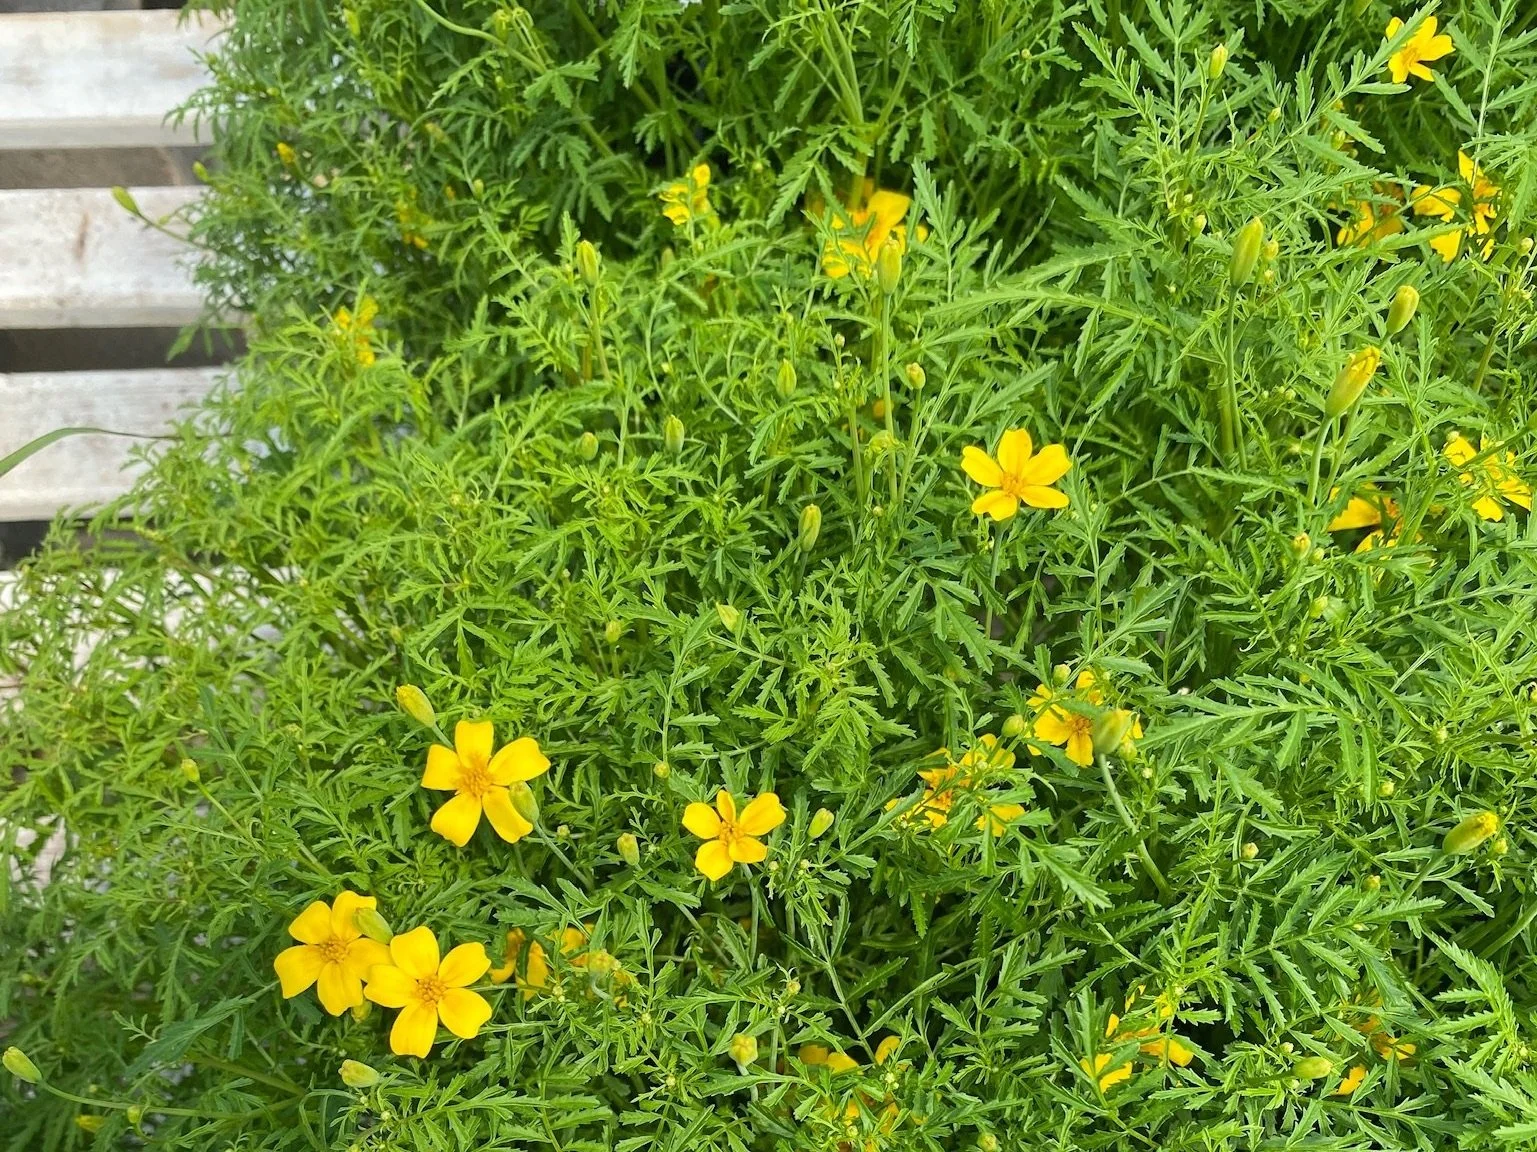
Lemon Gem Marigold
Tagetes tenuifolia, Gem Marigold. These plants are a favorite at Red Wagon for their feathery foliage, compact clumping habit, and profuse blooms. Their petite flowers attract insects and keep blooming even without consistent harvest. Plant gem marigolds in their own containers or include in the herb and vegetable garden. Your imagination is the limit with how to include these flowers in your kitchen: top salads, pizzas or pastas with the bright petals, or decorate cupcakes for summer birthday celebrations. The green sepals and stems can be bitter, so remove those before eating.

Mexican Mint Marigold
Tagetes lucida, Mexican Mint Marigold, Mexican Tarragon. Easily the most delicious of all of the Tagetes species, Mexican Mint Marigold has small, yellow flowers that are primarily employed for their sweet licorice flavor, which can be added to beverages and salads. The Aztecs considered T. lucida sacred and used the plant in the preparation of their famous drinking chocolate. True to its native habitat, this compact plant thrives in heat and full sun, and will bloom from late summer through fall.
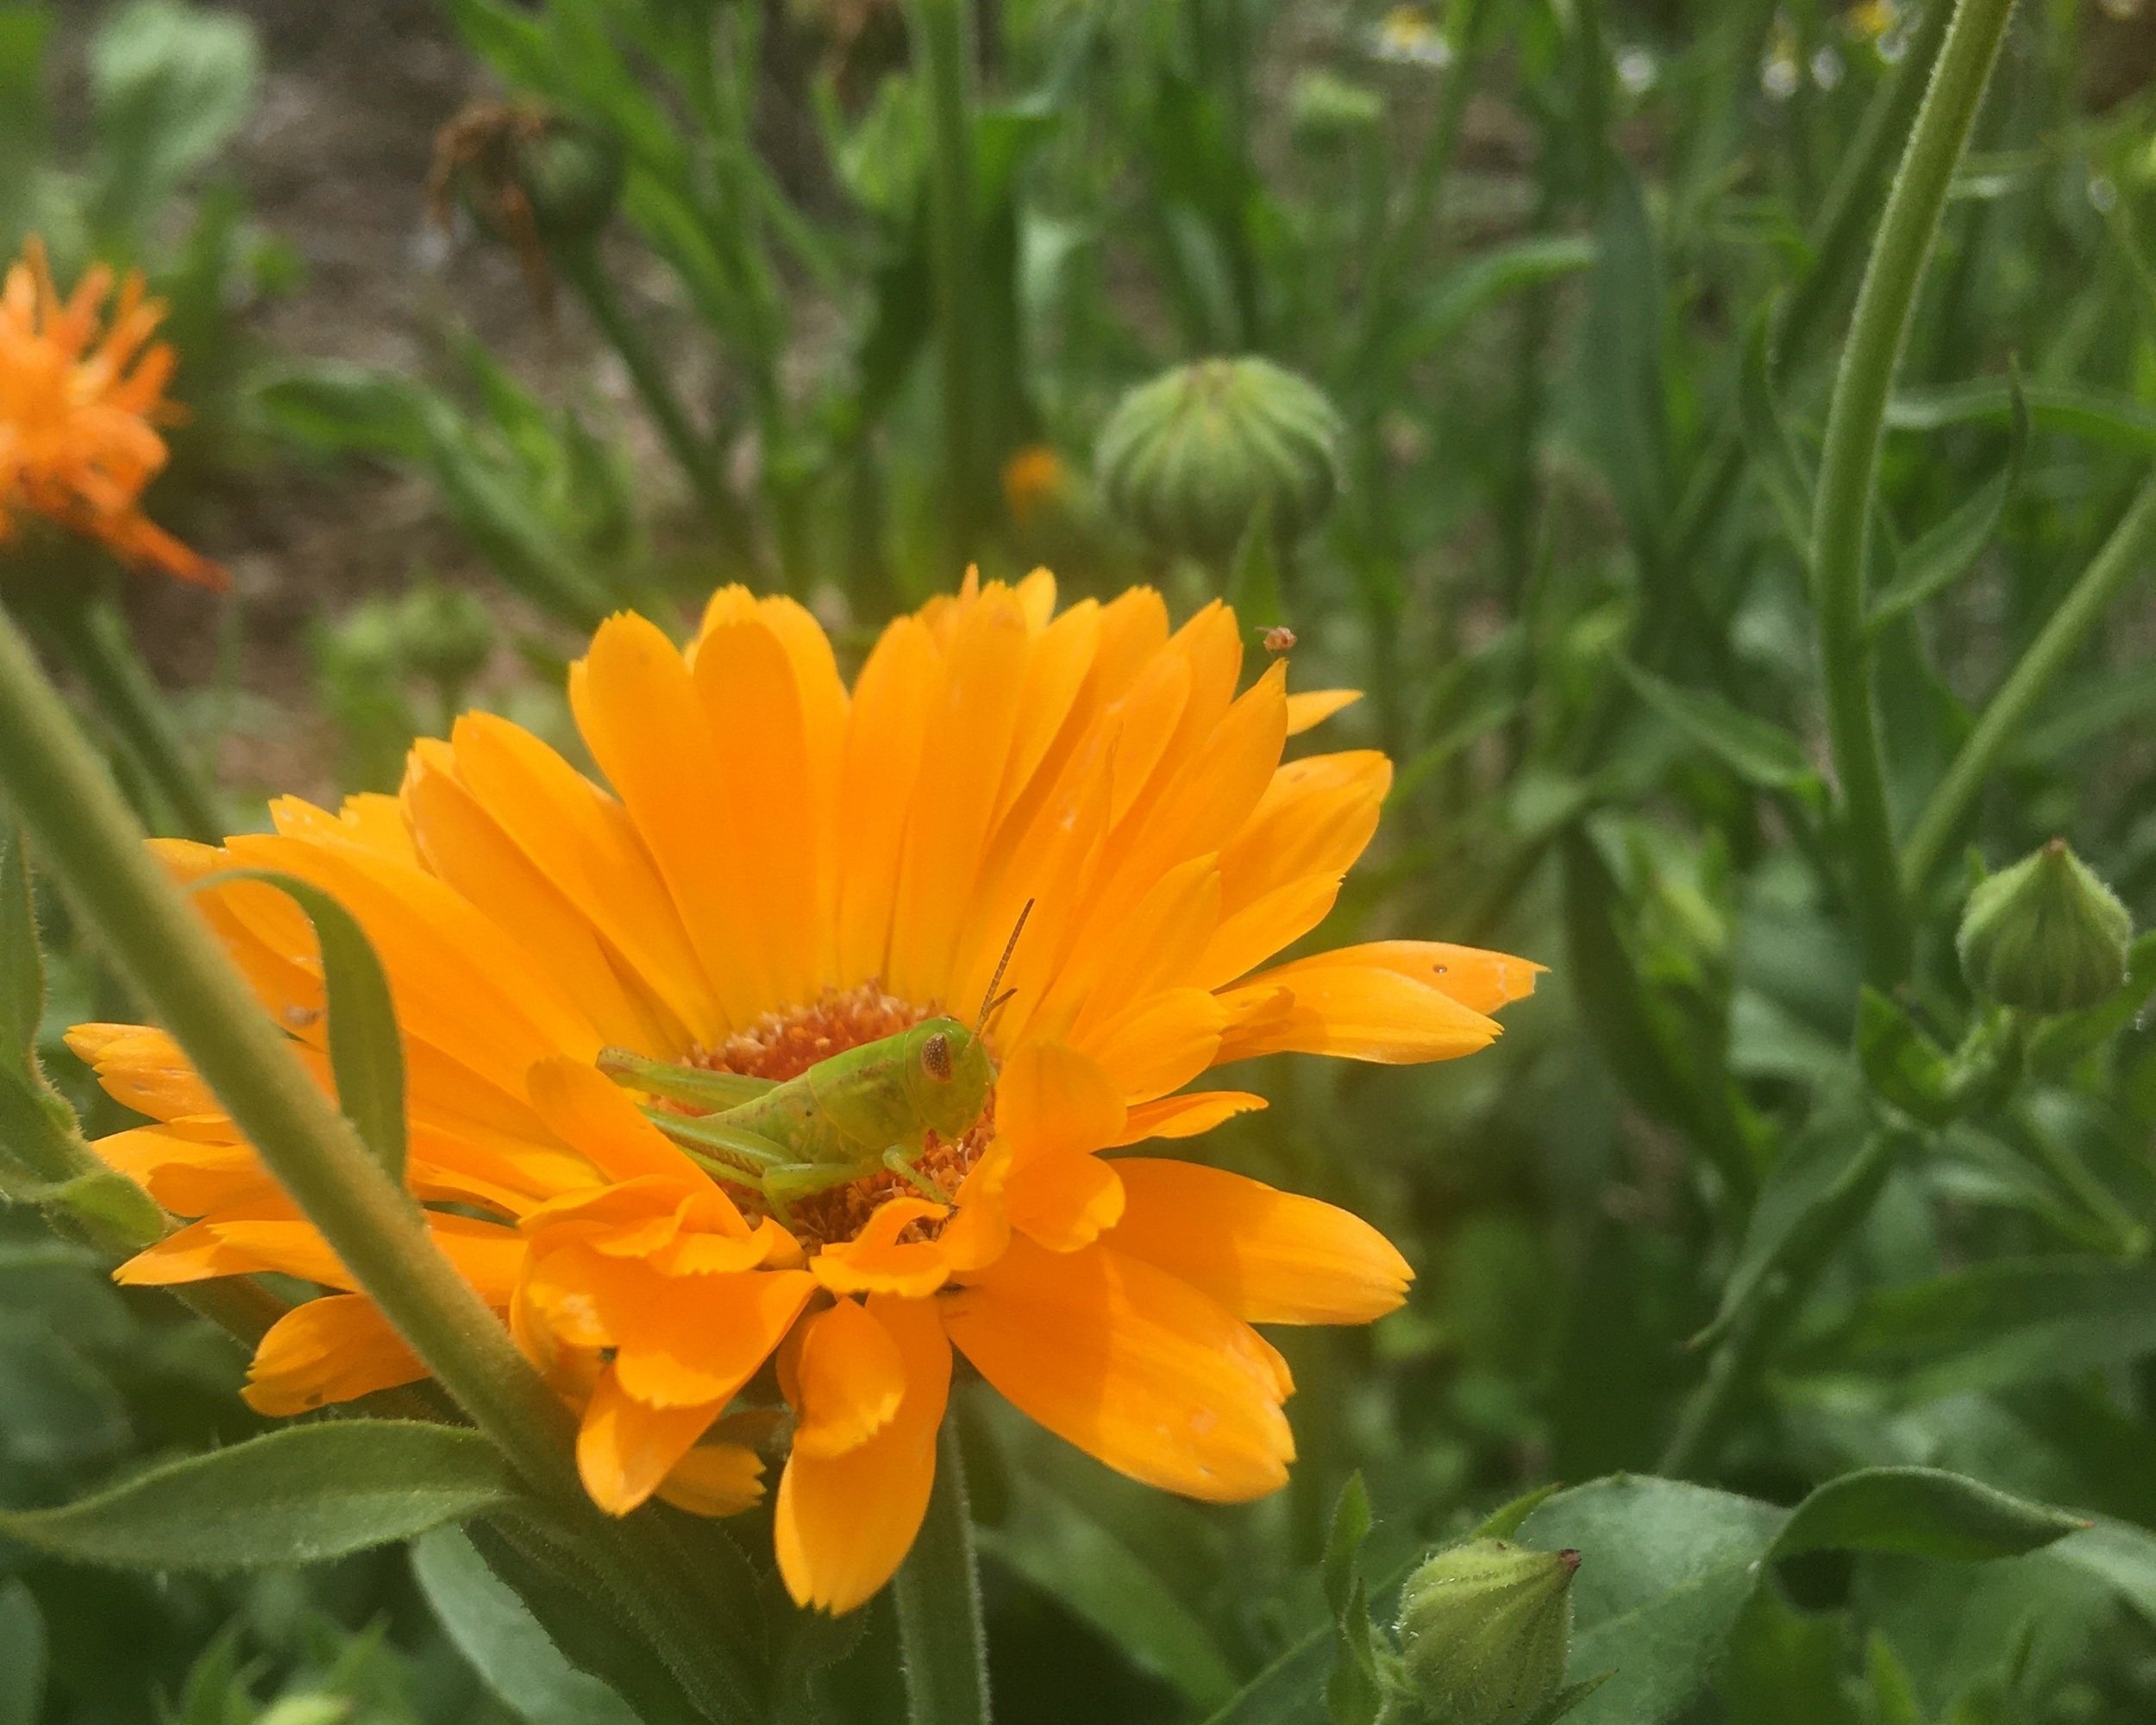
Calendula officinalis ‘Alpha’
An honorable mention goes to Calendula officinalis, often referred to as Pot Marigold. Although Calendula is not in the Tagetes genus, it does, like marigold, share a place in the Asteraceae or Daisy family. Calendula has oblong, waxy leaves and a flower that looks more similar to a tiny sunflower than a true marigold. Calendula has been similarly bred to display single and double blooms in a wide array of yellows, oranges and reds, and is held in high esteem as an herbal remedy (see our post about it here). Use the whole flower heads in fresh or dry tea blends, pluck the petals from the bitter center and sprinkle them on salads and cookies, or use as medieval folk did and throw a handful of the dried flowers into broths and stocks, where it lends rich color, flavor and medicinal benefit to soups all winter long.
Whether planted for their beauty, defensive strategies, or edible petals, marigolds will provide a dash of sunshine well after the garden has been put to bed. With a variety of cultivars in each species, you could be forgiven for filling up your entire garden in Tagetes (and Calendula) flowers this year. You can find a list of all the marigolds we grow here.
Veggie Gardening with Kids
If you’re planning to do a lot of gardening with young ones this year, consider some of our most popular “kid’s sized” vegetables. These varieties are easy to grow and crank out prolific, tasty produce that take well to consistent harvesting by eager garden helpers. With this list, you’ll have something snackable in the garden every month of the growing season.

Mexican sour gherkin
If your family loves cucumbers, both Picolino cucumbers and Mexican sour gherkins should find a spot in your garden this year. Picolino are a prolific and crisp cocktail cucumber, harvested at just 4-5” long for maximum sweetness and crunch. Mexican sour gherkins are also known as “mouse melons” and their inch-long fruits resemble something out of a fairy tale. They have a tart, lemony flavor and firm bite that kids love. Both varieties produce long vines and tendrils, so offer plenty of support with a trellis and watch them climb up, up, and away. They could even grow on a little teepee. Remember that they also benefit from consistent harvesting, which make them perfect for a daily scavenger hunt to find the ripe fruits.

Lunchbox peppers are so named for their snackable size, maturing at just 2-3” long and coming in shades of yellow, orange and red. These peppers are super sweet, and their small size also encourages more prolific fruiting per sturdy plant. While perfect for fresh eating, lunchbox peppers do equally well sauteéd and stuffed.
There’s no better seed to sow with kids than radishes. Sown directly in the garden early in the spring and carefully thinned to 1-2”, radishes offer a relatively quick payoff of bright pink roots with a sweet, pleasantly peppery flavor. Watered adequately and harvested early, radishes can be seeded in the veggie garden all season long. Try a mix of French breakfast and cherry red varieties for a range of harvest times and colors.
Alongside your radish patch, set in some sprouting broccoli (also known as broccolini). It’s well known that broccoli is a favorite green with kiddos, and these sprouting types offer a “cut and come again” approach that is much more consistent and satisfying than waiting half the season for one full-sized crown. Broccolini are also more heat tolerant, although they’ll want plenty of water and decent soil. The sweet stems and florets are easily incorporated into mixed grills, crudité platters, and mixed into classic mac n’ cheese. These broccoli shoots are so sweet, they are also perfect to eat out of hand in the garden.
Baby Bear pumpkins mature to about half the size of a typical pie pumpkin, late in the season. They have very sturdy handles that make them appealing to children because they are easy to hold and don’t risk losing their stems. While they make excellent decorative pumpkins, Baby Bear has a sweet flesh that is perfect for pie making, and semi-hulless seeds that make a tasty roasted snack.
Of course, no children’s garden would be complete without cherry tomatoes, and Sungolds continue to win out with their bright orange color and candy-sweet flavor that kids can’t get enough of. Be sure to provide trellising and harvest consistently to prevent fruits from cracking. One plant will provide enough for snacks, but plant more for drying, freezing, canning, roasting or adding to salsa and sauces.

Plant of the Week: Buckets and Baskets and Crates, Oh My!
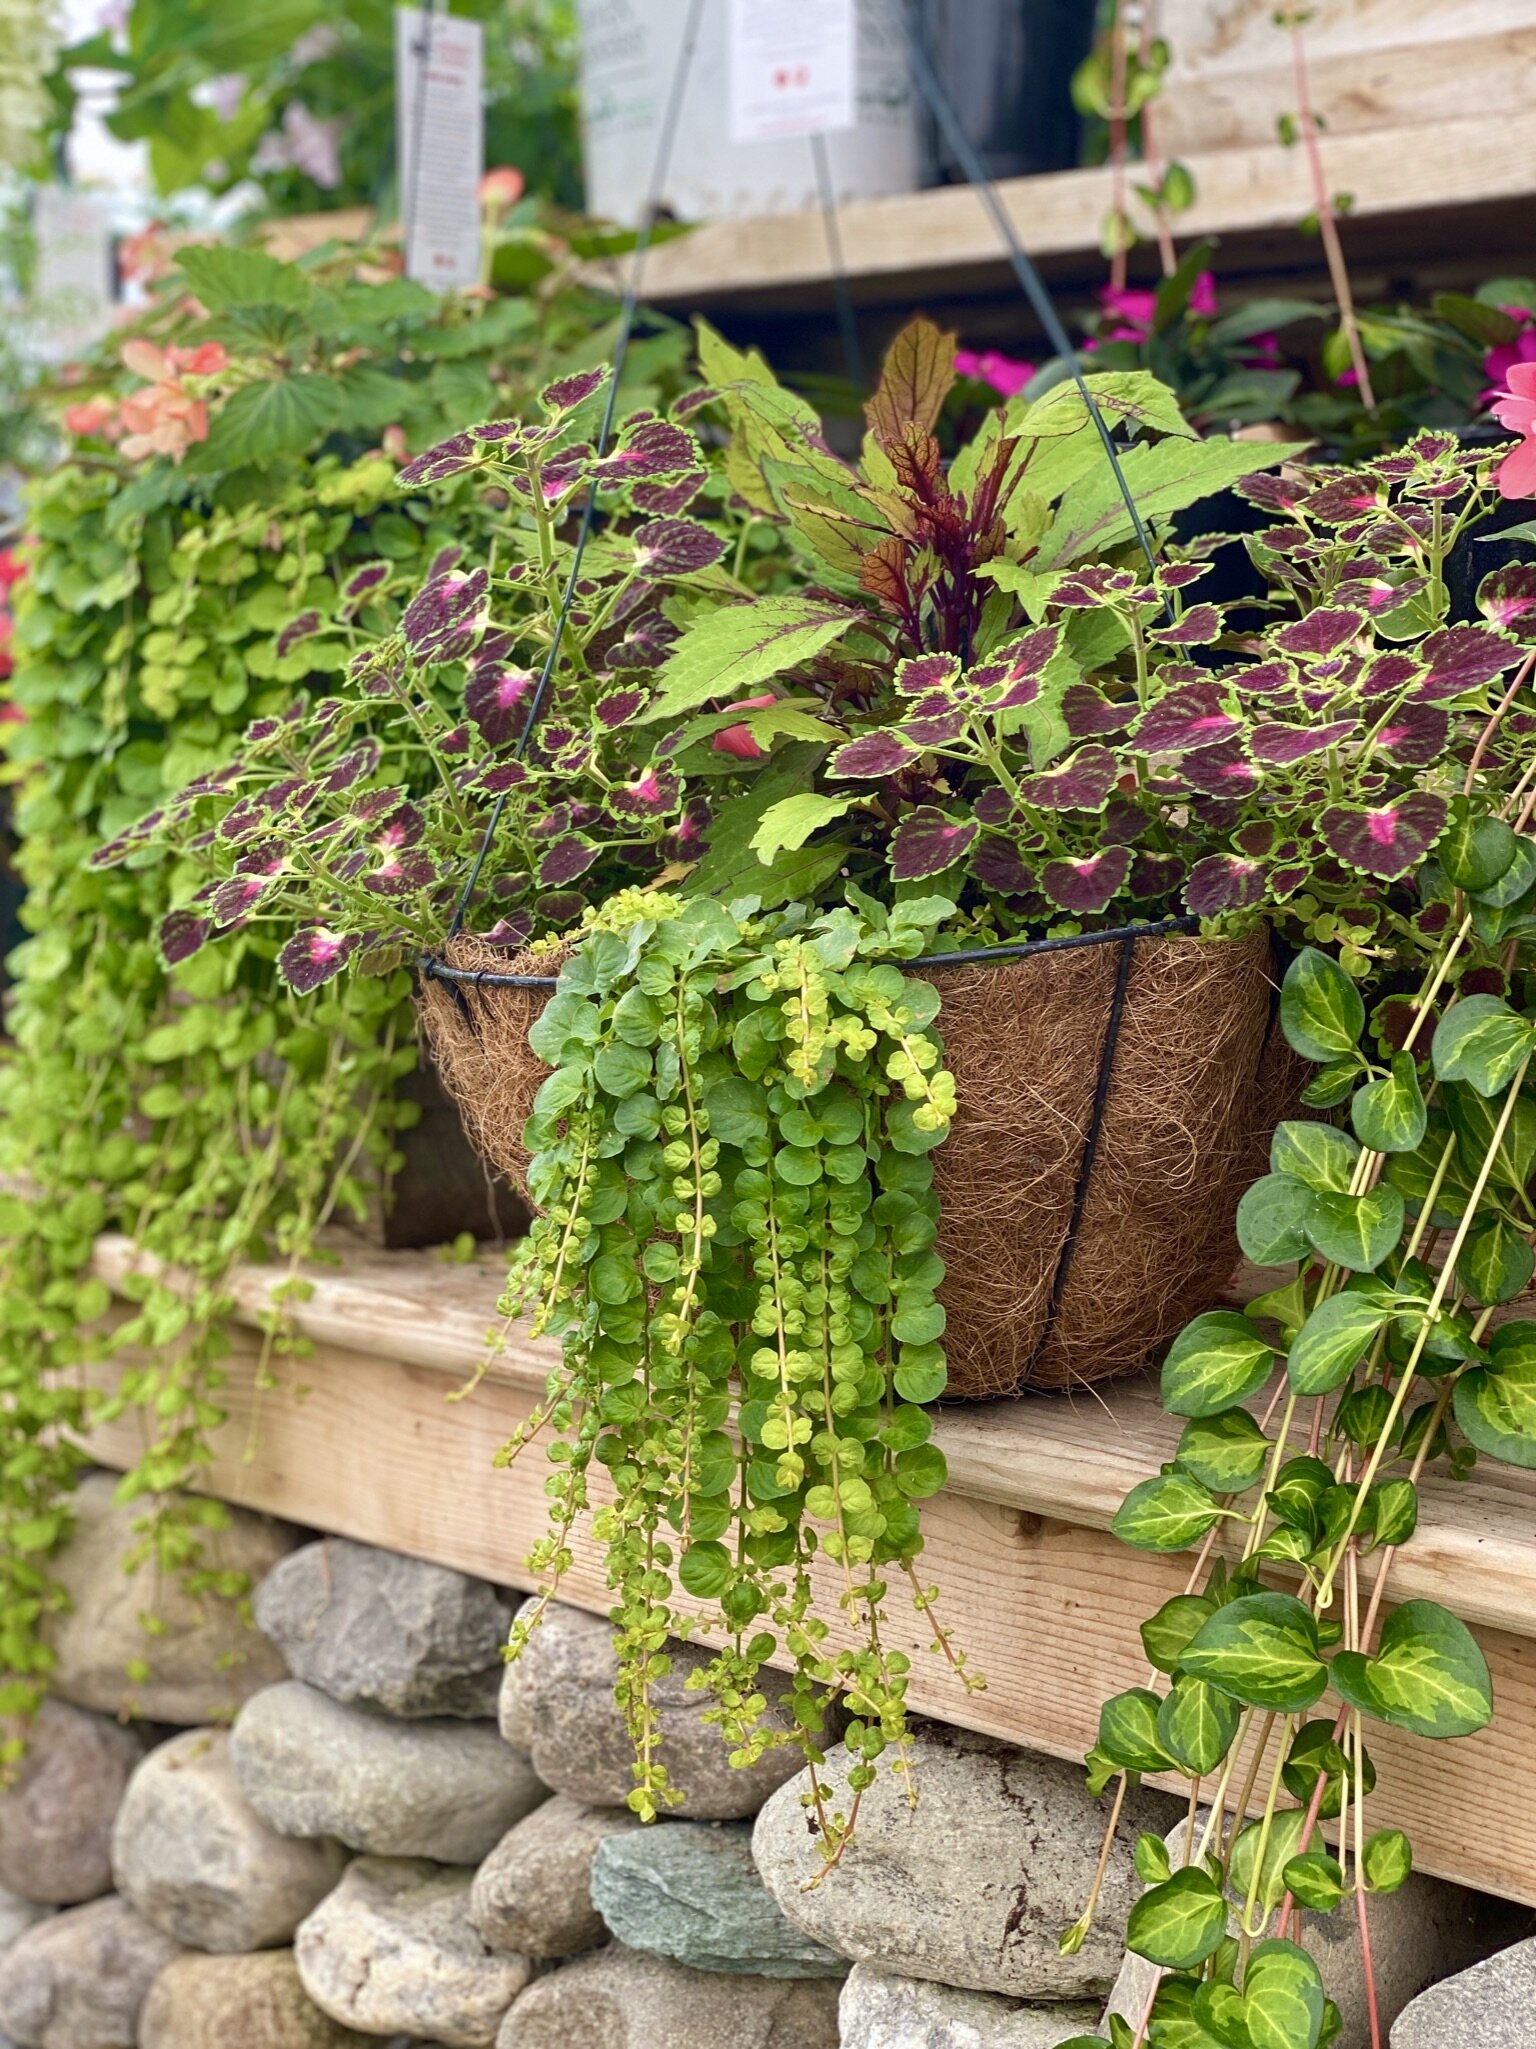
This week we’re featuring one of our best deals yet: Buy one large planter, get one free! If you need some late season color for the porch or patio, we’ve got you covered with vining hanging baskets, gorgeous sap bucket planters, and locally made apple crates from our neighbors at Clifford Lumber that are overflowing with blooms.
Our friend and retail staff member Hope Johnson is to thank for designing many of our annual combinations. Hope brings a keen eye and a mastery of color and form to everything she does, whether it’s arranging planters or designing her stunning bee quilts. We’re lucky to have an artist like Hope on our team.
Below is a list of the many containers we have available. Prices range between $15.99 and $60, so finding symmetry in your patio garden is particularly economical this week!
Thunbergia: Also known as Black-eyed Susan Vine, with pops of butter yellow and orange flowers that peek out from draping foliage. Place in a hot, sunny spot where it can trellis along a fence or drape down from the hanging basket.
Mandevilla: A tropical plant with bold pink blooms that we eagerly anticipate every summer. These plants love the heat, but can also be brought indoors to overwinter.
Passionflower: We have two varieties of this stunning vine- “Aphrodite’s Nightie'‘ + “Blue Bahama”. Both will produce lush climbing foliage and totally unique blooms through the summer and fall. And did you know it has a calming effect when used as a tea herb?
Lophospermum: This year we are finally carrying this sweet flowering vine in “Wine Red” and it could not be easier to grow. Just place the basket in part to full sun and enjoy the burgundy flowers all season long.
Nasturtium: A kid favorite! Edible flowers and leaves cascade out of these sweet baskets. Infuse into vinegar for a spicy salad dressing, or pickle the seed pods for a highly local take on capers.
Herb Trios: 12” oval pots that feature mixed basil varieties and classic culinary herbs. Bring to your next potluck and place in the center of the table for on-demand garnishes.
Tomato Buckets: Trellised in 3 gallon pots, these tomatoes are great for patio snacking or adding some additional cherry tomato varieties to your collection. For folks who are summering in Vermont, they also offer a late planting opportunity.
Shade Baskets: If you’re working with part to full shade, fear not. Our fiber baskets are full of sturdy foliage and flowers that look good through the season. Our friends at Stone Soup fill their awning with them every year for long-lasting color and texture.
Sap Buckets and Apple Crates: These make wonderful gifts, as they come ready to display and provide cut flower options close by when placed near an entrance or by the kitchen door. This week, you can find the perfect one for a friend- and get one free to keep for yourself.

Passionflower “Blue Bahama”
In the Garden
Have you been cutting back your annual flowers? While it’s important to leave some blossoms for the pollinators to enjoy, cutting annual flowers prolongs their bloom time and provides you with fresh backyard bouquets every day. Additionally, flowers that have been pollinated tend not to last nearly as long in a vase as those that are cut before the insects find them. Now is a good time to scan your cutting garden and prune back any spent flower heads or those that have gone to seed- think of it as a haircut for your garden.
With all the rain we’ve been getting, it’s a good idea to add fertility to your flowers and vegetables now, especially if you have loamy or sandy soil. We like to use Vermont Compost Company’s Compost Plus for gentle, long-lasting feedings that will keep the produce and flowers in peak production.
As always, our retail greenhouses are open from 8-6 every day, and we’re happy to answer questions and help you find your new favorite plants. You can join us in person on August 5th for our free First Thursday event; this month Chad will be talking about pests and diseases of the home garden.
Happy gardening,
Sophie
P.S. If your kitchen ambitions are larger than what your garden can provide, we have bulk fresh herbs available to purchase: Use the secret code BASIL for $5 off your order of Sweet Genovese Basil.
Plant of the Week: 3 Native perennials
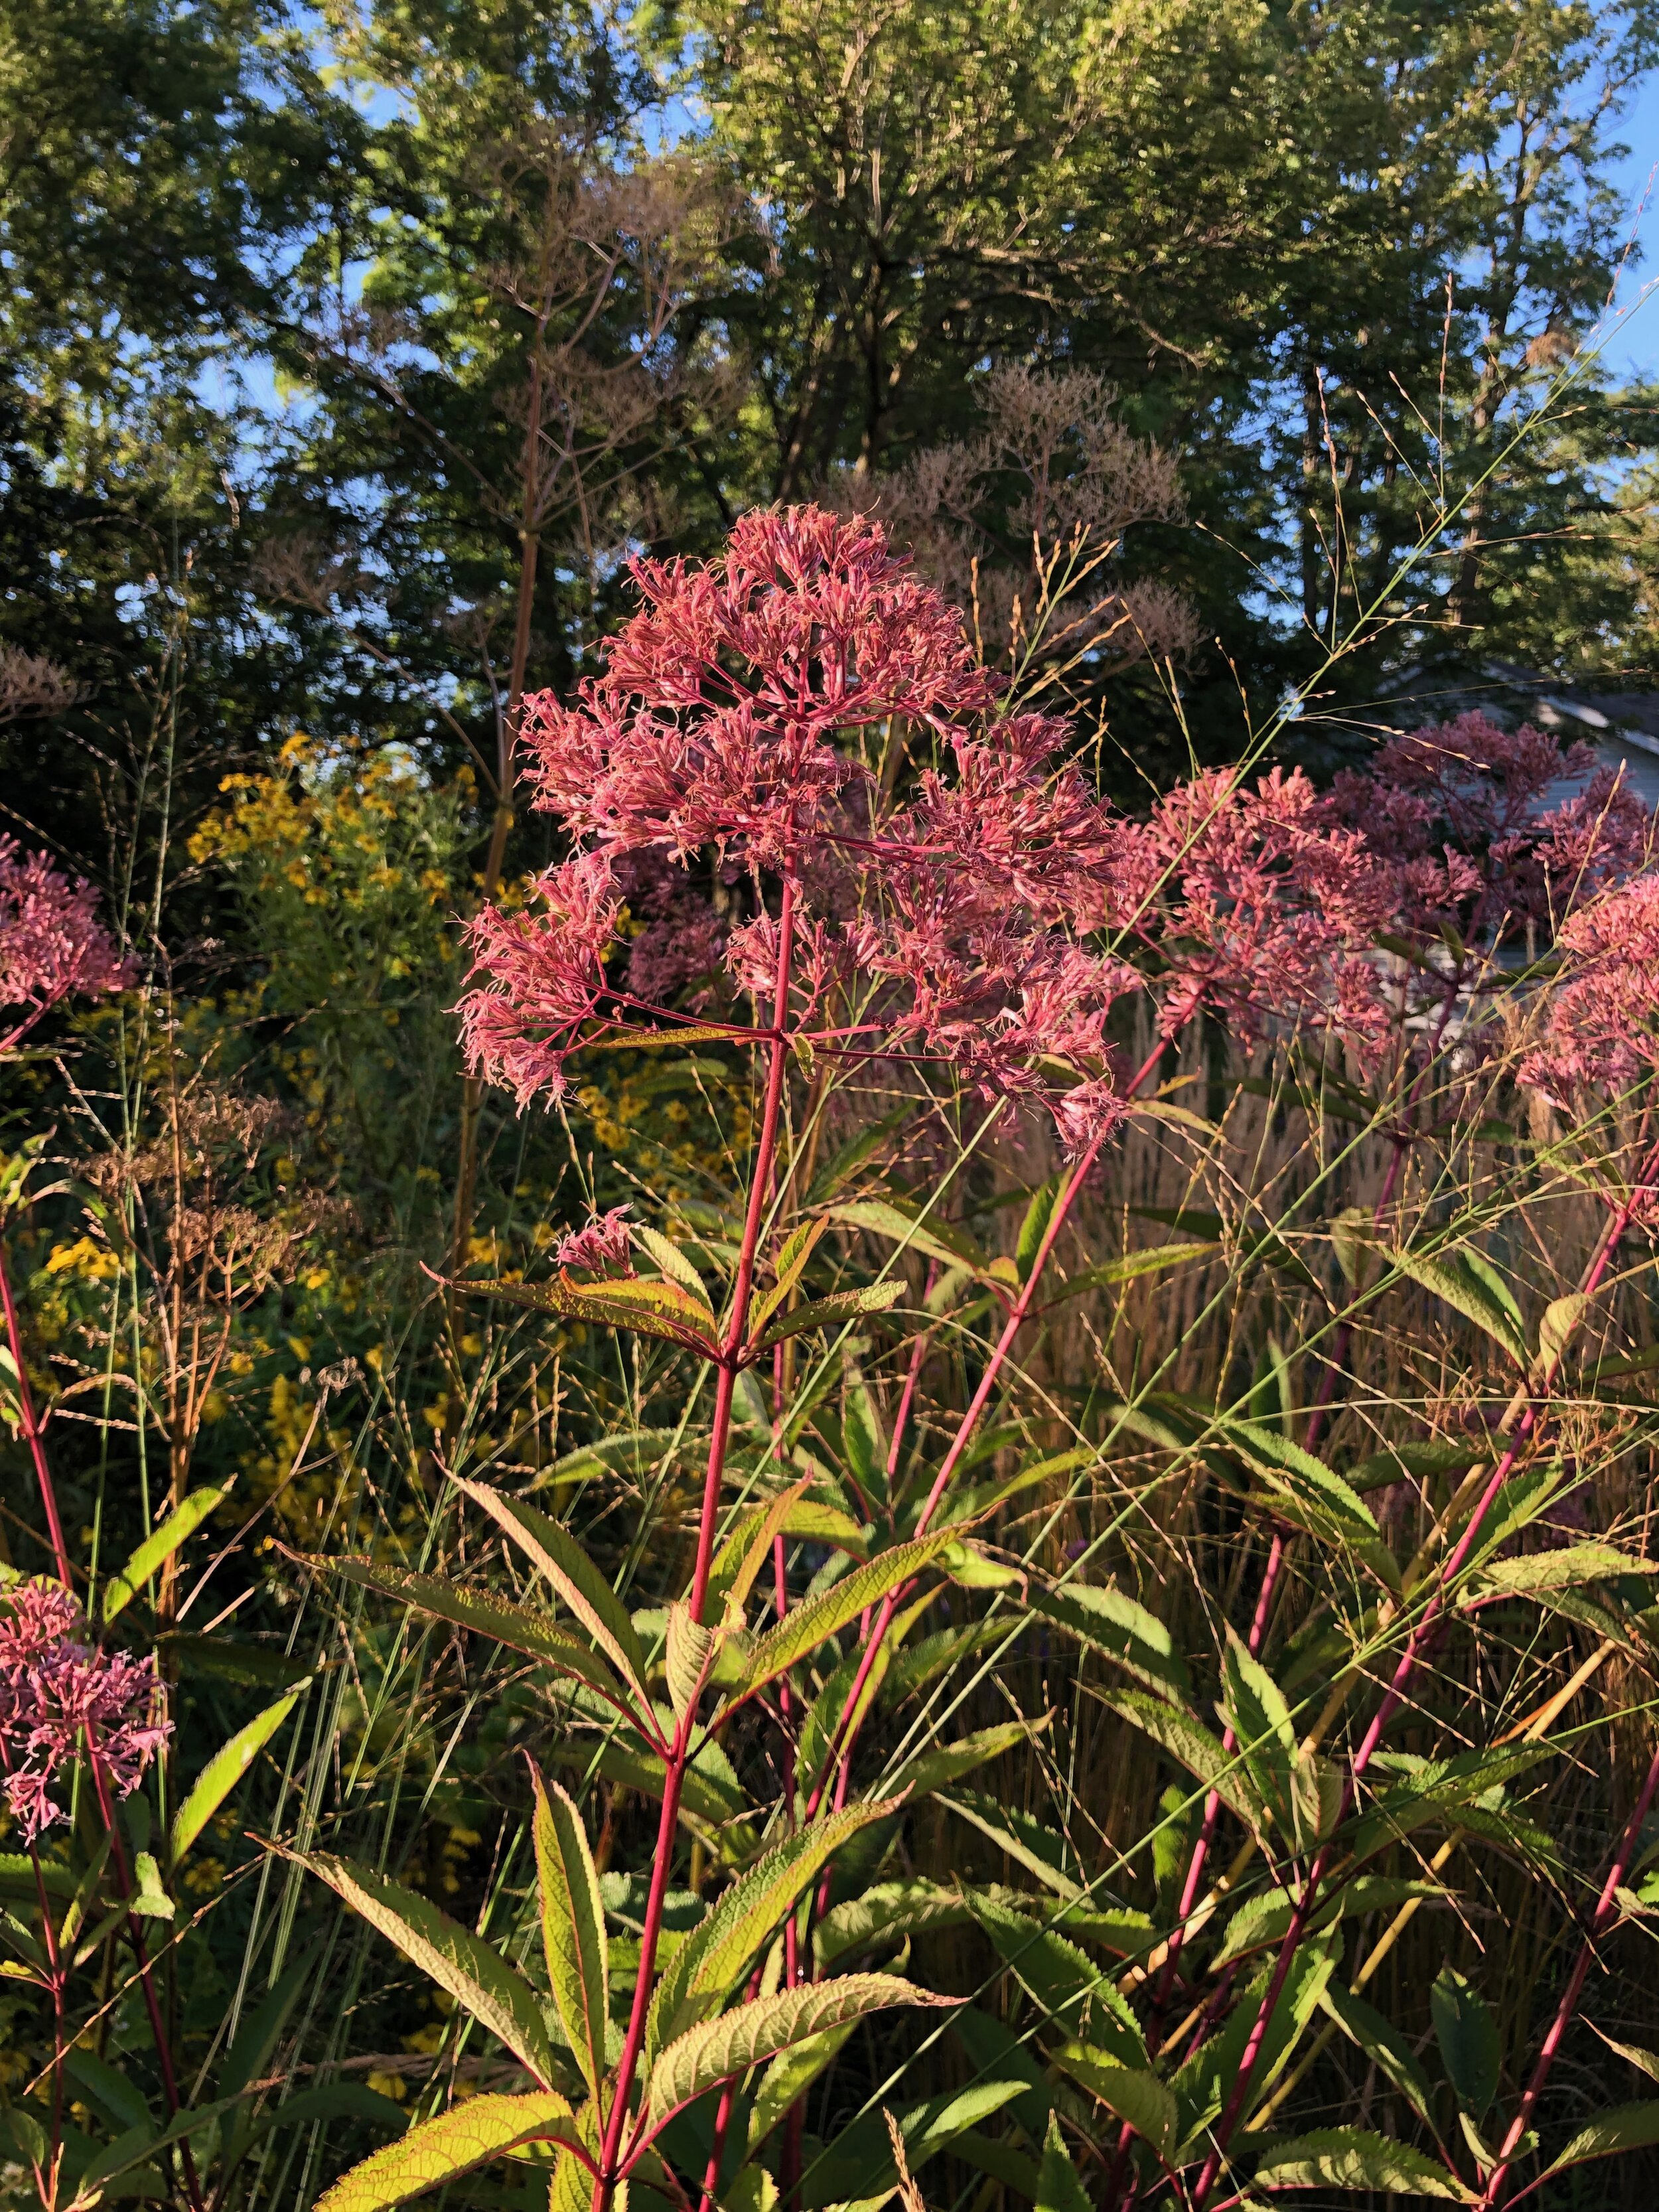
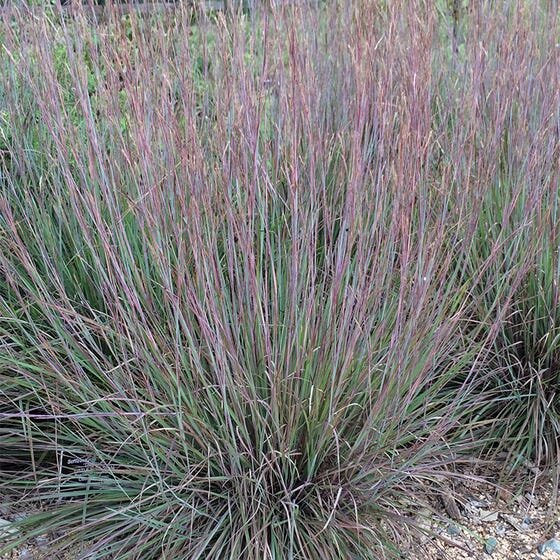
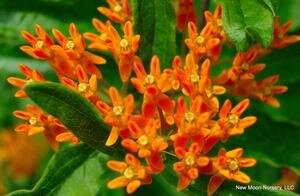
In our attempt to reduce plastic, we have been growing a few plants in fiber pots. They are not perfect, but they have been good for a few things. One of our experiments was with native perennials. We wanted to give you an option that feels ecological for those extra-eco plantings, so this week’s Plant(s) of the Week are a trio of power house perennials for the native / pollinator garden:
Asclepias tuberosa, a.k.a. Butterfly Weed - a little slow to get established, but once it takes off, it provides a bright pop of orange all summer long.
Eupatorium maculatum, a.k.a. Joe Pye Weed - a tall meadow plant that looks so striking in the landscape and is always covered in bees and butterflies
Schizachrium scoparum, a.k.a. Little Bluestem - the Audubon calls this a living bird feeder.
You can buy one ($5.99), get one free of any of the plants in this power trio. It is okay to mix and match, and we encourage you to bring home all three so that you can create a little pollinator habitat with three plants that bloom at different times, at three different heights, and create a perfect little haven for our smallest friends.
In addition, we have lots of great perennials in smaller sizes this year so that you can add to your existing garden or create a new flower bed without breaking the bank. Quarts are $9.99, 4” pots are $4.99.
We have the following in smaller sizes:
Eupatorium perfoliatum, a.k.a. Boneset
Saponaria ocymoides, a.k.a. Rock Soapwort
Heuchera a.k.a. Coral Bells in lots of different varieties
Rudbeckia hirta ‘Indian Summer’, ‘Goldilocks’, and ‘Cherokee Sunset’
Allium cernuum, a.k.a. Nodding Onion
Centranthus ruber a.k.a. Rosy Red Valerian or Jupiter’s Beard
Chasmanthium latifolium, a.k.a. Northern Sea Oats
Hibiscus moscheutos, a.k.a. Hardy hisbiscus ‘Luna Swirl’
Dianthus - lots of varieties
Monarda bradburiana - a favorite native plant of mine. It makes a great ground cover and grows well in all sorts of conditions
Monarda didyma, a.k.a. Scarlet Beebalm
Eryngium yuccifolium - another favorite native plant of mine. It’s got great architecture in the summer garden.
Echinacea purpurea ‘White Swan’
Achillea millefolium ‘Moonshine’ and ‘Sassy Summer Sangria’
Nepeta x faassenii ‘Junior Walker’
Heliopsis helianthiodes ‘Summer Night’ - this won’t stay at this size / price point for long. It is a fast growing, big plant, and will get bumped up to a gallon or two gallon pot soon. It is a great filler for the back of the border where you want late July (yellow) color and height. It would look great with this week’s power trio Plant(s) of the Week!
In the Garden
It is time to harvest garlic. While the rains have made it hard to find a good time to pick, we want to encourage you to do it sooner rather than later. The longer the garlic sits in wet soil, the less success you will have to cure it properly. Harvest now so that the skins don’t rot and leave all the cloves exposed all winter long. To learn more about harvesting and curing garlic, you can read these blog posts from the way back machine.
Now is a great time to assess the perennial gardens and take notes about changes you would like to make. It is often a time of year with less color in the garden. The early bloomers are done, and the late season flowers haven’t started quite yet. Some great additions: salvias, echinacea, flowering shrubs such as smooth leaf hydrangea, Russian sage, geranium, Eryngium, and lots more. We can help you out with your selection if you tell us what you are looking for in terms of height, color and exposure.
I am ripping out the old peas and planting more greens of all sorts. I have been harvesting lettuce, beets, kohlrabi, cucumbers, greens of all sorts, and radicchios of all sorts. Take a look at anything that is sub-par in the garden, and turn that space into something productive. We have lots of new 4-pack veggies each week and can help you make the most of the summer and fall with succession plantings that you will harvest until the ground freezes.
I have to admit that there is a pile of bark mulch in my driveway that doesn’t seem to magically go away. I bought it to add to my arsenal of murder weapons in my attempt to eradicate the Bishop’s Weed at our house. But it is still there, and so is the Bishop’s Weed. Do you have any projects that you can never make time for? We all do, right? I am hoping to wrap up some of those danglers this week. And no, I don’t think bark mulch will really help to kill the Bishop’s Weed. But it will hide the ugly black plastic that I will smother it with first. Wish me luck.
Happy gardening,
Julie
New Medicinal Herbs for 2021

By Sophie Cassel
Note: The plants discussed here have long histories of use, and the information included does not constitute medical advice. Be sure to check in with your medical provider before using any new herbs long-term.
This year I have the honor of introducing you to some of our newest additions to the Red Wagon Plants medicinal herb family. In addition to the many medicinal herb starts we grow every year, we have added some plants that are tried and true herbal allies, if not as common in the modern Vermont garden.
Medicinal herbs tend to be very closely related if not identical to their “wild” counterparts, with very little breeding done by humans for horticultural production. In this way, the most adaptable and hardy plants tend to thrive, and those very compounds that aid the plant’s survival also serve to act medicinally in the human body. Horticultural plant breeding is often targeted towards things like bloom time and flower color, so medicinal constituents may decrease as the plant adjusts in favor of these showy adaptations. For those of us who appreciate a more natural looking perennial garden, the wild beauty of the unmodified plants is part of their charm, and an assurance that we are growing high-quality medicine as well.
Another trick to medicinal plant growing is germination. Many of these more wild plants have adaptations to ensure seed viability which actually make them much more difficult to reliably germinate at home. Replicating the plant’s natural experience, such as letting the seeds go through a period of cold stratification (for northern climate plants) or nicking the seed coats to mimic the passage through an animal’s intestine, will help increase germination. They’ll never behave quite like a tomato or spinach seed, because these medicinal plants have not adapted to rely on human propagation. This means that buying established plant starts is a great way to ensure success this year, and you’ll be able to save seed to experiment with expanding your patch in years to come.
You’ll notice that a couple of these plants have the species name “officinalis”, as do other herbs that we grow; that’s a clue to the fact that these plants were historically included in official pharmacopeias and monastic apothecaries well before Linnaeus’s time in the early 18th century.
Without further ado, here are some of the newest additions to the Red Wagon medicinal herb family:
Marshmallow (Althea officinalis): A relative of hollyhock and hibiscus, this pale-pink flowering beauty lives up to its name, thriving in wet or dense soils. It will also do just fine in garden soils with enough moisture. Growing 3-5’ tall, plant marshmallow towards the back of your perennial beds, but still within easy enough reach to harvest the flowers and soft, velvety leaves for tea. All parts of this plant, including the 2+ year old roots, are valuable for their soothing mucilaginous qualities, which smooth out digestion and soften skin. A great herb for the kid’s garden!
Wood Betony (Stachys officinalis): This plant used to be a staple in old European herb gardens, and has been venerated for centuries as a panacea to “preserve the liver” and ease emotional malaise. Well-behaved clumps of deep green leaves form attractive mounds for the front of the garden, with stately 2’ spikes of purple flowers that will continue to sprout as you harvest through the season. Clip back stems, leaves and flowers and dry for a subtle, earthy tea that can clarify the mind and support healthy digestive function.
Skullcap (Scutellaria lateriflora): As our retail manager and fellow herb aficionado Lily said, “After 2020, everyone could use some skullcap!” A native wetland herb in the Mint family, skullcap will happily sort itself around plants like marshmallow and valerian, growing 1-2’ tall with petite periwinkle-colored flowers appearing along the stems. One of our most valued herbs for relaxing muscle tension and general anxiousness, this plant is used both to support sleep and simply find ease through the day. Cut back a few times over the season and dry for tea or infuse in alcohol to make a tincture. Skullcap doesn’t have much of a flavor, so it plays well with other aromatic family members like lemon balm, peppermint, and tulsi.
Elecampane (Inula helenium): Do you ever wish your sunflowers had a little more sass and came back every year? Elecampane is your answer! Growing up to 6’ tall, elecampane sports finely-petaled yellow flowers born on thick bracts, with large clasping leaves that are a showstopper in the garden. Named after Helen of Troy, the root of this plant has been long revered as a pungent digestive tonic with a camphorous aroma that lends itself well to infused honeys and cordials. It’s valuable in supporting lung health and getting out stuck “gunk” wherever it may be lodged.
California Poppy (Eschscholzia californica): We’re bringing back the California state flower to our collection this year. While related to the other garden poppies, Eschscholzia flowers later and requires far less in terms of soil quality to thrive. The only annual on this list, plant California poppy alongside other self-seeding annuals like chamomile and calendula, or tuck it around the front of a sunny perennial border that you don’t have time to mulch or fertilize. The whole plant is used medicinally, including the striking red root and attractive long seed pods (which also make excellent everlasting bouquet additions). Tincture the plant in vinegar or alcohol to make a tonic for sleep that is impeded by either pain or discomfort of body and mind alike.
Ashwagandha, aka Winter Cherry or Indian Ginseng, Withania somnifera, Solanaceae
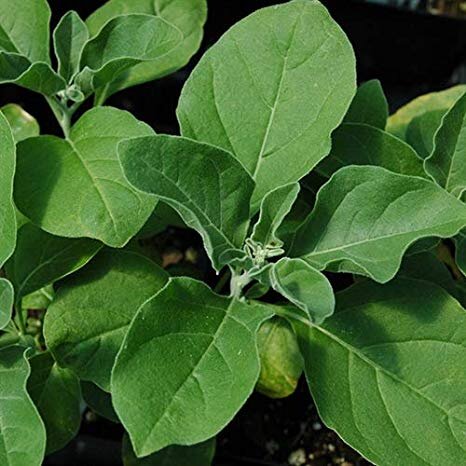
If you’ve been tracking the various “wellness” industries in the past few years, or even just perused the supplement section at your local grocery store, you’ve likely noticed the name of Withania somnifera, commonly called ashwagandha or winter cherry. A powerful herb popularly used in Indian Ayurvedic medicine (among other medicinal traditions of southeast Asia and Africa), ashwagandha root has become something of a darling in the West, used in expensive skincare regimes and “biohacking” diets that pledge eternal life to the devoted. As a member of the class of herbs known as “adaptogens”, ashwagandha has been traditionally used to help with sleep, build adrenal reserves, and improve overall vitality. However, like any exotic remedy, there are very real concerns around the sustainability and ethical production of plants grown far away once an unprecedented demand for them has been created.
Lucky for us, ashwagandha is a fun and relatively simple herb to grow in the home garden, and its very real health benefits provide an opportunity to easily upgrade your medicine chest. A member of the Solanaceae family, ashwagandha shares some characteristics with other family members like eggplants and peppers. It produces husk-enclosed fruits that look like tiny tomatillos, and appreciates plenty of heat and sunshine. However, ashwagandha is adapted to grow in sandy, dry conditions, and doesn’t need much in the way of water or fertility, just sweet, well-draining soil. Ashwagandha is prized for its long, tough roots, so well-worked soil is imperative to good root growth. The plants should be started indoors or purchased from a nursery (like Red Wagon) to give you a jump start on the season, and only transplanted outside or into a greenhouse once the soil has fully warmed up. I like to space my plants about a foot apart, which provides room for root growth but allows the plants to support each other once they reach their mature height of two to three feet tall.
Ashwagandha grows well alongside Tulsi or other sturdy mint family members like lemon balm, especially those that don’t mind a little shade cast by the ashwagandha leaves. I’ve planted calendula around my plants as well, but the calendula can become a bit leggy if they’re spaced too closely together. The same beetles that like to snack on tomatillo plants (called tomatillo beetles or three-lined potato beetles) will attempt to feast on your ashwagandha leaves. Check the leaves regularly for the tell-tale orange eggs, and if necessary put on some gloves and squash the mating adults and larvae when you see them. Even with a fair amount of leaf damage, the ashwagandha plants will soldier on, but I think it makes for better medicine when the plants are lovingly defended. While the flowers are fairly drab, the husked fruits make for a beautiful backdrop as they turn red in early fall.
Ashwagandha and Tulsi have similar cultural needs: they are warm-climate perennial plants that really thrive as annuals in our short northern summers. Plant ashwagandha in early June, and watch it take off through the whole summer, right up until frost. Harvest by loosening the soil and pulling the whole plant up, making sure not to break the roots in the process. Roots should be sprayed clean and chopped up immediately (a sharp pair of pruners will do the job). The first year I grew ashwagandha, I pulled up a plant and neglected to chop it up for a couple days. That was four years ago, and I still have that same root hanging as an ornament in my house- it grew so rock-hard that processing quickly became an impossible task. Once the roots have been chopped, you have a few options. You can use them whole (added to chai blends or tinctured in vodka), or you can further powder the root and add it to everything from drinks to baked goods.
Honestly, the first time I smelled fresh ashwagandha root, I thought it smelled like a swimming pool. Since falling in love with its gentle, nourishing qualities, I now associate the smell with the plant’s own charisma. Once dried, the smell is reduced, and you’re left with a potent medicinal herb that carries the extra benefits of being locally grown and lovingly harvested.
Many of the constituents in ashwagandha are best extracted in a bit of fat, so I usually simmer it in a bit of milk or coconut oil when preparing it. Below is a simple recipe for hot chocolate. Try drinking before bedtime to ease into a restful sleep, or as a midday boost without added caffeine! And of course, always talk with your health care practitioner about any herbs or supplements you’re regularly utilizing.
Ashwagandha Hot Cocoa:
Ashwagandha root, chopped and dried
Cocoa powder
Dark chocolate chunks
Milk (cow or non-dairy, but make sure it has some fat in it)
Cinnamon
Sweetener of your choice (I like maple syrup)
Toss a handful of chocolate chunks into a saucepan, cover with water, and stir while simmering, until chocolate has thoroughly melted into the water.
Add ashwagandha root (about a tablespoon per serving) and simmer for 5-10 minutes.
Add cocoa powder, milk, and cinnamon, and continue to cook on low heat for another 5-10 minutes.
Add sweetener to taste, strain out ashwagandha, and serve! The cooked roots can be reused a couple of times before composting.
Resources:
Ashwagandha monograph: https://www.herbrally.com/monographs/ashwagandha
Cech, Richo. Making Plant Medicine. Herbal Reads, 2000
Onions

Baby onions, about two to three weeks away from transplant time.
A while back, I delivered a crate of onions and garlic to my dad. We had some coffee, talked over the Thanksgiving meal plans, and I took a little walk. That day is a distant memory, my father has since passed away, but the image of those onions and garlic has stayed in my head. The way they filled the wooden crate brings me to a memory of the smile on my dad’s face when he saw them, the food we talked about making together, the warm coffee in our hands.
Onions are a back ground vegetable, easily taken for granted, but aren’t they the basis of flavor in most dishes?
Some people are like onions too. Sharp and edgy at first, sweet and mellow with time and heat.
I am thankful for their plumpness, their abundant harvest, the flavor they will bring to our meals, and the way they generously keep so well under the right conditions.
I rarely buy onions or garlic, usually having enough from the garden to last the year, in some form or another. The storage onions that are great to eat fresh in July, when cured properly, last until March or April. By then chives are ready, then scallions, then green garlic and fresh onions again, one following the other, with a predictable rhythm.
My dad is gone now, but the memories are not, storing and keeping, sweetening with time.
The best time to plant onions is as soon as the ground can be worked, usually middle to end of April in Vermont. They don’t mind cold ground. They prefer it actually, and the earlier they go in, the rounder and larger they will be. Their trajectory is programmed by the sun; as the days get longer, the onion plants remember to follow the cue and they grow round and big. If you neglect this key part of onion growing and plant them late, the onions stay small, and more oval in shape, in a sort of protest.
Our onion plants come in 4 packs. There are about 80 plants in each pack. You just need to separate each individual plant (it is a quick job, especially if the plants are well watered). Then make a trench, 4 inches deep, as long as you want. And then lay each onion delicately in the trench, white roots down, green part up. Fill the soil in around each plant, pat firmly and water well. If 80 onions is too many, you can certainly plant some of the plants in little groups of 4 to 6, and harvest them young, to eat like scallions or baby onions. These are easily the best value in the gardening world, not be forgotten.
Plant Profile: Lemon Balm, Melissa officinalis
By guest blogger, Sophie Cassel, herbalist and Red Wagon Plants team member
Lemon Balm, Melissa officinalis
Lemon balm, cousin to some of our more famous mint family plants, has a historical reputation that far exceeds its diminutive nature and ease of growth in the garden. Herbalists and philosophers since ancient times have revered Melissa officinalis for its bright scent and flavor and ability to brighten and revive the spirit. The latin name Melissa refers to the plant’s association with honey bees, and the species officinalis tips us off that this plant has been used medicinally for so long that it was part of the official pharmacopeia in monasteries. We can take our cues from the bees and the ancients, and make Melissa a part of our medicinal herb gardens.
Native to the Mediterranean and parts of Asia, lemon balm was brought to the Americas during colonial times and has naturalized somewhat, particularly on the west coast. Like most mints, it’s easiest to start lemon balm from cuttings or divisions, but it can also be started by seeds, which are light dependent. It isn’t fussy to grow and can tolerate a bit of shade, but it does prefer moist, well drained and fairly fertile soil without much competition, spaced about a foot apart. Unlike the more aggressive perennial mints, lemon balm tends to form clumps and spreads fairly slowly, making it a more friendly addition to any perennial mix or tea garden. There’s speculation that the high volatile oil content of lemon balm makes it a good companion plant, working to deter pests with its strong scent.
It’s best harvested just before flowering- cut the top third of the plant on a hot afternoon for the highest concentration of aromatic volatile oils. It will continue to branch and grow over the course of the summer, but be sure to let it set flowers at some point to attract its namesake bees to dine on its exquisite nectar.
Once harvested, the sky is the limit when it comes to lemon balm recipes. As a freshly infused tea, it can’t be beat. Simply pour boiling water over the fresh leaves and steep for 5-10 minutes, or place in a jar with cool water and let steep in the sunshine for a few hours, and you’ll be rewarded with a bright and delicate solar infusion that really captures the essence of the plant. Lemon balm dries easily- spread out in a basket in a warm dry spot for a couple days. You can then use it for a delicious, relaxing tea throughout the winter. Or take a cue from the seventeenth-century Carmelite nuns and infuse lemon balm and other herbs in alcohol to make a delicious cordial; drunk before meals it aids digestion and brings levity to any dinner party.
Medicinally, Melissa’s applications are broad. An easy way to think of the signature of lemon balm’s medicine is for ailments “like bees”. Busy, buzzing, unable to settle or slow down enough to rest or digest, that’s where lemon balm comes in. Equally beneficial for a disquieted mind as a rumbly tummy, try lemon balm tea to prepare for bedtime, or to quiet the nerves before a big presentation. It makes a great after-dinner drink, and is safe for both children and elders alike. Rosemary Gladstar uses lemon balm in a wonderful “Colic Remedy” tea that she notes is actually helpful for “anyone with digestive disturbances due to nervous stress, but is especially helpful for infants and those elders who have stomach problems”:
Colic Remedy:
3 parts lemon balm leaf
2 parts chamomile flower
1 part dill seed and leaf [or substitute for fennel seed and frond for a sweeter option]
Steep herbs in freshly boiled water for 10-30 minutes, depending on desired strength. The tea will become slightly more bitter as it steeps, which increases its efficacy for digestive troubles but may be less tasty to sensitive palates.
Plant some lemon balm in your garden this spring, and you will be rewarded with the accolades of bees and delicious medicine all year long.
Resources:
Gladstar, Rosemary (2012). Medicinal Herbs: a beginner’s guide. North Adams, MA: Storey Publishing,
Grieve, Maude (1931). A Modern Herbal. NY: Dover Publications.
Fennel, Foeniculum vulgare, Apiaceae family
by Sophie Cassel, guest blogger, herbalist, and Red Wagon team member
With these plant profiles, my hope is to inspire gardeners to consider growing and using some of the lesser known herbs that Red Wagon propagates, both for their beauty in the garden and their myriad uses in the kitchen and medicine cabinet. Fennel definitely fits the bill here. At Red Wagon, we grow two varieties of Foeniculum vulgare- bulb fennel, which is grown as a vegetable and also known as Florence fennel, and bronze leaf fennel, which is grown as an ornamental and culinary herb with potent medicinal uses.
If people are unfamiliar with bulb fennel in the garden or on the table, they are usually even less aware of bronze leaf fennel, but both of these varieties deserve a spot in the garden. In terms of medicinal usage, we’ll focus on bronze leaf fennel, which is actually quite a bit easier to grow than its bulbous relative, offering interest and uses throughout the growing season.
But first, we should acknowledge the long and celebrated history of fennel across cultures and healing modalities. The emperor Charlemagne reportedly required the cultivation of fennel on all imperial farms, and ever since Holy Roman conquerors introduced their favorite herbs to Anglo-Saxon Europe, western herbalists have extolled the virtues of this plant. My first introduction to fennel seeds, as a digestif following a rich Indian meal, points to its trusted use in Indian Ayurvedic medicine as well. In Longfellow’s 1842 poem “The Goblet of Life”, he too references the plant’s historic values:
Above the lowly plants it towers,
The fennel, with its yellow flowers,
And in an earlier age than ours
Was gifted with the wondrous powers,
Lost vision to restore.
It gave new strength, and fearless mood;
And gladiators, fierce and rude,
Mingled it in their daily food;
And he who battled and subdued,
A wreath of fennel wore.
Even if you’re not planning on going into battle or restoring sight to the blind this summer, fennel still deserves a place of honor in your herb garden. These days, it is chiefly used in all manner of digestive complaints like cramping, bloating, and that weighty feeling that comes after eating something that may not sit well. Like many of its cousins in the Apiaceae or Umbelliferae family (i.e. dill, coriander) fennel is considered carminative, meaning it helps to relieve gas and bloating. I have also seen this work in a similar way to alleviate the cramping that comes with premenstrual symptoms. Traditionally, the seeds of the plant have been the most trusted part for medicinal use, the feathery fronds and flowers also make an excellent tea or addition to salads and fresh summer dishes.
From a gardener’s perspective, bronze leaf fennel is much easier to grow than its finicky vegetal sibling, bulb fennel. While bulb fennel requires consistent adequate moisture, fertility, and mulch, bronze leaf fennel can thrive in a wider variety of soils and tolerates dry conditions. Sow or transplant once the ground has warmed, and offer plenty of sunshine, although some afternoon shade doesn’t seem to slow this plant down much. It can grow up to 2 feet high before flowering, and looks wonderful as a backdrop supporting other sturdy flowers, such as calendula or marigolds.
Once the fronds have begun shooting skyward, you can harvest the leaves continuously for culinary use and bouquets, but make sure to let some go to flower. Insects (including swallowtails) adore the flowers, and as the they mature you can delight in the flavor of the slowly ripening seeds. Be sure to harvest dried seed before frost, unless you’d prefer a garden full of bronze leaf fennel in subsequent years because they self-seed generously. But with its copious culinary and medicinal uses, that wouldn’t really be such a bad thing.
Using fennel for medicine is as easy as popping a pinch of the seeds in your mouth following a rich meal. I like to toast them a little before using to bring out their aroma and offer a pleasant crunch, and you can also fry the seeds in a small amount of honey to candy them and increase palatability. They also brew into a lovely tisane, steeped for 10 minutes in hot water (bonus points for your belly if you add some chamomile flowers to the brew). Fennel is very safe, and has been used for colicky babies as well as to promote lactation following birth. Fresh (or freshly dried) fennel is often considered decently palatable even to folks who have an aversion to the sticky-sweet taste of anise, another Apiaceae cousin of the plant.
Let this be the year you let fennel into your garden, your kitchen, and your heart!
References:
Ken Adams and Dan Drost, Fennel in the Garden, March 2012. https://digitalcommons.usu.edu/cgi/viewcontent.cgi?referer=https://www.google.com/&httpsredir=1&article=1267&context=extension_curall
Longfellow, H.W. Ballads and Other Poems, 1842. Found at https://www.hwlongfellow.org/poems_poem.php?pid=75
Rohde, Eleanour Sinclair. The Old English Herbals. Originally published 1922: Longmans, Green and Co.
Grieve, M. A Modern Herbal. Originally published 1931: Harcourt, Brace & Co.
Rainy Weather Gardening
The weather lately is really putting a damper on my gardening aspirations. I am gong to make the best of it, and focus on what can actually be done in the cool and wet spring we are having, rather than on what cannot be done.

Paths are newly mulched with cardboard and bark mulch. The row cover tunnel just yielded our first harvest of mache and arugula and was just replanted with chard and broccoli raab. The row cover with hoops is one of the best ways to keep bunnies out without a fence. This is the year of the bunny. We even have a bunny statue to beg off the bunnies and ask them to spare us, but it is not really working. Chamomile and stone edging is looking cute and a new patch of self seeding Marble Arch Mix Salvia will provide us with edible flowers, cut flowers, and dried flowers for a few years.
Here is what I am doing in the garden this week:
Clean up and mulch the path ways.
The weeds come out easily when the ground is wet. It is ok to walk on the pathways to clean them up and mulch them, but I avoid walking on the growing beds or doing much to the soil in the growing beds when the ground is really wet. Doing so would compact the soil and adversely affect the tilth. So, the paths are getting a little extra attention this year and I am mulching with a thick layer of cardboard and some rough bark mulch from Clifford’s lumber. This is not the regular bark mulch from a garden center - it is a byproduct of a local, family owned sawmill just down the road. I would not use it in all applications where mulch is needed, but it is perfect for paths and under trees and shrubs. It is a little too coarse for perennial beds (but that is a whole other topic, because really I don’t think bark mulch belongs in most perennial beds). Once the paths are clearly defined and mulched, the rest of the season will be so much less labor intensive in the garden. Some other mulch ideas for paths are burlap coffee bags (which you can find this Saturday at our New North End Plant Sale at Bibens Ace Hardware on North Ave in Burlington). straw (I recommend the organic straw from Aurora Farms in Charlotte), or a combination of newspapper and leaves. These are all pretty heavy duty recommendations for paths. I would not use a heavy mulch like this right under smaller growing plants because the decomposing organic matter uses up the nitrogen in the soil and starves the plants of the food they need for healthy growth. Mulching paths is satisfying and really pays off in the long run. Plus, you can do it in the rain.
Plant more salad greens and try out some new varieties of cool hardy vegetables, flowers and herbs
I just added two kinds of kohlrabi to the garden, green Swiss chard, some Italian bulb fennel, broccoli raab, dandelion greens and frisée. This weather is perfect for transplanting a few plants here and there into corners of the garden. Again, you want to avoid working your soil when it is wet, but it is entirely all right to loosen up small corners of beds and tuck in a few plants here and there. I just harvested my first planting or arugula and of mache and re-planted right into those spaces. I did not disturb the wet soil too much, and I think they will all be fine.
Make containers
Picking out colorful annuals and cool foliage plants is the perfect antidote to the grey and the wet days we seem to be stuck in lately. I am covering my mom’s balcony with pots of geraniums, agastache, salvia, herbs, petunias, argyranthemum, canna, millet, banana, and heuchera. Heurchera, or coral bells, is an under-used plant in containers, and adds broad texture, interesting contrasting color (so many to choose from), and looks good all season long. We have a dwarf red banana we are growing this year that has a beautiful glossy red tinged leaf and looks really striking with the wispy orange of the Kudos mandarin Agastache and the red veined caramel heuchera. Tuck in a red oak lettuce here and there, and you will have a gorgeous container with edibles, perennial and season long interest that holds up well in rain, cold, heat, and dry. I love helping people make containers and have two more Make and Take classes coming up in June for shade loving containers. There is still room to sign up in both.
Wistfully choose heat loving crops
This weekend, I plan to select the tomatoes, eggplants, peppers, melons, cucumbers I want to grow, but I am just hardening them off for now. I am not planting them in the ground. This means that they will come inside at night if it is below 45F and they will go back out in the day time to feel the sun (wishful thinking?), wind, and rain and get used to real life outside. What I am not doing is planting them in the cold ground. That would just stress them out. They need soil that is 50F or warmer in order to grow well, and stressing them at a young age will weaken them when they are older and diseases start to settle in. Planting heat loving crops in cool weather is just asking for trouble down the road.
Move perennials
They love this weather. If you have an area that once was sun but now is shade, it is a great time of year to move those sun loving plants to a brighter spot, away from the encroaching shadow of shrub and tree. I took advantage of the dry and warm day on Wednesday to clean up a perennial bed and replant with shade loving plants under the shrubs that now cast shade. I used tiarella, pulmonaria, variegated Solomon’s Seal, Jacob’s ladder, and hostas. I love that sun to shade switch that inevitably takes place in a garden, the moving art of it all.
Hopefully, this gives you a good amount to do and scratches the gardening itch just enough. Happy gardening!
Mid-April Garden Jobs

It is finally time to get into the garden after a long and very cold winter. Here are some jobs that can happen right now.
Sow from Seeds
Peas, carrots, beets, radishes, turnips
Transplant
Onions - they need the cooler days and long nights of April in order to make large onions in summer. Here are a couple of videos that will give you an idea of how to do it quickly. First, make a trench and sprinkle in some Compost Plus:
Then separate the clump of onion plants into individual plants. Onions should be planted about 4” apart, so just lay them in the trench, all in a row, then gently pat the soil around them to fill in the trench and stand them upright.
Leeks are planted the same way, but require more space, so I do those 6” part with 2 feet between the rows. Onions can have 1 foot between the rows. One 4-pack of our onion or leek plants has about 80 plants in each pack, so it is great to buy a few varieties and share with a friend so you can try multiple kinds. We grow red and yellow storage onions, Italian cipolinni onions, mini purple onions, 2 kinds of sweet onions, and early New York onions. We also grow scallions, 3 kinds of leeks, and shallots. All are planted in the same way, except scallions can be planted in small clumps of 10 to 15 plants. And they don’t need to grow in rows, but can be tucked into individual spots between other plants.
You can also be planting kale, arugula, mache, mustard greens, cabbage, and collards.
Herbs that can take the cold of April: Sorrel, chervil, cilantro, dill, chives.
In the flowering plants department, it is a good time to plant alyssum, violas, and pansies. They are a good food source for bees this time of year when very few other things are flowering.
I wrote more about onions a few years ago here.
Happy gardening! They are announcing rain later today, so I am getting out there now.
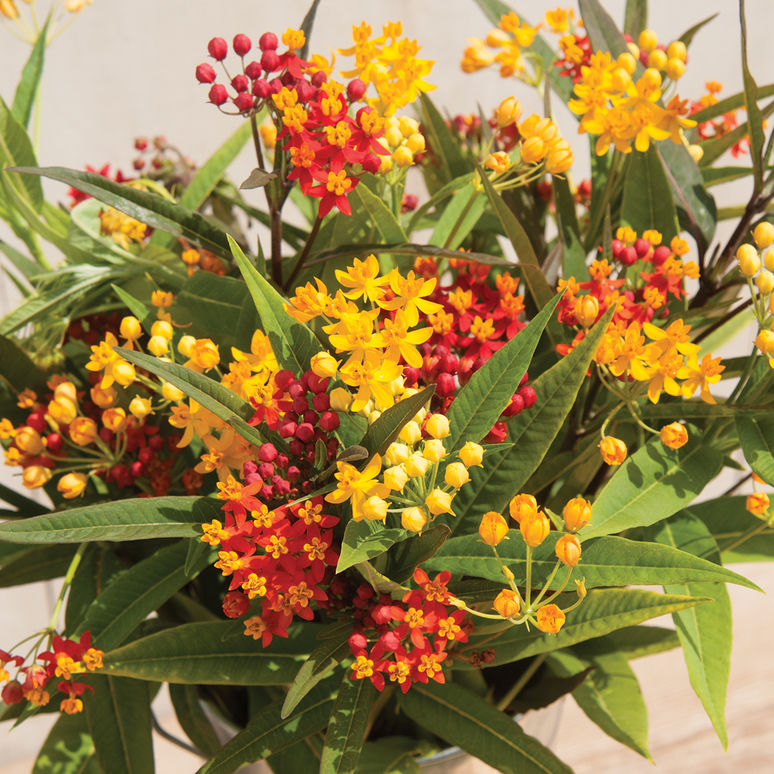
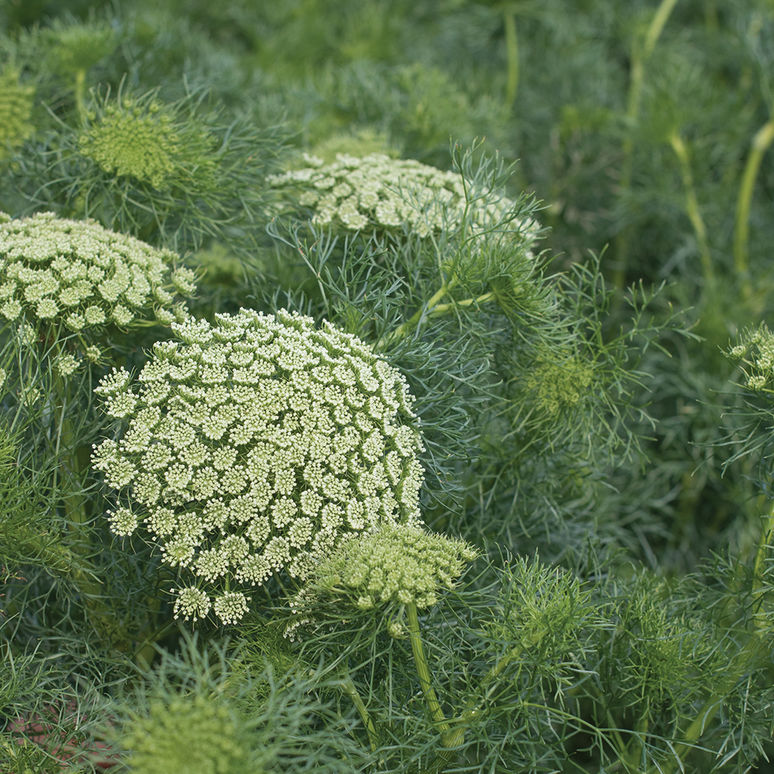
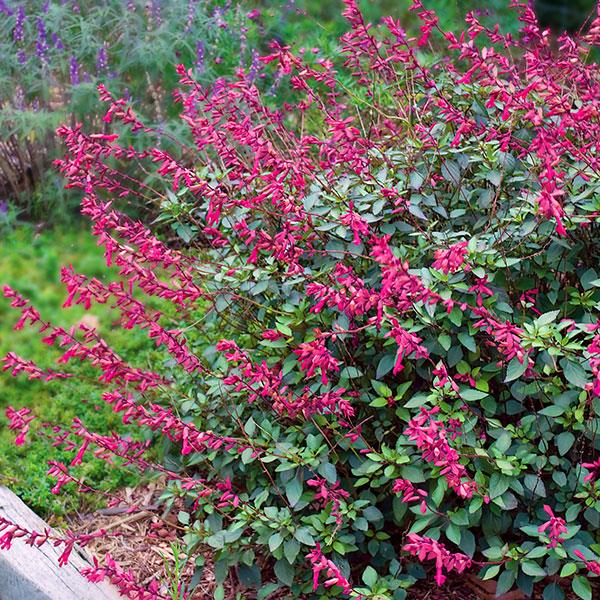
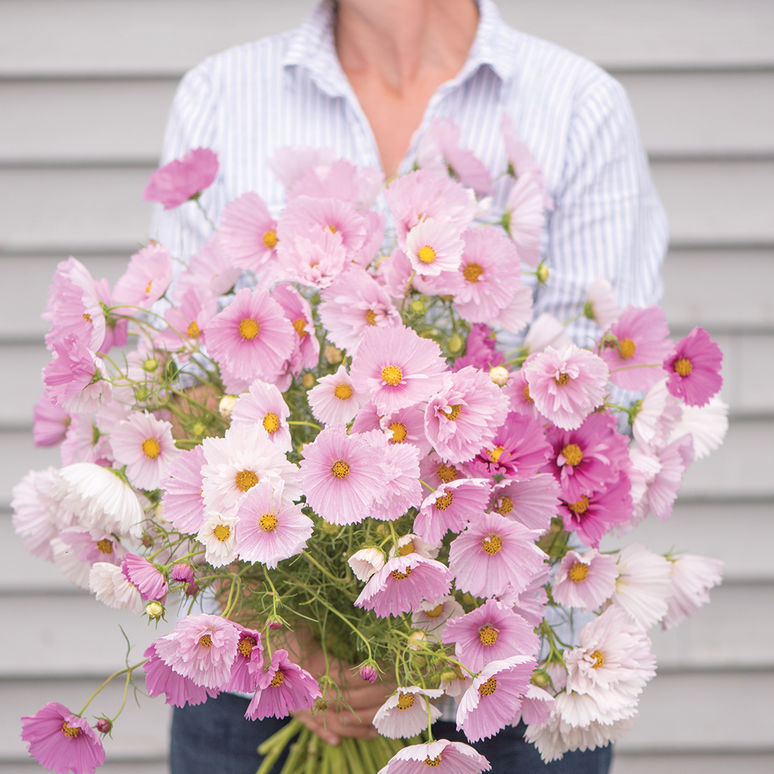
2018 Plant List Preview: Cut Flowers
Last year was the year of the cut flower program at Red Wagon. Not only did we grow and sell more cut flower varieties than ever before, but we also hosted a 3 part floral design workshop series with flower farmer / florist Nina Foster and had a chance to meet flower growers from Vermont, New Hampshire and Massachusetts. The fun and beauty continue into 2018 with an expanded offering of varieties that work well for cutting and arranging and crafting. Here is the list. If you are a home gardener, you can make a wish list now for summer dreaming and planning. If you are a commercial grower, feel free to contact us about purchase plants in larger quantities for your commercial operation. The photos below represent only about 1/3 of the plants we grow that are suitable for cut flower use. Most of our perennials and many more annuals and some herbs are also suitable for floral use. And please note that vegetables and berries can make unique and eye catching additions to those sprawling, romantic bouquets that are so in style right now. If you need any suggestions or want to make a special request, please don't hesitate to let us know.
Photo gratefully used with permission from Ball Horticultural and Johnny's Selected Seeds.


Peek into the Plants, Week of April 10th, 2017
We have lots of lovely plants to show off this week! Here is a little show and tell.


The wings that feed

Much like our plants at Red Wagon, us humans need nourishing food and water to stay healthy and alive. That’s why we love selling plants to gardeners; so they can grow their own food and cultivate their own nourishment. Too often, though, we forget about one of the most important keys to our nourishment: pollination. Pollination is what allows us to grow fruits and vegetables. And, while it seems hyperbolic to say, it is true that a world without pollinators is a world without food. Many of us are learning more about the issues pesticides create for pollinators, but it is less known just how precisely important pollinators are to our food system. An article published by the Pollinator Stewardship Council titled, “Ecosystem Service of Pollinators” pointed out that one study assigned “an economic value to the ‘ecosystem services’ provided by pollinators at approximately $167 billion”. The study also pointed out that pollinators not only affect the quantities of food produced, but they “may also have a beneficial impact on nutritional security-the availability of essential macro-and micronutrients in the human diet”. One study focusing on the nutritional benefits pollinators have on produce found that cross-pollinated almonds had a higher ratio of oleic to linoleic acids-a desirable “cardioprotective” quality for consumers. Another study sited showed that “bee-pollinated strawberries were more red, were heavier and firmer and had reduced sugar-acid ratios,” which proved to have higher market value and were healthier for consumers". So, while these studies are new and we still need more information, it is unarguable that pollinators are the lifeblood of our food system. And, we should take care of them as they take such good care of us.
Garlic Ritual
Planting garlic in Vermont is a great way to extend the gardening season and gives you a crop that is perfect in so many dishes, stores well all winter long and even generates its own seed. It is a perfect way to tune into the cycles of the gardening season and feel like you are growing an important part of your diet. Garlic is expensive to purchase so there are savings to be had with your own garlic crop. Please follow this guide for easy, step-by-step instructions that will give you a garlic patch for life. I have been growing out my own garlic for 18 years and usually do not need to ever buy seed stock or garlic in the grocery store. The pleasures of garlic growing are abundant and I encourage you to get familiar with this wonderful and simple crop.
When to start the cycle?
Planting dates in Vermont are anytime between mid October and late October. It is best to wait until then, because if you plant too early, the bulbs will break out of dormancy too soon and this weakens the plant going into our harsh winters. If you plant the cloves during those last two weeks of October, it gives them just the right amount of time to take root and hunker down until spring, but not send out any top growth.
To plant garlic, you need to follow a few easy steps.
1. Bed preparation.
This is the act of making your garden soil ready for garlic planting. You want a nice patch of garden, that is worked deeply so that the soil is loose about a foot down in depth. If your garden is very compacted and hard, the garlic will not be able to grow well and you will be sure to end up with small heads of garlic that are tedious to peel and not all that satisfying. You can prepare the bed with a 3 prong fork by digging in straight down, tilting the handle of the fork back and forth, and loosening the hard pan. This is a good work out! Don’t hesitate to get dirty here by kneeling in the earth and breaking up the clods of soil with your hands so they are not chunky at all. Add a bit of well rotted manure or compost at this time. Not too much. For a 5 by 10 bed, maybe a 5 gallon bucket’s worth. You don’t want to over feed the garlic roots in the fall, but a little compost will add organic matter and that will help the structure of the soil, keeping it loose, able to retain some moisture without staying too wet.
Take your time and your garden will reward you. I always look at garlic planting as a soulful moment in the gardening cycle. It is saying goodbye to summer and embracing the dormancy of winter, when seeds deep below the surface slowly get ready for their spring emergence. Living in a climate with such long winters, I need these small, but important, rituals to remind me that spring will come and the cold barren winter is a necessary part of it all. The seed garlic is planted in the fall because it needs to send roots far into the earth in order to feed itself the following year. I take this as a metaphor for my own winter activities that feed me all year long - catching up on sleep, feeding my mind with more reading time, eating great, nourishing foods, and spending more time with friends and family. I digress here, but these are the thoughts I have as I plant garlic, and after many years of doing it, I find that it is a necessary part of my mental preparation for winter.
2. Mark the rows with a hoe, or hand tool. I usually keep the rows about 12 inches apart and since my beds are about 4 feet wide, I keep 3 rows per bed and can easily reach the center. Just drag your tool - the sharp tip of a hoe or the narrow edge of a hard rake works well - through the soil to delineate the rows. You can use string and stakes if it is important to be straight, but I don’t bother with that at all.
3. Break up the garlic heads into individual cloves. Do not peel! And notice that one end is the root end and one end is the stem end. This will be important for planting right side up with the root end pointing straight down and the stem end pointing straight up.
4. Space out the cloves. Lay the cloves on the top of the soil, following the line you have just drawn in the soil. Allow about 6 inches between all the cloves.
5. Planting, spacing, and yields
Now you can start to plant. I always kneel down and take my time to feel the earth under me at this point. It just feels good and is a way to say goodbye to the garden before winter! Then, take a bulb planting tool, or a sturdy, sharp pointed stick, or your hand if your soil is soft and pliable, and poke a hole about 4 to 6 inches down. Shove the clove of garlic deep down, root end down, and cover up with the soil. Continue down the row and repeat until all is planted. Three heads of garlic will turn into about 24 heads next spring - assuming your garlic has about 8 cloves per head. . And with 6” by 12” spacing, a 5’ x 10’ patch of garlic will yield about 60 heads of garlic. That is enough to enjoy one head of garlic per week, all year long, and still have some left over for planting. To plant a patch this big, you will need to plant the equivalent of 7 to 10 heads of garlic.
6. Compost and mulch. I usually add another 4” of compost or well rotted horse manure to the bed. I then leave it like that for about 6 weeks. Then in mid to late December, I cover the bed with a thick layer of straw. You can also use leaves here, but straw is the best insulator with hollow stems that trap air and keep everybody warm down below. Another advantage of straw is that it usually does not have weed seeds in it; mulch hay, straw’s poor cousin, should be avoided since it is laden with all sorts of perennial grass and weed seeds. The straw moderates the winter soil temperature and prevents buckling and heaving which could push those garlic cloves up and out of the ground.
Let winter pass you by now, and next......
7. Spring time chores with garlic. Once the snow melts and the soil warms up a bit, your garlic will break dormancy and magically pop up out of the earth. It is important to pull back the straw to let the garlic see sunlight. If you wait a bit too long, and pull back the straw only to see a bunch of yellowing stems, don’t worry! The garlic shoots will green up in no time and will look fabulously sturdy after a week or so of direct sunlight. I usually pull the straw into the garden path, let it pile up there and then replace it around the growing garlic to block out weeds once the garlic plants are about 8 inches high. I often will add a little granular fertilizer at this time, before putting the mulch back in place. For a 5 by 10 garlic patch about 3 cups of Pro-Gro from North Country organics or one bag of Compost Plus from Vermont Compost Company is just about right. This will insure you get large, easy to peel cloves that taste great.
8. Garlic scapes will appear on stiff neck garlic around late May. These look like green curly cues with a pointy end that gracefully swoops down and around, waving in the breeze. This is the budding and flowering portion of the garlic plant. It should be removed to help the plant spend its energy on sizing up the goods below ground. If it is allowed to flower, the plants’ strength will go towards the flower and the garlic forming below ground will be the weaker for it. The good news here is that the “scapes” as they are called, are good to eat. I usually cut off the pointy tip - it is rubbery and inedible, and then slice up the round stem and use it in stir fries, stews, pasta dishes, or pickles. When cooked, it has the texture of a nice green bean and the flavor of mild garlic. It is absolutely delicious and a once a year treat that marks the beginning of summer - a harbinger of good things to come.
9. When to harvest? Garlic is ready to harvest when about 70% of its leaves have turned yellow. This is somewhat subjective, and should be taken as not a hard and fast rule, but rather a guide. You can dig up one head of garlic and look for signs of well formed skin, plump cloves, and individuation (cloves that are individually formed, and not one big mass). This is usually some time in late July. In very wet and rainy years, sometimes it makes more sense to take the garlic our of the ground a little early so that the skin does not rot in the damp earth.
10. How to harvest? Take out your three prong fork again and use it to loosen the soil around the outside edges of each garlic row. This will break up the soil enough to allow you to pull out each plant with a firm yank. (If the stems break off, it is likely you waited too long and the skin and stems are starting to rot. At that point, just dig up the cloves with a spade and they will be okay in taste; they just won’t store well. ) Lay the plants on the surface of the soil so that they start to dry off. Once all the garlic is pulled up, wipe it with a towel or rag, and get ready to tie it into bundles. I usually take about 8 plants, hold them together in one hand, and with the other hand, wrap twine around the whole bundle. Tie off the twine and then hang the bundle in a dark airy space. The rafters of a garage, shed or barn work well. If you don’t have that type of space, just find a place out of the rain, out of direct sunlight and with good air circulation - a covered porch? a dry basement with a fan running? a spare bedroom that can get a little dirty? (no shag rugs please!).
11. Curing the garlic Curing is the process of letting the garlic dry which makes the papery skin that allows the garlic to keep all winter. The stems will turn brown and brittle and the exterior of the bulbs will become dry and paper-like, just like garlic in the store. At this point, it is okay to cut off those dry stems, wipe off any remaining dirt, cut off the roots, and place your garlic in a crate to store it. This can be done anytime from 3 to 6 weeks after you initially hang up the garlic to dry.
12. Storing the garlic Once the garlic is cured, cleaned and trimmed, you are ready to store it for eating all winter long. Garlic is best stored in the dark. In an airy, dry, cool place. I use milk crates, covered with a piece of burlap, and keep the crate in a very cool part of the basement. Ideal garlic storing temperatures are between 35 and 45 degrees, but a refrigerator is too humid, so please don’t be tempted to use that as a storage method. Other good places to store garlic (and onions for that matter) are unheated attics, attached garages that don’t freeze, but are not heated, or 3 season porches that do not freeze. Root cellars are great, but most of us don’t have one. If well stored, garlic will last until April or May - almost right in time for the garlic scape harvest!
13. Finding seed stock.
Until you build up your own supplies, you will have to purchase seed garlic. There are many great resources for garlic and for finding garlic seed, I recommend Johnny’s Selected Seeds, or locally, Last Resort Farm in Monkton, Hudak Farm in Saint Albans, or any farmer at your local farmers market who has nice looking seed stock. Seed stock is basically sorted out of the garlic harvest and selected for the following the following traits:
- good size
- evenly formed cloves
- strong stem
- well formed skin
- great flavor
- ability to store for a long time
If you have been growing out your garlic in your garden, you can pick out the best cloves at cleaning and storing time. Set these aside in a safe place where they will not be eaten and come October, experience the joy of planting your own seed garlic.
14. Plant garlic. Repeat Step 1. above and the cycle starts all over again!