Garden Tips and Stories

Plant(s) of the Week: A power trio

Tulsi with bee friend. Photo by Sophie Cassel

Tulsi with bee friend. Photo by Sophie Cassel

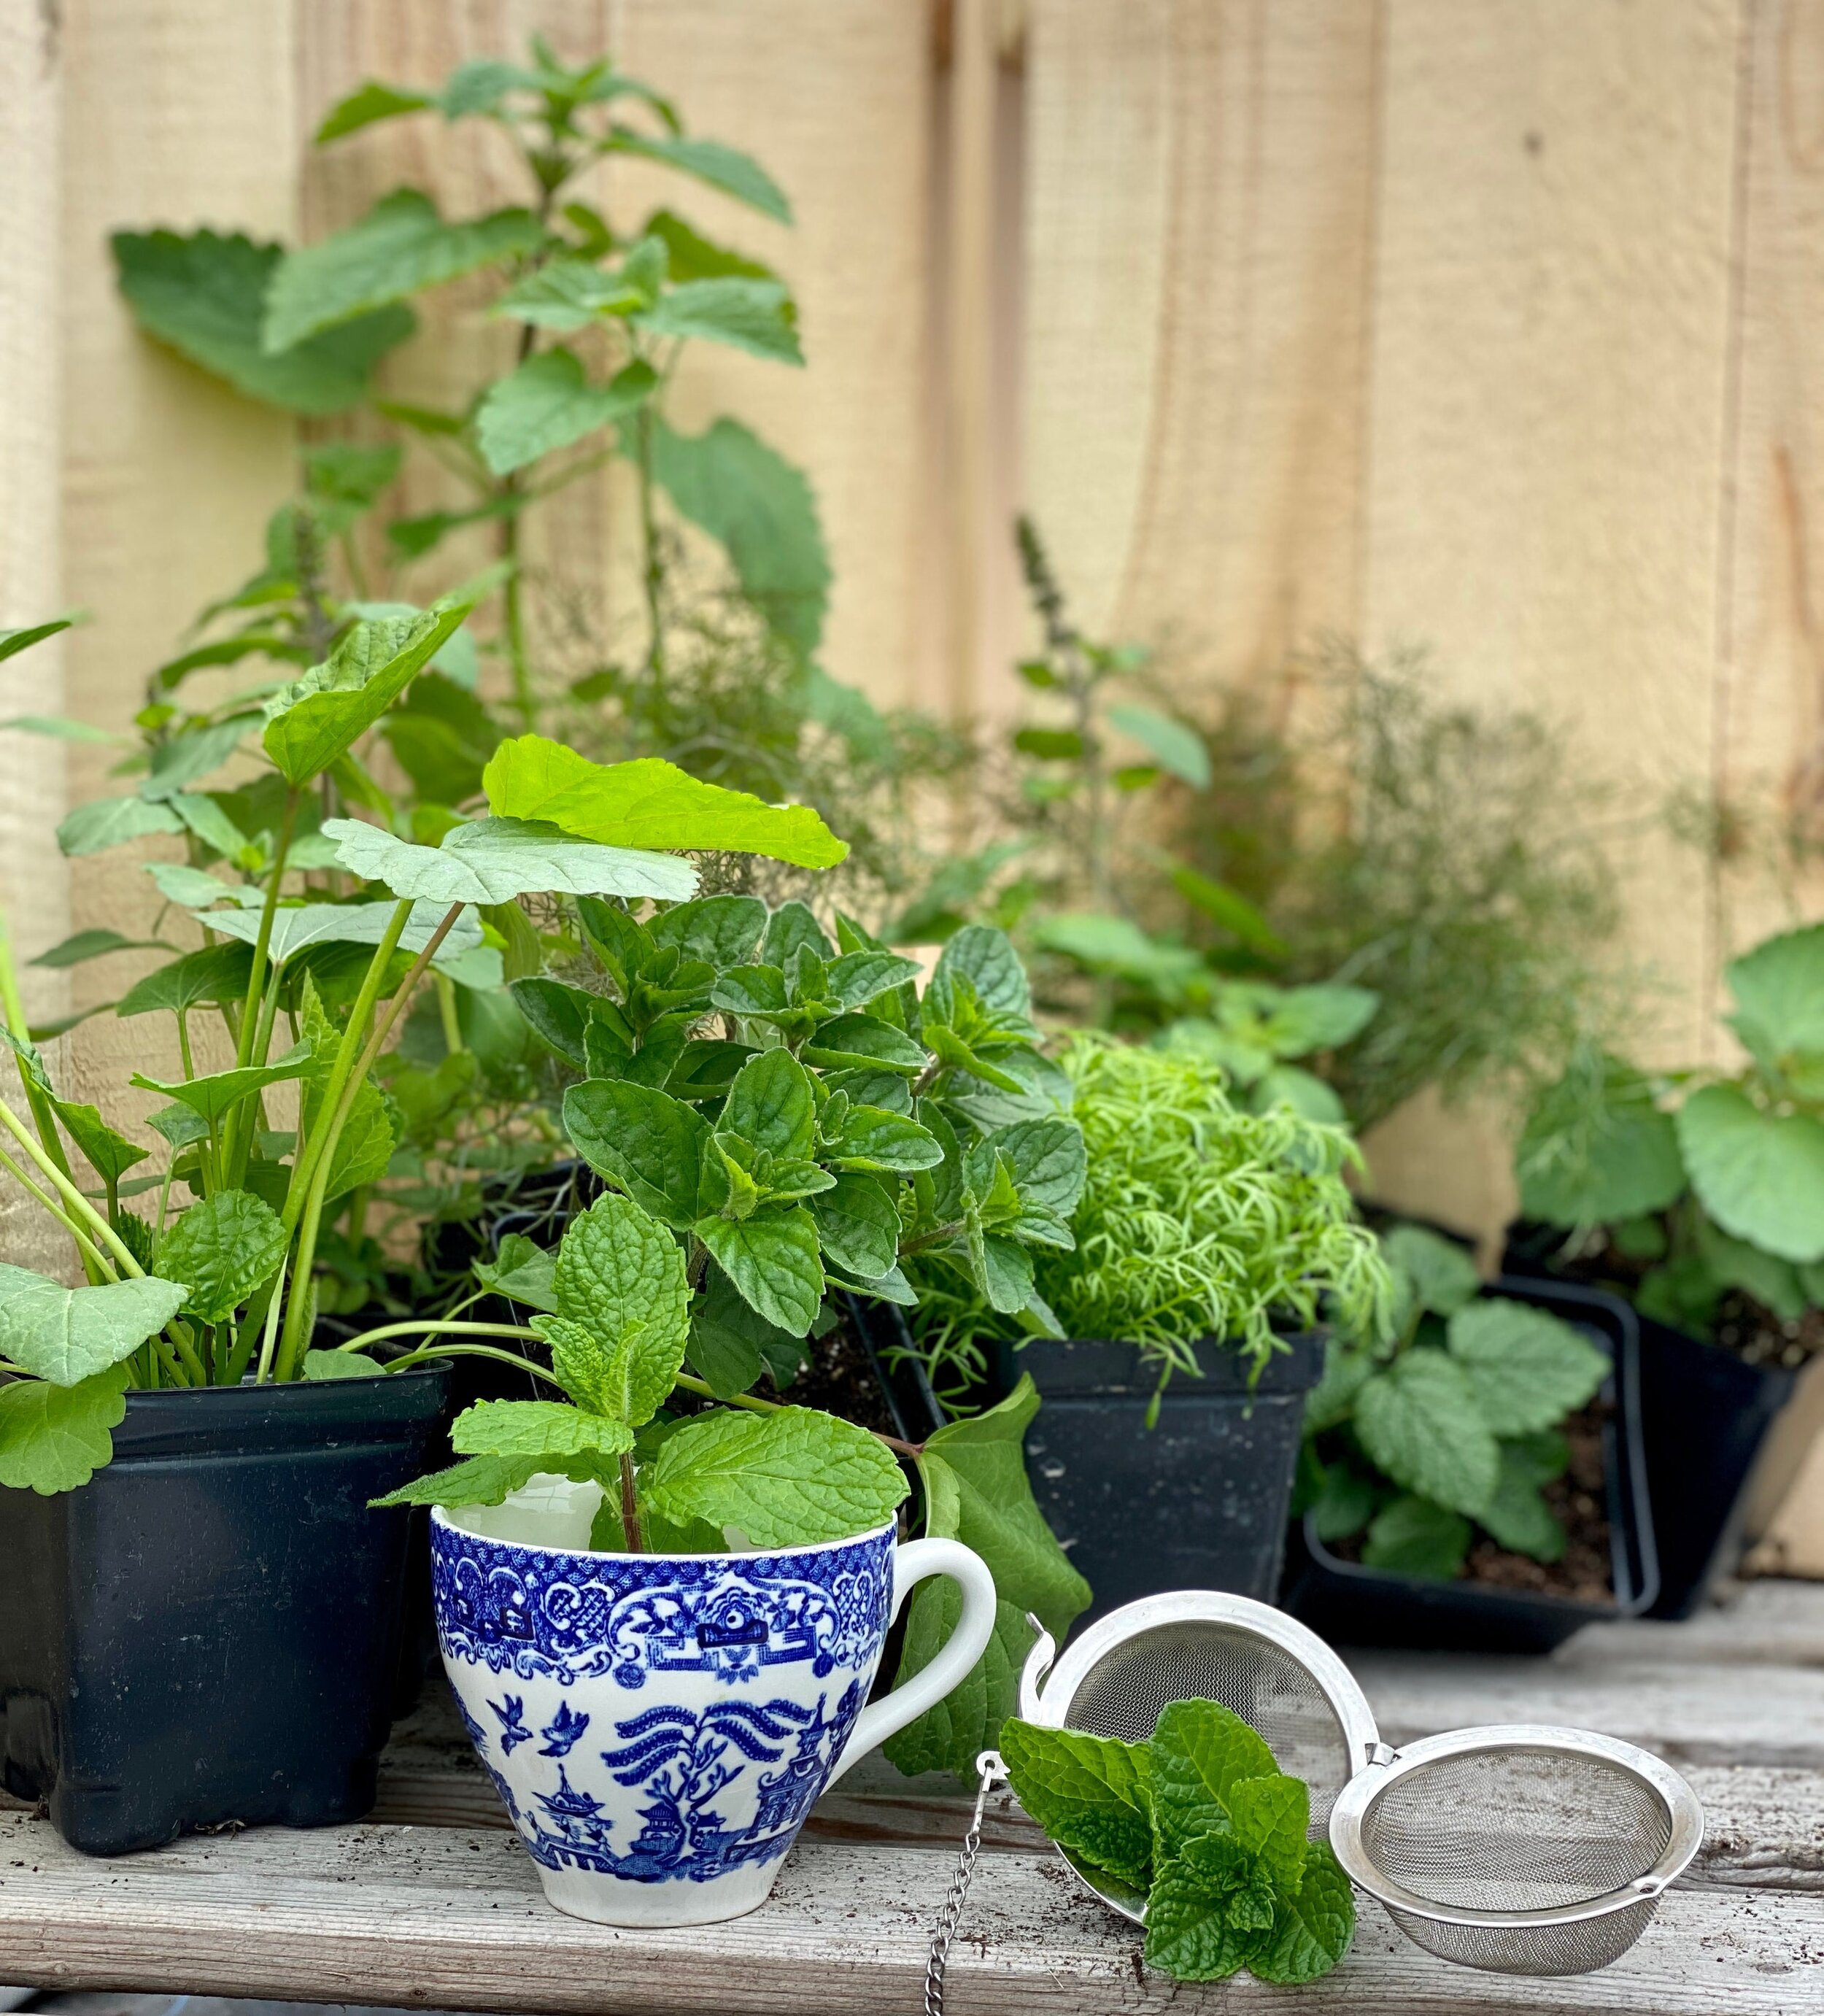
Happy Solstice! We are finally beginning to see the fruits of our early season labor, as the chamomile and calendula come into full flower, the mints begin to really take off, and the perennial valerian and angelica stand tall. I have been absolutely flabbergasted by the way my second-year lemon balm and catnip plants have bushed out, and have begun cutting them back to dry for winter teas. Any time I harvest plants for drying, I also make a batch of fresh herbal tea. This weekend I gathered

I chopped them all into a half-gallon mason jar and let it steep in the sunshine for a few hours before straining over ice for a perfect “sun tea”. A tea like this only exists at a unique moment, and in a unique garden. This snapshot of the season is a great way to get to know your individual herbs.

This week, in our retail greenhouse, we are offering a trio of herbs as our “Plant(s) of the Week”

  • Anise Hyssop

  • Tulsi (which we have a blog post about)

  • Chamomile.

These are a perfect sun tea trio. All three are plants that you’ll definitely want more than one of in your garden, and when you buy these three staple medicinal herbs, you get three free!

You can find me in the garden drinking sun tea, reading, and hanging out with the plants,

Sophie Cassel

Late June Garden Chores

Plant now for this look later in the summer.

Plant now for this look later in the summer.

IN THE GARDEN

—> Keeping up with the weeds after the rain is a priority. They will all bounce up and make a carpet in no time. For best results, cultivate when the weeds are young, once the soil has dried out.

—> Fertilize onions, leeks, and shallots because this is when they put on the most growth. I use Compost Plus and water once or twice with fish emulsion during the weeks of late June and early July.

—> Stake and prune tomatoes. Keep the suckers pinched off, and the foliage off the ground. Doing this now will keep the plants disease free for much longer. If you have not yet, I recommend mulching under the plants to keep the soil from splashing up on the leaves since this is one of the ways disease can spread. We will show you how to do this on our July 1st Plant Walk.

—> Now is a great time to put in a strawberry or asparagus patch. We have both available as bare root stock and our retail team can explain how to do it if you are not sure.

—> I have planted all the required staples such as tomatoes, peppers, squash, etc, and now I am ready to plant the electives. This week it is the cut flower garden. I have the following combos planned for different spots in the new display garden (which you can see on our First Thursday Plant Walks).

  • -Marble Arch Mix Salvia, Cosmos, Zinnia ‘Benary’s Giant White’

  • -Verbena bonariensis, Zinnias ‘Benary’s Giant Mix’ and ‘State Fair Mix’, Rudbeckia hirta

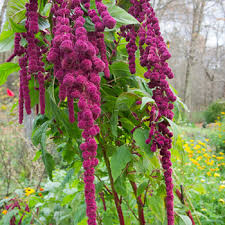
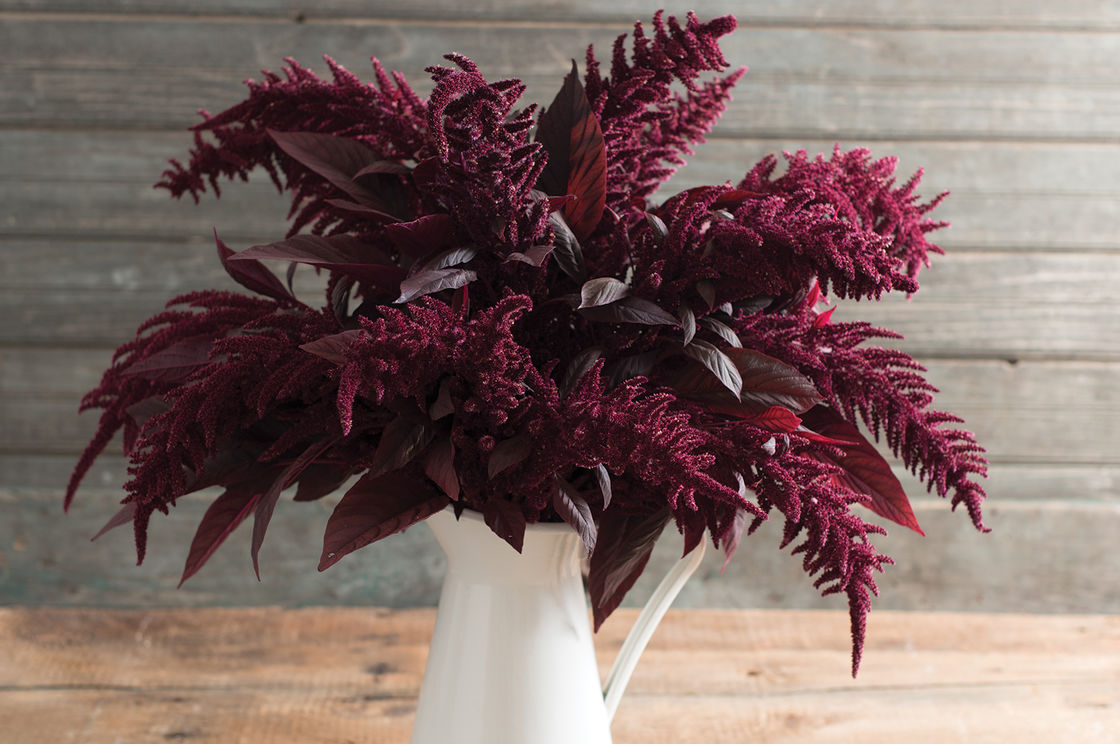
  • -Statice, Strawflower, Gomphrena, Celosia, Amaranth (all for drying)

  • -Sunflowers - a crazy mix of all of our varieties

Medicinal Herb Bundles for 2021

2021 is going to be a big year for medicinal herb growing! With ever more people finding joy and solace in tending to plants, many folks are also realizing that home gardening can be more than just tomatoes and pansies. At Red Wagon we’re branching out as well, and growing even more herbs with traditional medicinal uses. Maybe you’re feeling ready to dive in to the world of healing herbs but a little overwhelmed at all the choices available (don’t even get me started on how *all* plants are medicinal!) Our specially tailored herb bundles are a great way to fill your garden with plants that you know you’ll use and enjoy. Additionally, we’ll offer support through educational videos and recommendations all season.

Our pre-made bundles are only available through our online store; you can also find the individual plants in our retail greenhouses when you come to shop in-person.

To help you get to know the herbs, we’ve made introductory videos for all four bundles; check them out on our Youtube channel. In the video descriptions you’ll also find some book recommendations, many of whose authors have their own super-informative youtube channels. Let these resources be a jumping-off point for your own personal experiences and kitchen experiments with the herbs!

Garden Tea Time Bundle: This kit is full of only the tastiest herbs for making fresh and dried teas. If you’re working with herbs and children, this bundle offers kids a safe and yummy way to pick their own medicine.

Skin Care Herb Bundle: This kit makes a great gift for that glowing garden goddess in your life! Infuse oils for salves and make at-home hydrosols (floral waters) with the vibrant herbs in this bundle.

Sweet Dreams Herb Bundle: Whether you need help counting sheep or just a little support getting through the stresses of the day, the herbs in this kit have got your back.

Basic Home Apothecary Bundle: If you’re ready to form long-term relationships with some perennial herbs, this bundle is full of highly regarded medicinal plants that can be harvested from for years to come. These are great herbs to use when learning how to make tinctures (shelf-stable infusions using alcohol, vinegar or glycerine).

s655787569362225896_p3471_i4_w3241.jpeg

You might be wondering how to start working with herbs early this season, in addition to planning and planting the garden. One thing I do in the spring is go through the dried herbs I still have from seasons past. Now is the time to blend up those random dried herbs to make room for this year’s bounty. I also find it much easier to drink a daily herbal infusion when I have it already mixed up in a pretty jar on the counter. Right now, I’m drinking a blend of garden staples like lemon balm, wood betony and peppermint mixed with some early spring wild plants that will be ready to harvest soon: self-heal, nettles, and red clover. These herbs are mineral rich and help support the healthy liver and lymph function to ease the transition from winter into spring.

If you still have a bunch of dried culinary herbs, try mixing them up to use on roast chicken, spring soups (Nettle and potato soup anyone?), or sprinkled on toast with butter and the first radishes of the year. And remember, culinary herbs are good medicine, too!

2021 can be the year you work more deeply with herbs as a part of your everyday life. We look forward to offering more resources, and hearing about your experiences in the garden this growing season!

New Medicinal Herbs for 2021

marshmallow.jpeg

By Sophie Cassel

Note: The plants discussed here have long histories of use, and the information included does not constitute medical advice. Be sure to check in with your medical provider before using any new herbs long-term. 

This year I have the honor of introducing you to some of our newest additions to the Red Wagon Plants medicinal herb family. In addition to the many medicinal herb starts we grow every year, we have added some plants that are tried and true herbal allies, if not as common in the modern Vermont garden. 

Medicinal herbs tend to be very closely related if not identical to their “wild” counterparts, with very little breeding done by humans for horticultural production. In this way, the most adaptable and hardy plants tend to thrive, and those very compounds that aid the plant’s survival also serve to act medicinally in the human body. Horticultural plant breeding is often targeted towards things like bloom time and flower color, so medicinal constituents may decrease as the plant adjusts in favor of these showy adaptations. For those of us who appreciate a more natural looking perennial garden, the wild beauty of the unmodified plants is part of their charm, and an assurance that we are growing high-quality medicine as well. 

Another trick to medicinal plant growing is germination. Many of these more wild plants have adaptations to ensure seed viability which actually make them much more difficult to reliably germinate at home. Replicating the plant’s natural experience, such as letting the seeds go through a period of cold stratification (for northern climate plants) or nicking the seed coats to mimic the passage through an animal’s intestine, will help increase germination. They’ll never behave quite like a tomato or spinach seed, because these medicinal plants have not adapted to rely on human propagation. This means that buying established plant starts is a great way to ensure success this year, and you’ll be able to save seed to experiment with expanding your patch in years to come. 

You’ll notice that a couple of these plants have the species name “officinalis”, as do other herbs that we grow; that’s a clue to the fact that these plants were historically included in official pharmacopeias and monastic apothecaries well before Linnaeus’s time in the early 18th century. 

Without further ado, here are some of the newest additions to the Red Wagon medicinal herb family:

Marshmallow (Althea officinalis): A relative of hollyhock and hibiscus, this pale-pink flowering beauty lives up to its name, thriving in wet or dense soils. It will also do just fine in garden soils with enough moisture. Growing 3-5’ tall, plant marshmallow towards the back of your perennial beds, but still within easy enough reach to harvest the flowers and soft, velvety leaves for tea. All parts of this plant, including the 2+ year old roots, are valuable for their soothing mucilaginous qualities, which smooth out digestion and soften skin. A great herb for the kid’s garden!

Wood Betony (Stachys officinalis): This plant used to be a staple in old European herb gardens, and has been venerated for centuries as a panacea to “preserve the liver” and ease emotional malaise. Well-behaved clumps of deep green leaves form attractive mounds for the front of the garden, with stately 2’ spikes of purple flowers that will continue to sprout as you harvest through the season. Clip back stems, leaves and flowers and dry for a subtle, earthy tea that can clarify the mind and support healthy digestive function.

Skullcap (Scutellaria lateriflora): As our retail manager and fellow herb aficionado Lily said, “After 2020, everyone could use some skullcap!” A native wetland herb in the Mint family, skullcap will happily sort itself around plants like marshmallow and valerian, growing 1-2’ tall with petite periwinkle-colored flowers appearing along the stems. One of our most valued herbs for relaxing muscle tension and general anxiousness, this plant is used both to support sleep and simply find ease through the day. Cut back a few times over the season and dry for tea or infuse in alcohol to make a tincture. Skullcap doesn’t have much of a flavor, so it plays well with other aromatic family members like lemon balm, peppermint, and tulsi. 

Elecampane (Inula helenium): Do you ever wish your sunflowers had a little more sass and came back every year? Elecampane is your answer! Growing up to 6’ tall, elecampane sports finely-petaled yellow flowers born on thick bracts, with large clasping leaves that are a showstopper in the garden. Named after Helen of Troy, the root of this plant has been long revered as a pungent digestive tonic with a camphorous aroma that lends itself well to infused honeys and cordials. It’s valuable in supporting lung health and getting out stuck “gunk” wherever it may be lodged. 

California Poppy (Eschscholzia californica): We’re bringing back the California state flower to our collection this year. While related to the other garden poppies, Eschscholzia flowers later and requires far less in terms of soil quality to thrive. The only annual on this list, plant California poppy alongside other self-seeding annuals like chamomile and calendula, or tuck it around the front of a sunny perennial border that you don’t have time to mulch or fertilize. The whole plant is used medicinally, including the striking red root and attractive long seed pods (which also make excellent everlasting bouquet additions). Tincture the plant in vinegar or alcohol to make a tonic for sleep that is impeded by either pain or discomfort of body and mind alike.

Pruning Raspberries with Lily Belisle


Many trees, shrubs, vines and brambles benefit from annual pruning. Many plants have their own preferred way to be pruned. It can be difficult to gain confidence with a task you only get to do once a year. Plants are forgiving, and give second chances. So my suggestion is to watch a YouTube video and give it a try. Raspberries are a great place to start.

Raspberries are vigorous growers once the plants are established and you'll greatly improve your yield, disease resistance, and ease of harvest with annual pruning. There are 2 types of raspberries - ones that make fruit on second year canes (floricanes), these are your summer raspberries - and ones that make fruit on first (primocane) and second year canes (floricanes), these are your fall raspberries with a few fruits in the summer. I grow both types at my house and prefer to prune them all the same way.

You'll need hand pruners or loppers and gloves. These canes are prickly.


C8081F79-4F0C-4B82-85DD-B2FF13965B28.JPG

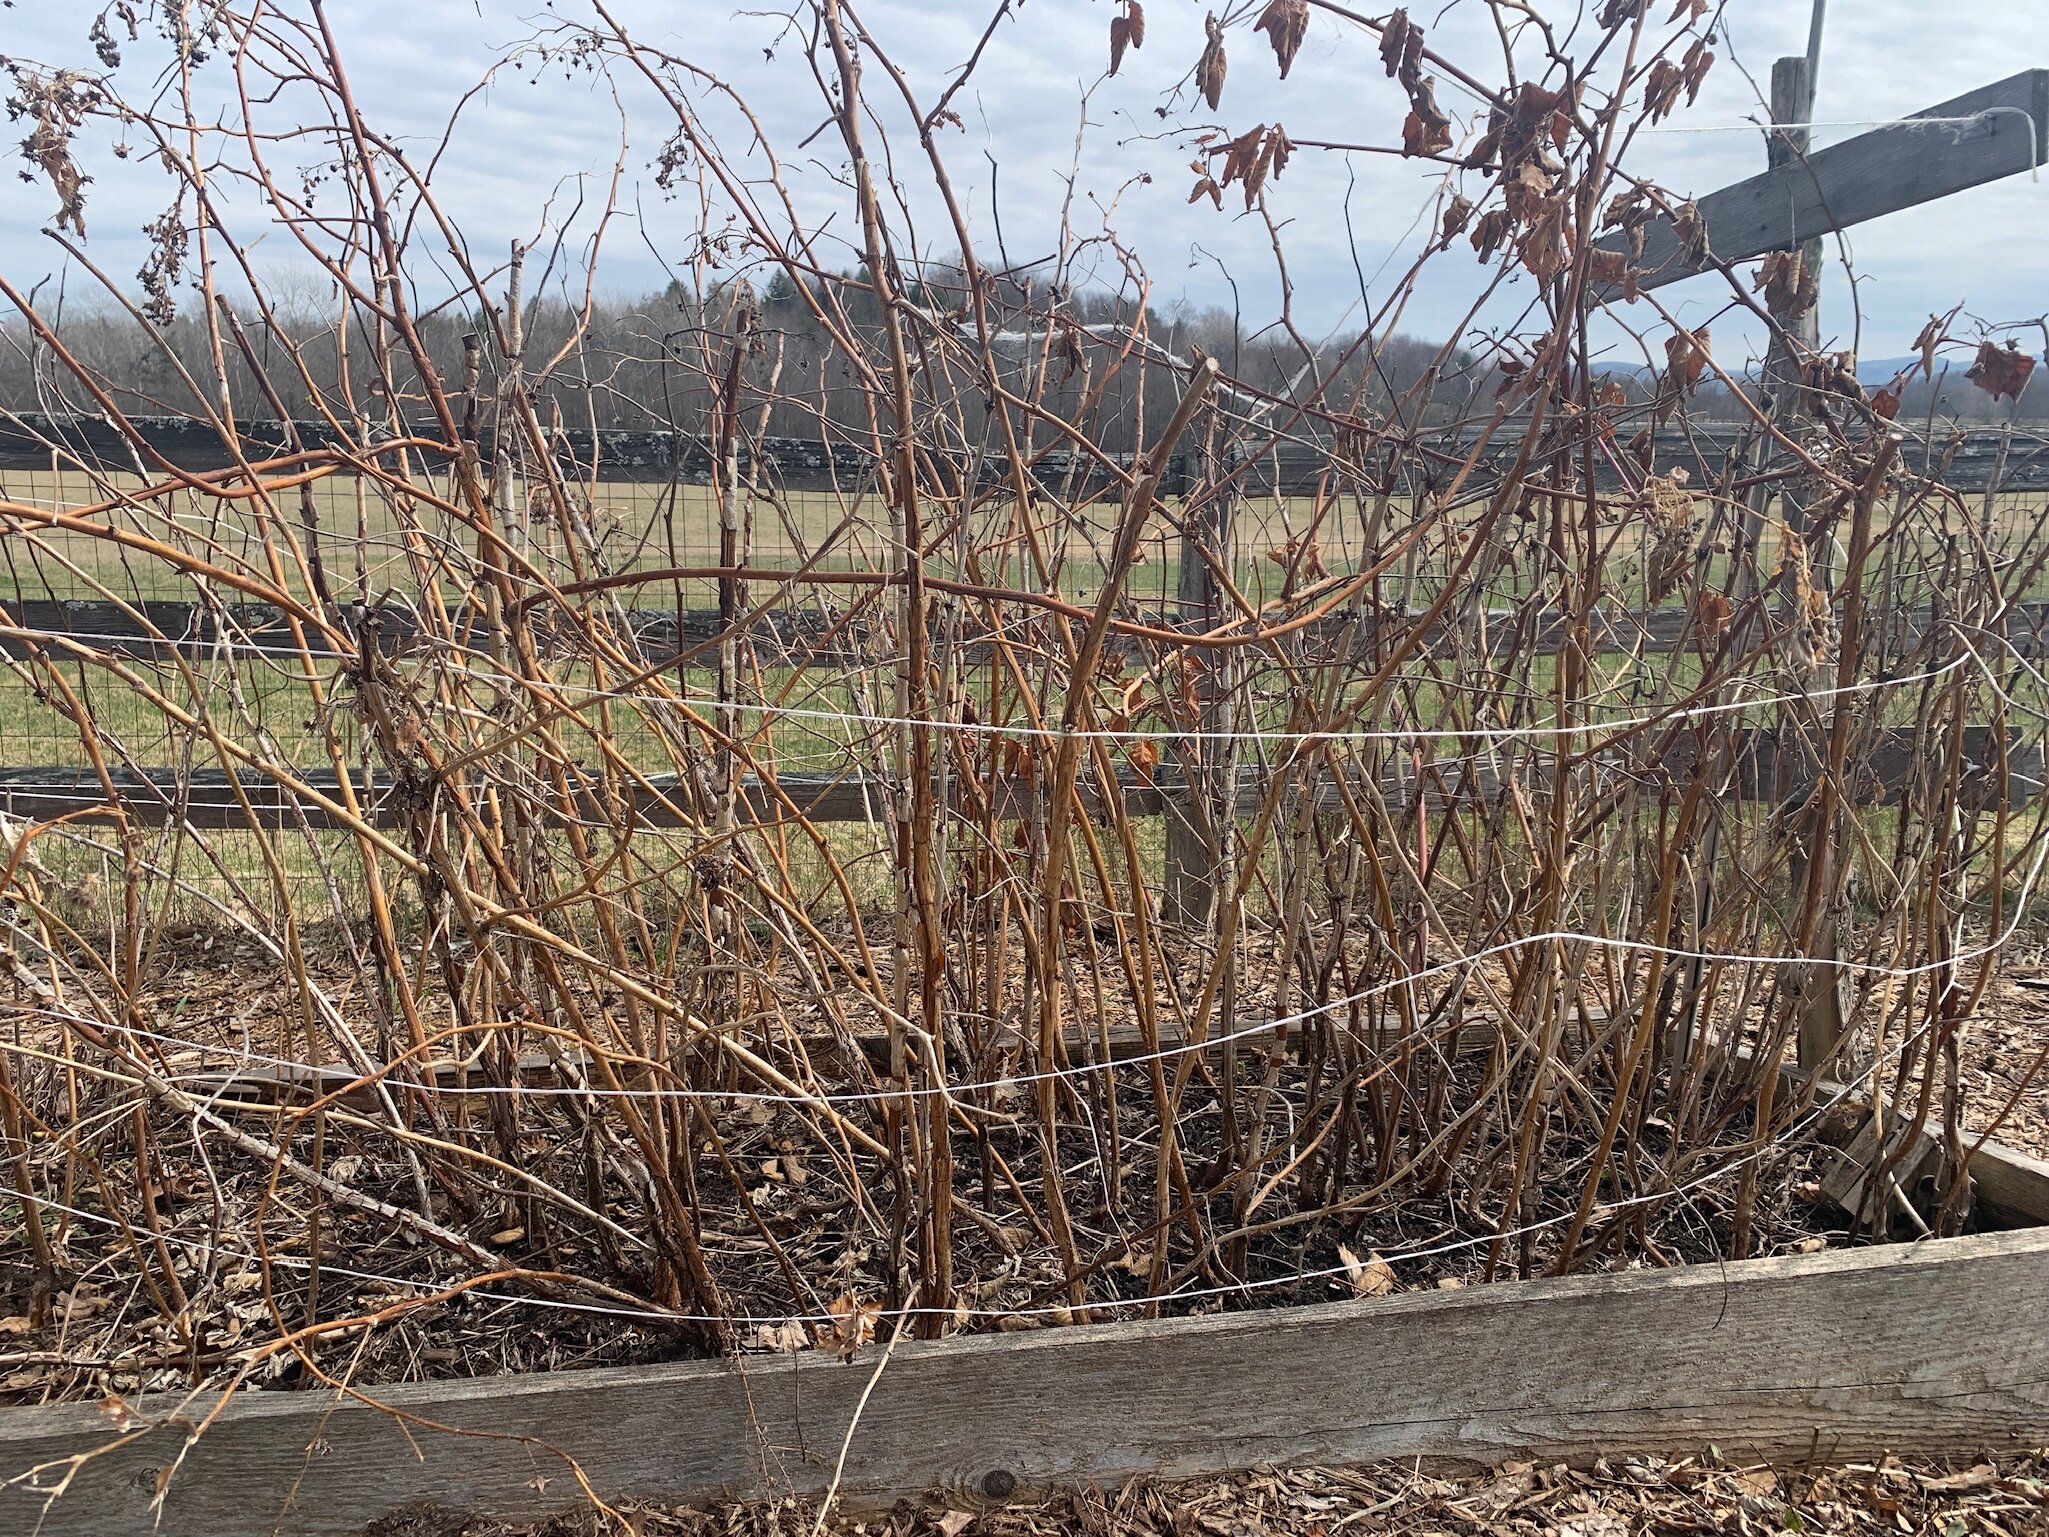
The goal is to remove all canes that are 2 years old (floricanes) and any damaged or weak canes. Cut cane down as close to the soil level as possible.

How do you tell which canes are floricanes? They will have branching, the bark will look dull and weathered, and when you cut them the wood will be dead.

C4334A97-30E1-4E9B-AED0-35CE8B0995A7.JPG

Many of my canes were damaged by rabbits, so I cut all those down too. Any very thin canes should also be removed.

19569387-DDD3-4068-9962-4DBFEB79B7EF.JPG
2516B80A-A44E-4B39-9F66-783398A7CCB4.JPG

Lastly with all the remaining canes that I'm keeping I prune them down to be about 4-5' tall.

Enjoy!

Growing Indoor Greens - a great project to do with kids.

Tokyo Bekana and Ruby Streaks

We all have the spring fever itch around late February, and it can be scratched a little by growing some edible greens indoors. We recommend mustard greens because they tolerate low light, can be eaten while small and they grow relatively quickly.

Just fill a shallow tray with good potting soil that you have moistened well. It should feel like a sponge that has just been wrung out - not drippy, but not dry either. Place seeds on top, about ¼” apart; it does not have to be exact. Gently press the seeds into the soil, and sprinkle a very small dusting of soil over the seeds. It is best to NOT bury them deeply, they don’t need that and it will just slow down the germination.

Keep the soil in the tray moist by watering regularly, and then start to eat the greens when they are anywhere from sprout sized to 4” or so in height. They probably won’t regrow much indoors, but you can experiment and see how they do. The types of seeds you use and the soil and the amount of light you have and how much you water all are factors that affect the rate of growth. Try different varieties, different watering methods and see what works best for you. You can usually have a small “micro-green” harvest within 2 to 3 weeks.

Here are some varieties we recommend for your indoor shoots and micro-greens:

Arugula

Spicy Blend

Mustards

Blast Off!

watering.jpg

The last week of February is when we typically start up the greenhouses. That means we turn on the heaters, run the water, clean up and sanitize all the surfaces of each greenhouse, and get some seeds into the soil. Our spring starts now, with more time in the greenhouse touching plants and dirt and feeling the sun warm us up. While we fast track ourselves out of winter with the help of the greenhouses, here are a few things you could do at home to follow along.

  1. Start seeds. If you have grow lights, now is a great time to start leeks, onions, shallots, and certain perennials. If you don’t have grow lights, you could sprout seeds in a mason jar or start some edible shoots in a sunny window. Mustard greens are the quickest, and the most forgiving of poor light. Here is a blog post on how to start your own shoots and micro-greens indoors. You can order seeds in our online store and pick up your order Friday afternoon (or get in touch to arrange a time that suits you). Our bagged soil has started to come in too. You can s find that here. More soil and seeds coming soon!

  2. Make a plant list. Here is what we are growing this year. This is a perfect time to get out the graph paper, the garden journal or the art supplies and dream up your garden plan. Some people make “mood boards” by cutting out pictures from garden magazines. You can create a digital version using Pinterest, Google Slides, or Powerpoint. Or, if you are like me, you can simply make lists of plant names. I just love keeping a list of plants in a notebook, or on my phone that I can keep adding to as I the mood strikes or as I learn about a new variety. There are so many ways to plan a garden, and they are all correct. Let us know if you want help!

  3. Learn about something new you would like to grow. This year, I really want to get into forcing Belgian endive. I am learning about it on You Tube and by talking to other growers. It is one of my favorite things to eat, but it requires some planning. You can learn more about how it is done on a big commercial scale here, . Chicories in general are on my list for this year. This video by Charles Dowding is a great introduction if you are curious too.

  4. Mark your calendar! We will be opening for walk in shopping on Friday, April 16th. Please keep your eye out for more information about in-person shopping, hours, and COVID protocols. We cannot wait to see you and share the greenhouses with you again.

With gratitude for all of your support,

Julie

PS.

We want to let you know that Family Cow Farmstand will be closing at the end of this week. We are so sad to say goodbye to Aubrey and Scott, and we wish them well on their next adventure. They have been the absolute best farmers, neighbors and friends. We eagerly await their next iteration. For now, come to the farm stand and stock up in the next few days.

A perfect gift from Aubrey this winter - chicories grown in Massachusetts at Kitchen Garden Farm. This photo has inspired my 2021 garden plan and set the bar quite high for improved radicchio growing in our display garden. I cannot wait.

A perfect gift from Aubrey this winter - chicories grown in Massachusetts at Kitchen Garden Farm. This photo has inspired my 2021 garden plan and set the bar quite high for improved radicchio growing in our display garden. I cannot wait.

Calendula

calendula sophie.JPG

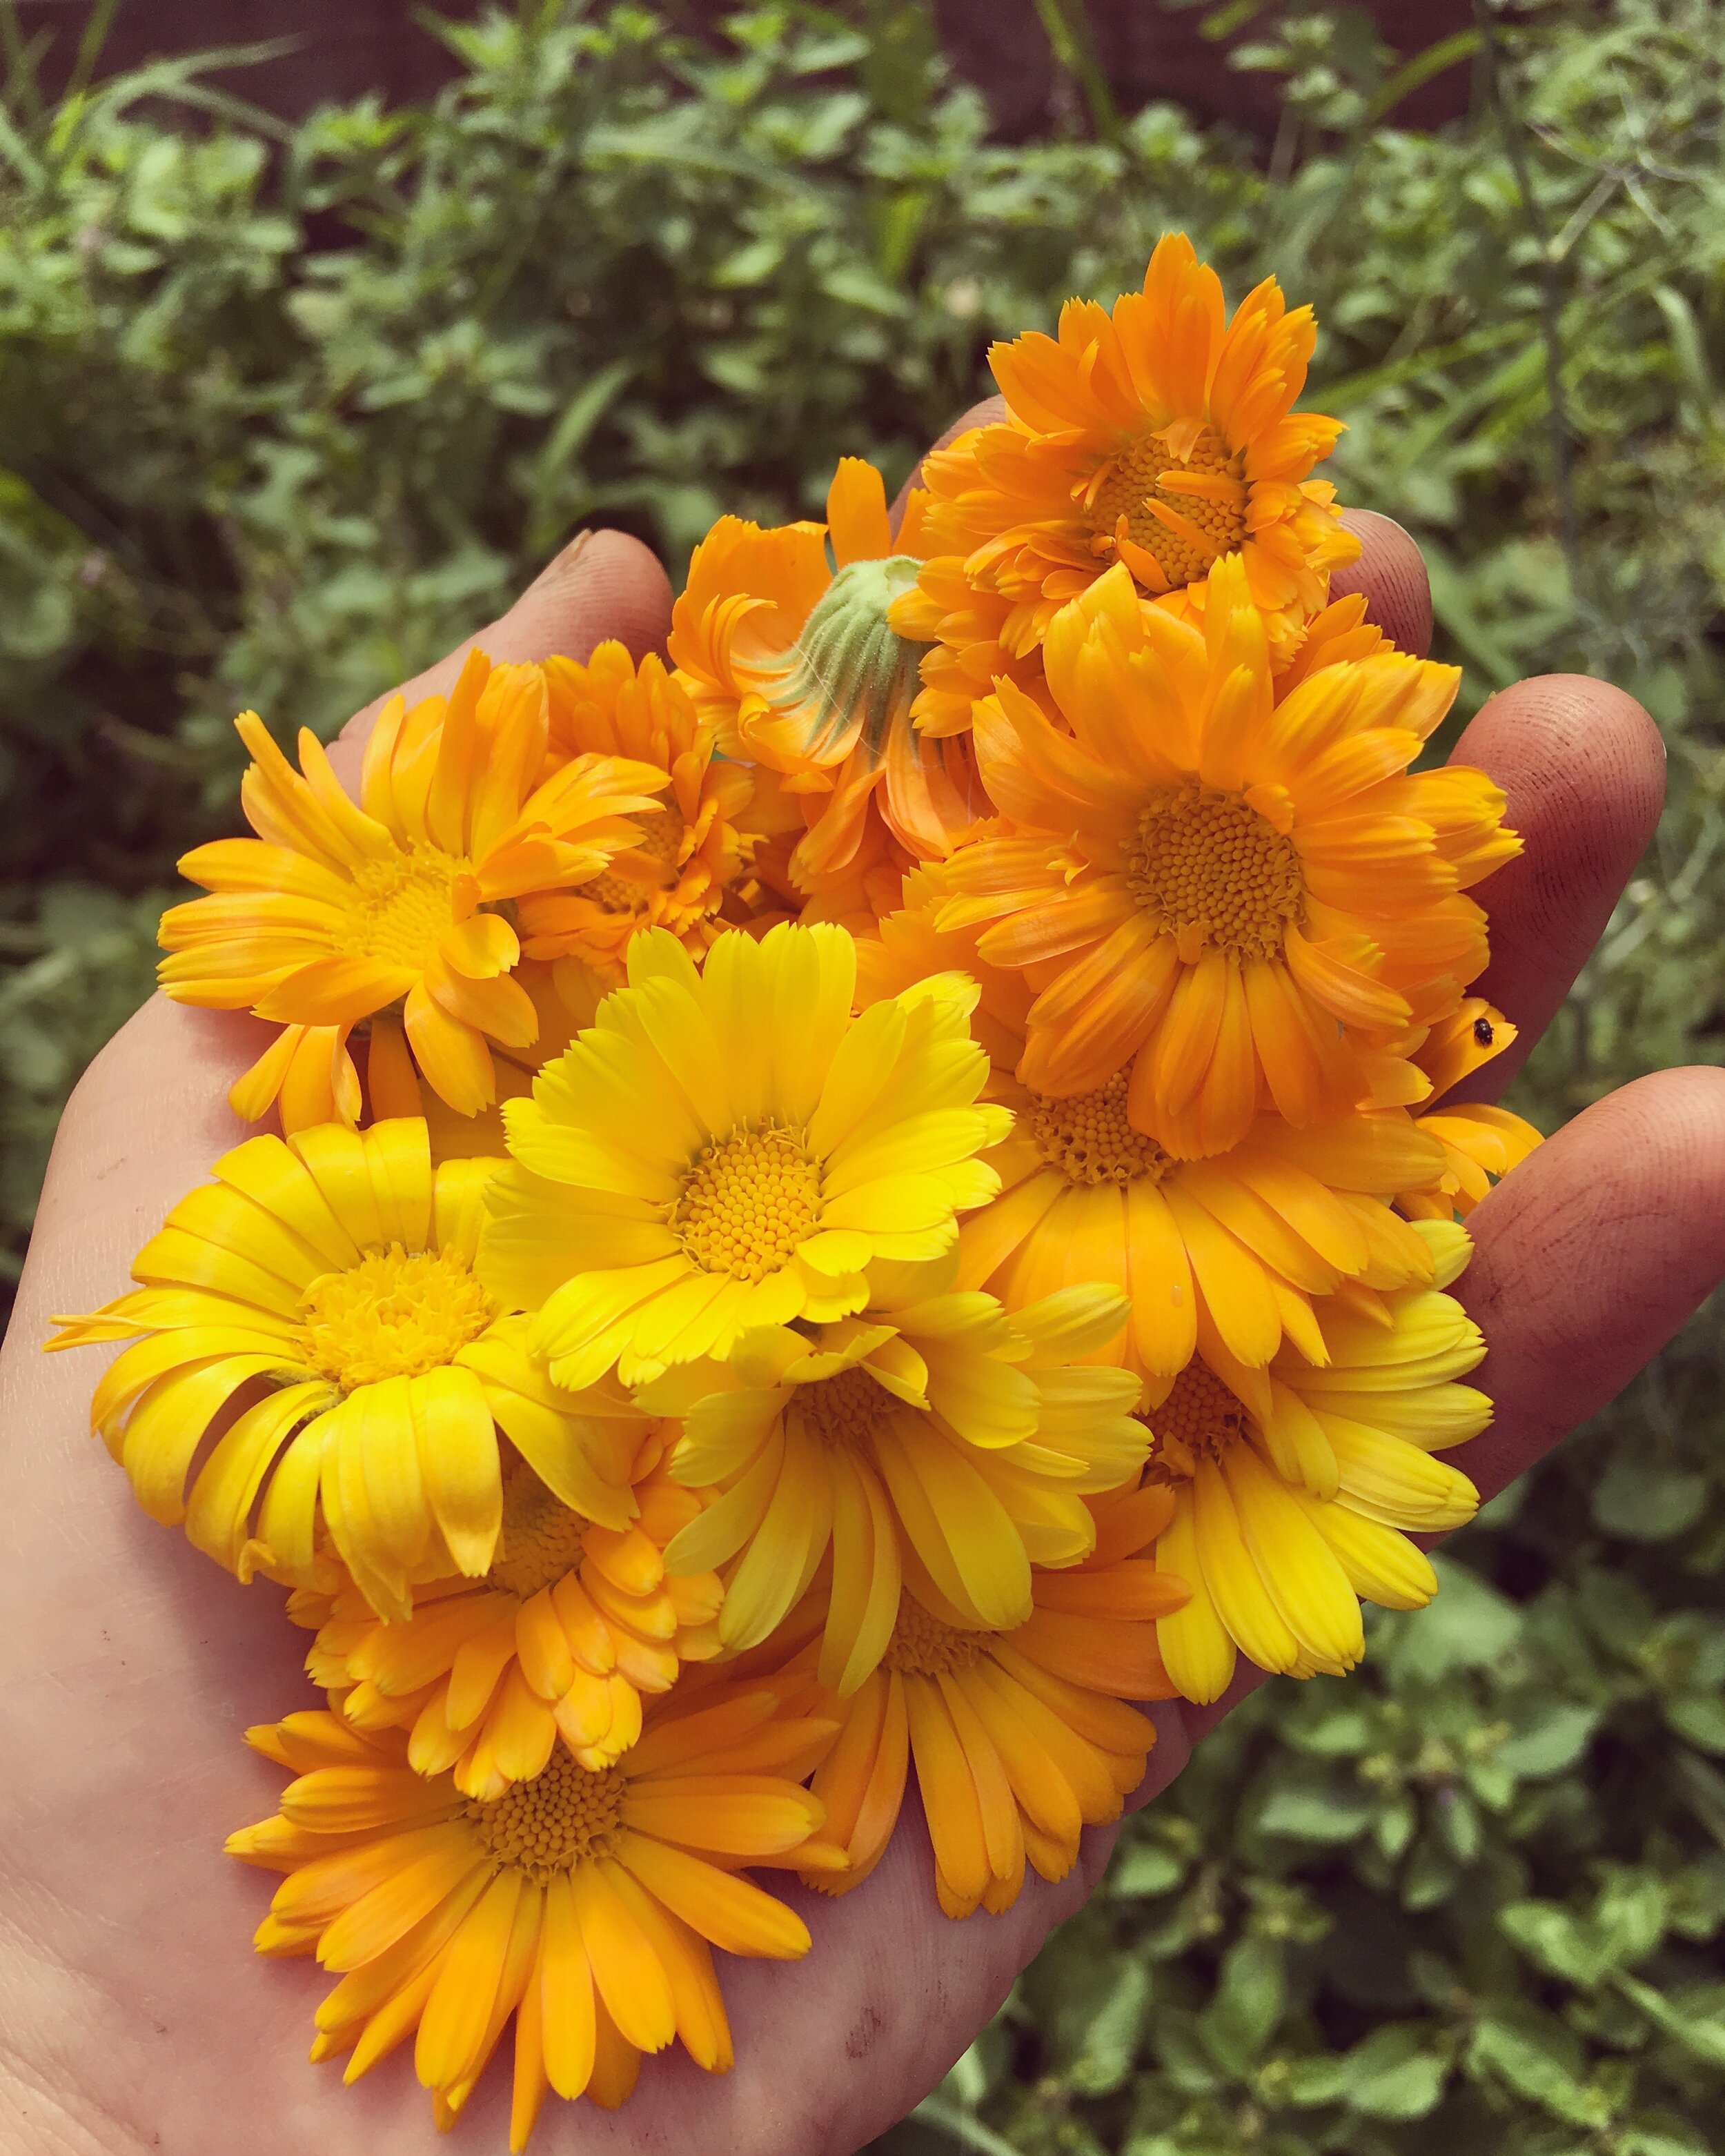
Calendula (Calendula officinalis), historically also known as Pot Marigold, is one of those cheery plants that has successfully transcended the gap between herbal medicine and ornamental gardening. Its sunny blossoms start blooming early in the summer if transplanted, and will proliferate all season long and even after frost, as long as the flowers are picked before going to seed. Like others in the Asteraceae family, pollinators flock to this plant, which provides a valuable long-term nectar source. While there are many types of ornamental calendula available on the market, highly medicinal varieties include Resina, Alpha, and Erfurter Orangefarbige. You’ll know you’ve got a potent calendula if when you pick the blossom (snapping it from the stem and removing the flower head and green bracts) your fingers get sticky with resin.

If you’re growing calendula and deadheading the plants regularly, you’ll find yourself with a wealth of flower heads to use. Luckily, there are endless ways to make use of this beautiful and powerful plant! 

Calendula occupies a unique and important place in any herbal medicine chest. Powerful yet gentle, it’s listed as an active ingredient in balms for everything from cracked hands to rashy baby bums. Calendula enjoys a long history of use as a venerated wound healer and anti-inflammatory herb, soothing and repairing injuries and ulcerations of all kinds. As it also has documented immune-stimulating affects (through its work on the lymphatic system), calendula is also useful when dealing with skin issues that stem from some kind of infection. At the start of gardening season, I can often be found soaking my roughed-up hands in strong calendula tea to heal cracked cuticles and scraped knuckles. 

But we can’t talk about skin without mentioning the skin that lines our insides- the digestive tract! In the same way that calendula heals external wounds, it is equally as powerful when taken internally to alleviate the effects of inflammation in the gut. Allergic reactions both inside and out can benefit from application of this herb, and it is gentle enough to use every day in a variety of ways. I love including calendula in mouthwash formulas to heal irritation and inflammation in the gums.

There’s no reason to relegate calendula to the first-aid kit, though. It is also a wonderful tool in the kitchen, adding color and beauty to baked goods and salads as the “poor man’s saffron”. To use, simply pluck the petals off the flower head, and sprinkle into your batter or lettuce mix. The center of the heads, with their sticky resin, tend to leave an uncomfortable feeling on the back of the throat when consumed raw, so it’s best to save those for tea infusions, or thrown into soups and bone broths where you’ll get the benefit of the herb and the visual delight as well. 

Now that you’ve harvested your blossoms and dreamed up all the ways you’ll use your calendula, make sure to dry some for winter use. Flowers should be picked in the height of the day, when they have fully opened and any dew has dried. Dry flowers in baskets or on newspaper, spread in a single layer so that they are not touching (you can also use a dehydrator on the lowest setting). Calendula flowers hold lots of moisture, so it’s important to let them dry fully before storing, lest they get moldy on you. The center of the head should snap apart easily when dry. As the season wanes, leave some flowers to go to seed on the plant. You can harvest these fossil-like structures once they’ve turned brown and come off easily in your hand. 

Calendula is an excellent and safe introduction into the world of herbal medicine, and with its myriad uses, it’s one of the most reliable plants you can keep on hand throughout the year. 

Basic Calendula Oil, Two Ways:

  • Calendula flowers, wilted for a few days or completely dried

  • High quality oil, such as olive, sunflower, grapeseed, almond, or jojoba

Roughly chop calendula flowers and pack into jar, then fully cover with oil (add an extra glug or two to make sure flowers stay submerged). Label with contents and date, then leave to steep in a dry, shady place for 2-4 weeks. Different herbalists have different habits, and some prefer to let their oils steep in the sunshine, while I keep mine out of direct sunlight. 

If you’re in a rush, you can quickly make an infused oil by heating the oil and flowers slowly in a double boiler, making sure that you stay well below the smoke point for that oil. Heat gently for an hour or two. In either case, when you’re finished infusing the oil, strain out and compost the flowers, label your oil, and store in a dark place for up to a year. You can use this oil to make salves, lotions, and creams, or apply directly to skin. 

Gut-Healing Tea (make with fresh or dry herbs):

  • Calendula flower

  • Chamomile flower

  • Plantain leaf (Plantago spp.)

  • Fennel seed

  • Peppermint leaf

Blend equal parts of all herbs. Infuse about a handful (approx. ¼-½ cup) of herbs in 1 quart of boiled water, and allow to steep for an hour or overnight. Enjoy hot or iced, and drink daily as part of a regimen to help with digestive upset (can also be enjoyed as part of a healthy-skin regimen, too!)

Resources:

Calendula Monograph: https://www.herbrally.com/monographs/calendula

Henriette’s Herbal: https://www.henriettes-herb.com/blog/yell-calendula.html

Succession Gardening for Success

savoy cabbage.jpg

Garden Planning for the Seasonal Kitchen

Growing vegetables in your backyard, community garden or in containers by the kitchen door is a great way to feed yourself - whether it be just a few ripe tomatoes in August or a full-fledged homesteader's garden, you are on the path to feeding yourself and your family. Gardening is a great way to improve how you eat while spending some contemplative time outside. With all of these benefits in mind, it is easy to jump into gardening enthusiastically, and you will reap even more rewards with a little bit of planning. In Vermont, our gardening season seems short but can be stretched almost year round with a few simple tips. I always recommend that people take a look at how their vegetable gardens have been in the past and find just one or two things they would like to improve so that they can grow more of it for a longer season. For example a common question I hear is "how can I keep cilantro from bolting?" Well, in short, you can't. But with a few changes in your gardening practices, you can grow it all spring, summer, and fall without ever seeing it go to seed.    The trick is to understand the life cycle of each vegetable or herb and how to best plant it to maximize its harvest. With certain crops, like zucchini, it is best to understand how prolific they are and to plant them conservatively so that the entire garden (and thereby your diet and your neighbors' diet) is not taken over with just one thing. It is also helpful to plant things seasonally so that the harvest is not so overwhelming in August with little to eat before or after. Or sometimes we just want fresh salads all summer, but don't replant and are left salad-less after July 1st.

Succession Planting for Successful Gardening

Certain crops should be planted multiple times throughout the season to ensure a continuous harvest. This is called succession planting. How often you plant is a matter of taste and space and time. The following list describes the maximum you could do with each crop, but adjust according to your needs and priorities - this is just a guide. If you want to make sure you have a certain vegetable all summer long, then you can follow the guidelines. If you want it a little less, then create your own modified planting schedule.

  • Lettuce can be grown from seed or from transplants. Seed grown lettuce is often grown in a row that can be cut and will re-grow a few times - think of mesclun. Transplanted lettuce can be grown to produce full heads like what you find in the store. Both methods require regular planting every week or two for a continuous harvest. It can be planted from seed in mid-April to mid-August for cut greens and transplanted for full heads from late April / early May through early August. Some people will transplant a few plants and plant some seeds at the same time in a different area; this method provides two generations of lettuce and two types of salad greens. Once the cut lettuce becomes bitter in the heat of summer, it is best to pull it up, recondition the soil with compost, and plant something else. If the goal is to always have fresh lettuce, it is very simple to do if you remember to replant it. You can even purchase a number of plants and hold some in their pots in a shady spot and only plant out a few each week. You can seed it yourself in trays or pots and follow this same method. Having several varieties, cold-tolerant ones for spring and fall plantings, and heat-tolerant ones for mid-summer, will produce the best flavor.

  • Cilantro is very similar to lettuce in its growing habits. It will grow up to a point and then goes to seed, called bolting. It will bolt more quickly in summer heat and, conversely, will stand ready to harvest for many weeks in the cool weather of fall - even early winter. It is good to time plantings so that cilantro is ready to harvest before June 21 (the solstice), and then plant more afterward. It can be transplanted or grown from seed. Like lettuce, it is simple to do both at the same time, thereby giving the gardener two generations. Cilantro seed is coriander, so it does have a use if you enjoy that flavor. There is nothing you can do to prevent cilantro from bolting entirely, but you can slow the process down by placing your mid-summer plantings in a partly-shady spot.

  • Dill can be treated just like cilantro, and, like coriander seed, dill seed heads have a use in the kitchen, so it is fine to let some of the dill patch go to seed. The seed heads can be used in pickles. you can also let them self-sow or save the fully dried seeds in a paper bag for replanting.

  • Basil can be planted multiple times for best results. Plants can be pinched to slow down the flowering, but best flavor will come from newly replanted basil plants. This is a heat loving plant. Should only be planted once soil temps are in the upper 50's - usually last week in May or first week in June. Basil's flavor is at its peak right before it starts to make flowers.

  • Cucumbers, cantaloupes, and zucchini and summer squash are best in quality when well tended. Just a single plant or two of any of those is usually enough for the home gardener, but by planting it two to three different times, spaced out, the quality will always be good. The dates are: June 1st (or last week in May if you are in a warm spot), July 1st and July 15th. This method will ensure a continuous harvest of prime looking vegetables. Just remember to pull out and discard the pest- and disease-prone older plants. If your compost gets very hot and is well managed, it is okay to compost these plants. Pest problems will diminish when the older, less healthy plants are removed. And you can use that opened up space for a quick growing crop like, lettuce, herbs, scallions, greens or fennel.

  • Arugula, mustards and other cutting greens for salads are best if sown or transplanted on a weekly or biweekly basis. Again, a small amount can be seeded next to the transplanted crops in order to give you 2 generations at once. This way you can have smaller quantities coming in at various times.

  • Broccoli gives the gardener a couple of options. It is best if transplanted and can be planted over 3 dates in the spring and 3 dates in late summer for a continuous harvest. I would choose late April, early May and mid May for the spring plantings and then Early August, mid August and early September for the fall plantings. Full heads can be harvested and the plants can stay in the ground to produce side shoots.

  • Green Beans are best when fresh and young. The seed is relatively cheap, so it is better to rip out old plants and have new ones coming along regularly. Having smaller, multiple plantings also means that no on is stuck picking beans for hours on end. Sow new seeds when the previous or first generation is about 6 inches high.

  • Boc Choi, Cabbage, and Cauliflower can also be planted multiple times. Cabbage holds well in the heat and can be planted every couple of weeks late April through early August. Boc Choi and Cauliflower are not as heat tolerant and should be planted around the same dates as broccoli (see above). It is best to use row cover like Reemay on these young transplants so that flea beetles do not destroy the plants.

  • Spinach is another one that does not do well in the heat, but can be planted multiple times in spring and late summer. It can also overwinter with a little straw mulch for very early spring eating. Frequency of planting can happen every week mid April to early June and then early August to mid September. The last plantings in September are the ones which will be over-wintered and eaten the following spring. Apply straw mulch on overwintering spinach in December once the ground is frozen.

  • Beets, Carrots, Turnips can be planted from seed every two or three weeks from mid-April until about the third week in July. Summer carrots are not the same as fall carrots and certain varieties do better in summer than in fall. The flavor of fall carrots is much sweeter, so I usually plant a larger patch in the fall. Fall carrots can also be stored all winter without going bad due to their lower moisture content. I don't love summer carrots, so I often skip those. Remember, it is all about what you like to eat.

  • Celery and Celeriac are slower growing and can be transplanted 1 to 3 times during the season, from mid May until early July. These need lots of water and benefit from straw mulch to hold the moisture evenly around the roots.

  • Bulb Fennel and radishes are similar to lettuce - they can be planted each week if really loved, but they bolt in the heat and do best in the cooler temperatures of spring and fall. They are best if planted late April to early June and then again late August to mid September. They are cold tolerant and hold well in late fall. Radishes are grown from seeds and fennel is best transplanted. Fennel also benefits from a straw mulch - even moisture around the roots is what helps it make larger roots.

  • Corn - it is possible to do multiple plantings over different weeks, but an easier method is to plant all at once, but with various varieties that have different days to maturity. There can be a 40 day span between early and late varieties.

  • Peas can be planted every week, but this requires a lot of harvesting, irrigating, trellising, and variety research. It is possible though. More practically, the home gardener can sow 2 or 3 varieties in late April with various days to maturity. Fall plantings are sometimes successful but are weather-dependent. These should be done in mid August.

The following are generally planted just once a year, but the harvest can be staggered with a few tricks:

  • Tomatoes, Peppers, Eggplant - try a few varieties of each in order to not have everything at once. Determinate tomatoes will provide you with a big harvest all at once which is a good thing for people who make big batches of sauce for canning or freezing. Determinate tomatoes are the ones that grow until a certain height and then mature all at once. Indeterminate tomatoes are the ones that grow indefinitely until the frost and the fruit ripens gradually August until frost or disease kills the plant.

  • Peppers and eggplant are best if transplanted in early June once the soil warms up. One planting is usually plenty, but again an assortment of varieties will keep the harvest varied, staggered and interesting.

  • Onions and Potatoes are generally planted all at once, and again a few different varieties will provide you with a longer period of fresh eating. Both onions and potatoes can be stored for long periods of time in cool and dark conditions. Both can also be eaten fresh as young, green onions or new potatoes. Both can be harvested, cured, and stored for eating year round, though some onion varieties store much longer than others.

  • Winter Squash is another crop that is planted just once and can be stored. It is best cured for a week or two in a warm spot before eating.

  • Watermelons are usually planted just once in the home garden (early June is best). Cantaloupes can be planted as late as early July.

Open Spots

When you harvest a crop and create an open spot in the garden, take advantage of that spot with any of the quick growing crops that you like to eat. Some easy ones to try from transplants:

  • arugula

  • baby boc choi

  • fennel

  • lettuce

  • mustard greens

  • scallions

  • kale

  • chard

  • beets

  • herbs - pretty much any herb can be planted up until early August. Cilantro, dill, parsley, chervil are all cold tolerant and can be planted as late as mid-September from plants (mid August to late from seeds)

You can also tuck in flowers that grow vertically and don’t take up too much room:

  • cosmos

  • verbena bonariensis

  • lisianthus

  • calendula

  • poppies

From seed, you can try:

  • carrots

  • beets

  • radish

  • asian greens

  • mustard greens

  • lettuce

  • bush beans

Sweet Potato Time Has Come

sweet potatoes.jpeg

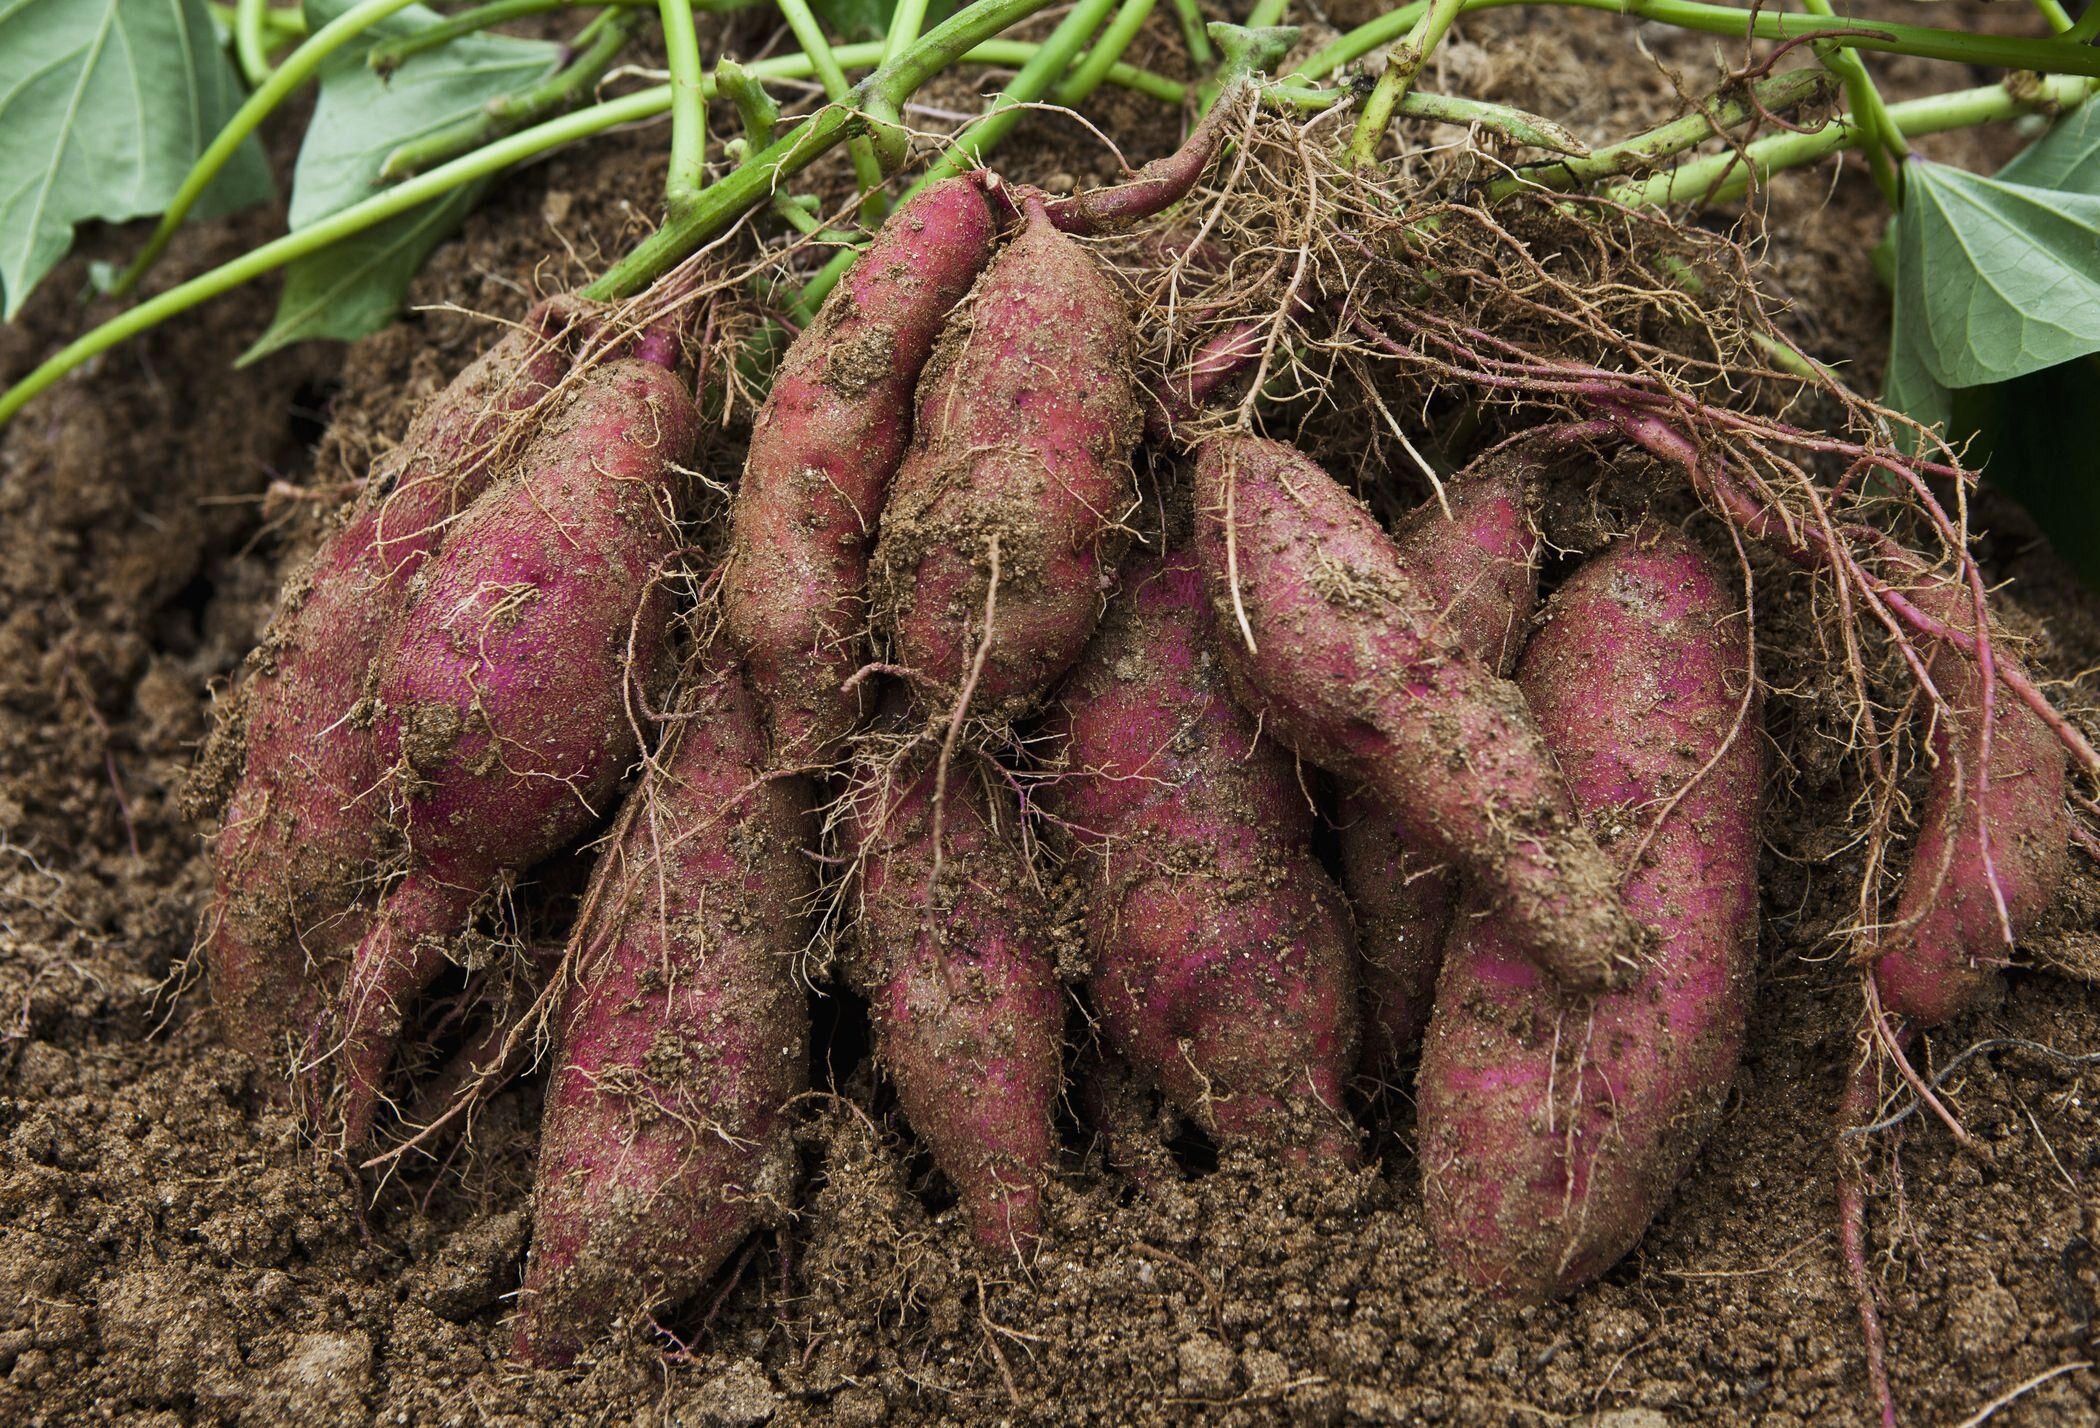
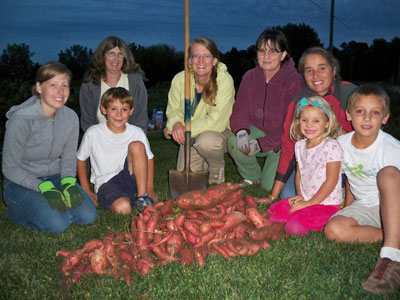
Starting today, we have sweet potato slips available for sale in our online store for next day curbside pick up. They are sold 3 slips to a pot, and each slip turns into a plant that produces 5 to 10 pounds of sweet potatoes. Harvesting them in the fall is so fun, and you will feel like a gardening champion. Please note that the slips must be kept well watered at planting time for the first couple of weeks. Daily soakings will ensure the growth of healthy plants. When you buy 6 plants, we will throw in a 7th for free.

This is the 12th year of our fundraising partnership with the Vermont Community Garden Network - that is a lot of sweet potatoes grown over the years in support of the educational and food security programming throughout the state. We love this organization and the work it does to make gardening accessible to all.

Sweet potatoes are fun to grow and are a nutrient dense food that stores well through the winter. They are not grown like “Irish” potatoes (which actually come from Peru), and they are not even related. Sweet potatoes originate from South America and they are in the morning glory family. They grow as a long vine along the ground and produce large, orange sweet potatoes just below the surface of the soil. They can also be trained to climb up a trellis, and they can even be grown in containers. In 2009, Starksboro customers shared their very interesting container method via a photo album, which you can view here.

The organic slips come from Jones  Family Farms in Bailey, North Carolina, and are approved for use in certified organic production by Vermont Organic Farmers, LLC.

Planting Instructions

Sweet potatoes are grown from slips, which are cuttings from a parent vine. The slips grow best in a loose, sandy or silty soil that drains well. If they are grown in a rich dark soil they may discolor but are still good to eat.

Transplant the slips into garden beds during June, once nighttime temperatures are consistently above 50 degrees. Transplant in the late afternoon or on an overcast day. Lay the slips on their sides with 2/3 of the slip buried a half inch under the soil. Water enough to keep the soil moist, for the first couple of weeks.

Plant the slips 10 to 18 inches apart in rows that are two to three feet apart. The rows or raised bed should be elevated 4 to 8 inches above the ground level to allow the sweet potatoes room to form.

Keep the cuttings watered while they are getting established. The leaves that were originally on the planted slips will dry up and fall off leaving just the vine stem. New leaves will emerge from the cuttings as the slips become established.  Hoe around the vines to cultivate weeds and mulch with straw if desired. The sweet potato vines will cover the ground reaching 5 to 10 feet in length.

Pest Control – Deer love sweet potato leaves, so be sure your planting area is fenced if deer are a problem. A flying gold colored beetle may chew round holes in the leaves. The vines are tough and will keep growing despite insect damage.

Harvesting – Sweet potatoes are dug and harvested in late September through mid October, a day or two before the first predicted frost. Most of the sweet potatoes will be just below the parent plant. Each plant can produce up to six sweet potatoes.

Curing and Storing – After harvesting, dry the sweet potatoes on the ground for two or three hours. Allow them another 10 to 14 days to cure at room temperature or above, before storing the sweet potatoes at a temperature between 50 and 60 degrees F.

Unlike potatoes, sweet potatoes should not be kept cold in a garage, refrigerator or outbuilding. If properly cured and stored, they will keep until April. Enjoy!


Plant Updates, Tomato Workshop Take 2, and Thank You!

I woke up this morning with the garden on my mind. I have been watching our back yard open up this season and feel its energy, ready to burst a little more with the dawn of each new day. As we enter the third year of our meadow-style home garden, I have noticed a huge increase in the birds that come to our feeders and generally treat the back yard as their banquet. A flock of Carolina wrens came through last week and hopped through the garden foraging for whatever goodies it is they like, and every morning our resident lady Cardinal swoops in and sits on the branch of the mulberry tree right outside the window, showing off, all shy and coy. It is such a show.

As the weather warms up, many of you are thinking about tomatoes. The tomato webinar I hosted last week was sold out with a huge request for more, so I am going to do it a second time this Thursday at 5:30. Here is the correct link to sign up if you are interested. And today at noon, I will do a Facebook Live video walking through our tomato, eggplant and pepper greenhouse. You can join me for a look behind the scenes and hear about all the different varieties we are growing. And you can find them here too.

French marigolds have crested, double flowers in rich oranges, reds, yellows, and bronze. A summer staple in the garden.

French marigolds have crested, double flowers in rich oranges, reds, yellows, and bronze. A summer staple in the garden.

Here are some other plants newly up on the website:

Marigolds, Sweet Corn 6-packs, Tasty Jade cucumbers, and Cherokee Purple tomatoes are some of our summer favorites.

Flower Power Bundles - annual flower plants to make a cutting garden or mix into flower beds. We have included 9 of our favorite varieties in this bundle, and there are 2 plants or more in each pot.

Basil Bundles - a collection of Sweet Genovese Basil, along with our specialty basils like pistou, purple, thai and lemon for the herb lover and pesto maker.

Our potting soil is back in stock for filling your planters and window boxes, along with watering wands and many other helpful tools that we were sold out of earlier in the week. It is been a challenge to keep things in stock with all of the eager gardeners out there these days!

Thanks so much for all of your support this season. It has been just incredible, and our Red Wagon team has done the best job to adjust and shift. I feel very proud of all of us working together to make gardening work for our community. You generous contributions to our Grow it Forward program (you have raised over $600 so far) are being used to fill gardens at housing sites in Chittenden County and Addison County in partnership with VT Community Garden Network and Housing Vermont. We are also working with Champlain Housing Trust and Food Not Bombs to bring big, potted cherry tomatoes to people who don’t have access to gardens. All of this makes us smile, and feels incredibly rewarding. Thank you.

Enjoy the garden,

Julie and the crew


Onions

Baby onions, about two to three weeks away from transplant time.

Baby onions, about two to three weeks away from transplant time.

A while back, I delivered a crate of onions and garlic to my dad. We had some coffee, talked over the Thanksgiving meal plans, and I took a little walk. That day is a distant memory, my father has since passed away, but the image of those onions and garlic has stayed in my head. The way they filled the wooden crate brings me to a memory of the smile on my dad’s face when he saw them, the food we talked about making together, the warm coffee in our hands.

Onions are a back ground vegetable, easily taken for granted, but aren’t they the basis of flavor in most dishes?

Some people are like onions too. Sharp and edgy at first, sweet and mellow with time and heat.

I am thankful for their plumpness, their abundant harvest, the flavor they will bring to our meals, and the way they generously keep so well under the right conditions.

I rarely buy onions or garlic, usually having enough from the garden to last the year, in some form or another. The storage onions that are great to eat fresh in July, when cured properly, last until March or April. By then chives are ready, then scallions, then green garlic and fresh onions again, one following the other, with a predictable rhythm.

My dad is gone now, but the memories are not, storing and keeping, sweetening with time.

The best time to plant onions is as soon as the ground can be worked, usually middle to end of April in Vermont. They don’t mind cold ground. They prefer it actually, and the earlier they go in, the rounder and larger they will be. Their trajectory is programmed by the sun; as the days get longer, the onion plants remember to follow the cue and they grow round and big. If you neglect this key part of onion growing and plant them late, the onions stay small, and more oval in shape, in a sort of protest.

Our onion plants come in 4 packs. There are about 80 plants in each pack. You just need to separate each individual plant (it is a quick job, especially if the plants are well watered). Then make a trench, 4 inches deep, as long as you want. And then lay each onion delicately in the trench, white roots down, green part up. Fill the soil in around each plant, pat firmly and water well. If 80 onions is too many, you can certainly plant some of the plants in little groups of 4 to 6, and harvest them young, to eat like scallions or baby onions. These are easily the best value in the gardening world, not be forgotten.

Vegetable Garden Planning - Seeds vs Transplants

romaine.JPG

It can be confusing to know which vegetables and herbs you start from seed directly in the ground and which ones you start as seedlings that have been started indoors or in a greenhouse. Here is a handy guide to help you with those decisions when planning this year’s garden.

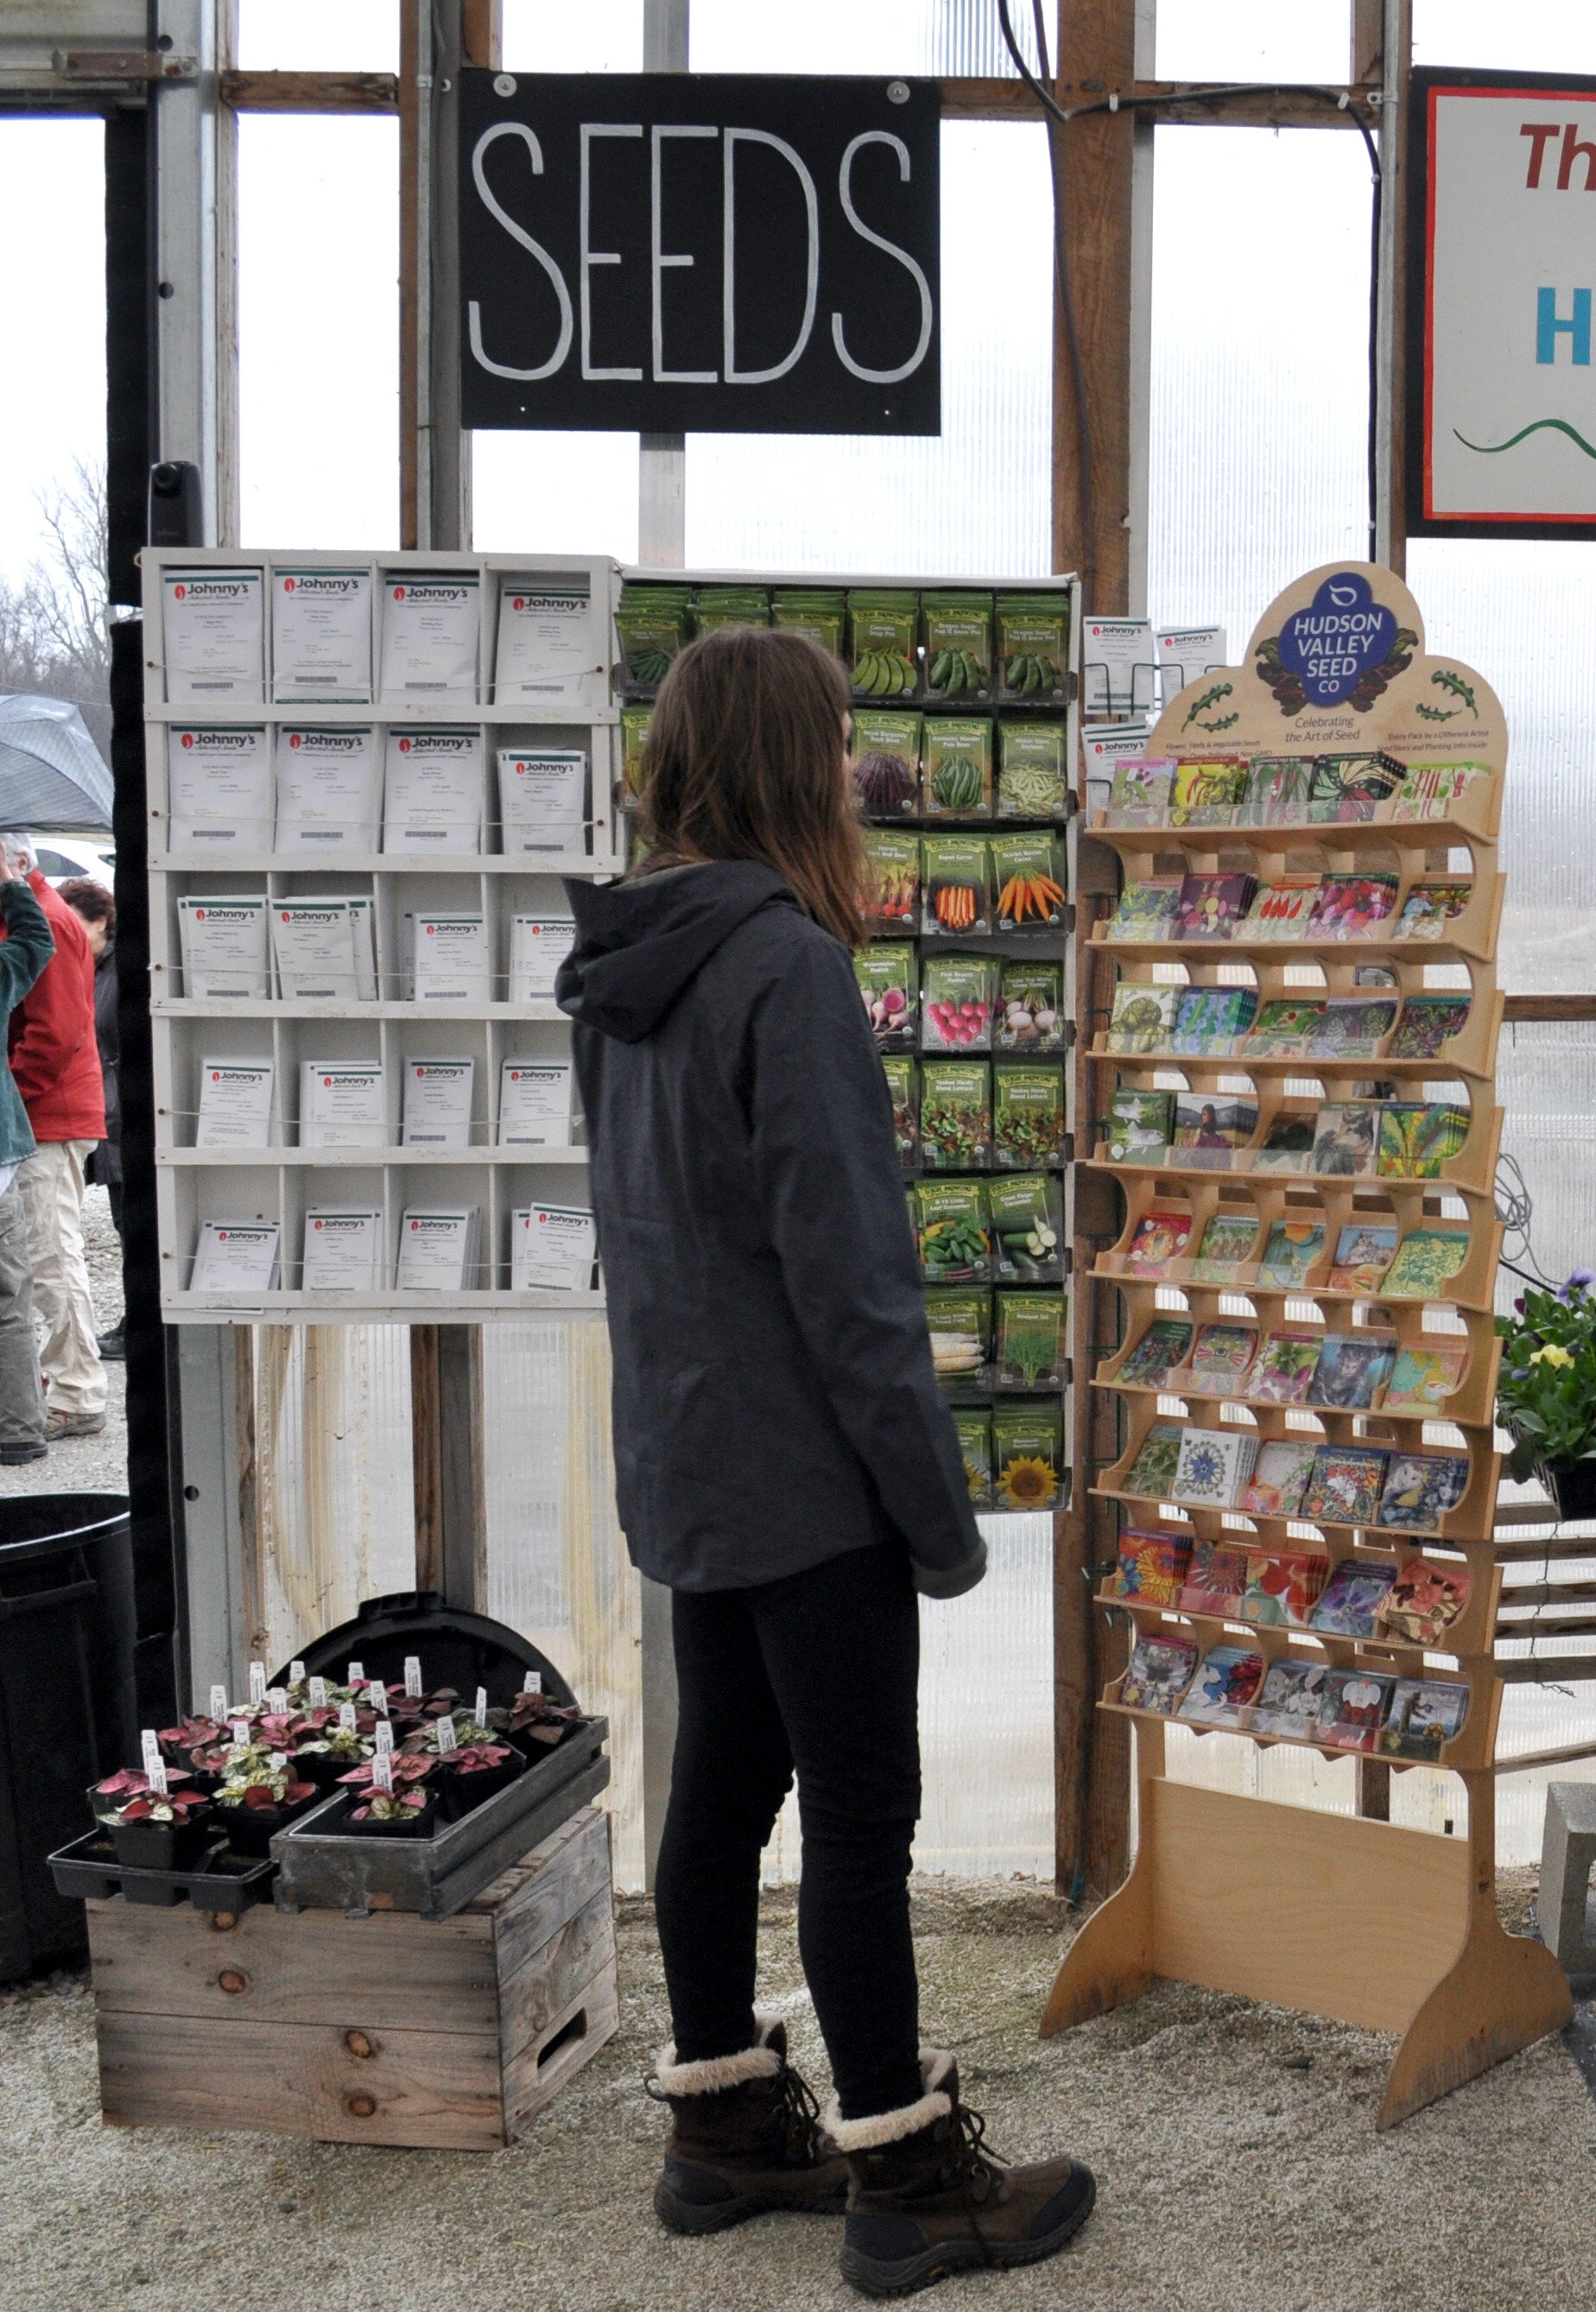
seed rack.jpg


8 Plants to Grow for Your Home Medicine Chest

Thyme. Photo courtesy of Lisa Cassel Arms

Thyme. Photo courtesy of Lisa Cassel Arms

8 Plants for Your Medicine Chest

This year, make the commitment to add plant-based, home grown remedies to your life! Whether in the bathroom cabinet, the first aid kit, or the spice rack, medicinal herbs deserve a place in your home. Below are eight easy-to-grow herbs that you can grow and process to provide your family with plenty of herbal TLC. If you’re looking for more guidance on growing and using herbs this year, we’ll be discussing medicinal gardening in full on March 28th from 10-12 in the Red Wagon classroom!

  1. Yarrow (Achillea millefolium): This common roadside “weed” is actually a treasured medicinal wunderkind. The genus refers to its alleged use by the warrior Achilles, who brought the plant into battle to staunch the sword wounds of his soldiers. Swords aside, yarrow is the premier first aid herb for all sorts of cuts and scrapes. It is both styptic (staunching bleeding) and antimicrobial, so it is quite safe to put directly on a wound. When fresh, the leaves and flowers can be mashed or chewed into a juicy poultice and put directly on the skin. For year-round use, simply dry the aerial parts of the plant (as flowers begin to open), and powder the leaves and flowers. This can be stored in a first aid kit for easy access, and will keep for a couple years. Yarrow is a popular ornamental, so while the wild white variety is traditionally used medicinally, the brightly colored ornamental varieties can also be used in a pinch.

  2. Calendula (Calendula officinalis): Sunny, cheery “pot marigold” is one of the first flowers to burst forth in June, and one of the last to die back as frost looms in October. Harvesting is as simple as plucking the flowers from the stem as they open and drying them for a couple days in a warm, sunny location, then storing in a dark place. Once the plants start flowering, harvest can happen as frequently as every other day, which helps keep the plant in bloom consistently. Calendula is healing to all damaged tissue, internal and external, and can help foster immunity and a bright spirit in the depths of winter. Deb Soule of Avena Botanicals in Maine encourages everyone to “Grow a Row” of calendula as a way of supporting folks healing from abuse and trauma. 

  3. Echinacea (Echinacea purpurea, angustifolia): Many folks already have Echinacea growing as an easy native ornamental in their perennial gardens, but haven’t harvested it before. A favorite of nectar-seeking butterflies, both the flowers and roots of the plant are harvested for medicine. Pop the matured flower heads off the stalk through the late summer (leaving plenty for the pollinators), and either dry for tea or chop up and cover with vodka to make your own immune-boosting tincture. Harvest roots in late fall and add to the vodka, and in a month you’ll have enough Echinacea tincture to keep your loved ones healthy through the winter! 

  4. Tulsi (Ocimum sanctum, tenuiflorum): A relative of basil, tulsi brings joy to the garden with its heavenly scent and flower stalks that attract all manner of pollinating insects. Tulsi leaves and flowers can be harvested fresh for tea, or hung in a dry, warm place to dry, then stripped off their stems and stored for a burst of sweetness throughout the year. Though native to farm warmer climates, this plant thrives through our northern summers and is a favorite tea plant for children and adults alike.

  5. Thyme (Thymus vulgaris): We offer a few varieties of thyme at Red Wagon, and this culinary staple is equally useful as infection-fighting medicine. My favorite to dry for tea is the French variety, which is a bit more floral and sweet than the German variety. Harvest by giving the plant a “haircut” right as it begins to set blossoms, and dry in a basket or paper bag, then strip from the stem. Strong thyme tea with a bit of honey provides welcome warmth during cold and flu season, and it can be added to biscuits and other baked goods for a dash of herbaceous brightness.

  6. Rose (Rosa spp.): Growing roses can be as simple or as complicated as you like, but harvesting their bounty is easy regardless of the species you cultivate. As the flowers bloom, pluck the petals and allow to dry in a basket out of the sun. You can certainly harvest the buds, but that robs the pollinators of the nectar, and reduces the showiness of your plants. Often once the bloom has been pollinated, it will begin to drop its fragrant petals on its own, and you can come along with your basket to catch them! Rose petals brighten and sweeten any tea blend, add luxury to chocolate treats, and are a classic skin-soothing secret. To learn more about using roses in skincare, join us June 30th for a Make-and-Take skin spray class at RWP!

  7. Mint (Mentha spp): This year at Red Wagon we’re growing fifteen different kinds of mint varieties, all with distinct aromatic profiles! I’m personally a big fan of the Kentucky Colonel and Chocolate mints, but it’s tremendously fun to plant a variety (in pots if you’re concerned about spreading) and see which types work best in your kitchen. Mint dries well, and I often will combine a few varieties into a tea blend for greater depth of flavor. In addition to settling digestion and brightening the spirit, mint can be used to literally cool down in the heat of summer- a strong mint tea can be chilled, and applied with a washcloth to the face and neck after sun exposure (as well as drunk for maximum cooling!)

  8. Lavender (Lavandula spp.): What could be more classic in the garden than lavender? With its beautiful purple blossoms and sturdy upright habit, it’s the definition of classic English gardening. We have quite a few lavender varieties in the greenhouses. For harvesting, the Phenomenal (L. intermedia) type seems to be a frontrunner in terms of quantity and fragrance of blooms, but Hidcote and Provence also work well. Cut flower stalks in early bloom and make a fresh lavender wand, or dry flowers and leaves to crush for homemade sachets. I also love infusing lavender into bath salts, and drying to use in the winter for uplifting facial steams


I hope this list piques your interest in planning your herb garden this year! There’s more inspiration to be found on the Red Wagon Herbs We Grow list, so be sure to peruse before the planting season begins!

Rainy Weather Gardening

The weather lately is really putting a damper on my gardening aspirations. I am gong to make the best of it, and focus on what can actually be done in the cool and wet spring we are having, rather than on what cannot be done.

Paths are newly mulched with cardboard and bark mulch. The row cover tunnel just yielded our first harvest of mache and arugula and was just replanted with chard and broccoli raab. The row cover with hoops is one of the best ways to keep bunnies out…

Paths are newly mulched with cardboard and bark mulch. The row cover tunnel just yielded our first harvest of mache and arugula and was just replanted with chard and broccoli raab. The row cover with hoops is one of the best ways to keep bunnies out without a fence. This is the year of the bunny. We even have a bunny statue to beg off the bunnies and ask them to spare us, but it is not really working. Chamomile and stone edging is looking cute and a new patch of self seeding Marble Arch Mix Salvia will provide us with edible flowers, cut flowers, and dried flowers for a few years.

Here is what I am doing in the garden this week:

Clean up and mulch the path ways.

The weeds come out easily when the ground is wet. It is ok to walk on the pathways to clean them up and mulch them, but I avoid walking on the growing beds or doing much to the soil in the growing beds when the ground is really wet. Doing so would compact the soil and adversely affect the tilth. So, the paths are getting a little extra attention this year and I am mulching with a thick layer of cardboard and some rough bark mulch from Clifford’s lumber. This is not the regular bark mulch from a garden center - it is a byproduct of a local, family owned sawmill just down the road. I would not use it in all applications where mulch is needed, but it is perfect for paths and under trees and shrubs. It is a little too coarse for perennial beds (but that is a whole other topic, because really I don’t think bark mulch belongs in most perennial beds). Once the paths are clearly defined and mulched, the rest of the season will be so much less labor intensive in the garden. Some other mulch ideas for paths are burlap coffee bags (which you can find this Saturday at our New North End Plant Sale at Bibens Ace Hardware on North Ave in Burlington). straw (I recommend the organic straw from Aurora Farms in Charlotte), or a combination of newspapper and leaves. These are all pretty heavy duty recommendations for paths. I would not use a heavy mulch like this right under smaller growing plants because the decomposing organic matter uses up the nitrogen in the soil and starves the plants of the food they need for healthy growth. Mulching paths is satisfying and really pays off in the long run. Plus, you can do it in the rain.

Plant more salad greens and try out some new varieties of cool hardy vegetables, flowers and herbs

I just added two kinds of kohlrabi to the garden, green Swiss chard, some Italian bulb fennel, broccoli raab, dandelion greens and frisée. This weather is perfect for transplanting a few plants here and there into corners of the garden. Again, you want to avoid working your soil when it is wet, but it is entirely all right to loosen up small corners of beds and tuck in a few plants here and there. I just harvested my first planting or arugula and of mache and re-planted right into those spaces. I did not disturb the wet soil too much, and I think they will all be fine.

Make containers

Picking out colorful annuals and cool foliage plants is the perfect antidote to the grey and the wet days we seem to be stuck in lately. I am covering my mom’s balcony with pots of geraniums, agastache, salvia, herbs, petunias, argyranthemum, canna, millet, banana, and heuchera. Heurchera, or coral bells, is an under-used plant in containers, and adds broad texture, interesting contrasting color (so many to choose from), and looks good all season long. We have a dwarf red banana we are growing this year that has a beautiful glossy red tinged leaf and looks really striking with the wispy orange of the Kudos mandarin Agastache and the red veined caramel heuchera. Tuck in a red oak lettuce here and there, and you will have a gorgeous container with edibles, perennial and season long interest that holds up well in rain, cold, heat, and dry. I love helping people make containers and have two more Make and Take classes coming up in June for shade loving containers. There is still room to sign up in both.

Wistfully choose heat loving crops

This weekend, I plan to select the tomatoes, eggplants, peppers, melons, cucumbers I want to grow, but I am just hardening them off for now. I am not planting them in the ground. This means that they will come inside at night if it is below 45F and they will go back out in the day time to feel the sun (wishful thinking?), wind, and rain and get used to real life outside. What I am not doing is planting them in the cold ground. That would just stress them out. They need soil that is 50F or warmer in order to grow well, and stressing them at a young age will weaken them when they are older and diseases start to settle in. Planting heat loving crops in cool weather is just asking for trouble down the road.

Move perennials

They love this weather. If you have an area that once was sun but now is shade, it is a great time of year to move those sun loving plants to a brighter spot, away from the encroaching shadow of shrub and tree. I took advantage of the dry and warm day on Wednesday to clean up a perennial bed and replant with shade loving plants under the shrubs that now cast shade. I used tiarella, pulmonaria, variegated Solomon’s Seal, Jacob’s ladder, and hostas. I love that sun to shade switch that inevitably takes place in a garden, the moving art of it all.

Hopefully, this gives you a good amount to do and scratches the gardening itch just enough. Happy gardening!


Who likes what? Inspiration for this rainy and cool spring.

calendula.jpg

While it has been a little cool and wet, I have had some extra time to plot out some new combinations I want to try in the garden. I love to mix up edible and ornamental plants, and coming up with some new ideas is always a creative part of the garden process I enjoy

People often ask me about companion planting, with the goal of learning more about what plants keep pests off of what other plants. I usually reply by saying that a mixed garden, with flowers and herbs interspersed among the vegetables generally helps confuse insect pests and also helps attract beneficial insects who are in search of pollen. Here are some combinations that I regularly create just because they work so well. Maybe as an exercise in trying something new, you could try your hand at one or two of these combos and then come up with some of your own. It is a great way to study plants, contrast, colors, and texture in the garden.

  • Verbena bonariensis, California poppies and lacinato kale - We do this often in the demonstration garden at Red Wagon Plants because the Verbena bonariensis is self seeding, along with some California poppies, and it is just so simple to throw in a few kale plants and see the magic unfold all summer long. The poppies bloom first and are a cheery, airy note floating beneath and alongside the dark green, almost black foliage of the kale. Later on, in late summer, the kale is bigger, the poppies are finished blooming and the verbena kicks into high gear with wiry stems waving high above the kale; delicate purple blossoms nod above the mature, gnarly textured leaves of the kale.

Some other favorites include:

  • Rainbow chard, gem marigolds, and lunchbox peppers

  • Opopeo amaranth,nicotiana elata, northern sea oats and redbor kale

  • Green butter lettuce, curly parsley, and calendula

  • Tokyo Bekana mustard, chervil, green oak lettuce, pansies and alyssum

  • Bleu Solaize leeks, Hungarian bread seed poppy, and rebor kale

  • Datura, African blue basil, and dusty miller

Mid-April Garden Jobs

onions.JPG

It is finally time to get into the garden after a long and very cold winter. Here are some jobs that can happen right now.

Sow from Seeds

Peas, carrots, beets, radishes, turnips

Transplant

Onions - they need the cooler days and long nights of April in order to make large onions in summer. Here are a couple of videos that will give you an idea of how to do it quickly. First, make a trench and sprinkle in some Compost Plus:

Then separate the clump of onion plants into individual plants. Onions should be planted about 4” apart, so just lay them in the trench, all in a row, then gently pat the soil around them to fill in the trench and stand them upright.

Leeks are planted the same way, but require more space, so I do those 6” part with 2 feet between the rows. Onions can have 1 foot between the rows. One 4-pack of our onion or leek plants has about 80 plants in each pack, so it is great to buy a few varieties and share with a friend so you can try multiple kinds. We grow red and yellow storage onions, Italian cipolinni onions, mini purple onions, 2 kinds of sweet onions, and early New York onions. We also grow scallions, 3 kinds of leeks, and shallots. All are planted in the same way, except scallions can be planted in small clumps of 10 to 15 plants. And they don’t need to grow in rows, but can be tucked into individual spots between other plants.

You can also be planting kale, arugula, mache, mustard greens, cabbage, and collards.

Herbs that can take the cold of April: Sorrel, chervil, cilantro, dill, chives.

alyssum clear chrystal mix.jpg

In the flowering plants department, it is a good time to plant alyssum, violas, and pansies. They are a good food source for bees this time of year when very few other things are flowering.


I wrote more about onions a few years ago here.

Happy gardening! They are announcing rain later today, so I am getting out there now.


2018 Plant List Preview: Cut Flowers

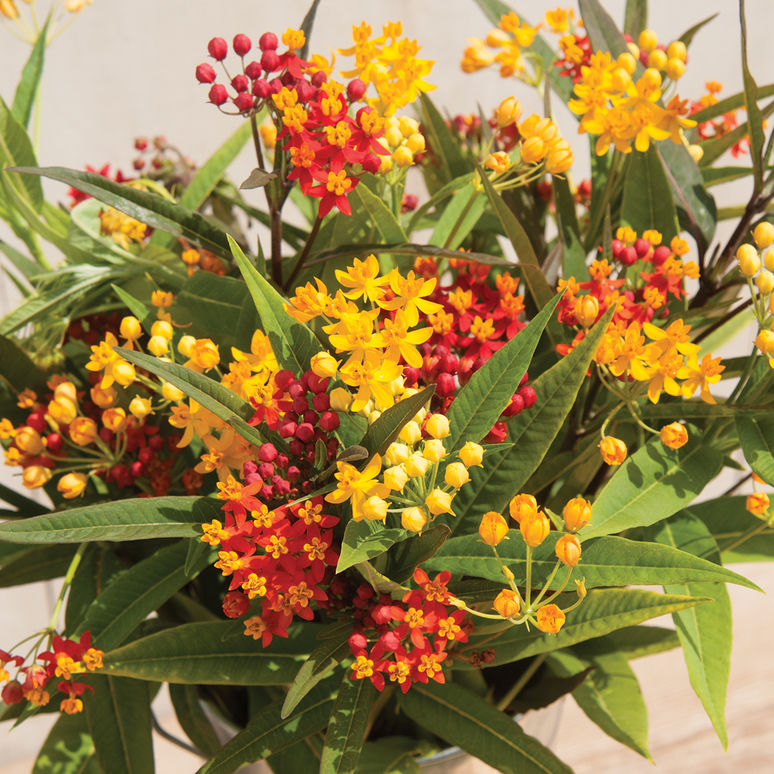
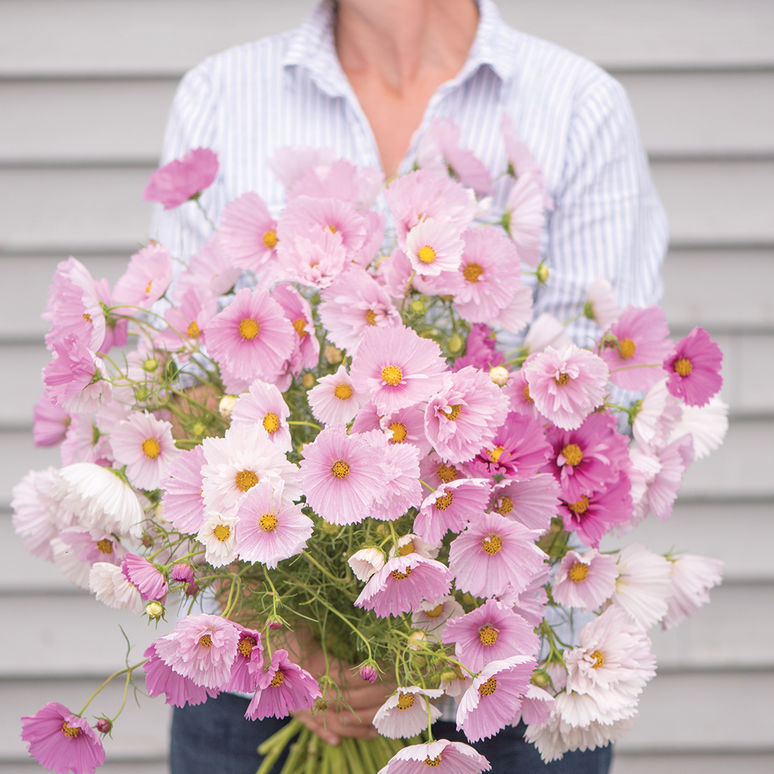
Last year was the year of the cut flower program at Red Wagon. Not only did we grow and sell more cut flower varieties than ever before, but we also hosted a 3 part floral design workshop series with flower farmer / florist Nina Foster and had a chance to meet flower growers from Vermont, New Hampshire and Massachusetts. The fun and beauty continue into 2018 with an expanded offering of varieties that work well for cutting and arranging and crafting. Here is the list. If you are a home gardener, you can make a wish list now for summer dreaming and planning. If you are a commercial grower, feel free to contact us about purchase plants in larger quantities for your commercial operation. The photos below represent only about 1/3 of the plants we grow that are suitable for cut flower use. Most of our perennials and many more annuals and some herbs are also suitable for floral use. And please note that vegetables and berries can make unique and eye catching additions to those sprawling, romantic bouquets that are so in style right now. If you need any suggestions or want to make a special request,  please don't hesitate to let us know. 

Photo gratefully used with permission from Ball Horticultural and Johnny's Selected Seeds. 


Sweet Potatoes Slip Sale 2016

sweet_potatoes_3.jpg

Sweet Potato Slip Sale

June 11th and 12th, 2016

8:00 to 6:00 pm

 Red Wagon Plants greenhouses

2408 Shelburne Falls Rd  * Hinesburg, VT

Proceeds from the sale benefit the educational programs of Vermont Community Garden Network.

For more information, call 482-4060

Sweet potatoes can be grown in Vermont. Under ideal conditions they thrive and can yield up to 5 pounds per slip. During this benefit sale, we will be selling sweet potato slips in 4" pots, with three slips per pot. These get transplanted 18" apart, in loose, well drained soil. You can also grow them in containers. They like warm, southern exposure, and can be trellised to save space.

Here are some resources for more information on Sweet Potatoes:

The Vermont Community Garden Network has information on their programs and the sweet potato sale here.

This  article on the Mother Earth News website highlights growing methods for northern gardeners and best ways to store the tubers.

 Here is a photo essay on how some ingenious customers are growing their sweet potatoes in Starksboro.

Recipe for Roasted Sweet Potato Fries with Herbs

2 large sweet potatoes, peeled and cut into 1/3 inch batons

3 TBS olive oil

salt and pepper

1/3 cup finely chopped parsley, chives, and or cilantro

2 cloves of garlic, finely chopped

1 small pinch of cayenne

1 tsp lemon juice

  • Preheat the oven to 450 F. Place 2 large cookie sheets in the oven so they are pre-heated as well
  • Toss the cut sweet potatoes with the olive oil and salt and pepper in a large bowl
  • Arrange them on the hot pans in a single layer.
  • Roast for 20 minutes, and flip them over with a spatula, and return to the oven for another 20 minutes, or until tender and browned.
  • Meanwhile, toss the herbs, garlic, cayenne and lemon juice together in the same bowl
  • When the hot fries come out of the oven, sprinkle the herb mixture on the fries and serve immediately

Growing Instructions for Sweet Potatoes

Sweet potato slips are cuttings that come from a parent vine. The slips grow best in a loose, sandy or silty soil that drains well. If sweet potatoes are grown in a rich dark soil they may discolor but are still good to eat. • Transplant the slips into garden beds during June, preferably in the late afternoon or on an overcast day. When transplanting, lay the slips on their sides with 2/3 of the slip buried a half inch under the soil. Water enough to keep the soil moist, but not saturated. • Plant the slips 10 to 18 inches apart in rows that are three to four feet apart. The rows or raised bed should be elevated 4 to 8 inches above the ground level to allow the sweet potatoes room to form. • Keep the cuttings watered while they are getting established. The leaves that were originally on the planted slips will dry up and fall off leaving just the vine stem. New leaves will emerge from the cuttings as the slips become established. • The sweet potato vines will cover the ground reaching 5 to 10 feet in length. Hoe around the vines to cultivate weeds and mulch with hay if desired. • Deer love sweet potato leaves, so be sure your planting area is fenced if deer are aproblem. A flying gold colored beetle may chew round holes in the leaves. The vines are tough and will keep growing despite insect damage. • Sweet potatoes are dug and harvested in late September through mid October, a day or two before the first predicted frost. Most of the sweet potatoes will be just below the parent plant. Each plant can produce up to six sweet potatoes. • After harvesting, dry the sweet potatoes on the ground for two or three hours. Allow them another 10 to 14 days to cure at room temperature or above, before storing the sweet potatoes at a temperature between 50 and 60 degrees F. • Unlike Irish potatoes, sweet potatoes should not be kept cold in a garage, refrigerator or outbuilding. If properly cured and stored, they will keep until April. Enjoy!

Hardening Off Those Plants

Curious about what "hardening off" means and why it's important? Here's a blog from our archives to help you prep your cold-season transplants for the great outdoors. 

Plants need to be hardened off before being transplanted. What does this mean? It is the process you take them through to get used to direct sunlight, wind, cold, heat, dryness, and any other weather conditions they will be asked to live through during their lives. When plants are started in the greenhouse, in trays or pots, their world is sheltered and comfortable; food is readily available in the compost-fortified soil, and the temperatures are carefully regulated. Once it is time to go out into the harsh world of the garden, the goods and services become a little more scarce for those baby plants and they go through a bit of withdrawal known as "transplant shock."  Hardening them off gives them a gradual adjustment to this new world.  It is best to start out by putting the plants outside for a few hours, and then bringing them back in; this gives them a small taste of direct sunlight. In any greenhouse, the plastic film filters out 10 to 25% of the sun's rays and the tender plants are literally sun-burned when they first encounter that unmediated light.  Here is how I do it at my house. When you buy plants that were grown by Red Wagon Plants, they have already been hardened off and you can put them right in the ground. The following method is important to follow if you are working with plants that you know are not hardened off yet.

Once they have gotten used to a few hours of sunlight at a time, they can stay outside overnight, but under a protective row cover.

The cover comes off in the daytime and the plants are acclimated to being where they will be planted for a few days.

If the temperatures drop down below freezing, cover them again. Cold hardy plants such as broccoli, cabbage, kale, hardy lettuces, hardy herbs, escarole, scallions, onions can take a frost without a problem, but they will do it with more grace and strength if they have been gradually introduced to those temperatures.

Once the plants have had a few cold nights, under cover, they can have a couple more nights without cover, and then are properly hardened off and ready to go in the ground.

It's also a good idea to give cold-weather transplants a little extra compost or a fish/seaweed emulsion watering at transplant time. It is hard for plant roots to uptake nutrients in cool weather and this will aid their transition as well.