Getting a Garden Started with Red Wagon Plants

Oh, my garden is perfect in March - all imagined blue blossoms and bursting red tomatoes and lush with shiny leaves.  I can picture it so well in these days before reality has arrived.  But still, I'm excited for the real thing, the dramas and surprises and smells and harvest.  And I'm looking forward to sharing my amateur garden adventures here on the Red Wagon Plants blog this season. I'm a Burlington mom, an enthusiastic though not terribly skilled gardener, food-lover, fund-raiser and marketer.  I blog about my parenting and food adventures over at crankycakes.com, and Julie's asked me to write about real life with Red Wagon plants through the growing season.  Last week she came over to talk about our plans, and we took a stroll around my Burlington condo, looking at the remnants of last year's garden that haven't yet been cleaned and gotten ready for the season.  It isn't pretty, but there's all that March imagination - and there was Julie with her excitement and amazing knowledge.

opt-legs-shadow

We talked about my goals, and looked at the space.  Within a general theme of edible landscaping, I want to grow:

  • Beautiful plants that we can enjoy through the season.
  • More of the things I never get enough of through our CSA share (especially tomatoes).
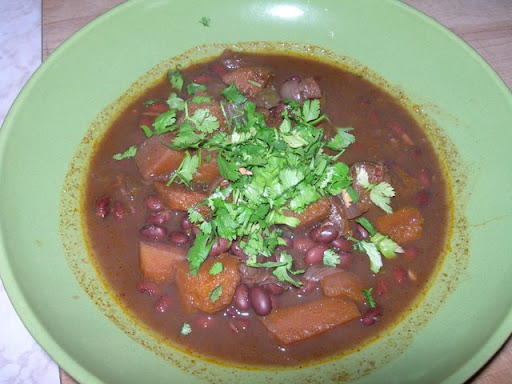
  • Plants that will help with my gift-giving for the holidays.  Last year I made some crazy nasturtium liqueur and I want to do more with cordials from the garden.  Plus I'm aspiring to make hot sauce to share.

I showed Julie my challenging spots - the north-facing edge that faces our neighbors' units where I grew red-veined sorrel last year (pretty leaves, but unwieldy and inedible).  Julie suggested currants, which will tolerate lots of shade, plus give us flowers and fruit.

opt-north

We looked at the north-east corner where I don't have anything except one gooseberry bush planted.  Julie wondered about making this shady spot a garden for pollinators - bees, birds and butterflies.  She pulled out her laptop and pulled up a long list of plants that could be in the shade.  We agreed on:

The longest side of my house faces east, which means a short day of direct light.  Last year, I had grown leeks (never got bigger than scallions), chard, kale, and other greens there, along with a big patch of nasturtiums.  After talking about what I wanted, we settled on:

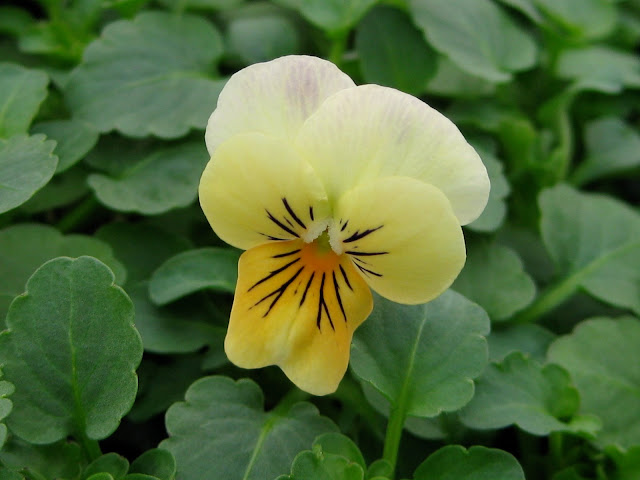
  • Rhubarb (I've been interested in rhubarb for a while but because I have young children, I've been scared of the leaves that I had always heard were terribly toxic.  Last year I learned that it would take 10 lbs. of leaves to reach actual lethal levels, so I now can relax and allow it in the garden.)
  • Cilantro
  • Parsley
  • Dill
  • Bronze fennel
  • Bulb fennel
  • Chives
  • Chervil
  • Meadow rue

We walked around to the south, where we talked about taking advantage of the heat and light and growing pots of tomatoes and vines along a south-west wall, and putting in a container with:
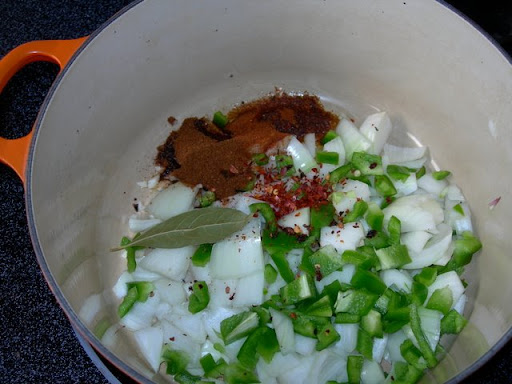
opt-south-wall

So our plans are big, and the plants are growing.  Can't wait to get started.

First Week in the Greenhouse

Last week was the first week back in the greenhouse and all the work went so smoothly it didn't even feel like work. It would take more poetry than what is in me to describe the joy I feel from being back at work and playing with plants. I am also so grateful for our amazing team of kind and hard working people - Allison Lea, Eric Denise, Dana Ozimek and Buddy Koerner. It makes a huge difference to have such an all star team of Red Wagon Plants allumni, and the plants feel the love and experience too. Here are a few shots of the week's progress.

Can you find Sandy peeking at everything in the photo above?

And here are a few of the 2010 geraniums.....

Hens and Chicks waiting for a warm spot in a rock garden or along a stone path.....

Some Sweet Allysum poking through...

Any signs of life stirring in your garden?

Cuba

I recently took a trip to the city of Havana, Cuba with the hope of seeing some of the urban agriculture I had heard so much about. First a little background: the Cuban economy was sent into a complete crisis when the Soviet system collapsed and they lost access to a major trading partner. All exports and imports ground to a screeching halt and Cubans entered what they call the "Special Period." It was during this time that Cuban agriculture shifted from an industrial, chemical intensive model to a more diversified, small scale and organic model. The learning curve was steep out of sheer necessity and now Cuba can show examples of organic agriculture at its best, in spite of the ongoing US embargo. Under the Castro system, Cuban farmers may produce some of their own crops to sell at farmers' markets; this makes farmers one of the few groups that are able to have their own small enterprise since most businesses in Cuba are owned by the government. I was extremely lucky to be able to visit the famous Alamar Organiponico in Havana. This is one of the most innovative, organic vegetable farms I have ever seen and seems to have incredible high yields off of a relatively small parcel of land (roughly 20 acres). The Alamar Organiponico is a Basic Unit of Production, which in Cuban terms means that the land is owned by the government but the produce and its proceeds are owned by the workers who work cooperatively and share the profit. With the help of translator and friend, Majel Reyes, I met with the director of the Organiponico, Miguel Salcines Lopez. He explained to us that when agriculture in Cuba was industrial and monocrop systems only, with high levels of mechanization, many rural people left the countryside because their labor had been replaced by machines and subsistence agriculture was no longer possible. This great influx into the cities made for a new cultural outlook that disdained agrarian life. Part of the importance of the Alamar project is to create a type of agriculture that is human scaled and rewarding on all levels: financial, physical and spiritual. He believes strongly that if the people do not find meaning and beauty in their work, then the plants and crops will suffer.

Miguel Salcines, director of the Alamar Organiponico

Mr. Salcines was trained as an agronomist and worked for the government in a bureaucratic job for most of his career but said his soul woke up once he was able to work on the organiponico. His joy and enthusiasm seemed contagious. The farm consists of greenhouses, screenhouses, tropical ornamental plant nurseries, small scale forage crops, composting facility, vermiculture facility, a cafe, a farmstand, and a value added facility. Every crop we saw was a healthy bursting splash of green. Most crops are grown in raised beds with four rotations per year. Since the land is farmed so intensively, soil rejuvenation is constantly in motion with the addition of worm castings, compost, and soil innoculated with  mychorrizal fungi (a beneficial fungus which is produced on site).

Vermiculture at Alamar
California Red Wrigglers
Mychorrizal Fungi production. Plants are grown in cement bunkers, soil is innoculated with benefical spores, root systmes of plants host the fungi, plants are cut down, and fungi multiplies on root systems in soil.

All of their field transplants are grown on site and their potting soil is mixed on site. It is made up of rice hulls, worm castings, and compost.

Potting soil in dump wagon
Dumped out
Potting soil for seed starting
A really healthy root system
Seedlings growing out before being transplanted
Tomatoes, young and trellised
Carrots
Lettuce and herbs
Lettuce, herbs, a pole barn under construction, and housing complex

As you can see, plant spacing is very tight, but because of careful crop rotation, use of beneficial insects, and attention to soil health, disease and insect pressure is at a minimum. I was surprised to see that crops showed no sign of disease or stress in spite of the tight spacing and lack of air circulation between plants.

There are more photos available here. I encourage everyone to consider the possibility of going to Cuba. Americans can go legally under a general license if they are conducting research pertaining to their profession. Seeing a country where the people are at once poor yet highly educated with access to all kinds of arts and culture is a truly illuminating experience. The warmth and intelligence of all the Cubans we met was a life changing experience and one that I hope to repeat.  Cuba libre!

Marigolds

Tiger Eye French Marigold

Marigolds are one of my favorite plants and I find myself often defending them. They have a reputation for being stodgy and boring, and while they are certainly ubiquitous, there are plenty of interesting varieties out there that no one needs to get bored with them.  Discoveries of unusual marigolds continue to delight me as I peruse catalogs and put the finishing touches on our seeding plans.

he first European discovery of them was by the Portuguese in Central America. I am not sure if they were cultivated by Native Americans, or just growing wild, but they were no doubt appreciated. The Portuguese brought them to Europe and India. Now they are used widely throughout the world for ornamental, medicinal, ritual, and culinary purposes. All marigolds are edible, but the small flowere tagetes type, like the gem series are best used for this purpose.

I am working out the timing of all our marigold varieties. Doing the timing means figuring out when to plant them, how often to plant them and what kind of pot they should end up in. When you buy marigolds, they usually come in 4 packs or 6 packs, and have often by treated with a hormone that induces them to bloom on short stems so that you know what they will look like once planted.

We don't use any kind of hormone sprays or growth regulators. So sometimes, we sell marigolds and other annuals while they are still green, without blooms. It involves a little more work because we have to have pictures of the marigolds around the greenhouse and we have to explain why we do it, but really it much better than using  a bunch of chemicals.

Here are some of the new varieties we are doing this year.

I really love marigolds. I know that they are not unusual or rare, but they fire up some sort of ofalctory memory center for me. Maybe my grandmother had them, or my parents planted them. I have no visual memory of them that is as strong as the scent memory. Their pungent, almost citrus-like aroma is a deterent to some and appealing to others. How do you feel about marigolds?

Anyhow, here are a few that I am excited about.

crackerjack Mix Marigold
Creamy Vanilla African Marigold
French Bonanza Flame Marigold
Jolly Jester Marigold

This last one is, Jolly Jester, is one of my favorites. It is about 4 feet tall, and not at all a typical marigold. The striped blooms are a contrasting play of lively yellow and deep orange, and they sway gently in the breeze. They do not at all have the stiff appearance of many marigolds and kids just love them. This is an old-fashioned variety - we find the seeds at Seed Savers Exchange which specializes in heirloom seeds of harder to find plants. 97 of our 679 varieties come from them.

Happenings

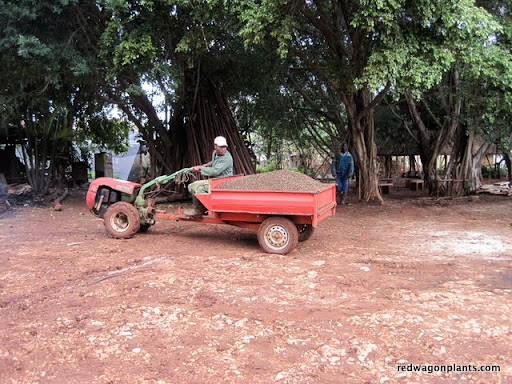
Eric and Lindsay moving the bit of soil left over from last year into a greenhouse.

Charley's stone walls for the workshops he teaches. Red Wagon Plants and Queen City Soil and Stone own a greenhouse together so that he can use it in the winter for workshops and we use it in the spring and summer for retail sales.

Eric just finished installing a new heater. Our old heaters have been destroyed, one by one, by mud wasps that make their mud homes in the delicate workings of the motors or heat exchangers. We are replacing them with heaters that do not have nooks and crannies in which the wasps can hide.

Our booth at the NOFA conference this past weekend. It was great to meet customers and see friends, old and new.

Field Trip

Every winter, I try to have a field trip to at least one greenhouse business to see how other people do things. This time, I am heading off to Peace Tree Farm, Candy and Lloyd Tavern's very impressive and large operation in Buck's County, PA. I hope to get a chance to see their  very efficient systems at work. They are growing organic herb plants along  as part of their operation, and I can't wait to see it all and ask lots of questions. I first met Lloyd at a conference a couple of years ago and was really impressed with his vast knowledge of all things mechanical when it comes to greenhouse production. Our operation at Red Wagon Plants is not at all mechanized. .... everything we do is by hand, from filling the pots, to watering, to seeding, and carrying trays to the truck. Larger operations use machines for many of these tasks, and I avoid these machines because we are too small to warrant the cost, and I am a first class techno-phobe. Things just break if I come near them. So in an effort to get over some of my fear of machinery, I'll visit Lloyd and Candy and will be grateful for their kind exposure to greenhouse robotics.  Photos to come!

Making Plans for Spring

I have been making a few plans for the season, along with the help of my co-workers. We always come up with a few new ways each year to reach more people, be more informative and helpful and to make our workspace more efficient and comfortable. One of the best aspects of a seasonal business is the available time, each year, to reflect and improve. Every problem that occurs in one season has a chance to be improved upon the following season. This is true of gardening in general, but when that forgiving cyclical approach is applied to running a business, it can help everyone feel saner and ready for the challenge of a quick and furious growing season.

This year's areas of improvement are, drum role please...

Communication - we hope to better reach our customers with the information they seek. We are often asked questions about a growing method, a pest problem, a cooking question, etc and we hope that by making our website more informative we will be able to meet some of those needs.

Infrastructure - after the growing season we will be replacing the plastic on the three of our greenhouses. By replacing the plastic every 5 years, we insure that proper light levels are getting through the glazing. We will also take the time to regrade the gravel base in each greenhouse as a way to control weeds and water flow. We will replace the black landscape fabric over the gravel and that will give us a nice, clean start to the 2011 season. Keeping a greenhouse clean is one of the most important factors in organic production. Weeds, algae, and dirt are all great habitats for pests and disease; since we don't have the chemical means to take care of these problems, we must rely on simple hygiene and cleanliness. Eric Denice, our resident can-fix-anything delivery person and all around wonderful guy, will also be building some new benches to keep the plants out of harms way (ie, the hungry mouths of many, many voles). Last year, the voles destroyed tray after tray of broccoli, lettuce, kale and countless other tidbits. Raspberries in the mouse traps were the only thing that could compete a little with the tender green growth of our much loved plants. Sorry, voles, we had to do it.

Information Management - our database is a constant work in progress. We keep track of thousands of varieties on our database - this includes all the information we can gather about the plant including every time we have ever seeded it, how many weeks we seed it per year, what kind of pest problems it has, how well customers like it, etc. This has been an ongoing project of many years, and now it is finally at a point where all of that information gathering is proving useful and there is enough data in the system to simultaneously make my head spin and make heart leap. I love knowing when things are planted and how to improve the cropping strategies.  I am a secret computer geek who is really grateful her parents sent her to computer camp at the age of 12.

Community Outreach - As always, we will be working with many, many groups this year to donate plants to community garden projects. We hope to teach a few workshops, maybe one or two about canning and freezing the garden harvest, and also some hands on workshops in the garden, so people who haven't done it learn how to sow seeds directly, the best way to transplant our starts, etc. Our teaching and plant donations are the absolute best parts of this business. Few things give me more joy in my work life than driving around with a van full of plants that will be distributed to neighborhoods that need beautifying and to families that need a little help with their food. If you know of a group that could use some free plants for public gardening purposes (schools, churches, food banks, etc) please let us know, and we will add them to our list of Community Partners.

Plants for Honey Bees

Calendula

Cleome

Cosmos

Heliotrope

Hyacinth Bean Vine

Salvia

Mints

Scarlet Runner Bean

Sorghum

Basils

Borage

Catnip

Chamomile

Chives

Cilantro

Dill

Germander

Lavender

marjoram

Oregano

Rosemary

Sage

Thyme

Savory

Clematis

Dicentra (Bleeding Heart)

Eupatorium (Joe Pye Weed)

Verbena bonariensis

Lemon Balm

Asclepias

Liatris

Ajuga

Allysum

Echinacea

Perovskia (Russian Sage)

Nepeta

Salix (Willows)

Sambucus (Elderberry)

Physocarpus (Nine Bark)

Lyng's Giant Grey Stripe Sunflower

Fennel, Bronze Leaf

In general, bees like plants whose colors have alot of contrast and they go out to feed off one type of plant at a time, so it is a good idea to plant multiple plants of one type in an area. Creating a pollinator friendly garden will not only help the bees, but will also help your yields in the vegetable and fruit garden. The more pollinators come visiting the better your results...you will see it in the fruit set of squashes, cucumbers, melons, etc. Pollinator gardens help the bees, help our food supply and add beauty to our worlds.

Please visit the resources section of our garden journal for a growing list of resources pertaining to bees and pollination.

New Varieties for the New Year

We are adding so many new varieties for the new year. We will update the plant selection of the website and include all of the new selections for 2010, but for now here is a sneak peak.

This is a really fun summer squash with lovely shades of green and yellow, split right down the middle. The flavor is similar to any yellow summer squash, but the striped look is really fun in the harvest basket.

Zephyr Summer Squash

This next nasturtium is a new introduction from Johnny's Selected Seeds. It has such brilliant hues of yellows, oranges and reds. I think it will be a real standout amongst the herbs and edible blossoms in the spring garden. Nasturtiums are the work horses of the garden world - they just never stop producing their cheery blooms all season long.

Kaleidoscope mix nasturtium

A few customer have asked for this nostalgic, old-fashioned annual. It is a beautiful lime green flower with bracts and petals that dry perfectly along their regal, spiked stem. I just love these in bouquets with zinnias and ornamental grasses.

Bells of Ireland

Round of Hungary Pepper is another customer request. It's a really sweet pepper with a flatened shape that is perfect for stuffing and baking. It is an heirloom and as such carries with it a full spectrum of flavors. Perfect addition to the grilled vegetables you may be looking forward to this summer.

Round of Hungary Sweet Pepper

We will continue to update you with all the new varieties, so keep checking in to see what's coming. And as always, we love to hear your suggestions, stories of what works well for you...our plants and your gardens have a lot to share!

Salix nana or the Willow Wonder

Salix nana or Arctic Blue Willow

Certain plants look just right in the snow, and since I am home so much more in the winter than in the summer, I like to make sure there is some winter appeal to our gardens. We have a hedgerow of Salix nana, or Arctic Blue Willow. They are a fast growing plant, perfect for privacy screens, bird habitat and bee forage.

Here is the same shrub in winter. I love how the snow just hangs in the branches. Birds perch here and get out of the wind. And the twiggy nature of these willows keeps them well employed as a privacy screen all year long.

Salix nana in winter

Snow and greenhouses

Snow removal is a big part of greenhouse maintenance in the winter. Our greenhouses are really strong, made from tubular steel, engineered by Harnois, up in Quebec, and can handle a big snow load. The problem though, is once the snow slides off, it has to be cleared away from the sides so that more snow can slide off. If it builds up too much on the sides, it can put uneven pressure on the frame, and when another heavy snow falls, the uneven pressure combined with the added weight of the snow load can cause a problem. We have a snow blower to do this, but when it gets to be too much, we call in Roger Parker, a neighbor and all around helpful person who has an excavation business and owns every great piece of large equipment a person could want. His tractor and huge rear-mounted snowblower fits in between the greenhouses just fine and they can clear away the big snow piles in a few passes. It sure beats shoveling!

From the Valentine's Day blizzard of 2007

Seed Inventory

It's a good idea, if you start your own seeds, to do a thorough cleaning out of the seed supply every year. Keeping old seed around will just lead to frustration. Here is a basic guideline for seed shelf-life:

  • 1 year: onions, parsnips, parsley, salsify, scorzonera, and spinach;
  • 2 years: corn, peas, beans, chives, okra, dandelion;
  • 3 years: carrots, leeks, asparagus, turnips, rutabagas;
  • 4 years: peppers, chard, pumpkins, squash, watermelons, basil, artichokes and cardoons;
  • 5 years: most brassicas, beets, tomatoes, eggplant, cucumbers, muskmelons, celery, celeriac, lettuce, endive, chicory.

I am never too sure about what to do with old seeds. Sometimes I throw them around on bare patches of earth to see what will come up and other times I sadly throw them into the compost or trash. Most importantly, I try to be really careful to order only what I can use within the lifetime of the seed.

Winter Work

Every day, I try to work a little and play a little. And come fall and winter, it is always a little bit of a challenge to find the right balance. I try to learn some new skill every winter and usually find a topic to study with a friend or two. This winter the skill is social media as a business tool - hence this blog and Red Wagon Plants presence on Facebook and Twitter. I am reading many interesting food blogs and a few homesteading and farming blogs, using Google reader to stay updated on these issues. It doesn't really feel like work, but I sense my slow passage up the learning curve and hope it translates into increased relationship with customers. Having a business that is only open to the public 2 months out of the year means that I spend 10 months not hearing from customers. My biggest goal with internet communication is to hear from customers more regularly throughout the year, and to track the progress of our plants.  So please, let me know. - Julie

Leek Fest

I have just used up the last of my leeks. That means we ate about 225 leeks this fall. That is a lot of leeks. We grow two different kinds for two slightly different purposes.

My favorite for flavor and beauty is Bleu Solaize, a French heirloom variety that is just majestic in the garden. It stands about 2 feet tall and has thick, blue-green leaves that make for a dramatic, palm-like display in the kitchen garden or tucked into a mixed ornamental bed. The leaves even turn a pretty violet color once cold weather hits. I think they would make a lovely back drop for some bright red ladybird poppies or mixed in with some verbena bonariensis and short sonata cosmos.  What really makes Bleu Solaize special though, is its ability to survive very cold temperatures.  If I still had some in the garden, I would start mulching them with straw right about now (early December) and would be able to harvest them all winter and even into early spring. I guess next year I will have to plant even more leeks.

The other variety we grow is King Richard (known as "King Dick" around the greenhouse work bench).  I love this variety because it is ready to eat long before the Bleu Solaize (you can start to eat them at the baby stage - see recipe below), it does not require hilling, and it easy to clean.  It has been bred to be "self-blanching" which means that the white, edible part is extra long in proportion to the green part and does not have to be buried in soil to stay white, so overall the leek stays cleaner and there is much less waste or compost to deal with. All of this ease in growing and cooking is at the cost of flavor.  These leeks are sweet and mild, but just don't pack the same rich, leeky flavor of the Bleu Solaize. I still like them a ton, though, and this is why we grow TWO kinds of leeks!

Growing and Care of Leeks:

Our plants come in 4 packs and there are about 100 plants per pack. This may seem like a lot, but since they hold in the garden for such a long time, it is really a moderate amount that can be eaten over a 3 to 6 month period. I start out by making a trench with the edge of my hoe, about 3 inches deep. You should allow for 6 inches of space per leek in rows that are about 8 to 12 inches apart. So for one 4 pack of leeks, I usually prepare three row that are 18 feet long. You can pack them in a little tighter if you don't have the space. You can also plant them in once long row, which makes them easier to hill.  You can also plant crops with a short life span (radishes, arugula, lettuce, spinach) right near them since leeks take a long time to size up and use all their alloted space.  When planting the leeks in their trench, it is important to bury them about as far down as you can and leave only a few inches of the delicate green top showing. They are really slow to grow, so you can save space by planting them in a nurse bed, where you just pack them in pretty tightly and wait a month or so to transplant them to their rows in the garden. Just keep them well watered either way. Leeks and onions need lots of water to get established and off to a good start.  And keep them well weeded too; the slow growth rate of leeks makes them very susceptible to weed pressure. Once the leeks are about a half inch in diameter, you can hill them by gently piling loose soil around their base a few inches up the plant. This is alos a great time to add compost and some straw mulch.  Once mulched and composted, the leeks become pretty much care-free other than some watering every now and then. The mulch and the compost help retain moisture, so it they are a critical component of having nice, large leeks.

Some of my favorite leek recipes

First of all, here is a nice video of how to wash leeks. It's pretty quick once you are used to it.

Leeks in Vinaigrette

3 to 4 leeks per person (if they are small) or 1 or 2 leeks per person if they are large.
about a tablespoon of this vinaigrette
Garnishes: a table spoon of capers per plate, half a chopped hard boil egg, finelly chopped tarragon, parsley or chives
Arrange leeks on indivudual serving plates, drizzle with dressing and top with garnishes.

Braised Leeks

Place washed and trimmed leeks in an oven-proof casserole dish in a single, snug layer.
Pour in enough stock (chicken, beef, veggie - your choice) to fill in half way up the leeks.
Tuck in a few sprigs of thyme, rosemary, or savory in between the leeks.
Salt and pepper  liberally, dot with a few small nuggets of butter.
Cover with tin foil and bake in a preheated 350 degree oven until soft, about 45 to 60  minutes depending on the size of your leeks.
Uncover the leeks, sprinkle with a little freshly grated parmesan and place under a preheated broiler until browned and bubbly.  You can skip the cheese and broiler phase if you want to be more wholesome about it.

Potato Leek Soup

In a large soup pot, place the following ingredients:

3 washed and trimmed leeks, roughly chopped
2 small/medium potatoes, roughly chopped
1 gallon or so of broth of your choice (chicken, beef, or veggie)
a few sprigs of rosemary or thyme
a few cloves of garlic, finely chopped
Let everything simmer on medium/low heat  until very tender, about one hour or so. Remove herb sprigs and puree in a blender or with a hand held immersion blender (much easier method).
Salt and pepper to taste.
Stir in a little heavy cream if you are feeling decadent.
Garnish with fresh pasley or chives, finely chopped.

Bringing in Herbs for the Winter

Herbs are one of the key ingredients in summer cooking that make the food really stand out, but we don't have to stop once winter comes.  The key, in my mind, to things tasting good is to layer in flavors using various simple techniques.  Herbs are the fastest and simplest of those methods, other than say, adding salt.

We have had such a warm November that I am still clipping herbs right out of the garden and the herbs in pots are still doing well on the back porch.  I have also started to bring in herbs from the garden to dry them.  The simplest method is to cut whole branches of  the woody herbs such as thyme, sage, winter savory, and rosemary and tie them into bundles and hang them in a dark, well ventilated place.  I usually leave them hanging for a month or so, and then place all the bundles into a large basket lined with a clean dishcloth.  I use a large amount of herbs all winter, by the handful, in simmering stews, soups, under and over roasted meats, inside the cavity of roasted poultry, etc.  I just can't think of a simpler and more effective way to add depth to whatever is cooking.

The leafier herbs, such as basil, cilantro, parsley and chives can be frozen for year round use.  This is best done with the aid of a food processor.  I take handfuls of washed herbs (stems removed) and pulse them in the bowl of the processor until they are finely chopped. I then drizzle in a little olive oil while the machine runs. Once it all looks like a nice green mush, I scoop it all into freezer bags and shape it into a thin, flat layer before placing the bags (lying down) into the freezer.  This allows the herb puree to freeze in a thin sheet that can be broken into smaller pieces when you are ready to use it. This frozen herb puree is a great addition to soups, stews, sauces, roasted or steamed veggies, and salad dressings.  I simply toss in a chunk of the herb popsicle at the end of the cooking time of whatever I am making so that the fresh flavor really comes through.

You can also bring herbs inside in pots for the winter and place them near a sunny window.  I keep a few herbs in pots all summer just for this purpose, but you can dig up whole plants out of the garden and repot them with some good potting soil. These are nice herbs to use as garnish, or chopped into a fresh salad.  These are not the herbs I use by the handful, but when I want just a teaspoon of fresh, chopped herbs to add a final punch to a dish.  Some of the herbs that work well for bringing indoors are thyme, parsley, rosemary, sage, oregano and basil.  The sunnier the window, the better luck you will have. You can also use some grow lights on a timer for even better results.  It's best to water these indoor herbs about once a week, but since they are in a semi dormant stage, they don't need to stay as moist as they would in the summer. The herbs won't always look great, but they will always smell good and have enough flavor boosting powers to earn their keep.

Tomato Varieties, Old and New

This past season was pretty hard on tomatoes.  Lots of rain, cool temperatures, and very high disease pressure made for less than ideal conditions.  At Red Wagon, we grow varieties that taste really good and that produce well.  Sometimes those two things don't always go together, and flavor is sacrificed for high yields, or the other way around. Our tomato variety list has always favored flavor; in other words, we grow lots of open-pollinated, heirloom varieties that don't always produce high yields, but whose flavor is far superior to those hard lobes lurking on grocery store shelves.  All of the 'heirloom' varieties you see in catalogs or in our plant displays have stopped being commercially produced by large farms, and while enjoying a renaissance among small, local and organic farms, their lack of shipability (too delicate) and irregular shapes and sizes will likely make sure they remain a stranger to the tractor trailer. For the sake of clarity, let me explain something about the language used to describe plant varieties. 'Heirloom' and 'hybrid' are not exactly parallel terms.  Their is no botanical definition of an 'heirloom' - that is just a folksy way of saying a certain variety has been around a long time, it is open pollinated (more on that in a second) and there is often some sort of story associated with how the seed has been saved over many generations.  The heirlooms often taste better--but not always--and sometimes the propaganda around an heirloom's attributes eclipses the reality.  A hybrid variety is a plant that has been bred from two different tomato varieties.  This gives it, in theory, hybrid vigor.  For example, one parent is known for its resistance to pathogens but has the mouth-feel of a doorknob while the other parent is famous for flavor, but withers at the sight of a fungal spore. A hybrid variety is bred with a higher degree of human intervention, than an open pollinated variety.  This simple plant breeding has been going on since the beginning of agriculture and is not to be confused with recombinant DNA breeding which is inter-specific (think fish genes in a tomato).  Open-pollinated varieties are plants with the same exact parents and are bred with the simple aid of wind, insect, or plant mechanics--i.e. humans don't have to get involved other than to isolate the plants from other varieties, and to collect the seed etc.  All 'heirloom' varieties are open-pollinated, but again, remember that 'heirloom' is not a scientific term, it's more of a literary term - think "plants with stories."

A while back, a New York Times editorial by chef and restauranteur, Dan Barber, confirmed what I had been thinking: that in order for our agriculture-and on a small scale, our back yard gardens-to thrive, we need to diversify. This past summer, those gardens that included a mix of heirloom tomatoes and hybridized tomatoes probably had better luck over all.  I know that in my garden, that was true, but I was still a little surprised that the margin between the two was pretty slim.  In spite of the harsh conditions, my tomatoes did pretty well. I gave them lots of mulch and lots of space between the plants and I regularly clipped off yellowing vegetation.  Surprisingly, some of the hybrids died really early on (they are bred for resistance to certain pathogens, but not all), and some of the heirlooms clung on for dear life until our first (very early) frost. So the lesson I learned is that the best thing to do is to have a mix of varieties, and hope for the best.  I would not suggest growing only one favorite heirloom; if there is room in your garden, grow a plant or two from each category - heirloom and hybrids of slicers, cherry, paste, early producers, late producers, etc.  I know this is not practical for small spaces, but just a guideline to use in your garden planning.

We are adding some new tomatoes for the 2010 season, and so far, here is what I have come up with.  Please feel free to leave me suggestions, that is our favorite way of trying something new.

Pink Beauty - a hybrid with firm, delicious fruit.  Pink, medium-size, 6-8 oz.  74 days to maturity.

Fantastic - A customer request. A hybrid with 3 to 5 inch round, firm slicing fruit with good shape and crack resistance. Meaty, bright red and with exceptional flavor. Indeterminate. 85 days to maturity.

Goliath - a hybrid with smooth, bright red fruit that is huge - 10 to 15 ounces each. Sweet luscious flavor and blemish free exterior. High yielding and great disease resistance. 65 days to maturity (EARLY for such large fruit)

Rutgers - a hybrid with pinkish-red saladette (2-3" diameter) size fruit with outstanding flavor that is always a favorite in taste tests.  The earliest tomato that keeps producing all season long. Cold tolerant. Determinate. 50 days

Orange Blossom -a hybrid determinate (means they don't get as tall as others and all of the fruit ripens at once)  with medium-firm, globe-shaped fruits average 6-7 oz., have a nice texture, and are mildly flavored, balanced with a little acidity. 60 days to maturity

Black Cherry -A small and pretty cherry tomato with rich, sweet flavor.  Nice in mixed tomato salads. Black tomatoes are really a deep mahogany and are known to have superior flavor.  Open-pollinated. 64 days.

Paul Robeson - An heirloom. A well loved tomatoes on many people’s “favorites” list.  Dark red fruit tinged with black, brown and purple flesh and skin. Rich flavor with hints of spice and red wine. Varies widely in size, but averages 10 to 12 ounces each. Does well in colder temperatures; seed is from Siberia. 74 days.

A Time of Acceptance

I love garlic planting time.  You can really learn a lot about your soil when it is fall and the garden has spent a summer being tended (or not).  This is the second burst of good intentions, the first one being the entire month of May when ideas run ecstatically through the garden plan .  Garden cleanup is a confessional time in the gardening calendar. It is a time to look at mistakes, assess and swear to never make them again, renew your commitment to gardening, and prepare to let the passage of a long winter slowly rekindle your optimism for that spring burst.   Or you can  just learn to live with your shortcomings and realize that the garden is a very forgiving place, where perfection, motivation, and execution don't have to be the priorities.  In other words, it's time to take the pressure off.  There is so much of it in our lives, why not let the garden be a place where we accept and embrace imperfection. Garlic planting is a perfect way to mark the impending doom of winter and the shortening days.  Tucking those fat cloves deep into the earth, I feel unbounded optimism, a deep sense of satisfaction that I am punctuating the calendar with an earthy tradition, full of meaning and metaphor.  The garden is a great place to create your own traditions that are in step with changing seasons; it's a place of rituals that are private and intimate,  between you and your dirt. When I plant garlic, I imagine winter as a time to prepare for spring, as a passage in the circular cycle.  The thought of those cloves, tucked into their bed and nestled in straw, remind me that it is alright to take time to just rest and renew come those cold and bleak days.

I always start by selecting a site for the garlic that will benefit both the garden, the garlic and future crops.  Garlic brings a full  9 months of cultivation to the garden, much more than other vegetable plantings.  With it also comes a deep soil work up, a thick layer of composted manure, and another thick layer of straw.  These are all great ways to treat your soil and whatever is planted in that spot, in your garden's future, will feel the love.  As part of my garden rotation, I spend the winter imagining what will be planted where the garlic once stood, which crop will benefit from the extra organic matter and nutrients and care that the garlic received.  Many people think that garlic is a healing food with all sorts of immune boosting properties....I think it does the same type of work in the garden.  Once again, I am reminded of the way gardening is a microcosm of life and of the body, following the cycle not just of the seasons, but also, of growth and acceptance.

Black Bean and Butternut Squash Chili

This is one of my favorite things to do with butternut squash, and every time I make it, I am reminded of my friend, Robin Holland.  She made it for a mom's group I was a part of when my daughter was a baby and a toddler.  A dozen or so of us would get together once a week, share an amazing meal and, together, relish in the joys and burdens of motherhood.  I still make this often, and every time, the flavors combine together to transport me back to those days.  There is something inherently grounding and warming about this dish.

Black Bean and Butternut Squash Chili

(enough for a crowd and easily reduced)

2 cups of dried black beans, soaked overnight, rinsed and drained (turns into about 6 cups of soaked beans

1 large butternut squash, peeled, seeded, and roughly chopped into 1" chunks

2 TBS olive oil

2 large onions, chopped

1 or 2 green or red peppers, chopped

5 cloves of garlic, finely chopped

4 bay leaves

6 TBS chili powder

1 tsp dried chili flakes

2 cups of apple cider

8 cups of water

Salt to taste (at the end)

2 to 4 TBS maple syrup

Chopped cilantro, jalapeno and lime wedges for garnish (optional)

In a large, heavy pot, heat the olive oil.  Add the onion, bell pepper, garlic, chili powder, pepper flakes, bay leaves, and stir until soft and starting to brown.  Add 1 cup of the apple cider, and scrape up the brown bits and allow it to cook down by about half the volume.  This helps to concentrate the flavors of the aromatics (onions, bay leaf, etc).

It should look something like this.

Next add the squash, and the soaked beans, the remainder of the liquid, and allow to cook over medium to low heat for about 1 1/2 hours, or until everything is soft. Finish the stew by adding the maple syrup, and about 1 TBS salt (I find the beans and the squash really need lots of salt).  Stir and wait a few minutes before tasting.  Adjust with more syrup or salt if needed.

This is great served with the garnishes, some corn tortillas or corn bread, and a piece of cheddar cheese.  The warmth and sweetness create a harmonious and satisfying balance.

Lost Potatoes and the Simple Garden Dinner

Tonight's dinner was another super easy one and I averted yet another trip to the grocery store. First, I found some feral potatoes. I was turning over a plot of soil in the garden where the potatoes once stood and there they were, gnarly and red, asking why they had been forgotten. After a good scrub down, they got tossed into a pot of cold water and gently boiled until tender. Did you know potatoes should always start their cooking in cold water? That way, their temperature rises gradually and evenly. They don't end up with the dreaded mushy exterior and crunchy interior.

While the potatoes were cooking, I did a quick cabbage braise which turned out to be luscious and silky. Here is the recipe.

Braised Green Cabbage with Leeks and Apples (for 2)

1 TBS Butter and 1 TBS olive oil

1 leek, white part only, washed and sliced into 1/4 inch rounds

1/2 macintosh apple, peeled and seeded and slice into thin crescent slices

1/2 a small green cabbage, cored and sliced thinly (about 3 cups)

1/4 cup of cider vinegar

Sea salt

another TBS butter (optional)

Heat up olive oil and butter together over medium high heat. Add leek and stir occasionally for a few minutes until leek starts to soften. Add the apple and cabbage, and stir. Cook a few minutes, add the vinegar and salt to taste. Put a lid on the pot, and cook about 15 minutes. If there is too much liquid, you can take the lid off and raise the heat to boil off the extra liquid. Finish by adding more butter if you like.

This is great spooned over simple boiled or mashed potatoes. The sweetness of the apple and leek is a nice balance to the acidity of the vinegar.

This is also delicious, for the meat eaters among us, with some salt pork, bacon, or cured sausage. Just add it in at the beginning with the leek, and then let it simmer away. Reduce some of the butter or olive oil if you do the pork ad-ins.

Bon Ap.